
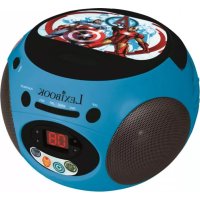
DMP103FE - Mp3 player LEXIBOOK - Free user manual and instructions
Find the device manual for free DMP103FE LEXIBOOK in PDF.

| Product type | Digital media player (MP3) |
| Brand | LEXIBOOK |
| Model | DMP103FE (DMP103Series series) |
| Internal memory | 1 GB (flash) |
| Expandable memory | SD card (max. 2 GB) |
| Supported audio formats | MP3, WMA |
| Supported video formats | SMV |
| Supported photo formats | JPEG, BMP |
| Supported e-book format | TXT |
| Voice recording | WAV format (built-in MIC) |
| Power supply | 1 AAA/LR03 1.5V battery (not included) |
| Display | LCD screen |
| Connectivity | USB 2.0 (cable included), 3.5mm headphone jack |
| Main functions | Audio, video, photo playback, voice recording, e-book, A-B repeat, equalizer (6 modes), play modes (normal, repeat one, repeat all, shuffle), auto page turning, key lock |
| Available settings | Language (10 languages), auto-off, power save, LCD contrast, equalizer, play mode, recording settings |
| Safety | Do not immerse, avoid extreme temperatures and magnetic sources, remove battery if not used for extended period |
| Maintenance | Clean with a soft, dry cloth |
| Warranty | 2 years (excluding misuse) |
| Included accessories | 1 pair of earphones, 1 USB cable, 1 CD-ROM (drivers and video converter), user manual |
| Country of manufacture | China |
| Manufacturer reference | DMP103Series |
Frequently Asked Questions - DMP103FE LEXIBOOK
User questions about DMP103FE LEXIBOOK
0 question about this device. Answer the ones you know or ask your own.
Ask a new question about this device
Download the instructions for your Mp3 player in PDF format for free! Find your manual DMP103FE - LEXIBOOK and take your electronic device back in hand. On this page are published all the documents necessary for the use of your device. DMP103FE by LEXIBOOK.
USER MANUAL DMP103FE LEXIBOOK
Thank you for purchasing the DMP103Series digital multimedia player. Listen to your favourite music files (MP3 and WMA files), record voice messages (WAV files), watch videos (SMV files) and pictures (JPG and BMP files). You can store data on the unit's 1GB flash memory. The unit can also support an SD card of up to 2GB. Please read this user guide in full to discover all the functions this product has to offer.
WARNING: Do not put heavy objects on the device. Do not expose the device to water or any other liquids. Avoid extreme temperatures, moisture and magnetic source.
Product description
Image A
- VOL+/Up key
- Next/Fast forward key
- On/Off/Play/Pause/Stop key
- MODE key
- Previous/Fast backward key
- VOL-/Down key
- Record/A-B repeat/Delete key
Image B
1-Battery slot
2 - Insert and eject
3 - SD card slot
Image C
4 - Earphone socket
5-Microphone
6-USB
Unpacking the device
When unpacking, ensure that the following elements are included:
1 DMP103Series digital multimedia player
1earphone
1 USB cable
1 CD-Rom
1 instruction manual
WARNING: All packaging materials, such as tape, plastic sheets, wire ties and tags are not part of this player and should be discarded.
Battery installation
The DMP103Series player operates with 1 x AAA/LR03 1.5V type battery (not included).
- Open the battery compartment cover located at the back of the unit.
- Insert 1 x AAA/LR03 1.5V type battery (not included) into the battery compartment observing the correct polarity (image B, p.2).
- Replace the battery cover.
Note: The battery indicator is located on the upper right corner of the LCD screen:


: The battery capacity is full.
: The battery capacity is low. Recharge or replace the battery.
Non-rechargeable batteries are not to be recharged. Rechargeable batteries are to be removed from the product before being charged. Rechargeable batteries are only to be charged under adult supervision. Different types of batteries or new and used batteries are not to be mixed. Only batteries of the same or equivalent type as recommended are to be used. Batteries are to be inserted with the correct polarity. Exhausted batteries are to be removed from the toy. The supply terminals are not to be short circuited. Do not throw batteries into a fire. Remove the batteries if you are not going to use the unit for a long period of time.
WARNING: If the unit malfunctions or receives an electrostatic shock, turn the unit off and on again using the key. If this proves to be ineffective, remove the battery and insert it again.
Getting started
Before using the player for the first time, please follow the instructions below:
- Remove the static label from the unit's LCD screen.
- Plug the earphones in the earphones socket.
- Insert an SD card into the SD card slot and/or download music files to the device's flash memory with the USB cable provided.
Turning the unit On/Off
- To switch on the player, press and hold the key for 3 about seconds.
- To switch the unit off, press and hold the key for 3 about seconds.
Note:
- The player automatically turned on when the USB cable is disconnected.
- You can set up the delay for the automatic turn-off function of the player (refer to the "Power setting" p.18).
Hold function
To disable all the keys, press and hold the RECORD and MODE keys at the same time. The "Lock" icon will be displayed on the LCD screen. Press and hold the RECORD and MODE keys at the same time one more time to deactivate the hold function.
Downloading data
To listen to or watch media files, you can download files to:
- The device's 1GB flash memory.
- An SD card (not included) – maximum size supported is 2GB.
- Both the flash memory and the SD card. In this case, the device will play the files from the flash memory first; then those included on the SD card.
SD card operation
- Make sure the player is TURNED OFF before inserting/taking out an SD card.
- To insert an SD card, please push the SD card along the card slot.
- To take it out, push and eject the SD card towards the direction of the arrow.
Note:
- When an SD card is inserted, the player adds automatically the audio files stored on the card in the playlist.
- When an SD card is inserted, the SD card icon is displayed on the upper part of the LCD screen.
- If you cannot find the SD card on your PC, please update the operational system of your computer.
- Do not remove the player or take out the SD card during the file transfer process. Else, the data might be lost or damaged.
Connection to a computer
To download files from your computer to your multimedia player:
- Open the USB cover located on the top of the unit.
- Connect the player to a computer using the USB cable provided. The player enters into USB standby status and "READY" will be displayed onscreen.
- Transfer the desired files to the 2 new drives in "My computer": one for the unit's flash memory and another one for the SD card. When transferring data, the message "WRITING" is displayed onscreen.
Note:
- All keys are disabled when the player is connected to the PC.
- Do not disconnect the player when transferring data.
Windows 98 driver
If you are using Windows 98, install the driver from the CD-ROM provided with your player.
- Insert the CD-Rom into your computer's CD-Rom drive.
- In "My Computer", double-click on your CD-Rom drive icon to display the CD files.
- Double-click on the "98 Driver" folder, then on the "Setup" file.
- Follow the onscreen instructions to install the driver.
Main Menu
When the player is turned on, the main menu will be automatically displayed onscreen.
- Use the and keys to browse through the menu and select the desired mode.
- Press the key to enter the mode.
- Press and hold the MODE key at any time to go back to the main menu.
Music Mode
Playback
- In the main menu, use the and keys to select the Music mode and press to access the "Files list" screen.
- Use the V+ and V- keys to select the "Int flash" or "EXT (MMC/SD)" option and press to display the audio files stored in the players' flash memory or in the SD card.
- Use the V+ and V- keys to select the desired track and press the key to start the playback.
- Press the key again to pause the current track. Press once more to return to playback.
- During playback, press and hold to stop the current track (the icon will be displayed on the left part of the LCD screen).
Note: The player also supports the LRC type files, allowing you to display the lyrics of the songs during playback.
Searching tracks
- In "Stop" mode (the icon is displayed on the left part of the LCD screen), press or to quickly browse through your track list.
- In "Play" mode (the icon is displayed on the left part of the LCD screen), press or to select the previous or the next track.
Fast forward and backward
In "Play" mode, press and hold or to fast forward or backward the track currently playing. This function is also available in "Pause" mode.
A-B Repeat function
- In "Play" mode (audio tracks or recordings), press RECORD to define the starting point of the segment, and "A" will appear on the lower left corner of the screen.
- Then, press the RECORD key again to define the ending point of the segment. "A-B" will appear on display.
- When the A-B Repeat function has been enabled, the unit will play the specified segment again and again.
- Press the RECORD key once more to cancel the A-B Repeat function and return to normal play mode.
Adjusting the volume
Use the V+ (volume up) or V- (volume down) keys to adjust the volume. Press and hold the V+ or V- key to adjust the volume faster. The volume level ranges from 0-28.
Deleting audio files
- In the main menu, use the and keys to select the Music mode and press to access the "Files list" screen.
- Use the V+ and V- keys to select the "Int flash" or "EXT (MMC/SD)" option and press▶ to display the audio files stored in the players' flash memory or in the SD card.
- Use the V+ and V- keys to select the track you want to delete and press the RECORD key. The screen displays "Delete Files" or "Return".
Note: To go back to the audio files list, use the V+ and V- keys to select "Return" and press
- Use the V+ and V- keys to select "Delete Files", then press the key to confirm. The screen will display "Are you sure?"
- Use the MODE key to select "Yes" or "No".
- Select "Yes" then press▶ to confirm and delete the file.
Note: Use the MODE key at any time to go back to the "Files list" screen.
Video Mode
Your player supports the SMV type video files.
Playback
- In the main menu, use the and keys to select the Video mode and press to access the "Files list" screen.
- Use the V+ and V- keys to select the "Int flash" option and press
- Press the key to enter the "MVIDEO" folder. The screen displays the video files stored in the players' flash memory.
- Use the V+ and V- keys to select the desired video and press the key to start the playback.
- Press the key once to pause the video. Press it again to return to playback.
- During playback, press and hold to stop the video.
Previous/Next video
In "Stop" mode or in "Play" mode, press to select the previous video and press to select the next video.
Fast forward and backward
In "Play" mode, press and hold or to fast forward or backward the video currently playing. This function is also available in "Pause" mode.
Adjusting the volume
Use the ^+ (volume up) or V- (volume down) keys to adjust the volume. Press and hold the V^+ or V- key to adjust the volume faster. The volume level ranges from 0-28.
Deleting video files
- When the video files list is displayed, use the V+ and V- keys to select the video you want to delete and press RECORD. The screen displays "Delete Files" or "Return".
Note: To go back to the video files list, use the V+ and V- keys to select "Return" and press - Use the V+ and V- keys to select "Delete Files", then press the key to confirm. The screen will display "Are you sure?"
- Use the MODE key to select "Yes" or "No".
- Select "Yes" then press to confirm and delete the file.
Note:
- Your player can only play the video files placed in the "MVIDEO" folder.
- Use the MODE key at any time to go back to the "Files list" screen.
Video converter tool
On the CD-Rom supplied with your multimedia player, you will find a video converter software. This converter tool will allow you to convert easily video files to SMV format. Read carefully the following instructions to understand how to use the converter tool:
- Insert the CD-Rom into your computer's CD-Rom drive.
- In "My Computer", double-click on your CD-Rom drive icon to display the CD files.
- Double-click on the SMV Convert Tool folder, then on the "VIDEO2SMV" file to launch the converter program. The screen will display the converter interface.
- On the "Input Video" line, click the button to browse through your folders and select the file you want to convert to the SMV format.
- On the "Output file" line, click the button to choose where you want to save the converted file.
- Select the conversion quality level and the video dimension, then click the "Convert" button to start converting the file.
- When the file has been converted to the SMV format, repeat the above steps to convert new video files or click on the "Quit" button to exit the conversion mode.
Note: During the conversion, click the "Cancel" button to cancel the process.
Recording Mode
- In the main menu, use the and keys to select the Recording mode and press or RECORD to start recording.
- Press the key once to pause recording. Press again to continue recording.
- Press the MODE key to stop and store the recording. The screen will display "Stored!" for 1 second and return to main menu.
Note :
- The recordings can be saved in the player's flash memory or in an SD card (refer to the "Recording setting" section of the "Set-up menu" chapter, p.19)
- When the player's memory is full, the screen will display a warning message for 2 seconds and you won't be able to do recordings. Try to free memory space.
- During a recording, if the battery power is too low, the screen will display a warning message for 2 seconds then the recording will be stopped and stored automatically.
Voice Mode
Recording playback
- In the main menu, use the and keys to select the Voice mode and press
- Use the V+ and V- keys to select the "Int flash" or "EXT (MMC/SD)" option and press
- Press the key to enter the "VOICE/folder. The screen displays the recording files list.
- Use the V+ and V- keys to select the desired recording and press the key to start/pause/stop the playback.
Previous/Next recording
In "Stop" mode or in "Play" mode, press to select the previous recording and press to select the next recording.
Fast forward and backward
In "Play" mode, press and hold or to fast forward or backward the recording currently playing. This function is also available in "Pause" mode.
Adjusting the volume
Use the V + (volume up) or V - (volume down) keys to adjust the volume. Press and hold the V + or V - key to adjust the volume faster. The volume level ranges from 0-28.
Deleting recording files
- When the recording files list is displayed, use the V+ and V- keys to select the recording you want to delete and press RECORD. The screen displays "Delete Files" or "Return".
Note: To go back to the recording files list, use the V+ and V- keys to select "Return" and press - Use the V+ and V- keys to select "Delete Files", then press the key to confirm. The screen will display "Are you sure?"
- Use the MODE key to select "Yes" or "No".
- Select "Yes" then press to confirm and delete the file.
Note: Use the MODE key at any time to go back to the "Files list" screen.
Photo Mode
- In the main menu, use the and keys to select the Photo mode and press to access the "Files list" screen.
- Use the V+ and V- keys to select the "Int flash" option and press
- Press the key to enter the "PHOTO/folder. The screen displays the photo files stored in the players' flash memory.
- Use the V+ and V- keys to select the desired photo and press the key to display the picture on the LCD screen.
- While viewing photos, press the or the keys to display the previous picture or the next picture.
- Press MODE to enter the photo settings menu.
- Use the V+ and V- keys and press to select "Manual Display" (you must use the and keys to browse through your photos), "Auto Display" (launch a slideshow of the pictures stored in the player's memory) or "Return" to go back to the main menu.
Note :
- In order to be displayed, the photos must be in JPG or BMP format.
- In order to be displayed, the photos must be placed in the "PHOTO" folder.
Deleting photos
- When the photo files list is displayed, use the V+ and V- keys to select the picture you want to delete and press RECORD. The screen displays "Delete Files" or "Return".
Note: To go back to the photo files list, use the V+ and V- keys to select "Return" and press - Use the V+ and V- keys to select "Delete Files", then press the key to confirm. The screen will display "Are you sure?"
- Use the MODE key to select "Yes" or "No".
- Select "Yes" then press to confirm and delete the file.
Note: Use the MODE key at any time to go back to the "Files list" screen.
E-book Mode
- Create a TXT type file on your computer and transfer the file to your player.
- In the main menu, use the and keys to select the E-book mode and press to access the "Files list" screen.
- Use the V+ and V- keys to select the "Int flash" option and press
- Press the key to enter the "EBOOK" folder. The screen displays the E-book files stored in the players' flash memory.
- Use the V+ and V- keys to select the desired file and press the key to display the text on the LCD screen.
- Use the V- and V^+ keys or the | and the keys to display the previous page or the next page.
Note :
- In order to be displayed, the E-book files must be in TXT format.
- In order to be displayed, the E-book files must be placed in the "EBOOK/j" folder.
English
Deleting E-book files
- When the E-book files list is displayed, use the V+ and V- keys to select the E-book you want to delete and press RECORD. The screen displays "Delete Files" or "Return".
Note: To go back to the E-book files list, use the V+ and V- keys to select "Return" and press - Use the V+ and V- keys to select "Delete Files", then press the key to confirm. The screen will display "Are you sure?"
- Use the MODE key to select "Yes" or "No".
- Select "Yes" then press to confirm and delete the file.
Note: Use the MODE key at any time to go back to the "Files list" screen.
Auto flip setting
Your player allows you to flip automatically your E-book pages.
- While reading an E-book file, press the RECORD key to display the "Auto flip setting" menu.
- Use the V- and V + keys or the and the keys to select the page scrolling speed, between 00 ("Auto flip" function disabled) and 10 seconds, then press to confirm.
- The "Auto flip" will be launched automatically. Press once to pause the scrolling.
- When the scrolling is paused, press RECORD to enter the "Auto flip setting" menu and change the page scrolling speed. Press to resume the scrolling.
Note :
- When the "Auto flip" function has been activated, you must press▶ and pause the scrolling before you can change the page flip speed.
- Use the MODE key at any time to go back to the "Files list" screen.
- The "Auto flip" function is only available when the TXT file's content has more than one page.
Setup Menu
In the main menu, use the and keys to select the Setup mode and press . Use the V+ and V- keys to select one of the 9 available options then press the key to confirm.
Language
- Use the V+ and V- keys to select "Language" and press
- Use the V+ and V- keys to select the desired language (English, Deutsch, Français, Espanol, Português, Italiano, Nederlands, Ржский, 繁體中文&日本語).
- Press to confirm and go back to the setup menu.
Power setting
This option allows you to set the auto-power-off time delay for your multimedia player.
- Use the V+ and V- keys to select "Power setting" and press
- Use the V+ and V- keys to select the desired time delay: 2 minutes, 5 minutes, 10 minutes or "Disable" (to cancel the auto-power-off function).
- Press to confirm and go back to the setup menu.
Note: The default value is 2 minutes.
Power Save
This option allows you to set the LCD screen auto-power-off time delay.
- Use the V+ and V- keys to select "Power Save" and press
- Use the V + and V- keys to select the desired time delay: 5 seconds, 20 seconds, 30 seconds,
60 seconds and "Disable" (to cancel the screen auto-power-off function). - Press to confirm and go back to the setup menu.
Note: The default value is 30 seconds.
EQ setting
- Use the V+ and V- keys to select "EQ setting" and press
2.6 EQ options can be selected: Normal, Rock, Classic, Pop, Jazz and Bass. Use the V+ and V- keys to select the desired setting and press to confirm.
Play Mode setting
There are 4 types of play mode: "Normal" (play all the tracks in order then stop), "Repeat One" (repeat the current track), "Repeat All" (repeat all tracks in order), "Shuffle All" (random play of all tracks).
- Use the V+ and V- keys to select "Play Mode setting" and press
- Use the V+ and V- keys to select the desired play mode then press▶■ to confirm.
Note: The default setting is "Normal".
Recording setting
- Use the V+ and V- keys to select "Recording setting" and press
-
Five options can be changed: "Source", "Encoder", "Sample", "Channel" and "Save".
-
"Source": the only record source is the player integrated microphone ("MIC"), you can't change this option.
-
"Encoder": use the MODE key to select one of the 3 encoder modes (IMADPCM, MSADPCM and PCM).
- "Sample": use the MODE key to select the recording sample rate (8000Hz, 11025Hz or 16000Hz).
- "Channel": this option is set on "Mono". You can't change it.
- "Save": use the MODE key to select where to save your recordings, in the flash memory ("INT"), or in the SD card ("EXT").
- Use the V + and V- keys to select the option you want to change. When you have finished, select
"Return" and press the key to go back to the settings menu.
Contrast
- Use the V+ and V- keys to select "Contrast" and press
- Use the and keys to decrease or increase the LCD screen contrast, then press the key to confirm.
About
- Use the V+ and V- keys to select "About" and press
- The screen will display the current software version, the flash memory capacity and the free memory available.
Return
Use the V+ and V- keys to select "Return" and press the key to confirm and go back to the main menu.
Warranty
NOTE: Please keep this instruction manual, it contains important information. This product is covered by our two-year warranty. To make use of the warranty or the after-sales service, please contact your retailer and supply proof of purchase. Our warranty covers material or installation-related defects attributable to the manufacturer, with the exception of wear caused by failure to respect the instructions for use or any unauthorised work on the equipment (such as dismantling, exposure to heat or damp, etc.).
Reference: DMP103Series
©2008 LEXIBOOK®
Designed and developed in Europe - Made in China
LEXIBOOK UK Ltd,
Unit 10 Petersfield Industrial Estate,
Bedford Road, Petersfield, Hampshire,
GU32 3QA, United Kingdom
Helpline: 0808 100 3015, http://www.lexibook.com
Environmental Protection
Unwanted electrical appliances can be recycled and should not be discarded along with regular household waste! Please actively support the conservation of resources and help protect the environment by returning this appliance to a collection centre (if available).

Introduction
Lexibook Ibérica S.L.
Cancellare file E-book
EQ setting (Equalizer)
Opmerking: De standardwaaarde is 30 seconden.
EQ instelling
Opmerking: De standardinstelling is "Normal".
Opname-installing
- Product description
- Image A
- Image B
- Image C
- Unpacking the device
- Battery installation
- Getting started
- Turning the unit On/Off
- Note:
- Hold function
- Downloading data
- SD card operation
- Connection to a computer
- Windows 98 driver
- Main Menu
- Music Mode
- Playback
- Searching tracks
- Fast forward and backward
- A-B Repeat function
- Adjusting the volume
- Deleting audio files
- Video Mode
- Previous/Next video
- Deleting video files
- Video converter tool
- Recording Mode
- Note :
- Voice Mode
- Recording playback
- Previous/Next recording
- Deleting recording files
- Photo Mode
- Deleting photos
- E-book Mode
- English
- Deleting E-book files
- Auto flip setting
- Setup Menu
- Language
- Power setting
- Power Save
- EQ setting
- Play Mode setting
- Recording setting
- Contrast
- About
- Return
- Warranty
- Introduction
- Cancellare file E-book
- EQ setting (Equalizer)
- EQ instelling
- Opname-installing
Brand : LEXIBOOK
Model : DMP103FE
Category : Mp3 player