
AL500MCH - Alarm Clock LEXIBOOK - Free user manual and instructions
Find the device manual for free AL500MCH LEXIBOOK in PDF.

| Product type | Radio alarm clock night light |
| Brand | LEXIBOOK |
| Model | AL500MCH |
| Color / Design | Mickey Mouse Club |
| Radio and night light power supply | 3 AA/LR6 1.5V batteries (not included) |
| Clock power supply | 1 AA/LR6 1.5V battery (not included) |
| Main functions | AM/FM radio, alarm, night light, 4 Mickey Mouse sound effects |
| Time setting | Time adjustment knob |
| Alarm setting | Alarm adjustment knob and alarm button |
| Radio volume | Volume adjustment knob |
| Station search | SCAN+ and SCAN- buttons |
| Alarm duration | 1 hour if not stopped |
| Night light duration | 1 hour |
| Warranty | 1 year |
| Maintenance | Clean with a slightly damp cloth, without detergent. Protect from moisture and heat. |
| Battery safety | Do not recharge non-rechargeable batteries. Observe polarity. Remove batteries if not used for an extended period. |
| Package contents | 1 radio alarm clock night light, 1 instruction manual |
| Environmental information | Device recyclable, do not dispose of with household waste. |
| Reference | AL500MCH |
Frequently Asked Questions - AL500MCH LEXIBOOK
User questions about AL500MCH LEXIBOOK
0 question about this device. Answer the ones you know or ask your own.
Ask a new question about this device
Download the instructions for your Alarm Clock in PDF format for free! Find your manual AL500MCH - LEXIBOOK and take your electronic device back in hand. On this page are published all the documents necessary for the use of your device. AL500MCH by LEXIBOOK.
USER MANUAL AL500MCH LEXIBOOK
- Clock
- Night light feet (left feet)
- Battery compartment (at the bottom of the unit)
- Alarm button
- Mickey Mouse button
- Clock battery compartment
- Alarm knob
- Clock knob
- Night light
- POWER button
- SCAN+ button
- SCAN- button
- Volume knob
Battery information
Radio Alarm Clock Night light
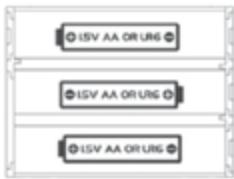
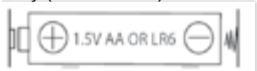
The radio and the night light work with 3 × 1.5 ~V _ _ _ _ _ AA / LR6 type batteries (not included).
When you use the AL500MCH for the first time:
- Using a screwdriver, open the battery compartment cover located at the bottom of the unit.
- Install the 3 × AA / LR6 1.5 ~V —— batteries (not included) observing the polarity markings inside the battery compartment.
- Close the battery compartment and tighten the screw.
IMPORTANT NOTE: For better performance, it is recommended to use alkaline batteries with this product.
Clock
The clock works with 1 × 1.5V AA/ LR6 type battery (not included).
- Using a screwdriver, open the battery compartment cover located at the back of the clock.
- Install the AA / LR6 type battery (not included) observing the polarity markings inside the battery compartment.
- Close the battery compartment and tighten the screw.
Non-rechargeable batteries are not to be recharged. Rechargeable batteries are to be removed from the product before being charged. Rechargeable batteries are only to be charged under adult supervision. Different types of batteries or new and used batteries are not to be mixed.
Only batteries of the same or equivalent type as recommended are to be used. Batteries are to be inserted with the correct polarity. Exhausted batteries are to be removed from the product. The supply terminals are not to be short circuited. Do not throw batteries into a fire. Remove the batteries if you are not going to use the product for a long period of time.
WARNING: Malfunction or loss of memory may be caused by strong frequency interference or electrostatic discharge. Should any abnormal function occur, remove the batteries and insert them again.
Contents of the packaging
When unpacking, ensure that the following elements are included:
1 x Mickey Mouse Club radio alarm clock night light
1 x instruction manual
WARNING: All packaging materials, such as tape, plastic sheets, wire ties and tags are not part of this product and should be discarded.
Settings
CLOCK AND ALARM
- To set the clock, turn the clock knob.
- To set the alarm, turn the alarm knob then press the alarm button to switch it on.
- When the alarm rings, press the alarm button to turn it off.
NOTE:
If the alarm button is pushed down, the alarm will not ring.
If you don't push the alarm button when the alarm goes off, it will ring for 1 hour.
RADIO
- Press and hold the POWER button for a few seconds to turn the radio on.
- Press the SCAN+ or SCAN- buttons to search for radio channels.
- To get the best reception, fully extend the radio antenna and move it about to find where the reception is clearest.
- Use the volume knob to the left to increase or decrease the volume.
- Press and hold the POWER button for a few seconds to turn the radio off.
Press Mickey Mouse to play one of the 4 funny Mickey Mouse Club sounds effects.
NIGHTLIGHT
Press once on the left side of the clock's base to switch on the nightlight. Press again to stop it.
Note: when activated, the nightlight will stay on for 1 hour.
Maintenance
Only use a soft, slightly damp cloth to clean the unit. Do not use detergent. Do not expose the unit to direct sunlight or any other heat source. Do not immerse the unit in water. Do not dismantle or drop the unit. Do not try to twist or bend the unit.
Warranty
This product is covered by our 1-year warranty.
For any claim under the warranty or after sale service, please contact your distributor and present a valid proof of purchase. Our warranty covers any manufacturing material and workmanship defect, with the exception of any deterioration arising from the non-observation of the instruction manual or from any careless action implemented on this item (such as dismantling, exposition to heat and humidity, etc.). It is recommended to keep the packaging for any further reference.
In a bid to keep improving our services, we could implement modification on the colours and the details of the product shown on the packaging.
NOTE: Please keep this instruction manual, it contains important information.
Reference: AL500MCH
Designed and developed in Europe - Made in China
©2010 LEXIBOOK®
©Disney
United Kingdom & Ireland
For any further information, please call 0808 100 3015
www.lexibook.com

This product is not a toy.
C E
Environmental Protection
Unwanted electrical appliances can be recycled and should not be discarded along with regular household waste! Please actively support the conservation of resources and help protect the environment by returning this appliance to a collection centre (if available).

Very satisfactory/Très satisfaisant
Disappointing/Decevant