
DMP60BB - Mp3 player LEXIBOOK - Free user manual and instructions
Find the device manual for free DMP60BB LEXIBOOK in PDF.

| Product type | MP3 Player |
| Brand | LEXIBOOK |
| Model | DMP60BB |
| Internal memory | 128 MB |
| External memory (SD card) | Up to 1 GB |
| Display | LCD screen with blue backlight |
| Power supply | 1 AAA battery |
| Connectivity | USB 2.0, 3.5mm headphone jack |
| Supported audio formats | MP3, WMA |
| Playback functions | Play, pause, stop, previous/next track, fast forward/reverse |
| Equalizer | 6 modes: Pop, Jazz, Classic, Rock, Bass, Normal |
| Repeat modes | Normal, repeat 1 track, repeat all |
| Voice recording | Yes, built-in |
| A-B repeat function | Yes |
| Lock function | Yes |
| Warranty | 2 years |
| Maintenance and cleaning | Clean with a dry cloth, avoid moisture and extreme temperatures |
| Safety | Do not immerse, do not place heavy objects, avoid magnetic sources |
Frequently Asked Questions - DMP60BB LEXIBOOK
User questions about DMP60BB LEXIBOOK
0 question about this device. Answer the ones you know or ask your own.
Ask a new question about this device
Download the instructions for your Mp3 player in PDF format for free! Find your manual DMP60BB - LEXIBOOK and take your electronic device back in hand. On this page are published all the documents necessary for the use of your device. DMP60BB by LEXIBOOK.
USER MANUAL DMP60BB LEXIBOOK
Touches Lecture/Pause/Stop

Thank you for purchasing the DMP60BB digital media player. Listen to your favourite music files and record voice messages or background music. You can store data on the unit's 128 MB flash memory . The unit can also support an SD card of up to 1GB. Please read this user guide in full to discover all the functions this product has to offer.
Important notes: do not put heavy objects on the device. Do not expose the device to water or any other liquids. Avoid extreme temperatures, moisture and magnetic source.
Product description
Please refer to the images located at the back of the cover page.
Image A

Play/Pause/Stop keys

Backward key

Forward key

Volume up key

Volume down key

Record key

Mode selection key
Image D
LCD screen

A-B repeat mode icon

Playback icon

Pause icon

Repeat mode icon

Music format indicator

Battery indicator
Image B
1-Battery slot
2 - Insert and eject
3 - SD card slot
Image C
4 - Earphone socket
5 - Microphone
6-USB

Pop Jazz Classic Rock Bass
SD card indicator
Hold indicator
Track number and timer indicator
DVR mode indicator
Music EQ indicator

Sound effect indicator
Notes: If "MP3/WPA" is not displayed, then another format of files is playing or there are no files inside the unit.
Getting started
- Remove the static label from the unit's LCD screen.
- Insert 1 x AAA battery into the battery compartment observing the correct polarity (+/- signs).
- Plug the earphones in the earphone socket.
- Insert an SD card into the SD card slot or download music files to the device's flash memory.
Downloading data
To listen to media files, you can download files to:
- The device's 128 MB flash memory.
- An SD card - maximum size supported is 1G.
- Both the flash memory and the SD card. In this case, the device will play the files from the flash memory first; then those included on the SD card.
SD card operation
- Make sure the DEVICE IS TURNED OFF before inserting/taking out an SD card.
- To insert an SD card, please push the SD card along the card slot.
- To take it out, push and eject the SD card towards the direction of the arrow.
Connection to a computer
- Open USB cover located on top of the unit.
- Connect the unit to a computer using the USB cable provided. "USB" will be displayed onscreen; it will flash throughout the download.
Notes:
- If an SD card is inserted, you can find 2 new drives in "My computer": one for the unit's flash memory and another for the SD card.
- If you cannot find the SD card on your PC, please update the operational system of your computer.
- Do not remove the device or take out the SD card during the file transfer process. Else, the data might be lost or damaged.
- Please do not format your unit under the MAC OS operation system.
Turning the unit On/Off
Press MODE to turn the unit on. Press and hold MODE to turn the device off. The device will also power on automatically after you unplug the USB cable.
Note: the unit will turn off automatically after 3 minutes of inactivity.
Listening to music
Playback
- After you turn on the unit, the last song played will be displayed.
- Press▶■ to play all your tracks. Press again to pause the current track. Press once more to return to playback. Press and hold▶■ to stop the current track.
Searching tracks
- In stop mode, press and hold or to quickly browse your track list.
- Press or to select the previous or next track.
Fast forward and backward
In play mode, press and hold or to fast forward or backward the track currently playing. This function is also available in pause mode.
Adjusting the volume
In MUSIC/RECORD mode, use the V+ (volume up) or V- (volume down) keys to adjust the volume. Press and hold the V+ or V- key to adjust the volume faster. The volume level ranges from 0-19.
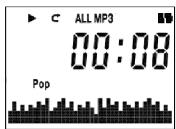
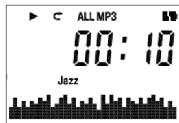
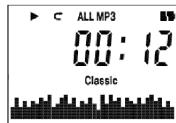
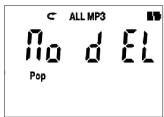
EQ mode selection
The default equalizer mode is Normal. There are 6 EQ modes to choose from. Press the MODE key to select an equalizer mode: Pop > Jazz > Classic > Rock > Bass > Normal > Pop.
Repeat mode selection
There are 3 repeat modes to choose from:
ALL
Normal - Play all the tracks in order then stop.
C>1
Repeat once - Repeat the current track.
1ALL
Repeat all - Repeat all tracks in order.
- Press MODE once in stop/pause mode to enter repeat mode. "MP3" will flash.
- Press twice to enter repeat mode; "C01 ALL" will flash. Press MODE to confirm.
- Press to choose your desired repeat mode in a loop: < > |>key: C ALL => C1 => C2 ALL => C ALL.
- Press MODE to confirm.
Recording mode
Recording
- In stop/pause mode, press and hold the RECORD key to start recording. "REC" will flash.
- Press once to pause recording. "REC" and the recorded time will flash.
- Press again to continue recording.
- Press MODE to store the recording.
- Press MODE twice to exit recording mode.
Notes:
- If you press and hold MODE while recording, the unit will power off and store automatically store the voice data.
- If an SD card is inserted, the voice date will be stored in the SD card. If the SD card memory is full, the unit will display "FULL". Then, if you press and hold the RECORD key to record, the voice data will be stored in the flash memory.
- Do not eject the SD card when recording.
Replay mode
- Press MODE once in stop/pause mode to enter recording mode. "MP3" will flash.
- Press either once to enter recorder mode. "REC" will flash.
- Press MODE to confirm, and enter the recording initial mode.
- Use the key to listen/pause/stop the playback of the recording.
- Press MODE twice to exit recording mode.
A-B Repeat function
- In music playback mode, press RECORD to define the starting point of the segment, and "A-" will appear on display.
- Then, press the RECORD key again to define the ending point of the segment. "A-B" will appear on display.
- When the A-B Repeat function has been enabled, the unit will play the specified segment again and again.
- Press the RECORD key once more to cancel the A-B Repeat function and return to normal play mode.
Delete function
You can delete the music and recording data directly from the unit. You can also execute this command on your computer.
- In MUSIC/RECORD initial/stop/pause mode, press the MODE key once to enter system setting, "MP3" will flash.
- Press the key 1 time to enter the DELETE function mode.
- The default selection is "NO DEL" (no deletion). Use the V+ or V-key to toggle the selection between yes and no.

- Press MODE to confirm. If you select "No", the unit will return to the previous mode; if you select "Yes", "dEL----" will be displayed and the current file will be deleted.
- Then, the unit will return to stop status at the beginning of the next track.
Options
Hold function
To disable all the keys, press and hold the RECORD and MODE keys at the same time. The _0^ icon will display. Press and hold the RECORD and MODE keys at the same time to deactivate the hold function. Note: the hold function will be deactivated automatically when the unit turns off automatically and during the connection to a USB port.
LED backlight
Press any key to turn the blue backlight on. The LCD screen will light up during 10 seconds.
Low battery
When the battery is low the battery indicator will flash. "Lo" will be displayed if you try to record new data.
Reset
WARNING: If the unit malfunctions or receives an electrostatic shock, switch the unit off and on again using the MODE button. If this proves to be ineffective, remove the batteries and insert them again.
Warranty
NOTE: Please keep this instruction manual, it contains important information. This product is covered by our two-year warranty. To make use of the warranty or the after-sales service, please contact your retailer and supply proof of purchase. Our warranty covers material or installation-related defects attributable to the manufacturer, with the exception of wear caused by failure to respect the instructions for use or any unauthorised work on the equipment (such as dismantling, exposure to heat or damp, etc.).
LEXIBOOK UK Ltd, Unit 10 Petersfield Industrial Estate, Bedford Road, Petersfield, Hampshire, GU32 3QA, United Kingdom, Freephone helpline: 0808 100 3015, http://www.lexibook.com
Environmental Protection
Unwanted electrical appliances can be recycled and should not be discarded along with regular household waste! Please actively support the conservation of resources and help protect the environment by returning this appliance to a collection centre (if available).

Introduccion
- Product description
- Please refer to the images located at the back of the cover page.
- Image A
- Image D
- LCD screen
- Image B
- Image C
- Getting started
- Downloading data
- SD card operation
- Connection to a computer
- Notes:
- Turning the unit On/Off
- Listening to music
- Playback
- Searching tracks
- Fast forward and backward
- Adjusting the volume
- EQ mode selection
- Repeat mode selection
- Recording mode
- Recording
- Replay mode
- A-B Repeat function
- Delete function
- Options
- Hold function
- LED backlight
- Low battery
- Reset
- Warranty
- Environmental Protection
- Introduccion
Brand : LEXIBOOK
Model : DMP60BB
Category : Mp3 player