
Sonicare Power Flosser 3000 HX3826 - Interdental brush PHILIPS - Free user manual and instructions
Find the device manual for free Sonicare Power Flosser 3000 HX3826 PHILIPS in PDF.


 AZ
AZ
 BG
BG
 CS
CS
 DA
DA
 DE
DE
 EL
EL
 EN
EN
 ES
ES
 ET
ET
 FI
FI
 HE
HE
 HU
HU
 HY
HY
 IT
IT
 KA
KA
 KK
KK
 KY
KY
 LT
LT
 LV
LV
 MK
MK
 NL
NL
 NO
NO
 PL
PL
 PT
PT
 RO
RO
 RU
RU
 SK
SK
 SL
SL
 SQ
SQ
 SV
SV
 TG
TG
 TK
TK
 UK
UK
 UZ
UZ
| Product Type | Water flosser (interdental brush) |
| Brand | Philips Sonicare |
| Model | Power Flosser 3000 HX3826 |
| Dimensions (H x W x D) | Approx. 30 x 10 x 10 cm |
| Weight | Approx. 0.6 kg (including reservoir) |
| Water Reservoir Capacity | 200 ml |
| Power Source | Rechargeable lithium-ion battery |
| Charging Time | Approx. 24 hours for full charge |
| Usage Time (Full Charge) | Up to 14 days (2 sessions/day, 1 min each) |
| Pressure Settings | 3 levels: Low, Medium, High |
| Flossing Modes | Clean, Gum Care, Pulse |
| Nozzle Types | Standard and Quad Stream |
| Maintenance | Rinse nozzle and reservoir after each use; replace nozzle every 3-6 months |
| Cleaning Instructions | Hand wash only; do not immerse handle in water; use mild soap |
| Safety Features | Automatic shut-off after 2 minutes; water-resistant design (IPX7) |
| Spare Parts | Replacement nozzles (HX3826-01), charging adapter, travel case (sold separately) |
| Reparability | Battery not user-replaceable; contact Philips service for repairs |
| Warranty | 2-year worldwide warranty |
| Certifications | CE, FCC, RoHS |
Frequently Asked Questions - Sonicare Power Flosser 3000 HX3826 PHILIPS
User questions about Sonicare Power Flosser 3000 HX3826 PHILIPS
0 question about this device. Answer the ones you know or ask your own.
Ask a new question about this device
Download the instructions for your Interdental brush in PDF format for free! Find your manual Sonicare Power Flosser 3000 HX3826 - PHILIPS and take your electronic device back in hand. On this page are published all the documents necessary for the use of your device. Sonicare Power Flosser 3000 HX3826 by PHILIPS.
USER MANUAL Sonicare Power Flosser 3000 HX3826 PHILIPS


O'zbek 238
Polski 254
Português 271
Română 287
Shqip 303
Slovenščina 318
Slovensky 333
Srpski 348
Suomi 363
Svenska 378
Türkmençe 393
Ελληνικά 409
Български 426
Кыргызча 442
Македонски 458
Russian 474
Tajik 491
Ukrainian 507
Kazakh 523
phosphorus 56 556
Important safety information
Only use the product for its intended purpose. Read this important information carefully before you use the product and its batteries and accessories, and save it for future reference. Misuse can lead to hazards or serious injuries.
Warnings
- Keep the charger away from water.
- After cleaning, make sure the charger is completely dry before you connect it to the wall socket.
- This appliance can be used by children and persons with reduced physical, sensory or mental capabilities or lack of experience and knowledge if they have been given supervision or instruction concerning use of the appliance in a safe way and understand the hazards involved. Cleaning and user maintenance shall not be made by children without supervision.
- Children shall not play with the appliance.
- Only use original Philips accessories or consumables. Only use charger provided with the product. If supplied, only use the original USB cable and USB power supply unit.
- Do not charge the product outdoors or near heated surfaces.
- Do not clean any part of the product in the dishwasher.
- To avoid physical injury, do not fill the reservoir with hot water. Do not put foreign objects in the reservoir.
- The maximum altitude of use is 4500 meters.
- This product has only been designed for cleaning teeth and gums.
- Do not use it for any other purpose (for e.g. eyes, nose and ears).
- Stop using the appliance and consult your dentist/doctor if excessive bleeding occurs after use, if bleeding continues to occur after 1 week of use or if you experience discomfort or pain.
- If you have had oral or gum surgery in the previous 2 months, consult your dentist before you use this appliance.
- If you have a pacemaker or other implanted device, contact your doctor or the manufacturer of the implanted device prior to use.
- If you have medical concerns, consult your doctor before you use this appliance.
- This appliance is a personal care device and is not intended for use on multiple patients in a dental practice or institution.
- Charge and use the product at a temperature between 5 °C and 40 °C (41 °F and 104 °F).
Battery safety instructions
- This appliance contains batteries that are only to be removed by skilled persons.
- Only use the product for its intended purpose. Read this information carefully before you use the product and its batteries and accessories, and save it for future reference. Misuse can lead to hazards or serious injuries. Accessories supplied may vary for different products.
- Only use original Philips accessories and consumables. Only use detachable supply unit WAAxxxx.
- Keep product and batteries away from fire and do not expose them to direct sunlight or high temperatures.
- If the product becomes abnormally hot or smelly, changes color, or if charging takes longer than usual, stop using and charging the product and contact Philips.
- Do not place products and their batteries in microwave ovens or on induction cookers.
- Do not open, modify, pierce, damage, or dismantle the product or battery to prevent batteries from heating up or releasing toxic or hazardous substances. Do not short-circuit, overcharge, or reverse charge batteries.
- This appliance contains batteries that are non-replaceable. When the battery is at end of life, the appliance shall be properly disposed of, see section on recycling.
- To avoid accidental short-circuiting of batteries after removal, do not let battery terminals come into contact with metal objects (e.g., coins, hairpins, rings). Do not wrap batteries in aluminum foil. Tape battery terminals or put batteries in a plastic bag before you discard them.
Storage and transportation conditions
Temperature -10°C to 60°C (14 °F to 140 °F).
Electromagnetic fields (EMF)
This Philips appliance complies with all applicable standards and regulations regarding exposure to electromagnetic fields. The following symbols may appear on the product: Read Operator's Manual.


Detachable Power Supply Part: The "xxxxxx" indicates the model number of the approved chargers to be used.
Introduction
Welcome to Philips! Congratulations on your new Sonicare Cordless Power Flosser. To fully benefit from the support that Philips offers, register your product at philips.com/welcome.
Intended Use
The Philips Sonicare Cordless Power Flosser is an oral irrigator intended to remove plaque and food debris between teeth and on the tooth surface in order to reduce tooth decay and improve and maintain gum health. This product is intended for consumer home use,
normally used at least once a day. Use by children should be with adult supervision.
Your Philips Sonicare Power Flosser
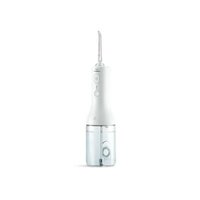
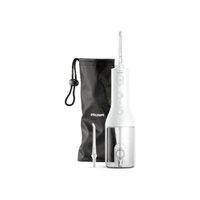
1 Nozzle 2 Nozzle rotator 3 Nozzle release button 4 On/off button 5 Intensity indicator 6 Intensity button 7 Mode indicator (Specific models only) 8 Mode button (Specific models only) 9 Battery indicator light 10 Charging port/cover 11 In-Reservoir Nozzle Storage 12 Reservoir 13 Reservoir fill door 14 Nozzle case (Specific models only) 15 Travel pouch (Specific models only) 16 USB-A to small plug 17 USB-A power adapter (Specific models only)
Note: The contents of the box may not include all items shown depending on the product configuration purchased.
Nozzles
To see what type of nozzles you have, check the code at the base of the nozzle. Each nozzle type provides different benefits.

Nozzle label F1 F2 F3
Nozzle Name Standard nozzle Comfort nozzle Quad Stream
nozzle
| Benefit Standard nozzle with a single stream of water for removing debris and plaque. | Soft rubber nozzle for comfort and ease of positioning for those with sensitive gums. | Soft rubber nozzle that directs water into a cross-shaped stream that gently removes plaque for an effortlessly thorough clean. |
Note: The contents of the box may not include all items shown depending on the product configuration purchased.
Modes and intensities
Modes (Specific models only)

Depending on your model, your Cordless Power Flosser is equipped with either one or two different modes. If you have a device with two modes, press the mode button to toggle between standard clean mode and deep clean mode to select your desired mode. If you have a device with one mode, it is already in the clean mode.
Clean (2000 and 3000 Series)
This mode, with pacer, provides constant water pressure for a great clean.
The pacer indicates when you are supposed to move to the next section of your mouth via a short pause in the waterfall every 15 seconds.
This Cordless Power Flosser comes with the pacer activated.
![graph TD A["Top State"] -->|15 sec.| B["Bottom State"] B -->|15 sec.| A](/content/2026/07/1411943/images/3424e85aa0a79e7fb74a1b16ff407b55783ae871eb85c42681f196c5987a7d4f.jpg)

To activate or deactivate the pacer
With the Cordless Power Flosser off, press and hold the intensity selection button for 3 seconds.
- When deactivated, the battery indicator light will flash amber once
- When activated, the battery indicator light will flash green twice
Deep clean (3000 Series)
This mode utilizes Pulse Wave technology, to guide you tooth by tooth, using strong and gentle pulses of water for a thorough clean.
With Pulse Wave technology the flow of the water increases and decreases in intensity, providing a brief pause during which you can move the nozzle to the next space between your teeth.
Intensities

Your Cordless Power Flosser comes with three different intensity settings. To change the intensity to the setting you prefer, press the intensity button.
Note: It is recommended to start using this Power Flosser on the lowest intensity and increase the intensity over the course of a few weeks.
Getting Started
Charging your Cordless Power Flosser

1. Gently pull and rotate the charging port cover on the back of the Cordless Power Flosser to expose the charging port.
2. Plug the USB-A cable into the charging port on the back of the Cordless Power Flosser.
Note: Make sure the handle is completely dry before you connect the USB-A cable.

3. Connect the USB-A cable into a 5V USB wall adapter.
Note: Wall adapter not included in all models. Only use a 5V IPX4 adapter.
4. The battery indicator flashes while charging (see 'Charging').
Note: It can take up to 8 hours to fully charge the battery, but you can use the Cordless Power Flosser before it is fully charged.
Note: Replace the charging port cover on the Cordless Power Flosser when not actively charging.
Filling the Reservoir
Fill the reservoir with lukewarm water. There are two easy ways to fill the reservoir.
Note: When filling reservoir, do not exceed the max fill line.
Note: Remove the charger from the Cordless Power Flosser prior to filling the reservoir and using the device.
Option 1:
Lift the flip top to the side of the reservoir and fill the reservoir through the quick side fill port.
Option 2:

1 Twist to detach the reservoir and fill the reservoir through the wide mouth opening.
2 Fill the reservoir.

3 Twist the reservoir to reattach.
Inserting and removing nozzles

Insert your preferred nozzle into the handle. Press the nozzle down until you hear a "click".
Note: Ensure the nozzle is fully inserted and flush with the top of the device.

To remove the nozzle, press the nozzle release button and pull the nozzle from the handle.
Using your Cordless Power Flosser

1 Before turning on the device, point the nozzle tip at the sink. Press the on/off button on the handle to turn on the Cordless Power Flosser. Allow water to spray into the sink. Turn off the device once water dispenses from the device.
2 Place the nozzle tip in your mouth. Lean over the sink and partially close your lips over the nozzle tip to avoid splashing. Leave enough space to allow water to flow from your mouth into the sink.

3 Press the on/off button on the handle to turn on the Cordless Power Flosser. 4 With the Cordless Power Flosser turned on:
Note: Do not press nozzle release button while using.
a Position the nozzle tip just above the gum line at a 90° angle.
Note: For the Quad Stream nozzle, press gently so that the nozzle tip is in contact with the gum line and the teeth.
b Starting from your back teeth in your upper or lower jaw, slide the nozzle tip along the gum line and pause briefly between each tooth.
c Continue to clean both inside (15 seconds) and outside (15 seconds) of your teeth for a total of 30 seconds in one arch of your mouth.
Note: Remember to clean the insides of your teeth.
Note: You can use the Nozzle Rotator to turn and position the nozzle tip to clean the insides of your teeth.
d Repeat in the other arch of your mouth for another 15 seconds on the inside and 15 seconds on the outside until all spaces around and between your teeth have been cleaned for a total of at least one minute.
Note: You can stop the water flow during use by pressing the on/off button on the Cordless Power Flosser.
Note: The Cordless Power Flosser switches off automatically after 2 minutes.
Note: If you choose to refill the reservoir during use, turn the device off while refilling the reservoir and then pick up where you left off until all spaces around and between your teeth have been cleaned for a total of at least one minute.
Cleaning Orthodontic Brackets with the Quad Stream Nozzle

1 To clean around orthodontic brackets, place the nozzle tip over each bracket.

2 Gently rotate the nozzle tip around the bracket in a small circle before moving to the bracket on the next tooth.
After each use
1 Turn off the Cordless Power Flosser. 2 Detach and empty the reservoir. 3 Remove the nozzle from the handle by pushing the nozzle release button on the top of the handle. 4 Rinse the nozzle under the tap. 5 Dry any excess water from the nozzle, the outside of the handle, and the reservoir. 6 Insert the nozzle back into the handle or utilize the in-reservoir nozzle storage feature (see 'Storage').
Note: To facilitate drying, keep the reservoir side fill port door open or leave the Cordless Power Flosser disassembled between uses.
Charging
Battery Status
This Cordless Power Flosser is designed to provide at least 25 flossing sessions, each session lasting 1 minute.

The battery indicator shows the battery status when you complete the flossing session, or when you pause the Power Flosser.
Note: The device will shut off after 2 minutes of use.
When the Power Flosser is charging
Battery status Battery indicator
| Full Solid green | |
| Charging Flashing green | |
| Note: The battery indicator will flash until fully charged. When it becomes fully charged while plugged in, the light will turn solid green for 30 seconds and then it will turn off | |
| When the Power Flosser is not charging | |
Battery status Battery indicator
| Full Solid green |
| Medium Flashing green |
| Low Flashing amber |
| Empty Flashing amber for 5 seconds and thePower Flosser turns off automatically |
Cleaning
Note: When the low battery indicator appears, the Power Flosser is designed to provide at least 3 flossing sessions, each session lasting 1 minute.
The Cordless Power Flosser needs to be cleaned once a week. Clean the device and the accessories as follows. Accessories may vary by model.
Warning: Do not clean the Cordless Power Flosser while the charging cord and adapter are attached. Unplug the device and close the charging port cover before cleaning.
Reservoir
Gently remove the reservoir from the Cordless Power Flosser by twisting. The reservoir can be hand washed with warm water and mild soap or cleaned in the top rack of the dishwasher.
Handle
When necessary, you can clean the handle by wiping with a soft cloth and mild soap.
Nozzles
- Regular cleaning: Remove the nozzle from the handle. Rinse the tip under warm water.
- Every few months, or if your nozzle becomes clogged: Soak the nozzle in a container of 2 parts water and 1 part vinegar for 5 minutes. Rinse the nozzle with warm water.
Internal components, hose and handle
Fill the reservoir with warm water and add 1-2 tablespoons of white vinegar. Point the nozzle at the sink and turn on the Cordless Power Flosser to run the solution through the Cordless Power Flosser until the reservoir is empty. Rinse by repeating with a full reservoir of clean warm water.
Nozzle Storage Case
The storage case can be hand washed in warm water with mild soap or cleaned in the top rack of the dishwasher.
Travel pouch
Clean the travel pouch by wiping with a soft cloth and a mixture of warm water with mild soap. Wipe the travel pouch with cloth to dry.
Storage
In-Reservoir Nozzle Storage
Your Cordless Power Flosser is designed such that you can store one nozzle suspended from the bottom of the Cordless Power Flosser handle into the reservoir. To use this functionality:

1 Twist reservoir to detach. 2 Remove the nozzle by pressing the nozzle eject button on the back of the handle. 3 Insert bottom of nozzle into the bottom of the Power Flosser. 4 Twist the reservoir to reattach.
Note: Be sure to dry the inside of the reservoir and the nozzle prior to using this functionality.
Note: To facilitate drying, keep the reservoir side fill port door open or leave the Cordless Power Flosser disassembled between uses.
Note: If you are not going to use the product for an extended period of time, unplug it from the electrical outlet, clean it and store it in a cool and dry place away from direct sunlight.
Warning: Do not place other items in the reservoir. In particular, do not store the charging cord or wall adapter in the reservoir.
Replacement
Replace nozzles every 6 months or immediately when damaged. To buy accessories or spare parts, visit philips.com or go to your local Philips Sonicare dealer.
Locating the model number
Look on the box for the model number of your device.
2000 Series - (for all HX3801, HX3822 models)
3000 Series - (for all HX3804, HX3805, HX3806, HX3824,
HX3825, HX3826 models)
Warranty and support
For product information, support and online user instructions, please visit: www.philips.com/support or read the international warranty leaflet.
Warranty restrictions
The terms of the international warranty do not cover the following:
- Reservoir
- Nozzles
- Damage caused by use of unauthorized replacement parts or unauthorized nozzles
- Damage caused by misuse, abuse, neglect, alterations or unauthorized repair
- Normal wear and tear, including chips, scratches, abrasions, discoloration or fading
Recycling

- This symbol means that electrical products and batteries shall not be disposed of with normal household waste.
- Follow your country's rules for the separate collection of electrical products and batteries.
Removal of built-in rechargeable battery
CONTAINS LITHIUM-ION RECHARGEABLE CELL. MUST BE RECYCLED OR DISPOSED OF PROPERLY.
The built-in rechargeable battery must be removed by a qualified professional when the product is discarded. Instructions for removal of built-in rechargeable batteries can be found on www.philips.com/support.


Nozzle label F1 F2 F3


Series 3000 – (for all models HX3804, HX3805, HX3806, HX3824, HX3825 and HX3826)
Warranty and support

How to activate or deactivate the pacifier
Deep clean (3000 Series)
Option 2:


Nozzle label F1 F2 F3
Nozzle name Standard nozzle Comfort nozzle Quad Stream
Nozzle

Deep clean (3000 Series)


Nozzle label F1 F2 F3


Detachable part of the power unit: "xxxxxx" indicates the model number of chargers approved for use.
Introduction
Welcome to Philips! Congratulations on your purchase of the new Sonicare Cordless Power Flosser. To fully benefit from the support that Philips offers, register your product at www.philips.com/welcome.
Intended use
The Philips Sonicare Cordless Power Flosser is an oral irrigator intended to remove plaque and food debris
from between teeth and tooth surfaces to reduce tooth decay and improve and maintain gum health. This product is intended for household use by consumers, typically at least once a day. Children should use the brush under adult supervision.
Your Philips Sonicare Power Flosser
1 Nozzle 2 Nozzle rotator 3 Nozzle release button 4 On/off button 5 Intensity indicator 6 Intensity button 7 Mode indicator (select models only) 8 Mode button (select models only) 9 Battery status light 10 Charging connector / cover 11 Nozzle storage in the reservoir 12 Reservoir 13 Reservoir charging door 14 Nozzle case (select models only) 15 Travel case (select models only) 16 USB-A to small plug 17 USB-A power adapter (select models only)
Nozzle label F1 F2 F3
| Naziv mlaznice | Mlaznica Standard | Mlaznica Comfort | Mlaznica Quad Stream |
| Korist Mlaznica | Mekana gumena mlaznica za ugodno i lagano namještanje za one s osjetljivim desnima. | Mekana gumena mlaznica koja usmjerava vodu u križne mlazove koji nježno uklanjaju plak za temeljito čišćenje bez napora. | |
| Standard s jednim mlazom vode za uklanjanje ostataka hrane i plaka. |
Depending on your model, the Cordless Power Flosser has one or two different modes. If you have a two-mode device, press the mode button to switch between Clean (standard) and Deep Clean (deep cleaning) to select the desired mode. If you have a one-mode device, it is already in Clean mode.
Clean (series 2000 and 3000)
In this mode, the rhythm feature ensures a continuous water pressure for excellent cleaning results.
![graph TD A["Top Stage"] -->|15 sec.| B["Bottom Stage"] B -->|15 sec.| A](/content/2026/07/1411943/images/6c624db81a545eb42cf354c67fe56e5bf5169154cb3d5bdd6c6f35f5ed3aa981.jpg)
2 Connect the USB-A cable to the charging port on the back of the Cordless Power Flosser.
Note: The handle must be completely dry before connecting the USB-A cable.

3 Connect the USB-A cable to a 5V USB wall adapter.
Note: The wall adapter is not included with all models. Use only a 5V IPX4 adapter.
Option 2:

1 Turn to detach the reservoir and fill it through the wide opening.
2 Fill the reservoir.
Insert the desired nozzle into the handle. Press down until you hear a click.
To remove the nozzle, press the nozzle release button and pull it out of the handle.
Using the Cordless Power Flosser
d Repeat the process on the other jaw for 15 seconds on the inside and 15 seconds on the outside, until you have cleaned all areas around and between your teeth for at least one minute.
1 To clean around orthodontic brackets, place the tip of the nozzle on each bracket.
This Cordless Power Flosser device is designed to provide at least 25 flossing sessions, with each session lasting 1 minute.
The battery status indicator shows the battery level when you perform a flossing session or when you stop the Power Flosser device.
2 Remove the nozzle by pressing the nozzle eject button on the back of the handle.
3 Insert the bottom of the nozzle into the bottom of the Power Flosser device.


Clean (2000 and 3000 Series)
Deep clean (3000 Series)

![graph TD A["Top Circular Flow"] --> B["15 sec."] B --> C["Bottom Circular Flow"] C --> D["15 sec."] D --> E["Top Circular Flow"] E --> F["15 sec."] F --> G["Bottom Circular Flow"] G --> H["15 sec."] H --> I["Top Circular Flow"]](/content/2026/07/1411943/images/89cbb8451acb5f9a48e17bbbc081e69d042e667917a633130a418de0916777c9.jpg)
HX3806, HX3824, HX3825, HX3826)


3 Connect the USB-A cable to a 5V USB wall adapter.


2 Connect the USB-A cable to the charging port on the back of the Cordless Power Flosser.
3 Connect the USB-A cable to a 5V USB wall adapter.


Deep Clean (3000 Series)
Option 1:
2000 Series – (all HX3801, HX3822 models)
3000 Series – (all HX3804, HX3805, HX3806,
HX3824, HX3825, HX3826 models)

Nozzle code F1 F2 F3
To activate or deactivate the pacer

Nozzle label F1 F2 F3
How to activate or deactivate the pacer
With the Cordless Power Flosser off, press and hold the intensity selection button for three seconds.
Deep clean (3000 Series)
Charging the Cordless Power Flosser

2 Connect the USB-A cable to the charging port on the back of the Cordless Power Flosser.
3 Connect the USB-A cable to a 5 V USB wall adapter.
Note: The wall adapter is not included in all models. Use only a 5V adapter IPX4.
4 The battery indicator blinks during charging (see 'Charging').
Alternative 2:

Bruke Cordless Power Flosser
1 Before turning on the device, point the tip of the nozzle toward the sink. Press the on/off button on the handle to turn on the Cordless Power Flosser. Let the water spray into the sink. Turn off the device when water comes out of it.
![graph TD A["Top Stage"] -->|15 sec.| B["Bottom Stage"] B -->|15 sec.| A](/content/2026/07/1411943/images/00231da09af05ea90ef627074d10ffca3bed60e5472d930c20e1548a56dab3de.jpg)


Uchlik yorlig'i F1 F2 F3
Depending on your model, the Cordless Power Flosser is equipped with one or two modes. If you have a two-mode device, press the mode button to select between standard cleaning mode and deep cleaning mode. If you have a single-mode device, it is already in cleaning mode.
Cleaning (2000 and 3000 series)

To activate or deactivate the timer
With the Cordless Power Flosser off, press and hold the intensity selection button for 3 seconds.
- When deactivated, the battery indicator light flashes yellow once
- When activated, the battery indicator light flashes green twice
Deep cleaning (3000 series)
This mode uses strong and gentle pulses of water for thorough cleaning, utilizing Pulse Wave technology to control the work along each tooth.
1 To open the charging port, carefully pull and twist the charging port cover on the back of the Cordless Power Flosser.
2 Connect the USB-A cable to the charging port on the back of the Cordless Power Flosser.
3 Connect the USB-A cable to a 5V USB wall adapter.
Note: The wall adapter is not provided with all models. Use only a 5V IPX4 rated adapter.

4 The battery indicator flashes while charging (see "Charging").
Note: It takes up to 8 hours for the battery to fully charge, but you can use the Cordless Power Flosser before it is fully charged.
1 To remove the reservoir, twist it and fill it through the wide opening. 2 Fill the reservoir.
3 Twist to reattach the reservoir.

Insert your preferred tip into the handle. Press the tip down until you hear a click.
To remove the tip, press the tip release button and pull the tip from the handle.
Using the Cordless Power Flosser

1 Before turning on the device, point the tip into the sink. Press the on/off button on the handle to turn on the Cordless Power Flosser. Aim the water into the sink. Turn it off when water starts to come out of the device.
3 Press the on/off button on the handle to turn on the Cordless Power Flosser.
4 With the Cordless Power Flosser on:
Note: Do not press the tip release button during use.

a Hold the tip at a 90° angle slightly above the gum line.
c Continue cleaning the inner (15 seconds) and outer (15 seconds) surfaces of your teeth, for a total of 30 seconds per tooth row.
2 Before moving to the next tooth, gently move the tip in a small circle around the bracket.
After each use
1 Turn off the Cordless Power Flosser. 2 Separate the reservoir and empty it. 3 Remove the tip from the handle by pressing the tip release button on the handle. 4 Rinse the tip under the tap. 5 Dry the tip, the outside of the handle, and the reservoir from excess water. 6 Reattach the tip to the handle or use the tip storage function in the reservoir (see "Storage").
Note: To facilitate drying, keep the fill port door on the reservoir open or leave the Cordless Power Flosser disassembled between uses.
Charging
Battery status
This Cordless Power Flosser is designed to provide at least 25 interdental cleaning sessions, each lasting 1 minute.

The battery level indicator reflects the battery status when you finish a cleaning session or pause the Power Flosser.


Nozzle label
F1 F2 F3
Nozzle name Standard nozzle Comfort nozzle "Quad Stream" nozzle
Deep clean (3000 Series)


Nozzle label
F1 F2 F3
Clean (2000 and 3000 Series)
Deep clean (3000 Series)
1 Carefully pull and turn the charging port cover on the back of the Cordless Power Flosser to reveal the charging port.
2 Connect the USB-A power cable to the charging port on the back of the Cordless Power Flosser.
Note: Make sure the handle is completely dry before connecting the USB-A cable.


3 Connect the USB-A cable to a 5V USB wall adapter.
c Clean the inner (15 seconds) and outer (15 seconds) sides of your teeth for 30 seconds per arch.
Note: Don't forget to clean the inner side of your teeth.
1 When cleaning around orthodontic braces, place the nozzle tip above the bracket on each tooth.


Nozzle label F1 F2 F3
Nozzle name Standard Nozzle Comfort Nozzle Quad Nozzle
Stream
Clean (2000 and 3000 Series)
Deep clean (3000 Series)
1 Gently pull and rotate the charging port cover on the back of the Cordless Power Flosser to reveal the charging port.

2 Plug the USB-A cable into the charging port on the back of the Cordless Power Flosser.
When the Cordless Power Flosser is charging
Battery level Battery indicator
Full charge Lights green

Removable power supply: The label 'xxxxx' represents the model number of approved chargers that should be used.
Introduction
Welcome to Philips! Congratulations on your new Sonicare Cordless Power Flosser. To get the most out of Philips support, register your product at philips.com/welcome.
Intended use
The Philips Sonicare Cordless Power Flosser is an oral irrigator intended to remove plaque and food debris from between teeth and from the tooth surface to prevent caries and improve and maintain gum health. This product is for home use, at least once a day. Children should use the product under adult supervision.
Product Philips Sonicare Power Flosser
1 Nozzle 2 Nozzle rotation part 3 Nozzle release button 4 On/off button 5 Intensity indicator 6 Intensity button 7 Mode indicator (Certain models only) 8 Mode button (Certain models only) 9 Battery indicator light 10 Charging connector/cover 11 Nozzle storage in reservoir 12 Reservoir 13 Reservoir filling door 14 Nozzle pouch (Certain models only) 15 Travel pouch (Certain models only) 16 USB-A to small plug 17 USB-A power adapter (Certain models only) Note: The contents of the box may not include all items shown, depending on the product configuration purchased.
Nozzles
To see which types of nozzles you have, check the code on the nozzle base. Each nozzle type offers different benefits.

F1 F2 F3
Nozzle label
| Naziv mlaznice Standardmlaznica | Comfort mlaznica | Quad Streammlaznica | |
| Pogodnost Standardmlaznica sa jednim mlazom vode za uklanjanje nečistoće i plaka. | Mekana gumena mlaznica za ugodno i lako pozicioniranje kod osoba sa osetljivim desnima. | Mekana gumena mlaznica koja usmerava vodu u mlaz u obliku krsta koji nežno uklanja plak i temeljno čisti bez napora. | |
Note: The contents of the box may not include all items shown, depending on the product configuration purchased.
Modes and intensities
Depending on the model, the Cordless Power Flosser has one or two modes. If you have a device with two modes, press the mode button to switch between Clean (standard) and Deep Clean (deep cleaning) to select the desired mode. If you have a device with one mode, it is already in Clean mode.
Clean (2000 and 3000 series)
With a brushing timer, this mode offers constant water pressure for a fantastic clean.
![graph TD A["Top Circular Flow"] --> B["15 sec."] B --> C["Bottom Circular Flow"] C --> D["15 sec."] D --> E["Top Circular Flow"] E --> F["15 sec."] F --> G["Bottom Circular Flow"] G --> H["15 sec."] H --> I["Top Circular Flow"]](/content/2026/07/1411943/images/b61d27e6032f5dc16295e6f7265396de955040c77607dd839a2a1eca2eea15cb.jpg)
Activating or deactivating the brushing timer When the Cordless Power Flosser is off, press and hold the intensity button for 3 seconds.
2 Connect the USB-A cable to the charging connector on the back of the Cordless Power Flosser.
3 Connect the USB-A cable to a 5V USB wall adapter.
Note: The wall adapter is not included with all models. Use only a 5V IPX4 adapter.
4 The battery indicator blinks during charging (see 'Charging').
Note: A full charge may take up to 8 hours, but you can use the Cordless Power Flosser before it is fully charged.
Note: Replace the charging port cover on the Cordless Power Flosser when not actively charging.
Filling the water reservoir
Option 2:

1 Twist to detach the reservoir and fill it through the wide opening.
2 Fill the reservoir.
3 Twist the reservoir to reattach it.
Inserting and removing nozzles

Insert the desired nozzle into the handle. Press the nozzle down until you hear a 'click'.
Note: Make sure the nozzle is fully inserted and aligned with the top of the device.

To remove the nozzle, press the nozzle release button and pull it out of the handle.
Using the Cordless Power Flosser
1 Before turning on the device, point the nozzle tip toward the sink. Press the power button on the handle to turn on the Cordless Power Flosser. Let the water spray into the sink. Turn off the device after water has flowed out.

2 Place the nozzle tip in your mouth. Lean over the sink and partially close your lips around the nozzle tip to prevent splashing. Leave enough space for water to flow from your mouth into the sink. 3 Press the power button on the handle to turn on the Cordless Power Flosser. 4 With the Cordless Power Flosser on:
1 To clean around orthodontic brackets, place the nozzle tip on each bracket.

2 Gently move the nozzle tip in small circles around the bracket before moving to the bracket on the next tooth.
After each use
1 Turn off the Cordless Power Flosser. 2 Detach and empty the reservoir. 3 Detach the nozzle from the handle by pressing the nozzle release button on the top of the handle. 4 Rinse the nozzle under running water. 5 Dry excess water from the nozzle, the outside of the handle, and the reservoir.
6 Insert the nozzle back into the handle or use the nozzle storage function in the reservoir (see 'Storage').
This Cordless Power Flosser is designed to provide at least 25 flossing sessions, with each session lasting 1 minute.
The battery status indicator shows the battery status when you finish a flossing session or when you pause the Power Flosser.
2 Remove the nozzle by pressing the nozzle eject button on the back of the handle.
3 Insert the bottom of the nozzle into the bottom of the Power Flosser.

4 Rotate the reservoir to put it back in place.
Note: Make sure to dry the inside of the reservoir and the nozzle before using this function.
3000 Series – (for all HX3804, HX3805, HX3806, HX3824, HX3825, HX3826 models)
Warranty and support
For product information, support, and online user instructions, visit: www.philips.com/support or read the international warranty leaflet.
Warranty limitations

Nozzle marking
F1 F2 F3

Deep clean (3000 Series)
Option 2:


Deep clean (3000 Series)
Philips Sonicare Cordless Power


| Nasadka tagmasy | F1 F2 F3 | ||
| Nasadka ady | Standard nasadkasy | Comfort nasadkasy | Quad Stream nasadkasy |
| Yeñillik | Galyndylary we daşlary aýrymak üçin yeke suw akymly Standart nasadkasy. | Näzik diş eti bar bolan adamlar üçin rahat we yeğil yerleşyän yumşak rezin nasadka. | Yumşak rezin nasadka suwy atanak şekilli akyma ugrukdyrmak arkaly, daşlary emaý bilen aýyrýar we kösençsiz doly arassaçylyk geçýär. |
Depending on the model, your Cordless Power Flosser is equipped with one or two modes. If your device has two modes, press the mode button to switch between the standard Clean mode and the Deep Clean mode to select the desired mode. If your device has one mode, it is already set to the cleaning mode.
Connect the USB-A cable to a 5 V USB wall adapter.
Note: The wall adapter is not included with all models. Use only a 5 V IPX4 adapter.

Attach your preferred nozzle to the handle. Press the nozzle down until you hear a "click" sound.
Note: Make sure the nozzle is fully attached and is flush with the top of the device.

To remove the nozzle, press the nozzle release button and pull the nozzle off the handle.
Using your Cordless Power Flosser

1 Before turning on the device, point the nozzle tip into the sink. Press the on/off button on the handle to turn on the Cordless Power Flosser. Allow the water to spray into the sink. After the water flows from the device, turn it off.
The battery indicator shows the battery status when the cleaning session ends or when you turn off the Power Flosser.
Bellik: It will turn off automatically after 2 minutes of use.
While the Power Flosser is charging
Battery status Battery indicator
| Doly Yanyp duran yasyl | |
| Zarýad alýar Yanyp sönýän yasyl | |
| Bellik: Zarýad doly alynýança, batareýa görkezijisi yanyp söner. Toga dakylgy wagty doly zarýad alanda, çyra 30 sekuntlap yasyl reňkde yanyp durar we soňra söner | |
| Power Flosser zarýad alman durka | |
Battery status Battery indicator
| Doly Yanyp duran yasyl |
| Orta Yanyp sönyän yasyl |
| Pes Yanyp sönyän sary |
| Boş 5 sekunt sary reňkde yanyp sönýärwe Power Flosser awtomatik öçýär |
| Bellik: Zarýad pes görkezijisi peýda bolanda, Power Flosser her biri 1 minutlyk azyndan 3 sany arassalama seansyny üpjün etmäge niyetlenilendir. |
Cleaning
Clean (2000 kcal 3000 Series)

Deep clean (3000 Series)

HX3806, HX3824, HX3825, HX3826)
Clean (2000 and 3000 Series)

Deep clean (3000 Series)

XXXXXX
Clean (2000 and 3000 Series)

Deep clean (3000 Series)
4 Kora e включен Cordless Power Flosser:
HX3806, HX3824, HX3825, HX3826)


The power supply part: «xxxxх» indicates the model number of the chargers to be used.
Introduction
Depending on your model, your Cordless Power Flosser is equipped with one or two different modes. If you have a handle with two modes, press the mode button to switch between Standard Clean and Deep Clean modes to select your desired mode. If you have a handle with one mode, it is already in clean mode.

2 Connect the USB-A power cord to the power port on the back of the Cordless Power Flosser.
3 Connect the USB-A cord to a 5V USB wall charger.
Note: The wall adapter is not included in all models. Only use a 5V IPX4 adapter.

Place your favorite nozzle onto the handle. Press the nozzle until you hear a "click" sound.
To remove the nozzle, press the nozzle release button and pull the nozzle off the handle.
Using your Cordless Power Flosser


4 The battery indicator will flash during charging (see "Charging").
Depending on your model, your Cordless Power Flosser is equipped with one or two different modes. If you have a handle with two modes, press the mode button to switch between Standard Clean and Deep Clean modes to select your desired mode. If you have a handle with one mode, it is already in clean mode.
Clean (2000 L 3000 Series)
Standard Clean and Deep Clean modes
Your Cordless Power Flosser is equipped with one or two different modes. If you have a handle with two modes, press the mode button to switch between Standard Clean and Deep Clean modes to select your desired mode.
- Standard Clean mode is suitable for daily cleaning.
Deep clean (3000 Series)
This mode is intended for a more thorough cleaning. Pulse Wave technology helps remove plaque and improve gum health, for a deeper clean.
The Pulse Wave mode uses gentle pulses of water to help remove plaque and improve gum health, for a deeper clean.
Cleaning modes

The Cordless Power Flosser has two cleaning modes: Clean mode and Deep Clean mode.
Use the mode button to switch between Clean and Deep Clean modes.
Mode button
Charging the Cordless Power Flosser

1. Plug the USB cable into the charging port on the base of the Cordless Power Flosser.

2. Connect the USB-A end of the cable to a USB power adapter.
Note: Use a USB-A to USB-C cable, or a USB-A to USB-A cable.

3. Connect the USB-A end to a 5V USB power source.
The charging time is approximately 5 hours. Use a 5V IPX4 rated power source.
4. The charging indicator light will turn on (see "Charging indicator").
Before using the device, read the instructions for use carefully, especially the safety instructions, and keep them for future reference. Use the Cordless Power Flosser only as described in these instructions.
Before using the device, if it is not working properly, contact the Cordless Power Flosser service center.
The device is intended for cleaning between teeth and for oral hygiene. Use only as described in these instructions.
Step 2.
Remove the water tank from the device. Fill the tank with lukewarm water.
Before use, make sure the device is fully charged and the tank is securely attached.
Do not use the device if the nozzle is damaged or if the device has been dropped.
Using the Cordless Power Flosser

1. Remove the nozzle from the storage compartment. Attach the nozzle to the device until it clicks into place. If the nozzle is not attached properly, water may leak. 2. Fill the water tank with lukewarm water. Do not exceed the maximum fill line. 3. Attach the water tank to the device until it clicks into place. 4. If the Cordless Power Flosser is not working properly.
Before using the device, make sure the nozzle is properly attached.
1. Place the nozzle tip in your mouth, aiming it at the spaces between your teeth.

2. Turn on the device by pressing the power button. Adjust the pressure setting as needed.
This Cordless Power Flosser is designed for use with 5 replaceable nozzles, each lasting approximately 1 month.
Do not use the device if the nozzle is damaged or if the device is not working properly. Do not attempt to repair the device yourself. Contact the service center for assistance.
12. The device is not intended for use by children without supervision.
__SUPPIMER__

F1 F2 F3

3070600 1:
Uzbekistan Uzbekistan Uzbekistan Uzbekistan Uzbekistan Uzbekistan Uzbekistan Uzbekistan Uzbekistan Uzbekistan
307060n 2:
Rsugon Lsugm3gmn Lsugdn Lsugmymdn. Qssgnfgon Lsugdl j3gdm, Lsubd sm zungmbgom „Qsbs3y6gdsu”. Dgbnd3b: Qsmbdy6qn, mmd Lsugdn Lmymso smnl Hsugmn qo Qsugmymn dmbymdnmmdnl 8gos bsbnmn.

b 8905 s6 j3005 y0nl y365 z0nngdncos6 o6bydynm, gssbfnnsmym on buzdnl b3gmn mmdnmydnl bs8nl gssb3mn3 m s dgnfj b6nn gssbgmym ononmgymn z0nml dmmnl.


HX3804, HX3805, HX3806 - Series 3000
HX3824, HX3825, HX3826
www.philips.com/Sonicare
©2023 Koninklijke Philips N.V. (KPNV). All rights reserved. Philips and the Philips shield are trademarks of KPNV. Sonicare and the Sonicare logo are trademarks of Philips Oral Healthcare, LLC and/or KPNV.
300009920852 (12/04/2023)
- IMPORTANT SAFETY INFORMATION
- WARNINGS
- BATTERY SAFETY INSTRUCTIONS
- STORAGE AND TRANSPORTATION CONDITIONS
- ELECTROMAGNETIC FIELDS (EMF)
- INTRODUCTION
- INTENDED USE
- YOUR PHILIPS SONICARE POWER FLOSSER
- NOZZLES
- MODES AND INTENSITIES
- MODES (SPECIFIC MODELS ONLY)
- CLEAN (2000 AND 3000 SERIES)
- TO ACTIVATE OR DEACTIVATE THE PACER
- DEEP CLEAN (3000 SERIES)
- INTENSITIES
- GETTING STARTED
- CHARGING YOUR CORDLESS POWER FLOSSER
- FILLING THE RESERVOIR
- OPTION
- INSERTING AND REMOVING NOZZLES
- USING YOUR CORDLESS POWER FLOSSER
- CLEANING ORTHODONTIC BRACKETS WITH THE QUAD STREAM NOZZLE
- AFTER EACH USE
- CHARGING
- BATTERY STATUS
- CLEANING
- RESERVOIR
- HANDLE
- INTERNAL COMPONENTS, HOSE AND HANDLE
- NOZZLE STORAGE CASE
- TRAVEL POUCH
- STORAGE
- IN-RESERVOIR NOZZLE STORAGE
- WARNING: DO NOT PLACE OTHER ITEMS IN THE RESERVOIR. IN PARTICULAR, DO NOT STORE THE CHARGING CORD OR WALL ADAPTER IN THE RESERVOIR
- REPLACEMENT
- LOCATING THE MODEL NUMBER
- WARRANTY AND SUPPORT
- WARRANTY RESTRICTIONS
- RECYCLING
- REMOVAL OF BUILT-IN RECHARGEABLE BATTERY
- HOW TO ACTIVATE OR DEACTIVATE THE PACIFIER
- NOZZLE LABEL F1 F2 F
- NOZZLE NAME STANDARD NOZZLE COMFORT NOZZLE QUAD STREAM
- CLEAN (SERIES 2000 AND 3000)
- USING THE CORDLESS POWER FLOSSER
- HOW TO ACTIVATE OR DEACTIVATE THE PACER
- CHARGING THE CORDLESS POWER FLOSSER
- ALTERNATIVE
- BRUKE CORDLESS POWER FLOSSER
- UCHLIK YORLIG'I F1 F2 F
- CLEANING (2000 AND 3000 SERIES)
- TO ACTIVATE OR DEACTIVATE THE TIMER
- DEEP CLEANING (3000 SERIES)
- BATTERY LEVEL BATTERY INDICATOR
- PRODUCT PHILIPS SONICARE POWER FLOSSER
- FILLING THE WATER RESERVOIR
- WARRANTY LIMITATIONS
- NOZZLE MARKING
- CLEAN (2000 KCAL 3000 SERIES)
- CLEAN (2000 L 3000 SERIES)
- STANDARD CLEAN AND DEEP CLEAN MODES
- CLEANING MODES
- MODE BUTTON
- STEP
- SUPPIMER
- N
Brand : PHILIPS
Model : Sonicare Power Flosser 3000 HX3826
Category : Interdental brush