
CMF75S - Fan Cellini - Free user manual and instructions
Find the device manual for free CMF75S Cellini in PDF.


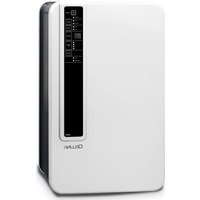
| Product Type | Pedestal Fan |
| Brand | Cellini |
| Model | CMF75S |
| Height | 75 cm (29.5 in) |
| Blade Diameter | 16 inches (40 cm) |
| Weight | 4.5 kg (9.9 lbs) |
| Power Supply | 220-240 V, 50/60 Hz |
| Power Consumption | 50 W |
| Speed Settings | 3 speeds (Low, Medium, High) |
| Oscillation | Yes, 90° horizontal |
| Remote Control | Yes, included |
| Timer | Yes, up to 7.5 hours |
| Noise Level | ≤ 55 dB(A) |
| Adjustable Height | Yes, telescopic pole |
| Material | ABS plastic, metal pole and base |
| Color | White with black accents |
| Protection Class | IPX0 (not water-resistant) |
| Warranty | 2 years |
| Included Accessories | Remote control, user manual |
Frequently Asked Questions - CMF75S Cellini
User questions about CMF75S Cellini
0 question about this device. Answer the ones you know or ask your own.
Ask a new question about this device
Download the instructions for your Fan in PDF format for free! Find your manual CMF75S - Cellini and take your electronic device back in hand. On this page are published all the documents necessary for the use of your device. CMF75S by Cellini.
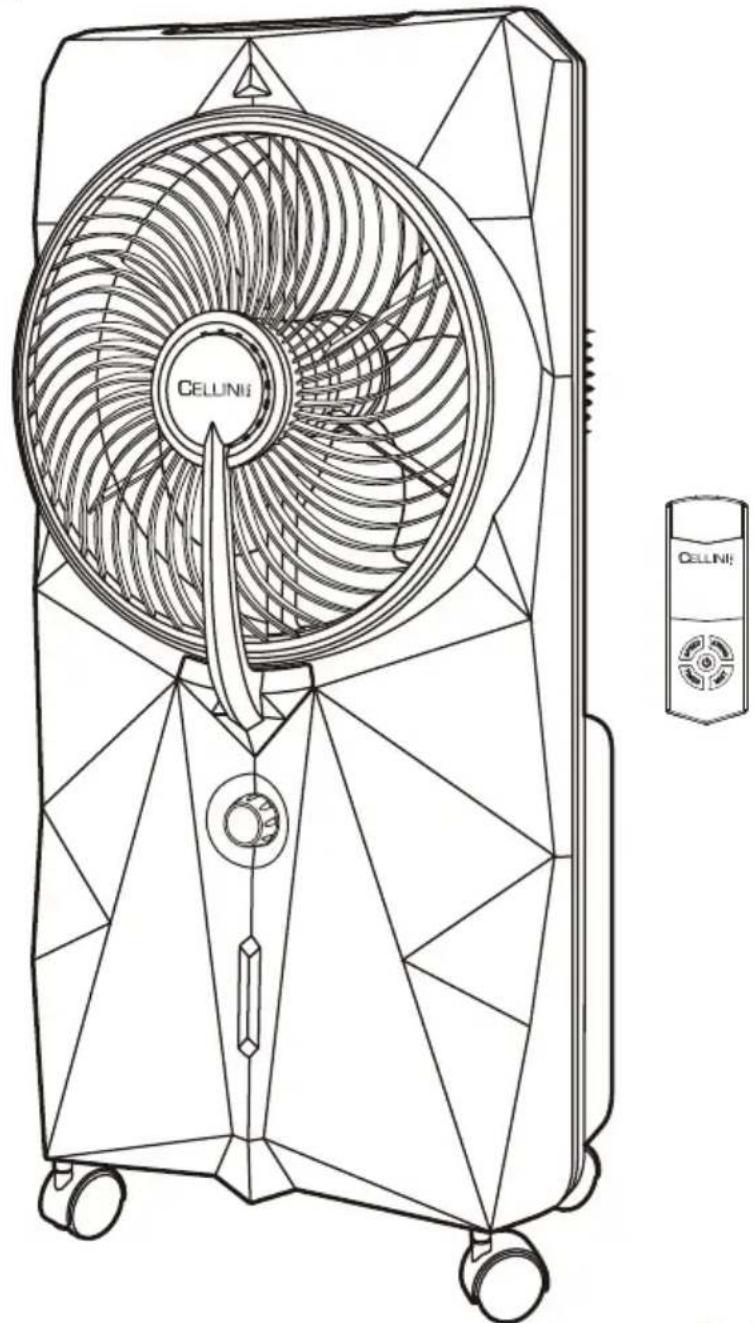
USER MANUAL CMF75S Cellini
natural_image
Line drawing of a CELUNI air fan with visible blades and control panel (no text or symbols on the fan itself)CE回
FEATURES
- Remote Controller Sensor
- Rotary Fan Grille
- Misting Outlet
- Misting Volume Control
- Water Level Indicator
- Wheel
- Timer ON Indicator
- Ionizer ON Indicator
- Misting ON Indicator
- Fan Oscillation Indicator
-
Fan Low Speed Indicator
-
Fan Medium Speed Indicator
- Fan High Speed Indicator
- Timer Button
- Ionizer Button
- Misting ON/OFF Button
- Timer & Temperature Display
- Fan Oscillation Button
- Fan Speed Button
- Fan Power ON/OFF Button
- Power ON/OFF Indicator
-
Handle
-
Rear Fan Grille
- Fan Blade
- Detachable Water Tank
- Cord Hook
- Drain Plug
- Remote Fan Speed Control Button
- Remote Timer Button
- Remote Power ON/OFF Button
- Remote Misting ON/OFF Button
- Remote Fan Oscillation Button
- Remote Battery Flap

natural_image
Technical line drawing of a mechanical device with internal components and mounting base (no text or symbols)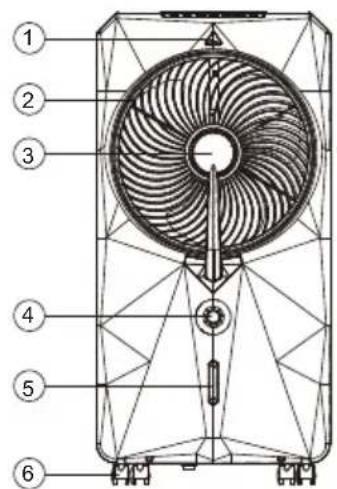
Front View

natural_image
Technical line drawing of a mechanical device with internal components and wheels (no text or symbols)
Back View


natural_image
Line drawing of a portable electric heater with control panel (no text or symbols)
natural_image
Technical line drawing of a vehicle rear view showing roof, grille, and side-mounted components (no text or symbols)
Remote Control Unit
Control Panel Top View Base View


The lightning flash with arrowhead symbol, within an equilateral triangle, is intended to alert the user to the presence of uninsulated. "Dangerous Voltage" within the product's enclosure that may be of sufficient magnitude to constitute a risk of electric shock to persons.

The exclamation point within an equilateral triangle is intended to alert the user to the presence of important operating and maintenance (servicing) instructions in the literature accompanying the appliance.
WARNING:
TO REDUCE THE RISK OF FIRE OR ELECTRIC SHOCK, DO NOT EXPOSE THIS APPLIANCE TO RAIN OR MOISTURE.
PRODUCT INTRODUCTION
Misting Fan is design with digital control system. It has device for storing water. It can lower surrounding temperature, freshen the air with equipped ion humidify the air through the principle of water evaporation. LED panel makes it luxurious and easy to use.
IMPORTANT NOTES
Please read the instruction manual carefully before operating this unit.
-
Make sure that the home power supply consistent with the product before plug in.
-
Switch off and disconnect from the power outlet when not in use or before cleaning.
-
Do not expose the unit to rain and keep out of reach of water on the control panel or LED for proper use.
-
Do not put the fingers or any objects inside the fan grill during operation.
-
Do not operate the unit if there is any damage to the power plug or cord - take unit to our after sales service center for repair, do not attempt to undertake any required repairs yourself.
-
Wipe clean with damp cloth only - do not use any abrasive cleaners.
-
This appliance is not intended for use by persons (including children) with reduced physical, sensory, or mental capabilities or lack of experience and knowledge unless then have been given supervision or instruction concerning use of the appliance by a person responsible for their safety.
-
Do not use the misting function if unit is to be used in a damp space.
-
Do not use the misting mode when water tank is empty; always keep enough water in tank in order for this function to operate, otherwise may cause water pump malfunction.
-
If unit is being stored away for a long period of time without use, empty the water tank before storing or transporting the unit.
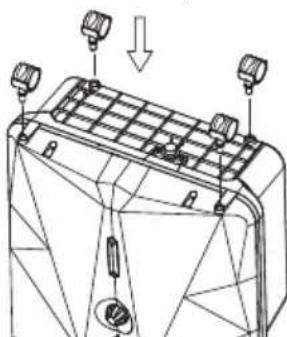
HOW TO ASSEMBLE THE WHEELS (SEE DRAWING 1)
-
Attach the four wheels into the unit.
-
Two of the wheels can be locked in position if required.
natural_image
Technical line drawing of a mechanical assembly with mounting holes and a central grid structure (no text or symbols)DRAWING 1
Make sure that the home power supply is consistent with the product before plug in.
Press the "fan power ON/OFF button" (Feature No. 20) on the control panel or (Feature No.30) on the remote controller to start operation, LED light (Feature No.21) will become illuminated on the control panel. Press the same button to turn off the function.
FAN SPEED OPERATION
Select the required fan speed to Low/Medium/High by press the "Fan Speed Button" (Feature No. 19) on the control panel or (Feature No. 28) on the remote control. LED light above selected speed will become illuminated on the control panel.
MISTING OPERATION
- Ensure the unit is placed on a level surface and unplug from the power and switch off all the function when refilling water.
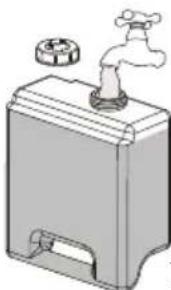
- Remove the water tank (Feature No.25) and fill water, but do not fill water over the Marking Line (see drawing 2 below) to ensure water does not overflow.
natural_image
Illustration of a water dispenser with a faucet and lid (no text or symbols)DRAWING 2

- Remove the water tank and fill clean water.

- Tighten the cover in clockwise direction.

-
Turn the water tank upside down to make sure no leakage.
-
Put the water tank back to the unit.

natural_image
Technical line drawing of a mechanical device with wheels and housing (no text or symbols)-
Misting function will not operate effectively if water not enough.
-
Connect to the power socket, press fan power ON/OFF button, select the fan speed to start and press "Misting ON/OFF Button" (Feature No.16) on the control panel or (Feature No.31) on the remote controller to switch the misting on or off; illuminated lights on the control panel will indicate the functions currently in operation.
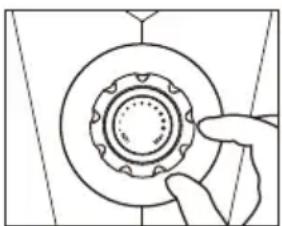
- Adjust the mist density, turn the "misting volume control" (Feature No.4) clockwise to increase the mist density or anti-clockwise to decrease the mist density, then get an optimum mist performance as required.
- It may take a minute for a new misting fan to start the misting, it is normal for air to come out of the nozzles before water and the mist.

- Press the "Fan power ON/OFF" button.

- Select the Fan Speed to start.

- Press the "Misting ON/OFF" to start misting.
natural_image
Hand holding a circular mechanical component with teeth, no text or symbols visible- Adjust the mist density by turning the "Misting volume control" knob.
Warning :
- Low Water Level Alarm: when water level becomes low, you will hear the "beep" sound and the "Mist Indicator" will flash for a second. At the same time the power of the pump inside the unit will be cut off
to protect the life of the pump.
To stop the alarm, turn off the unit from the power outlet.
Fill the tank with water and turn on the unit again.

natural_image
Illustration of a portable air conditioner unit with a cross symbol and label 'WING 3' (no text on device or background)2. DIRECT POUR WATER INTO MIST FAN IS PROHIBITED. (SEE DRAWING 3)
To start 360° air flow direction, press the "Fan Oscillation Button" (Feature No. 18) on the control panel or (Feature No. 32) on the remote controller once; LED light(Feature No.10) will become illuminated on the control panel and the rotary fan grille will begin to rotate, directing air in a full circle. This setting will be memorized and keep unit next operation. Press the same button to turn off the function.
IONIZER OPERATION
Press the "lonizer Button" (Feature No. 15) on the control panel to release the anions. Illuminated light is on the control panel will indicate function is currently in operation. Press the same button to turn the function off.
TIMER OPERATION
- Press the "Timer Button" (Feature No. 14) on the control panel or (Feature No. 29) on the remote controller to set the countdown timer. The unit will operate with its present settings until the timer counts down.
- Timer can be set from 1 to 8 hours.
- Once set, LED display will show the time set.
- To switch off the timer function and operate the unit continuously, press the timer button until LED display switches off and the LED light on the control panel above timer button LED will also be off.
REMOTE CONTROLLER
- Open the remote control battery flap (Feature No. 33) and insert 1 piece 3V "CR2032" of Button battery.
- Remote controller must be aimed at the sensor (Feature No.1) on the front of the appliance, distance within 5 meters, and will not function from beside or behind the appliance.
CLEANING AND MAINTENANCE (SEE DRAWING 4)
- Ensure the unit is switched off and disconnected from a power source before cleaning.
- Clean outer casing or control panel with a damp cloth only - do not use any abrasive cleaners or harsh chemicals, and ensure the control panel or LED is out of reach of water.
- Check the condition of misting and water tank before every use.
-
After long time operation with this appliance, the unit may become clogged with dust and dirt, which will greatly affect the performance of the unit. Sometimes mold and mildew may also occur due to the water tank not regular cleaned, recommend to clean once every two weeks.
-
Remove the drain plug (Feature No.21) and allow the water tank to empty.
- If the unit is being stored for a long period of time without use, empty the water tank before storing or transporting the un it.

natural_image
Technical line drawing of a mechanical device with no visible text or symbolsDRAWING 4
TECHNICAL SPECIFICATIONS
Input Voltage ...... AC220-240V 50/60Hz
Input Power....75W
Operating Temperature.... 0°C-45°C
Humidity.... Lower than 90%
Water Tank Capacity 4 Liter
Fan Maximum Air Volume ..... Approx > 300m³/Hour
Fan Maximum Speed....Approx 5.5m/s
Evaporative Contant Of Water ..... Approx 300mL/Hr
Timer Control.... 1-8 Hours
Remote Control Distance.....Approx 5 Meters
Ion Density Approx.... Approx 3 x 10^6 lon/cm ^3
Product Dimension ..... Approx W40 x D25 x H80.6cm
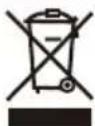
This marking indicates that this product should not be disposed with other household wastes throughout the EU. To prevent possible harm to the environment or human health from uncontrolled waste disposal, recycle it responsibly to promote the sustainable reuse of material
resources. To return your used device, please use the return and collection systems or contact the retailer where the product was purchased. They can take this product for environmental safe recycling.
WARNING:
A. To avoid an electrical shock, please do not open the rear cabinet (rechargeable fan) for repair or cleaning unless qualified person.
B. If the supply cord is damaged, it must be replaced by the manufacturer or its service agent or a similarly qualified person in order to avoid a hazard.
C. The appliance is not intended for use by persons (including children) with reduced physical, sensory or mental capabilities, or lack of experience and knowledge, unless they have been given supervision or instruction concerning use of the appliance by a person responsible for their safety.
D. Children should be supervised to ensure that they do not play with the appliance.
CELLINI Italy
超聲波冷霧電風扇
帶負離子空氣淨化功能
產品型號: CMF75S
使用説明書
natural_image
Line drawing of a CELLINI air fan with triangular blades and wheels, no text or symbols presentCE回
功能及名稱簡介(圖解)
natural_image
Technical line drawing of a mechanical assembly with mounting flanges and a hanging component (no text or symbols)(圖示一)
風扇操作功能
natural_image
Technical line drawing of a mechanical device with wheels and housing (no text or symbols)4 將水箱放回機身
natural_image
Line drawing of a hand adjusting a circular mechanical component with a central hub (no text or symbols)8 調節霧化強弱
警告:
natural_image
Line drawing of a portable air conditioner unit with fan and wheels (no text or symbols)(圖示三)
負離子操作
natural_image
Technical line drawing of a mechanical device with no visible text or symbols(圖示四)
Proudly Serviced by:
ToolBox
a Gilman Group Company
太平家庭電器
- FEATURES
- PRODUCT INTRODUCTION
- IMPORTANT NOTES
- HOW TO ASSEMBLE THE WHEELS (SEE DRAWING 1)
- FAN SPEED OPERATION
- MISTING OPERATION
- Warning :
- DIRECT POUR WATER INTO MIST FAN IS PROHIBITED. (SEE DRAWING 3)
- IONIZER OPERATION
- TIMER OPERATION
- REMOTE CONTROLLER
- CLEANING AND MAINTENANCE (SEE DRAWING 4)
- TECHNICAL SPECIFICATIONS
- WARNING:
- CELLINI Italy
- 超聲波冷霧電風扇
- 功能及名稱簡介(圖解)
- 風扇操作功能
- 警告:
- 負離子操作
- 太平家庭電器
Brand : Cellini
Model : CMF75S
Category : Fan