
HCR2250ADS - Cooker HAIER - Free user manual and instructions
Find the device manual for free HCR2250ADS HAIER in PDF.
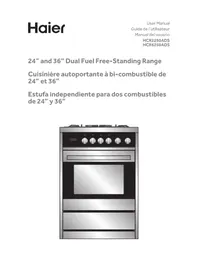


| Product type | Gas hob |
| Brand | Haier |
| Model | HCR2250ADS |
| Number of burners | 4 |
| Ignition type | Built-in electric ignition |
| Safety | Gas safety device (thermocouple) |
| Surface material | Glass ceramic or enameled steel (depending on version) |
| Pan supports | Enameled cast iron pan supports |
| Dimensions (W x D x H) | 590 x 520 x 50 mm (estimate) |
| Required cutout | 560 x 490 mm (estimate) |
| Net weight | Approximately 10 kg |
| Gas supply | Natural gas (G20) or LPG (G30/G31), depending on setting |
| Burner power | Rapid burner: 3.0 kW, semi-rapid burners: 1.7 kW, auxiliary burner: 1.0 kW (estimate) |
| CO2 emission class | Class A (estimate) |
| Maintenance and cleaning | Clean pan supports and burners with soapy water, glass ceramic surface with suitable product |
| Spare parts available | Yes (pan supports, burners, knobs, etc.) |
| Repairability | Easy: standard parts, Haier support |
| Repairability index | 7.5/10 (estimate) |
| Standards | CE, NF (estimate) |
Frequently Asked Questions - HCR2250ADS HAIER
User questions about HCR2250ADS HAIER
0 question about this device. Answer the ones you know or ask your own.
Ask a new question about this device
Download the instructions for your Cooker in PDF format for free! Find your manual HCR2250ADS - HAIER and take your electronic device back in hand. On this page are published all the documents necessary for the use of your device. HCR2250ADS by HAIER.
USER MANUAL HCR2250ADS HAIER
24" and 36" Dual Fuel Free-Standing Range
TABLE OF CONTENTS
RANGE SAFETY....2
The Anti-tip Bracket 4
PARTS AND FEATURES 8
ELECTRONIC CONTROL 10
Setting the Clock and timer 10
Timed Cooking....11
COOKTOP USE....12
OVEN USE....14
Cooking with the Convection Oven 14
Oven Modes....15
Bake Tips and Techniques 16
Convection Bake Tips and Techniques....17
Convection Roast Tips and Techniques 19
Convection Broil Tips and Techniques....21
OVEN CARE 22
Cleaning 22
TROUBLESHOOTING....24
Solving Baking and Roasting Problems....24
Solving Operational Problems 25
LIMITED WARRANTY 26
RECORD KEEPING
Thank you for purchasing this Haier product. This user manual will help you get the best performance from your new range.
For future reference, record the model and serial number located on the inside frame of the range, and the date of purchase.
Staple your proof of purchase to this manual to aid in obtaining warranty service if needed.
Model number
Serial number
Date of purchase
Your safety and the safety of others are very important.
We have provided many important safety messages in this manual and on your appliance. Always read and obey all safety messages.

This is the safety alert symbol.
This symbol alerts you to potential hazards that can kill or hurt you and others. All safety messages will follow the safety alert symbol and either the word "DANGER," "WARNING" or "CAUTION."
These words mean:
DANGER
An imminently hazardous situation. You could be killed or seriously injured if you don't immediately follow instructions.
WARNING
A potentially hazardous situation which, if not avoided, could result in death or serious bodily injury.
CAUTION
A potentially hazardous situation which, if not avoided, may result in moderate or minor injury.
All safety messages will tell you what the potential hazard is, tell you how to reduce the chance of injury, and tell you what can happen if the instructions are not followed.
WARNING
Fire Hazard
If the information in this manual is not followed exactly, a fire or explosion may result causing property damage, personal injury or death.
- Do not store or use gasoline or other flammable vapors and liquids in the vicinity of this or any other appliance.
- WHAT TO DO IF YOU SMELL GAS
- Do not try to light any appliance.
- Do not touch any electrical switch.
- Do not use any phone in your building.
- Immediately call your gas supplier from a neighbor's phone. Follow the gas supplier's instructions.
- If you cannot reach your gas supplier, call the fire department.
- Installation and service must be performed by a qualified installer, service agency or the gas supplier.
WARNING
The California Safe Drinking Water and Toxic Enforcement Act requires the Governor of California to publish a list of substances known to the State of California to cause cancer, birth defects, or other reproductive harm, and requires businesses to warn of potential exposure to such substances.
This product contains a chemical known to the State of California to cause cancer, birth defects, or other reproductive harm. This appliance can cause low-level exposure to some of the substances listed, including benzene, formaldehyde, carbon monoxide, toluene, and soot.
In the State of Massachusetts, the following installation instructions apply:
- Installations and repairs must be performed by a qualified or licensed contractor, plumber, or gasfitter qualified or licensed by the State of Massachusetts.
- If using a ball valve, it shall be a T-handle type.
- A flexible gas connector, when used, must not exceed 3 feet.
THE ANTI-TIP BRACKET
WARNING
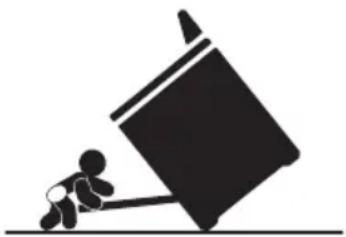
Tip Over Hazard
A child or adult can tip the range and be killed.
Connect anti-tip bracket to rear range foot.
Reconnect the anti-tip bracket, if the range is moved.
See the installation instructions for details.
Failure to follow these instructions can result in death or serious burns to children and adults.
Anti-Tip
Bracket

Range Foot
Making sure the anti-tip bracket is installed:
- Slide range forward.
- Look for the anti-tip bracket securely attached to floor.
- Slide range back so rear range foot is under anti-tip bracket.
IMPORTANT SAFETY INSTRUCTIONS
WARNING: To reduce the risk of fire, electrical shock, injury to persons, or damage when using the range, follow basic precautions, including the following:
- WARNING: TO REDUCE THE RISK OF TIPPING OF THE RANGE, THE RANGE MUST BE SECURED BY PROPERLY INSTALLED ANTI-TIP DEVICES. TO CHECK IF THE DEVICES ARE INSTALLED PROPERLY, SLIDE RANGE COMPLETELY FORWARD, LOOK FOR ANTI-TIP BRACKET SECURELY ATTACHED TO THE FLOOR BEHIND THE RANGE AND SLIDE RANGE COMPLETELY BACK UNTIL THE REAR RANGE FOOT IS UNDER ANTI-TIP BRACKET.
- WARNING: NEVER use this appliance as a space heater to heat or warm the room. Doing so may result in carbon monoxide poisoning and overheating of the oven.
- WARNING: NEVER cover any slots, holes or passages in the oven bottom or cover an entire rack with materials such as aluminum foil. Doing so blocks airflow through the oven and may cause carbon monoxide poisoning. Aluminum foil linings may also trap heat, causing a fire hazard.
- CAUTION: Do not store items of interest to children in cabinets above a range or on the back guard of a range – children climbing on the range to reach items could be seriously injured.
- Do Not Leave Children Alone – Children should not be left alone or unattended in area where the range is in use. They should never be allowed to sit or stand on any part of the range.
- Wear Proper Apparel – Loose-fitting or hanging garments should never be worn while using the range.
- User Servicing – Do not repair or replace any part of the range unless specifically recommended in the manual. All other servicing should be referred to a qualified technician.
- Storage in or on the Range – Flammable materials should not be stored in an oven or near surface units.
- Do Not Use Water on Grease Fires – Smother fire or flame or use dry chemical or foam-type extinguisher.
- Use Only Dry Potholders – Moist or damp potholders on hot surfaces may result in burns from steam. Do not let potholder touch hot heating elements. Do not use a towel or other bulky cloth.
IMPORTANT SAFETY INSTRUCTIONS
- DO NOT TOUCH SURFACE UNITS OR AREAS NEAR UNITS – Surface units may be hot even though they are dark in color. Areas near surface units may become hot enough to cause burns. During and after use, do not touch, or let clothing or other flammable materials contact surface units or areas near units until they have had sufficient time to cool. Among those areas are the cooktop and surfaces facing the cooktop.
- Never Leave Surface Units Unattended at High Heat Settings – Boil over causes smoking and greasy spillovers that may ignite.
- Glazed Cooking Utensils – Only certain types of glass, glass/ceramic, ceramic, earthenware, or other glazed utensils are suitable for range-top service without breaking due to the sudden change in temperature.
- Utensil Handles Should Be Turned Inward and Not Extend Over Adjacent Surface Units – To reduce the risk of burns, ignition of flammable materials, and spillage due to unintentional contact with the utensil, the handle of a utensil should be positioned so that it is turned inward, and does not extend over adjacent surface units.
- Clean Cooktop With Caution – If a wet sponge or cloth is used to wipe spills on a hot cooking area, be careful to avoid steam burn. Some cleaners can produce noxious fumes if applied to a hot surface.
- Use Care When Opening Door – Let hot air or steam escape before removing or replacing food.
- Do Not Heat Unopened Food Containers – Build-up of pressure may cause container to burst and result in injury.
- Keep Oven Vent Ducts Unobstructed.
- Placement of Oven Racks – Always place oven racks in desired location while oven is cool. If rack must be moved while oven is hot, do not let potholder contact hot heating element in oven.
- DO NOT TOUCH HEATING ELEMENTS OR INTERIOR SURFACES OF OVEN – Heating elements may be hot even though they are dark in color. Interior surfaces of an oven become hot enough to cause burns. During and after use, do not touch, or let clothing or other flammable materials contact heating elements or interior surfaces of oven until they have had sufficient time to cool. Other surfaces of the appliance may become hot enough to cause burns – among these surfaces are oven vent openings and surfaces near these openings, oven doors, and windows of oven doors.
IMPORTANT SAFETY INSTRUCTIONS
- Proper Installation – The range, when installed, must be electrically grounded in accordance with local codes or, in the absence of local codes, with the National Electrical Code, ANSI/NFPA 70. In Canada, the range must be electrically grounded in accordance with Canadian Electrical Code. Be sure the range is properly installed and grounded by a qualified technician.
- Disconnect the electrical supply before servicing the appliance.
- Injuries may result from the misuse of appliance doors or drawers such as stepping, leaning, or sitting on the doors or drawers.
- Maintenance – Keep range area clear and free from combustible materials, gasoline, and other flammable vapors and liquids.
- Top burner flame size should be adjusted so it does not extend beyond the edge of the cooking utensil.
For self-cleaning ranges –
- Do Not Clean Door Gasket – The door gasket is essential for a good seal. Care should be taken not to rub, damage, or move the gasket.
- Do Not Use Oven Cleaners – No commercial oven cleaner or oven liner protective coating of any kind should be used in or around any part of the oven.
- Clean Only Parts Listed in Manual.
For units with ventilating hood –
- Clean Ventilating Hoods Frequently – Grease should not be allowed to accumulate on hood or filter.
- When flambé cooking under the vent hood, turn the fan on.
READ AND SAVE THESE INSTRUCTIONS
PARTS AND FEATURES
This manual covers several different models. The range you have purchased may have some or all of the items listed. The locations and appearances of the features shown here may not match those of your model.

(A) Left Rear Surface Burner (B) Left Front Surface Burner (C) Oven Vent (D) Model and Serial Number Plate (E) Anti-tip Bracket (F) Grate (G) Right Rear Surface Burner (H) Right Front Surface Burner
(A) Control Panel (B) Door Gasket (C) Broil Element (D) Oven Light (E) Convection Fan and Element (F) Bottom Element (not visible) (G) Oven Door Window


(A) Grate (B) Burner Cap (C) Burner Head
(D) Electrode (E) Safety Valve (On Some Models) (F) Control Knob Off Position
Accessory
Both flat-bottom wok pans and round-bottom wok pans supported with the wok ring (provided) can be used with all models.

(A) Wok Ring
ELECTRONIC CONTROL

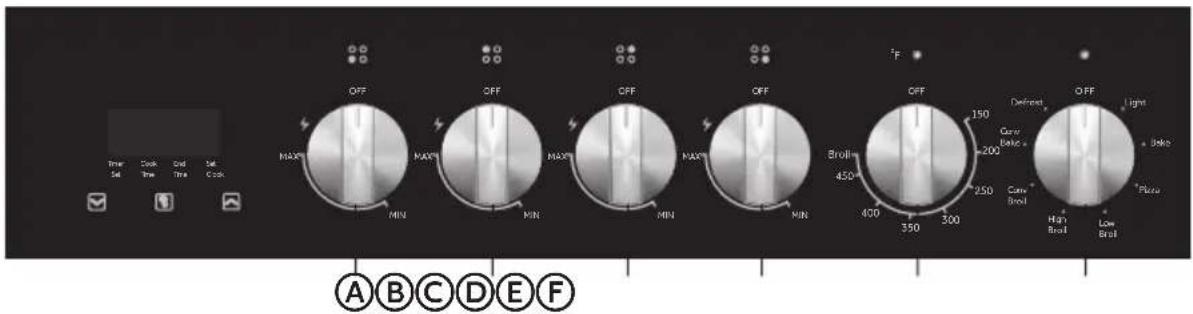
(A) Front Left Burner
(B) Rear Left Burner
(C) Front Right Burner
(D) Rear Right Burner
(E) Electric Oven Temperature Knob
(F) Electric Oven Control Knob
SETTING THE CLOCK AND TIMER
Your model has a digital display, 12-hour clock with 3 Control buttons.
IMPORTANT: In the event of a power failure, all settings including the time display will be lost. When the power is returned, the bar above Timer Set and 12:00 will be displayed.
TO SET THE TIME OF DAY
When the power is connected, the screen displays 12:00 and the bar above "Set Clock."
To set the correct time, press the up arrow or down arrow until the correct time is displayed. After 5 seconds, the clock will start automatically, or you can press the function button to select manual operation.

Ⓐ Decrease Time
B Function
© Increase Time
TO SET THE TIMER
The digital countdown timer can be set up to 23 hours and 59 minutes maximum.
To set the timer, press the function button repeatedly until the bar above Timer Set is displayed. Once the function button is released, the current time is displayed and the bar above Timer Set flashes. When the function button is pressed the remaining time is displayed. When the set time is reached, Timer Set disappears and the alarm will ring. To stop the alarm, press any button.
NOTE: After pressing the function button, you must set the timer within 5 seconds.
WARNING
Food Poisoning Hazard
Do not let food sit in oven more than one hour before or after cooking.
Doing so can result in food poisoning or sickness.
Timed Cooking allows the oven to be set to turn on at a certain time of day, cook for a set length of time, and/or shut off automatically. Delay start should not be used for food such as breads and cakes because they may not bake properly.
NOTE: Before setting, make sure the clock is set to the correct time of day. See "To Set the Time of Day" earlier in this section.
- Press the function button repeatedly until the bar above Cook Time flashes and then press the up arrow or down arrow to set the time frame for baking.
- Press the function button repeatedly until the bar above End Time flashes and then press the up arrow or down arrow to set the time to turn off the oven.
- Set the cooking temperature and cooking mode by turning the Thermostat knob and the Selector knob.
- After following these steps, the bars above Cook Time and End Time will flash, indicating that the automatic cooking feature of the oven is set.
For example: If cooking time takes 45 minutes and you want to finish cooking at 6:00.
- Press the function button repeatedly until the bar above Cook Time flashes and set the cooking time 45 minutes.
- Press the function button repeatedly until the bar above End Time flashes and set the finish time to 6:00.
After the above setting, the current time is displayed and the bars above Cook Time and End Time will flash indicating that the automatic cooking feature is set. When the clock displays 5:15, the oven will start cooking automatically, and the Cook Time bar will flash.
COOKTOP USE
Read the instructions before installing or using this appliance.
- This appliance shall be installed in accordance with the regulations in force and only used in a well-ventilated space.
- The use of a gas-cooking appliance results in the production of heat and moisture in the room in which it is installed. Ensure that the kitchen is well ventilated: keep natural ventilation holes open or install a mechanical ventilation device (mechanical extractor hood).
- Prolonged intensive use of the appliance may call for additional ventilation, for example opening of a window, or more effective ventilation, for example increasing the level of mechanical ventilation where present.
In order to ignite a burner, push down on the knob while rotating it counterclockwise, until the knob indicator is aligned with the ignite icon.
For models with a safety valve - Once the flame is lit, hold the knob depressed for about 3-4 seconds until the device keeps the burner automatically lit. If the burner fails to ignite, wait one minute for the gas to dissipate before attempting to reignite. Adjust the flame intensity by rotating the knob counterclockwise from MAX (maximum) to MIN (minimum).
To turn off the burner, rotate the knob clockwise until the indicator on the knob is aligned with OFF.
RECOMMENDATIONS
Power Failure
In case of prolonged power failure, the surface burners can be lit manually. Hold a lit match near a burner and turn knob counterclockwise until the indicator is aligned with MAX. After the burner is lit, turn knob to desired setting.
In the case of unintentional flame extinguishing, the safety valve intervenes by shutting off the gas to the burners.
The electric igniter must not be actuated for longer than 15 seconds. Should the burner not light, or should the burner be unintentionally turned off, immediately close the burner, and wait at least 1 minute before repeating. Once ignited, adjust the flame as desired.
For lower gas consumption and a better result, use saucepans with a diameter matching the diameter of the burner, to avoid the flame coming up around the sides of the saucepan. See the Container Table. Use only flat-bottomed pans.
As soon as liquid starts to boil, turn the flame down to a level sufficient to maintain boiling.
MATCH PAN DIAMETER TO FLAME SIZE
The flame should be the same size as the bottom of the pan or smaller. Do not use small pans with high flame settings as the flames can lick up the sides of the pan. Oversize pans that span two burners are placed front to rear, not side to side.
Use Balanced Pans
Pans must sit level on the cooktop grate without rocking. Center the pan over the burner.
Use a Lid That Fits Properly
A well-fitting lid helps shorten the cooking time. Flat, heavy bottom pans provide even heat and stability.

BALANCED PAN

FLAME TOO LARGE FOR PAN SIZE
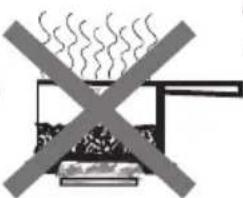
USE LIDS THAT FIT PROPERLY
Container Table
| Burner Min Saucepan Max | Saucepan | |
| Auxiliary 3.5" (9.0 cm) 6.3" | (16 cm) | |
| Semi-rapid 5.1" (13 cm) 7.1" | (18 cm) | |
| Rapid 5.9" (15 cm) 10.2" | (26 cm) | |
| Triple ring 8.3" (21 cm) 10.2" | (26 cm) |
COOKING WITH THE CONVECTION OVEN
In a conventional oven, the heat sources cycle on and off to maintain an average temperature in the oven cavity. As the temperature gradually rises and falls, gentle air currents are produced within the oven. This natural convection tends to be inefficient because the currents are irregular and slow. In this convection system, the heat is “conveyed” by a fan that provides continuous circulation of the hot air.
This European Convection system provides state-of-the-art engineering and advanced design to create the finest convection oven. In standard convection ovens, a fan simply circulates the hot air around the food. The system is characterized by the combination of an additional heating element located around the convection fan and the venting panel that distributes heated air in three dimensions: along the sides, the top and the full depth of the oven cavity. This European Convection system aids in maintaining a more even oven temperature throughout the oven cavity.
The circulating air aids in speeding up the baking process and cooks the food more evenly. By controlling the movement of heated air, convection cooking produces evenly browned foods that are crispy on the outside yet moist inside. Convection cooking works best for breads and pastries as well as meats and poultry. Air-leavened foods like angel food cakes, soufflés and cream puffs rise higher than in a conventional oven. Meats stay juicy and tender while the outside is flavourful and crisp.
By using European Convection, foods can be cooked at a lower temperature and cooking times can be shorter. When using this mode, the standard oven temperature should be lowered by 25°F (15°C).
Foods requiring less cooking time should be checked slightly earlier than normal. For best results, foods should be cooked uncovered, in low-sided pans to take advantage of the forced air circulation. When using the Convection Roast mode, the standard oven temperature does not need to be reduced.
ADVANTAGES OF CONVECTION COOKING
• Even baking, browning and crisping are achieved. - During roasting, juices and flavors are sealed in while the exterior is crisp. - Yeast breads are lighter, more evenly textured, more golden and crustier. - Air-leavened foods such as cream puffs, soufflés and meringues are higher and lighter. - Baking on multiple racks at the same time is possible with even results. • Multiple-rack baking saves time. • Prepare whole meals at once with no flavor transfer. • Dehydrates herbs, fruits and vegetables. - Requires no specialized bake ware. - Saves time and energy. - Convection broiling allows for extraordinary grilling with thicker cuts of food.
OVEN MODES
The Thermostat knob and Control knob are used together to select Oven Modes.
THERMOSTAT KNOB
Select the cooking temperature by turning the knob clockwise to the required temperature, between 150°F and Broil. The light will come on when the oven is preheating. The light will turn off when the desired temperature has been reached. Regular flashing means that oven temperature is being constantly maintained at the set temperature.
CONTROL KNOB
Selects the oven function. Each of the functions listed below can be used only with the correct temperature.
Light
The oven light is on, with no cooking mode selected. During oven operation the light will remain on.
Bake
Set temperature: from 150°F to 450°F
Is cooking with heated air. Both the upper and lower elements cycle to maintain the oven temperature.
Pizza
Set temperature: from 150°F to 450°F
Is a special cooking mode with heated air and the lower hidden back element. The lower elements cycle to cook Pizza.
Low Broil
Set temperature: Broil
There are 2 broil elements. In low broil only the inner element is on.
High Broil
Set temperature: Broil
There are 2 broil elements. In high broil both the inner and outer are on.
Conv Broil (Convection Broil)
Set temperature: Broil
Convection Broil combines the intense heat from the upper element with the heat circulated by the convection fan.
Conv Bake (Convection Bake)
Set temperature: from 150 °F to 450 °F
Convection Bake cooks with heat from a ring element behind the back wall of the oven. The heat is circulated throughout the oven by the convection fan.
Defrost
Set temperature: Not applicable.
Does not use any heating element, only the convection fan is used to defrost foods.
BAKE TIPS AND TECHNIQUES
Baking is cooking with heated air. Both upper and lower elements in the oven are used to heat the air but no fan is used to circulate the heat.
Follow the recipe or convenience food directions for baking temperature, time and rack position. Baking time will vary with the temperature of ingredients and the size, shape and finish of the baking utensil.
General Guidelines
- For best results, bake food on a single rack with at least 1" - 1 ½" (2.5 - 3 cm) space between utensils and oven walls.
- Use one rack when selecting the bake mode.
- Check for doneness at the minimum time.
- Use metal bakeware (with or without a nonstick finish), heatproof glass, glass-ceramic, pottery or other utensils suitable for the oven.
- When using heatproof glass, reduce temperature by 25°F (15°C) from recommended temperature.
- Use baking sheets with or without sides or jelly roll pans.
- Dark metal pans or nonstick coatings will cook faster with more browning. Insulated bakeware will slightly lengthen the cooking time for most foods.
- Do not use aluminum foil or disposable aluminum trays to line any part of the oven. Foil is an excellent heat insulator and heat will be trapped beneath it. This will alter the cooking performance and can damage the finish of the oven.
- Avoid using the opened door as a shelf to place pans. • See Troubleshooting for tips to Solving Baking and Roasting Problems.
BAKE CHART
| FOOD ITEM | RACK POSITION | TEMP. °F (°C) (PREHEATED OVEN) | TIME (MIN) |
| Cake | |||
| Cupcakes | 2 | 350 (175) | 19-22 |
| Bundt Cake | 1 | 350 (175) | 40-45 |
| Angel Food | 1 | 350 (175) | 35-39 |
| Pie | |||
| 2 crust, fresh, 9” | 2 | 375-400 (190-205) | 45-50 |
| 2 crust, frozen fruit, 9” | 2 | 375 (190) | 68-78 |
| Cookies | |||
| Sugar | 2 | 350-375 (175-190) | 8-10 |
| Chocolate Chip | 2 | 350-375 (175-190) | 8-13 |
| Brownies | 2 | 350 (175) | 29-36 |
| Breads | |||
| Yeast bread loaf, 9x5 | 2 | 375 (190) | 18-22 |
| Yeast rolls | 2 | 375-400 (190-205) | 12-15 |
| Biscuits | 2 | 375-400 (190-205) | 7-9 |
| Muffins | 2 | 425 (220) | 15-19 |
| Pizza | |||
| Frozen | 2 | 400-450 (205-235) | 23-26 |
| Fresh | 2 | 475 (246) | 15-18 |
CONVECTION BAKE TIPS AND TECHNIQUES
Reduce recipe baking temperatures by 25°F (15°C).
- For best results, foods should be cooked uncovered, in low-sided pans to take advantage of the forced air circulation. Use shiny aluminum pans for best results unless otherwise specified.
- Heatproof glass or ceramic can be used. Reduce temperature by another 25°F (15°C) when using heatproof glass dishes for a total reduction of 50°F (30°C).
- Dark metal pans may be used. Note that food may brown faster when using dark metal bakeware.
- The number of racks used is determined by the height of the food to be cooked.
- Baked items, for the most part, cook extremely well in convection. Don't try to convert recipes such as custards, quiches, pumpkin pie, or cheesecakes, which do not benefit from the convection-heating process. Use the regular Bake mode for these foods.
- Multiple rack cooking for oven meals is done on rack positions 1, 2, 3, 4 and 5. All five racks can be used for cookies, biscuits and appetizers.
- 2 Rack baking: Use positions 1 and 3.
- 3 rack baking: Use positions 2, 3 and 4 or 1, 3 and 5.
- When baking four cake layers at the same time, stagger pans so that one pan is not directly above another. For best results, place cakes on front of upper rack and back of lower rack (See graphic at right). Allow 1" - 1 ½" (2.5 - 3 cm) air space around pans.
- Converting your own recipe can be easy. Choose a recipe that will work well in convection.
- Reduce the temperature and cooking time if necessary. It may take some trial and error to achieve a perfect result. Keep track of your technique for the next time you want to prepare the recipe using convection. • See Troubleshooting for tips to Solving Baking and Roasting Problems.

Rack 3
Rack 1
FOODS RECOMMENDED FOR CONVECTION BAKE MODE:
Appetizers Biscuits Coffee Cakes
Cookies (2 to 4 racks) Yeast Breads
Cream Puffs
Popovers
Casseroles and One-Dish Entrées
Oven Meals (rack positions 1, 2, 3)
Air Leavened Foods (Soufflés, Meringue, Meringue-Topped Desserts, Angel Food Cakes, Chiffon Cakes)
CONVECTION BAKE CHART
Reduce standard recipe temperature by 25°F (15°C) for Convection Bake. Temperatures have been reduced in this chart.
CONVECTION CAVITY
| FOOD ITEM | RACK POSITION | TEMP. °F (°C) (PREHEATED OVEN) | TIME (MIN) |
| Cake | |||
| Cupcakes | 2 | 325 (160) | 20-22 |
| Bundt Cake | 1 | 325 (160) | 43-50 |
| Angel Food | 1 | 325 (160) | 43-47 |
| Pie | |||
| 2 crust, fresh, 9" | 2 | 350-400 (175-205) | 40-52 |
| 2 crust, frozen fruit, 9" | 2 | 350 (175) | 68-78 |
| Cookies | |||
| Sugar | 2 | 325-350 (160-175) | 9-12 |
| Chocolate Chip | 2 | 325-350 (160-175) | 8-13 |
| Brownies | 2 | 325 (160) | 29-36 |
| Breads | |||
| Yeast bread loaf, 9x5 | 2 | 350 (175) | 18-22 |
| Yeast rolls | 2 | 350-375 (175-190) | 12-15 |
| Biscuits | 2 | 375 (190) | 8-10 |
| Muffins | 2 | 400 (205) | 17-21 |
| Pizza | |||
| Frozen | 2 | 375-425 (190-220) | 23-26 |
| Fresh | 2 | 450 (232) | 15-18 |
CONVECTION ROAST TIPS AND TECHNIQUES
- Do not preheat for Convection Roast.
- Roast in a low-sided, uncovered pan.
- When roasting whole chickens or turkey, tuck wings behind back and loosely tie legs with kitchen string.
- Use the 2-piece broil pan for roasting uncovered.
- Use the probe or a meat thermometer to determine the internal doneness on "END" temperature (see cooking chart).
- Double-check the internal temperature of meat or poultry by inserting the meat thermometer into another position.
- Large birds may also need to be covered with foil (and pan roasted) during a portion of the roasting time to prevent over-browning.
- The minimum safe temperature for stuffing in poultry is 165°F (75°C).
- After removing the item from the oven, cover loosely with foil for 10 to 15 minutes before carving if necessary to increase the final foodstuff temperature by 5° to 10°F (3° to 6°C).
QUICK AND EASY RECIPE TIPS
Converting from standard BAKE to CONVECTION ROAST:
• Temperature does not have to be lowered. - Roasts, large cuts of meat and poultry generally take 10-20% less cooking time. Check doneness early. - Casseroles or pot roasts that are baked covered in CONVECTION ROAST will cook in about the same amount of time.
CONVECTION ROAST CHART
CONVECTION CAVITY
| MEATS | WEIGHT (lb) | OVEN TEMP. °F (°C) | RACK POSITION | TIME (min. per lb) | INTERNAL TEMP. °F (°C) |
| Beef | |||||
| Rib Roast 4-6 325 (160) | 2 16-20 | 18-22 | 145 (63)medium rare | ||
| 160 (71)medium | |||||
| Rib Eye Roast, (boneless) | 4-6 325 | (160) 2 16-20 | 18-22 | 145 (63)medium rare | |
| 160 (71)medium | |||||
| Rump, Eye, Tip, Sirloin (boneless) | 3-6 325 | (160) 2 16-20 | 18-22 | 145 (63)medium rare | |
| 160 (71)medium | |||||
| Tenderloin Roast 2-3 | 400 (205) | 2 15-20 145 | (63) | medium rare | |
| Pork | |||||
| Loin Roast (boneless or bone-in) | 5-8 350 | (175) 2 16-20 | 160 (71) | medium | |
| Shoulder 3-6 350 (175) | 2 20-25 | 160 (71) | medium | ||
| Poultry | |||||
| Chicken whole 3-4 375 | (190) 2 | 18-21 180 (82) | |||
| Turkey, not stuffed | 12-15 325 | (160) 1 10-14 | 180 (82) | ||
| Turkey, not stuffed | 16-20 325 | (160) 1 9-11 | 180 (82) | ||
| Turkey, not stuffed | 21-25 325 | (160) 1 6-10 | 180 (82) | ||
| Turkey Breast 3-8 325 | (160) 1 | 15-20 170 (77) | |||
| Comish Hen 1-1 1⁄2 350 | (175) 2 | 45-75 | total | 180 (82) | |
| LambHalf Leg 3-4 325 (160) 2 22-27Whole Leg 6-8 325 (160) 1 22-27 | 28-33 | 160 (71) medium170 (77) well160 (71) medium170 (77) well | |||
| 28-33 | |||||
CONVECTION BROIL TIPS AND TECHNIQUES
- Place rack in the required position needed before turning on the oven.
- Use Convection Broil mode with the oven door closed.
- Do not preheat oven. • Use the 2-piece broil pan.
- Turn meats once halfway through the cooking time (see convection broil chart).
- Thicker cuts and unevenly shaped pieces of meat, fish, and poultry may cook better at lower broiling temperatures.
CONVECTION BROIL CHART
CONVECTION CAVITY
| FOOD AND THICKNESS | RACK POSITION | BROIL SETTING | INTERNAL TEMP. °F (°C) | TIME SIDE 1 (MIN.)* | TIME SIDE 2 (MIN.)* |
| Beef | |||||
| Steak (1-1⁄2" or more) | |||||
| Medium rare 4 Low 145 (65) | 9-12 8-10 | ||||
| Medium 4 Low 160 (71) | 11-13 10-12 | ||||
| Well | 4 | Low | 170 (77) | 18-20 | 16-17 |
| Hamburgers (more than 1") | |||||
| Medium 4 High 160 | (71) 8-11 | 5-7 | |||
| Well | 4 | High 170 (77) | 11-13 | 8-10 | |
| Poultry | |||||
| Chicken Quarters | 4 | Low | 180 (82) | 16-18 | 10-13 |
| Chicken Halves | 3 | Low | 180 (82) | 25-27 | 15-18 |
| Chicken Breasts | 4 | Low | 170 (77) | 13-15 | 9-13 |
| Pork | |||||
| Pork Chops (11⁄4" or more) | 4 | Low | 160 (71) | 12-14 | 11-13 |
| Sausage - fresh | 4 | Low | 160 (71) | 4-6 | 3-5 |
OVEN CARE
CLEANING
IMPORTANT: Before cleaning, make sure all controls are off and the oven and cooktop are cool. Always follow label instructions on cleaning products. Soap, water, and a soft cloth or sponge are suggested first unless otherwise noted. Do not use abrasive cleaning products.
EXTERIOR PORCELAIN ENAMEL SURFACES
Food spills containing acids, such as vinegar and tomato, should be cleaned as soon as the entire appliance is cool. These spills may affect the finish.
Cleaning Method:
Glass cleaner, mild liquid cleaner, or nonabrasive scrubbing pad: Gently clean around the model and serial number plate because scrubbing may remove numbers.
EXTERIOR STAINLESS STEEL
NOTE: Do not use soap-filled scouring pads, abrasive cleaners, Cooktop Polishing Cream, steel-wool pads, gritty washcloths, or some paper towels. Damage may occur, even with one-time or limited use.
Rub in direction of grain to avoid damaging.
Cleaning Methods:
Liquid detergent or all-purpose cleaner: Rinse well with clean water and dry with soft, lint-free cloth.
Stainless Steel Cleaner and Polish
Vinegar for hard water spots
OVEN DOOR EXTERIOR
Cleaning Method:
Glass cleaner and paper towels or nonabrasive plastic scrubbing pad: Apply glass cleaner to soft cloth or sponge, not directly on panel.
PORCELAIN-COATED GRATES AND CAPS
- Clean as soon as cooktop, grates and caps are cool.
- Food spills containing acids, such as vinegar and tomato, should be cleaned as soon as the cooktop grates and caps are cool. These spills may affect the finish.
- To avoid chipping, do not bang grates and caps against each other or hard surfaces such as cast iron cookware.
- Do not reassemble caps on burners while wet.
Cleaning Method:
Nonabrasive plastic scrubbing pad and mildly abrasive cleanser
BURNER SPREADER
Wash the burner spreader frequently with boiling water and detergent to remove any deposits which could block the flame outlet.
Before reinstalling, dry the burner spreader thoroughly so the burner will ignite properly.
COOKTOP CONTROL KNOBS
- Pull knobs straight away from control panel to remove.
- When replacing knobs, make sure knobs are in the Off position.
Cleaning Method:
Soap and water or dishwasher:
NOTE: Do not use steel wool, abrasive cleansers or oven cleaner. Do not soak knobs.
CONTROL PANEL
Cleaning Method:
Glass cleaner and soft cloth or sponge: Apply glass cleaner to soft cloth or sponge, not directly on panel.
NOTE: Do not use abrasive cleaners, steel-wool pads, gritty washcloths or some paper towels. Damage may occur.
OVEN CAVITY
Food spills should be cleaned when oven cools. At high temperatures, foods react with porcelain, so staining, etching, pitting or faint white spots can result.
Cleaning Method:
Mild detergent and warm water.
NOTE: Do not use oven cleaners.
OVEN RACKS AND ROASTING RACKS
Cleaning Method:
Steel-wool pad
2-PIECE BROILER PAN
Cleaning Method:
Mildly abrasive cleanser: Scrub with wet scouring pad.
Solution of 1/2 cup (125 mL) ammonia to 1 gal. (3.75 L) water: Soak for 20 minutes, and then scrub with scouring or steel-wool pad.
Oven cleaner: Follow product label instructions. Porcelain enamel only, not chrome Dishwasher
SOLVING BAKING AND ROASTING PROBLEMS
With any oven setting poor results can occur for many reasons other than a malfunction of the oven. Check the chart below for causes of the most common problems. Since the size, shape and material of baking utensils directly affect the baking results, the best solution may be to replace old baking utensils that have darkened and warped with age and use.
| Baking Problem Cause | |
| Food browns unevenly | Oven not preheatedAluminum foil on oven rack or oven bottomBaking utensil too large for recipePans touching each other or oven walls |
| Food too brown on bottom | Oven not preheatedUsing glass, dull or darkened metal pansIncorrect rack positionPans touching each other or oven walls |
| Food is dry or has shrunk excessively | Oven temperature too highBaking time too longOven door opened frequentlyPan size too large |
| Food is baking or roasting too slowly | Oven temperature too lowOven not preheatedOven door opened frequentlyTightly sealed with aluminum foilPan size too small |
| Piecrusts do not brown on bottom or crust is soggy | Baking time not long enoughUsing shiny steel pansIncorrect rack positionOven temperature is too low |
| Cakes pale, flat and may not be done inside | Oven temperature too lowIncorrect baking timeCake tested too soonOven door opened too oftenPan size may be too large |
| Cakes high in middle with crack on top | Oven temperature too highBaking time too longPans touching each other or oven wallsIncorrect rack positionPan size too small |
| Piecrust edges too brown | Oven temperature too highEdges of crust too thin |
SOLVING OPERATIONAL PROBLEMS
Before calling for service, check the following to avoid unnecessary service charges.
| Oven Problem Problem Solving Steps | |
| The oven display stays OFF | Turn off power at the main power supply (fuse or breaker box). Turn breaker back on. If condition persists, call an authorized service center. |
| Cooling fan continues to run after oven is turned off | The fan turns off automatically when the electronic components have cooled sufficiently. |
| Oven is not heating Check the circuit breaker or fuse box to your house. Make sure there is proper electrical power to the oven. Make sure the oven temperature has been selected. | |
| Oven is not cooking evenly | Check oven calibration. Adjust calibration if necessary. Refer to cook charts for recommended rack position. Always reduce recipe temperature by 25 °F (15 °C) when baking with Convention Bake mode. |
| Oven light is not working properly | Replace or reinsert the light bulb if loose or defective. Touching the bulb with fingers may cause the bulb to burn out. |
| Oven light stays on | Check for obstruction in oven door. Check to see if hinge is bent or door switch broken. |
| Cannot remove lens cover on light | There may be a soil build-up around the lens cover. Wipe lens cover area with a clean dry towel prior to attempting to remove the lens cover. |
| Clock and timer are not working properly | Make sure there is proper electrical power to the oven. See the Clock and Timer sections. |
| Excessive moisture | When using bake mode, preheat the oven first. Convection Bake and Convection Roast will eliminate any moisture in oven (this is one of the advantages of convection). |
| Porcelain chips | When oven racks are removed and replaced, always tilt racks upward and do not force them to avoid chipping the porcelain. |
FOR MORE HELP, VISIT HAIER.COM OR CALL THE CONSUMER HELP LINE AT 1-877-377-3639.
LIMITED WARRANTY
IN-HOME SERVICE
FULL TWO YEAR WARRANTY
For 24 months from the date of original retail purchase, Haier will repair or replace any part free of charge including labor that fails due to a defect in materials or workmanship.
Haier may replace or repair at their sole discretion any part, sub system including the entire product.
Product must be accessible, without encumbrance and installed properly to receive for warranty repair service.
LIMITED WARRANTY
NOTE: This warranty commences on the date the item was purchased, and the original purchase receipt must be presented to the authorized service representative before warranty repairs are rendered.
Exceptions: Commercial Use Warranty
90 days labor from date of original purchase
90 days parts from date of original purchase
No other warranty applies.
FOR WARRANTY SERVICE
All service must be performed by a Haier authorized service center. For the name and telephone number of the nearest authorized service center, please call 1-877-337-3639.
Before calling please have available the following information:
Model number and serial number of your appliance. The name and address of the dealer you purchased the unit from and the date of purchase.
A clear description of the problem.
A proof of purchase (sales receipt).
This warranty covers home appliance services within the contiguous United States and Canada and where available in Alaska, Hawaii and Puerto Rico.
What is not covered by this warranty:
Replacement or repair of household fuses, circuit breakers, wiring or plumbing.
A product whose original serial number has been removed or altered.
Any service charges not specifically identified as normal such as normal service area or hours.
Replacement of light bulbs.
Damage to clothing.
Damage incurred in shipping.
Damage caused by improper installation or maintenance.
Damage from misuse, abuse accident, fire, flood, or acts of nature.
Damage from service other than an authorized Haier dealer or service center.
Damage from incorrect electrical current, voltage or supply.
Damage resulting from any product modification, alteration or adjustment not authorized by Haier.
Adjustment of consumer operated controls as identified in the owner's manual.
Hoses, knobs, lint trays and all attachments, accessories and disposable parts.
Labor, service transportation, and shipping charges for the removal and replacement of defective parts beyond the initial 24-month period.
Damage from other than normal household use.
Any transportation and shipping charges.
THIS LIMITED WARRANTY IS GIVEN IN LIEU OF ALL OTHER WARRANTIES, EXPRESS OR IMPLIED, INCLUDING BUT NOT LIMITED TO, THE WARRANTIES OF MERCHANTABILITY AND FITNESS FOR A PARTICULAR PURPOSE.
The remedy provided in this warranty is exclusive and is granted in lieu of all other remedies.
This warranty does not cover incidental or consequential damages, so the above limitations may not apply to you. Some states do not allow limitations on how long an implied warranty lasts, so the above limitations may not apply to you.
This warranty gives you specific legal rights, and you may have other rights, which vary from state to state.
Haier America
Wayne, NJ 07470
TABLE OF CONTENTS
RANGE SAFETY 28

Wok Ring
ELECTRONIC CONTROL MODULE
BALANCED PAN

FLAME TOO LARGE, USE LIDS THAT FIT THE PAN SIZE
Container Table
| Burner Min Casserole à sauce Max Casserole à sauce | |
| Auxiliaire 3,5" (9,0 cm) 6,3" (16 cm) | |
| Semi-rapide 5,1" (13 cm) 7,1" (18 cm) | |
| Rapide 5,9" (15 cm) 10,2" (26 cm) | |
| Triple bague 8,3" (21 cm) 10,2" (26 cm) |
COOKING WITH A CONVECTION OVEN
Conv Broil (Convection Broil)
Rack 1
EUROPEAN CONVECTION TABLE
Tipping Hazard
Ⓐ Wok ring
ELECTRONIC CONTROL

BALANCED PAN

The circulating air aids in speeding up the baking process and cooks the food more evenly. By controlling the movement of heated air, convection cooking produces evenly browned foods that are crispy on the outside yet moist inside. Convection cooking works best for breads and pastries as well as meats and poultry. Air-leavened foods like angel food cakes, soufflés and cream puffs rise higher than in a conventional oven. Meats stay juicy and tender while the outside is flavourful and crisp.
Rack 3 Rack 1
NOTE: Do not use abrasive cleaners, steel-wool pads, gritty washcloths or some paper towels. Damage may occur.
OVEN CAVITY
If you have a problem with this product, please contact the
"Haier Customer Satisfaction Center" at
1-877-337-3639.
DATED PROOF OF PURCHASE, MODEL #, AND SERIAL #
REQUIRED FOR WARRANTY SERVICE
IMPORTANT
Issued: May 2015 Printed in China Part # 00XXXXXXXXXX
- AND 36" DUAL FUEL FREE-STANDING RANGE
- TABLE OF CONTENTS
- RANGE SAFETY
- PARTS AND FEATURES
- ELECTRONIC CONTROL
- COOKTOP USE
- OVEN USE
- OVEN CARE
- TROUBLESHOOTING
- LIMITED WARRANTY
- RECORD KEEPING
- YOUR SAFETY AND THE SAFETY OF OTHERS ARE VERY IMPORTANT
- DANGER
- WARNING
- CAUTION
- THE ANTI-TIP BRACKET
- IMPORTANT SAFETY INSTRUCTIONS
- FOR SELF-CLEANING RANGES
- FOR UNITS WITH VENTILATING HOOD
- READ AND SAVE THESE INSTRUCTIONS
- ACCESSORY
- SETTING THE CLOCK AND TIMER
- TO SET THE TIME OF DAY
- TO SET THE TIMER
- FOOD POISONING HAZARD
- RECOMMENDATIONS
- POWER FAILURE
- MATCH PAN DIAMETER TO FLAME SIZE
- USE BALANCED PANS
- USE A LID THAT FITS PROPERLY
- COOKING WITH THE CONVECTION OVEN
- ADVANTAGES OF CONVECTION COOKING
- OVEN MODES
- THERMOSTAT KNOB
- CONTROL KNOB
- LIGHT
- BAKE
- PIZZA
- LOW BROIL
- HIGH BROIL
- CONV BROIL (CONVECTION BROIL)
- CONV BAKE (CONVECTION BAKE)
- DEFROST
- BAKE TIPS AND TECHNIQUES
- GENERAL GUIDELINES
- CONVECTION BAKE TIPS AND TECHNIQUES
- FOODS RECOMMENDED FOR CONVECTION BAKE MODE
- CONVECTION BAKE CHART
- CONVECTION ROAST TIPS AND TECHNIQUES
- QUICK AND EASY RECIPE TIPS
- CONVECTION ROAST CHART
- CONVECTION BROIL TIPS AND TECHNIQUES
- CONVECTION BROIL CHART
- CLEANING
- EXTERIOR PORCELAIN ENAMEL SURFACES
- CLEANING METHOD
- EXTERIOR STAINLESS STEEL
- CLEANING METHODS
- OVEN DOOR EXTERIOR
- PORCELAIN-COATED GRATES AND CAPS
- BURNER SPREADER
- COOKTOP CONTROL KNOBS
- CONTROL PANEL
- OVEN CAVITY
- OVEN RACKS AND ROASTING RACKS
- PIECE BROILER PAN
- SOLVING BAKING AND ROASTING PROBLEMS
- SOLVING OPERATIONAL PROBLEMS
- IN-HOME SERVICE
- FULL TWO YEAR WARRANTY
- FOR WARRANTY SERVICE
- WHAT IS NOT COVERED BY THIS WARRANTY
- THIS LIMITED WARRANTY IS GIVEN IN LIEU OF ALL OTHER WARRANTIES, EXPRESS OR IMPLIED, INCLUDING BUT NOT LIMITED TO, THE WARRANTIES OF MERCHANTABILITY AND FITNESS FOR A PARTICULAR PURPOSE
- ELECTRONIC CONTROL MODULE
- COOKING WITH A CONVECTION OVEN
- EUROPEAN CONVECTION TABLE
- IMPORTANT
Brand : HAIER
Model : HCR2250ADS
Category : Cooker