
MC770 - Multifunction Printer OKI - Free user manual and instructions
Find the device manual for free MC770 OKI in PDF.

| Product type | Multifunction printer |
| Brand | OKI |
| Model | MC770 |
| Dimensions (approx.) | 427 x 508 x 513 mm |
| Weight (approx.) | 30 kg |
| Power supply | 110–240 V AC, 50/60 Hz |
| Main functions | Print, copy, scan, fax |
| Print resolution | Up to 1200 x 1200 dpi |
| Print speed | Up to 30 pages per minute |
| Paper capacity | 250 sheets (standard tray) |
| Connectivity | USB, Ethernet, Fax |
| Screen type | LCD screen |
| Maintenance | Clean with a dry, soft cloth. Do not use solvents. |
| Consumables | Color and black toner cartridges |
| Safety | Unplug before any intervention. Wear gloves when unpacking. |
| Spare parts | Available from authorized technical service |
| Repairability | Maintenance reserved for qualified technician |
| General information | User manual and instruction manual free in PDF format |
Frequently Asked Questions - MC770 OKI
User questions about MC770 OKI
0 question about this device. Answer the ones you know or ask your own.
Ask a new question about this device
Download the instructions for your Multifunction Printer in PDF format for free! Find your manual MC770 - OKI and take your electronic device back in hand. On this page are published all the documents necessary for the use of your device. MC770 by OKI.
USER MANUAL MC770 OKI
- The unpacking and setup procedure shall be done by a qualified service technician.
- Be sure to unplug the power cable of the equipment before installing and setting up the product.
- Disconnect the ground wire after unplugging the power cable. In addition, be sure to connect the ground wire before plugging the power cable.

Cautionary Points
- Install the equipment near an outlet. Be sure to wire the power cable securely so as to unplug it easily and not to trip over it.
- According to the equipment model, these illustrations may differ.
- The covers of this equipment have been designed so as not to be easily removed. Therefore, when using tools, be sure not to put your face and hands in the direction in which force will be applied; otherwise this could result in injury. In addition, pay attention not to deform parts by using too much force.
- When unpacking and setting up the product, be sure to wear gloves to avoid injury.
Accessories
Setup
-
Take out the FAX unit and the accessories.
-
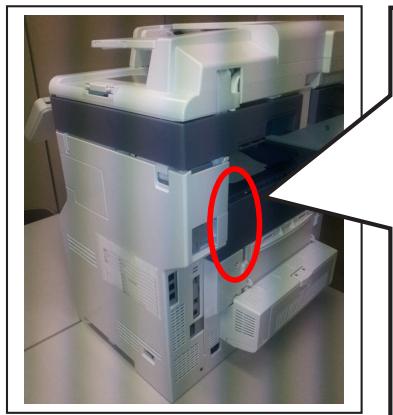
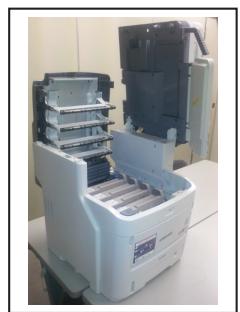
Take off the covers.
-
For JPD: 3 covers
- Other than JPD: 2 covers
-
Take off the cover.
-
You must wear gloves for this procedure.
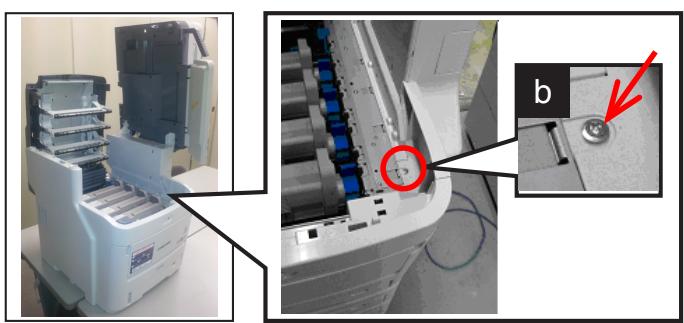
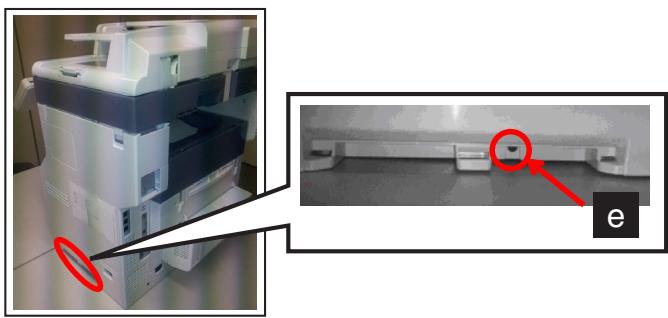
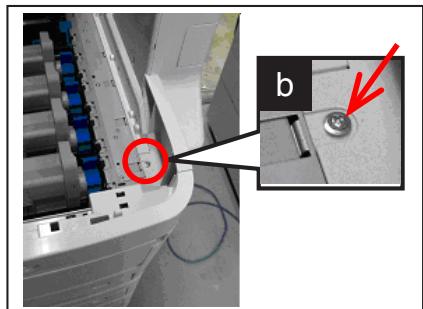
1) Remove [b] and [e].
b:1
e:1
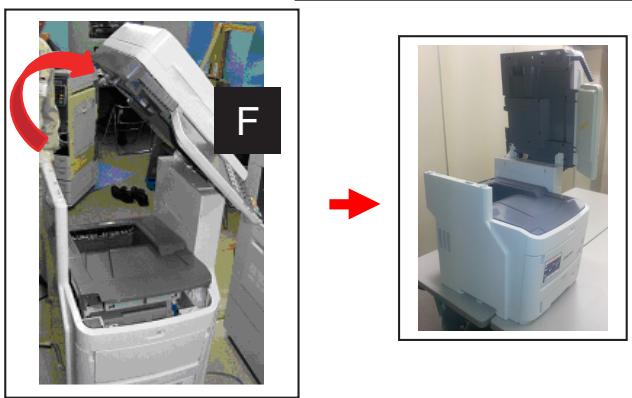
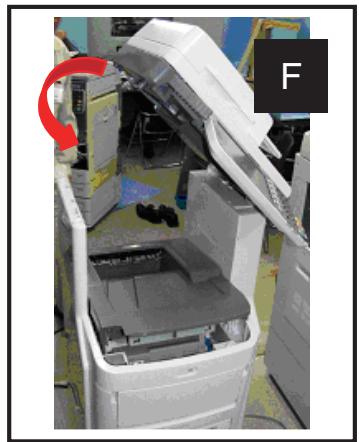
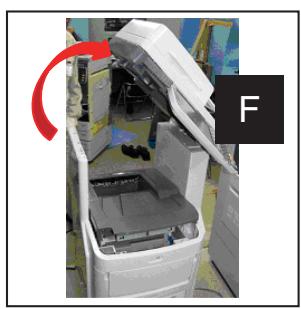
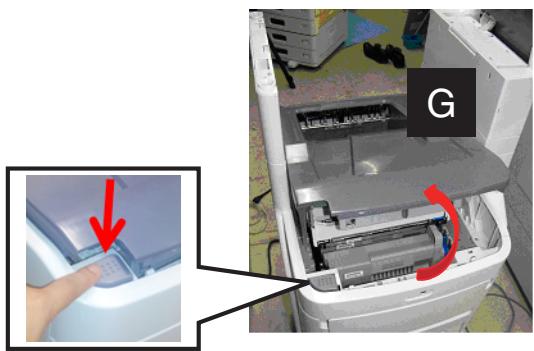
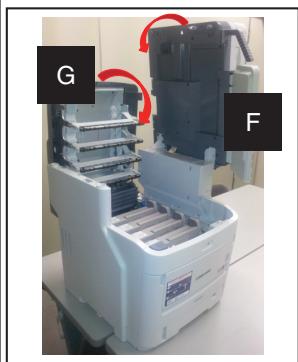
2) Open [F].
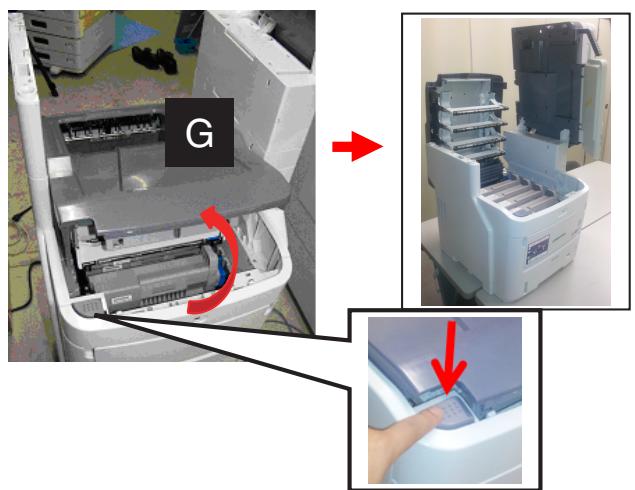
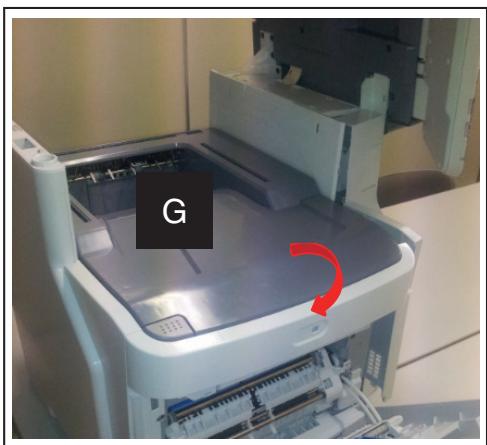
3) Push the locking button to open [G].
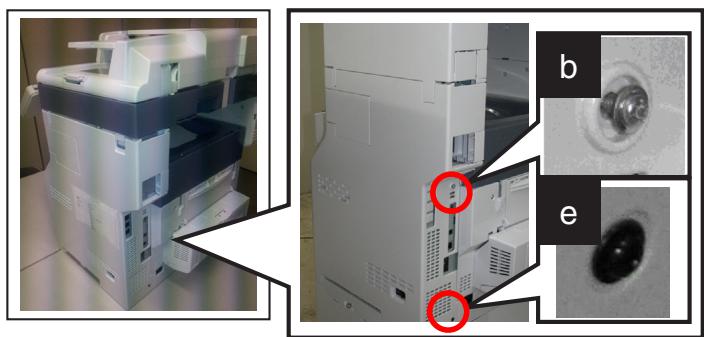
4) Remove [b].
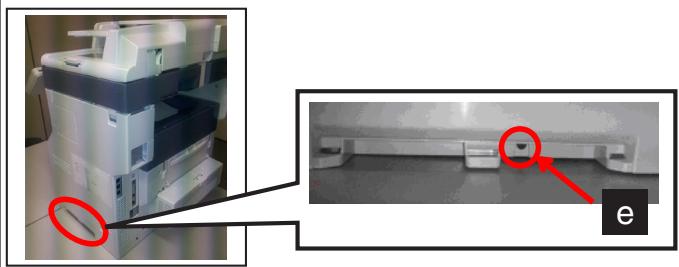
5) Remove [e].
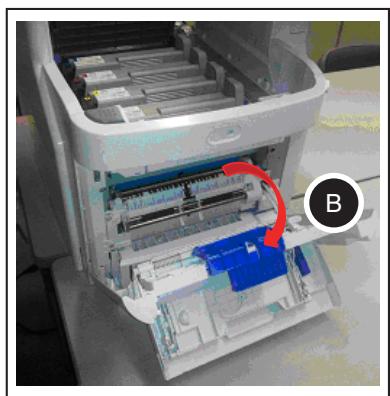
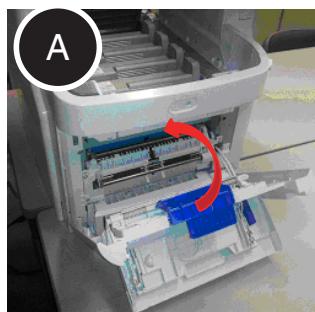
6) Open the covers in the order of (A) and (B).
7) Close [G].

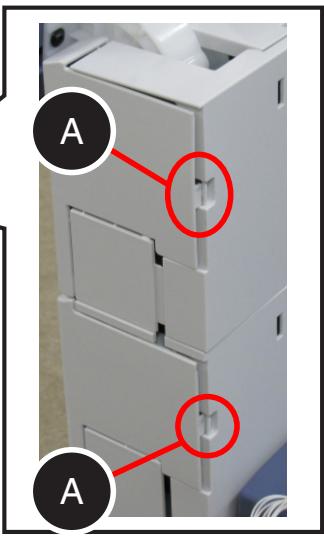
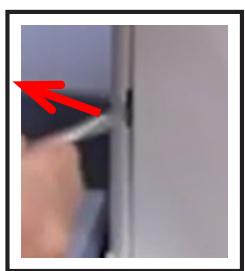
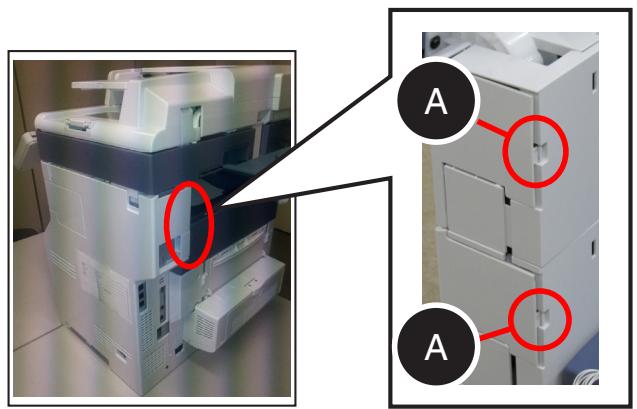
8) Release the latches (A) of the cover.
A:2
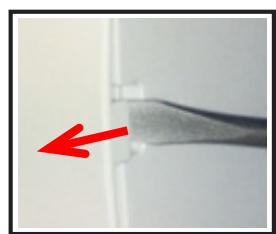
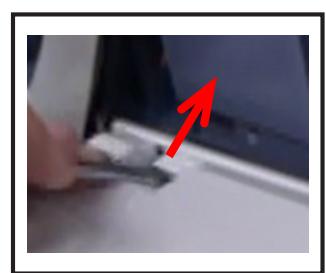
* As shown in the figure, insert a flathead screwdriver into the groove and push it in the direction of the arrow to release the latches.

When using tools, be sure not to put your face and hands in the direction in which force will be applied; otherwise this could result in injury.
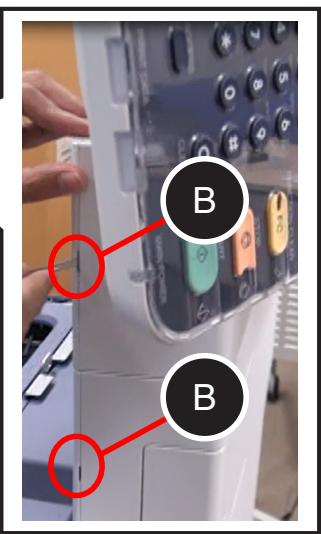
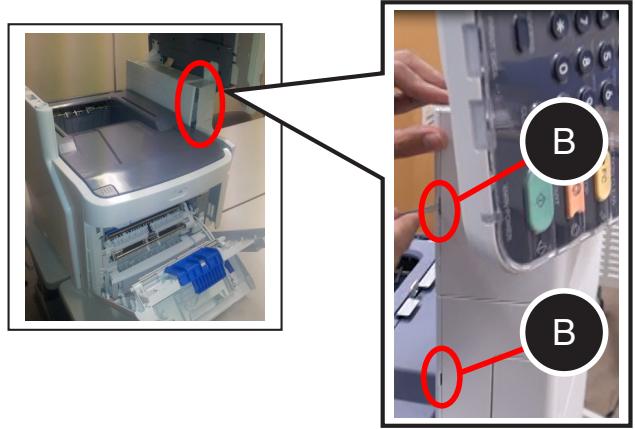
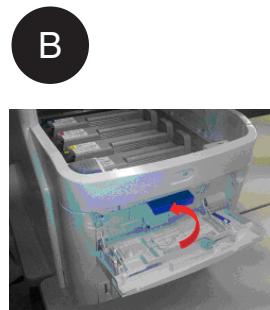
9) Release the latches (B) of the cover.
B:2
* As shown in the figure, insert a flathead screwdriver into the groove and push it in the direction of the arrow to release the latches.

When using tools, be sure not to put your face and hands in the direction in which force will be applied; otherwise this could result in injury.
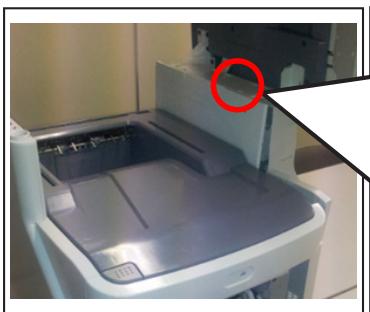
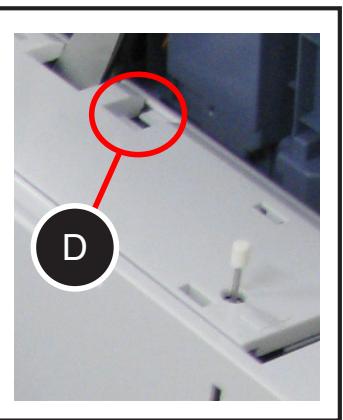
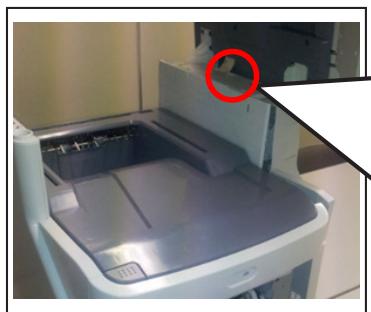
10) Release the latch (D) of the cover.
D:1
* As shown in the figure, insert a flathead screwdriver into the groove and push it in the direction of the arrow to release the latches.

When using tools, be sure not to put your face and hands in the direction in which force will be applied; otherwise this could result in injury.
11) Closer [F].
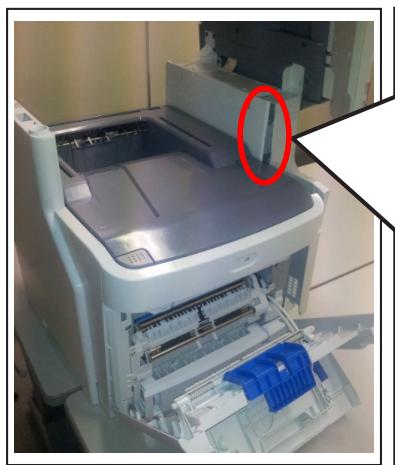
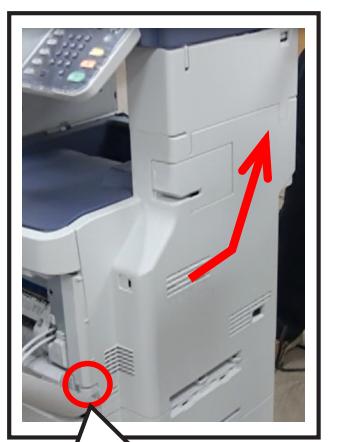
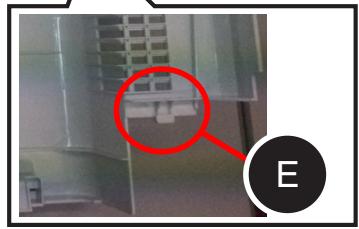
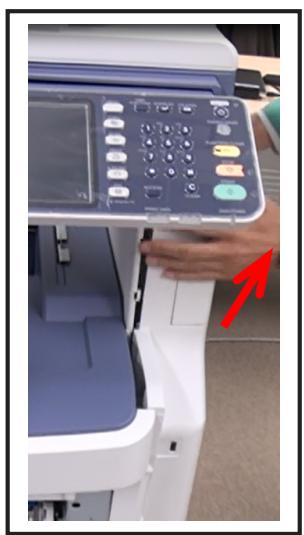
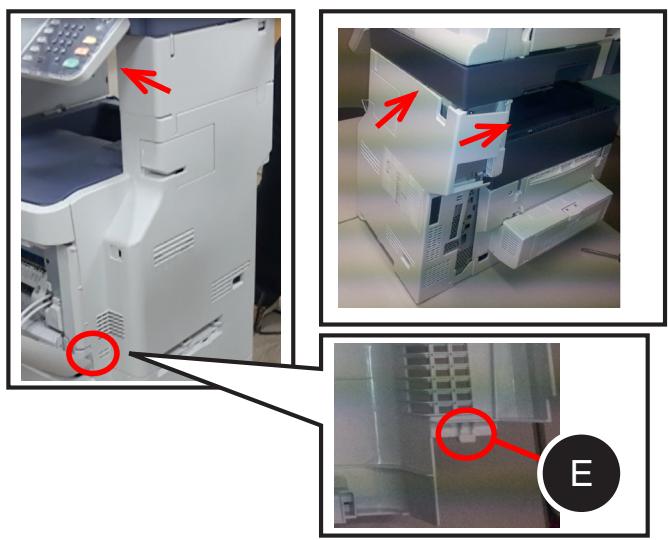
12) Take off the upper side of the cover, release the latch (E) and then take off the cover.
E:1 place
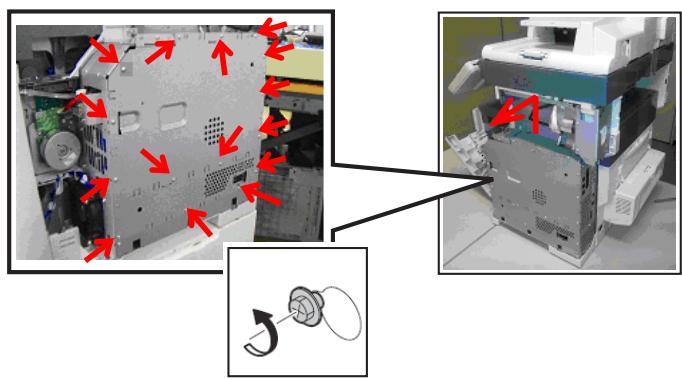
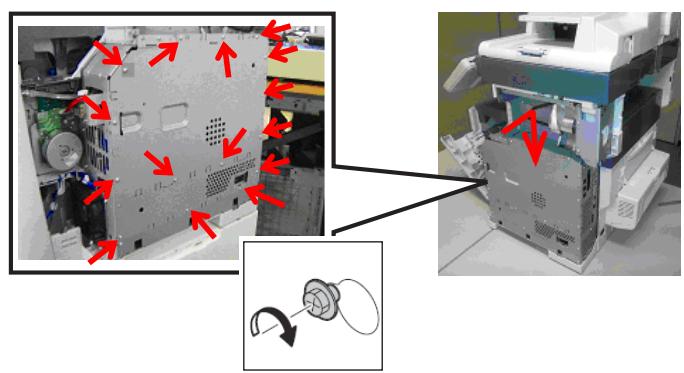
Loosen the screws and take off the cover.
- Screws: 15 places
-
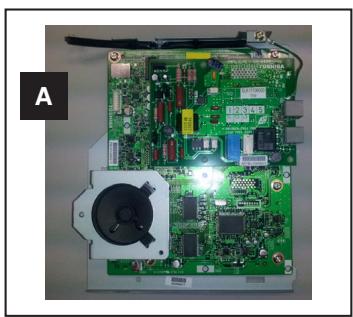
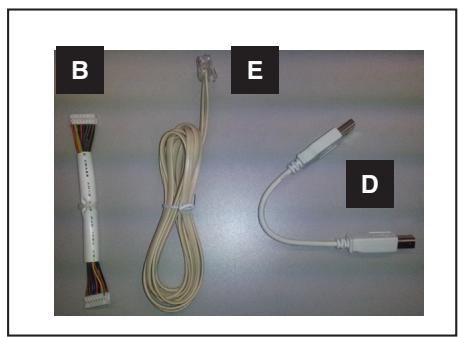
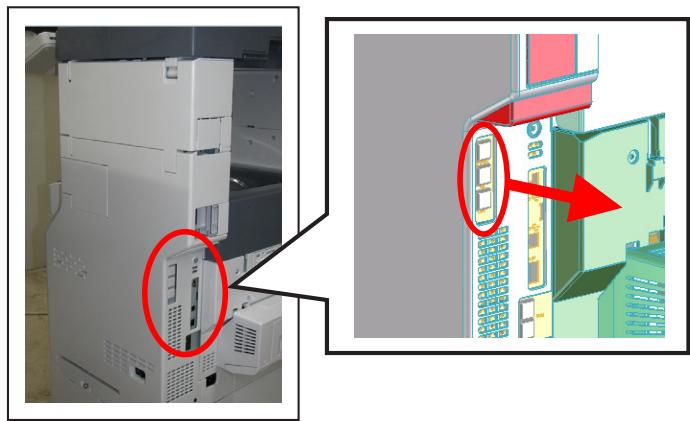
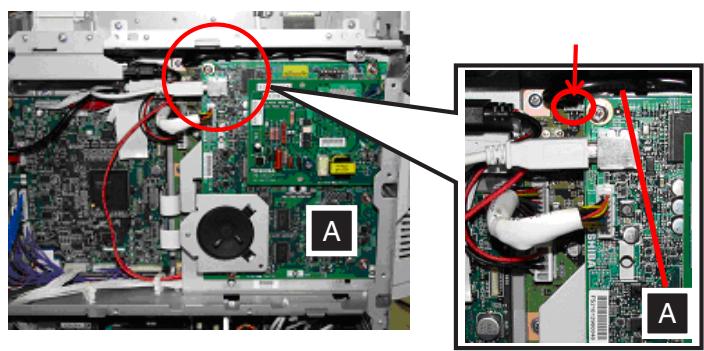
Connect the connectors of [D] and [B] to the board.
-
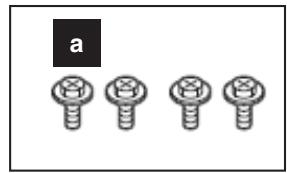
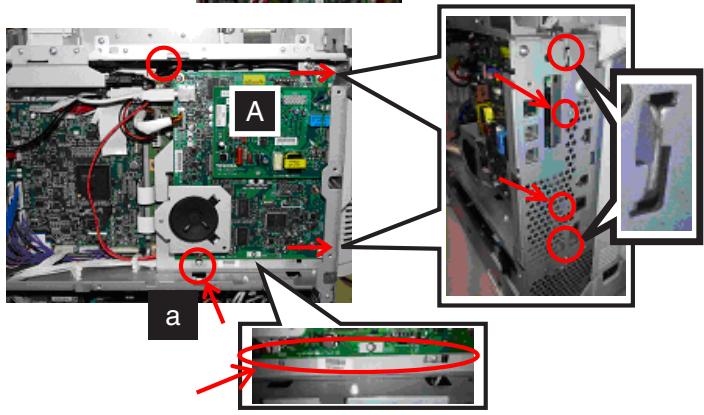
Place [A] into the attaching position and secure it with [a].
a:4

When installing [A], be careful not to catch the rear side cables.
- Connect the cable of [A] to the board.
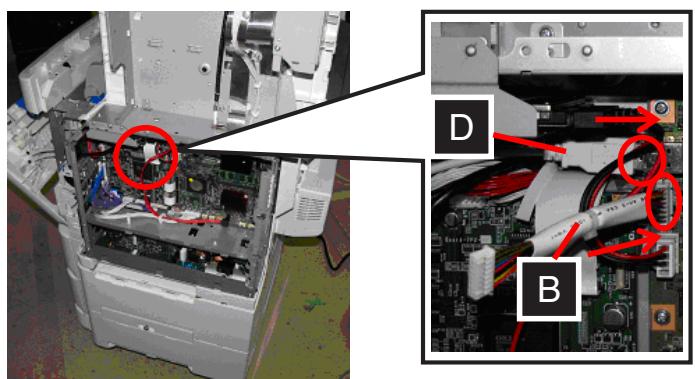

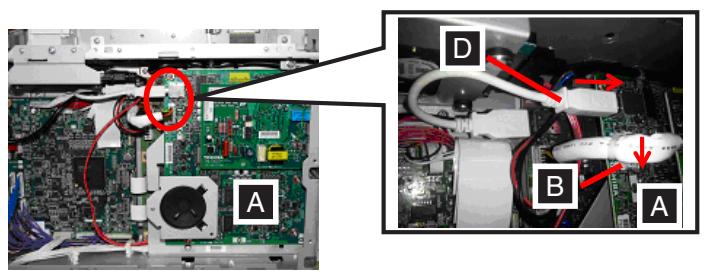
-
Connect the connectors of [D] and [B] to [A].
-
Attach the cover and tighten the screws.
-
Screws: 15 places
-
Insert its latch (E) and then the parts indicated by the arrows as shown in the figure.

Perform this operation with care to avoid injury. In addition, be sure not to damage the cover.
- Insert the latches (A) and (B) of the cover.
A:2 places
B:2 places
- Open [F].
- Insert the latch (D) of the cover.
- Close the covers in the order of (A) and (B).
- Push the locking button to open [G].
- Attach [b].
b:1

- Attach [b] and [e].
b:1
e:1
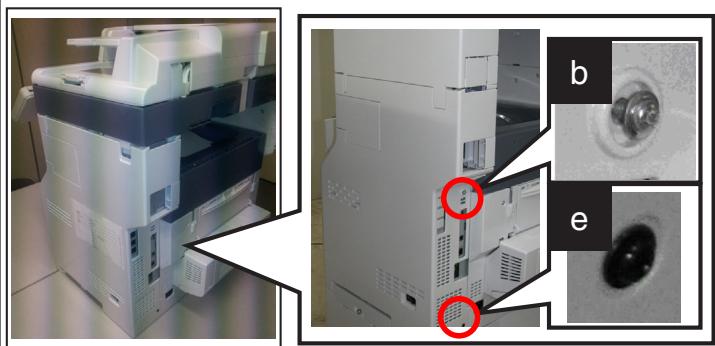
- Attach [e].
e:1
- Close in the order of [G] and [F].
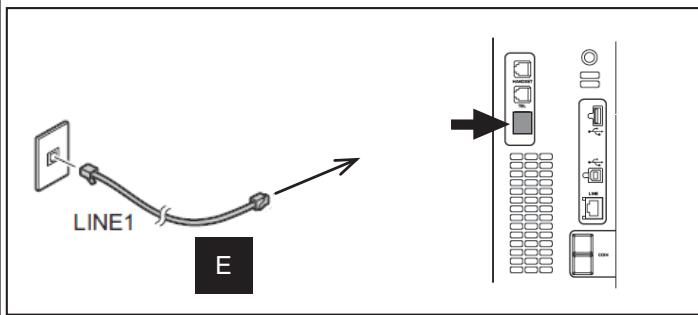
- Connect [E].
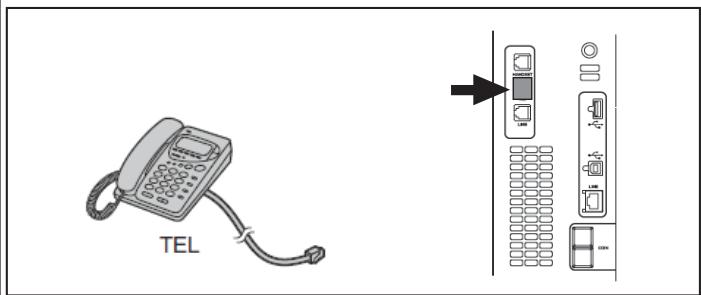
- Connect the cable from the telephone.
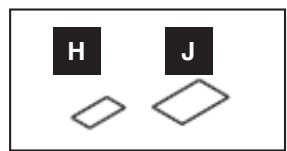
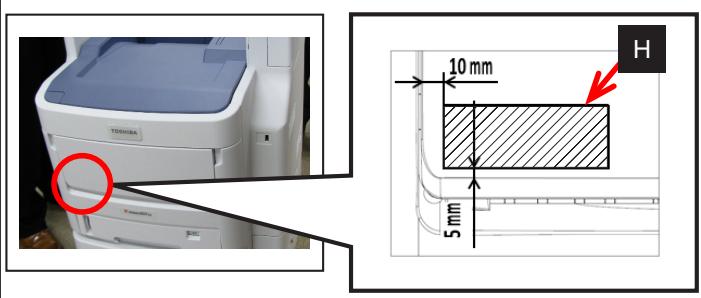
22. Attach the label [H].
H:1
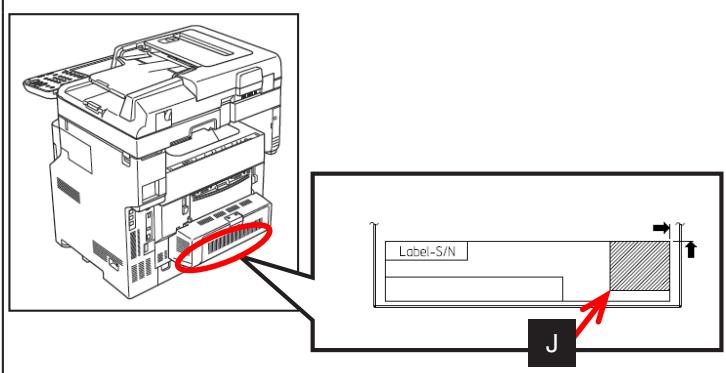
23. Select the corresponding label [J] according to the destination and applicable model and attach it.
J:1
24. The operation is now completed.
Setting Destination
1. Destination
(1) Plug the power cable.
(2) Turn the power ON by means of the main power switch while pressing [0] and [8] simultaneously.
(3) [9001] [START] button
(4) Key in the destination number shown below and then press the [OK] button.
0: Japan
1: Asia/Chile/Peru/Argentina/Saudi Arabia/Singapore/Malaysia
2: Australia/New Zealand 3: Hong Kong 4: U.S.A/Canada
5: Germany/Cyprus/Luxembourg/Ireland
6: England 7: Italy 8: Belgium
9: Holland 10: Finland 11: Spain
12: Austria 13: Switzerland 14: Sweden
15:Denmark 16:Norway 17:Portugal
18: France 19: Greece 20: Poland
21: Hungary 22: Czech Rep. 23: Turkey
24: South Africa 25: Taiwan 26: Russia
27: Brazil
(5) Shut down the equipment by pressing the [ON/OFF] button until a sound is audible.
- Initializing Memory
2. Memory Initialization
(1) Press the [ON/OFF] button while pressing [1] and [^] .
(2) [100] [START] button
(3) When "ARE YOU SURE?" appears, press the [INITIALIZE] button.
(4) After the display has changed from "TESTMODE 100" to "TEST MODE CL", shut down the equipment by pressing the [ON/OFF] button until a sound is audible.
(5) Turn on the power again.
Setting Dial Type
3. Dial Type Selection (except Europe)
(1) [USER FUNCTIONS] [ADMIN] [PASSWORD] "Admin Password" (default: 123456) [OK] [FAX] [INITIAL SETUP] Next page
(2) Select the DIAL TYPE button.
(3) Press [OK].
- Cautionary Points
- Accessories
- Setup
- Attach the label [H].
- Select the corresponding label [J] according to the destination and applicable model and attach it.
- The operation is now completed.
- Setting Destination
- Destination
- - Initializing Memory
- Memory Initialization
- Setting Dial Type
- Dial Type Selection (except Europe)
Brand : OKI
Model : MC770
Category : Multifunction Printer