
bSure SV1 - Projector PHILIPS - Free user manual and instructions
Find the device manual for free bSure SV1 PHILIPS in PDF.


| Product Type | LCD Projector |
| Model | Philips bSure SV1 |
| Resolution | SVGA (800 x 600) |
| Brightness | 1800 ANSI Lumens |
| Contrast Ratio | 400:1 |
| Lamp Life | Up to 3000 hours (standard mode) |
| Lamp Type | 200W UHP |
| Projection Lens | Manual zoom and focus |
| Keystone Correction | Vertical: ±30° |
| Inputs | VGA, S-Video, Composite, Audio (3.5mm) |
| Dimensions (W x D x H) | 310 x 230 x 95 mm |
| Weight | 2.9 kg |
| Power Consumption | 280W (standby <5W) |
| Noise Level | 34 dB (normal mode) |
| Speaker | 1 x 8W mono |
| Maintenance | Clean air filter monthly; replace lamp after 3000 hours |
| Safety | Auto-off after 30 min idle; overheat protection |
| Spare Parts Availability | Replacement lamps and filters available through Philips service centers |
| General Information | Designed for business and education; compatible with 4:3 aspect ratio |
| Manual Language | English (44 pages) |
Frequently Asked Questions - bSure SV1 PHILIPS
User questions about bSure SV1 PHILIPS
0 question about this device. Answer the ones you know or ask your own.
Ask a new question about this device
Download the instructions for your Projector in PDF format for free! Find your manual bSure SV1 - PHILIPS and take your electronic device back in hand. On this page are published all the documents necessary for the use of your device. bSure SV1 by PHILIPS.
USER MANUAL bSure SV1 PHILIPS
Philips Home Cinema Projector LC 6281 / LC 6285

User guide
Index
Things you should know 5
Important Safeguards 6-7
1. Introduction 8-9
Packaging contents 8
Optional accessories 9
Service accessories 9
2. Functional overview 10-14
Controls 10-11
Remote control 12-13
Connections 14
3. Set up 15-18
Positioning the projector and screen 15-16
Switching on the projector 16-17
Adjusting the focus and size of the image 17
Adjusting the vertical angle of the projector 17
To raise 17
To lower 17
Keystone correction 17-18
Vertical keystone correction on LC6281 17
Vertical and horizontal keystone correction on LC6285 18
Moving/transporting the projector 18
Preparation 18
Moving/transporting the projector 18
Inserting the batteries in the remote control 18
4. Installation 19-24
General information 19
Video input 19
Multimedia input 19
Connecting to video equipment 20-23
CVBS 20
S-VHS 20
Scart connection 21
Component/HDTV 21
YPbPr/RGsogB 21
When YPbPr connection has been made 21
Scart connection 22-23
RGBS 22-23
Connecting to a computer 24
PC/Macintosh 24
Index
5. Operation 25-35
Preparation 25-26
General 25
Messages 25
Direct key feedback 25
Feedback messages 26
Error messages 26
Warning messages 26
On Screen Display Menu 27-35
Menu tree 27-29
General explanation 30
Video/S-Video/Component adjustments 31
Picture adjustments 31
Features 31
Multimedia adjustment 32
Picture adjustments 32
Features 32
General adjustments/settings 33
Set up adjustments 33
Examples 34
Zoom/Magnification 34
Picture in Picture (PIP) - LC6285 only 34-35
Picture Format 35
Personal Start-up screen 35
6. Maintenance 36-38
Cleaning 36
Cleaning the cabinet 36
Cleaning the lens 36
Cleaning the dust filter 36
Lamp 37
Lamp replacement 37-38
Resetting the lamplife time 38
7. Troubleshooting 39-41
Things you should know
Note: This equipment has been tested and found to comply with the limits for a Class B digital device, pursuant to Part 15 of the FCC Rules, as well as the European CE marking and Canadian ICES-003.
Operation is subject to the following two conditions:
- This device may not cause harmful interference, and
- This device must accept any interference received, including interference that may cause undesired operation.
These limits are designed to provide reasonable protection against harmful interference when the equipment is operated in a commercial environment.
FCC Warning:
To assure continued compliance, use only the provided grounded mains supply lead and shielded interface cables when connecting this device to a computer. Also, any unauthorized changes or modifications to this equipment could void the user's authority to operate this device.
Important information!
The product you have purchased contains the latest in high-quality optical components. Like all products equipped with an optical function - such as camera lenses, slide projectors, and binoculars - these components are sensitive to polluted environments. Small contaminations like dust and smoke particles can easily attach to the surfaces of the optical components, degrading performance and reducing the lifetime of the product.
Take additional measures to protect the product when operating (or storing) it in unclean or smoky environments, such as bars, casinos, production environments, arcade game centers, etc.
Negligence in observing the installation recommendations above could infringe the warranty conditions for this product.
This Philips projector uses three LCD (Liquid Crystal Display) panels. These panels contain a total of 1,440,000 (for SVGA projectors) or 2,359,296 (for XGA projector) pixels. As with any equipment, certain tolerances apply to the performance specification of the product. Your projector might have some inactive pixels - within acceptable tolerances - which may result in illuminated or dark dots on the picture screen. These inactive pixels will not affect the overall picture quality or the life expectancy of the projector.
For cooling purposes the lamp is open. When removing the lamp do not tilt. If the inner tube is broken glass particles may fall out!
Save energy! Please put the projector in the Power/Standby position if you are not going to use the projector for more than 15 minutes.
Important note for users in the U.S.A.
The responsible party of this multi media projector is the following:
Philips Consumer Electronics Company
One Philips Drive
Knoxville, TN 37914
Telephone (1888) 873-4672
Important Safeguards

CAUTION: Please read all of these instructions before you operate your projector. Save these instructions for future reference.
Electrical energy can perform many useful functions. This projector has been engineered and manufactured to meet applicable safety standards. IMPROPER USE CAN RESULT IN POTENTIAL ELECTRICAL SHOCK OR FIRE HAZARDS. In order not to defeat the safeguards incorporated into this projector, observe the following basic rules for its installation, use and servicing.
- Unplug the projector from the wall socket before cleaning lamp replacement.
- Do not use liquid cleaners or aerosol cleaners. Use a soft dry cloth to clean the projector unit. If the unit is very dirty, wet a cloth with neutral detergent, squeeze it tight, wipe the unit with it, and finish by wiping with a dry cloth. Do not use a chemical duster or polisher-cleaner because it can adversely affect the unit and peel the paint.
- Do not use attachments not recommended by PHILIPS, as they may cause hazards.
- Do not use the projector near water—for example, near a bathtub, washbowl, kitchen sink, or laundry tub, in a wet basement, near a swimming pool, etc. Never spill liquid into the projector.
- Do not place the projector on an unstable cart, stand, or table. The projector may fall, which may cause serious injury to a child or an adult and/or serious damage to the unit. Use only with a cart or stand recommended by its manufacturer as being suitable for use with a projector.
- Ceiling, wall, or shelf mounting should be done with a mounting kit approved by the manufacturer for use with a projector and should follow the manufacturer's instructions.
- Projector equipment and cart combinations should be moved with care. Quick stops, excessive force, and uneven surfaces may cause the equipment and cart combination to overturn.
- Slots and openings of the cabinet are provided for ventilation. To ensure reliable operation of the projector and to protect it from overheating, these openings must not be blocked or covered. These openings should never be covered with cloth or other material. The bottom opening should not be blocked by placing the projector on a bed, sofa, rug, or other similar surface. The projector should not be placed near or over a radiator or heating vent. The projector should not be placed in a built-in installation such as a bookcase unless proper ventilation is provided.
- The projector should be operated only from the type of mains source indicated on the side of the projector or in the specifications and with the appropriate mains lead. If you are not sure of the type of mains supplied to your business or the right type of mains lead, consult your projector dealer or local power company.
- Do not allow anything to rest on the mains lead. Do not place the projector where the lead will be walked on.
- Follow all warnings and instructions marked on the projector.
- As a safety feature, this projector is equipped with a mains lead with a 3-pin grounded plug (for USA versions only) or a 2-pin grounded plug (for European versions only). The 3-pin/2-pin grounded plug will fit only into a grounding type mains outlet. If the plug does not fit, use an adapter that is properly grounded or have an electrician install a grounded type outlet. Do not attempt to modify this AC plug.
- For added protection of the projector during a lightning storm, or when it is left unattended or not in use for long periods of time, unplug it from the wall socket and disconnect any cable systems. This will prevent damage to the projector due to lightning and power-line surges.
- Do not overload wall sockets and extension leads with too many products, because this can cause a fire or electric shock.
- Never push objects of any kind into the projector through cabinet slots as they may touch dangerous voltage points or short cut parts, which could result in a fire or electric shock.
- Do not attempt to service the projector yourself other than maintenance issues presented in chapter 'Maintenance'. Opening or removing covers may expose you to dangerous voltage or other hazards. Refer all servicing to qualified service personnel.
- Unplug the projector from the wall socket and refer servicing to qualified service personnel under the following conditions:
A. When the mains lead or plug is damaged or frayed. B. If liquid has been spilled into the projector. C. If the projector has been exposed to rain or water. D. If the projector does not operate normally when you follow the operating instructions. Adjust only those controls that are covered by the operating instructions; improper adjustment of other controls may cause damage and will often require extensive work by a qualified technician to restore the projector to normal operation. E. If the projector has been dropped or the cabinet has been damaged. F. When the projector exhibits a distinct change in performance - (this indicates a need for service).
- Upon completion of any service or repairs to the projector, ask the service technician to perform a routine safety check to check that the projector is in safe operating condition.
- When replacement parts are required, be sure the service technician has used replacement parts specified by the manufacturer that have the same characteristics as the original parts. Unauthorized substitutions may result in fire, electric shock, or other hazards.
- It is recommended to clean the air filter after every 100 lamp hours. The projector may become too hot if the filter is not cleaned when required.
- If the lens becomes dirty or smudged, clean it with a clean, dampened cloth. Never touch the lens with your fingers.
- Do not look directly into the aperture and lens while operating the projector as this may damage your eyes.
- Please allow cool down of the projector for a few minutes before switching off the mains.
- Please dispose of batteries and lamp in special chemical disposal bins.
1. Introduction

Congratulations on your purchase of one of the most sophisticated and reliable products on the market today. We are sure that, used properly, it will bring you years of enjoyment. You will want to keep this manual handy, as it is a convenient source of information about your projector. For your own protection and prolonged operation of your projector, please read the enclosed Safety Sheet.
Packaging contents
Please confirm that the following items are packed in the projector box. They are provided to help you use or set up your projector.
LC 6285
Projector - Lens cap

Remote control + batteries

Scart/RCA component 2 X AAA Zinc Carbon, 1.5 V Video adapter (not for USA version)

Component cable
LC 6281
Projector - Lens cap

Remote control + batteries 2 X AAA Zinc Carbon, 1.5 V
General
Mains Lead VGA cable Audio/Video RCA Cable


S-Video cable Scart/RCA Audio Video Printed User Guide adapter (not for USA version)

Quick set up Card and Safety Sheet
1. Introduction
Optional accessories
The following accessories are available via the dealer from which you purchased your Philips projector:
• LCA 3122/00 - 150 W replacement lamp - 8670 931 22009 • LCA 2214/00 - Ceiling mount - 8670 922 14009 • LCA 1130/00 - Softbag - 8670 911 3009
Service accessories
The following accessories are available via our Service organisation only:
- Compact remote Control - 3139 228 62561 for LC 6281 • Compact remote Control - 3139 228 62551 for LC 6285 • Mains lead USA - 3122 438 75210 • Mains lead Euro - 3122 438 75190 • Mains lead UK - 3122 438 75200 • Mains lead CCEE - 3122 438 75260
• S-Video cable - 3122 438 75250 • VGA cable - 3122 438 75230 • Audio video RCA cable - 3122 438 75240 • RCA4 cable - 3122 438 752210 (only for LC 6285) - Scart/RCA component Video adapter - 3122 438 71170 (only for LC 6285) • SCART/RCA Audio Video adapter - 2422 033 00345 • Printed User Guide - 3122 435 91150
2. Functional overview
Controls >

On / Standby ① Standby/Remote control indicator
To switch the projector in or out of the Power/Standby mode.
The indicator on the button:
- lights red when the projector is in Power/Standby mode;
- lights green when the projector is in operation mode; – slowly blinks green when the projector is warming up; – slowly blinks red when the projector is cooling down;
- fast blinks red/yellow for 1 second when the projector receives a signal from the remote control in Power/Standby mode;
- fast blinks green/yellow for 1 second when the projector receives a signal from the remote control in operation mode.
Error indicator ②
— Lights up red in case of lamp error - Fast blinks red in case of temperature error
IR sensor ③
To receive the signals from the remote control.
Height/Level adjuster ④
To adjust the vertical angle of the projector.
Focus ring ⑤
To adjust the focus of the projected image.
On LC6285 only
Zoom ring ⑥
Adjust the size of the projected image.
Menu ⑦
To activate and deactivate the menu.
Volume -/+ ⑧
To adjust the volume.
OK ⑨
To confirm actions in the menu when the menu is on screen.
Picture size -/+ ⑩
To reduce/enlarge the size of the projected picture.
Source ⑪
To select the current projection source (Auto, Multimedia, YPbPr, RGBsync, RGsogB, S-Video, Video). The button toggles between the seven signals.
When 'Auto' is selected the source with the highest priority will automatically be selected (Multimedia, YPbPr or RGsogB, RGBsync, S-Video, Video). When only one input source is connected, this will automatically be selected.
2. Functional overview Controls <

Cursor Control ⑫
When the menu is active the Cursor Control controls the menu cursor to navigate through the On Screen Display (OSD) menu. The cursor control works with up/down and left/right button operation.
2. Functional overview
Remc


Standby ① To switch the projector in or out of the Power/Standby mode.
Picture format ② To select one of the six available picture format options (wide screen, super zoom 4:3, 4:3, movie expand 14:9, movie expand 16:9, 16:9 subtitles).
Smart picture ③ To select specific picture characteristics for different input sources. The button toggles between: Movie, Nature, Sports, Cartoon, Game and Internet.
Picture size = / + ④ To reduce/enlarge the size of the projected picture.
Child lock ⑤ To de-activate all remote and local controls. To disable the Childlock function press Childlock to enter the menu and set Childlock to Off. For LC6285 Child lock can also be disabled by pressing OK on the remote control or on the projector for 10 seconds.
Menu ⑥ To activate and de-activate the menu.
Cursor Control ⑦ When the menu is active, the Cursor Control controls the menu cursor to navigate through the OSD menu. The cursor control works with up/down and left/right button operation.
- +8 To adjust the volume.
A(udio)/V(ideo) Mute ⑨ To mute the sound of the projector and to mute the picture.
Freeze ⑩ To capture a (moving) picture. The button toggles between the Freeze mode and the display situation.
Zoom ⑪ To switch the 'Zoom' function 'On' or 'Off' (toggle button: 1x, 4x, 9x, 16x). In 'On' condition, the centre of the picture will be enlarged. The 'Magnification' factor can also be changed in the 'Features' menu.
Mirror ⑫ To mirror the picture for use of the projector in various positions with respect to the user(s) and the projection screen.
Info ⑬ To show information on the projector status: Source, Input Signal, Mute, A/V Mute, PIP source (PIP source only for LC 6285) and Picture Format.
2. Functional overview Remote control <


OK 14
To confirm actions in the menu when the menu is on screen.
Mute 15
To mute the sound of the projector.
Keystone 46
Only on LC 6281 remote control
To correct picture distortion of the vertical keystone type by internal scaling.
Source selection buttons ⑰
To select the current projection source (Component, S-Video, Video, Multimedia).
Crystal Clear Demo ⑯
Only on LC 6285 remote control
CrystalClear picture enhancement demo.
Keystone ⑰
To correct picture distortion of the vertical and horizontal keystone type by internal scaling.
PIP keys ⑱ (Picture In Picture)
PIP
To call up the PIP window. In the PIP window you can project the picture of another source connected to the projector.
PIP source
To select the source from which you wish to project the picture in the PIP window. The button toggles between the connected sources.
Swap Picture source
To exchange the pictures projected on the main screen and in the PIP window.
Source ⑲
To select the current projection source (Auto, Multimedia, YPbPr, RGBsync, RGsogB, S-Video, Video). The button toggles between the seven signals.
When 'Auto' is selected, the source with the highest priority will automatically be selected (Multimedia, YPbPr or RGsogB, RGBsync, S-Video, Video). When only one input source is connected, this will automatically be selected.
2. Functional overview
Connections <

Component in ① (PR/R, PB/B, Y/G, S)
Video source connections
Input sockets to connect to DVD- and HDTV-video equipment
These sockets can be connected to the following output sockets: YPbPr, RGBsync, RGsogB, (480p, 720p, 1080i).
S-Video ②
Input socket to connect to the S-Video out socket of an S-Video recorder, a VCR, DVD player, video camera, or TV with AV output socket. This socket can be connected to an S-Video (Y/C) output socket.
Video ③
Input socket to connect to the Video out socket of a video recorder, DVD player, video camera, or TV with AV output socket. This socket can be connected to Video (CVBS) output sockets.
Audio L/R ④
Input sockets to connect to the Audio out sockets of a video recorder, DVD player, video camera, or TV with A/V output socket.
Data source connection
Multimedia ⑤
Input socket to connect to the Data out terminal of a computer.
Filter ⑥
General
Dust filter
Lamp compartment ⑦
Mains inlet socket ⑧
To connect the projector to the mains.
Lock slit ⑨
To insert an optional locking device (Kensington lock)
Horizontal adjuster ⑩
To adjust a possible oblique displayed picture.
3. Set up >
Positioning the projector and screen

- Place the projector on a stable, level surface, out of direct sunlight and away from sources of excessive dust, dirt, heat, water, moisture, vibration and strong magnetic fields.
- Allow sufficient cooling of the product by keeping all air inlets and outlets clear from obstructions.
- Position the projector in such a way that the viewers cannot watch into the projector light beam.
- Choose a screen size suitable for the number of viewers and the size of the room. Picture quality is best when you sit directly in front of the projector screen.
- The projector can be used for front projection, rear projection and ceiling projection applications. As default factory setting, the projector has been set up for front projection. You can change to rear or ceiling projection via the 'Mirror' function in the 'Set up' menu or with the Mirror button on the remote control.
- For more information on the projection properties of the projector, please check the table below.

Distances/sizes picture LC 6281
| Picture size table | Fixed focal length | ||||
| Projection distance(m) | Image Diagonal(inches) | Image Diagonal(cm) | Image Width(cm) | Image Height(cm) | offset (cm) |
| 1,5 | 37 | 94 | 82 | 46 | 23 |
| 2,0 | 50 | 126 | 110 | 62 | 31 |
| 2,5 | 62 | 157 | 137 | 77 | 39 |
| 3,0 | 74 | 189 | 165 | 92 | 46 |
| 3,5 | 87 | 220 | 192 | 108 | 54 |
| 4,0 | 99 | 252 | 219 | 123 | 62 |
| 4,5 | 111 | 283 | 247 | 139 | 69 |
| 5,0 | 124 | 315 | 274 | 154 | 77 |
| 5,5 | 136 | 346 | 302 | 170 | 85 |
| 6,0 | 149 | 377 | 329 | 185 | 92 |
| 7,0 | 173 | 440 | 384 | 216 | 108 |
| 8,0 | 198 | 503 | 439 | 247 | 123 |
| 9,0 | 223 | 566 | 494 | 277 | 139 |
| 10,0 | 248 | 629 | 548 | 308 | 154 |
| 11,0 | 272 | 692 | 603 | 339 | 170 |
| 12,0 | 297 | 755 | 658 | 370 | 185 |
| 15,0 | 372 | 944 | 823 | 462 | 231 |
3. Set up >

Distances/sizes picture LC 6285
| Picture size table | Wide* Tele* | ||||||
| Projection distance (m) | Image Diagonal (inches) | Image Diagonal (cm) | Image Width (cm) | Image Height (cm) | Image offset (cm) | Image Diagonal (inches) | Image Diagonal (cm) |
| 1,2 | 39 | 98 | 85 | 48 | 24 | 31 | 79 |
| 1,5 | 48 | 122 | 107 | 60 | 30 | 39 | 98 |
| 2,0 | 64 | 163 | 142 | 80 | 40 | 52 | 131 |
| 2,5 | 80 | 204 | 178 | 100 | 50 | 65 | 164 |
| 3,0 | 96 | 245 | 214 | 120 | 60 | 78 | 197 |
| 3,5 | 112 | 286 | 249 | 140 | 70 | 90 | 230 |
| 4,0 | 129 | 327 | 285 | 160 | 80 | 103 | 262 |
| 4,5 | 145 | 367 | 320 | 180 | 90 | 116 | 295 |
| 5,0 | 161 | 408 | 356 | 200 | 100 | 129 | 328 |
| 5,5 | 177 | 449 | 391 | 220 | 110 | 142 | 361 |
| 6,0 | 193 | 490 | 427 | 240 | 120 | 155 | 394 |
| 7,0 | 225 | 571 | 498 | 280 | 140 | 181 | 459 |
| 8,0 | 257 | 653 | 569 | 320 | 160 | 207 | 525 |
| 9,0 | 289 | 735 | 641 | 360 | 180 | 233 | 591 |
| 10,0 | 321 | 816 | 712 | 400 | 200 | 258 | 656 |
| 11,0 | 354 | 898 | 783 | 440 | 220 | 284 | 722 |
| 12,0 | 386 | 980 | 854 | 480 | 240 | 310 | 787 |
| 15,0 | 482 | 1225 | 1068 | 600 | 300 | 388 | 984 |
* With the Zoom ring you can enlarge (wide) or reduce (tele) the size of the projected image.
Switching on the projector


Warning
If the projector is switched off you have to wait 1 minute before you can switch on the projector again. Press standby key again to confirm
Press OK key to remove this warning.
Philips Home Cinema Projector
1 Insert the mains lead into the projector's Mains inlet socket and connect it to the wall socket. The Standby indicator (on the Ⓓ Standby button) lights up red, the projector is now in the Power/Standby mode. 2 Remove the lens cap. 3 Press the ⏻ Standby button on the projector or any key on the remote control to switch on the projector. – The Standby indicator starts blinking green. - When the projection lamp is on, the Standby indicator lights up green and the start-up screen appears for several seconds.
4 Press the ⏻ Standby button to switch the projector back into the Power/Standby mode. — The Standby Warning screen will appear for 20 seconds. - The Standby Warning screen can be removed by pressing the OK button. 5 Press the ⏻ Standby button again to confirm. - The projector will now go into Power/Standby mode.
You can also press the Standby button twice in succession to switch the projector into Power/Standby mode immediately.
3. Set up
6 To switch off the mains supply completely, disconnect the mains lead.
Adjusting the focus and size of the image
— Save energy! Please put the projector in the Power/Standby position if you are not going to use the projector for more than 15 minutes. - If SmartSave is enabled, the projector will switch to StandBy after the selected time. If SmartSave is not enabled, the projector will not switch to StandBy. This setting can be changed in the 'Set up' menu - Before disconnecting the mains lead, make sure that the cooling fan has stopped (about 3 minutes after the projector has been switched to Power/Standby).
- Use the Zoom ring (LC6285 only) to adjust the size of the image.
- Use the Focus ring to adjust the focus of the image.
Adjusting the vertical angle of the projector
To raise:
- Keep knob A pressed and lift to raise the projector.
- The Height/Level Adjuster B will come out. 3 Use the horizontal adjuster C to fine-tune the display angle.
To lower:
- Keep knob A pressed and gently lower the projector.
- Use the Focus Ring and Zoom Ring to readjust the focus and size of the image. 3 Use the horizontal adjuster C to fine-tune the display angle.

Keystone correction

If projector and screen are not properly placed, the picture will be distorted, producing a keystoned image (picture top width larger than picture bottom width or vice versa/picture left side width larger than picture right side width or vice versa). When a keystoned image occurs the image ratio (4:3, 16:9) will still be guaranteed. This is especially important when the projector is being used together with an 'intelligent whiteboard'.
'Keystone correction' allows you to correct picture distortion of the vertical and horizontal (horizontal is only for LC 6285) keystone type by internal scaling.
Vertical keystone correction on LC 6281
- Use Keystone to widen the upper part of the image.
- Use Keystone to widen the lower part the image. – The keystone slider appears on the screen.
- This correction function also is accessible through the 'Keystone' option in the 'Set up' menu of the On Screen Display (OSD) menu.

3. Set up
Vertical and horizontal keystone correction on LC 6285
1 Press Keystone.
- The keystone correction screen appears.
2 Use Cursor Control up and/or down to widen/narrow the image in vertical direction. 3 Use Cursor Control left and/or right to widen/narrow the image in horizontal direction. - This correction function also is accessible through the 'Keystone' option in the 'Set up' menu of the On Screen Display (OSD) menu.
Moving/transporting the projector
Preparation
1 Press the ⏻ On-Standby button twice to put the projector in Power/Standby. – The Standby indicator starts blinking red. 2 Wait until the cooling fan has stopped (about 3 minutes after the projector has been put in Standby) and disconnect the mains lead and all other cables. 3 Put the lens cap back in place to prevent dust, dirt or other contamination from harming or damaging the front of the projector lens when moving the projector.
Note: Never place the projector on the side where the connections are located.
Moving/transporting the projector
The projector contains many glass and precision parts. If you need to transport the projector, please follow these packing instructions to prevent accidental damage to the projector.
- When you are hand-carrying the projector, be sure to use a carrying case like the optional softbag.
- When shipping the projector, use the original packaging material if possible. If you do not have the original packaging, use equivalent materials, placing plenty of cushioning around the projector.
- When transporting the projector as freight or checked luggage, first put it in a carrying case, then pack it in a firm box, using cushioning around the case.
Inserting the batteries in the remote control
1 Push and slide the lid in the direction of the arrow. 2 Install two 'AA' batteries as indicated inside the battery compartment. 3 Replace the lid and snap it into place.

Note: The maximum range of the remote control is approximately 15 m (± 50 feet).
4. Installation
General information
Video input
The projector accepts the input signal of all major video formats:
Video (CVBS) S-Video (Y/C): NTSC 3.58, 4.43, PAL B, G, D, H, I, N, M and SECAM B, D, G, K, K1, L.
Component video:YPbPr, RGBsync, RGsogB.
EDTV/HDTV: 480p, 575p, 720p/(50/60), 1035i/(30), 1080i/(25/30/AUS), 1080p/(30).
The projector will recognize these standards and adapt to them automatically.
With the 'Picture Format' feature you can select one of six picture format options: wide screen, super zoom 4:3, 4:3, movie expand 14:9, movie expand 16:9,
16:9 subtitles.
Multimedia input
The Multimedia input is suitable for both Apple Macintosh computers (Power Book and Power Mac) as well as for IBM compatible PCs. The projector is Microsoft (R), Windows (R)
95/98/ME/2000/XP compatible and accepts input signals from all computers that meet following specifications:
LC6285
• Multi scan up to SXGA/60 Hz
• H-sync (Horizontal scan rate): 30-72 kHz
• V-sync (Vertical refresh rate): 56-85 Hz
• Bandwidth: 80 MHz
• Display Data Channel DDC: 1/2B LC6281
• Multi scan up to XGA/75 Hz
• H-sync (Horizontal scan rate): 30-72 kHz
• V-sync (Vertical refresh rate): 56-85 Hz
• Bandwidth: 110 MHz
• Display Data Channel DDC: 1/2B
The data output of IBM compatible PCs can be connected directly to the projector using standard data cables. When connecting the projector to a Macintosh computer equipped with a 2 row, 15 pin connector a VGA/MAC adaptor (available at your PC store) is required. If your computer is equipped with a 3 row connector no adaptor is needed.
CAUTION
Always switch off projector and external equipment before making any connections.
4. Installation
Connecting to video equipment >

Video (CVBS)
1 Connect the Video (out) socket of a VCR, DVD player, video camera or TV to the Video (in) socket of the projector.
For this, use the video/audio connection cable (1a) supplied.
2 Connect the Audio out L/R sockets of the VCR, DVD player, video camera or TV to the Audio (in) L/R sockets of the projector.
For this, use the audio/video connection cable supplied (1b).
S-Video
1 Connect the S-Video (out) socket of a S-Video recorder, DVD player, video camera or TV to the S-Video (in) socket of the projector.
For this, use the S-Video connection cable supplied (2).
2 Connect the Audio out L/R sockets of the S-Video recorder, DVD player, video camera or TV to the Audio (in) L/R sockets of the projector.
For this, use the audio/video connection cable supplied (1a).
Scart connection

Scart adapter
(not for USA version)
Video (CVBS)
1 Connect the Scart/RCA Audio Video adapter supplied to the Scart connector of the VCR, DVD player, video camera or TV.
2 Plug the video/audio connection cable supplied into both the adapter and the Video and Audio (in) L/R sockets of the projector.

Scart adapter (not for USA version)
S-Video
3 Plug the S-Video connection cable supplied into the VCR and the S-Video socket of the projector.
4. Installation
Connecting to video equipment >

Component/HDTV
YPbPr/RGsogB
- Connect the Component in sockets of the projector (Pr/R, Pb/B,Y/G) to the appropriate output sockets of your Component- or HDTV-video equipment (YPbPr/YCbCr/RGB). For this, use the audio/video connection cable supplied (1).
- If required you can connect the Audio out L/R sockets of the Component- or HDTV-video equipment to the Audio (in) L/R sockets of the projector.
For this, use an optional audio connection cable (2).
– Audio information from the Component- or HDTV-video equipment will be played via the projector speaker.
When YPbPr connection has been made:
1 Use Cursor Control to select 'Source' in the 'Set up' menu. See 'On Screen Display Menu' - 'General explanation' on how to navigate through the menu.
2 Press Menu.
- The menu bar appears on the screen. The 'Picture' item is highlighted.


Philips Home Cinema Projector
3 Use Cursor Control left to select 'Set up'.
4 Use Cursor Control down to select 'Auto Component Selection'.
5 Use Cursor Control right to select 'YPbPr'.
6 Confirm with OK.
4. Installation
Connecting to video equipment >

Scart connection


RGBS
1 Connect the Scart/RCA Component Video adapter supplied (1) to the Scart connector of your Component- or HDTV-video equipment.
2 Connect the Component in sockets of the projector to the R, G, B and Y outputs of the adapter.
For this, use the Component cable supplied (2).
- If required you can connect the Audio out L/R sockets of the Component- or HDTV-video equipment to the Audio (in) L/R sockets of the projector.
For this, use an optional audio connection cable (3).
– Audio information from the Component- or HDTV-video equipment will be played via the projector speaker.
3 Press Menu.
- The menu bar appears on the screen. The 'Picture' item is highlighted.
3 Use Cursor Control left to select 'Set up'.
4 Use Cursor Control down to select 'Auto Component Selection'.
4. Installation Connecting to video equipment <
5 Use Cursor Control right to select 'YPbPr' or 'RGsogB'.

6 Confirm with OK.
Note The Scart/RCA Component Video adapter and the Component cable are only supplied with the LC6285 projector. For LC6281 an optional cable and adapter have to be used.
4. Installation
Connecting to a computer <

PC/Macintosh
\- Connect the Data (out) socket of the computer to the Multimedia socket of the projector and secure the plugs by tightening the thumb screws.
For this, use the VGA cable supplied (1).
The data output of IBM compatible PCs can be connected directly to the projector using standard data cables. When connecting the projector to a Macintosh computer equipped with a 2 row, 15 pin connector a VGA/MAC adaptor (available at your PC store) is required. If your computer is equipped with a 3 row connector no adaptor is needed.
5. Operation
Preparation >
General


Note

Messages


1 Press the ⏻ Standby button to switch on the projector.
– The Standby indicator starts blinking green.
When the projection lamp is on, the Standby indicator lights up green and the start-up screen (when enabled) appears for several seconds.
2 Select the required source (Multimedia, YPbPr, RGBsync, RGsogB, S-Video, Video) by pressing the Source button (LC 6285) or the appropriate button on the remote control (LC 6281).
– The sources that can be selected are shown on the screen.
- The required source can also be selected via the 'Source' option in the 'Set up' menu of the On Screen Display (OSD) menu.
When only one input source is connected, this source will automatically be selected (Auto Source). When more input sources are connected, the source with the highets priority will be selected (Multimedia, YPbPr or RGsogB, RGBsync, S-Video, Video). Source selection can be changed in the Set up menu.
3 Switch on the computer or start video playback.
- A feedback message appears on the screen, indicating the selected source.
Direct key feedback
Direct key feedback is given when settings/adjustments are made directly via the remote control or local keyboard. Feedback is given by means of a slider, a simple dialog or a list of options.
Sliders are used when setting e.g.:
- volume;
- picture size;
- vertical keystone;
- brightness;
- contrast;
colour tracking.
Dialogs are used when setting e.g.:
\- horizontal/vertical keystone;
\- mirror;
\- child lock.
Lists are used when setting e.g.:
\- smart picture;
\- picture format;
\- source.
5. Operation Preparation <
Feedback messages
Feedback messages are displayed in the top right corner of the screen. They are displayed e.g. when:
\- a signal comes up or goes down;
\- an input source is changed;
– the PIP input source is changed;
\- the Freeze, Mute or A/V Mute function is activated;
\- the Child lock, Cristal clear or Zoom function is (de-)activated;
\- the local keyboard or remote control is used when Child lock is activated;
\- the Info button is pressed.


Error messages
Error messages are displayed when there is a serious technical problem. They can occur at any time during operation and need immediate action. Error messages are displayed in the centre of the screen, indicating the problem and its possible solution. They are displayed e.g. when:
\- a temperature error occurs. E.g. the internal temperature is too high. Message will appear together with red blinking Error indicator.
\- a fan error occurs. E.g. one of the fans has a failure;
\- resolution or refresh rate is too high. Data source cannot be shown.


Warning messages
Warning messages are displayed in the centre of the screen. They are displayed e.g. when:
– lamplife time has almost expired;
– lamplife time has expired.


5. Operation
On Screen Display Menu >

All video and Multimedia adjustments and settings (except Volume, Mute and A/V Mute) are done via On Screen Displays and with help of Menu, OK and Cursor Control on the projector or the remote control. The projector is set to standard specifications at the factory. However, you can adjust these specifications to suit your own preferences. The projector menu screens allow you to adjust the various projector settings (for both Multimedia and Video). For explanation and operation see next pages.
VIDEO/S-VIDEO/COMPONENT MODE


5. Operation
On Screen Display Menu >
Menu tree


MULTIMEDIA MODE


5. Operation
On Screen Display Menu >
Menu tree
GENERAL ADJUSTMENTS/SETTINGS
Main menu Sub menu Setting


5. Operation On Screen Display Menu

General explanation


1 Press Menu.
\- The menu bar appears on the screen.
The 'Picture' item is highlighted.
Depending on the selected source (Multimedia, YPbPr, RGBsync, RGsogB, S-Video, Video) some options of the submenu may be greyed out. This indicates that these functions:
\- are not available in a certain mode,
– have no function for the selected source.
For example:
\- Cristal clear under menu 'Picture' when Data has been selected as source.
Hue under menu 'Picture' when signaltype is not NTSC.
2 Use Cursor Control left and/or right to move the cursor to any other item in the menu bar.
3 Select the sub menu item to be adjusted using Cursor Control up and/or down.
- When more items are available than can be shown in one screen, this will be indicated by 8 at the bottom of the list. Move the cursor down to go to the next list of items. Move the cursor up to go back to the first list.
- When a selection list in a submenu contains more items than can be shown in one screen, this will be indicated by ⚙t the bottom of the list. Move the cursor down to go to the next list of items. Move the cursor up to go back to the first list.
4 Adjustments are generally made by setting an on screen slider to the required value. For this use Cursor Control left/right. Confirm the adjustment by pressing OK. Settings are generally made by selecting the required item from a list of options. For this use Cursor Control up/down. Confirm the setting by pressing OK.
5 Select the next item to be adjusted in the sub menu and adjust as described above.
6 Press Menu to close the On Screen Menu Display.
5. Operation On Screen Display Menu

Video/S-Video/Component adjustments


For Video/S-Video/Component signal input, the following 'Picture' and 'Features' adjustments can be made:
Picture adjustments
\- Press Menu and select 'Picture' in the menu bar. The following 'Picture' adjustments can now be made, following the instructions under 'General explanation' and the screen.
- Brightness
to adjust the brightness of the displayed picture;
- Contrast
to adjust the overall contrast intensity;
Colour
to adjust the colour saturation of the projected image;
-Tint
to adjusts the overall colour impression from warm to cool;
\- Smart picture
to select specific picture characteristics for different input sources: Movie, Nature, Sports, Cartoon, Game and Internet;
— CristalClear (LC6285 Only)
CrystalClear picture enhancement demo.Temporarily undoes all Picture settings to compare picture performance with and without Picture settings;
\- Sharpness
to control the contour impression of the picture;
\- Hue (only for NTSC)
to adjust the tint of the projected image;
\- Picture Format
to select one of six picture format options (wide screen, super zoom 4:3, 4:3, movie expand 14:9, movie expand 16:9, 16:9 subtitles).
Features
\- Press Menu and select 'Features' in the menu bar. The following 'Features' can now be selected, following the instructions under 'General explanation' and the screen.
— Picture In Picture (LC 6285 only)
to enable the projection of second picture in the currently projected picture.
\- PIP format (LC 6285 only)
to select the size of the PIP window: Small, Medium or Large;
\- PIP location (LC 6285 only)
to select the location of the PIP window in the main screen;
\- Start-up screen
to display (Philips) or suppresses (Off) the default Philips start-up screen or your personal startup text (Personal) upon the projector's start up;
\- Menu appearance (LC 6285 only)
to change the colour of the On Screen Displays;
-Zoom
to enlarge a part of the picture;
\- Freeze
to capture a moving picture (still picture);
\- Child lock
to de-activate all remote and local controls (On). To disable the Childlock function press Childlock on the remote control to enter the menu and set Childlock to Off.
For LC6285 Child lock can also be disabled by pressing OK on the remote control or on the projector for 10 seconds.
\- Sleep timer
to switch off Sleep timer mode or selects the delay time after which the projector automatically switches to Standby.


Philips Home Cinema Projector
English User guide LC 6281 / LC 6285
5. Operation On Screen Display Menu

Multimedia adjustments


For Multimedia signal input, the following 'Picture' and 'Features' adjustments can be made.
Picture adjustments
\- Press Menu and select 'Picture' in the menu bar. The following 'Picture' adjustments can now be made, following the instructions under 'General explanation' and the screen.
\- Brightness
to adjust brightness of the displayed picture;
\- Contrast
to adjust the overall contrast intensity;
\- Tint
to adjust the overall colour impression from warm to cool;
\- Smart picture
to select specific picture characteristics for differnet input sources: Movie, Nature, Sports, Cartoon, Game and Internet;
\- Sharpness
to control the contour impression of the picture;
Features
\- Press Menu and select 'Features' in the menu bar. The following 'Features' can now be selected, following the instructions under 'General explanation' and the screen.
\- Picture In Picture (LC 6285 only)
to enable the projection of second picture in the currently projected picture.
\- PIP format (LC 6285 only)
to select the size of the PIP window: Small, Medium or Large;
\- PIP location (LC 6285 only)
to select the location of the PIP window in the main screen;
\- Start-up screen
to display (Philips) or suppress (Off) the default Philips start-up screen or your personal startup text (Personal) upon the projector's start up;
\- Menu appearance (LC 6285 only)
to change the colour of the On Screen Displays;
\- Zoom
to enlarge a part of the picture;
\- Freeze
to capture a moving picture (still picture);
\- Child lock
to de-activate all remote and local controls (On). You can also select the time after which Child lock should become active (Lock after). To disable the Childlock function press Childlock on the remote control to enter the menu and set Childlock to Off. For LC6285 Child lock can also be disabled by pressing OK on the remote control or on the projector for 10 seconds.
\- Sleep timer
to switch off Sleep timer mode or to select the delay time after which the projector automatically switches to Standby.


5. Operation On Screen Display Menu >
General adjustments/settings


Set up adjustments
The projector is equipped with the following functions to optimize its use and handling:
\- Press Menu and select 'Set up' in the menu bar. The following settings/adjustments can now be made for both Multimedia, Component and Video/S-video input, following the instructions under 'General explanation' and the screen:
- Language
to select the required menu language;
- Picture size
to reduce/enlarge the size of the projected picture;
\- Keystone
to correct picture distortion of the vertical and horizontal keystone type by internal scaling. Horizontal keystone correction is only available on LC 6285.
\- Source
to select the current projection source: Multimedia, YPbPr or RGsogB, RGBsync, S-Video, Video. When Auto is selected the source with the highest priority will automatically be selected (Multimedia, YPbPr or RGsogB, RGBsync, S-Video, Video). When only one input source is connected, this will automatically be selected.
\- SmartSave
to switch off SmartSave mode or select the delay time after which the projector automatically switches to Standby.
\- Minor
to mirror the picture for use of the projector in various positions with respect to the user(s) and the projection screen;
\- Feedback
to suppress OSD feedback messages. Warning or error messages however are never suppressed;
\- Lamp counter
to show the operating time of the lamp, which can be reset after a new lamp has been installed;
\- System information
the System Information sub menu contains an overview of the most relevant information on the hardware and software configuration;
\- Factory settings
to reset all user settings to the default factory settings;
\- Auto Component Selection
to select between YPbPr and RGsogB as component input source.
5. Operation
On Screen Display Menu >
Examples


The following settings/adjustments follow a slightly different procedure or may need some further explanation.
Zoom/Magnification
'Zoom' is used to enlarge a part of the picture.
1 Press Menu.
– The menu bar appears on the screen.
2 Use Cursor Control to select 'Zoom' in the Features menu.
3 Use the Cursor Control to adjust the Zoom factor in the 'Magnification' slider (4x, 9x or 16x).
4 Press OK to confirm and exit the menu.
5 Use Cursor Control to select another section of the enlarged area ('Panning').
Note
Pressing the Zoom button on the remote control, will immediately bring up the Magnification slider (step 3). Pressing the Zoom button 4 times in succession will switch off the Zoom function.
Picture in picture (PIP) - LC 6285 only
'PIP' enables projection of a second picture in the currently projected picture.
1 Press Menu.
- The menu bar appears on the screen.
2 Use Cursor Control to select 'PIP' in the Features menu.
3 Use Cursor Control to select 'On'.

— The PIP window will appear on the screen.
4 Use PIP source on the remote control to select the source from which you wish to project the picture in the PIP window.
If you select 'Auto' the system will check if a source is available. If a source is found then its picture will be projected.
\- The picture of the selected source will be projected in the PIP window.
5 Press Menu and select 'Features' in the menu bar.
6 Use Cursor Control to move to 'PIP format' and select the required PIP window size ('Small', 'Medium' or 'Large').

7 Use Cursor Control to move the cursor to 'PIP location' and press OK.
8 Use Cursor Control to select the required position of the PIP window and confirm with OK.

Philips Home Cinema Projector
English User guide LC 6281 / LC 6285
5. Operation
On Screen Display Menu >
\- To exchange the pictures, projected on the main screen and in the PIP window press Swap Picture source on the remote control.
Notes
- Pressing the PIP button on the remote control, will immediately bring up the PIP window (step 3). Pressing the PIP button twice in succession will switch off the PIP function.
- High resolution pictures from data sources can only be projected in the PIP formats Medium or Large. The Small option in the menu will therefore be greyed out.
Picture Format
'Picture Format' is used to select one of six picture format options (wide screen, super zoom 4:3, 4:3, movie expand 14:9, movie expand 16:9, 16:9 subtitles). For video signal input the last selected picture format (before the projector was switched off) will be selected again.
1 Press Menu.
- The menu bar appears on the screen.
2 Use Cursor Control to select 'Picture format' in the Picture menu.
3 Use Cursor Control to select the required picture format (wide screen, super zoom 4:3, 4:3, movie expand 14:9, movie expand 16:9, 16:9 subtitles) and confirm by pressing OK.
- The picture format has now been set.

Notes
- Pressing the Picture Format button on the remote control, will immediately bring up the Picture Format selection window (step 2). Pressing the Picture Format button again will select the next picture format.
— Due to the scaling of the image when the picture format is changed, it might be possible that a part of the actual image is missing at the top or the bottom of the screen. With Cursor Control you can adjust the position of the projected image upwards or downwards.
Personal Start-up text
1 Press Menu.
– The menu bar appears on the screen.
2 Use Cursor Control to select Start-up screen in the 'Features' menu.
3 Use Cursor Control to select 'Personal'.

- You can now enter your personal Start-up text with a maximum of 15 characters.
Use Cursor Control Up/Down to select characters.
Use Cursor Control Left/Right to move to a previous/next position.
4 Confirm with OK.
5 Press OK again to return to the main menu..
6. Maintenance

Cleaning
Caution

Switch off and disconnect the projector before cleaning.
1 Press the ⏻ On-StaStandby button twice to switch off the projector.
– The Standby indicator starts blinking red.
2 Wait until the cooling fan has stopped (about 3 minutes after the projector has been put in Standby) and disconnect the mains lead and all other cables.
Cleaning the cabinet
- When the cabinet is dusty, clean it by gently wiping with a soft cloth.
- A chamois leather slightly moistened with water is sufficient for cleaning the housing.
- Do not use cleaning agents as they may harm the housing.
Cleaning the lens
- When the lens is dirty or dusty, first blow the dust off and then gently wipe with a soft brush or lens cleaning paper. Never touch the lens with your fingers.
- The lens is likely to become mouldy if left dirty.
Cleaning the dust filter
Make sure to clean the dust filter regularly.

1 Switch off the projector and wait until the cooling fan has stopped before disconnecting the projector.
2 Lift the Filter tab (A) at the rear of the projector and remove the filter holder (B) from the projector.

3 Press clamp C, open the holder and remove the filter.
4 While firmly holding the filter, gently remove any accumulated dust, from the dusty side, with a vacuum cleaner.
5 Press clamp C, put the filter back in place and release clamp C. Firmly press the filter edges in place.
6 Close the filter holder.

7 Insert the filter holder into the projector until it clicks in position..
Notes
We advise you to clean the filter every 100 hours. Operating the projector without filter or with a tom or damaged filter may seriously damage the projector.
When the filter is damaged replace it with a filter of the same type (12 nc: 3122 434 02190).
Don't switch on the projector again unless the filter holder is installed correctly.
6. Maintenance

Lamp

When operation time reaches the last 100 hours of the average lamplife, the message 'Warning: lamplife has almost expired' will be displayed on the screen, each time the projector is switched on.

The lamplife remaining can be checked using the OSD menu.
1 Press Menu.
- The menu bar appears on the screen.
2 Use Cursor Control to select Lamp counter in the 'Set up' menu.

\- The used lamplife hours are displayed.

\- When the lamplife has expired, the message "Warning: lamplife has expired" is displayed on the screen.
Lamp Replacement

1 Switch off the projector and wait until the lamp has cooled down (about 5 minutes) before disconnecting the projector. Remove the mains lead from both projector and wall socket. The mains lead must be disconnected from the projector otherwise the lamp door cannot be removed.
2 Tum the projector over. Never place the projector on the side where the connections are located!
3 Remove the lamp door.
- When tab A is pressed the mains inlet socket will be partly closed. The lamp door therefore cannot be removed if the mains lead is not disconnected from the projector.
4 Read the caution and warning labels on the lamp holder.

5 Unscrew screws B.
6 Grasp the lamp holder handle and carefully pull the lamp holder out of the projector.
- Do not tilt. If the inner tube is broken glass particles may fall out.
- Keep lamp holder opening to your right. Do not touch lamp or point lamp holder opening at anyone.
7 Carefully remove the new lamp housing from its package.
• Always use the same type of lamp: LCA3122/00 (150 W), 12nc: 8670 931 22009.
- Do not touch lamp or point lamp housing opening at anyone.
- Do not drop, as the impact may cause the lamp to break.
8 Place the lamp holder in the guiding slots and insert into the lamp compartment.

Philips Home Cinema Projector
English User guide LC 6281 / LC 6285
6. Maintenance
Lamp replacement

9 Tighten screws B again.

10 Put the lamp door back in place.
11 Insert the mains lead into both the projector Mains inlet socket and the wall socket.
12 Press the Standby button to switch on the projector.
13 Reset the lamp life time (see 'Resetting the lamplife time').
14 Dispose of the old lamp in special chemical disposal bins.
Resetting the lamplife time


1 Press Menu.
- The menu bar appears on the screen.
2 Use Cursor Control to select Lamp counter in the 'Set up' menu.

4 Press OK for 10 seconds to reset the lamp counter.
5 If required, select another item you wish to adjust or press Menu to exit.
7. Troubleshooting

If a fault occurs, first check the points listed below before taking the projector for repair. If you are unable to remedy a problem by following these hints, consult your dealer or service organisation.
Warning
Under no circumstances should you try to repair the projector yourself as this could invalidate the guarantee.
Read as follows
Problem
- Possible cause
- Solution
Image is not or incorrectly displayed
General
- Mains lead is not correctly connected.
- Correctly connect mains lead.
- The filter holder is not installed correctly or is damaged.
- Install the filter holder correctly (see 'Cleaning the dust filter' under 'Maintenance').
- Lamp holder cover is not closed correctly or the lamp holder is damaged.
- Close the cover correctly (see 'Lamp replacement' under 'Maintenance').
\- Signal cable not correctly connected.
\- Connect signal cable correctly.
- The projector is in Off position.
- Press ⏻ On-Standby to switch on the projector.
- A/V Mute active.
- Cancel A/V Mute.
- Projector still uses settings of a previous detected source on the input.
- Reset all projector settings in the 'Set up' menu ('Factory settings').
Note
Please note that all other projector settings will be reset as well.
In Component Video mode
\- Keystoneing is applied on a high resolution component signal.
\- Decrease keystoning until the image is correctly displayed. For this use the Keystone buttons on the remote control or the 'Keystone' option in the 'Set up' menu.
In Data mode
- Input resolution is too high (and keystoning is applied).
- If you wish to keep the keystone correction, decrease the input resolution until the image is correctly displayed. For this, refer to the User Guide or support information of the computer.
- If you wish to keep the input resolution as it is, decrease keystoning until the image is correctly displayed. For this, use the Keystone buttons on the remote control or the 'Keystone' option in the 'Set up' menu.
- Input resolution is too high (and no keystoning is applied).
- Decrease the input resolution until the image is correctly displayed. For this, refer to the User Guide or support information of the computer.
In case of YPbPr connection
- 'YPbPr' is not selected in the menu and 'Auto Source' is activated. In this case 'Auto Source' will not recognize 'YPbPr'.
- Select 'YPbPr' as projection source in the 'Set up' menu ('Auto Component Selection' sub menu).
Philips Home Cinema Projector
39
English User guide LC 6281 / LC 6285
7. Troubleshooting
In case of RGsogB (Scart) connection
- 'RGsogB' is not selected in the menu and 'Auto Source' is activated. In this case 'Auto Source' will not recognize 'RGsogB'.
- Select 'RGsogB' as projection source in the 'Set up' menu ('Auto Component Selection' sub menu).
Poor colour
Note
- Adjust 'Brightness', 'Contrast', 'Tint' or 'Hue' (see 'Picture adjustment' under 'Operation' - 'On Screen Display Menu').
- Reset all projector settings in the 'Set up' menu ('Factory reset'). Please note that all other projector settings will be reset as well.
In case of YPbPr or RGsogB (Scart) connection
\- Wrong component source selected in the menu:YPbPr i.s.o. RGsogB or vice versa.
\- Check what source has been connected ('YPbPr' or 'RGsogB') and select this source the 'Set up' menu ('Auto Component Selection' sub menu).
Image is blurred
\- Image is not focused.
\- Adjust focus ring.
\- Distance between projector and screen is not correct.
\- Adjust the distance between the projector and the screen. See table on page 10.
\- Signal cable is not correctly connected.
\- Connect signal cable correctly.
Picture rolls
\- Signal cable is not correctly connected.
\- Connect signal cable correctly.
No sound
— Audio cable is not correctly connected.
\- Connect audio cable correctly.
— Volume is not adjusted properly.
\- Adjust volume.
\- (A/V-)Mute active.
\- Cancel (A/V-)Mute.
The projector does not react to commands from the remote control
\- Distance is too great.
\- Reduce distance.
\- Batteries are exhausted.
\- Replace batteries (see 'Inserting the batteries in the remote control').
\- IR sensor is obstructed.
\- Remove obstacle.
7. Troubleshooting
Indicators
Standby/Remote control indicator (ring around Standby On button)
- red: Power/Standby mode.
- green: operation mode.
– green blinking (slow): warning up.
- red blinking (slow): cooling down.
- Do not switch the projector off; it will restart the lamp automatically within a few seconds.
- red/yellow blinking (slow) for 1 second: signal from remote control received in Power/Standby mode;
- green/yellow blinking (fast) for 1 second: signal from remote control received in operation mode.
Error indicator
- red: lamp error
- red blinking (fast): temperature error
No reaction when pressing keys on local keyboard or remote control
\- Child lock active.
\- Press Childlock on the remote control to enter the menu and set Childlock to Off. For LC6285 Child lock can also be disabled by pressing OK on the remote control or on the projector for 10 seconds.
- In case of green/red colored picture, when a compact signal is provided, select correct input signal (RGBsync or YPbPr or RGsogB).
Green/red colored picture
- Component signal is provided.
- Select correct input signal (RGBsync or YPbPr or RGsogB).
The Philips LC 6281 and LC 6285 projectors use three LCD (Liquid Crystal Display) panels. These panels contain a total of 1,200,000 pixels. As with any equipment, certain tolerances apply to the performance specification of the product. Philips' specifications for defective pixels is very severe. Only one bright blue pixel is allowed. This pixel will not affect the overall picture quality or the life expectancy of the projector.
Philips Home Cinema Projector
English User guide LC 6281 / LC 6285
Philips Home Cinema Projector LC 6281 / LC 6285

General information
Video input
The projector accepts the input signal of all major video formats: Video (CVBS) S-Video (Y/C): NTSC 3.58, 4.43, PAL B, G, D, H, I, N, M and SECAM B, D, G, K, K1, L. Component video:YPbPr, RGBsync, RGsogB. EDTV/HDTV: 480p, 575p, 720p/(50/60), 1035i/(30), 1080i/(25/30/AUS), 1080p/(30). The projector will recognize these standards and adapt to them automatically. With the 'Picture Format' feature you can select one of six picture format options: wide screen, super zoom 4:3, 4:3, movie expand 14:9, movie expand 16:9, 16:9 subtitles.Multimedia input
The Multimedia input is suitable for both Apple Macintosh computers (Power Book and Power Mac) as well as for IBM compatible PCs. The projector is Microsoft (R), Windows (R) 95/98/ME/2000/XP compatible and accepts input signals from all computers that meet following specifications: LC6285 • Multi scan up to SXGA/60 Hz • H-sync (Horizontal scan rate): 30-72 kHz • V-sync (Vertical refresh rate): 56-85 Hz • Bandwidth: 80 MHz • Display Data Channel DDC: 1/2B LC6281 • Multi scan up to XGA/75 Hz • H-sync (Horizontal scan rate): 30-72 kHz • V-sync (Vertical refresh rate): 56-85 Hz • Bandwidth: 110 MHz • Display Data Channel DDC: 1/2B The data output of IBM compatible PCs can be connected directly to the projector using standard data cables. When connecting the projector to a Macintosh computer equipped with a 2 row, 15 pin connector a VGA/MAC adaptor (available at your PC store) is required. If your computer is equipped with a 3 row connector no adaptor is needed.CAUTION
Always switch off projector and external equipment before making any connections.4. Installation
Connecting to video equipment >
Video (CVBS)
1 Connect the Video (out) socket of a VCR, DVD player, video camera or TV to the Video (in) socket of the projector. For this, use the video/audio connection cable (1a) supplied. 2 Connect the Audio out L/R sockets of the VCR, DVD player, video camera or TV to the Audio (in) L/R sockets of the projector. For this, use the audio/video connection cable supplied (1b).S-Video
1 Connect the S-Video (out) socket of a S-Video recorder, DVD player, video camera or TV to the S-Video (in) socket of the projector. For this, use the S-Video connection cable supplied (2). 2 Connect the Audio out L/R sockets of the S-Video recorder, DVD player, video camera or TV to the Audio (in) L/R sockets of the projector. For this, use the audio/video connection cable supplied (1a).Scart connection
 Scart adapter (not for USA version)Video (CVBS)
1 Connect the Scart/RCA Audio Video adapter supplied to the Scart connector of the VCR, DVD player, video camera or TV. 2 Plug the video/audio connection cable supplied into both the adapter and the Video and Audio (in) L/R sockets of the projector.  Scart adapter (not for USA version)S-Video
3 Plug the S-Video connection cable supplied into the VCR and the S-Video socket of the projector.4. Installation
Connecting to video equipment >
Component/HDTV
YPbPr/RGsogB
- Connect the Component in sockets of the projector (Pr/R, Pb/B,Y/G) to the appropriate output sockets of your Component- or HDTV-video equipment (YPbPr/YCbCr/RGB). For this, use the audio/video connection cable supplied (1). - If required you can connect the Audio out L/R sockets of the Component- or HDTV-video equipment to the Audio (in) L/R sockets of the projector. For this, use an optional audio connection cable (2). – Audio information from the Component- or HDTV-video equipment will be played via the projector speaker.When YPbPr connection has been made:
1 Use Cursor Control to select 'Source' in the 'Set up' menu. See 'On Screen Display Menu' - 'General explanation' on how to navigate through the menu. 2 Press Menu. - The menu bar appears on the screen. The 'Picture' item is highlighted.    Philips Home Cinema Projector 3 Use Cursor Control left to select 'Set up'. 4 Use Cursor Control down to select 'Auto Component Selection'. 5 Use Cursor Control right to select 'YPbPr'. 6 Confirm with OK.4. Installation
Connecting to video equipment >
Scart connection
 RGBS
1 Connect the Scart/RCA Component Video adapter supplied (1) to the Scart connector of your Component- or HDTV-video equipment. 2 Connect the Component in sockets of the projector to the R, G, B and Y outputs of the adapter. For this, use the Component cable supplied (2). - If required you can connect the Audio out L/R sockets of the Component- or HDTV-video equipment to the Audio (in) L/R sockets of the projector. For this, use an optional audio connection cable (3). – Audio information from the Component- or HDTV-video equipment will be played via the projector speaker. 3 Press Menu. - The menu bar appears on the screen. The 'Picture' item is highlighted. 3 Use Cursor Control left to select 'Set up'. 4 Use Cursor Control down to select 'Auto Component Selection'.4. Installation Connecting to video equipment <
5 Use Cursor Control right to select 'YPbPr' or 'RGsogB'.  6 Confirm with OK. Note The Scart/RCA Component Video adapter and the Component cable are only supplied with the LC6285 projector. For LC6281 an optional cable and adapter have to be used.4. Installation
Connecting to a computer <
PC/Macintosh
\- Connect the Data (out) socket of the computer to the Multimedia socket of the projector and secure the plugs by tightening the thumb screws. For this, use the VGA cable supplied (1). The data output of IBM compatible PCs can be connected directly to the projector using standard data cables. When connecting the projector to a Macintosh computer equipped with a 2 row, 15 pin connector a VGA/MAC adaptor (available at your PC store) is required. If your computer is equipped with a 3 row connector no adaptor is needed.5. Operation
Preparation >
General   Note  Messages    1 Press the ⏻ Standby button to switch on the projector. – The Standby indicator starts blinking green. When the projection lamp is on, the Standby indicator lights up green and the start-up screen (when enabled) appears for several seconds. 2 Select the required source (Multimedia, YPbPr, RGBsync, RGsogB, S-Video, Video) by pressing the Source button (LC 6285) or the appropriate button on the remote control (LC 6281). – The sources that can be selected are shown on the screen. - The required source can also be selected via the 'Source' option in the 'Set up' menu of the On Screen Display (OSD) menu. When only one input source is connected, this source will automatically be selected (Auto Source). When more input sources are connected, the source with the highets priority will be selected (Multimedia, YPbPr or RGsogB, RGBsync, S-Video, Video). Source selection can be changed in the Set up menu. 3 Switch on the computer or start video playback. - A feedback message appears on the screen, indicating the selected source.Direct key feedback
Direct key feedback is given when settings/adjustments are made directly via the remote control or local keyboard. Feedback is given by means of a slider, a simple dialog or a list of options. Sliders are used when setting e.g.: - volume; - picture size; - vertical keystone; - brightness; - contrast; colour tracking. Dialogs are used when setting e.g.: \- horizontal/vertical keystone; \- mirror; \- child lock. Lists are used when setting e.g.: \- smart picture; \- picture format; \- source.5. Operation Preparation <
Feedback messages
Feedback messages are displayed in the top right corner of the screen. They are displayed e.g. when: \- a signal comes up or goes down; \- an input source is changed; – the PIP input source is changed; \- the Freeze, Mute or A/V Mute function is activated; \- the Child lock, Cristal clear or Zoom function is (de-)activated; \- the local keyboard or remote control is used when Child lock is activated; \- the Info button is pressed.   Error messages
 are displayed when there is a serious technical problem. They can occur at any time during operation and need immediate action. Error messages are displayed in the centre of the screen, indicating the problem and its possible solution. They are displayed e.g. when: \- a temperature error occurs. E.g. the internal temperature is too high. Message will appear together with red blinking Error indicator. \- a fan error occurs. E.g. one of the fans has a failure; \- resolution or refresh rate is too high. Data source cannot be shown.   Warning messages
 are displayed in the centre of the screen. They are displayed e.g. when: – lamplife time has almost expired; – lamplife time has expired.  5. Operation
On Screen Display Menu >
 All video and Multimedia adjustments and settings (except Volume, Mute and A/V Mute) are done via On Screen Displays and with help of Menu, OK and Cursor Control on the projector or the remote control. The projector is set to standard specifications at the factory. However, you can adjust these specifications to suit your own preferences. The projector menu screens allow you to adjust the various projector settings (for both Multimedia and Video). For explanation and operation see next pages. VIDEO/S-VIDEO/COMPONENT MODE      5. Operation
On Screen Display Menu >
Menu tree   MULTIMEDIA MODE   5. Operation
On Screen Display Menu >
Menu tree GENERAL ADJUSTMENTS/SETTINGS Main menu Sub menu Setting  5. Operation On Screen Display Menu
 General explanation       1 Press Menu. \- The menu bar appears on the screen. The 'Picture' item is highlighted. Depending on the selected source (Multimedia, YPbPr, RGBsync, RGsogB, S-Video, Video) some options of the submenu may be greyed out. This indicates that these functions: \- are not available in a certain mode, – have no function for the selected source. For example: \- Cristal clear under menu 'Picture' when Data has been selected as source. Hue under menu 'Picture' when signaltype is not NTSC. 2 Use Cursor Control left and/or right to move the cursor to any other item in the menu bar. 3 Select the sub menu item to be adjusted using Cursor Control up and/or down. - When more items are available than can be shown in one screen, this will be indicated by 8 at the bottom of the list. Move the cursor down to go to the next list of items. Move the cursor up to go back to the first list. - When a selection list in a submenu contains more items than can be shown in one screen, this will be indicated by ⚙t the bottom of the list. Move the cursor down to go to the next list of items. Move the cursor up to go back to the first list. 4 Adjustments are generally made by setting an on screen slider to the required value. For this use Cursor Control left/right. Confirm the adjustment by pressing OK. Settings are generally made by selecting the required item from a list of options. For this use Cursor Control up/down. Confirm the setting by pressing OK. 5 Select the next item to be adjusted in the sub menu and adjust as described above. 6 Press Menu to close the On Screen Menu Display.5. Operation On Screen Display Menu
 Video/S-Video/Component adjustments    For Video/S-Video/Component signal input, the following 'Picture' and 'Features' adjustments can be made:Picture adjustments
\- Press Menu and select 'Picture' in the menu bar. The following 'Picture' adjustments can now be made, following the instructions under 'General explanation' and the screen. - Brightness to adjust the brightness of the displayed picture; - Contrast to adjust the overall contrast intensity; Colour to adjust the colour saturation of the projected image; -Tint to adjusts the overall colour impression from warm to cool; \- Smart picture to select specific picture characteristics for different input sources: Movie, Nature, Sports, Cartoon, Game and Internet; — CristalClear (LC6285 Only) CrystalClear picture enhancement demo.Temporarily undoes all Picture settings to compare picture performance with and without Picture settings; \- Sharpness to control the contour impression of the picture; \- Hue (only for NTSC) to adjust the tint of the projected image; \- Picture Format to select one of six picture format options (wide screen, super zoom 4:3, 4:3, movie expand 14:9, movie expand 16:9, 16:9 subtitles).Features
\- Press Menu and select 'Features' in the menu bar. The following 'Features' can now be selected, following the instructions under 'General explanation' and the screen. — Picture In Picture (LC 6285 only) to enable the projection of second picture in the currently projected picture. \- PIP format (LC 6285 only) to select the size of the PIP window: Small, Medium or Large; \- PIP location (LC 6285 only) to select the location of the PIP window in the main screen; \- Start-up screen to display (Philips) or suppresses (Off) the default Philips start-up screen or your personal startup text (Personal) upon the projector's start up; \- Menu appearance (LC 6285 only) to change the colour of the On Screen Displays; -Zoom to enlarge a part of the picture; \- Freeze to capture a moving picture (still picture); \- Child lock to de-activate all remote and local controls (On). To disable the Childlock function press Childlock on the remote control to enter the menu and set Childlock to Off. For LC6285 Child lock can also be disabled by pressing OK on the remote control or on the projector for 10 seconds. \- Sleep timer to switch off Sleep timer mode or selects the delay time after which the projector automatically switches to Standby.    Philips Home Cinema Projector English User guide LC 6281 / LC 62855. Operation On Screen Display Menu
 Multimedia adjustments     For Multimedia signal input, the following 'Picture' and 'Features' adjustments can be made.Picture adjustments
\- Press Menu and select 'Picture' in the menu bar. The following 'Picture' adjustments can now be made, following the instructions under 'General explanation' and the screen. \- Brightness to adjust brightness of the displayed picture; \- Contrast to adjust the overall contrast intensity; \- Tint to adjust the overall colour impression from warm to cool; \- Smart picture to select specific picture characteristics for differnet input sources: Movie, Nature, Sports, Cartoon, Game and Internet; \- Sharpness to control the contour impression of the picture;Features
\- Press Menu and select 'Features' in the menu bar. The following 'Features' can now be selected, following the instructions under 'General explanation' and the screen. \- Picture In Picture (LC 6285 only) to enable the projection of second picture in the currently projected picture. \- PIP format (LC 6285 only) to select the size of the PIP window: Small, Medium or Large; \- PIP location (LC 6285 only) to select the location of the PIP window in the main screen; \- Start-up screen to display (Philips) or suppress (Off) the default Philips start-up screen or your personal startup text (Personal) upon the projector's start up; \- Menu appearance (LC 6285 only) to change the colour of the On Screen Displays; \- Zoom to enlarge a part of the picture; \- Freeze to capture a moving picture (still picture); \- Child lock to de-activate all remote and local controls (On). You can also select the time after which Child lock should become active (Lock after). To disable the Childlock function press Childlock on the remote control to enter the menu and set Childlock to Off. For LC6285 Child lock can also be disabled by pressing OK on the remote control or on the projector for 10 seconds. \- Sleep timer to switch off Sleep timer mode or to select the delay time after which the projector automatically switches to Standby.   5. Operation On Screen Display Menu >
General adjustments/settings     Set up adjustments
The projector is equipped with the following functions to optimize its use and handling: \- Press Menu and select 'Set up' in the menu bar. The following settings/adjustments can now be made for both Multimedia, Component and Video/S-video input, following the instructions under 'General explanation' and the screen: - Language to select the required menu language; - Picture size to reduce/enlarge the size of the projected picture; \- Keystone to correct picture distortion of the vertical and horizontal keystone type by internal scaling. Horizontal keystone correction is only available on LC 6285. \- Source to select the current projection source: Multimedia, YPbPr or RGsogB, RGBsync, S-Video, Video. When Auto is selected the source with the highest priority will automatically be selected (Multimedia, YPbPr or RGsogB, RGBsync, S-Video, Video). When only one input source is connected, this will automatically be selected. \- SmartSave to switch off SmartSave mode or select the delay time after which the projector automatically switches to Standby. \- Minor to mirror the picture for use of the projector in various positions with respect to the user(s) and the projection screen; \- Feedback to suppress OSD feedback messages. Warning or error messages however are never suppressed; \- Lamp counter to show the operating time of the lamp, which can be reset after a new lamp has been installed; \- System information the System Information sub menu contains an overview of the most relevant information on the hardware and software configuration; \- Factory settings to reset all user settings to the default factory settings; \- Auto Component Selection to select between YPbPr and RGsogB as component input source.5. Operation
On Screen Display Menu >
Examples    The following settings/adjustments follow a slightly different procedure or may need some further explanation.Zoom/Magnification
'Zoom' is used to enlarge a part of the picture. 1 Press Menu. – The menu bar appears on the screen. 2 Use Cursor Control to select 'Zoom' in the Features menu. 3 Use the Cursor Control to adjust the Zoom factor in the 'Magnification' slider (4x, 9x or 16x). 4 Press OK to confirm and exit the menu. 5 Use Cursor Control to select another section of the enlarged area ('Panning').Note
Pressing the Zoom button on the remote control, will immediately bring up the Magnification slider (step 3). Pressing the Zoom button 4 times in succession will switch off the Zoom function.Picture in picture (PIP) - LC 6285 only
'PIP' enables projection of a second picture in the currently projected picture. 1 Press Menu. - The menu bar appears on the screen. 2 Use Cursor Control to select 'PIP' in the Features menu. 3 Use Cursor Control to select 'On'.  — The PIP window will appear on the screen. 4 Use PIP source on the remote control to select the source from which you wish to project the picture in the PIP window. If you select 'Auto' the system will check if a source is available. If a source is found then its picture will be projected. \- The picture of the selected source will be projected in the PIP window. 5 Press Menu and select 'Features' in the menu bar. 6 Use Cursor Control to move to 'PIP format' and select the required PIP window size ('Small', 'Medium' or 'Large').  7 Use Cursor Control to move the cursor to 'PIP location' and press OK. 8 Use Cursor Control to select the required position of the PIP window and confirm with OK.  Philips Home Cinema Projector English User guide LC 6281 / LC 62855. Operation
On Screen Display Menu >
\- To exchange the pictures, projected on the main screen and in the PIP window press Swap Picture source on the remote control.Notes
- Pressing the PIP button on the remote control, will immediately bring up the PIP window (step 3). Pressing the PIP button twice in succession will switch off the PIP function. - High resolution pictures from data sources can only be projected in the PIP formats Medium or Large. The Small option in the menu will therefore be greyed out.Picture Format
'Picture Format' is used to select one of six picture format options (wide screen, super zoom 4:3, 4:3, movie expand 14:9, movie expand 16:9, 16:9 subtitles). For video signal input the last selected picture format (before the projector was switched off) will be selected again. 1 Press Menu. - The menu bar appears on the screen. 2 Use Cursor Control to select 'Picture format' in the Picture menu. 3 Use Cursor Control to select the required picture format (wide screen, super zoom 4:3, 4:3, movie expand 14:9, movie expand 16:9, 16:9 subtitles) and confirm by pressing OK. - The picture format has now been set. Notes
- Pressing the Picture Format button on the remote control, will immediately bring up the Picture Format selection window (step 2). Pressing the Picture Format button again will select the next picture format. — Due to the scaling of the image when the picture format is changed, it might be possible that a part of the actual image is missing at the top or the bottom of the screen. With Cursor Control you can adjust the position of the projected image upwards or downwards.Personal Start-up text
1 Press Menu. – The menu bar appears on the screen. 2 Use Cursor Control to select Start-up screen in the 'Features' menu. 3 Use Cursor Control to select 'Personal'.  - You can now enter your personal Start-up text with a maximum of 15 characters. Use Cursor Control Up/Down to select characters. Use Cursor Control Left/Right to move to a previous/next position. 4 Confirm with OK. 5 Press OK again to return to the main menu..6. Maintenance
 Cleaning Caution  Switch off and disconnect the projector before cleaning. 1 Press the ⏻ On-StaStandby button twice to switch off the projector. – The Standby indicator starts blinking red. 2 Wait until the cooling fan has stopped (about 3 minutes after the projector has been put in Standby) and disconnect the mains lead and all other cables.Cleaning the cabinet
- When the cabinet is dusty, clean it by gently wiping with a soft cloth. - A chamois leather slightly moistened with water is sufficient for cleaning the housing. - Do not use cleaning agents as they may harm the housing.Cleaning the lens
- When the lens is dirty or dusty, first blow the dust off and then gently wipe with a soft brush or lens cleaning paper. Never touch the lens with your fingers. - The lens is likely to become mouldy if left dirty.Cleaning the dust filter
Make sure to clean the dust filter regularly.  1 Switch off the projector and wait until the cooling fan has stopped before disconnecting the projector. 2 Lift the Filter tab (A) at the rear of the projector and remove the filter holder (B) from the projector.  3 Press clamp C, open the holder and remove the filter. 4 While firmly holding the filter, gently remove any accumulated dust, from the dusty side, with a vacuum cleaner. 5 Press clamp C, put the filter back in place and release clamp C. Firmly press the filter edges in place. 6 Close the filter holder.  7 Insert the filter holder into the projector until it clicks in position.. Notes We advise you to clean the filter every 100 hours. Operating the projector without filter or with a tom or damaged filter may seriously damage the projector. When the filter is damaged replace it with a filter of the same type (12 nc: 3122 434 02190). Don't switch on the projector again unless the filter holder is installed correctly.6. Maintenance
Lamp
 When operation time reaches the last 100 hours of the average lamplife, the message 'Warning: lamplife has almost expired' will be displayed on the screen, each time the projector is switched on.  The lamplife remaining can be checked using the OSD menu. 1 Press Menu. - The menu bar appears on the screen. 2 Use Cursor Control to select Lamp counter in the 'Set up' menu.  \- The used lamplife hours are displayed.  \- When the lamplife has expired, the message "Warning: lamplife has expired" is displayed on the screen.Lamp Replacement
 1 Switch off the projector and wait until the lamp has cooled down (about 5 minutes) before disconnecting the projector. Remove the mains lead from both projector and wall socket. The mains lead must be disconnected from the projector otherwise the lamp door cannot be removed. 2 Tum the projector over. Never place the projector on the side where the connections are located! 3 Remove the lamp door. - When tab A is pressed the mains inlet socket will be partly closed. The lamp door therefore cannot be removed if the mains lead is not disconnected from the projector. 4 Read the caution and warning labels on the lamp holder.  5 Unscrew screws B. 6 Grasp the lamp holder handle and carefully pull the lamp holder out of the projector. - Do not tilt. If the inner tube is broken glass particles may fall out. - Keep lamp holder opening to your right. Do not touch lamp or point lamp holder opening at anyone. 7 Carefully remove the new lamp housing from its package. • Always use the same type of lamp: LCA3122/00 (150 W), 12nc: 8670 931 22009. - Do not touch lamp or point lamp housing opening at anyone. - Do not drop, as the impact may cause the lamp to break. 8 Place the lamp holder in the guiding slots and insert into the lamp compartment.  Philips Home Cinema Projector English User guide LC 6281 / LC 62856. Maintenance
Lamp replacement  9 Tighten screws B again.  10 Put the lamp door back in place. 11 Insert the mains lead into both the projector Mains inlet socket and the wall socket. 12 Press the Standby button to switch on the projector. 13 Reset the lamp life time (see 'Resetting the lamplife time'). 14 Dispose of the old lamp in special chemical disposal bins. Resetting the lamplife time   1 Press Menu. - The menu bar appears on the screen. 2 Use Cursor Control to select Lamp counter in the 'Set up' menu.  4 Press OK for 10 seconds to reset the lamp counter. 5 If required, select another item you wish to adjust or press Menu to exit.7. Troubleshooting
 If a fault occurs, first check the points listed below before taking the projector for repair. If you are unable to remedy a problem by following these hints, consult your dealer or service organisation.Warning
Under no circumstances should you try to repair the projector yourself as this could invalidate the guarantee.Read as follows
Problem
- Possible cause - SolutionImage is not or incorrectly displayed
General
- Mains lead is not correctly connected. - Correctly connect mains lead. - The filter holder is not installed correctly or is damaged. - Install the filter holder correctly (see 'Cleaning the dust filter' under 'Maintenance'). - Lamp holder cover is not closed correctly or the lamp holder is damaged. - Close the cover correctly (see 'Lamp replacement' under 'Maintenance'). \- Signal cable not correctly connected. \- Connect signal cable correctly. - The projector is in Off position. - Press ⏻ On-Standby to switch on the projector. - A/V Mute active. - Cancel A/V Mute. - Projector still uses settings of a previous detected source on the input. - Reset all projector settings in the 'Set up' menu ('Factory settings').Note
Please note that all other projector settings will be reset as well.In Component Video mode
\- Keystoneing is applied on a high resolution component signal. \- Decrease keystoning until the image is correctly displayed. For this use the Keystone buttons on the remote control or the 'Keystone' option in the 'Set up' menu.In Data mode
- Input resolution is too high (and keystoning is applied). - If you wish to keep the keystone correction, decrease the input resolution until the image is correctly displayed. For this, refer to the User Guide or support information of the computer. - If you wish to keep the input resolution as it is, decrease keystoning until the image is correctly displayed. For this, use the Keystone buttons on the remote control or the 'Keystone' option in the 'Set up' menu. - Input resolution is too high (and no keystoning is applied). - Decrease the input resolution until the image is correctly displayed. For this, refer to the User Guide or support information of the computer.In case of YPbPr connection
- 'YPbPr' is not selected in the menu and 'Auto Source' is activated. In this case 'Auto Source' will not recognize 'YPbPr'. - Select 'YPbPr' as projection source in the 'Set up' menu ('Auto Component Selection' sub menu). Philips Home Cinema Projector 39 English User guide LC 6281 / LC 62857. Troubleshooting
In case of RGsogB (Scart) connection
- 'RGsogB' is not selected in the menu and 'Auto Source' is activated. In this case 'Auto Source' will not recognize 'RGsogB'. - Select 'RGsogB' as projection source in the 'Set up' menu ('Auto Component Selection' sub menu).Poor colour
Note
- Adjust 'Brightness', 'Contrast', 'Tint' or 'Hue' (see 'Picture adjustment' under 'Operation' - 'On Screen Display Menu'). - Reset all projector settings in the 'Set up' menu ('Factory reset'). Please note that all other projector settings will be reset as well.In case of YPbPr or RGsogB (Scart) connection
\- Wrong component source selected in the menu:YPbPr i.s.o. RGsogB or vice versa. \- Check what source has been connected ('YPbPr' or 'RGsogB') and select this source the 'Set up' menu ('Auto Component Selection' sub menu).Image is blurred
\- Image is not focused. \- Adjust focus ring. \- Distance between projector and screen is not correct. \- Adjust the distance between the projector and the screen. See table on page 10. \- Signal cable is not correctly connected. \- Connect signal cable correctly.Picture rolls
\- Signal cable is not correctly connected. \- Connect signal cable correctly.No sound
— Audio cable is not correctly connected. \- Connect audio cable correctly. — Volume is not adjusted properly. \- Adjust volume. \- (A/V-)Mute active. \- Cancel (A/V-)Mute.The projector does not react to commands from the remote control
\- Distance is too great. \- Reduce distance. \- Batteries are exhausted. \- Replace batteries (see 'Inserting the batteries in the remote control'). \- IR sensor is obstructed. \- Remove obstacle.7. Troubleshooting
Indicators
Standby/Remote control indicator (ring around Standby On button) - red: Power/Standby mode. - green: operation mode. – green blinking (slow): warning up. - red blinking (slow): cooling down. - Do not switch the projector off; it will restart the lamp automatically within a few seconds. - red/yellow blinking (slow) for 1 second: signal from remote control received in Power/Standby mode; - green/yellow blinking (fast) for 1 second: signal from remote control received in operation mode.Error indicator
- red: lamp error - red blinking (fast): temperature errorNo reaction when pressing keys on local keyboard or remote control
\- Child lock active. \- Press Childlock on the remote control to enter the menu and set Childlock to Off. For LC6285 Child lock can also be disabled by pressing OK on the remote control or on the projector for 10 seconds. - In case of green/red colored picture, when a compact signal is provided, select correct input signal (RGBsync or YPbPr or RGsogB).Green/red colored picture
- Component signal is provided. - Select correct input signal (RGBsync or YPbPr or RGsogB). The Philips LC 6281 and LC 6285 projectors use three LCD (Liquid Crystal Display) panels. These panels contain a total of 1,200,000 pixels. As with any equipment, certain tolerances apply to the performance specification of the product. Philips' specifications for defective pixels is very severe. Only one bright blue pixel is allowed. This pixel will not affect the overall picture quality or the life expectancy of the projector. Philips Home Cinema Projector English User guide LC 6281 / LC 6285Philips Home Cinema Projector LC 6281 / LC 6285
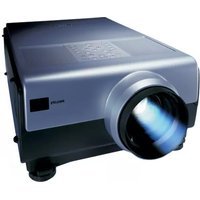
- PHILIPS HOME CINEMA PROJECTOR LC 6281 / LC
- INDEX
- THINGS YOU SHOULD KNOW
- IMPORTANT SAFEGUARDS
- INTRODUCTION
- FUNCTIONAL OVERVIEW
- SET UP
- INSTALLATION
- OPERATION
- MAINTENANCE
- TROUBLESHOOTING
- FCC WARNING
- IMPORTANT INFORMATION
- IMPORTANT NOTE FOR USERS IN THE U.S.A
- CAUTION: PLEASE READ ALL OF THESE INSTRUCTIONS BEFORE YOU OPERATE YOUR PROJECTOR. SAVE THESE INSTRUCTIONS FOR FUTURE REFERENCE
- PACKAGING CONTENTS
- OPTIONAL ACCESSORIES
- SERVICE ACCESSORIES
- CONTROLS
- ON / STANDBY ① STANDBY/REMOTE CONTROL INDICATOR
- ON LC6285 ONLY
- FUNCTIONAL OVERVIEW CONTROLS
- CURSOR CONTROL ⑫
- FUNCTIONAL OVERVIEW REMOTE CONTROL
- ONLY ON LC 6281 REMOTE CONTROL
- ONLY ON LC 6285 REMOTE CONTROL
- CONNECTIONS
- COMPONENT IN ① (PR/R, PB/B, Y/G, S)
- VIDEO SOURCE CONNECTIONS
- S-VIDEO ②
- VIDEO ③
- AUDIO L/R ④
- DATA SOURCE CONNECTION
- MULTIMEDIA ⑤
- FILTER ⑥
- GENERAL
- LAMP COMPARTMENT ⑦
- MAINS INLET SOCKET ⑧
- LOCK SLIT ⑨
- HORIZONTAL ADJUSTER ⑩
- POSITIONING THE PROJECTOR AND SCREEN
- SWITCHING ON THE PROJECTOR
- WARNING
- TO RAISE
- TO LOWER
- VERTICAL KEYSTONE CORRECTION ON LC
- VERTICAL AND HORIZONTAL KEYSTONE CORRECTION ON LC
- MOVING/TRANSPORTING THE PROJECTOR
- PREPARATION
- INSERTING THE BATTERIES IN THE REMOTE CONTROL
- VIDEO INPUT
- MULTIMEDIA INPUT
- CAUTION
- CONNECTING TO VIDEO EQUIPMENT
- VIDEO (CVBS)
- S-VIDEO
- SCART CONNECTION
- COMPONENT/HDTV
- YPBPR/RGSOGB
- WHEN YPBPR CONNECTION HAS BEEN MADE
- RGBS
- INSTALLATION CONNECTING TO VIDEO EQUIPMENT
- CONNECTING TO A COMPUTER
- PC/MACINTOSH
- DIRECT KEY FEEDBACK
- OPERATION PREPARATION
- FEEDBACK MESSAGES
- ERROR MESSAGES
- WARNING MESSAGES
- ON SCREEN DISPLAY MENU
- OPERATION ON SCREEN DISPLAY MENU
- PICTURE ADJUSTMENTS
- FEATURES
- SET UP ADJUSTMENTS
- ZOOM/MAGNIFICATION
- NOTE
- PICTURE IN PICTURE (PIP) - LC 6285 ONLY
- NOTES
- PICTURE FORMAT
- PERSONAL START-UP TEXT
- CLEANING THE CABINET
- CLEANING THE LENS
- CLEANING THE DUST FILTER
- LAMP
- LAMP REPLACEMENT
- READ AS FOLLOWS
- PROBLEM
- IMAGE IS NOT OR INCORRECTLY DISPLAYED
- IN COMPONENT VIDEO MODE
- IN DATA MODE
- IN CASE OF YPBPR CONNECTION
- IN CASE OF RGSOGB (SCART) CONNECTION
- POOR COLOUR
- IN CASE OF YPBPR OR RGSOGB (SCART) CONNECTION
- IMAGE IS BLURRED
- PICTURE ROLLS
- NO SOUND
- THE PROJECTOR DOES NOT REACT TO COMMANDS FROM THE REMOTE CONTROL
- INDICATORS
- ERROR INDICATOR
- NO REACTION WHEN PRESSING KEYS ON LOCAL KEYBOARD OR REMOTE CONTROL
- GREEN/RED COLORED PICTURE
Brand : PHILIPS
Model : bSure SV1
Category : Projector