ECF01PBEU - Coffee maker SMEG - Free user manual and instructions
Find the device manual for free ECF01PBEU SMEG in PDF.
User questions about ECF01PBEU SMEG
0 question about this device. Answer the ones you know or ask your own.
Ask a new question about this device
Download the instructions for your Coffee maker in PDF format for free! Find your manual ECF01PBEU - SMEG and take your electronic device back in hand. On this page are published all the documents necessary for the use of your device. ECF01PBEU by SMEG.
USER MANUAL ECF01PBEU SMEG
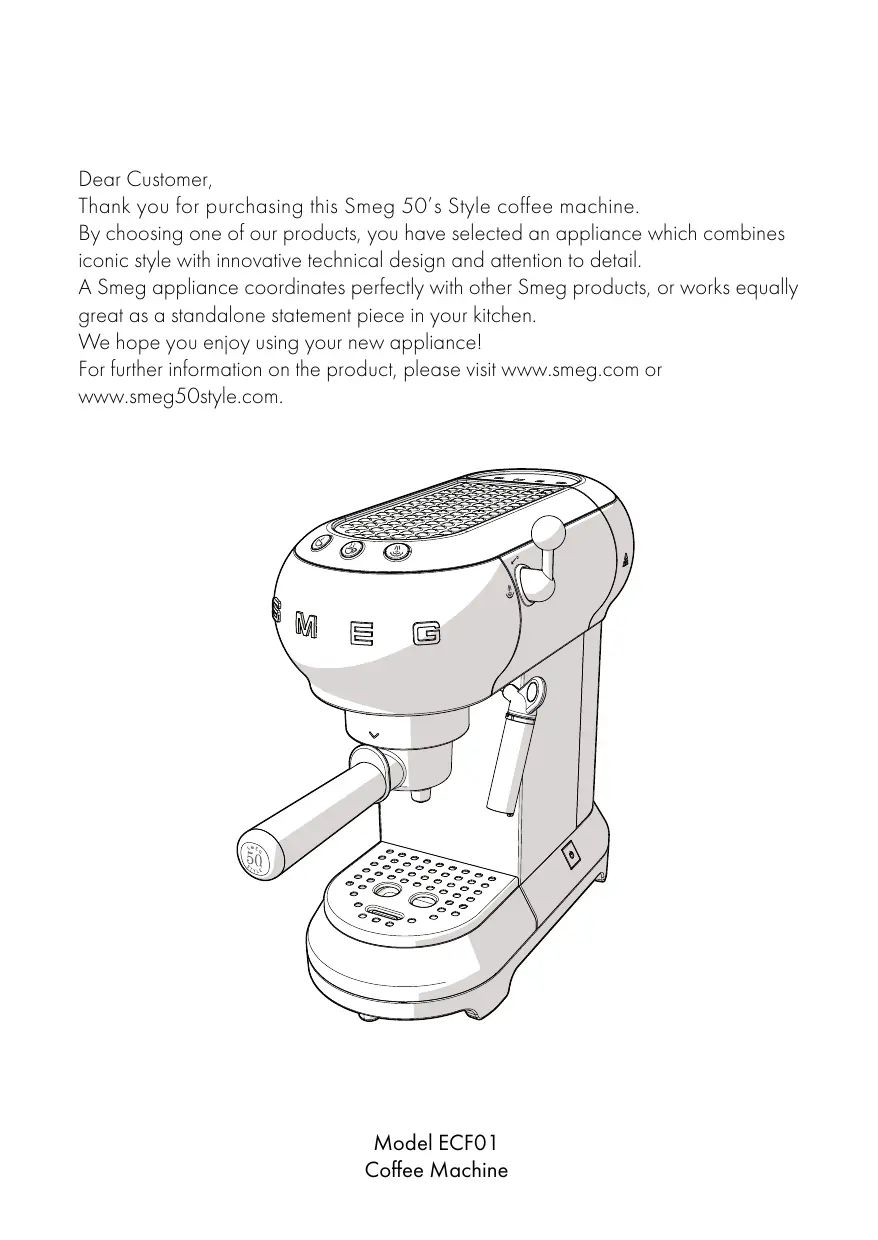
Thank you for purchasing this Smeg 50's Style coffee machine.
By choosing one of our products, you have selected an appliance which combines iconic style with innovative technical design and attention to detail.
A Smeg appliance coordinates perfectly with other Smeg products, or works equally great as a standalone statement piece in your kitchen.
We hope you enjoy using your new appliance!
For further information on the product, please visit www.smeg.com or www.smeg50style.com.

Contents
1 Instructions 26
1.1 Introduction 26
1.2 This user manual 26
1.3 Intended use 26
1.4 General safety instructions 27
1.5 Manufacturer liability 29
1.6 Identification plate 29
1.7 Disposal 29
2 Description 30
2.1 Product description 30
3 Use 31
3.1 Before first use 31
3.2 First use 32
3.3 How to prepare espresso coffee 33
3.4 How to prepare a cappuccino 34
3.5 How to heat water 36
3.6 Accessing the settings menu and changing the settings 36
3.7 How to cool down the boiler 38
4 Cleaning and maintenance 39
4.1 Instructions 39
4.2 Cleaning the body of the coffee machine 39
4.3 Cleaning the coffee machine components 39
4.4 Descaling 41
4.5 What to do if... 42
1 Instructions
1.1 Introduction
Key information for the user:
Instructions

General information on this user manual, on safety and final disposal.
Description

Appliance description
Use

Information on using your appliance.
Cleaning and care

Information for proper cleaning and maintenance of the appliance.

Safety instructions

Information

Advice
1.2 This user manual
This user manual is an integral part of the appliance and must therefore be kept in its entirety and in an accessible place for the whole working life of the appliance.
1.3 Intended use
- Use the appliance only indoors.
- This appliance has been designed specifically for domestic use.
- The appliance can be used to prepare espresso and cappuccino coffee using ground coffee or coffee pods. Every other use is considered improper. Do not use the appliance for anything other than its intended use.
- The appliance is not designed to operate with external timers or with remote-control systems.
- This appliance may not be used by people (including children) of reduced physical, sensory or mental capacity, or without sufficient experience and knowledge, unless they are supervised or instructed by adults who are responsible for their safety.
1.4 General safety instructions
Follow all safety instructions in order to use the appliance safely.
- Read this user manual carefully before using the appliance.
- Switch off the appliance immediately after use.
- Do not leave the coffee machine unattended during use.
- Disconnect the appliance from the power socket as soon as you have finished using it and before cleaning it.
- Do not immerse the appliance, the power cord or the plug in water or any other liquid.
- Do not use the appliance when the power cord or the plug is damaged or when the appliance has been dropped or is damaged in any manner.
- If the power cord is damaged, contact technical support immediately to arrange replacement in order to avoid any possible hazards.
- Do not touch the appliance or its plug with wet hands.
- Prevent the power cord from coming into contact with sharp edges.
- Do not pull on the power cord to unplug the machine.
-
Never position the appliance above or near gas or electric hob burners when they are hot or in use, inside an oven or near other heat sources.
-
Do not position the appliance near sinks or taps.
- Do not try to repair the appliance yourself or without the assistance of a qualified technician.
- In the event of a fault, repairs should only be carried out by a qualified engineer.
- Do not make any modifications to the appliance.
- Never try to put out a fire or flames with water: turn off the appliance and remove the plug from the socket, and smother the flames with a fire blanket or other appropriate cover.
- Disconnect the appliance from the power socket before assembly, disassembly and cleaning, and as soon as you have finished using it.
- This appliance may be used by children from the age of 8 provided they are supervised or instructed on the safe use of the appliance and they understand the associated risks.
- Cleaning and maintenance may be performed by children from the age of 8 as long as they are appropriately supervised.
- Children must never play with the appliance. Keep the appliance out of children's reach.
For this appliance
- Always disconnect the coffee machine from the power socket if it is left unattended and before assembly/disassembly of components or cleaning.
- Unplug the coffee machine before cleaning it and if you notice any fault.
- Let the coffee machine cool down before cleaning.
- Do not use the coffee machine without the tank fitted or if there is no water in the tank.
- Leave at least 3cm of space between the coffee machine and any walls to the rear or side, and 15cm clearance above the coffee machine.
- Danger of burns! The coffee machine generates heat and produces hot water and steam during its operation.
- Danger of burns! Do not touch the cup warmer shelf while the appliance is running.
- Do not use the coffee machine with parts or accessories of other manufacturers.
-
Only use original spare parts. The use of spare parts not approved by the manufacturer could lead to fires, electric shocks or personal injury.
-
Only place the coffee machine on level and dry surfaces.
- Avoid getting the coffee machine wet and do not spray liquids onto it. In the event of contact with liquid, immediately switch off the power at the socket or main breaker and dry the appliance thoroughly: Electric shock hazard!
- Do not use harsh detergents or sharp objects to clean the coffee machine.
1.5 Manufacturer liability
The manufacturer shall not be liable for injuries or property damage caused by:
- Use of the appliance other than that specified
- Failure to read the user manual
- Tampering with any part of the appliance
Use of non-original spare parts - Failure to observe the safety instructions
1.6 Identification plate
The identification plate bears the technical data, serial number and brand name of the appliance. Do not remove the identification plate for any reason.
1.7 Disposal

This appliance must be disposed of separately from other waste (Directive 2012/19/EU). The
appliance does not contain substances in quantities sufficient to be considered hazardous to health and the environment, in accordance with current European directives.

Electrical voltage Danger of electrocution
- Disconnect the mains supply.
-
Unplug the appliance.
-
Old appliances do not belong in household waste! To comply with current legislation, old appliances, on reaching the end of their useful lives, should be taken to a disposal facility where they can be sorted. This allows precious materials from old appliances to be recycled and helps protect the environment. For further information, contact the relevant local authorities or your nearest waste recycling centre.
Our appliances are packed in non-polluting and recyclable materials.
Take these packing materials to the appropriate recycling centre.

Plastic packaging Danger of suffocation
- Do not leave the packaging or any part of it unattended.
- Do not let children play with the plastic bags.
2 Description
2.1 Product description

Model ECF01 - Coffee Machine
1 Cup warmer shelf
2 Boiler outlet
3 Filter holder
4 Steel cup holder tray
5 Float
6 Stainless-steel drip tray
7 Hot water/steam nozzle and frothing nozzle for cappuccino
8 Steam knob
9 ON/OFF switch
10 Water tank lid
1 Water tank (1 litre)
12 Measuring/tamping scoop
13 Coffee pod filter
14 Ground coffee filter, 1 cup
15 Ground coffee filter, 2 cups
16 Water softener filter (optional)
17 One-cup coffee button (white light)
18 Two-cup coffee button (white light)
19 Steam button (white light)/Descale button (orange light)
20 Non-slip feet
3 Use

Danger of electrocution
- Plug into an earthed 3-pin socket.
- Do not remove the earth pin.
- Do not use an adapter.
- Do not use an extension cord.
- Failure to observe these warnings can lead to fire, electrocution or even death.
3.1 Before first use
- Remove any labels and stickers from the coffee machine.
- Carefully wash and dry the components of the coffee machine (see "4 Cleaning and care").
- Remove the lid (1) by pulling it upwards, then remove the tank (2).

- Fill the tank (2) with cool, clean water directly from the tap or using a jug, ensuring you do not exceed the maximum level on the tank.


Danger of malfunction
- Do not use the coffee machine without the tank fitted or if there is no water in the tank.

The components intended to come into contact with food are made of materials that comply with the provisions of current legislation.
3.2 First use
- Switch on the coffee machine by pressing the ON/OFF switch (1): the lights of the three buttons (2), (3) and (4) will flash in sequence.

-
The lights (3) and (4) flash to indicate that the machine is warming up to the set temperature. The coffee machine is ready for use as soon as the lights stop flashing and are lit steadily.
-
Position a container under the hot water/steam nozzle (4).
- Turn the steam knob (5) to the position and dispense 100ml of water.
- Return the steam knob (5) to the position.


Prepare 4-5 coffees or 4-5 cappuccinos to obtain best results.
3.3 How to prepare espresso coffee
Ground coffee:
- Insert the filter for ground coffee (1) in the filter holder (2), choosing between the one-cup filter and two-cup filter

- Tamp down the ground coffee using the tamping scoop (3).

- Remove any excess coffee from around the edge of the filter holder. Attach the filter holder by lining up the handle with and turning it to the right up to the position.


- For one cup, fill the filter with a level measure of coffee (approx. 7 grams).
- For two cups, fill the filter with two level measures.
-
To obtain a strong coffee, tamp down the coffee firmly.
To obtain a lighter coffee, tamp down the coffee less. -
Position the cup(s) under the filter holder spouts and press the 2 or 3 dispense button.


Danger of burns
- To avoid sprays, do not remove the filter holder while the machine is running: wait for a few seconds after dispensing has stopped.
Coffee pods:
- Insert the coffee pod filter in the filter holder.
- Insert the coffee pod in the filter holder, centring it as much as possible.
- Proceed in the same manner as for ground coffee.

Danger of burns
- To avoid sprays, do not remove the filter holder while the machine is running: wait for a few seconds after dispensing has stopped.

- You can stop the supply of coffee at any moment by pressing the dispense button again.
- To increase the quantity of coffee in the cup, hold down the dispense button.
3.4 How to prepare a cappuccino
- Prepare an espresso coffee in a large cup.
- Press the button: the light will flash.
-
Fill a container with 100ml of semiskimmed milk for each cappuccino you wish to prepare.
-
When the light stops flashing and is lit steadily, position an empty container underneath the frothing nozzle for cappuccino (1) and then open the steam knob (2) to the position to discharge any water present, before closing the knob again.
- Position the container with milk underneath the frothing nozzle for cappuccino (1) then immerse the frothing nozzle a few millimetres into the milk. Turn the knob (2) to the position and slowly move the container upwards to obtain creamier foam.

- Once the volume of milk has doubled, immerse the frothing nozzle for cappuccino all the way and heat the milk up to 60^ . Stop the steam by turning the steam knob to the right.
- Pour the milk into the cups with the espresso.


- To prepare more than one cappuccino, first prepare all the necessary cups of espresso, then steam the milk for all the cappuccinos together.
- For reasons of hygiene, it is advisable to clean the frothing nozzle for cappuccino after use.
- Discharge any milk residue by turning the steam nozzle to let the steam out.
- Do not dispense steam for longer than 60 seconds.
3.5 How to heat water
- Switch on the machine with the ON/OFF switch.
- Position a container underneath the frothing nozzle for cappuccino.
- Turn the steam knob to the position to let out the hot water.

- Do not dispense steam for longer than 60 seconds.
3.6 Accessing the settings menu and changing the settings
- Ensure that the machine is ready for use, then press and hold the button for 10 seconds until the three buttons start flashing: the machine is now in settings mode.
- Adjust the machine settings to your requirements.
- To exit the menu, just wait 15 seconds without pressing any buttons.
Setting the coffee temperature
- Access the settings menu.
- Press the button to select the coffee temperature. The lights for the current setting will turn on:
Lights
Temperature setting


Low


Medium


High
- The lights will start flashing in sequence.
- Press the button corresponding to the required temperature: low ()
medium

or high
- The button flashes to indicate that the selection has been stored.
Setting the quantity of coffee
To modify the quantity of coffee dispensed by the machine:
- Position one or two cups under the filter holder spouts.
- Press the button for one cup (32) or two cups (2220) and hold it down.
-
The machine will start dispensing coffee.
-
Release the button as soon as the required quantity of coffee is reached.
- The light flashes to indicate that the selected quantity has been stored.
Setting the water hardness
- Access the settings menu.
- Press the button to select the water hardness. The lights for the current setting will turn on:
Lights
Water setting


Soft


Medium


Hard
- The lights will start flashing in sequence.
- Press the button corresponding to the water hardness: soft (< 18^) , medium (18^ - 36^) or hard (>36^) .
- The button flashes to indicate that the selection has been stored.
Setting the automatic shut-off time
In order to save energy, the coffee machine will turn itself off when it has not been used for a certain period of time.
To set this time:
- Access the settings menu.
- Press to select the auto shut-off time. The lights for the current setting will turn on:
Lights
Time setting


9 minutes


30 minutes


3 hours
- The lights will start flashing in sequence.
- Press the button corresponding to the time you wish to set: 9 minutes ( 2 ) , 30 minutes ( 223 ) or 3 hours ( 八 四 ) .
- The button flashes to indicate that the selection has been stored.
Restoring factory default values
To return the machine to its factory settings:
- Access the settings menu.
- Turn the steam knob to the position.
- Press the button: the three lights will flash to indicate that the factory defaults have been reset.
- Return the steam knob to the position.
3.7 How to cool down the boiler
The boiler must be cooled down if you wish to prepare a coffee immediately after frothing milk.
If this procedure is not performed, the coffee dispensed will taste burnt.
- Position a container underneath the frothing nozzle for cappuccino and open the steam knob to dispense hot water.

- Hot water will stop coming out as soon as the boiler has cooled down.
- Close the steam knob again and prepare the coffee.
4 Cleaning and care
4.1 Instructions

Improper use Danger of electrocution
- Unplug the coffee machine before cleaning it.
- Do not immerse the coffee machine in water or other liquids.
- Let the coffee machine cool down before cleaning.

Improper use Risk of damage to surfaces
- Do not use steam jets to clean the coffee machine.
- Do not use cleaning products containing chlorine, ammonia or bleach on parts with metal surface finishes (e.g. anodised, nickel- or chrome-plated).
- Do not use abrasive or corrosive detergents (e.g. powder products, stain removers and metallic scourers).
- Do not use rough or abrasive materials or sharp metal scrapers.
4.2 Cleaning the body of the coffee machine
To keep the outer surface of the coffee machine in good condition, it should be cleaned regularly after use. Let the appliance cool down first. Clean with a soft, damp cloth.
4.3 Cleaning the coffee machine components
Cleaning the drip tray
The drip tray is equipped with a red float (1) which sticks out of the cup holder tray when the maximum liquid level is exceeded.

- Remove the cup holder tray (2) and then remove the drip tray (3) to empty it.


- Clean the drip tray with a cloth and then reposition it together with the cup holder tray.
Cleaning the coffee filters
Clean the coffee filters regularly under running water. If the holes are blocked, clean them with a pin or a brush.
Cleaning the frothing nozzle for cappuccino
Clean the frothing nozzle for cappuccino immediately after use.
- Turn the steam knob to let a little steam out and drive out any milk inside the nozzle.
- Shut off the coffee machine by pressing the ON/OFF switch.
- Hold the tube of the frothing nozzle (1) still with one hand and use the other to rotate the frothing nozzle (2) clockwise and pull it off downwards.

- Remove the rubber connecting nozzle (3) from the frothing nozzle tube by pulling it downwards.

- Wash the frothing nozzle and rubber connecting nozzle thoroughly with warm water.
- Check that the hole (4) is not blocked.

- Insert the rubber connecting nozzle (3) back into the frothing nozzle tube (1) then replace the frothing nozzle (2) by pushing it upwards and rotating it anticlockwise.
- Refit the frothing nozzle in its housing by following the cleaning instructions in reverse.
Cleaning the boiler outlet
The boiler outlet must be rinsed every 200 coffees made by dispensing approximately 500ml of water by pressing the coffee dispense button without adding ground coffee or a pod.
Cleaning the water tank
Clean the water tank once a month using a moist cloth and mild detergent.
4.4 Dscaling
The coffee machine needs descaling when the orange light on the button lights up.
- Fill the water tank with a solution of water and descaler, following the instructions on the package.
- Press the ON/OFF switch.
- Remove the filter holder and position a container underneath the frothing nozzle.
- Wait for the 2 or 22 lights to come on steadily.
- Press the button and hold for 10 seconds until the three buttons flash in sequence.
- Turn the steam knob to the position.
- Press to start descending.
- The descending cycle automatically performs a series of rinse cycles to remove scale from the coffee machine.
- The descending cycle will stop and the orange light will flash.
-
Remove the water tank, empty it and rinse it out.
-
Fill the tank to the maximum level mark and insert it in its housing.
- Position an empty container underneath the frothing nozzle and check that the steam knob is in the position.
- When the tank is empty it means that the rinse cycle is finished, and the orange light will turn off.
- Turn the steam knob to the position.

Danger of injury
- The descaler contains acid which can irritate the skin and eyes.
- Follow the manufacturer's instructions and safety warnings on the pack to the letter; they will also tell you what to do in the event of contact with skin or eyes.
- Use descaler products recommended by Smeg to avoid damage to the coffee machine.
Dscaling and rinsing the boiler outlet
During the descending cycle, close the steam knob every so often to make some of the descending solution come out from the boiler outlet.
During the rinse cycle, close the steam knob every so often to rinse off the boiler outlet.
4.5 What to do if...
| Problem | Possible causes | Solution |
| No water in tank. | Fill the tank. | |
| The filter holes are blocked. | Clean the filter with a brush or pin. | |
| Coffee does not come out | The tank is not inserted correctly. | Insert the tank correctly in its housing. |
| Scale build-up. | Perform a descaling cycle. | |
| The filter holder is not inserted correctly, or is dirty. | Insert the filter holder and turn it so it is fully closed. Clean the filter holder. | |
| The coffee drips out of the filter holder and not the spouts | The boiler outlet seal is worn. | Have it replaced at an Authorised Service Centre. |
| The spout holes are blocked. | Clean the spout holes. |
Cleaning and care
| Problem | Possible causes | Solution |
| The filter holder will not attach to the coffee machine. | The filter has been overfilled. | Use the supplied measuring scoop and use the correct filter. |
| The coffee machine does not work and all lights flash. | Possible fault. | Unplug the coffee machine and contact an Authorised Service Centre. |
| The ground coffee has not been tamped sufficiently. | Tamp the coffee harder. | |
| There is insufficient ground coffee. | Use a larger quantity. | |
| The "crema" of the coffee is light in colour and comes out of the spout very fast | The coffee grind is too coarse. | Use only ground coffee for espresso machines. |
| Poor quality ground coffee. | Change type of ground coffee. |
Cleaning and care
| Problem | Possible causes | Solution |
| The ground coffee has been tamped too hard. | Tamp the coffee with less force. | |
| There is too much ground coffee. | Decrease the quantity used. | |
| The “crema” of the coffee is dark in colour and comes out of the spout slowly | The boiler outlet or filter is blocked. | Clean the outlet and the filter. |
| The coffee grind is too fine. | Use only ground coffee for espresso machines. | |
| Scale build-up. | Perform a descaling cycle. | |
| Steam knob open. | Close the steam knob. | |
| The ②and ③lights flash for a few seconds | Boiler temperature too high. | Cool down the boiler. |
| Scale build-up. | Perform a descaling cycle. |
Problem
Possible causes
Solution
No water in tank.
Fill the tank.
Boiler outlet or filter blocked.
Clean the boiler outlet and the filter.
The tank is not inserted correctly.
Insert the tank correctly in its housing.

If the problem has not been resolved or in the case of other types of fault, contact your local technical support centre.
The manufacturer reserves the right to make any changes deemed useful for improvement of its products without prior notice. The illustrations and descriptions contained in this manual are therefore not binding and are merely indicative.