
OT 19 - Mobile Phone BLAUPUNKT - Free user manual and instructions
Find the device manual for free OT 19 BLAUPUNKT in PDF.


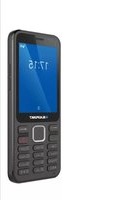
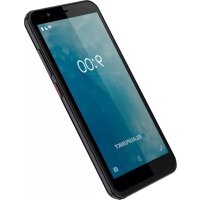
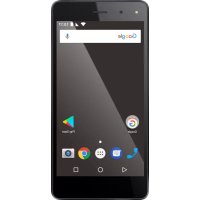
| Product Type | Basic Mobile Phone |
| Brand | Blaupunkt |
| Model | OT 19 |
| Dimensions (H x W x D) | Approx. 110 x 45 x 15 mm |
| Weight | Approx. 80 g (with battery) |
| Battery Type | Lithium-Ion, 800 mAh |
| Talk Time | Up to 3 hours |
| Standby Time | Up to 200 hours |
| Display | 1.8-inch color TFT |
| Network Technology | GSM 900/1800 MHz |
| SIM Card | Mini-SIM (1 slot) |
| Camera | 0.3 MP (VGA) |
| FM Radio | Yes, requires headset |
| Flashlight | Yes |
| Phonebook Capacity | Up to 300 contacts |
| Messaging | SMS |
| Ringtone | Polyphonic, MP3 support |
| Cleaning | Wipe with a soft, dry cloth |
| Safety | Do not expose to water or moisture; avoid disassembly |
| Spare Parts | Battery, charger, headset |
| General Information | Blaupunkt OT 19 is a durable, easy-to-use basic mobile phone ideal for calls and essential features. |
Frequently Asked Questions - OT 19 BLAUPUNKT
User questions about OT 19 BLAUPUNKT
0 question about this device. Answer the ones you know or ask your own.
Ask a new question about this device
Download the instructions for your Mobile Phone in PDF format for free! Find your manual OT 19 - BLAUPUNKT and take your electronic device back in hand. On this page are published all the documents necessary for the use of your device. OT 19 by BLAUPUNKT.
USER MANUAL OT 19 BLAUPUNKT
3.1 Insert the memory card and SIM card....7 3.2 Switch the device on and off....7 3.3 Description of device 7 3.4 Unlock the device 8
- Charging the battery 8
- Using the Touch screen 8
- Using the Phone's Buttons 9
6.1 Virtual buttons....9 6.2 Menu icons....9
- Manage calls....9
7.1 Make calls....9 7.2 Flight mode 10 7.3 Receive a call....10 7.4 Emergency calls....10
- The Home screen....10
8.1 Notification bar 10 8.2 Customize the idle screen 11
- Connecting to the Internet.... 11
9.1 Configure the Internet.... 11 9.2 Access Internet via Wi-Fi 11
- Messages.... 11
10.1 Send Message 11 10.2 Input methods.... 12
- Multimedia.... 12
11.1 Camera 12 11.2 Photos.... 12 11.3 FM Radio 12
- Contacts .... 13
- Phone .... 14
- Search .... 14
- Google Play Store .... 14
- More applications .... 15
16.1 Clock 15 16.2 E-mail .... 15 16.3 File manager / Files .... 15
- Settings .... 15
17.1 Network & Internet 15
17.2 Connected devices .... 16 17.3 Apps & notifications .... 16 17.4 Battery .... 16 17.5 Display 16 17.6 Sound .... 16 17.7 Storage 16 17.8 Privacy 17 17.9 Location 17 17.10 Security .... 17 17.11 Accounts .... 17 17.12 Accessibility .... 17 17.13 Gesture Settings 17 17.14 Digital Wellbeing & parental controls 18 17.15 Google 18 17.16 DuraSpeed .... 18 17.17 System .... 18 17.18 About phone 18 18. Handling and maintenance .... 18 18.1 Battery .... 18 18.2 Maintain the appliance .... 18 19. Recycling your device 19 20. Declaration of Conformity .... 19
1. Safety instructions
ATTENTION: Please read this guide carefully. Failure to comply with the safety regulations may be dangerous or illegal, and the manufacturer cannot be held liable for any malfunction resulting from improper use.
Safe switch-on
The owner of the device is responsible for the use of the device. Never switch the device on in areas where wireless devices are prohibited or radio interference may be dangerous.
Road safety
Observe the local laws and regulations regarding smartphone usage while driving. If you make a phone call while driving, observe the following rules: Focus on driving to become aware of traffic conditions; If the device has a hands-free function, use hands-free. If the traffic situation requires, stop the car before you pick up the phone.
Interference
Wireless devices may be sensitive to interference that affects performance.
Electronic devices
To avoid demagnetization, do not leave your device close to electronic devices for a long time.
Use in hospitals
Hospitals and other healthcare facilities may use devices that are particularly sensitive to RF signals. Switch off your phone if instructed to do so by posted signs or hospital staff.
Electrical medical devices
Your phone is a radio transmitter that can interfere with electronic medical devices or implants such as hearing aids, pacemakers, insulin pumps, and so on. We recommend keeping a distance of at least 15 cm between the implant and the device, and never wearing your phone in a breast pocket. Follow the instructions of the medical device manufacturer. If you have a medical implant and have any other questions about using mobile or wireless devices, consult your doctor.
Use on the airplane
Your device supports flight mode; please use this feature on the airplane. Follow the instructions given on the airplane.
Explosion hazards and restricted areas
Turn off the device in explosion hazardous areas. Sparks in such places may lead to an explosion or fire that could result in serious injury or death. Turn off the device at gasoline or gas filling stations, especially near fuel pumps. Strictly follow instructions in locations such as fuel tanks, chemical plants, and areas with explosive substances.
Use environment
The device complies with recommended emission values for radio waves when kept at a minimum distance of 1.5 cm from the ear. When carrying the phone in a case, belt clip, or holder, ensure that it does not contain metal and that the phone is slightly away from the body.
When using other accessories, it may not be possible to operate in accordance with radio frequency guidelines. If you do not use a case and do not hold the phone to your ear, keep it at least 2.5 cm away from your body, especially during data transfer.
Proper use
Please do not attempt to disassemble the device. If the product is defective, contact your distributor.
Battery and other accessories
Only use parts and accessories approved by the manufacturer. Using non-factory accessories and spare parts may result in warranty loss. Do not short-circuit the battery.
Charge the appliance in a well-ventilated and suitable temperature environment away from flammable and explosive materials. Handle the used battery according to local regulations and do not throw it into household trash.
The mains power socket used must be close to the charger/holder and easily accessible, so that it can be used as an 'on/off' facility.
Water resistance
The appliance is not waterproof. Precipitation, fog, and other liquids can corrode electronic circuits. If moisture has reached the phone, power off the phone, if possible.
Backup
Make a backup of all the data stored on your device.
Connect to another device
Before connecting an external device, read the safety instructions in this manual. Do not connect an incompatible device.
2. Technical Specifications
Basic features:
Display 6.49" HD+ (720*1560), 2.5D
Operating system Android 10 GO
CPU Cortex-A53 1.1-1.3GHz
GPU ARM Mali-T720
RAM 2GB
ROM 16GB
MicroSD card up to 256 GB
Wifi 802.11 b/g/n
Bluetooth 4.2
Battery 4000mAh
Back Camera 13MP + 2MP + 0.3MP
Front Camera 5MP
Fingerprint, GPS+AGPS
Network:
GSM: 900 / 1800 MHz
WCDMA: 900 / 2100 MHz
4G LTE-FDD: B1 / B3 / B7 / B8 / B20
SAR value: 0.310 W/Kg (Head), 1.402 W/Kg (Body)
Power Supply Features:
| Manufacturer | ShenZhenHuaJinElectronicsco.,LTD |
| Model | HJ-050100B3-EU |
| Input voltage | 100-240 V |
| Input AC frequency | 50/60 Hz |
| Output voltage | 5 V |
| Output current | 1 A |
| Output power | 5 W |
| Average active efficiency | 74,98% |
| Efficiency at low load (10 %) | 64,93% |
| No-load power consumption | 0.08W |
Phone layout
The following illustration of the phone is for informational purposes only; your device may be different.

3. Getting started
3.1 Insert the memory card and SIM card
Turn off the power and remove the back cover. Insert the SIM card according to the mark on the device. Make sure that the chip contact and the cut edge of the card are aligned in the correct direction. Slide the card into the slot until it stops. The device handles Nano SIM + Nano SIM + Micro SD cards.

3.2 Switch the device on and off
Press and hold the Power button to turn on the power.
Press and hold the power button and select "Power off" from the Options menu.
3.3 Description of device


| 1 - Earphone | 8 - Flash light |
| 2 - Receiver | 9 – Sub-camera |
| 3 - Light sensor | 10 - Volume+ |
| 4 - Front camera | 11 - Volume- |
| 5 - USB Port | 12 - Power Key |
| 6 - Main camera | 13 – Speaker |
| 7 - Sub-camera | 14 – Fingerprint sensor |
3.4 Unlock the device
To unlock the device, you may need the PIN (not the SIM card PIN), password, or pattern drawing.
Unlock the screen:
- Press the power key to wake up the phone.
- Place and hold your finger on the lock icon, then pull it down.
Please note: the unlocking process depends on the pre-configured unlock method.
To set the unlock method:
■ In the idle screen, touch Settings > Security > Touch Screen lock. Choose the type of locking as desired. You can set your screen lock based on Pattern, PIN, Password, Swipe, or None.

4. Charging the battery
- Connect one end of the charger to the device.
- Connect the charger to the power outlet.
- Charging will start regardless of whether the device is turned on or not.
- When the phone is turned on, the movement of the battery icon in the upper right corner indicates charging. When the motion stops, the phone is charged.
- When the phone is turned off, the movement of the battery icon on the screen indicates charging. When the motion stops, the phone is charged.
- Disconnect the charger from the power outlet.
- Disconnect the charger from the phone.
5. Using the Touch screen
You can use the touch screen in the following ways:
- Touch: Acts on items on the screen, such as application and settings icons, to type letters and symbols using the onscreen keyboard, or to press onscreen buttons.
- Touch and hold: Touch and hold an item on the screen until an action occurs.
- Drag: Touch and hold an item and move your finger on the screen until you reach the target position.
- Swipe or slide: Quickly slide your finger across the surface of the screen, (without dragging an item). For example, slide the screen up or down to scroll a list.
- Double-tap: You can tap twice quickly to control the zoom in Maps.
- Pinch: In some applications (Such as Maps, Browser, and Gallery) you can zoom in and out by placing two fingers on the screen at once and pinching them together (to zoom out) or spreading them apart (to zoom in).
- Rotate the screen: On most screens, the orientation of the screen changes as you rotate it. You can turn this feature on and off.
6. Using the Phone's Buttons
6.1 Virtual buttons
| Button | Description |
 | Apps: Opens the list of recent applications. |
 | Home: returns to Home screen.Pressed long opens the Google AssistantTM |
 | Back: returns to the previous screen you were working in |
6.2 Menu icons
 | Dialer |
 | Messaging |
 | Camera |
 | Browser (Chrome) |
7. Manage calls
7.1 Make calls
- Tap the icon on main menu or the home screen to dial the desired number.
- To dial an international number, touch and hold the 0 key to enter the Plus (+) symbol, and then enter the international country prefix, followed by the phone number.
- Press the icon to dial.
- You can control the volume using the Volume up / down buttons on the left side of the unit. ■ The dialer can also open Call log and Contacts.
■ While during a call, touch the 📞 icon to end a call.
7.2 Flight mode
Some locations like airplanes may require you to turn off your mobile, Wi-Fi, and Bluetooth wireless connections.
- Swipe your finger on the idle screen from top to bottom to open the drop-down menu. ■ Touch the Flight mode.
7.3 Receive a call
In an incoming call, you can choose from the following options:
- Tap the Answer option to receive the call.
- Tap the Decline option to reject the call.
7.4 Emergency calls
You can also make emergency calls without a SIM card. For more information, contact your network service provider.
8. The Home screen
When you sign in, the home screen opens.
The Home screen is your starting point to access all the features on your phone. Swipe left or right on the screen to view all installed applications.
8.1 Notification bar
The notification bar shows your device status and notifications. Notification icons indicate new messages and events. When a new notification arrives, its icon appears in the Notification Bar.
Notification Icons Status Icons

To see more information about notifications, open the notification panel by swiping your finger over the top of the screen.
Close the notification bar:
Drag the bottom of the notification panel to the top of the screen or simply press the back button. The notification panel will also close when responding to a notification.
8.2 Customize the idle screen
Press and hold your finger on an empty area of the screen to reach the following menus:
Home settings: you can turn on or off the Add icon to Home screen option.
Wallpapers:
you can add a wallpaper from the Gallery Go or the Wallpapers, which contains a pre-installed wallpaper. Here you can select the My photos option which opens the Files, and you can choose a picture.
Select the photo you want to set up and confirm it by pressing the Set wallpaper at the top of the screen. You can set the selected image to the background of the Home screen, the Background screen of the Lock screen, or both.

9. Connecting to the Internet
Your device has a pre-installed browser to access websites through your mobile device. Open your browser (Chrome) and enter the URL of the page you want to access in the address bar. You must have a subscription to access web pages, and you must complete the appropriate configuration settings on your device.
9.1 Configure the Internet
Go to Settings > Network & Internet > Data usage > Tap Mobile data.
By default, your network provider sends the Access Point Name settings via SMS, or they come automatically with your SIM card. You may need to install these settings. After this, you can choose from the listed access point names. If the access point names are not listed by default, please contact your network provider for the same.
To add any operator Access Point Name, go to Settings > Network & Internet > Mobile network > Advanced > Access Point Name.
9.2 Access Internet via Wi-Fi
Go to Settings > Network & Internet > Wi-Fi, then enable Wi-Fi. Next, select the Wi-Fi connection listed under Wi-Fi networks.
10. Messages
Select Messages on the standby screen.
10.1 Send Message
To send a new message, tap the Start chat button in the right corner of the screen.
Enter the recipient's phone number or select from the Contacts list.
If you have selected the recipients, confirm by tapping the Send to option.

Enter the text of the message and press the send key.

To add an attachment, press the + icon on the left.
When you edit a message, the default message type is SMS. As soon as you add an attachment or reach 10 SMS messages, the phone automatically switches to MMS.
10.2 Input methods
The device contains various input modes. In Editing mode, press and hold [,] to display Input Options and to set the keyboard.
Writing numbers and symbols
Press the 123? button to access numbers and symbols.
For numbers: you can also enter them using the letters that contain numbers: press and hold, then swipe to the desired character.
For symbols: press and hold [.] to display the list of symbols, slide your finger to the symbol you want to enter.
11. Multimedia
11.1 Camera
Use the camera to take photos and video clips. To open the camera, press the Camera icon on the idle screen. To take a photo or video, press the recording icon: 📄. To set the camera parameters, press the Settings icon at the left corner of the top of the screen.
11.2 Photos
In the Gallery Go app, you can view pictures and videos taken with your camera, or those stored on your SD card.
11.3 FM Radio
Connect the headset, then press the FM Radio icon in the main menu. By opening the channel list, the machine automatically searches for and stores available stations.
FM Radio
Radio on
Radio off
You can move forward or backward through the channels and add the currently listened channel to Favorites:

12. Contacts
On the Main Menu, select the Contacts icon.
- To create a new contact, press the New contact icon or enter your Google Account to synchronize your contacts.
- Fill the desired fields.
- Save the contact.
By opening the contact, the following functions

are available:

Add a contact to Favorites.

Additional options: Delete, Share, Set ringtone, Route to voicemail, Move to another account, Block numbers, Help & feedback.

Dial the number.

Send a message to the phone number.

Make video call with Google Duo (Google account is needed)

Edit the contact.
Additional features available on contacts:
- Search: search among contacts.
- Your info: you can add your own contact information here. • Accounts: managing accounts.
- Contact sync settings: changing Google synchronization settings. (This menu can be seen when you are signed in to a Google account) • Display: setting the appearance of contacts and the application theme.
- Edit contacts: set default account for new contacts and phonetic names.
- Manage contacts: import, export, restore contacts; undo changes and blocked numbers.
13. Phone
From the standby screen, open the Phone icon to dial or make call settings.

To enter the number to dial, open the dialer.
You can also choose from the following options:
Search for a contact:

Search contacts and pla...


Dial from Favorites.

View call logs, dialing from call logs.

Open Contacts.
To access the settings, select the options icon:

Search contacts & places


In this menu, you can find the following menus: Display options, Sounds and vibration, Quick responses, Calls (Calls settings: Fixed Dialling Numbers, Call forwarding, Call barring, Caller ID, Call waiting), Blocked numbers, Voicemail, Accessibility, Assisted dialling, Caller ID & spam, Nearby places, About, terms & privacy, Advanced (Flip to silence).
14. Search
Your device uses Google search on the Ready screen. Enter the search term in the search queue and press the search button:


15. Google Play Store
Play Store lets you download music, movies, android apps and games. Open the application from the Standby screen:

Enter your Google Account information to use this app.
16. More applications
16.1 Clock
You can check the date and time on the clock surface. By pressing the alarm icon, you can set a new alarm, or turn the current alarm on or off. You can set a countdown, stopwatch, city or change the settings of the Clock application.

16.2 E-mail
To set up an email account, go to Google app drawer > Gmail, select the type of account you want to set up (Google, Outlook, Hotmail, and Live, Yahoo, Exchange and Office 365, Other).
Enter the email address and password, then follow the on-screen instructions.
16.3 File manager / Files
In this menu, you can view, edit, or delete data stored on your device and SD card.
17. Settings
17.1 Network & Internet
Navigate from the Standby screen or from the Main Menu to Settings. Under Network & Internet, you can do the following:
• Wi-Fi
Turn on the feature to access Wi-Fi networks. The device automatically displays available networks. Select the network you want to connect to. Enter the password if it's necessary.
- Mobile network
- You can turn on or off the mobile data or the roaming data;
- Check the app data usage;
- Turn on or off the 4G Calling; ○ Choose from the following network types: 2G only, 3G only, 3G preferred, 4G preferred;
- Check and edit access points;
- Manually search and choose a network.
- Data Usage
In this menu, you can review your data usage (mobile and Wi-Fi), and turn your mobile data on and off. You can set the maximum amount of data that can be used through a mobile network.
(Data warning & limit). Attention! The service provider can calculate the costs of data traffic in different units.
- Hotspot & tethering
You can share your device's Internet connection via USB, via Bluetooth, or by setting up a Wi-Fi hotspot.
- SIM cards
You can enable or disable SIM cards and set the preferred SIM for mobile data, calls, and SMS.
- Flight mode
You can turn Flight mode on or off in Menu / Settings / Network & Internet. By activating it, the device turns off the wireless features (mobile network, Wi-Fi, Bluetooth, FM radio, GPS), but the multimedia features (Music, Video, Games) can still be used.
- VPN:
Virtual private networks can be configured in this menu item.
- Private DNS:
Setting of Private DNS.
17.2 Connected devices
- Bluetooth
Your device supports Bluetooth, which allows you to send data wirelessly.
o Turn on the function.
From the Available Devices list, select the device you want to exchange data with. Before sending data, you need to pair your device with another device.
To pair, make sure the code on the screen matches the code of the other device.
- If the code matches, confirm.
17.3 Apps & notifications
In this menu you can view apps installed on your device, customize their notifications and permissions.
17.4 Battery
We get information about the battery (current charge, last full upload time, screen and device usage since full charge), and check if there is an app which drains the battery. Here you can turn on off the Battery saver option.
17.5 Display
You can set here the brightness level, night light, wallpaper, dark theme, screen timeout, auto-rotate screen, font size and lock screen display.
17.6 Sound
It is possible to set the device's ringtone, volume, and other tones.
17.7 Storage
You can check here the device and the SD-card storage.
17.8 Privacy
Here you can check the following: application permissions, turning on or off showing the password as the user types it, lock screen settings, autofill, Google location history, activity controls, ads, and usage & diagnostics.
17.9 Location
You can turn Location on or off and manage its settings.
17.10 Security
We get a general overview of the security status of your device and set different device security and privacy rules.
- Screen lock
In this menu, you can set the screen lock on your device to prevent unauthorized access. (None, Swipe, Pattern, PIN, Password)
- Face Unlock
Facial recognition uses the contours of your face to recognize you and unlock your device. Once your face has been registered, all you need to do is look at your device and it will unlock. While this unlock method is incredibly convenient, it is recommended that you use the fingerprint lock if you wish to prioritize security. To use facial recognition to unlock your device, you will need to set up a backup lock method such as a PIN, pattern, or password.
- Fingerprint
Fingerprint recognition uses the unique characteristics of your fingerprint to unlock your device. This method is both highly secure and highly convenient, as you only need to hold your finger against your device to unlock it. To use fingerprint recognition to unlock your device, you will need to set up a backup lock method such as a PIN, pattern, or password.
- SIM card lock
You can turn the PIN code on or off and change the SIM card PIN.
- SIM card lock
You can turn the PIN code on or off and change the SIM card PIN.
17.11 Accounts
You can add a new account (corporate, personal, other) to this device in this menu item. Select the account type from the list and follow the on-screen instructions.
17.12 Accessibility
You can customize your phone using accessibility settings and apps.
17.13 Gesture Settings
You can interact with your phone using gestures. You can turn some gestures on and off.
The device supports the following Gestures:
- Three fingers Screenshot
- Gesture Motion (Launcher, FM Radio) • Smart Motion (Action unlock, Smart switch, Flip Mute)
17.14 Digital Wellbeing & parental controls
It can help you manage the screen time and set parental control.
17.15 Google
You can check and manage your Google accounts here.
17.16 DuraSpeed
You can turn on or off this option, which helps the foreground app restricting background apps, some notifications may be postponed or not received. It doesn't restrict background activities of apps switched on in the list.
17.17 System
This menu option allows you to perform language and input settings, adjust gestures, set date and time, backup, do more reset methods on the phone, and check system update.
17.18 About phone
You can check information about the device, the software, the phone number (if it's set), and emergency information about the owner.
18. Handling and maintenance
18.1 Battery
- The device has a rechargeable battery. When the power supply is low, charge the battery.
- Disconnect the charger from the power outlet and the appliance when not in use. Do not allow the battery to charge for more than a week, as it may reduce the battery life.
- Extreme temperatures may also affect the battery. If the ambient temperature exceeds 40 °C, do not charge the battery.
- Do not use a damaged battery or charger.
- Do not short-circuit the battery. For example, a metallic object such as a coin, clip, or pen may cause a short circuit.
- Do not leave the battery too hot (such as in a car in summer) or too cold (such as freezing), as it may reduce its service life. Try to store the battery between 15°C and 25°C. A too cold or too hot battery may temporarily not work, even if it is fully charged.
- Do not throw the battery in a fire. Dispose of the used battery according to local regulations and recycle if possible.
18.2 Maintain the appliance
- Keep the appliance dry. Precipitation, mist, and all other liquids can cause corrosion in the circuit boards.
- Do not store the product in dusty places, as moving parts and electrical accessories may be damaged.
- Do not store the device in hot places. High temperatures can shorten the life of the electrical devices, damage the battery and melt the plastic parts.
- Do not store the device in a cold place. When the device returns to normal temperature, the inside moisture can damage the electrical circuits.
- Open the appliance only as instructed in this manual.
- Do not drop, shake the appliance as small parts break.
- Do not use strong chemicals or solvents to clean the appliance.
- Do not paint the appliance. Paint can clog the moving parts and hinder proper operation.
- Use only approved parts, improper parts may damage the unit and may result in warranty loss. If the product does not work properly, consult the service provided on the warranty card.
- The manufacturer is not liable for any malfunction resulting from improper use.
19. Recycling your device

The logo on the left indicates that the product should not be disposed of in household waste. Dispose of such devices at a collection point for hazardous waste (electronic waste).
20. Declaration of Conformity
The Blaupunkt OT 19 model complies with the essential requirements and relevant provisions of the 2014/53/EU Directive and RoHS Directive 2011/65/EU. The Declaration of Conformity is available on our website.

Designed and Engineered by
Blaupunkt Competence Center Mobile Europe
HTM Mobile Kft.
Assembled in P.R.C by
YUNJI (HONG KONG) HOLDINGS CO., LTD
Room 5, Block B, 14/F., Wah Hen Commercial Centre, 383 Hennessy Road, Wanchai, Hong Kong, China
For more information on this product, visit our website at www.htmmobile.hu or www.blaupunkt.com.
Google, Android and other marks are trademarks of Google LLC.


- SAFETY INSTRUCTIONS
- SAFE SWITCH-ON
- ROAD SAFETY
- INTERFERENCE
- ELECTRONIC DEVICES
- USE IN HOSPITALS
- ELECTRICAL MEDICAL DEVICES
- USE ON THE AIRPLANE
- EXPLOSION HAZARDS AND RESTRICTED AREAS
- USE ENVIRONMENT
- PROPER USE
- BATTERY AND OTHER ACCESSORIES
- WATER RESISTANCE
- BACKUP
- CONNECT TO ANOTHER DEVICE
- TECHNICAL SPECIFICATIONS
- BASIC FEATURES
- NETWORK
- PHONE LAYOUT
- GETTING STARTED
- INSERT THE MEMORY CARD AND SIM CARD
- SWITCH THE DEVICE ON AND OFF
- DESCRIPTION OF DEVICE
- UNLOCK THE DEVICE
- UNLOCK THE SCREEN
- CHARGING THE BATTERY
- USING THE TOUCH SCREEN
- USING THE PHONE'S BUTTONS
- VIRTUAL BUTTONS
- MENU ICONS
- MANAGE CALLS
- MAKE CALLS
- FLIGHT MODE
- RECEIVE A CALL
- EMERGENCY CALLS
- THE HOME SCREEN
- NOTIFICATION BAR
- CUSTOMIZE THE IDLE SCREEN
- WALLPAPERS
- CONNECTING TO THE INTERNET
- CONFIGURE THE INTERNET
- ACCESS INTERNET VIA WI-FI
- MESSAGES
- SEND MESSAGE
- INPUT METHODS
- WRITING NUMBERS AND SYMBOLS
- MULTIMEDIA
- CAMERA
- PHOTOS
- FM RADIO
- CONTACTS
- PHONE
- SEARCH
- GOOGLE PLAY STORE
- MORE APPLICATIONS
- CLOCK
- FILE MANAGER / FILES
- SETTINGS
- NETWORK & INTERNET
- WI-FI
- MOBILE NETWORK
- DATA USAGE
- CONNECTED DEVICES
- APPS & NOTIFICATIONS
- BATTERY
- DISPLAY
- SOUND
- STORAGE
- PRIVACY
- LOCATION
- SECURITY
- SCREEN LOCK
- FACE UNLOCK
- FINGERPRINT
- SIM CARD LOCK
- ACCOUNTS
- ACCESSIBILITY
- GESTURE SETTINGS
- DIGITAL WELLBEING & PARENTAL CONTROLS
- DURASPEED
- SYSTEM
- ABOUT PHONE
- HANDLING AND MAINTENANCE
- MAINTAIN THE APPLIANCE
- RECYCLING YOUR DEVICE
- DECLARATION OF CONFORMITY
Brand : BLAUPUNKT
Model : OT 19
Category : Mobile Phone