
Tapo RV20 - Vacuum Cleaner TP-LINK - Free user manual and instructions
Find the device manual for free Tapo RV20 TP-LINK in PDF.


| Product Type | Robot vacuum |
| Brand | TP-Link |
| Model | Tapo RV20 |
| Dimensions (diameter × height) | 350 mm × 80 mm |
| Weight | 3.5 kg |
| Power supply | Lithium-ion battery 14.4 V / 2600 mAh |
| Battery life | Up to 120 minutes |
| Charging time | Approximately 4 hours |
| Dustbin capacity | 400 ml |
| Main features | Suction, main brush, side brush, random and scheduled navigation, obstacle detection, scheduling, Wi-Fi connectivity, voice control (Amazon Alexa, Google Assistant), Tapo app |
| Power levels | 3 (Silent, Standard, Turbo) |
| Sensors | Infrared sensors, drop sensor, obstacle sensor |
| Noise | 55 dB (silent mode) |
| Maintenance and cleaning | Clean the HEPA filter every 2 weeks, clean the main brush and side brushes once a month, empty the dustbin after each use |
| Safety | Fall detection (stairs), automatic stop in case of blockage, battery with overheat protection |
| Spare parts and repairability | HEPA filter, main brush, side brushes, battery, wheels, charging base |
| Connectivity | Wi-Fi 2.4 GHz, Bluetooth for initial setup |
| Compatibility | Tapo app for iOS and Android |
| Color | White / Black |
Frequently Asked Questions - Tapo RV20 TP-LINK
User questions about Tapo RV20 TP-LINK
0 question about this device. Answer the ones you know or ask your own.
Ask a new question about this device
Download the instructions for your Vacuum Cleaner in PDF format for free! Find your manual Tapo RV20 - TP-LINK and take your electronic device back in hand. On this page are published all the documents necessary for the use of your device. Tapo RV20 by TP-LINK.
USER MANUAL Tapo RV20 TP-LINK
Scan QR code or visit
https://www.tp-link.com/support/setup-video/#robot-vacuum

©2023 TP-Link 7106510690 REV1.0.0 *Images may differ from actual products.
CONTENTS
1 / English
7 / Deutsch
13 / Español
19 / Ελληνικά
25 / Français
31 / Italiano
37 / Português
43 / Suomi
49 / Nederlands
55 / Svenska
61 / Norsk
67 / Danish
*Images may differ from actual products.
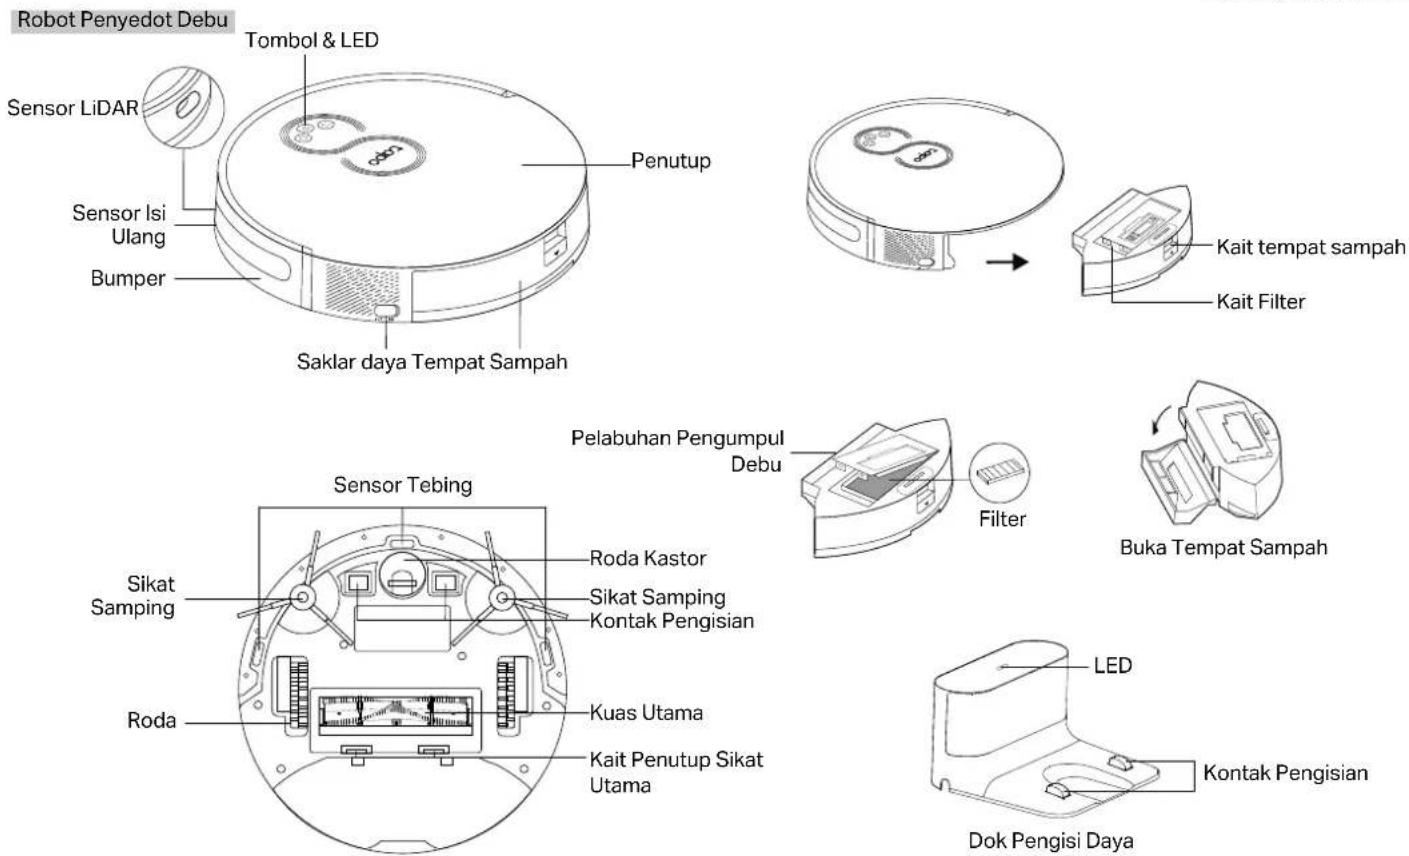
Overview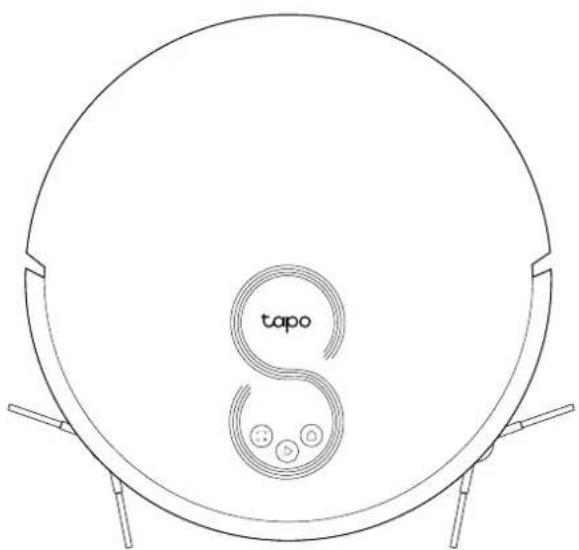
Power/Clean
- Press once: Start/pause cleaning.
- Press and hold for 5 seconds: Turn on/off the robot vacuum.
*For the first use, slide the power switch from OFF to ON to turn on.
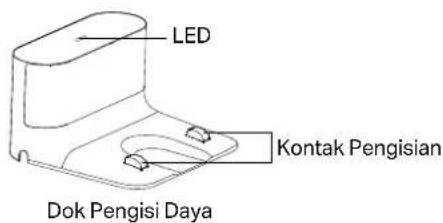
Dock
- Return to the dock to charge.
Spot Cleaning/Child Lock
- Press once: Start spot cleaning.
- Press and hold for 5 seconds: Turn on/off the child lock.
Combination Button
- Press and hold simultaneously for 5 seconds: Enter setup mode to configure network.
- Press and hold simultaneously for 10 seconds: Restore to factory default settings.
LED
• Red: Battery level < 20%; Error
• Orange: Battery level between 20% and 80%
• Green: Battery level > 80%

1 Position the Dock
- Remove the bottom cover of the dock, connect the power cord to the dock, and then replace the cover.
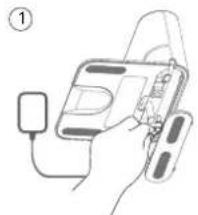
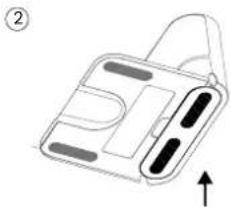
- Place the dock on a level surface, flat against a wall, without obstacles within 1.5m (4.9ft) in front and 0.5m (1.6ft) on left and right.

Notes
• To ensure a better user experience, make sure the area is with good Wi-Fi signal. - Do not place it in direct sunlight. Ensure the area around the dock is free of clutter to improve docking performance. • To prevent the risk of your robot vacuum falling downstairs, ensure that the dock is placed at least 1.2m (4 ft) away from stairs. - Always keep the dock powered on, otherwise the robot vacuum will not automatically return. And do not move the dock frequently.
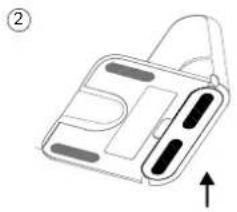
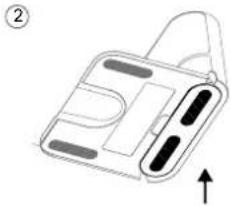
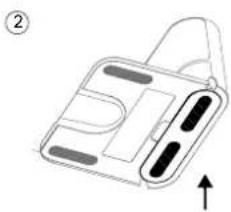
2 Remove Protective Strip
Remove the protective strips on both sides of the front bumper.

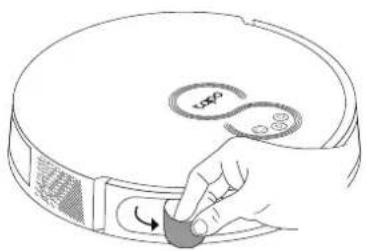
3 Remove Protective Film
Remove the protective film on the front bumper.
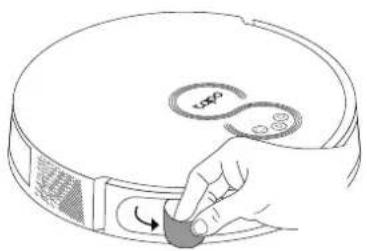
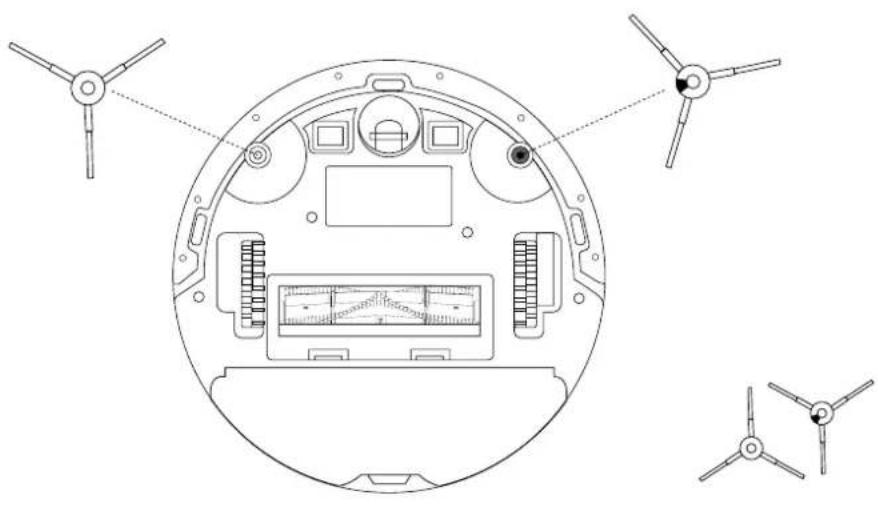
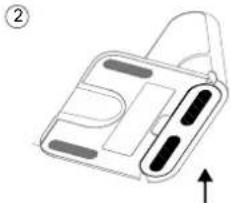
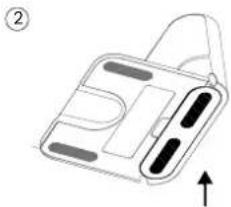
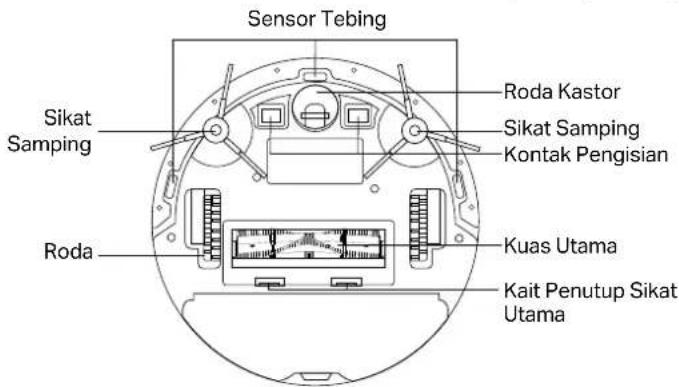
4 Install Side Brushes
- Identify the colors on the side brushes and the slots of the robot vacuum (black-black; white-white).
- Install the side brushes according to the colors and press them tightly to ensure they are installed in place.
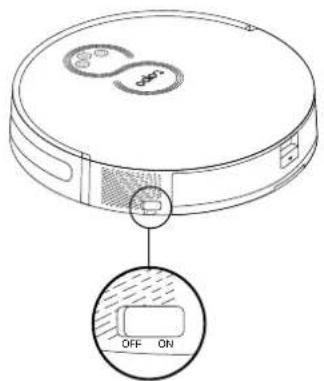
5 Power On and Charge
- Slide the power switch from OFF to ON to turn on your robot vacuum.
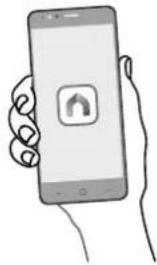
- Place the robot vacuum on the charging dock or tap Ⓞ to send it back to the dock to charge. It will return to the dock at the end of a cleaning job and whenever it needs to recharge.
Notes
- When the LED of the charging dock flashes 3 times and then goes out, the charging will begin.
• We recommend that you charge the robot vacuum fully for about 4 hours prior to starting the first cleaning job.
- If the robot vacuum is paused for 10 minutes, it will automatically enter sleep mode and the cleaning job will be canceled.
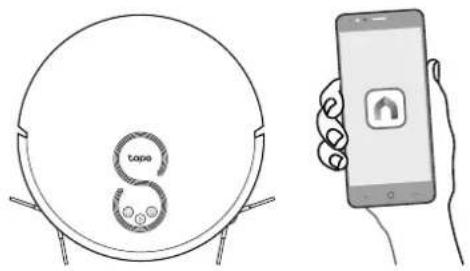
6 Download the Tapo App and Connect to Wi-Fi
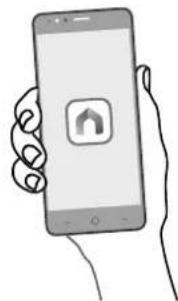
- Download the Tapo app from the App Store or Google Play, then log in.

- Open the Tapo app, tap the + icon, and select your model. Follow the step-by-step instructions to easily set up your robot vacuum.
Troubleshooting & Voice Prompts for Issues: https://www.tp-link.com/support/faq/3525/
Notes
German

Spanish
5 Power On and Charging

Greek
Power/Charging
Remarks
French
Note
4 Install Side Brushes
Italian

Notes
4 Install the side brushes
Portuguese
5 Turn on and charge
Notes
3 Remove the protective film
Remove the protective film from the front bumper.
Finnish
Dutch
5 Turn on and charge

4 Install the side brushes
Swedish

Troubleshooting & voice messages for problems: https://www.tp-link.com/support/faq/3525/
Note
4 Install the side brushes
5 Turn on and charge
Troubleshooting & Voice Prompts for issues: https://www.tp-link.com/support/faq/3525/
4 Install side brushes
5 Turn on and charge

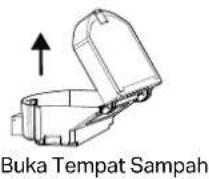
Dustbin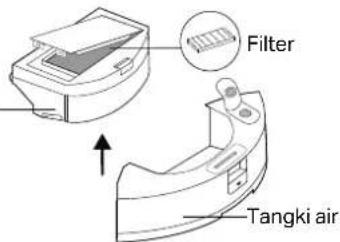
1 Position the Dock
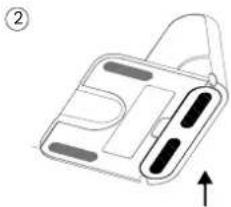
3 Remove the Protective Film
Remove the protective film on the front bumper.

4 Install Side Brushes


Note
3. Remove the protective film.
5. Turn on the power and charge.

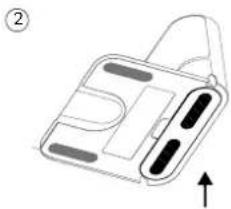
Remove the protective film.
2
②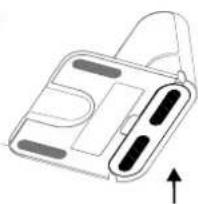
English: Safety Information
- Keep the device away from water, fire, humidity or hot environments.
- Do not attempt to disassemble, repair, or modify the device. If you need service, please contact us.
Warning
Avoid replacing a battery with an incorrect type that can defeat a safeguard. Avoid disposing of a battery into fire or a hot oven, or mechanically crushing or cutting a battery, which can result in an explosion. Do not leave a battery in an extremely high temperature surrounding environment, which can result in an explosion or the leakage of flammable liquid or gas. Do not leave a battery subjected to extremely low air pressure, which may result in an explosion or the leakage of flammable liquid or gas.
The instructions shall state the substance of the following:
This appliance is not intended for use by persons (including children) with reduced physical, sensory or mental capabilities, or lack of experience and knowledge, unless they have been given supervision or instruction concerning use of the appliance by a person responsible for their safety.
Children should be supervised to ensure that they do not play with the appliance.
The appliance is only to be used with the power supply unit provided with the appliance.
WARNING: For the purposes of recharging the battery, only use the detachable supply unit provided with this appliance.
The appliance contains a 2600mAh lithium-ion battery.
This appliance can be used by children aged from 8 years and above and persons with reduced physical, sensory or mental capabilities or lack of experience and knowledge if they have been given
supervision or instruction concerning use of the appliance in a safe way and understand the hazards involved. Children shall not play with the appliance. Cleaning and user maintenance shall not be made by children without supervision.
For TP-Link Branded Products Only. For more information about warranty, please visit https://www.tapo.com/support
THIS WARRANTY GIVES YOU SPECIFIC LEGAL RIGHTS, AND YOU MAY HAVE OTHER RIGHTS THAT VARY FROM STATE TO STATE (OR BY COUNTRY OR PROVINCE).
TO THE EXTENT ALLOWED BY LOCAL LAW, THIS WARRANTY AND THE REMEDIES SET FORTH ARE EXCLUSIVE AND IN LIEU OF ALL OTHER WARRANTIES. REMEDIES AND CONDITIONS.
TP-Link warrants the TP-Link branded hardware product contained in the original packaging against defects in materials and workmanship when used normally in accordance with TP-Link's guidelines for some period which depends on the local service from the date of original retail purchase by the end-user purchaser.
https://www.tapo.com/support
THIS WARRANTY GIVES YOU SPECIFIC LEGAL RIGHTS, AND YOU MAY ALSO HAVE OTHER RIGHTS WHICH VARY FROM STATE TO STATE (OR FROM COUNTRY OR PROVINCE).
TO THE EXTENT PERMITTED BY LAW, THIS WARRANTY AND THE REMEDIES SET FORTH ARE EXCLUSIVE AND IN LIEU OF ALL OTHER RIGHTS, REMEDIES, AND CONDITIONS.
TP-Link hereby declares that the device is in compliance with the essential requirements and other relevant provisions of directives 2014/53/EU, 2009/125/EC, 2011/65/EU and (EU)2015/863.
The original EU Declaration of Conformity may be found at https://www.tapo.com/support/ce/.
TP-Link hereby declares that the device is in compliance with the essential requirements and other relevant provisions of the Radio Equipment Regulations 2017.
The original UK Declaration of Conformity may be found at https://www.tapo.com/support/ukca/
German:
No restrictions exist in the use of radio frequencies or frequency bands in all EU member states, EFTA countries, Northern Ireland and Great Britain.
Operating Frequency / max output power
for technical support, user guides, FAQs, warranty & more


- CONTENTS
- POWER/CLEAN
- DOCK
- SPOT CLEANING/CHILD LOCK
- COMBINATION BUTTON
- LED
- POSITION THE DOCK
- NOTES
- REMOVE PROTECTIVE STRIP
- REMOVE PROTECTIVE FILM
- INSTALL SIDE BRUSHES
- POWER ON AND CHARGE
- DOWNLOAD THE TAPO APP AND CONNECT TO WI-FI
- GERMAN
- SPANISH
- POWER ON AND CHARGING
- GREEK
- POWER/CHARGING
- REMARKS
- FRENCH
- NOTE
- INSTALL THE SIDE BRUSHES
- PORTUGUESE
- TURN ON AND CHARGE
- REMOVE THE PROTECTIVE FILM
- FINNISH
- DUTCH
- SWEDISH
- TURN ON THE POWER AND CHARGE
- ENGLISH: SAFETY INFORMATION
- WARNING
Brand : TP-LINK
Model : Tapo RV20
Category : Vacuum Cleaner