
HSE 159 IX - Range hood SCHOLTES - Free user manual and instructions
Find the device manual for free HSE 159 IX SCHOLTES in PDF.
User questions about HSE 159 IX SCHOLTES
0 question about this device. Answer the ones you know or ask your own.
Ask a new question about this device
Download the instructions for your Range hood in PDF format for free! Find your manual HSE 159 IX - SCHOLTES and take your electronic device back in hand. On this page are published all the documents necessary for the use of your device. HSE 159 IX by SCHOLTES.
USER MANUAL HSE 159 IX SCHOLTES
General information, 8
Data plate
Disposal
Precautions for operation,9
Information relating to installation
Use and Maintenance, 10-12
Electric control panel
Cleaning the outside of the appliance
Cleaning the grease filter
Replacing the carbon filter
Replacing the carbon filter (HPI 95)
Replacing the carbon filter (HSE 159 IX)
Lamp Replacement
Electrical Connection
The Guarantee
Assembly, 43
This instruction manual contains all the technical information necessary for the installation of the appliance.
The information and technical data provided is subject to change and the manufacturer, in line with technological progress, reserves the right to make any necessary modifications without prior notification.
All configurations and accessories linked to the appliance are described in the pages that follow, although some of these accessories may be optional and supplied on request.
In order to prolong the functional lifespan of the appliance and to guarantee maximum safety when using it, we recommend that the following instructions are followed carefully and that no electrical or mechanical variations are performed on the appliance or the exhaust ducting.
If you experience any problems, please contact the Authorised Technical Assistance Service and request original replacement parts.
Please read this manual carefully and follow all instructions provided so as to avoid damaging property or harming individuals.
Due to the fact that the suction/operational assembly is installed in various product types, its perimeter dimensions may vary; this may also lead to a variation in fixing points.
Disposal of household appliances:
- When disposing of packaging material: observe local legislation so that the packaging may be reused.
- The European Directive 2002/96/EC on Waste Electrical and Electronic Equipment (WEEE), requires that old household electrical appliances must not be disposed of in the normal unsorted municipal waste stream. Old appliances must be collected separately in order to optimise the recovery and recycling of the materials they contain and reduce the impact on human health and the environment. The crossed out "wheeled bin" symbol on the product reminds you of your obligation, that when you dispose of the appliance it must be separately collected.
Consumers may take their old appliance to public waste collection areas, other communal collection areas, or if national legislation allows return it to a retailer when purchasing a similar new product. All major household appliance manufacturers are active in the creation of systems to manage the collection and disposal of old appliances.
| DATA PLATE | |
| Electrical connections | voltage of 220-240V ~ 50/60Hz (see data plate ) |
| CE | This appliance conforms to the following European Economic Community directives: -2006/95/EEC dated 12/12/2006 (Low Voltage) and subsequent amendments -89/336/EEC dated 03/05/89 (Electromagnetic Compatibility) and subsequent amendments -93/68/EEC dated 22/07/93 and subsequent amendments. -2002/96/EC |
The accessories required for the installation of the hood can be found inside the latter. The hood is convertible and can therefore be installed in either the OUTDOOR VENTING or the AIR RECIRCULATION mode.
- Before installing and/or using this hood, please read the instructions carefully and thoroughly.
- Before you install the hood, make sure the voltage (V) and frequency (Hz) indicated on the serial and technical data plate located inside the appliance correspond with the voltage and frequency available in the place of installation.
- After having removed the packaging, check that the appliance is intact. If in doubt, do not use the appliance and contact professionally qualified personnel.
- All installation and adjustment operations should be carried out by a qualified technician in accordance with the regulations in force. Specific indications are given in the section intended for the installer.
- Clean the hood according to the manufacturer's instructions, especially for the deposits formed on the dirty surfaces to avoid any risks of fire.
- Ensure the burners are always covered so as not to cause the hood filter to overheat.
- When frying food, never leave the pan unattended: the oil inside the pan could overheat and catch fire. If the pan contains oil which has already been used to fry, the risk of spontaneous ignition is even greater.
- It is strictly forbidden to flambé food beneath the cooker hood.
- The lowest part of the hood must be positioned at least 65~cm above the hob.If the installation instructions for the gas cooker specify a greater distance, take this measurement into consideration when installing the hood.
- This hood is intended for domestic use only.
- This hood may only be used for the extraction of fumes and smoke produced while cooking foods.
12.The appliance must not be installed above stoves with a top radiant hotplate.
Ducted ("air extraction") version:
13 The air collected should not be conveyed in a duct used for the discharge of exhaust fumes from appliances that run on energy sources other than electricity.
14. Suitable ventilation of the room must be provided when the hood and appliances that run on energy sources other than electricity are used at the
same time.
- If the hood is used in the outdoor venting mode, check the condition of the exhaust duct should the latter have been left unused for an extended period of time.
- Remember to pay attention to the local norms in force and to the regulations from the competent authorities on the subject of air exhaust when the hood is operating in the outdoor venting mode.
All advice given on this matter must be followed scrupulously in order to avoid possible fires.
We shall not be held responsible for any damage or fires resulting from the non-observation of the above instructions when using this appliance.
Information relating to installation
The hood can operate in the following ways:
Ducted ("air extraction") version:
Smoke and steam are drawn in, then directed through a suitable duct (sold separately) until they are expelled outside or into a purpose-built shared exhaust duct.
If fitted, remove the carbon filter.
The airflow deviator must not be installed.
Filter ("air recirculation") version:
Smoke and steam are drawn in and purified using an active carbon filter, then redirected back into the kitchen with the help of the airflow deviator.
Make sure that the hood is already fitted with a carbon filter; if necessary, order one and install it.
You will also need a short piece of ducting (sold separately) to connect the motor assembly outlet to the flow deviator.
Operation
- The hood has several operating speeds. For more efficient performance, use the lowest suction level when there is only a small amount of smoke or steam and the higher suction level when there are large amounts of smoke and steam; there is also an intermediate suction level, which should be used when the amount of smoke and steam produced by the cooking process is at a normal level.
- We recommend that the hood is switched on a few minutes before the cooking process is started, and that it is only switched off after all the odours have been completely eliminated.
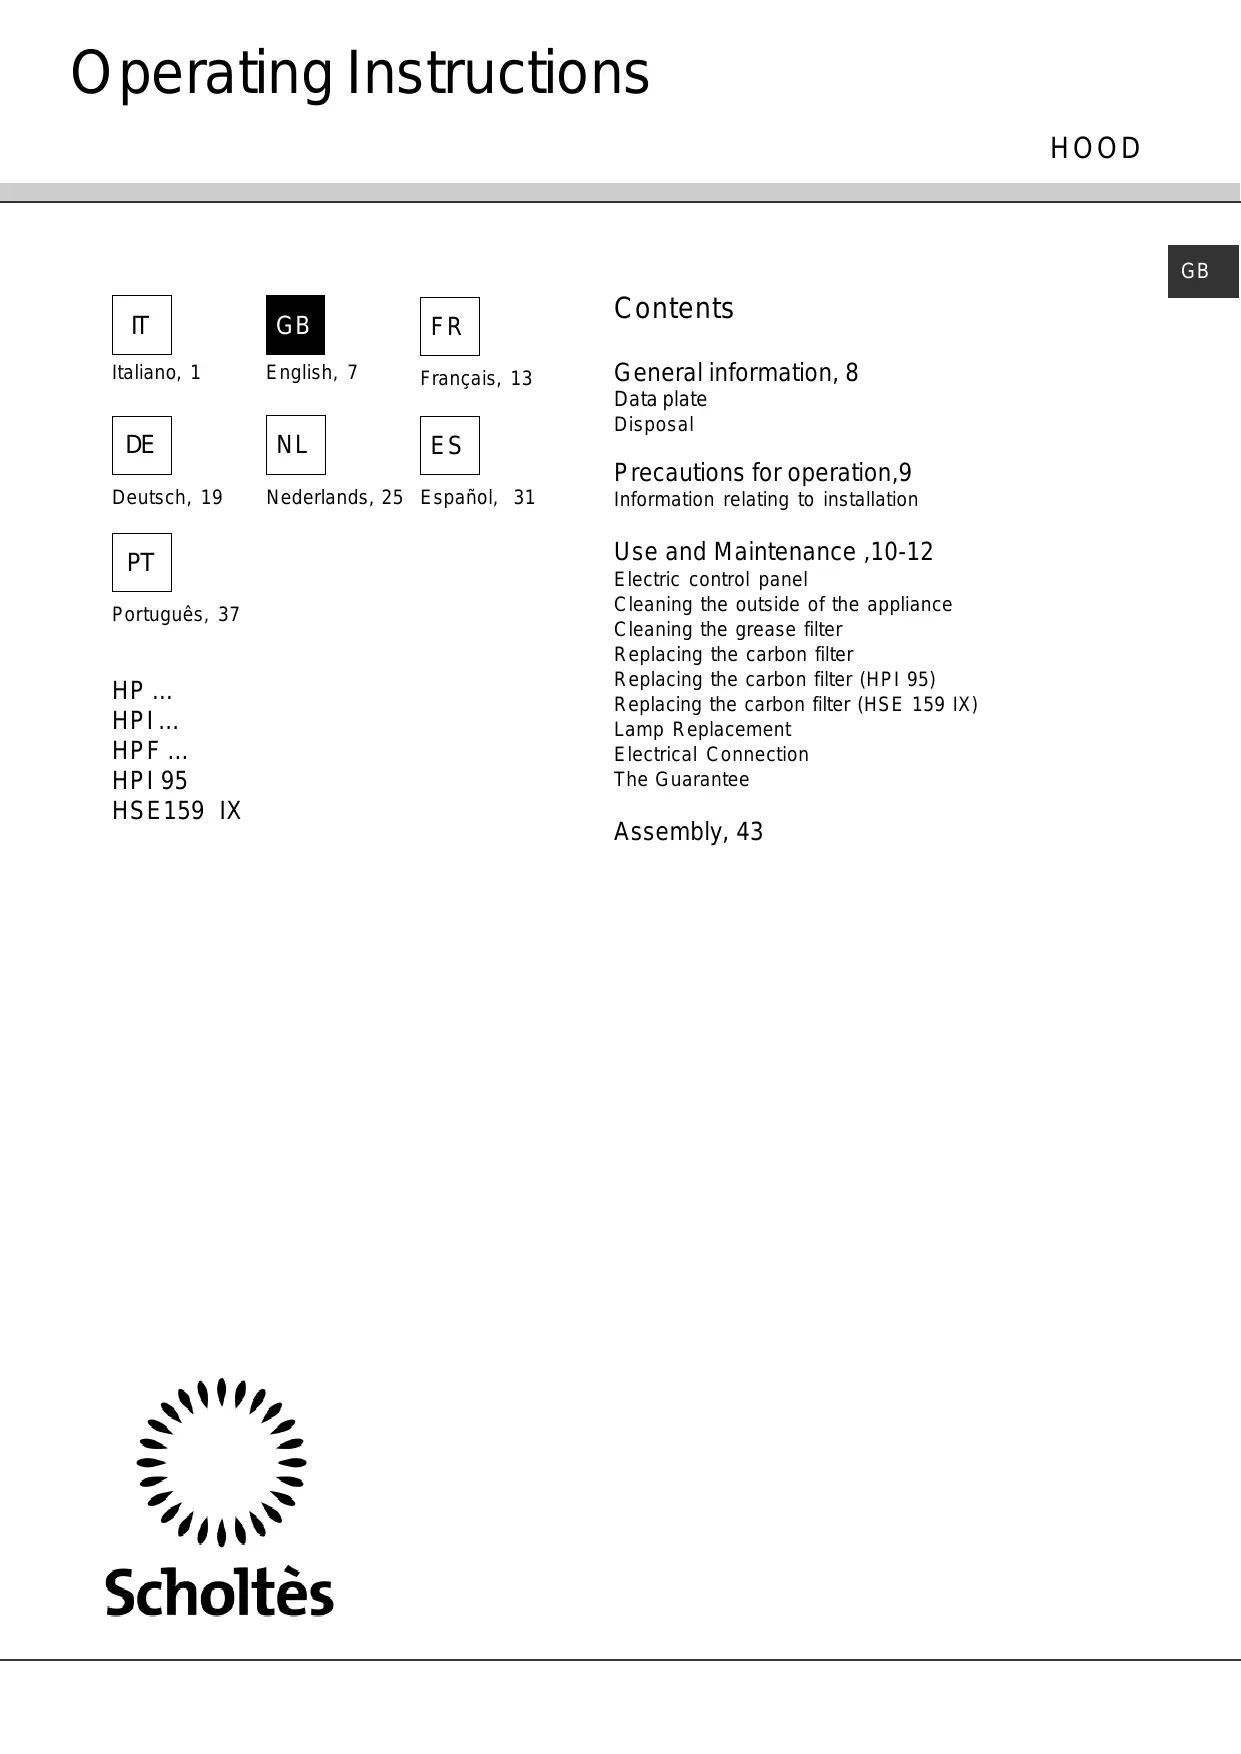
Push-button controls
The control panel includes:
1 "I\0" button to turn the motor on/off
3 "I" "II" "III", buttons to adjust the motor speed (1st - 2nd - 3rd speed)
1 " button to turn the lighting on/off
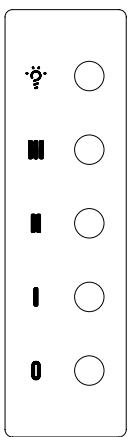
Electric control panel:
| 1 | 2 | 3 | 4 | 5 |
1 - lights ON/OFF button
2 - motor ON/OFF button
3 - "speed level 2" activation button
4 - "speed level 3" activation button
5 - "speed level 4" activation button
Switching the motor on and off.
When button 2 is pressed, the motor will start running at "speed level 1". To switch off the motor while it is running at "speed level 1", press button 2 once; for a higher speed level, press button 2 twice.
Setting the automatic deactivation timer.
To set the automatic motor deactivation timer (10 minutes), press and hold the button corresponding to the selected speed level for 2 seconds. The LED corresponding to this button will flash.
Resetting the filter alarm.
After every 30 hours of operation, the filter alarm will be activated. To reset it, press and hold button 4 for 5 seconds while the motor is switched off.
Touch Control Panel:
The hood features "Touch Control" buttons. They are activated by lightly touching the symbol related to the function you want to use.
1 - lights on/off button
2 - motor on/off button/timer deactivation
3 - "speed level 2" on button/timer deactivation
4 - "speed level 3" on button/timer deactivation
5 - "speed level 4"/"speed level 5" on button/timer deactivation
6 - timer activation button
Switching the motor on and off
When button 2 is pressed, the motor will start running at "speed level 1". To switch off the motor while it is running at "speed level 1", press button 2 once; for a higher speed level, press button 2 twice.
In "speed level 4" press button 5 to switch to "speed level 5".
Timer activation/deactivation automatic switching off
To activate the motor automatic switching off timer (10 minutes), press button 6. At the end of the time the motor and lights will switch off. To deactivate the timer press any speed button (buttons 2-3-4-5)
Indicator lights
- with the motor off indicator lights 7-8-9-10 are off
- at "speed level 1" indicator light 7 is on
- at "speed level 2" indicator lights 7-8 are on
- at "speed level 3" indicator lights 7-8-9 are on
- at "speed level 4" indicator lights 7-8-9-10 are on
- at "speed level 5" indicator lights 7-8-9 are on and 10 is flashing
- the timer is shown by indicator light 7 flashing
Resetting the filter alarm
The filter alarm activates every 100 hours of operation, the alarm is shown by the flashing of indicator lights 7-8-9-10 for 10 seconds, each time the motor switches off. To reset it, press button 6 three times.
!If any problems relating to the operation of the appliance arise, before contacting the technical assistance service, unplug the product to disconnect it from the electricity supply for at least 5 seconds, then reconnect it. If the problem persists, make sure that the control panel is connected to the main
Maintenance
Disconnect the appliance from the electricity supply before performing any type of maintenance work on it.
To ensure the hood operates efficiently and consistently, we recommend that maintenance is performed regularly (every ten days on average).
Cleaning the outside of the appliance
Clean the external surfaces of the appliance regularly.
To clean the hood thoroughly, use a cloth which has been dampened with alcohol or any of the special cleaning products currently available in shops.
Do not use products which contain abrasive substances.
Cleaning the grease filter
The grease filter is used to trap suspended particles of grease which are produced during the cooking process.
It should be cleaned once a month using non-aggressive detergent, either manually or in the dishwasher, at a low temperature using a short cycle.
If cleaned in the dishwasher the filter may become opaque over time, but its filtering capacity will not be diminished in any way.
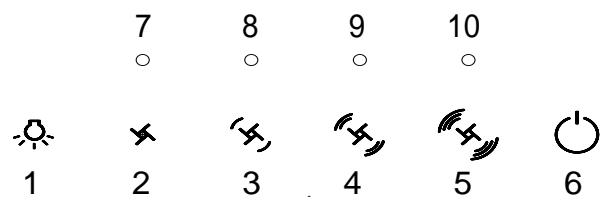
Remove it using the handle attached, pushing it backwards then pulling it downwards (Fig. 1).
After washing it, dry it carefully and replace it, following the above instructions in reverse order.
For the HSE 159 IX model only, the grease filter may be replaced by the active carbon filter kit inside the packaging.
Fig. 1
Replacing the carbon filter
The carbon filter is used to remove grease and odours from the air before it is released back into the room through the upper grille.
The carbon filter may be washed every two months, using hot water and suitable detergent or a dishwasher cycle at 65^ (if cleaned in the dishwasher, run an entire cycle when no crockery is inside). Remove excess water without damaging the filter, then remove the matting inside the plastic frame and place the filter in the oven at 100^ for 10 minutes to dry it thoroughly.
Replace the active carbon filter every three years or if it is damaged
To fit or replace the carbon filter:
Remove the grease filter(s).
- Fit the frame holding the carbon filter in place and fix it to the motor assembly using 4 screws.
Position the carbon filter matting over the frame and fix it in place using the bracket provided.
Fit the grease filter(s).
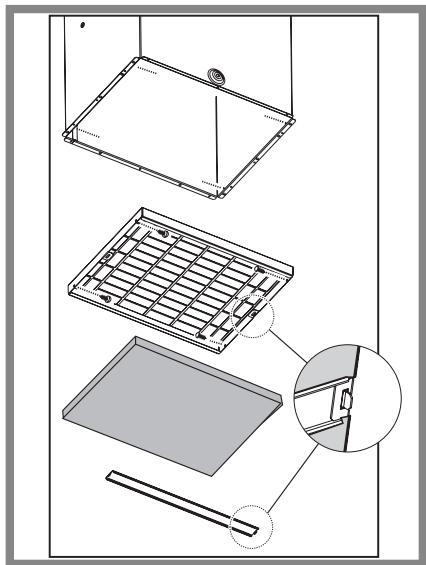
Fig. 2
Replacing the carbon filter (HPI 95)
For your hood to operate at its best, the activated carbon filters must be replaced on a regular basis, at least once every three months. To buy these, contact an Authorised Service Centre or the Retailer where you purchased it. Before you begin to insert the carbon filter, put the omnipolar switch on the O position (OFF). Pull the lever on the metal filter until it is released from its housing then remove it by pulling it downwards (Fig. 3). Remove the soiled activated carbon filters "O" by turning them clockwise and then removing them from the guide pegs on the outdoor venting assembly.
Fit the new filters on, making sure the holes located on the same fit well around the special reference pegs of the outdoor venting assembly (Fig. 4) and turn them anti-clockwise until you hear them click (opposite action
to the one for dismounting).
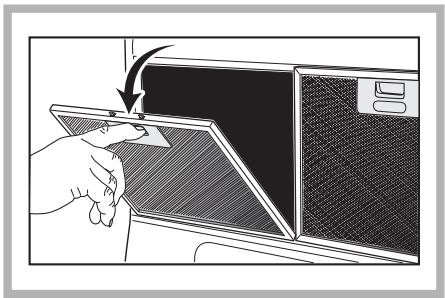
Fig. 3
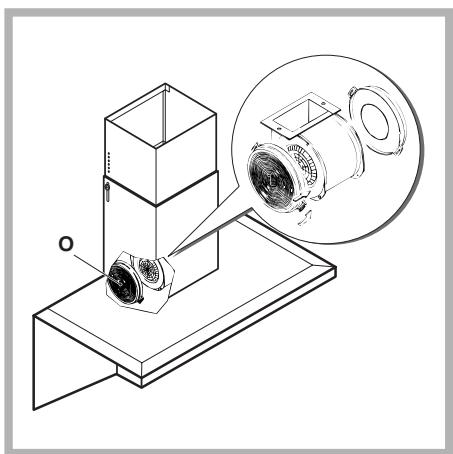
Fig. 4
Replacing the carbon filter (HSE 159 IX)
The carbon filter (fig. 3) is used to remove grease and odours from the air before it is released back into the room through the upper grille.
The carbon filter may be washed every two months, using hot water and suitable detergent or a dishwasher cycle at 65^ (if cleaned in the dishwasher, run an entire cycle when no crockery is inside). Remove excess water without damaging the filter, then remove the matting inside the plastic frame and place the filter in the oven at 100^ for 10 minutes to dry it thoroughly.
Replace the active carbon filter every three years or if it is damaged
To fit or replace the carbon filter:
Remove the grease filter(s).
Fit the grease filter(s).
Lamp Replacement
For the HSE 159 IX model only: call technical assistance service. For the other models:
disconnect the appliance from the electricity supply.
a. Remove the cover of the recessed lamp by using a small screwdriver to lever it out (Fig. 5).
b Replace the faulty lightbulb with an identical one.
c. Replace the lamp cover.
d. If the lighting system does not work, make sure the lamps have been inserted correctly before contacting the technical assistance service.
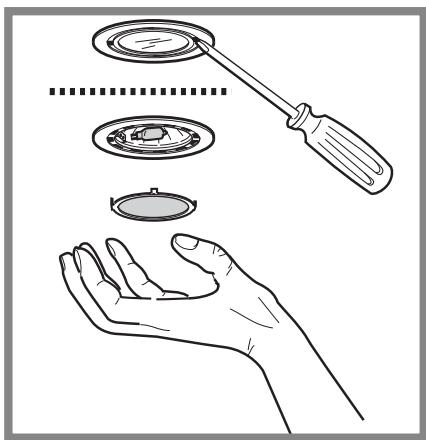
Fig. 5
Electrical Connection
This hood is intended for a fixed permanent installation. For the mains voltage and frequency information, consult the serial number plate situated inside the appliance. The power supply cable (type H05VV-F 3 × 0.75 ~mm^2 ) connected to the hood's terminals marked "L" (mains), "N" (neutral) and fastened by means of the cable clamp must be connected to a suitable and accessible fixed power point by specialised and authorised personnel, who are to install the hood in compliance with the norms and laws in force, providing for an omnipolar switch above the electrical connection with a minimum contact opening of 3 ~mm . The manufacturer will not be held responsible should all the accident-prevention norms in force and necessary for the normal and regular operation of the electrical system fail to be observed.
The Guarantee
The appliance should reach the purchaser provided with not only this instruction booklet but also the GUARANTEE CERTIFICATE. Should the latter be missing, then DEMAND IT.
For the guarantee to be effective, the purchaser should ask the retailer to validate the guarantee certificate by stamping it and dating it with the date of purchase in the space provided.
THE GUARANTEE CERTIFICATE NEED NOT BE POSTED FOR VALIDATION.
Should this procedure fail to be observed, the technical staff shall be forced to CHARGE the purchaser for any repairs.
For any malfunctions during the operation of the hood, the purchaser can contact the Retailer where the appliance was bought or his/her nearest Authorised Service Centre.
HELP US SERVE YOU BETTER: please read the guarantee clauses herein.

Italiano, 1

English, 7

Français, 13

Deutsch, 19

Nederlands, 25

Espanol, 31

Portugués, 37
HP ...
HPI ...
HPF ...
HPI 95
HSE159 IX
Sommaire
Généralités, 14
Reset alarm filters.
- Position the cooker hood and drill the wall as shown in the picture (4 holes for the Ø8 rawl plugs provided)
- Fix the support bracket (1) to the wall using 2 screws
- Attach the cooker hood to the 2 previously inserted screws (2)
- Fasten 2 M5 screws provided to the slots (3) and adjust them to align the hood properly
- Once adjustment is completed, tighten the previously inserted screws
FR
Installation instructions
-Position the hood and mark the holes for the supports "E"
-drill the holes in the wall and position the supports, making a hole for each slot: make 4 holes (anchors Ø8 provided)
-secure the supports with the screws and rest the hood on these supports
-to adjust the position of the hood, loosen the screws of the supports and adjust the height
- once adjustment is completed, tighten the screws and mark the position of the roll bar screws
- remove the hood and make 2 holes (anchors AE8 provided)
-rest the hood on the supports and secure the roll bar screws "P"
FR
Installation instructions
