
SSB 50 A1 - Loudspeaker SILVERCREST - Free user manual and instructions
Find the device manual for free SSB 50 A1 SILVERCREST in PDF.


| Product Type | Portable Bluetooth Speaker |
| Model | SSB 50 A1 |
| Brand | SilverCrest |
| Dimensions (approx.) | 150 x 120 x 120 mm |
| Weight (approx.) | 0.5 kg |
| Power Supply | Built-in rechargeable battery, USB charging (5V) |
| Connectivity | Bluetooth, AUX input, USB port |
| Max Power Output | 10 W RMS |
| Frequency Response | 100 Hz - 20 kHz |
| Battery Life | Up to 6 hours at moderate volume |
| Charging Time | Approx. 3 hours |
| Main Functions | Bluetooth pairing, volume control, track skip, hands-free calling |
| Cleaning & Care | Wipe with a dry soft cloth; do not use abrasive cleaners or immerse in water. |
| Safety Warnings | Do not expose to extreme temperatures, moisture, or drop. Keep away from children. |
| Spare Parts & Repairability | Spare parts may be available from SilverCrest service; professional repair recommended. |
| General Information | This device is intended for private use only. Read all instructions before use. |
Frequently Asked Questions - SSB 50 A1 SILVERCREST
User questions about SSB 50 A1 SILVERCREST
0 question about this device. Answer the ones you know or ask your own.
Ask a new question about this device
Download the instructions for your Loudspeaker in PDF format for free! Find your manual SSB 50 A1 - SILVERCREST and take your electronic device back in hand. On this page are published all the documents necessary for the use of your device. SSB 50 A1 by SILVERCREST.
USER MANUAL SSB 50 A1 SILVERCREST
BLUETOOTH® TV STEREO SOUNDBAR SSB 50 A1
HOYER Handel GmbH
Tasköprüstraße 3
DE-22761 Hamburg
DEUTSCHLAND
DE
TV-STEREO-SOUN DBAR MIT BLUETOOTH® Bedienungsanleitung
- Overview ......2
- Intended purpose ....3
- Safety instructions ....3
- Items supplied ....5
- Before using for the first time ....5
5.1 Remote control 5
5.2 Setting up / Wall mounting 5
5.3 Overview - Connections 6
5.4 How to use 6 - Operation ......6
6.1 Selecting the type of connection 6
6.2 Sound settings 6
6.3 HDMI (ARC) connection.... 7
6.4 Bluetooth® 7
-
Cleaning and storing 8
-
Disposal 8
-
Troubleshooting ....8
-
Technical specifications .....9
11.Warranty of the HOYER Handel GmbH ..10
Service Centre ....10
1. Overview
Please observe the illustrations on the fold-out page.
Soundbar
| 1 | Display |
| - -: Standby mode | |
| LINE: LINE IN | |
| Hd: HDMI (ARC) | |
| AUX: AUX IN | |
| bt: Bluetooth® | |
| OPtl: OPTICAL | |
| 2 | POWER button |
| 3 | SOURCE button |
| 4 | VOL -/+ buttons |
| 5 | D C I N socket |
| 6 | SUB OUT socket |
| 7 | LINE IN socket |
| 8 | AUX IN L / R socket |
| 9 | OPTICAL IN socket |
| 10 | HDMI (ARC) socket |
Accessories
| 1 1 | Power unit |
| 1 2 | 2 wall brackets |
| 1 3 | Stereo cinch cable |
| 1 4 | TOSLINK cable |
Remote control
| 15 | Transmission LED |
| 16 | Button ✅ |
| 17 | HDMI (ARC) button |
| 18 | OPTICAL button |
| 19 | PAIR button |
| 20 | ▶▶I button |
| 21 | ▶II button |
| 22 | VOL -/+ buttons |
| 23 | TREBLE -/+ buttons |
| 24 | BASS -/+ buttons |
| 25 | MUSIC, MOVIE, DIALOG, 3D buttons |
| 26 | 3D button |
| 27 | Battery compartment |
| 28 | ◀◀ button |
| 29 | LINE IN button |
| 30 | Button ⚙ |
| 31 | AUX button |
| 32 | Button ⏻ |
Installation
| 33 | Screws (4x 25 mm / 4x 50 mm) |
| 34 | Rawlplugs (4) |
| Drilling template (no image) |
Thank you for your trust!
Congratulations on your new TV Soundbar Stereo with Bluetooth®.
For a safe handling of the device and in order to get to know the entire scope of features:
- Thoroughly read these user instructions prior to initial use.
- Above all, observe the safety instructions!
- The device should only be used as described in these user instructions.
- Keep this copy of the user instructions for future reference.
- If you pass the device on to someone else, please include this copy of the user instructions. The user instructions are a part of the product.
We hope you enjoy using your new TV Soundbar Stereo with Bluetooth®!
Trademarks
The Bluetooth ® word mark and the Bluetooth ® logo are registered trademarks of the Bluetooth SIG, Inc. (Special Interest Group), any use of the trademark by the Hoyer Handel GmbH is effected within the framework of a licence.
The HDMI ® word mark is a registered trademark of HDMI Licensing LLC.

The symbol means that the content of the user instructions must be observed.
2. Intended purpose
This is a consumer electronics device. The TV Soundbar Stereo with Bluetooth ® is intended for playing sound from audio devices.
The device is designed for private use and must not be used for commercial purposes. The device must only be used indoors.
3. Safety instructions
Warnings
If necessary, the following symbols and warnings will be used in these user instructions:

DANGER! This symbol, in combination with the note "Danger" means a high risk. Failure to observe this warning may result in injury to life and limb.

DANGER! Risk of electric shock! This symbol, in combination with the note "Danger! Risk of electric shock" means a high risk. Failure to observe this warning may result in injury to life and limb.

WARNING! This symbol, in combination with the note "Warning" means a moderate risk. Failure to observe this warning may result in injury or serious material damage.
CAUTION: low risk: failure to observe this warning may result in minor injury or material damage.
NOTE: circumstances and specifics that must be observed when handling the device.

DANGER for children and people with disabilities
Children must not play with packing material. Children must not play with the packing material. There is a risk of suffocation!
- This device is not designed to be used by people (including children) with limited physical, sensory or mental capabilities or people without adequate experience and/ or understanding, unless they are supervised by someone responsible for their safety or are instructed by them on how to use the device.
- Children must not play with the device.
- Keep the device out of the reach of children.

DANGER to and from pets and livestock
Electrical devices can represent a hazard to pets and livestock. In addition, animals can also cause damage to the device. For this reason you should keep animals away from electrical devices at all times.

DANGER! Risk of electric shock due to moisture
- The device must not be used in extreme conditions, e.g. rooms with high humidity (bathrooms).
- Protect the device and power unit from dampness and dripping or splashing water. For instance, never place
vases or something similar filled with liquid on or in the vicinity of the device.
- Never touch the device and power unit with wet hands.
- Pull the power unit out of the wall socket if liquid gets into the device.
- Should liquid enter the device, have it checked by an expert before starting the device up again.

DANGER! Risk of electric shock
- Never put the device into operation if there are visible damages to the device, the power unit or the cable or if the device has been dropped before. Do not use the device again, but have it checked by a specialist workshop.
- Never open the casing of the device or power unit.
- Connect the cable to the device before plugging the power unit into a wall socket.
- Only connect the power unit to a properly installed, easily accessible wall socket, the voltage of which corresponds to the specifications on the rating plate. The wall socket must continue to be easily accessible after the device is plugged in.
- Ensure that the cable cannot be damaged by sharp edges or hot surfaces.
- Ensure that the cable is not trapped or crushed.
- When removing the power unit from the wall socket, always pull the power unit and never the cable.
- Pull the power unit out of the wall socket, ... ...if there is a fault, ...before connecting the device to the power unit, ...before you clean the device and ...during thunderstorms.
- For a complete mains separation, pull the power unit out of the wall socket. Even if it is switched off, a small amount of power is always used as long as the power unit is plugged in.
- To avoid any risk, do not make modifications to the device. Repairs must be carried out by a specialist workshop or the Service Centre.
Batteries
- Be sure to observe the correct polarity when inserting the batteries.
- Clean the battery and possibly device terminals before you insert the batteries.

- DANGER OF EXPLOSION! Batteries must not be charged or reactivated by other means, nor must they be dismantled, thrown into a fire or short-circuited.
-
Remove the batteries from the remote control if you do not intend to use the remote control for an extended period, or if the battery runs out of power. The batteries might leak and damage the remote control.
Do not subject batteries to extreme conditions, e.g. do not place the remote control on radiators or expose it to direct sunlight. Otherwise, there is an increased danger of batteries leaking. -
If battery acid has leaked, avoid contact with the skin, eyes and mucous membranes. In case of contact with the acid, rinse the affected area at once with plenty of clean water and seek medical assistance immediately.
- Batteries can be life-threatening if swallowed. Therefore you should store batteries out of the reach of young children. If a battery has been swallowed, medical assistance must be sought immediately.
- Keep new and used batteries away from children.
- If you think the batteries could have been swallowed or have gotten into any part of the body, seek medical help immediately.

WARNING! Risk of material damage
- Only use the included original power adaptor for mains operation.
- If you notice any irregularities (e.g. unusual noises, strange smells or smoke developing), pull the power unit out of the wall socket immediately. Do not use the device any longer.
- If the device is moved from a cold location to a warm location, condensate may form in the device. Leave the device switched off for approx. 2 hours to become acclimatised.
- Place the device on a stable, flat surface.
- Protect the device against damage, e.g. from:
- Heat, direct sunlight and open flames
- Impacts and similar violent effects
- Candles and other open flames must be kept away from this product at all times in order to prevent the spread of fire.
- Do not cover the power unit to prevent overheating.
- Do not use any astringent or abrasive cleaning agents.
The device is fitted with non-slip plastic feet. As furniture is coated with a wide array of varnishes and synthetics, and is also treated with different care products, it cannot be fully ruled out that some of these materials contain ingredients that could attack and soften the non-slip plastic feet. If necessary, place a non-slip mat under the device. -
Please ensure the following when mounting on a wall:
-
The fixing material must be matched to the properties of the wall. If necessary, use fixing material other than that supplied.
- Make sure that in the installation location there are no pipes or cables in the wall (e.g. electricity, water, gas).
- If necessary, have the wall mounting carried out by an expert.
Notes on Bluetooth®
- Radio waves are potentially able to affect or even interfere with the operation of heart pacemakers, (sensitive) electronic devices and other radio waves (e.g. WLAN). Therefore, please observe the following notes.
- People wearing heart pacemakers, should maintain a distance of 20 cm to the product.
-
Radio waves may cause interferences, e.g. in mobile phones or hearing aids.
-
Do not use the product in areas subject to explosion hazards.
- In case of any interferences in other radio units (e.g. WLAN) occur, check by deenergizing the sound bar if this is the cause.
- Do not use the device in the vicinity of microwave ovens or devices generating magnetic fields.
4. Items supplied
1 soundbar
1 p o w e r u n i t
1 remote control
2 batteries of type LR3 AA 1.5 V
1 stereo cinch cable 13
1 T O S L I N K c
2x4 screws 33 (25 mm / 50 mm)
4 rawlplugs 34
2 wall brackets 12
1 drilling template
1 copy of the quick reference guide
1 important information
1 copy of the user instructions
- Remove all packing material.
- Check that the device is undamaged.
If the delivery is incomplete or defective, please contact the responsible service centre of the manufacturer (see "Warranty of the HOYER Handel GmbH" on page 10).
Please observe the illustrations on the fold-out page.
5. Before using for the first time
5.1 Remote control

WARNING!
- When inserting the batteries, please note the polarity markings inside the battery compartment.
- FIGURE A: open the battery compartment 27 by sliding the lid in the direction of the arrow and lifting it off.
- If necessary, replace the old batteries with new ones.
- Place the lid onto the battery compartment and push it in opposite direction of the arrow until it clicks into place.
5.2 Setting up / Wall mounting
NOTE: if you connect the device to a television set, place the device as centrally as possible below the set.
Setting up
- Place the device on a level surface.
- Connect the power unit 11 to the device.
Wall mounting

WARNING! Risk of material damage!
- Please ensure the following when mounting on a wall:
- The fixing material must be matched to the properties of the wall. If necessary, use fixing material other than that supplied.
- Make sure that in the installation location there are no pipes or cables in the wall (e.g. electricity, water, gas).
- If necessary, have the wall mounting carried out by an expert.
- In connection with the wall mounting, use HDMI right angle plugs so the plugs cannot be damaged by kinks.
- FIGURE B: drill 2 holes per wall bracket 40 cm apart. If necessary, use the enclosed drilling template.
- For the enclosed rawlplugs 34, use a drill with a diameter of 8 mm.
- Insert the rawlplugs 34 into the drill holes.
- Fasten the wall brackets 12 firmly to the wall using the screws 33.
- Insert all of the cables used into the connections (see "Overview - Connections" on page 6).
- Connect the power unit 11 to the device.
- Hook the device into the wall brackets 12. Both wall brackets 12 must engage safely into the holder on the rear of the device.
5.3 Overview - Connections
CAUTION: make sure that the soundbar and the devices to be connected are switched off before you connect them. Please also read the user instructions for the devices which you are connecting.
NOTES:
- An HDMI (ARC) cable for the HDMI (ARC) 10 input and a 3.5 mm stereo jack cable for the LINE IN 7 input are not included in the items supplied.
- The HDMI (ARC) 10 connection is only able to function if all components are ARC-enabled. If necessary, old HDMI cables must be replaced with new ARC-enabled ones.
| Input | Use | Remote control button | Display |
| AUX IN 8 | Connection with stereo cinch cable 13, e.g. television set, CD player | AUX 31 | AUX |
| LINE IN 7 | Connection with 3.5 mm stereo jack cable, e.g. MP3 player, telephone | LINE IN 29 | LInE |
| HDMI (ARC) 10 | Connection with HDMI (ARC) cable, e.g. to the HDMI ARC connection of the television set, DVD player | HDMI (ARC) 17 | Hd |
| OPTICAL IN 9 | Connection with TOSLINK cable 14, e.g. to digital receiver, DVD player | OPTICAL 18 | OPtl |
| Bluetooth® | Radio connection, e.g. smartphone | ∅ 30 | bt |
- A subwoofer can be connected to the cinch socket of the SUB OUT 6 output. This is automatically controlled by the device.
5.4 How to use
NOTE: the device remains in standby mode after being switched off. In this mode, the power consumption of the device is low. Pull the power unit 11 out of the wall socket to disconnect it from the mains.
- Connect the power unit 11 with an easily accessible wall socket. The display 1 shows --. The device is now in standby mode.
6. Operation
NOTES:
- All adjustments can be conveniently carried out with the remote control. The basic functions can also be carried out with the buttons on the device. Operation of the device in the instructions is usually described with the remote control.
-
The device switches to standby mode ...
...if no Bluetooth connection is established within 20 minutes or
...if either no signal or only a very weak signal is received for approx. 20 minutes, and the controls have not been used. -
Press the button ⏻ 32 to switch on the device from standby mode.
- Press the button ⏻ 32 to switch the device into standby operation.
6.1 Selecting the type of connection
- Press one of the AUX 31, LINE IN 29, HDMI (ARC) 17, OPTICAL 18 or 8 buttons 30 to switch to the desired connection (see "Overview - Connections" on page 6).
- On the audio device you can now start playback and select and control the music tracks.
6.2 Sound settings
NOTE: Changes in the sound settings are shown on the display 1.
- Volume: V00 ... V40
- Treble sounds: t -4 ... t 4
- Bass sounds: b -4 ... b 4
Controlling the volume
- During playback, press the VOL -/+ 22 buttons on the remote control or VOL -/+ 4 on the device. For a faster change of the volume, you can also keep the buttons pressed.
Muting the device
- Press the button ☑ 16 to mute the volume. The volume previously set will flash on the display 1.
- To switch the sound back on, press the button ☑ 16 again or one of the VOL -/+ 22 / 4 buttons.
Adjusting the tone quality
The settings are not stored when you change into a different mode.
- Press one of the buttons 25 to select the presets for the tone quality for music (MUSIC), films (MOVIE) or dialogue (DIALOG).
- Use the TREBLE -/+ 23 buttons to adjust the treble sounds.
- Use the BASS -/+ 24 buttons to adjust the bass sounds.
| Tone quality | Remote control buttons 25 | Display |
| Music MUSIC SOnG | ||
| Film | MOVIE | CInE |
| Language | DIALOG | dIA |
NOTE: for the movie tone quality (MOVIE) the 3D effect is already preset.
Switching the 3D effect on and off
- Press the 3D 26 button in order to switch the 3D effect on/ off.
- If the 3D effect is switched on, 3d is shown briefly in the display.
- If the 3D effect is switched off, the selected tone quality (SOnG, CInE or dIA) is shown in the display.
6.3 HDMI (ARC) connection
Definition
- HDMI stands for High Definition Multimedia Interface. Via this transmission route, digital images and audio signals can be transmitted.
- HDMI (ARC - Audio Return Channel) means that the cable is provided with an ARC channel. Via this channel, audio signals are transmitted in both directions.
The following modern devices are usually provided with an ARC output: television sets, games consoles or digital receivers. In the following, the connection to a television set is described.
Via the ARC channel of the HDMI cable, digital audio signals can be transmitted from the source device (e.g. television set) to the soundbar.
The audio transmission via the HDMI (ARC) socket 10 can only work if all components are ARC-enabled. If the transmission is unsuccessful, you must take one or possibly several of the following items into account:
- The old HDMI cable must be replaced with a new ARC-enabled cable.
- Not every HDMI socket on the television set needs to support ARC. In this case, the HDMI cable on the television set must be connected to another ARC-enabled HDMI socket. Usually, the respective HDMI sockets are labelled with ARC. If not, refer to the user instructions of your television set.
-
For several television sets, the digital audio output must be activated. Select the audio output PCM 2.0 (PCM stereo). If the audio output PCM 2.0 (PCM stereo) is not set on the television set, the soundbar will automatically switch off.
-
Connect the socket HDMI (ARC) 10 by means of an ARC-enabled HDMI cable to an HDMI ARC socket of your television set.
- Switch on the soundbar with the button ⏻ 32.
- By pressing the HDMI (ARC) button 17, select the HDMI input.
- Switch on the television set. When the connection is established for the first time, it may take several seconds until sound is output from the soundbar.
NOTE: if you use the HDMI (ARC) 10 connection, the soundbar is usually switched on and off via the remote control of the connected device. The connected device must support the CEC (Consumer Electronic Control) protocol.
6.4 Bluetooth®
Establishing connection
NOTES:
• The identification of the device is "SSB 50 A1".
- After it has been switched over to Bluetooth ® , the device automatically attempts to establish a connection with the last paired device.
- Please observe that the establishment process of the connection may vary slightly depending on the device and the software used.
- Press the 8 30 button to switch over to a Bluetooth® connection. The display 1 shows bt.
- Switch on the audio device (e.g. smartphone) and start the Bluetooth® connection.
- The audio device will now receive the device identification "SSB 50 A1". If nothing happens, press the PAIR 19 button on the remote control for approx. 1 second. The display 1 will show bt flashing rapidly.
- Establish the connection with the soundbar on the audio device. If you are asked for a password, enter "0000". Both devices are now interconnected. The display 1 shows bt continuously, and an audio signal sounds.
NOTE: usually, audio devices remember the identification of the device. In this case, it may not be necessary to establish the connection manually again if the Bluetooth® function is activated.
- Now play a song on the audio device. The sound is played back from the soundbar.
- With the I◀◀28, ▶▶I 20 and ▶/II 21 buttons you can select and control the music tracks.
Interruption of the connection
The connection is interrupted if
...one of the devices is switched off;
...the Bluetooth® function is switched off;
...the range (approx. 10 metres) is exceeded;
... you press the PAIR 19 button until the display 1 shows bt flashing rapidly. In this case, a new connection to another device can be established immediately.
7. Cleaning and storing

DANGER! Risk of electric shock!
- Pull the power unit 11 out of the wall socket before you clean the device. Make sure that no liquid gets into the device.
- Clean the device with a slightly damp cloth. In case of persistent contamination, you can also use a slightly more gentle cleaner such as detergent. Solvents, spirits, thinners etc. must not be used, as they can damage the surface of the device.
- When not using the device, store it in a place where neither high temperatures nor moisture can affect it. Remove the battery from the remote control.
8. Disposal
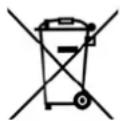
This product is subject to the provisions of European Directive 2012/19/EC. The symbol showing a wheelie bin crossed through indicates that the product requires separate refuse collection in the European Union. This applies to the product and all accessories marked with this symbol. Products identified with this symbol may not be discarded with normal household waste, but must be taken to a collection point for recycling electric and electronic appliances. Recycling helps to reduce the consumption of raw materials and protect the environment.
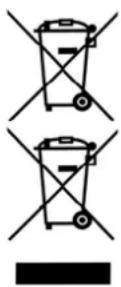
Batteries must not be discarded with your household waste. Spent batteries must be disposed of properly. Special containers are available for this purpose in shops selling batteries and at municipal collection points.
(Rechargeable) batteries marked with the following letters contain harmful substances such as: Cd (cadmium), Hg (mercury), Pb (lead).
Packaging
When disposing of the packaging, make sure you comply with the environmental regulations applicable in your country.
9. Troubleshooting
If your soundbar fails to function as required, please try this checklist first. Perhaps there is only a minor problem, and you can solve it yourself.

DANGER! Risk of electric shock!
- Do not attempt to repair the device yourself under any circumstances.
| Fault Possible causes / Action | |
| No function | Has the device been connected to the power supply? Is the display 1 showing – –?In the case of a connection to the HDMI ARC 10 socket, the HDMI cable as well as the connected device (e.g. a television set) must also be ARC-enabled. If your television set is not provided with an ARC-enabled HDMI connection, switch to a different type of connection or replace the television set.Replace the old HDMI cable with a new, ARC-enabled cable.Has the correct audio signal been selected at the audio device (e.g. television set)? Select PCM 2.0 (or PCM stereo) as the audio output. |
| No Bluetooth®connection | Is the Bluetooth®function of the audio device active?Did you switch off the device?Do eBluetooth®connection to another device exist? Press thePAIR 19 button until the display 1 shows bt flashing rapidly, and create the new connection. |
| No music play-back | Is the volume set too low on the audio device?Have you selected the correct connection?Is the volume too low or switched off? |
| Interferences during operation | In the case of any possibly occurring interferences, remove, if necessary, any mobile phones, tablets or other devices with radio wave operation located in the vicinity of the sound-bar. |
| Soundbar switches itself off | This device has an automatic shutdown mechanism to save energy. This device automatically switches to standby mode if either no signal or only a very weak signal is received for approx. 20 minutes, and the controls have not been used. |
10. Technical specifications
| Model: SSB 50 A1 | |
| Power rating: Standby power consumption: | 2x 10 W + 1x 30 W RMS < 0.5 W |
| Soundbar: Input: | 18.0 =¥ ◇13◇ |
| Power unit: SHEN ZHEN CITY HONG BEN ELECTRONIC CO., LTD | Input: 100 - 240 V ~ 50/60 Hz, 0.8 A max |
| Model EU: HB40-1801300SPA BS: HB40-1801301SPA | Output: 18.0 =¥ , ◇13◇ |
| Protection class of the power unit: | II □ |
| Audio format: PCM 2.0 (PCM stereo) | |
| Bluetooth®: Range: Frequency range: Transmission power: | v4.2 (A2DP, AVRCP) up to 10 m 2402-2480 MHz < 10 dBm |
| Input: LINE IN AUX IN L/R HDMI (ARC) OPTICAL IN | 1x 3.5 mm stereo jack socket 2x cinch sockets 1x HDMI ARC socket 1x TOSLINK socket |
| Output: SUB OUT 1x cinch socket | |
| Battery for the remote control: | 2x type LR3 AAA 1.5 V |
| Dimensions (WxDxH): | approx. 94 x 8 x 10 cm (not including wall bracket) |
| Weight: | approx. 2.8 kg |
| Operation and storage conditions: | 10 °C to 35 °C Relative humidity 40 to 85 % |
Symbols used
 | Double insulation |
 | Certified Safety. Devices must comply with the generally acknowledged rules of technology and the German Product Safety Act (Produktsicherheitsgesetz - ProdSG). |
 | With the CE marking, HOYER Handel GmbH declares the conformity with EU guidelines. |
 | Devices with this symbol may only be operated indoors (dry environment). |
 | This symbol reminds you to dispose of the packaging in an environmentally friendly manner. |
 | Recyclable materials: cardboard (except corrugated cardboard) |
| - - - - | Direct current |
| ◇-◇-◇ | Symbol for polarity |
Subject to technical modifications.
Notes on the EU declaration of conformity
The firm HOYER Handel GmbH hereby declares that this product meets the fundamental requirements of
- the RED 2014/53/EC,
- the ErP Directive 2009/125/EC, as well as
- the RoHS Directive 2011/65/EU.
For a complete EU-declaration of conformity, refer to the Internet at http://qr.hoyerhandel.com/d/298734
11. Warranty of the HOYER Handel GmbH
Dear Customer,
your device is provided with a 3 year warranty starting with the purchase date. In the event of product defects, you are entitled to statutory rights against the vendor. These statutory rights are not restricted by our warranty presented in the following.
Warranty conditions
The warranty period starts with the purchase date. Please keep the original purchase receipt in a safe place. This document is required to verify the purchase.
If within three years from the purchase date of this product a material or factory defect occurs, the product will be repaired or replaced by us – at our discretion – free of charge to you. This warranty implies that within the period of three years the defective device and the purchase receipt are presented, including a brief written description of the defect and the time it occurred. If the defect is covered by our warranty, the repaired or a new product will be returned to you. No new warranty period starts with a repair or replacement of the product.
Warranty period and statutory claims for defects
The warranty period is not extended when the warranty has been claimed. This also applies to replaced and repaired parts. Any damages and defects already existing at the time of purchase must be reported immediately upon unpacking. Repairs arising after the expiration of the warranty period are subject to a charge.
Warranty coverage
The device was produced carefully according to strict quality guidelines and tested diligently prior to delivery. The warranty applies to material or factory defects.
Excluded from the warranty are wear parts subject to normal wear and damages to fragile parts, e.g. switches, batteries, lamps or other parts manufactured from glass.
This warranty expires if the product is damaged, not used as intended or not serviced. For the proper operation of the product, all instructions listed in the operating instructions must be observed carefully. Any form of use and handling that is advised against in the operating instructions or warned against must always be avoided.
The product is only intended for private and not for commercial use. In the case of incorrect and improper treatment, use of force and interventions not performed by our authorised Service Centre, the warranty shall cease.
Handling in case of a warranty claim
In order to ensure prompt processing of your matter, please observe the following notes:
- Please keep the article number IAN: 298734 and the purchase receipt as a purchase verification for all inquiries.
- The article number can be found on the rating plate, an engraving, the title page of your instructions (in the bottom left), or as a label on the rear or underside of the device.
- If faulty operation or other defects occur, first contact the Service Centre listed in the following by telephone or email.
- Then, you are able to send a product reported as defective free of charge to the service address specified to you, including the purchase receipt and the information on the defect and when it occurred.

Please visit www.lidl-service.com to download this and many other manuals, product videos and software.

Service Centre
GB Service Great Britain
Tel.: 0871 5000 720 (£ 0.10/ Min.)
E-Mail: hoyer@lidl.co.uk
IE Service Ireland
Tel.: 1890 930 034
(0,08 EUR/ Min., (peak))
(0,06 EUR/ Min., (off peak))
E-Mail: hoyer@lidl.ie
IAN: 298734

Supplier
Please note that the following address is no service address.
First contact the aforementioned Service Centre.
HOYER Handel GmbH
Tasköprüstraße 3
DE-22761 Hamburg
GERMANY
Inhalt



- BLUETOOTH® TV STEREO SOUNDBAR SSB 50 A1
- HOYER HANDEL GMBH
- DE
- OVERVIEW
- THANK YOU FOR YOUR TRUST
- TRADEMARKS
- INTENDED PURPOSE
- SAFETY INSTRUCTIONS
- WARNINGS
- DANGER FOR CHILDREN AND PEOPLE WITH DISABILITIES
- DANGER TO AND FROM PETS AND LIVESTOCK
- DANGER! RISK OF ELECTRIC SHOCK DUE TO MOISTURE
- DANGER! RISK OF ELECTRIC SHOCK
- BATTERIES
- WARNING! RISK OF MATERIAL DAMAGE
- NOTES ON BLUETOOTH®
- ITEMS SUPPLIED
- BEFORE USING FOR THE FIRST TIME
- 5.1 REMOTE CONTROL
- WARNING
- 5.2 SETTING UP / WALL MOUNTING
- SETTING UP
- WALL MOUNTING
- 5.3 OVERVIEW - CONNECTIONS
- NOTES
- 5.4 HOW TO USE
- OPERATION
- 6.1 SELECTING THE TYPE OF CONNECTION
- 6.2 SOUND SETTINGS
- CONTROLLING THE VOLUME
- MUTING THE DEVICE
- ADJUSTING THE TONE QUALITY
- SWITCHING THE 3D EFFECT ON AND OFF
- 6.3 HDMI (ARC) CONNECTION
- DEFINITION
- 6.4 BLUETOOTH®
- ESTABLISHING CONNECTION
- INTERRUPTION OF THE CONNECTION
- CLEANING AND STORING
- DISPOSAL
- PACKAGING
- TROUBLESHOOTING
- TECHNICAL SPECIFICATIONS
- SYMBOLS USED
- NOTES ON THE EU DECLARATION OF CONFORMITY
- WARRANTY OF THE HOYER HANDEL GMBH
- WARRANTY CONDITIONS
- WARRANTY PERIOD AND STATUTORY CLAIMS FOR DEFECTS
- WARRANTY COVERAGE
- EXCLUDED FROM THE WARRANTY ARE WEAR PARTS SUBJECT TO NORMAL WEAR AND DAMAGES TO FRAGILE PARTS, E.G. SWITCHES, BATTERIES, LAMPS OR OTHER PARTS MANUFACTURED FROM GLASS
- HANDLING IN CASE OF A WARRANTY CLAIM
- SERVICE CENTRE
- SUPPLIER
- INHALT
Brand : SILVERCREST
Model : SSB 50 A1
Category : Loudspeaker