
RSH2445B - Mechanical chipper RYOBI - Free user manual and instructions
Find the device manual for free RSH2445B RYOBI in PDF.


| Product Type | Mechanical Chipper / Shredder |
| Brand | RYOBI |
| Model | RSH2445B |
| Power Source | Electric (Mains Powered) |
| Motor Power | 2400 W |
| No Load Speed | 4500 rpm |
| Max Cutting Diameter | 40 mm |
| Shredding Capacity | Branches up to 40 mm thick |
| Collection Bin Capacity | 45 L |
| Weight | 25 kg |
| Dimensions (L x W x H) | 90 x 50 x 60 cm |
| Cutting Mechanism | Rotating blade and anvil |
| Feed Type | Manual hopper feed |
| Safety Features | Overload protection, safety switch, anti-vibration handles |
| Noise Level | 95 dB(A) |
| Vibration Level | 5.5 m/s² |
| Material | Steel hopper and frame, plastic housing |
| Maintenance | Regular blade sharpening, lubrication, cleaning |
| Spare Parts Availability | Blades, anvils, belts, hopper components |
| Warranty | 2 years (subject to registration) |
Frequently Asked Questions - RSH2445B RYOBI
User questions about RSH2445B RYOBI
0 question about this device. Answer the ones you know or ask your own.
Ask a new question about this device
Download the instructions for your Mechanical chipper in PDF format for free! Find your manual RSH2445B - RYOBI and take your electronic device back in hand. On this page are published all the documents necessary for the use of your device. RSH2445B by RYOBI.
USER MANUAL RSH2445B RYOBI
natural_image
Exterior view of a modern office building (no signage)Important!
It is essential that you read the instructions in this manual before assembling, operating and maintaining the product.
Subject to technical modification.
Safety, performance, and dependability have been given top priority in the design of your electric silent shredder.
INTENDED USE
The product is designed for reducing organic garden waste materials such as branches, twigs and foliage to small pieces and is for use outdoors in a stationary position by an operator standing on the ground. The product is not intended for non-organic material, metal or material which exceeds its maximum cutting capacity of 45 mm diameter.
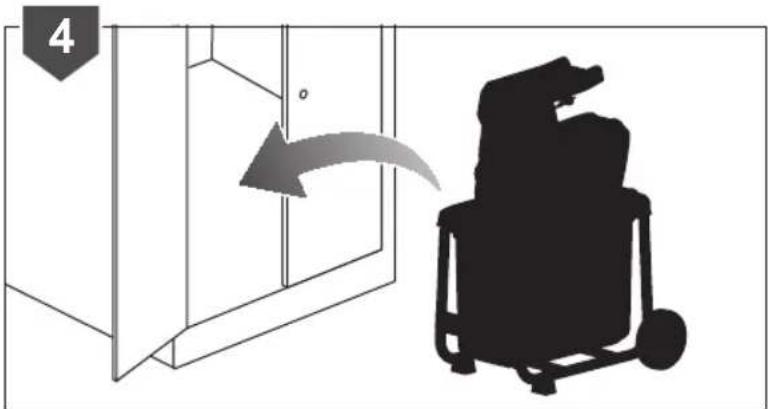
The product must be mounted on the stand provided and must be used with the collection box provided. It must not be mounted in any other way than shown in this manual.
GENERAL SAFETY RULES
WARNING
The product is not intended for use by children or persons with reduced physical, mental or sensory capabilities. Young children should be supervised at all times by someone other than the operator to ensure that they do not play near or with the product.
WARNING
When using the product, basic safety precautions should be followed to reduce the risk of fire, electric shock and personal injury. Read all of these safety instructions carefully before operating the product. Make sure you are familiar with the controls and the proper and safe use of the product. Please keep these instructions safe for later use.
TRAINING
■ Become familiar with the user guide before attempting to operate the product.
■ Never allow children or people unfamiliar with these instructions to use the product. Local regulations may restrict the age of the operator.
■ The operator or user of the product is responsible for accidents or hazards occurring to other people or their property.
PREPARATION
■ Do not allow children to operate the product.
■ Do not operate the product in the vicinity of bystanders, especially children and pets.
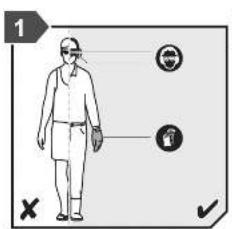
■ Wear ear protection and safety glasses at all times while operating the product.
■ Always wear protective non-slip footwear and long trousers. Avoid wearing clothing that is loose fitting or that has hanging cords or ties.
■ Only operate the product in open space (e.g. not close to a wall or a fixed object) and on a firm, level surface.
- Do not operate the product on a paved or gravel surface where ejected material could cause injury.
■ Before starting the product, check that all screws, nuts, bolts, and other fasteners are properly secured and that guards and collection box are in place. Return to
an authorised service centre to replace damaged or unreadable labels.
■ Before use, check the supply and extension cord for signs of damage or aging. If the cord becomes damaged during use, disconnect the cord from the supply immediately. Do not touch the cord before disconnecting the supply. Do not use the product if the cord is damaged or worn.
ELECTRICAL SAFETY
- Read these safety instructions thoroughly before connecting the product to the mains supply.
■ Before switching on, make sure that the voltage of your electricity supply is the same as that indicated on the rating plate. The manufacturer recommends you connect to a power socket protected by an RCD with a trip of 30 mA or less.
■ Connecting it to any other power source may cause damage.
If the supply cord is damaged, it must be replaced by the manufacturer, its service agent or similarly qualified persons in order to avoid a hazard.
The product is IPX4 rated excluding the plug. Only use an extension cord that is weather proof. Check the extension cord before every use for damage. Always uncoil the extension cord during use because coiled cords can overheat. Damaged extension cords should not be repaired, they should be replaced with an equivalent type.
A power spike causes voltage fluctuations and may affect other electrical products in the same power line. Connect the product to a power supply with an impedance equal or less than 0.389Ω to voltage fluctuations. Contact your electric power supplier for further clarification.
SPECIFIC SHREDDER SAFETY RULES
OPERATION
■ Before starting the product, look into the feeding chamber to make certain that it is empty.
- Keep your face and body away from the feed intake opening.
- Do not allow hands or any other part of the body or clothing inside the feeding chamber, discharge chute, or near any moving part.
■ Always be sure of your footing. Keep firm footing and balance. Do not overreach. Never stand at a higher level than the base of the product when feeding material into it.
■ Always stand clear of the discharge zone when operating the product.
- When feeding material into the product be extremely careful that pieces of metal, rocks, bottles, cans or other foreign objects are not included.
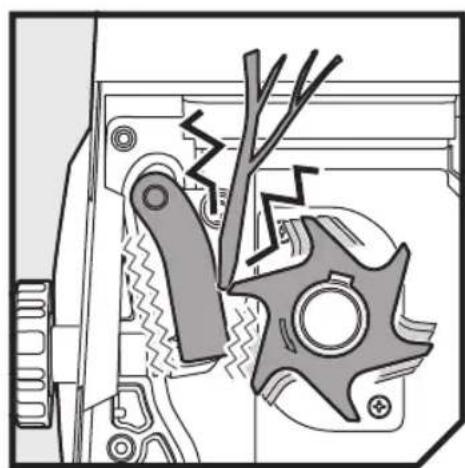
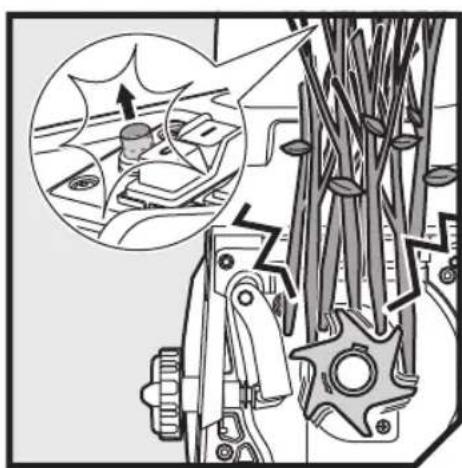
If the cutting mechanism strikes any foreign objects or if the product should start making any unusual noise or vibration, switch the product off and allow the cutters to completely stop. Disconnect the product from its power supply, and take the following steps:
- inspect for damage;
- check for and tighten any loose parts;
-
have any damaged parts replaced or repaired with genuine Ryobi spare parts.
-
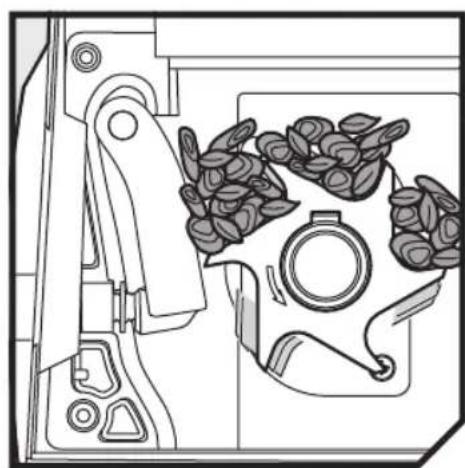
Do not allow processed material to build up in the discharge chute as this may prevent proper discharge or blockage and can result in kickback of material through the feed intake opening.
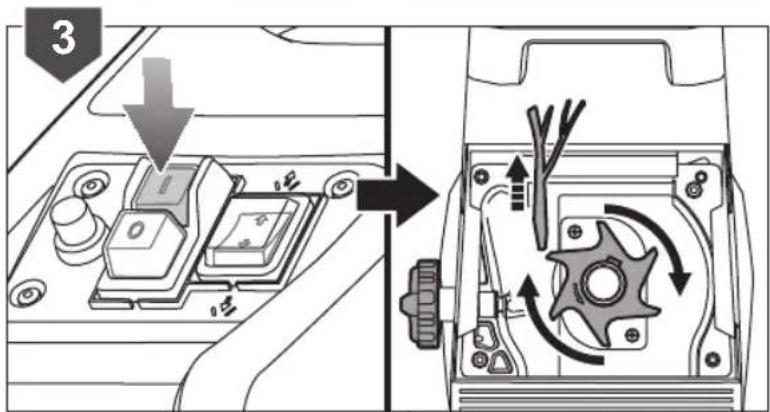
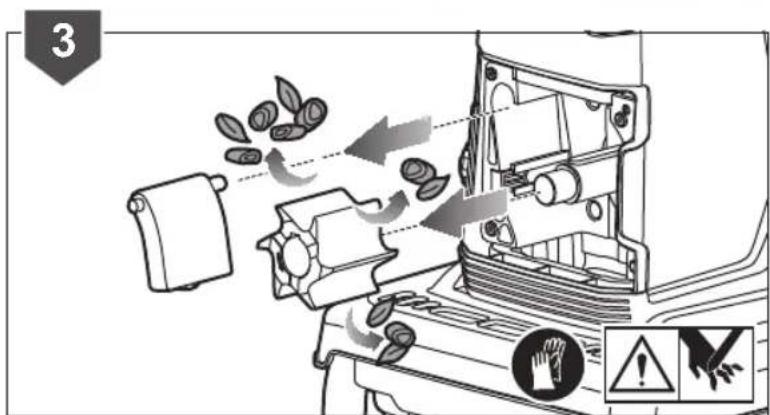
If the product becomes clogged, switch the product off and allow the cutters to completely stop. Disconnect the product from its power supply before clearing debris.
■ Never operate the product if the guards, covers, collection box, or other safety devices are defective, not in place, and not in good working order.
If dust is created by the shredding process, wear a suitable dust mask to prevent respiratory injury. - Do not move or transport the product while the motor is running.
■ Switch off the product and disconnect from the power supply whenever you leave work area.
■ Do not tilt the product while the motor is running.
■ You must never modify parts from the product or use parts not recommended by Ryobi, this may increase the risk of serious injury to yourself or others.
■ Always ensure that ventilation openings are kept clear of debris; otherwise, the motor may overheat resulting in possible damage to the product or increase the risk of fire.
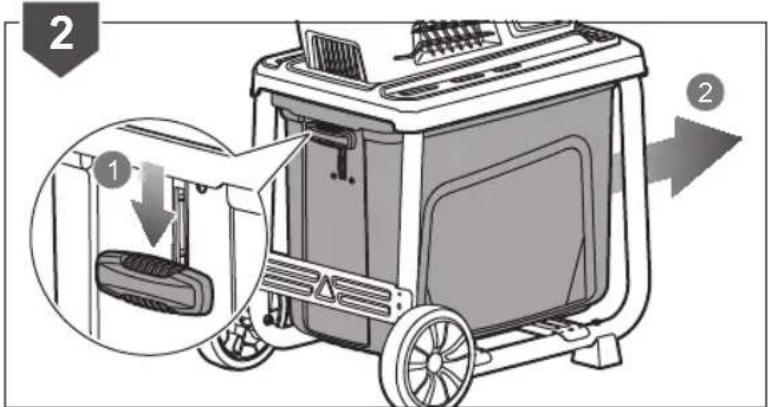
■ Switch off the product before attaching or removing the collection box.
WARNING
Injuries may be caused, or aggravated, by prolonged use of a tool. When using any tool for prolonged periods, ensure you take regular breaks.
TRANSPORTATION AND STORAGE
■ Make sure that the product has been thoroughly cleaned before storing it in a clean, dry place and secured out of the reach of children.
- Allow the product to adequately cool down before storing or transporting.
■ When transporting the product, make sure it is secured against falling or movement within the vehicle.
MAINTENANCE
Before cleaning, inspecting or servicing the product, switch it off and allow the cutters to completely stop, disconnect the electric supply. After some time of shredding the cutting mechanism will become hot. Allow it to adequately cool down before cleaning, inspecting or adjusting.
WARNING
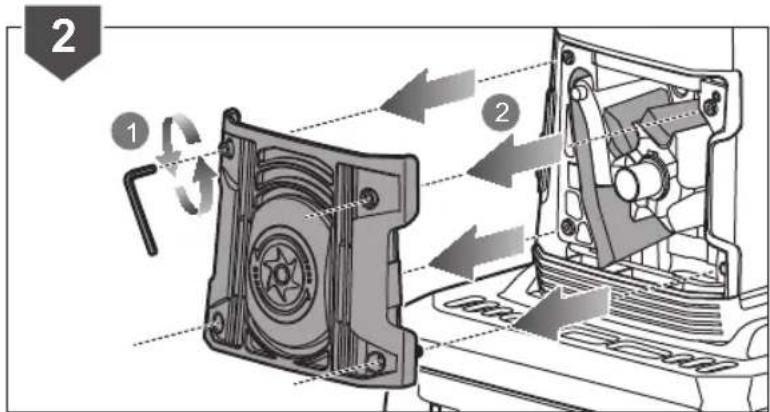
The cutter blades are extremely sharp. To avoid injury, exercise extreme caution and care when cleaning or working near the blades or inside the opened enclosure when the collection box is removed. Always wear heavy-duty protective gloves.
- Be aware that the cutting means can still be moved even when the power is off or if the interlock switch is engaged.
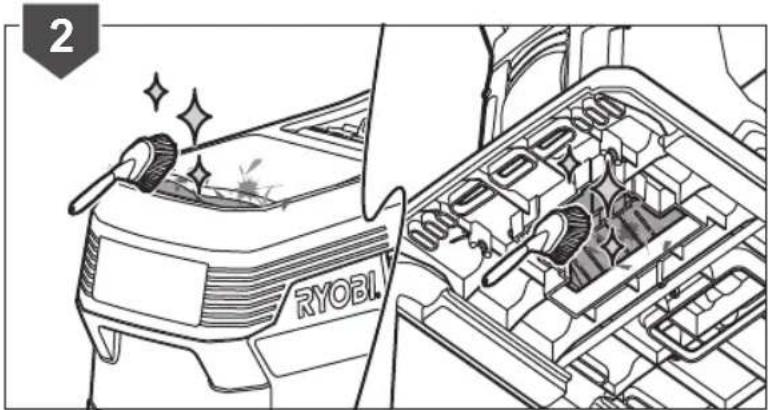
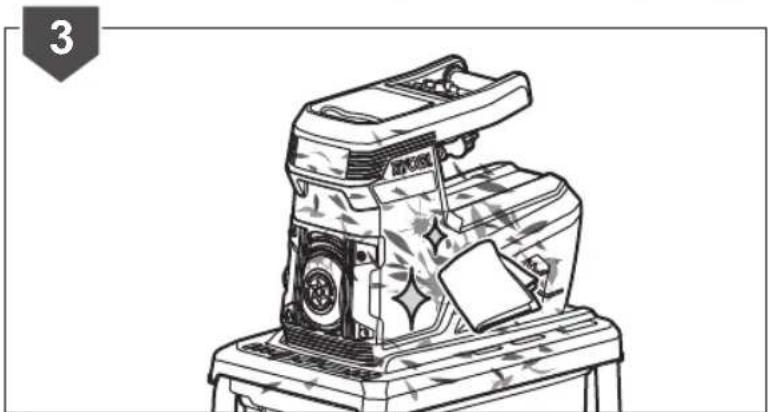
■ To ensure the best performance from the product, it must be kept clean.
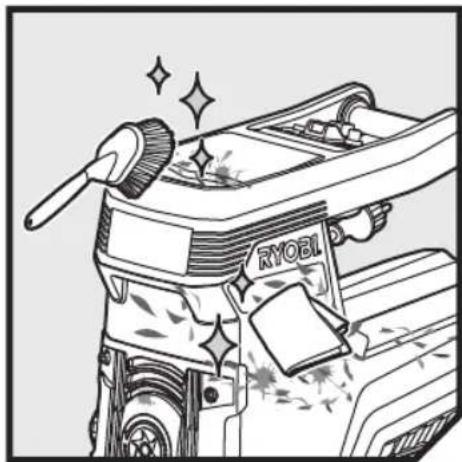
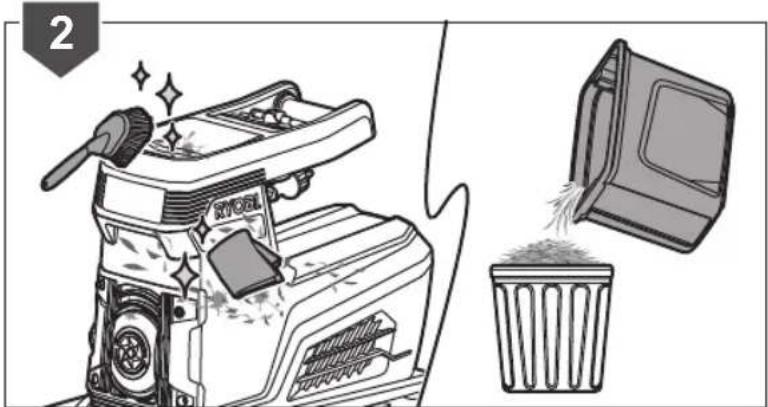
■ Always clean the product immediately after use. Wherever possible use a stiff brush inside the feed and discharge chutes and a dry cloth on the outside of the product. - Do not allow material to become dry and hard on any of the product surfaces, but particularly on the blades. This will directly affect the shredding performance.
■ Make sure that the feed hopper and the ejection chute are kept clean and clear of all waste material
■ Make sure that all nuts, bolts and screws (except the adjusting screw) are tight and secure.
■ Always have any damaged or worn parts repaired, or replaced by qualified personnel at an approved Ryobi service centre.
■ Never attempt to bypass the interlock switches on the collection box or the front cover of the cutter assembly.
WARNING
Do not at any time let brake fluids, gasoline, petroleum-based products, penetrating oils, etc., come in contact with plastic parts. Never use brake fluids, petroleum-based products, or any solvents to clean tool. Most plastics are susceptible to damage from various types of commercial solvents and may be damaged by their use.
gasoline,
- You may perform maintenance tasks described in the manual, for other repairs or advice seek the assistance of an approved Ryobi service centre.
SHAVING PLATE ADJUSTMENT
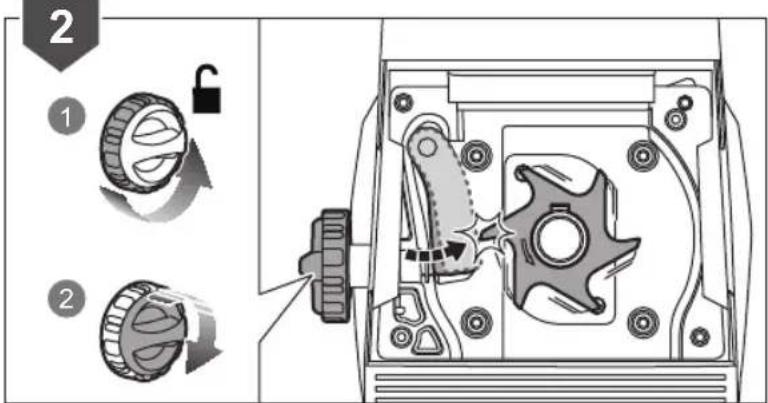
If the product fails to shred material, the shaving plate may need adjusting.
NOTE: Adjusting the shaving plate should only be attempted when deemed totally necessary. Adjusting the shaving plate too often or too far could cause the product to cease working.
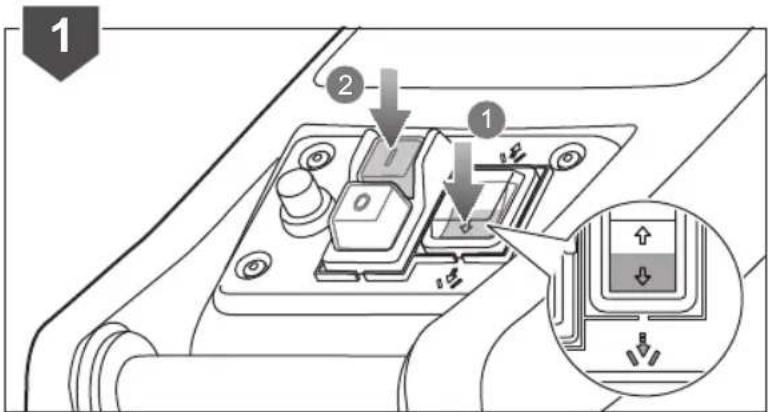
■ Ensure the product is turned on and working in normal forward direction. Adjusting the shaving plate while the motor is turned off could lead to serious damage of the product.
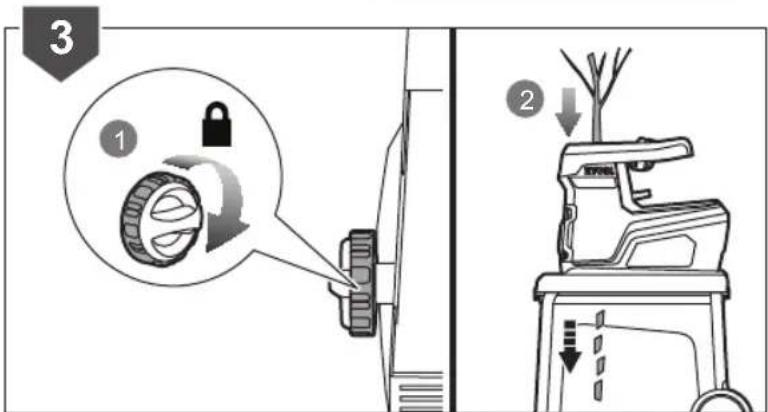
■ While the product is still running, turn the adjusting knob clockwise. When you hear the metal-on-metal contact or see fine aluminium shavings falling out of the discharge chute, stop adjusting the knob.
RESIDUAL RISK
Even when the product is used as prescribed, it is still impossible to completely eliminate certain residual risk factors. The following hazards may arise in use and the operator should pay special attention to avoid the following:
■ Exposure to noise can cause hearing injury. Wear ear protection and limit exposure.
■ Inhalation of dust and particles. Wear dust mask / filter when necessary.
■ Contact with the cutting mechanism. Keep unprotected body parts away from the cutting mechanism at all times.
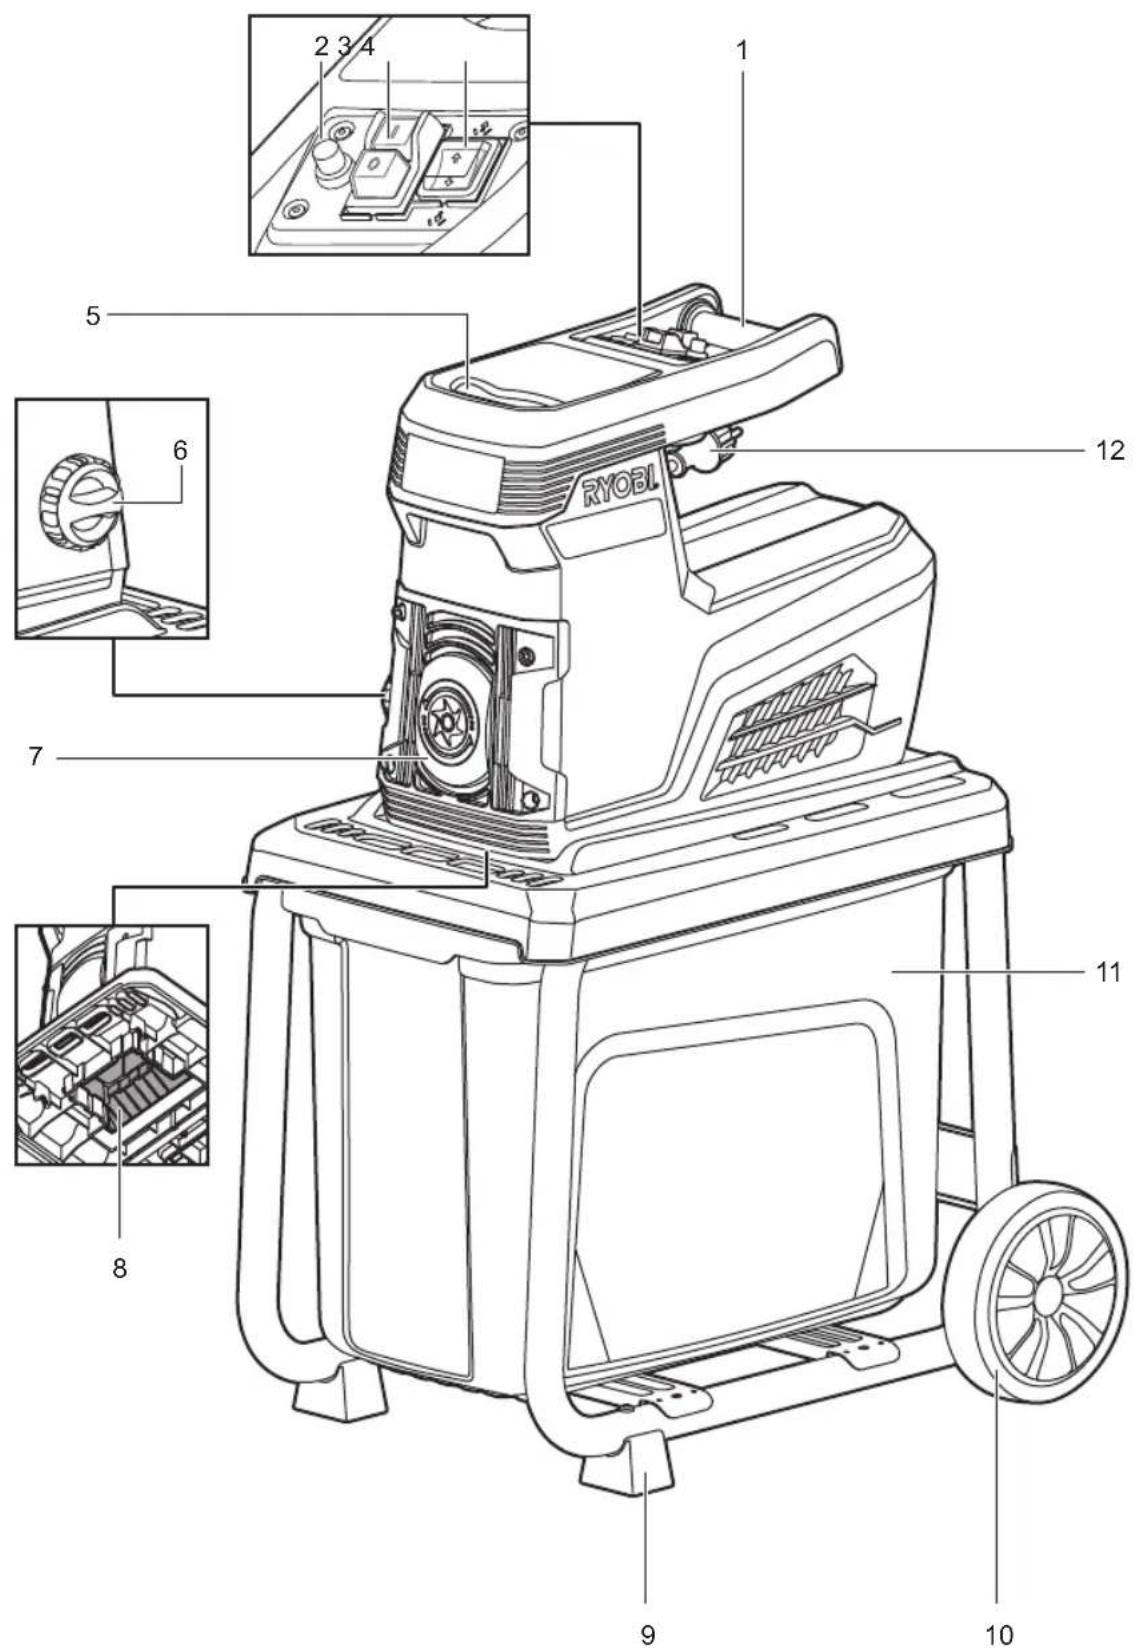
KNOW YOUR PRODUCT
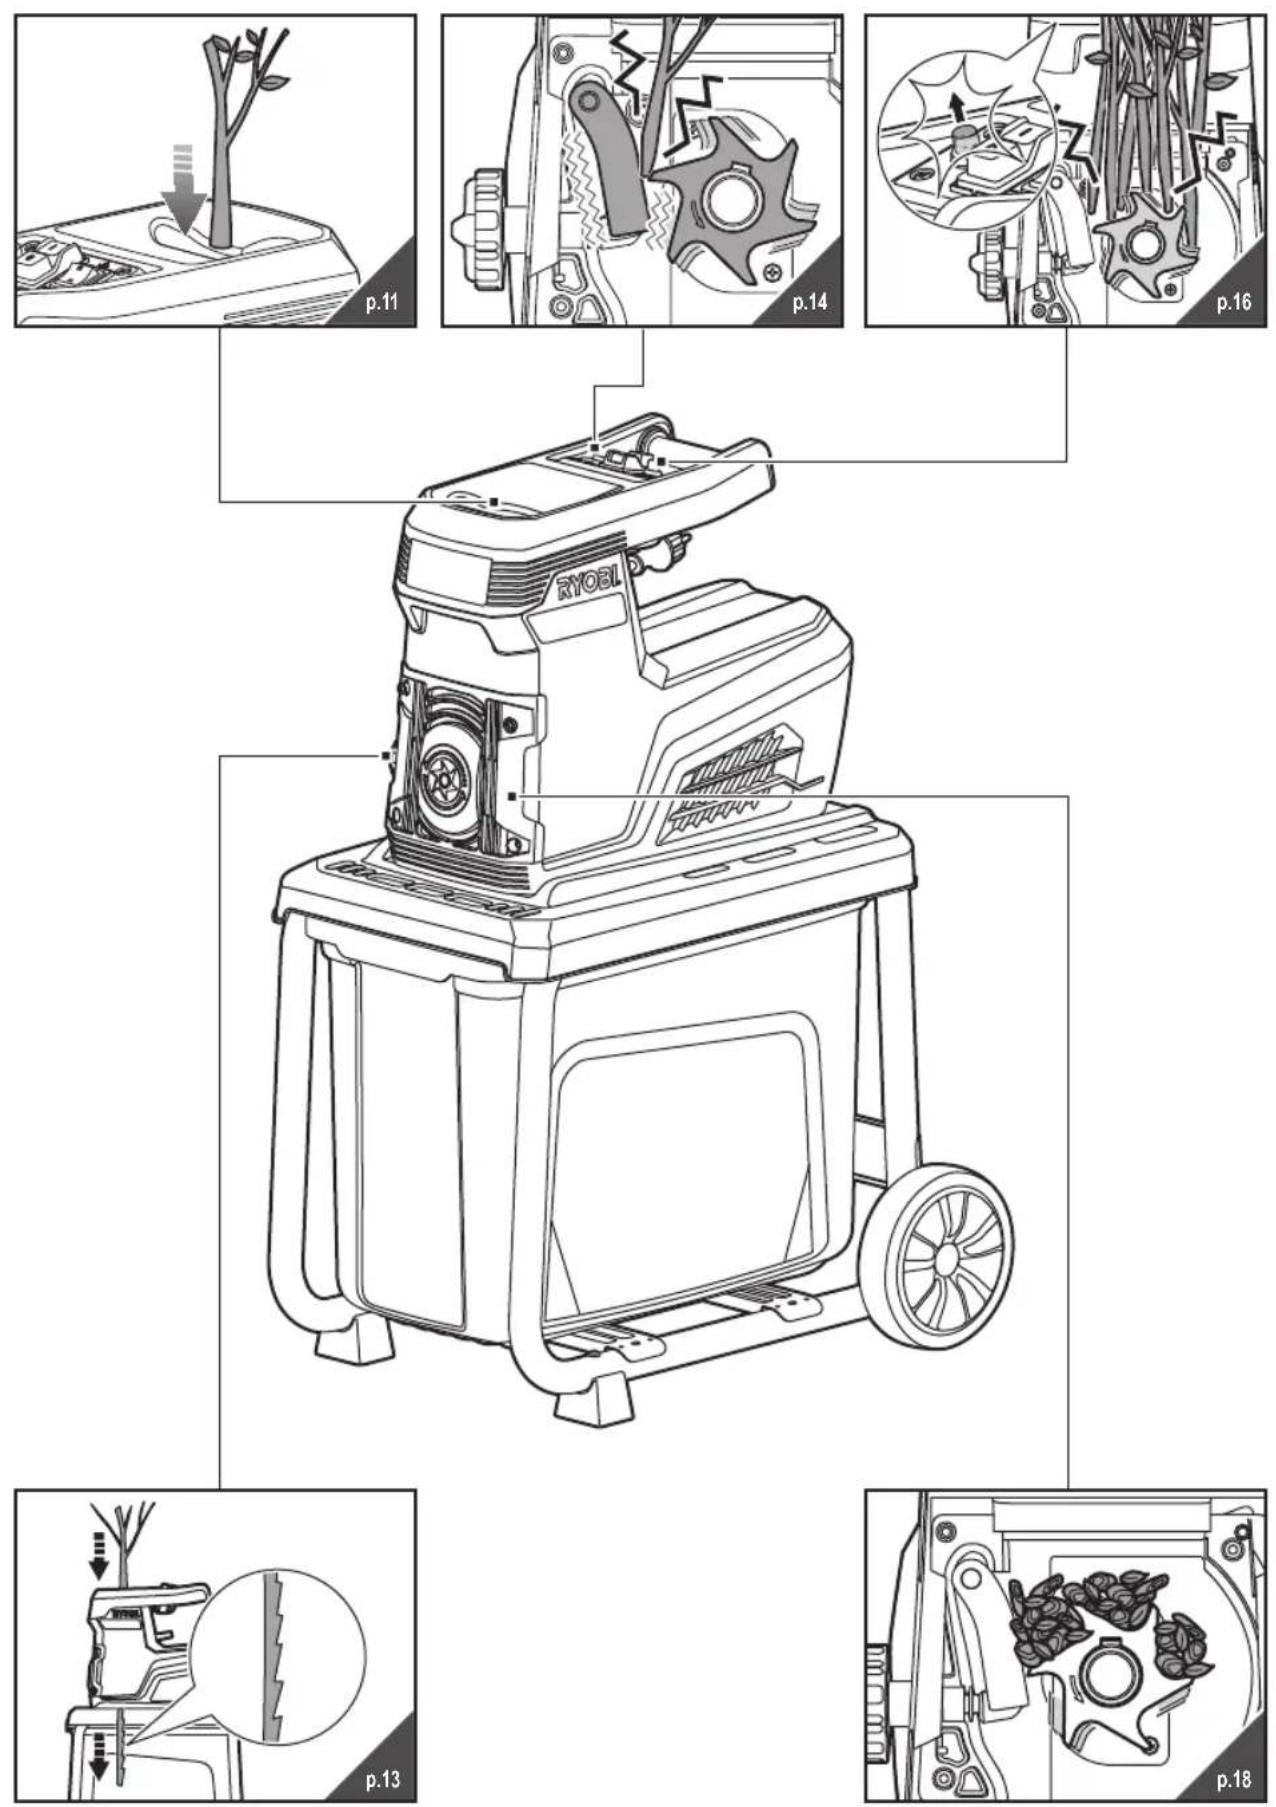
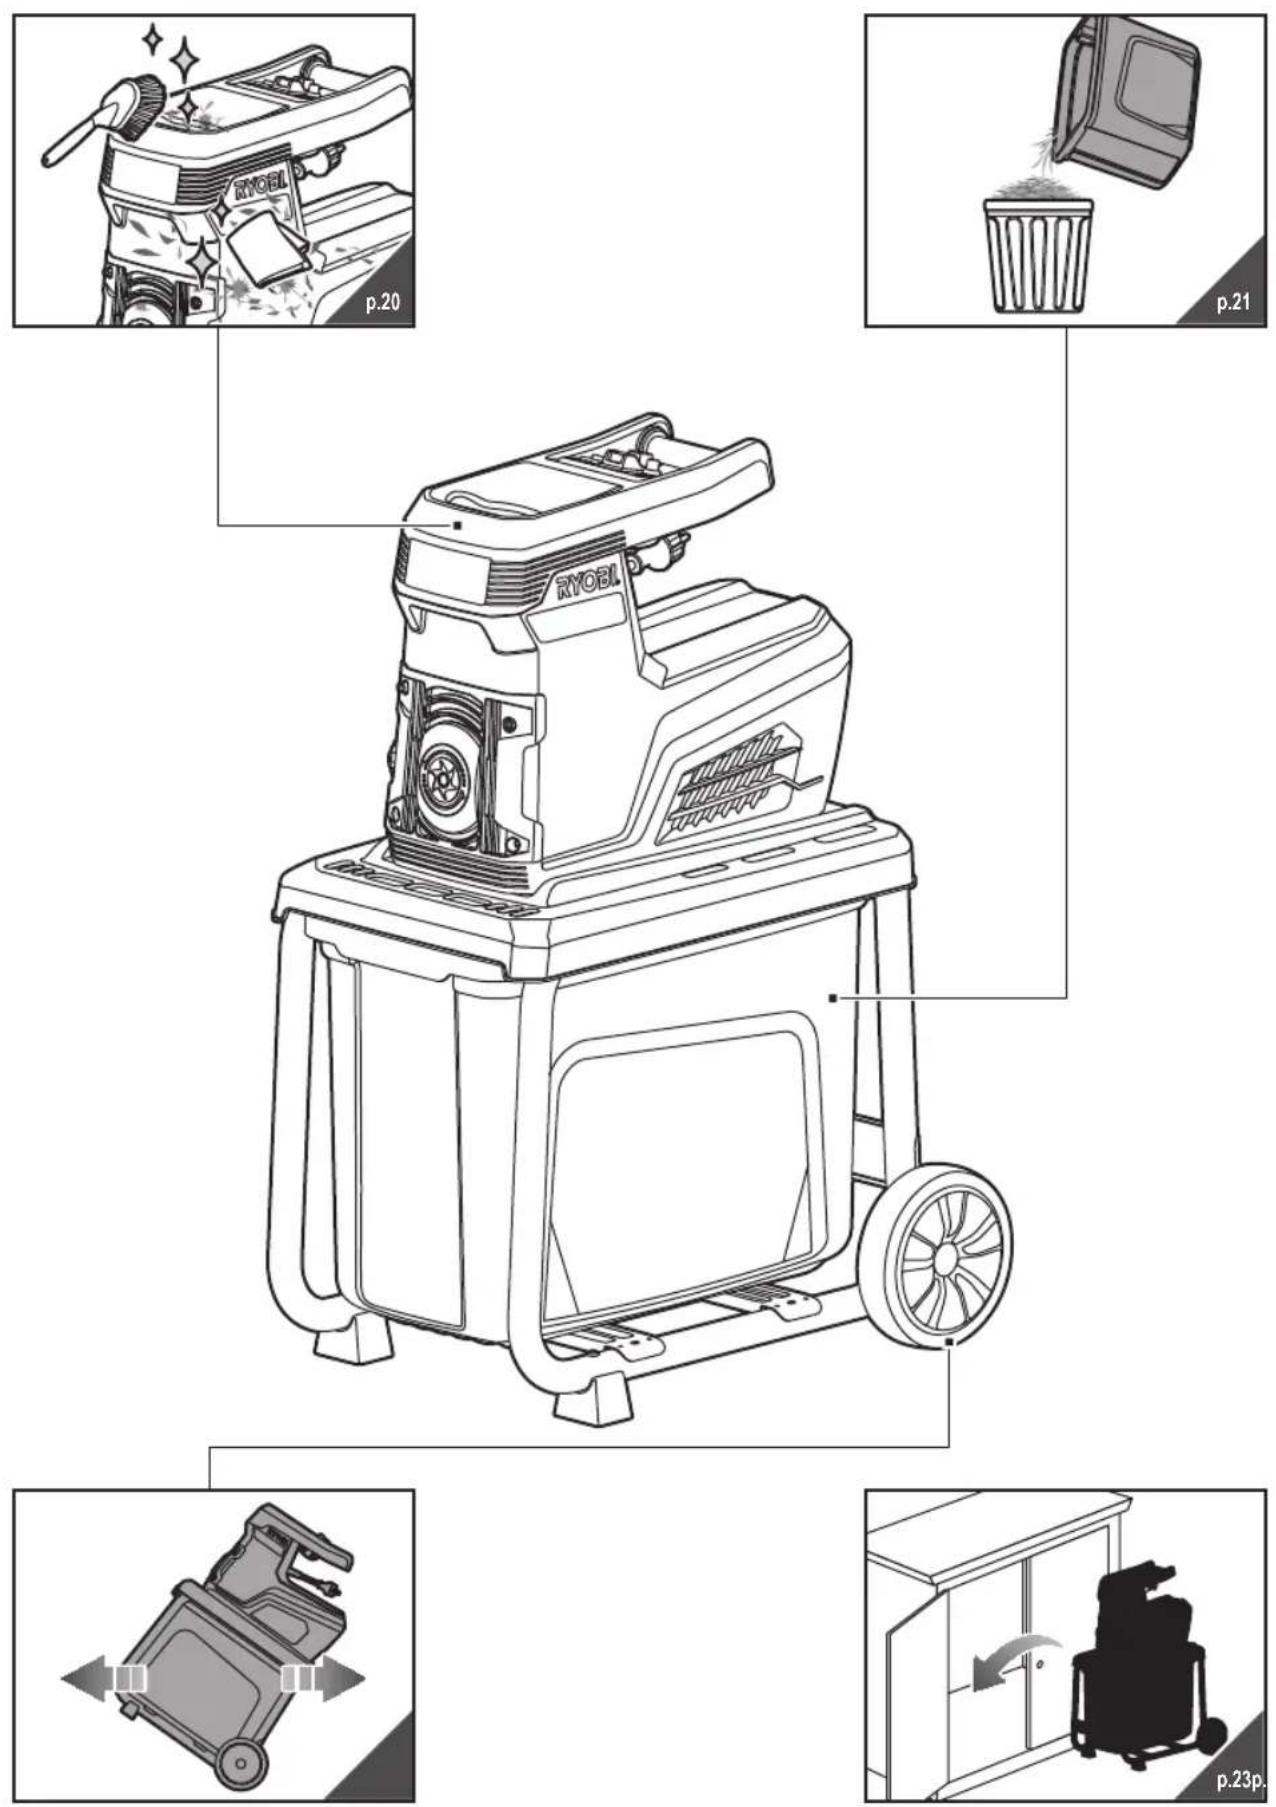
See page 6
- Handle
- Overload protection switch
- On/off switch
- Direction switch
- Feeding chute
- Shaving plate adjusting knob
- Front cover
- Discharge chute
- Foot
- Wheel
- Collection container
- Power cord
SHREDDING GUIDE
For best results when shredding, follow the guidelines shown in the table below.
MATERIAL SHREDDING METHOD
| Twigs and up to 6 mm diameter. | Feed into the feeding hopper at a rate which the product will accept without overloading. |
| Branches and up to 45 mm in diameter. | Clip off all side growth with secateurs before feeding into the feeding hopper. |
| Bedding plants, weeds and shrubby growth. | Knock soil and stones off the roots to avoid damage to the blades. |
| Freshly cut foliage, hedge, and kitchen waste.(i.e. cabbage leaves, vegetable peelings etc.) | With any material having a high moisture content it is advised to feed in some drier sticks at regular intervals to help push the material through the cutting assembly and prevent it from clogging. |
Dry sticks and twigs By inserting these at the end of your shredding task, this will help to clean the moisture and plant sap from the inside of the product and the cutting assembly.
- Do not allow garden waste to accumulate before shredding as it will begin to compost, become too damp and clog the cutting assembly. Dry material will help most material to clear the ejection chute. Save some dry sticks until last to help clean the blade area.
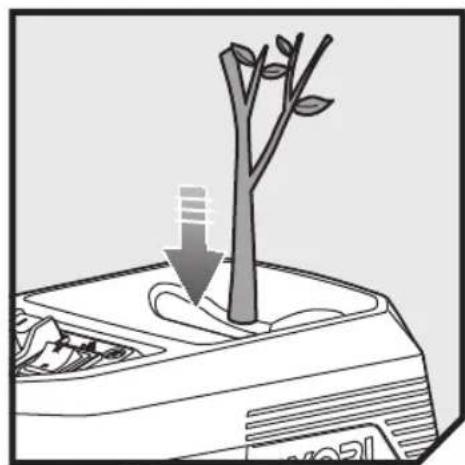
■ Frequently monitor the build up/collection of shredded material.
■ The exit of the discharge chute must be clear at all times to prevent blockages.
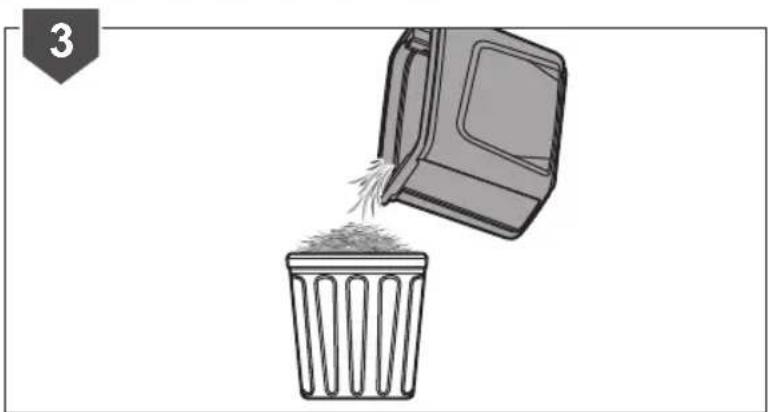
■ When the collection box is full, turn the product Off before emptying.
WARNING
Do not put your hands up inside the shredder's discharge chute to clear away shredded material while the product is switched on or connected to the mains supply. The blades are sharp. Wear heavy-duty gloves and exercise extreme caution when cleaning and clearing blockages.
WARNING
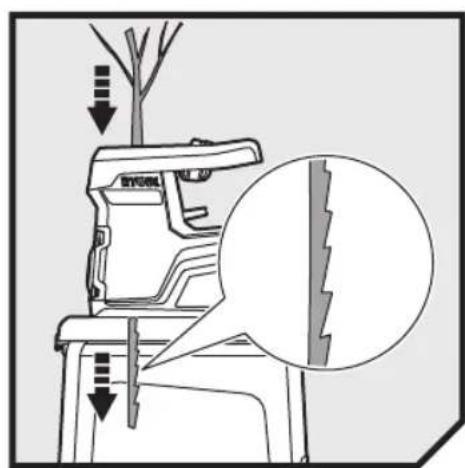
When feeding long woody branches/stems into the product be careful of whip and vibrations as they get caught by the cutter. The operator must wear eye protection whenever using the product.
WARNING
The cutting device has a tendency to pull branches/stems into the product. Do not try to impede entry of the material being cut once feeding has started. Always wear gloves to prevent skin lacerations when feeding material into the product.
NOTE: In normal use, do not switch off the product until all of the shredded material has cleared the cutter assembly. If the product is switched off too quickly, remaining pieces of material may clog the blade assembly and stall the motor when the product is switched back on.
SYMBOLS ON THE PRODUCT
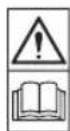
Read and understand all instructions before operating the product, follow all warnings and safety instructions.
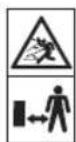
Beware of thrown or flying objects. Keep all bystanders, especially children and pets, at least 15 m away from the operating area
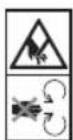
Danger - Rotating blades. Keep hands and feet out of openings while the product is running.
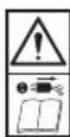
Switch off and remove plug from mains before maintenance or if cord is damaged.

Wear eye and ear protection.

Do not use as a step.

Wait until all machine components have completely stopped before touching them.

Wear non-slip, heavy duty gloves.

Please read the instructions carefully before using the product.

Regulatory Compliance Mark (RCM). Product meets applicable regulatory requirements.
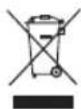
Waste electrical products should not be disposed of with household waste. Please recycle where facilities exist. Check with your local authority or retailer for recycling advice.

The guaranteed sound pressure level is 83 dB.
The guaranteed sound power level is 102 dB

On

Off
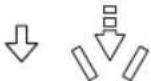
Forward
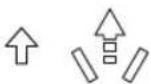
Reverse
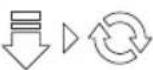
Press to reset
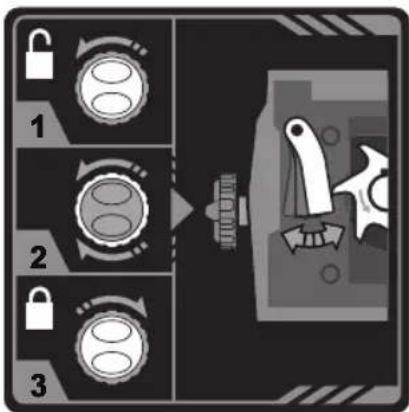
- Turn counterclockwise to unlock.
- Adjust the position of the shaving plate.
- Turn clockwise to lock.
The following signal words and meanings are intended to explain the levels of risk associated with this product.

DANGER
Indicates an imminently hazardous situation, which, if not avoided, will result in death or serious injury.

WARNING
Indicates a potentially hazardous situation, which, if not avoided, could result in death or serious injury.

CAUTION
Indicates a potentially hazardous situation, which, if not avoided, may result in minor or moderate injury.
CAUTION
Without safety alert symbol
Indicates a situation that may result in property damage.
SYMBOLS IN THIS MANUAL

Connect to power outlet.

Disconnect from power outlet.

Parts or accessories sold separately

Note

Warning

Lock

Unlock
Keep hands away from blades
natural_image
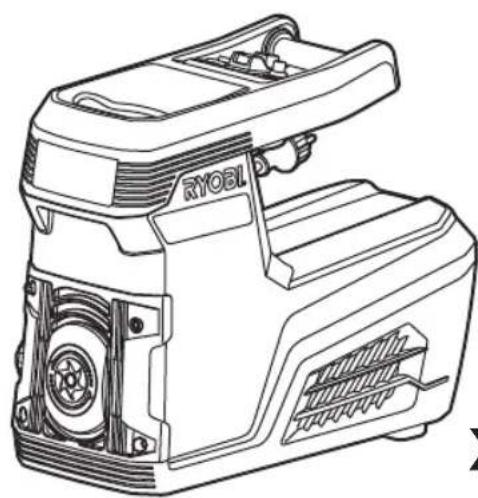
Line drawing of a Ryobl electric motor housing with mounting bracket (no text or symbols)x 1

natural_image
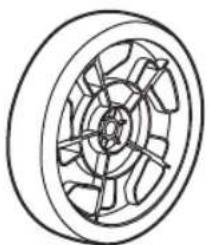
Technical line drawing of a mechanical pulley or wheel assembly (no text or symbols)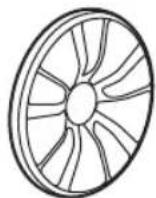
x 2x 2
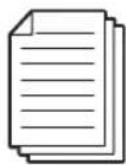
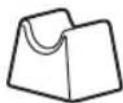
x 2x 1
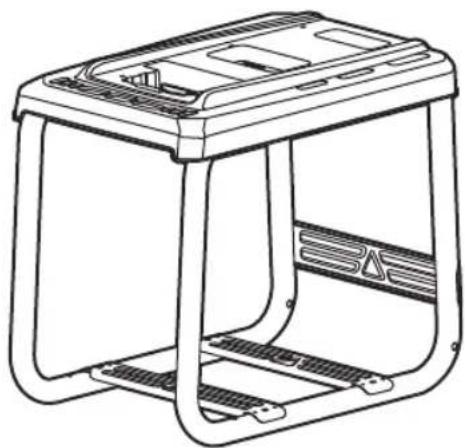
natural_image
Line drawing of a modular device with frame structure and mounting brackets (no text or symbols)x 1
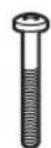
x 2 x 1
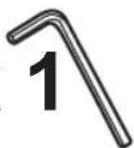
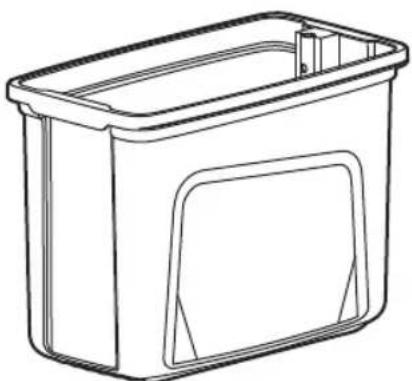
natural_image
Line drawing of a rectangular plastic container with a lid and side panel (no text or symbols)
x 2

x 2
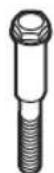
x 2
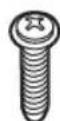
x 6x 1
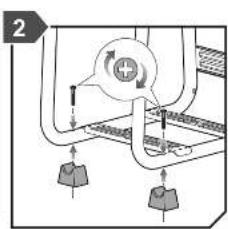
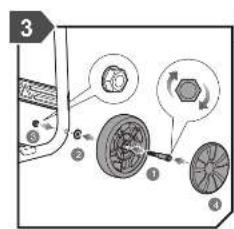
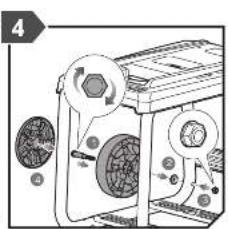
natural_image
Two-step diagram showing a mechanical assembly with a close-up view of the component (no text or symbols present)
natural_image
Diagram of a mechanical assembly with a component and a magnified view showing a circular feature (no text or symbols)
natural_image
Illustration of a portable electric water heater on a wheeled cart (no text or symbols)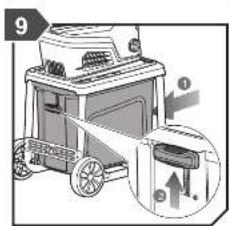
natural_image
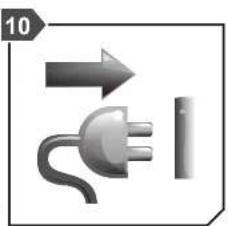
Pure electrical plug and capacitor symbols without any text or labels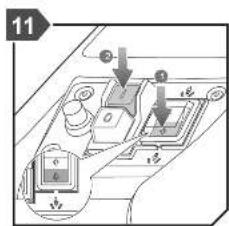
natural_image
Illustration of a tree growing from a container with leaves, showing a downward arrow (no text or symbols)
natural_image
Illustration of a plug and a switch with directional arrows (no text or symbols)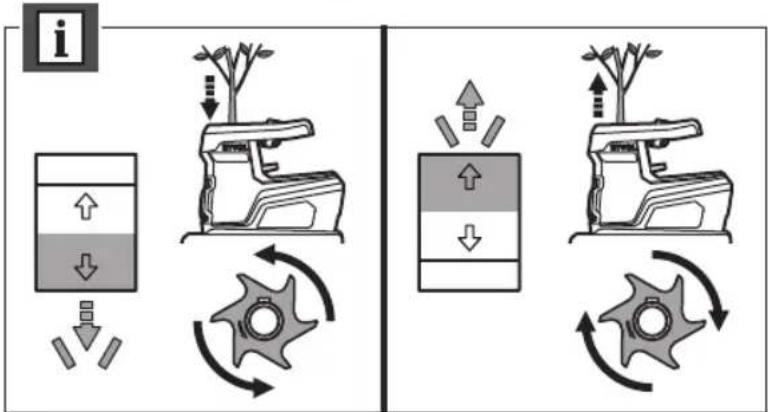
flowchart
graph TD
    A["Level 1: Battery Level"] --> B["Recycle"]
    B --> C["Recycle to Battery"]
    C --> D["Recycle to Battery"]
    D --> E["Recycle to Battery"]
    E --> F["Recycle to Battery"]
    F --> G["Recycle to Battery"]
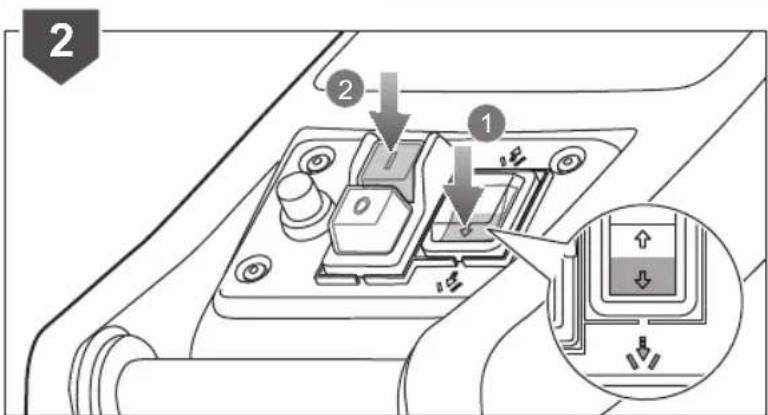
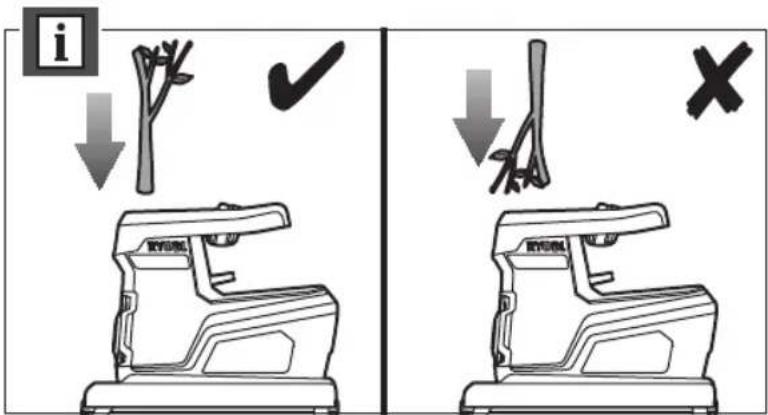
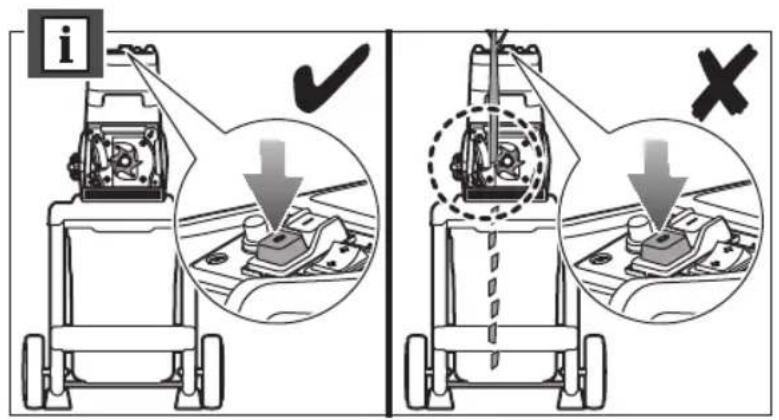
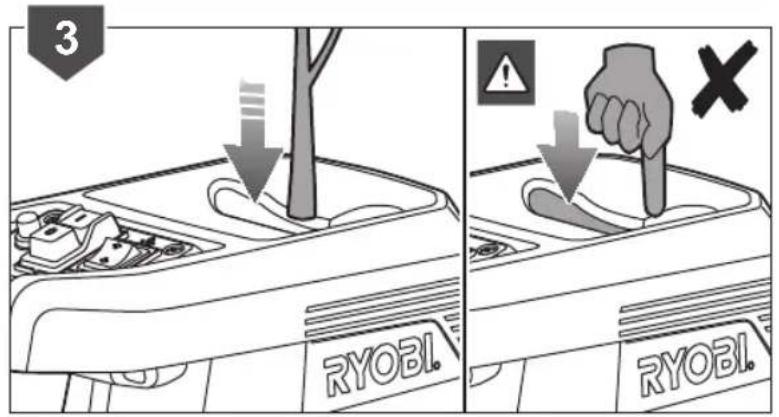
natural_image
Mechanical assembly diagram showing a gear mechanism with zigzag lines indicating motion or force (no text or symbols)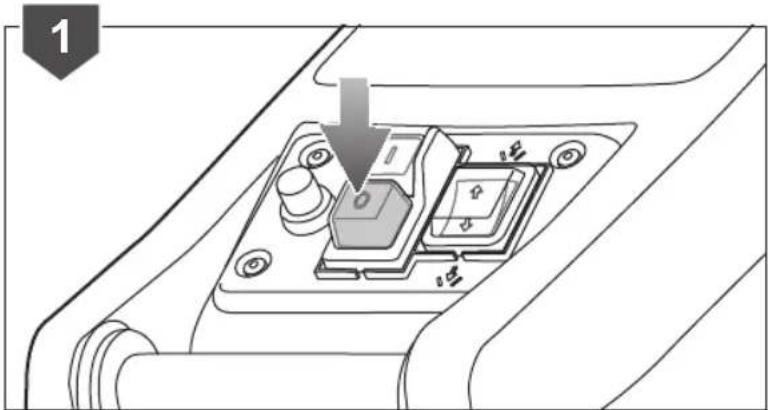
natural_image
Diagram of a car interior showing a switch and control panel with a downward arrow indicating action (no text or symbols present)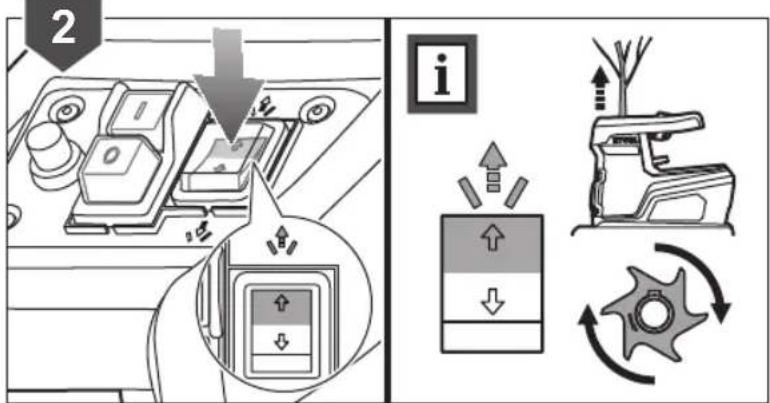
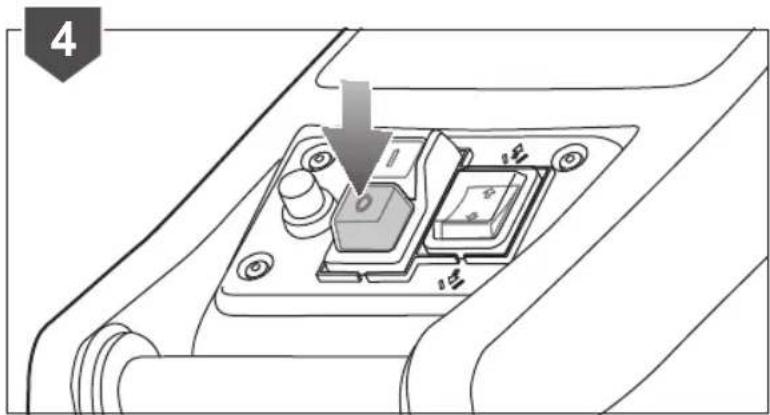
natural_image
Diagram of a mechanical switch component with a downward arrow indicating a process (no text or symbols present)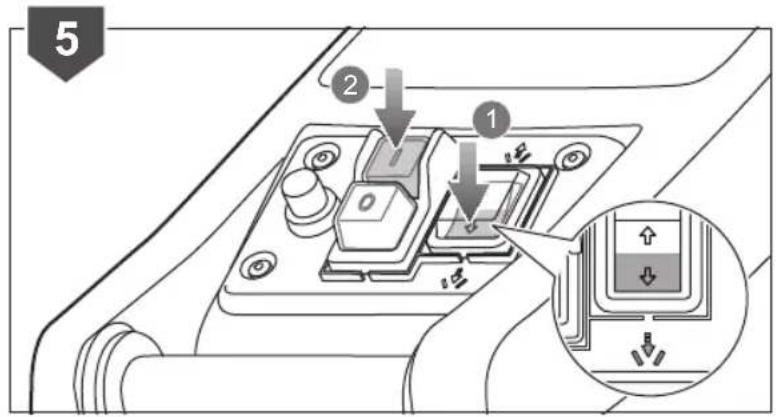
natural_image
Mechanical assembly diagram showing a tool interacting with a bracket and a gear mechanism (no text or symbols)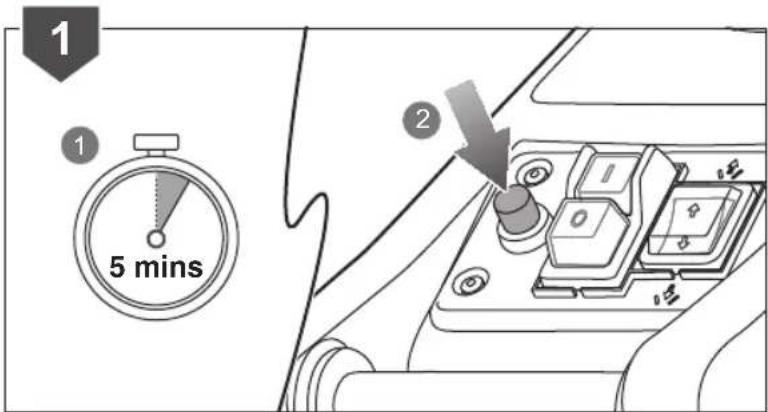
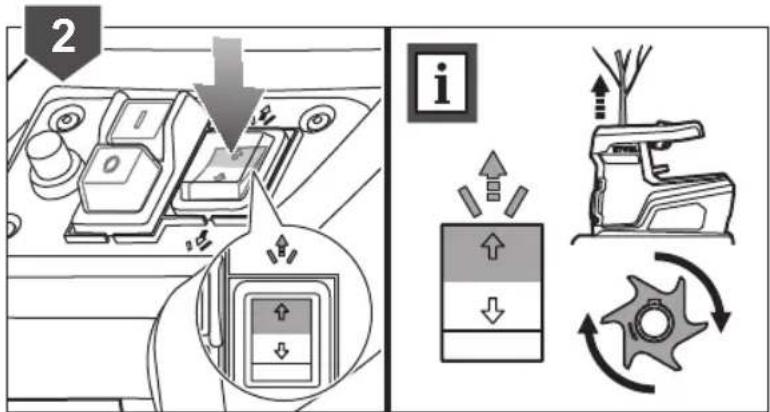
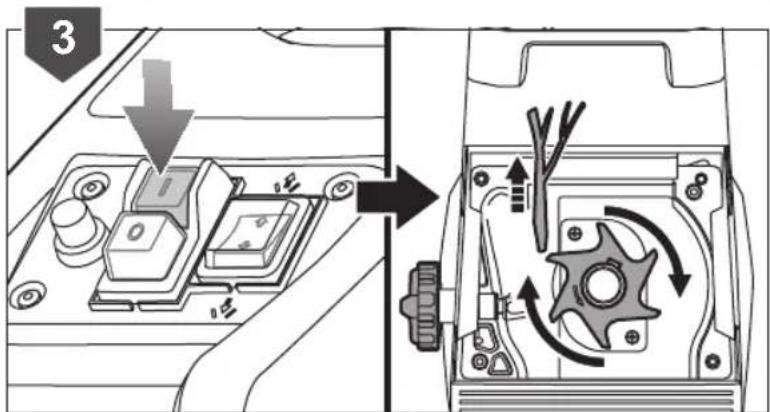
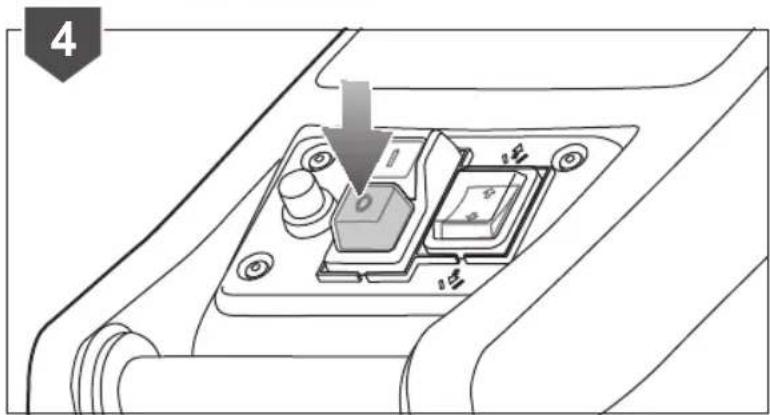
natural_image
Diagram of a mechanical switch component with a downward arrow indicating a process or operation (no text or symbols present)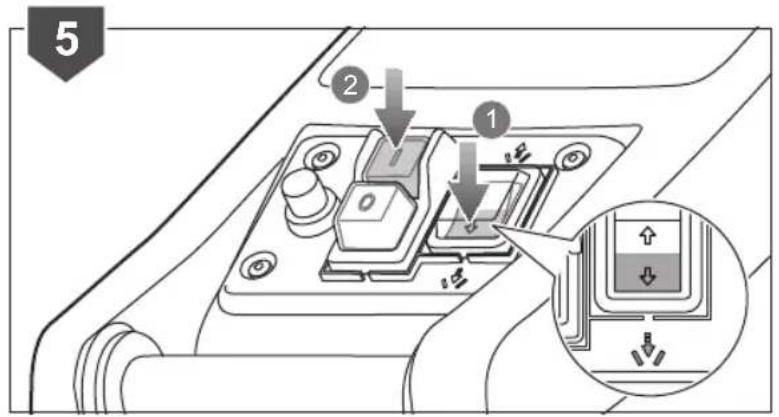
natural_image
Technical line drawing of a mechanical device with gear and gear-like components (no text or symbols)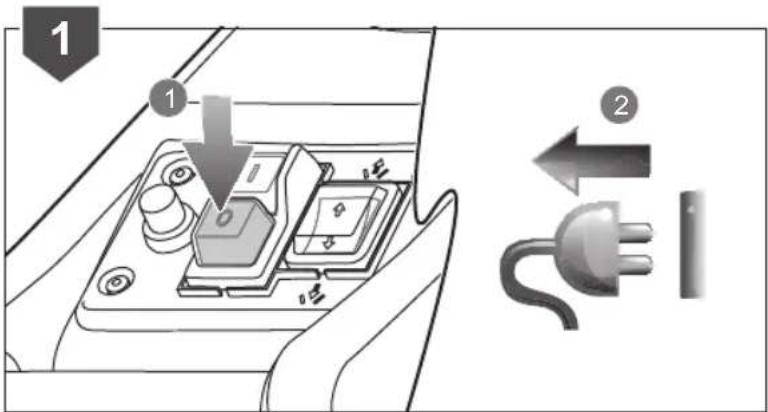
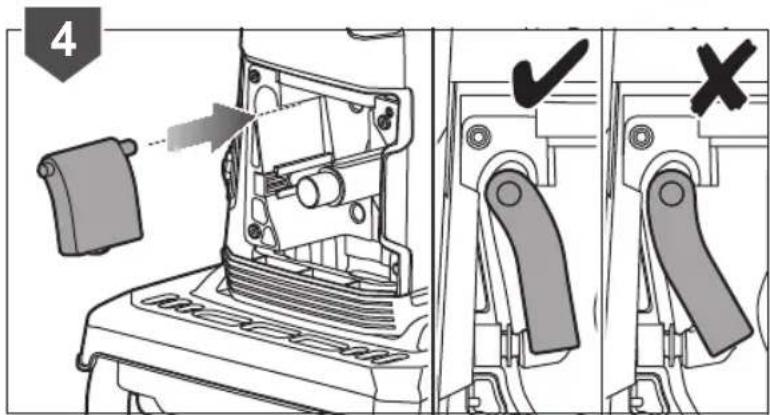
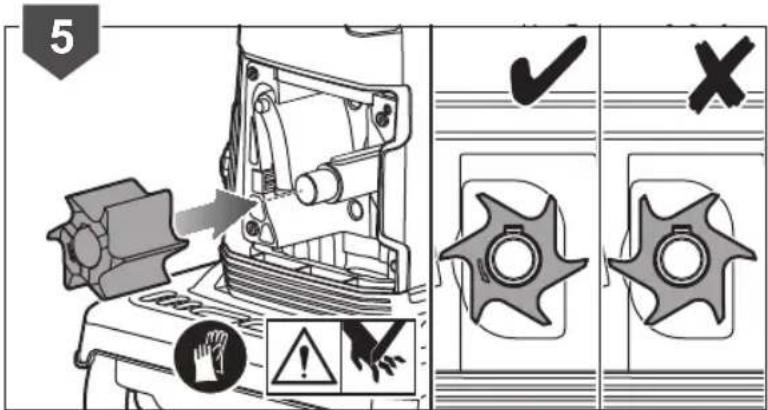
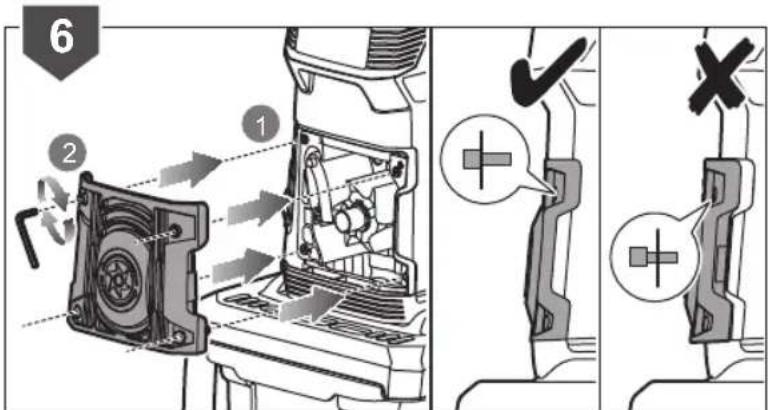
natural_image
Illustration of a Ryobi scooter engine with sparkles and motion blur (no text or symbols)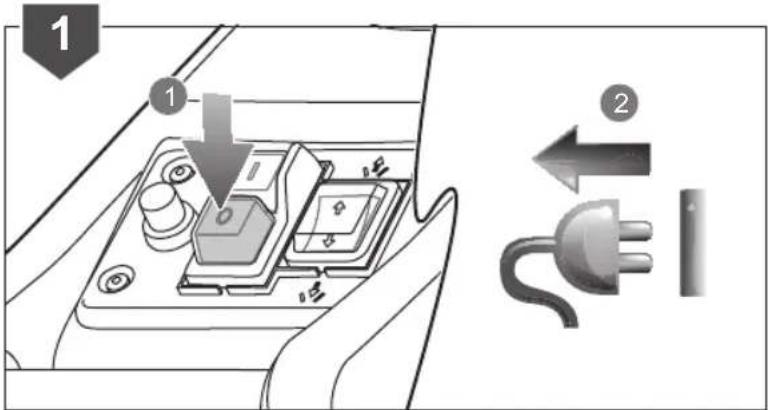
natural_image
Line drawing of a portable electronic device with a lid and buttons, no text or symbols present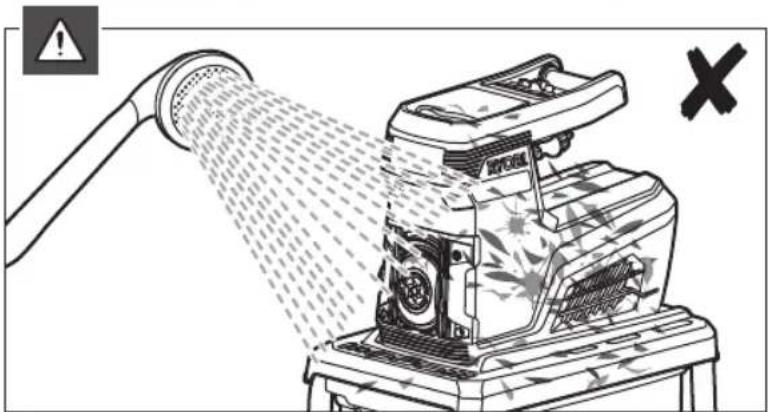
natural_image
Illustration of a showerhead spraying water onto a machine, with warning symbols and an 'X' mark (no text or labels on the diagram itself)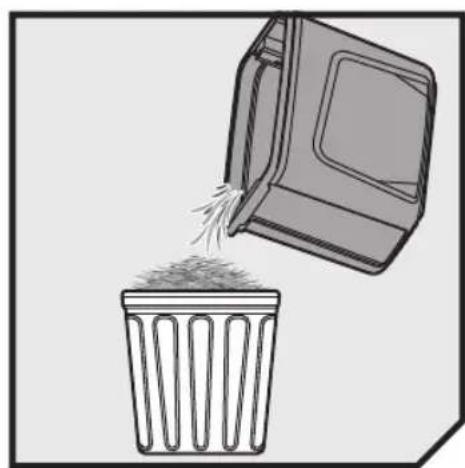
natural_image
Illustration of a trash bin with grain being poured into a plastic waste container (no text or symbols)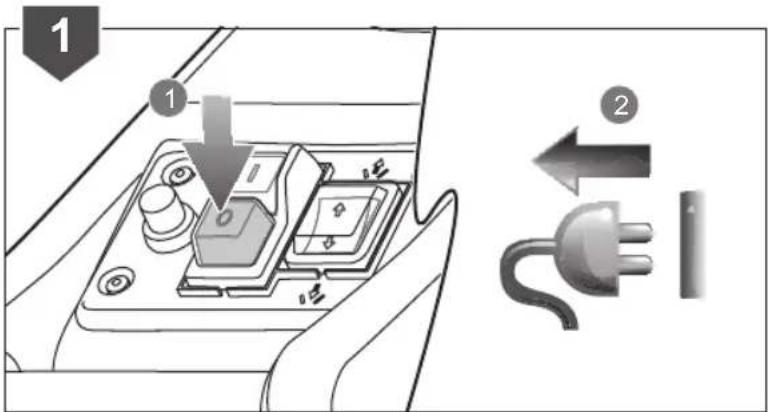
natural_image
Illustration of a trash bin with a lid pouring grain from it, labeled with number 3 (no text or symbols on the diagram itself)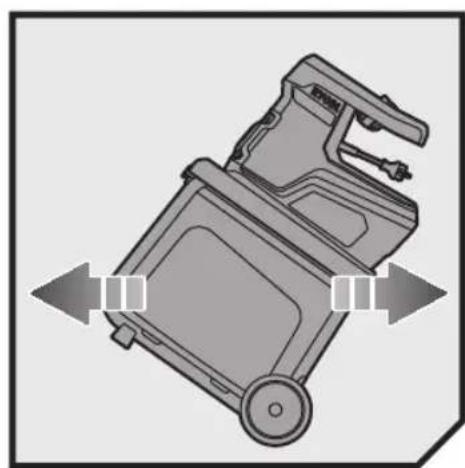
natural_image
Mechanical device with directional arrows indicating movement or force (no text or symbols)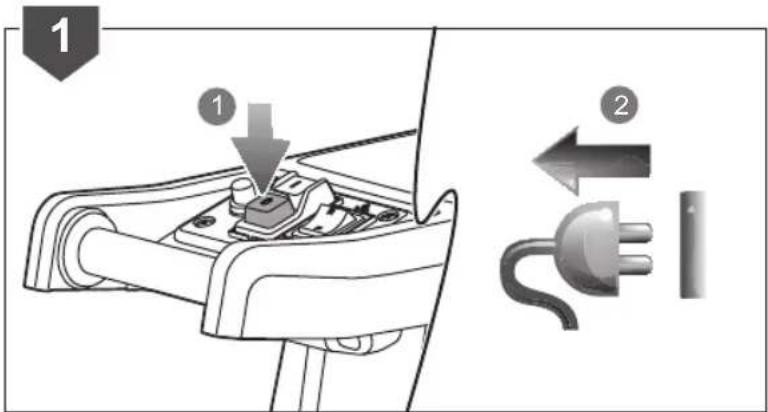
natural_image
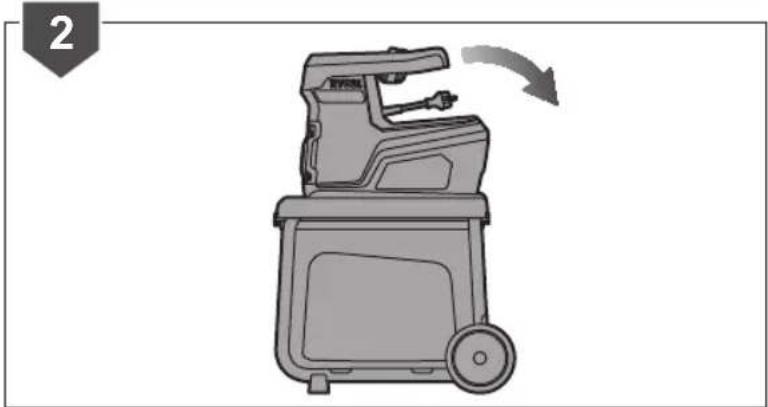
Diagram of a mechanical device with a rotating base and handle, showing a curved arrow indicating rotation (no text or symbols present)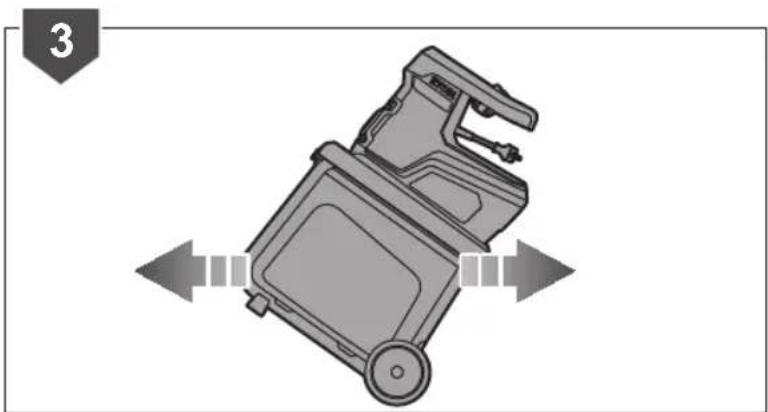
natural_image
Mechanical device with directional arrows indicating motion or movement (no text or symbols)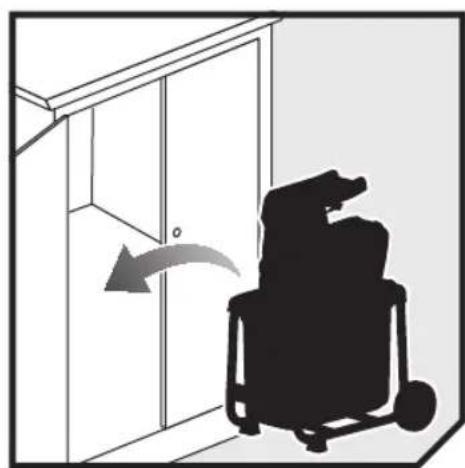
natural_image
Silhouette of a person in a wheelchair inside a room with a door and window (no text or symbols)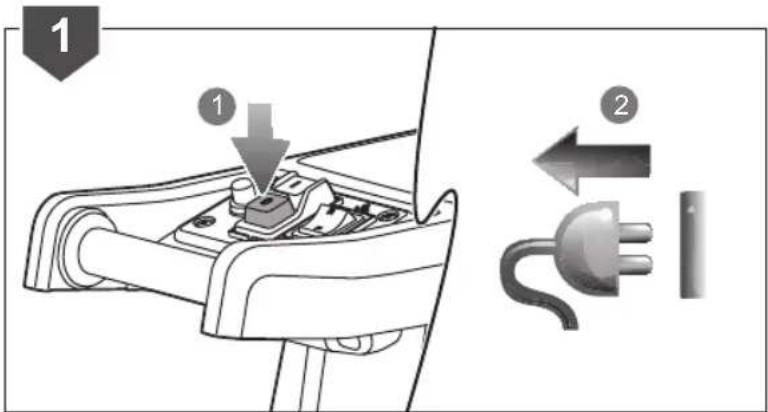
natural_image
Illustration of a food processing machine with waste sorting and a trash bin (no text or symbols)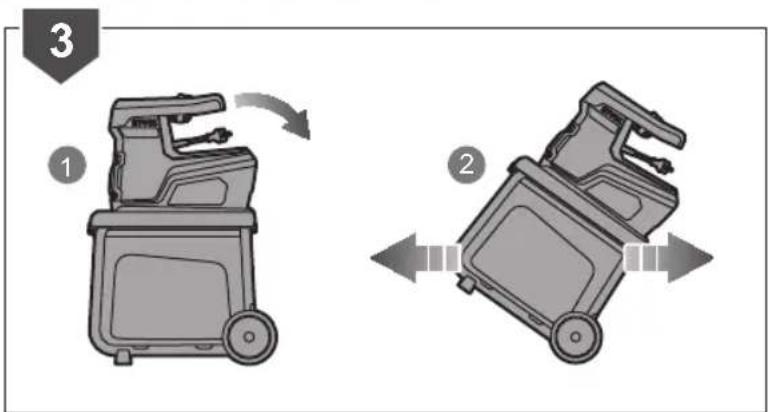
TROUBLESHOOTING
| PROBLEM CAUSE ACTION | ||
| Motor does not run. The overload protection has operated | Wait for the motor to cool, press the reset button.Switch on the product again. | |
| Power failure Check the power supply | cable, the plug and the house fuse. | |
| Material to be shredded is not drawn in | The material is jammed in the feeding funnel. | Follow instruction in the manual for clearing obstructions. |
| Shaving plate is too far from the cutting means. | Follow instruction in the manual for shaving plate adjustment. | |
PRODUCT SPECIFICATIONS
| Rated power 2400W(S6, 40%), 2000W(S1) | |
| Rated voltage 230-240V ~50Hz | |
| Maximum cutting diameter 45 mm | |
| Idle speed 40 min | -1 |
| Weight 28.8 kg | |
| Noise emission level (in accordance with EN 13683:2003+A2:2011/AC:2013 Annex F) | |
| A-weighted sound pressure level at operator's position | 80.7 dB(A) |
| Uncertainty of measurement | 2.5 dB |
| A-weighted sound power level | 99.30 dB(A) |
| Uncertainty of measurement | 2.26 dB |
NOTE:
- The S6(40%) indicates a load profile of 4 minutes load and 6 minutes idle time. For practical application, (i.e. collecting waste and shredding) continuous operation is permitted.
- The maximum cutting diameter depends on the hardness of the wood.
RYOBI®
Imported by:
Techtronic Industries (Australia) Pty. Ltd.
Level 1,660 Doncaster Road
Doncaster, VIC 3108, Australia
Techtronic Industries New Zealand Ltd.
18-26 Amelia Earhart Avenue
Mangere, Auckland 2022, New Zealand



- Important!
- INTENDED USE
- GENERAL SAFETY RULES
- WARNING
- TRAINING
- PREPARATION
- ELECTRICAL SAFETY
- SPECIFIC SHREDDER SAFETY RULES
- OPERATION
- TRANSPORTATION AND STORAGE
- MAINTENANCE
- SHAVING PLATE ADJUSTMENT
- RESIDUAL RISK
- KNOW YOUR PRODUCT
- See page 6
- SHREDDING GUIDE
- SYMBOLS ON THE PRODUCT
- DANGER
- CAUTION
- SYMBOLS IN THIS MANUAL
- NOTE:
Brand : RYOBI
Model : RSH2445B
Category : Mechanical chipper