
IAN 71207 - Alarm Clock AURIOL - Free user manual and instructions
Find the device manual for free IAN 71207 AURIOL in PDF.


| Product Type | Alarm Clock Radio |
| Brand | Auriol |
| Model | IAN 71207 |
| Dimensions (approx.) | 12 x 8 x 5 inches |
| Weight (approx.) | 1.2 lbs |
| Power Supply | AC 120V, 60Hz; Backup: 2 x AAA batteries (not included) |
| Radio Bands | FM |
| Radio Frequency Range | 87.5 - 108 MHz |
| Display Type | LED, red digits |
| Alarm Function | Dual alarm with radio or buzzer |
| Snooze Function | Yes, 9-minute snooze |
| Sleep Timer | Up to 90 minutes |
| Backup Battery | Maintains time and alarm settings during power outage |
| Controls | Rotary knobs for volume/tuning; buttons for alarm set |
| Care and Cleaning | Wipe with a soft, dry cloth. Do not use liquids. |
| Safety Note | Do not expose to moisture; unplug during cleaning. |
| Spare Parts Availability | Contact manufacturer for spare parts or repair services. |
| Repairability | No user-serviceable parts; refer to qualified technician. |
| General Information | Designed for bedside use; complies with safety standards. |
Frequently Asked Questions - IAN 71207 AURIOL
User questions about IAN 71207 AURIOL
0 question about this device. Answer the ones you know or ask your own.
Ask a new question about this device
Download the instructions for your Alarm Clock in PDF format for free! Find your manual IAN 71207 - AURIOL and take your electronic device back in hand. On this page are published all the documents necessary for the use of your device. IAN 71207 by AURIOL.
USER MANUAL IAN 71207 AURIOL
Operation and Safety Notes
DE AT CH
LCD radio-controlled clock
GB / MT Operation and Safety Notes Page 32
(L × A × P)
Z29620B: approx. ø 22.5 x 2.7 cm (T)
Cor:
Z29620A: anthracite/black
Z29620B: black/brushed silver
Scope of delivery
Description of Parts Page 33
Technical Data Page 33
Scope of delivery......Page 33
Safety
General Safety Information......Page 33
Safety Instructions for Batteries Page 34
Before Initial Use
Setting up Devices....Page 34
Installing the LCD radio-controlled clock....Page 35
Starting the LCD radio-controlled clock Page 35
Operation
Reception of DCF radio signal Page 36
Setting the time / date / month / year manually....Page 36
Displaying universal time....Page 36
Using the 12/24-hour display....Page 37
Setting the alarm Page 37
Activating/Deactivating the alarm......Page 37
Switching off the alarm signal Page 38
Setting the day of the week display....Page 38
Displaying the temperature in °C/°F......Page 38
Phases of the moon....Page 38
Displaying summertime......Page 38
Changing the battery....Page 38
Troubleshooting Page 38
Cleaning and Maintenance......Page 39
Disposal Page 39
Information
Declaration of Conformity......Page 39
Proper Use / Description of Parts / Technical Data / Scope of delivery / Safety
LCD Radio-Controlled Clock
● Proper Use
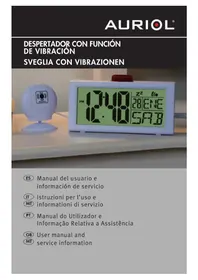
The LCD radio-controlled clock shows the time in 12 / 24-hour mode (in hours, minutes and seconds), the day of the week, the date, the phase of the moon and the room temperature. The radio-controlled clock also has an alarm function (weekday, weekend). The clock is only suitable for operation in enclosed spaces at normal room temperature. The device is not intended for commercial use.
● Description of Parts
1 Time display 2 Radio icon 3 Battery icon 4 Summertime icon S 5 Temperature scale (°C / °F) 6 Inside temperature 7 Phase of the moon 8 Day of the week display 9 Month display 10 Date display 11 Calendar 12 Weekend alarm icon 13 PM icon (afternoons) 14 AM icon (mornings) 15 Weekday alarm icon 16 Mounting hole 17 DOWN button 18 UP button 19 Base 20 Battery compartment cover 21 WAVE button 22 MODE button (set)
- Technical Data
Type of battery: 1 x Mignon 1.5 V /AA
Dimensions:
Z29620A: approx. 22.5 x 19.5 x 2.7 cm (W x H x D)
Z29620B: approx. 22.5 x 2.7 cm (D)
Colour:
Z29620A: anthracite / black
Z29620B: black/silver brushed
Scope of delivery
1 LCD Radio-Controlled Clock, 1 battery Mignon 1.5 V---, AA, 1 operating instructions

Safety
WARNING! Please read all safety information and instructions. Failure to comply with the safety information and instructions may result in fire and / or severe injuries.
KEEP ALL THE SAFETY ADVICE AND INSTRUCTIONS IN A SAFE PLACE FOR FUTURE REFERENCE!

General Safety Information
WARNING! DANGER TO LIFE AND ACCIDENT HAZARD FOR TODDLERS AND SMALL CHILDREN
CHILDREN! Never allow children to play unsupervised with the packaging material. There is a danger of suffocation from the packaging material. Children frequently underestimate the dangers. Children should be kept away from the product at all times. This is not a toy.
Children or persons who lack the knowledge or experience to use the device, or whose physical, sensory, or intellectual capacities are limited, must never be allowed to use the device without
Safety / Before Initial Use
supervision or instruction by a person responsible for their safety. Children must never be allowed to play with the device.
WARNING! DANGER TO LIFE! Batteries can be swallowed, which may represent a danger to life. If a battery has been swallowed, medical help is required immediately.
- Do not use the device if it is damaged. Damaged devices represent a danger of death!
WARNING! Do not use the device in hospitals or medical facilities, as otherwise this may result in malfunctions of life-support systems.
■ Do not expose the device to extreme temperatures, strong vibrations, heavy mechanical loads, direct sunlight, or moisture. Otherwise there is a danger that the device will be damaged.
- Please prevent the housing of the device from rubbing too strongly against textiles. This may result in static charges and affect the results of the measurements. Please note that the guarantee does not cover damage caused by incorrect handling, non-compliance with the operating instructions, or interference with the device by unauthorized individuals. ■ Under no circumstances should you take the device apart. Improper repairs may place the user in considerable danger. Repairs should only be carried out by specialist personnel.

Safety Instructions for Batteries
■ Remove the battery from the device if it is not going to be used for a prolonged period. CAUTION! DANGER OF EXPLOSION! The batteries must never be recharged! CAUTION! RISK OF EXPLOSION! Use batteries of the indicated type only. Otherwise there is a risk of an explosion.
- When inserting the battery, ensure the correct polarity! This is shown in the battery compartment. If necessary, clean the battery and device contacts before inserting the battery. ■ Remove a spent battery immediately from the device. There is an increased danger of leaks! If the above instructions are not complied with, the battery may discharge itself beyond its end voltage. There is then a danger of leaking. If the battery has leaked inside your device, you should remove it immediately in order to prevent damage to the device! ■ Batteries must not be disposed of in the normal domestic waste! ■ Every consumer is legally obliged to dispose of batteries in the proper manner!
- Keep batteries away from children; do not throw them in the fire, short-circuit them, or take them apart.
- Avoid contact with the skin, eyes, and mucous membranes. Any parts of the body coming into contact with battery acid should be rinsed off with copious amounts of water and/or a doctor contacted if necessary!
- Before Initial Use
- Setting up Devices
CAUTION! When selecting a location to set up the device, please ensure that it is not exposed to direct sunlight, vibrations, dust, heat, cold, or moisture. Do not place the device close to sources of heat, e.g., radiators. Otherwise, it may be damaged.
☐ Make sure that the device is standing safely on a stable surface. ☐ Make sure that the device is mounted properly if installed on a wall. A falling clock could injure people or cause damage to the device itself or to other objects. ☐ Stand the radio-controlled clock on its base 19 or mount it on the wall. ☐ Place the clock on a level, horizontal surface.
Before Initial Use
☐ Do not stand the device on valuable or sensitive surfaces without suitable protection. The surface may otherwise be damaged. ☐ Do not place the device anywhere near sources of interference such as televisions, computers, thick walls, etc. These may hinder reception of the radio signal. ☐ Do not use the clock in reinforced concrete buildings, e.g., airports, high-rises, factories, or basements. This can seriously disrupt reception of the radio signal. ☐ Do not start radio reception in a moving vehicle, e.g., car or train. Reception of the radio signal by the device can disrupt the vehicle electronics. ☐ Do not expose the clock to temperatures below -10 °C for any length of time. This can seriously affect the reception range of the device.
- Installing the LCD radio-controlled clock
Note: You will need a drill, suitable assembly material, and a screwdriver for installation.
⚠️ CAUTION! DANGER TO LIFE AND RISK OF INJURY; RISK OF DAMAGE TO PROPERTY!
Please read the operating and safety instructions for your drill carefully.
WARNING! DANGER TO LIFE! Please ensure that you do not drill into any electrical wiring, gas, or water pipes in the wall. If necessary, carry out checks with a wire, pipe, and stud detector before you drill into a wall.
☐ Find a suitable place to install the radio-controlled clock. ☐ Mark the drill hole on the wall.
CAUTION! DANGER OF INJURY! Refer to the operating instructions for your electric drill.
☐ Drill the hole with a drill. ☐ Insert a suitable dowel into the drill hole. ☐ Use a screwdriver to insert a suitable screw. ☐ Hang the radio-controlled clock on the screw using the mount 16.
- Starting the LCD radio-controlled clock
Note: Remove the insulating strip before using the product for the first time.
☐ Open the battery compartment cover 20 on the back of the device. ☐ Insert a Mignon 1.5 V / AA type battery. Note: Make sure that the polarity is correct when you insert the battery. This is indicated in the battery compartment. ☐ Close the battery compartment cover.
As soon as the battery is inserted, reception of the radio signal begins.
Note: Do not alter the position of the radio-controlled clock during reception of the signal. This may disrupt reception.
Radio Signal (DCF):
The DCF signal (time signal transmitter) consists of time pulses emitted by one of the most accurate clocks in the world close to Frankfurt / Main, Germany – this varies by 1 second in a million years.
Your radio-controlled clock receives these signals under ideal conditions up to a distance of approx. 1,500 km around Frankfurt / Main. Reception of the radio signal generally takes approx. 3–10 minutes.
☐ If it does not work properly, restart the radio-controlled clock. To do this, keep the WAVE button 21 pressed for approx. 3 seconds.
Reception can be considerably impaired by obstacles (e.g. concrete walls) or sources of interference (e.g. other electrical devices). If necessary, change the location of the radio clock (e.g. by putting it near a window) if you have problems with reception.
Operation
Operation
● Reception of DCF radio signal
The radio-controlled clock automatically starts to search for the DCF radio signal. The radio icon 📤 2 on the LCD indicates that the clock is searching for the radio signal.
Note: Reception of the radio signal may be seriously disrupted in reinforced concrete buildings (see "Setting up Devices").
It is also possible to start reception of the DCF radio signal manually on the clock.
☐ Press and hold down the WAVE button 21 for 3 seconds. The radio-controlled clock attempts to pick up the DCF radio signal. This process takes a few minutes and is indicated by the flashing radio icon 📷 2 on the LCD.
Note: If the radio-controlled clock cannot pick up the DCF radio signal on account of an error or the distance from the transmitter, etc., it is also possible to set the time manually. As soon as reception of the DCF signal is successful, the manual settings are overwritten.
- Setting the time / date / month / year manually
- Keep the WAVE button 21 pressed for approx. 3 seconds. The radio icon 🔒 2 flashes.
- Keep the WAVE button 21 pressed again for approx. 3 seconds to interrupt reception of the radio signal.
- Keep the MODE button 22 pressed for approx. 2 seconds. The time zone display flashes. Press the UP 18 or DOWN button 17 to set the required time zone.
Note: The default setting of the time zone (00) is GMT+1. Calculate the required time zone from this.
- Confirm your setting by pressing the MODE button 22. The hours display flashes. Press the
UP 18 or DOWN button 17 to set the required hour.
Tip: If you keep the UP 18 or DOWN button 17 pressed, the settings are made faster. You can also use this fast setting option for subsequent settings. If you do not press any button for 60 seconds, the LCD automatically reverts to the standard display.
- Confirm your setting by pressing the MODE button 22. The minutes display flashes.
- Repeat steps 4 and 5 to set the minutes, year, month 9 and date 10.
- Displaying universal time
Note: The display showing the names of the towns and times will appear in the LC display in place of the day of the week display 8, month display 9 and date display 10.
Press the MODE button 22 briefly three times. Press the MODE button [22] and hold it down for two seconds. The name of the town and the time will flash. Press the buttons UP 18 or DOWN 17 to select the town you wish to have.
Note: You can manually change individual towns to daylight saving time - even if they do not officially have daylight saving time.
Press and hold down the UP button 18 for approx. 2 seconds to set the town in question to daylight saving time if necessary. The local time in question will be moved forward by one hour or put back by one hour.
Note: The following towns do not have any official daylight saving time:
| Cities Dis- | play | UTC | Summer / Winter Time | |
| 1 | Alaska | AL | -9 | Manual Set ±1H |
| 2 | Honolulu | HN | -10 | Manual Set ±1H |
| 3 | Vancouver | VA | -8 | Manual Set ±1H |
| 4 | Los Angeles | LA | -8 | Manual Set ±1H |
| 5 | St. George | SG | -7 | Manual Set ±1H |
| 6 | Chicago | CH | -6 | Manual Set ±1H |
| 7 | Toronto TO -5 | Manual Set | ± 1H | |
| 8 | New York NY -5 | Manual Set | ± 1H | |
| 9 | Rio de Janeiro | RI -3 | Manual Set | ± 1H |
| 10 | London LO +0 | DCF schedule | ||
| 11 | Frankfurt FF +1 | DCF schedule | ||
| 12 | Paris | PA | +1 | DCF schedule |
| 13 | Madrid | MA | +1 | DCF schedule |
| 14 | Rome | RO +1 | DCF schedule | |
| 15 | Zurich | ZU +1 | DCF schedule | |
| 16 | Cairo | CA | +2 | DCF schedule |
| 17 | Moscow | MO +3 | DCF schedule | |
| 18 | Dubai | DU | +4 | Manual Set ± 1H |
| 19 | India | IN | +5.5 | Manual Set ± 1H |
| 20 | Bangkok | BK +7 | Manual Set ± 1H | |
| 21 | Hong Kong | HK | +8 | Manual Set ± 1H |
| 22 | Beijing | BJ +8 | Manual Set ± 1H | |
| 23 | Tokyo | TY | +9 | Manual Set ± 1H |
| 24 | Adelaide | AD | +9.5 | Manual Set ± 1H |
| 25 | Sydney SY | +10 | Manual Set ± 1H | |
| 26 | Auckland AK | +12 | Manual Set ± 1H | |
Press the MODE button 22 to confirm the setting. Press the MODE button 22 three times. Press and hold down the MODE button 22 for approx. 2 seconds. The day of the week 8, month 9 and date displays will appear in the display 10.
Using the 12/24-hour display
While time display 1 is indicated press the UP button 18 to switch between 12-hour and 24-hour format.
Note: The AM icon 14 on the LCD stands for mornings in 12-hour format. The PM icon 13 on the LCD stands for afternoons in 12-hour format.
Setting the alarm
Weekday alarm:
The weekday alarm is active every day from Monday to Friday.
- Press the MODE button 22 once briefly. The adjusted alarm time is indicated in the LC display.
- Press the MODE button 22 and keep it pressed for approx. 2 seconds. The hours display flashes.
- Press the UP 18 or DOWN button 17 to set the required hour. Press the MODE button 22 to confirm your setting.
- The minutes display flashes. Repeat step 3 to set the minutes.
Weekend alarm:
The weekend alarm is active on both days from Saturday to Sunday.
- Press the MODE button 22 twice briefly if the radio-controlled clock is in time display 1 mode. Press the MODE button 22 once briefly if the radio-controlled clock is in weekday alarm mode.
- Press and keep the MODE button [22] pressed for approx. 2 seconds. The hours display flashes.
- Press the UP 18 or DOWN button 17 to set the required hour. Press the MODE button 22 to confirm your setting.
- The minutes display flashes. Repeat step 3 to set the minutes.
- Activating / Deactivating the alarm
☐ Press the MODE button 22 briefly once/twice to enter weekday alarm mode/weekend alarm mode. Press the UP 18 or DOWN button 17. The weekday alarm icon 15 or the weekend alarm icon 12 appears on the LCD. The alarm has been activated. Press the UP 18 or DOWN button 17 again. The weekday alarm icon 15 or the weekend alarm icon 12 disappears from the LCD. The alarm has been deactivated.
Operation/Troubleshooting
- Switching off the alarm signal
☐ Press any button when the alarm is ringing to stop the alarm signal. There is no need to reactivate the alarm. It switches itself on automatically according to the chosen weekly setting.
Note: The alarm is ringing for one minute.
- Setting the day of the week display
The day of the week 8 can be displayed in various languages. The standard setting is German.
☐ Press the DOWN button 17 and keep it pressed. In the day of the week display 8, the abbreviation for the current language appears. Release the DOWN button 17 when the abbreviation for your chosen language appears.
The following languages are available:
EN=English
GE=German
FR=French
IT=Italian
SP=Spanish
DU=Dutch
- Displaying the temperature in °C/°F
The current inside temperature 6 is indicated on the LCD.
Press the DOWN button 17 to switch between the Celsius and Fahrenheit temperature scales 5
● Phases of the moon
The radio-controlled clock indicates the current phase of the moon 7 on the LCD.
The following icons can be displayed:
 |  |  |  |
| Full moon Waning gibbous | Last quarter | Waning crescent | |
 |  |  |  |
| New moon | Waxing crescent | First quarter | Waxing gibbous |
- Displaying summertime
Summertime is automatically indicated on the LCD by the summertime icon S 4. The clock receives the information as to whether it is summertime or not from the DCF radio signal.
You can also adjust the summertime manually (see "Displaying universal time").
Note: Reception of the radio signal may be seriously disrupted in reinforced concrete buildings.
- Changing the battery
The battery icon ☐ 3 appears on the LCD when the battery is low. Make sure that you replace the battery promptly.
☐ Open the battery compartment cover 20 on the back of the device. □ Remove the used battery. ☐ Insert a Mignon 1.5V==/AA type battery.
Note: Make sure that the polarity is correct when you insert the battery. This is indicated in the battery compartment.
☐ Close the battery compartment cover 20.
- Troubleshooting
☐ This appliance has delicate electronic components. This means that if it is placed near an object that transmits radio signals, it could cause interference. This could be, for example, mobile telephones, walkie talkies, CB radios, remote
Troubleshooting/Cleaning and Maintenance/Disposal/Information
controls and microwaves. If the display indicates a problem, move such objects away from it.
Electrostatic charge can lead to the appliance failing. In cases of the appliance failing to work remove the batteries for a short while and then replace them.
● Cleaning and Maintenance
■ Under no circumstances should you use liquids or detergents, as these will damage the device. ☐ The device should only be cleaned on the outside with a soft dry cloth.
- Disposal

The packaging is made entirely of recyclable materials, which you may dispose of at local recycling facilities.
Contact your local refuse disposal authority for more details of how to dispose of your worn-out product.

To help protect the environment, please dispose of the product properly when it has reached the end of its useful life and not in the household waste. Information on collection points and their opening hours can be obtained from your local authority.
Faulty or used batteries must be recycled in accordance with Directive 2006 / 66 / EC. Please return the batteries and / or the device to the available collection points.

Environmental damage through incorrect disposal of the batteries!
Batteries may not be disposed of with the usual domestic waste. They may contain toxic heavy metals and are subject to hazardous waste treatment rules and regulations. The chemical symbols for heavy metals are as follows: Cd = cadmium, Hg = mercury,
Pb = lead. That is why you should dispose of used batteries at a local collection point.
Information
• Declaration of Conformity
We, Milomex Ltd., c / o Milomex Services, Hilltop Cottage, Barton Road, Pulloxhill, Bedfordshire, MK45 5HP, UK, hereby declare under our sole responsibility that the product: LCD Radio-Controlled Clock, Model No.: Z29620A, Z29620B, Version: 12 / 2011, to which this declaration refers, complies with the standards / normative documents of 1999/5/EC.
The complete declaration of conformity can be viewed at: www.milomex.com
EMC CE
c/o Milomex Services
Hilltop Cottage
Barton Road
Pulloxhill
Bedfordshire
MK45 5HP
UK
Model-No.: Z29620A, Z29620B
Version: 12/2011
© by ORFGEN Marketing


- LCD RADIO-CONTROLLED CLOCK
- COR
- SCOPE OF DELIVERY
- SAFETY
- BEFORE INITIAL USE
- OPERATION
- INFORMATION
- PROPER USE / DESCRIPTION OF PARTS / TECHNICAL DATA / SCOPE OF DELIVERY / SAFETY
- ● PROPER USE
- ● DESCRIPTION OF PARTS
- TECHNICAL DATA
- DIMENSIONS
- COLOUR
- GENERAL SAFETY INFORMATION
- SAFETY / BEFORE INITIAL USE
- SAFETY INSTRUCTIONS FOR BATTERIES
- SETTING UP DEVICES
- INSTALLING THE LCD RADIO-CONTROLLED CLOCK
- ⚠️ CAUTION! DANGER TO LIFE AND RISK OF INJURY; RISK OF DAMAGE TO PROPERTY
- STARTING THE LCD RADIO-CONTROLLED CLOCK
- RADIO SIGNAL (DCF)
- ● RECEPTION OF DCF RADIO SIGNAL
- SETTING THE TIME / DATE / MONTH / YEAR MANUALLY
- DISPLAYING UNIVERSAL TIME
- USING THE 12/24-HOUR DISPLAY
- SETTING THE ALARM
- WEEKDAY ALARM
- WEEKEND ALARM
- ACTIVATING / DEACTIVATING THE ALARM
- OPERATION/TROUBLESHOOTING
- SWITCHING OFF THE ALARM SIGNAL
- SETTING THE DAY OF THE WEEK DISPLAY
- DISPLAYING THE TEMPERATURE IN °C/°F
- ● PHASES OF THE MOON
- DISPLAYING SUMMERTIME
- CHANGING THE BATTERY
- TROUBLESHOOTING
- TROUBLESHOOTING/CLEANING AND MAINTENANCE/DISPOSAL/INFORMATION
- ● CLEANING AND MAINTENANCE
- DISPOSAL
- ENVIRONMENTAL DAMAGE THROUGH INCORRECT DISPOSAL OF THE BATTERIES
- DECLARATION OF CONFORMITY
- EMC CE
Brand : AURIOL
Model : IAN 71207
Category : Alarm Clock