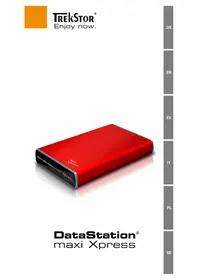
DataStation maxi pace 3.0 - Hard Drive TrekStor - Free user manual and instructions
Find the device manual for free DataStation maxi pace 3.0 TrekStor in PDF.


| Product Type | External Hard Drive |
| Brand | TrekStor |
| Model | DataStation maxi pace 3.0 |
| Interface | USB 3.0 |
| Compatible Operating Systems | Windows, macOS |
| Power Supply | External AC adapter (included) |
| Dimensions (approx.) | 200 x 120 x 40 mm |
| Weight (approx.) | 1.0 kg |
| Storage Capacity | Up to 4 TB (depending on variant) |
| Data Transfer Rate | Up to 5 Gbps (USB 3.0) |
| Main Functions | Data storage, backup, file transfer, media library |
| Maintenance | Keep dry, avoid magnetic fields, handle with care |
| Safety Precautions | Do not disassemble, avoid drops, use only supplied power adapter |
| Spare Parts & Repairability | No user-serviceable parts; contact support for issues |
| Package Contents | Hard drive, USB cable, power adapter, quick start guide |
| Manual Languages | DE, EN, ES, IT, PL, SV |
Frequently Asked Questions - DataStation maxi pace 3.0 TrekStor
User questions about DataStation maxi pace 3.0 TrekStor
0 question about this device. Answer the ones you know or ask your own.
Ask a new question about this device
Download the instructions for your Hard Drive in PDF format for free! Find your manual DataStation maxi pace 3.0 - TrekStor and take your electronic device back in hand. On this page are published all the documents necessary for the use of your device. DataStation maxi pace 3.0 by TrekStor.
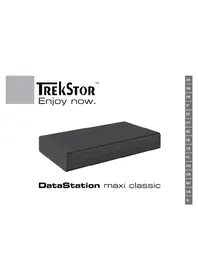
USER MANUAL DataStation maxi pace 3.0 TrekStor
Thank you for buying the TrekStor DataStation. We are confident that this product will be the source of much enjoyment. Please read the following instructions carefully so that you can become acquainted with the functions of this product and its use.
Current product information can be found at the TrekStor Website (www.trekstor.de).
Have you got questions about the operation or the functions of this product? On the TrekStor website you can find answers to the most frequently asked questions under "SERVICE" → "FAQ".
You can also get quick assistance by contacting our support. If you want to contact our support, it is best to visit our website, www.trekstor.de, and fill out the support form that can be found under "SERVICE" → "SUPPORT". You can of course also contact us directly by e-mail or telephone (see the back of these instructions). The more detailed your support request is, the quicker and better we will be able to help you!
System requirements
For data transfer with a computer
• Windows® 7/Vista™/XP, Mac® OS X
For these operating systems, no drivers are necessary for the operation of the DataStation in the USB mode. If you use Windows® XP, make sure that you have installed at least service pack 2.
• Free USB port (USB 1.1, Hi-Speed USB 2.0 or SuperSpeed USB 3.0)
For data transfer via SuperSpeed USB 3.0
• Current operating system with installed support for USB 3.0.
i Please note that the drivers for the USB 3.0 port are not automatically installed with all operating systems. If you have any questions about the installation of these drivers, please contact the manufacturer of your computer or of the used USB 3.0 interface card.
• Free USB 3.0 port
Important information about the KIT version of this DataStation
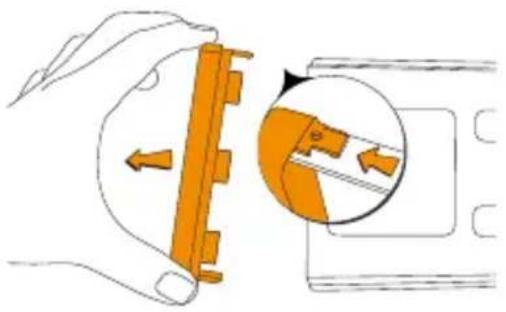
This DataStation is also available as a KIT version, i.e. as a version without a preinstalled 3.5" hard drive. Instructions for the installation of a hard drive can be found at the back of this manual.
The housing of this DataStation may only be opened if you have a KIT version of this DataStation. If there is a preinstalled hard drive in your DataStation, opening the housing or breaking the seal stickers over the screws of the housing may lead to problems in case of a warranty claim.
⚠️ Hard drives can be seriously damaged by electrostatic discharges. It is necessary that you touch a grounded piece of metal (e.g. a heating or water pipe) before you take the hard drive out of its ESD bag!
Important information about SuperSpeed USB 3.0
A SuperSpeed USB 3.0 interface makes possible an extremely fast access to your DataStation. In practice, a data transfer via USB 3.0 can be about four times faster than via Hi-Speed USB 2.0. This means minimized waiting times for you and thus more time for all tasks that are important to you.
The SuperSpeed USB 3.0 interface of your DataStation is fully backwards compatible with USB 2.0 and USB 1.1 ports on your computer. Therefore you can use your DataStation for data transfers with computers that do not have a USB 3.0 port. You can also use your DataStation with all other devices that have a USB 2.0 host port, e.g. media players or games consoles. However, when transferring data to a device without a USB 3.0 port the speed of the data transfer is limited to the data transfer rate of the older USB standards!
For the maximum benefit from the SuperSpeed USB 3.0 technology, please read and observe the following instructions and recommendations:
- Connect the USB 3.0 interface of your DataStation to a USB 3.0 port of your computer. You can usually recognize USB 3.0 connectors by the blue color used inside the ports and plugs. Please use only the supplied USB 3.0 cable!
- Please make sure that your operating system supports USB 3.0 and that the drivers for the USB 3.0 interface of your computer have been installed correctly. If you have any questions about the installation of the driver for the USB 3.0 interface, please contact the manufacturer of your computer (or, if a USB 3.0 interface card has been retrofitted in your computer, the manufacturer of the interface card) or the manufacturer of your operating system.
i It is not necessary to install any special drivers for your DataStation in able to use it with a correctly installed USB 3.0 interface. The DataStation is supported by the standard drivers that are set up during the correct installation of a USB 3.0 interface!
- If your computer or your notebook does not have a USB 3.0 interface, then in many cases it is possible to upgrade it with a USB 3.0 interface for either the PCI Express bus of a computer or the ExpressCard slot of a notebook. If you have questions about the compatibility of a specific interface card with your computer or notebook, then the manufacturers of the devices can help you.
- Thanks to the downward compatibility of USB 3.0, you can also connect your DataStation to a USB 2.0 or USB 1.1 port of your computer. However, in this case you will not be able to benefit from the higher data transfer rates that your DataStation is capable of delivering via USB 3.0. When connecting your DataStation to a USB 2.0 or USB 1.1 port please also use the supplied USB 3.0 cable!
- Should the supplied USB 3.0 cable not be at hand, you can also transfer data to a computer via a suitable USB 2.0 cable. In this case, the maximum data transfer speed will be that of USB 2.0, even if you connect your DataStation to a USB 3.0 port of your computer. The possible data transfer rate is always limited by the weakest link in the connection chain!
- A USB 3.0 hub offers separate connections for USB 3.0 and USB 2.0 devices. Therefore make sure that you use a USB 3.0 port if you connect your DataStation to a USB 3.0 hub.
- If you use a USB 2.0 hub, you will only be able to achieve the data transfer rate of USB 2.0!
1) Connecting the DataStation
a) Connect the USB 3.0 port of your DataStation with a USB 3.0 port of your computer. Please use only the provided USB 3.0 cable.
Thanks to the downward compatibility of USB 3.0 you can also connect your DataStation to a USB 2.0 or USB 1.1 port of your computer. In this case, you will not be able to benefit from the higher data transfer rate that you can get when you connect the DataStation via USB 3.0. When connecting via an older USB standard, please also use the provided USB 3.0 cable.
b) Next, connect the power supply to the "POWER" connector of the DataStation. After connecting to the DataStation, you can connect the power supply to the mains socket.
c) Switch on the DataStation isind the power switch 1/0 on the back of the device. Your operating system automatically recognizes the DataStation and adds the DataStation as a "LOCAL DISK" (or "LOCAL DRIVE") to "MY COMPUTER"/"COMPUTER" (Microsoft® Windows) or "DESKTOP" (Mac® OS X and Linux®).
⚠️ If you want to disconnect your DataStation from your computer, first log off, as described in these instructions, to safely remove the drive and prevent data loss. After logging off, you can switch off your DataStation by using the power button 1/0.
2) Data exchange
After a successful startup of the device, a local disk "TREKSTOR" appears under "MY COMPUTER"/"COMPUTER" (Windows®) or on your "DESKTOP" (Mac® OS X).
Windows ® 7/Vista TM /XP
- Select the desired files or folders with your mouse.
- Position the mouse pointer over the selected files or folders, and press the right mouse button. Select "COPY" from the context menu that appears.
- Under "MY COMPUTER"/"COMPUTER", select the desired target (such as the "TREKSTOR" drive).
- Click it with your right mouse button, and select "PASTE" to start copying. After copying is completed, the data will be available on the target drive.
Mac ® OS X from 10.3
Select the desired files with your mouse. Drag and drop the files in the "FINDER" to the drive symbol of your DataStation.
3) Logging off and disconnecting the TrekStor DataStation from the computer
Windows® 7/Vista™/XP
At the bottom right on the task bar, left-click on the icon "SAFELY REMOVE HARDWARE". In the context menu that appears, left-click on "SAFELY REMOVE MASS STORAGE DEVICE - DRIVE" to select it. This removes the DataStation from the operating system of your computer. You can now disconnect the DataStation from your computer.
Mac ® OS X from 10.3
You need to remove the drive from the Desktop before you disconnect it or turn it off. Click on the relevant drive icon, and drag it to the trash icon.
Note: Please follow the recommended logoff procedure to prevent damage to the device or data loss.
4) Formatting the hard disk
⚠️ Your DataStation has been preformatted with the high-performance file system NTFS. This file system is optimized for use with Microsoft® Windows® operating systems from Windows® XP and also works great with modern Linux® operating systems.
If you use Mac® OS X, it is necessary that you use a different file system. You can easily reformat your DataStation with a different file system using the "Disc Utility" of Mac® OS X. You have the choice between the file system "HFS+" ("Mac OS Extended"), which is optimized for use with Mac® OS X, and the file system "FAT32", which permits the exchange of data with Window® operating systems.
⚠️ Important: Back up all the data on your hard disk before formatting it.
⚠️ Note: ALL the data on the disk will be deleted when you format it.
i Please note that only files with a maximum file size of 4 GB are supported for a hard disk formatted with FAT32. If you want to store larger files, we recommend the use of the file systems NTFS (Windows®) or HFS+ (Mac® OS X).
Windows® 7/Vista™/XP
The DataStation can be formatted like any other hard disk in Windows ® .
• Under "MY COMPUTER"/"COMPUTER", right-click on the local disk "TREKSTOR".
- Select "FORMAT..." from the context menu that appears.
- Left-click on the " START" button, and confirm that you want to format by clicking the "OK" button.
Mac ® OS X from 10.4
To format the DataStation in Mac® OS X, please proceed as follows:
- Select "FINDER" → "PROGRAMS" → "UTILITIES" and open "DISK UTILITY".
- Click on the DataStation to select it. It is listed under its model number.
• In the right side of the window, select " PARTITION". - Use the drop-down list under "VOLUME SCHEME" to select the number of partitions you want to create.
Formatting with the file system HFS+
To format the DataStation in Mac® OS X with the file format "HFS+" ("MAC OS EXTENDED") please proceed as follows:
- Click on the button "OPTIONS" and choose either "GUID PARTITION TABLE" or "APPLE PARTITION TABLE" as the partition scheme and confirm the choice by clicking on "OK".
- Use the drop-down list to determine the file system for the hard disk/partition to be formatted, and enter the name in the provided field.
i Instructions for the Mac® OS X Leopard: The file system "HFS+" ("MAC OS EXTENDED") allows you to use the "TIME MACHINE".
• To start the formatting of the DataStation, click on the "APPLY" button and confirm this by clicking on "PARTITION", in the window that appears.
Formatting with the file system FAT32
The file system "FAT32" offers the maximum compatibility with different operating systems. Unfortunately, it is limited with respect to the maximum possible size of a file (max. 4 GB). To format the DataStation using Mac® OS X with the file system "FAT32" please proceed as follows:
- Click on the button "OPTIONS" and choose "MASTER BOOT RECORD" as the partition scheme and confirm the selection by klicking on "OK".
- Use the drop-down list to select the file system "MS-DOS"/"MS-DOS (FAT)" for the hard disk/partition to be formatted, and enter the name in the provided field.
i Please wait until the formatting of your DataStation has been completed. Please note that formatting under Mac® OS X 10.4.x takes a long time.
- To start the formatting of the DataStation, click on the "APPLY" button and confirm this by clicking on "PARTITION", in the window that appears.
Instructions for safety and use:

Only qualified persons may perform technical work on the product. The product may not be opened or changed. The components cannot be serviced by the user.

Never expose the device to moisture, condensation and liquids.

Protect the device from extremely high and low temperatures and temperature fluctuations. Use the device within an ambient temperature of 10° C to 40° C.

Never place the device close to a source of heat, and protect it from direct sunlight.

Make sure that the surroundings are as dust-free as possible when you use and store the device.

Never clean the surface of the device with solvents, paint thinners, cleansers or other chemical products. Instead, use a soft, dry cloth or soft brush.

Do not use USB cables longer than 3 meters.

In certain circumstances, exposing the device to an electrostatic discharge may interrupt the data transfer between the device and the computer and impair the functions of the device. If this occurs, the device should be unplugged from the USB port and then plugged in again.

The capacity indicated by your operating system can be different than the actual capacity of your external hard drive. Like most manufacturers of computer hardware, TrekStor uses the prefixes for units (e.g. 1 GB = 1.000.000.000 bytes) as prescribed by the International System of Units (SI). Unfortunately, many operating systems do not comply with this norm and display a lower capacity because they base their calculations on the assumption that 1 GB = 2 30 bytes = 1.073.741.824 bytes.
The manufacturer retains the right to continually improve the product. These changes may be made without being directly described in these operating instructions. For this reason, the information provided in these operating instructions may not reflect the current state of the art.
The manufacturer only guarantees suitability for the product's intended purpose. In addition, the manufacturer is not responsible for damages or loss of data and subsequent consequences.
Copyright © 2011 TrekStor GmbH. All rights reserved. Other cited product or company names may be trademarks or brand names of the respective owner.

MANUAL DE USUARIO
EC DECLARATION OF CONFORMITY
As manufacturer and importer respectively:
TrekStor GmbH
Kastanienallee 8 - 10
D-64653 Lorsch, Germany
herewith declares that the products
Product: DataStation maxi Xpress
Type: External hard disk drive
comply with the following directive(s):
• 2004/108/EC EMC Directive: Electromagnetic Compatibility
• 2006/95/EC Low Voltage Directive
The following norms were consulted to assess conformity:
• EN 55022:2006 + A1:2007
EMC: Information technology equipment – Radio disturbance characteristics – Limits and methods of measurement
• EN 55024:1998 + A1:2001 + A2:2003
EMC: Information technology equipment – Immunity characteristics – Limits and methods of measurement
• EN 60950-1:2006
Information technology equipment – Safety – Part 1: General requirements
· EN 61000-3-2:2006
EMC: Part 3-2: Limits – Limits for harmonic current emissions (equipment input current 16 A per phase)
• EN 61000-3-3:1995 + A1:2001 + A2:2005
EMC: Part 3-3: Limits – Limitation of voltage changes, voltage fluctuations and flicker in public low-voltage supply systems, for equipment with rated current 16 A per phase and not subjected to conditional connection
• EN 61000-4-2:1995 + A1:1998 + A2:2001
Electromagnetic compatibility (EMC) – Part 4-2: Testing and measurement techniques – Electrostatic discharge immunity test (ESD)
The CE symbol confirms that this product conforms with the above mentioned norms and regulations.
The manufacturer also declares the conformity of the product according to the following directives:
• 2001/95/EC General Product Safety
• 2002/95/EC RoHS: Hazardous substances in electrical and electronic equipment
Lorsch,
30.06.2010

Aaron Taylor, CTO

1

2

3
4


Supportinformationen
If you have any questions regarding your TrekStor product, please proceed as follows:
- Check the features as well as the functions of your device (apparent on the packaging), in order to use the correct settings.
• Read the manual carefully. - Inform yourself on our website www.trekstor.de/en about the up-to-date information concerning your product (e.g. available most recent firmware releases).
In the case you have further questions regarding your product, please note the following TrekStor support options:
FAQ The FAQ area of our website offers you a wide range of problem solving hints. Here you can obtain answers to the most frequently asked questions concerning our products.
E-Mail Please fill in the support form on our website or send an E-Mail to support.en@trekstor.de. You can find mailing addresses for other countries when you click "SERVICE" at the menu bar on our website.
Phone support Please find the number of the support hotline for your country on our website under "SERVICE" as well.


- SYSTEM REQUIREMENTS
- FOR DATA TRANSFER WITH A COMPUTER
- FOR DATA TRANSFER VIA SUPERSPEED USB 3.0
- IMPORTANT INFORMATION ABOUT THE KIT VERSION OF THIS DATASTATION
- IMPORTANT INFORMATION ABOUT SUPERSPEED USB 3.0
- CONNECTING THE DATASTATION
- DATA EXCHANGE
- WINDOWS ® 7/VISTA TM /XP
- MAC ® OS X FROM 10.3
- LOGGING OFF AND DISCONNECTING THE TREKSTOR DATASTATION FROM THE COMPUTER
- WINDOWS® 7/VISTA™/XP
- FORMATTING THE HARD DISK
- MAC ® OS X FROM 10.4
- FORMATTING WITH THE FILE SYSTEM HFS
- FORMATTING WITH THE FILE SYSTEM FAT32
- MANUAL DE USUARIO
- EC DECLARATION OF CONFORMITY
- SUPPORTINFORMATIONEN
- IF YOU HAVE ANY QUESTIONS REGARDING YOUR TREKSTOR PRODUCT, PLEASE PROCEED AS FOLLOWS
- IN THE CASE YOU HAVE FURTHER QUESTIONS REGARDING YOUR PRODUCT, PLEASE NOTE THE FOLLOWING TREKSTOR SUPPORT OPTIONS
Brand : TrekStor
Model : DataStation maxi pace 3.0
Category : Hard Drive