
SSR 576 A1 - Satellite receiver SILVERCREST - Free user manual and instructions
Find the device manual for free SSR 576 A1 SILVERCREST in PDF.


| Product Type | Satellite Receiver |
| Model | SSR 576 A1 |
| Brand | SilverCrest |
| Dimensions (W x H x D) | 280 x 50 x 180 mm |
| Weight | 0.6 kg |
| Power Supply | DC 12 V / 1 A (via external power adapter) |
| Power Consumption | Max. 10 W |
| Video Output | HDMI, SCART |
| Audio Output | Digital optical (S/PDIF), analog stereo |
| Tuner Type | DVB-S/S2, single tuner |
| Supported Satellite | Astra 19.2°E, Hotbird 13°E, and others |
| Number of Channels | Up to 4000 |
| Channel Memory | 2000 channels |
| Display | LED front panel, 4-digit segment |
| Remote Control | Infrared, 2x AAA batteries included |
| Connections | RF IN (F-type), RF LOOP OUT, USB 2.0, Ethernet |
| File System Support | FAT32, NTFS for USB recording/playback |
| Recording Function | Timeshift, one-touch recording to USB |
| Electronic Program Guide (EPG) | 7-day EPG for supported channels |
| Parental Control | Channel lock, rating limits |
| Operating Temperature | 0 °C to 40 °C |
| Maintenance | Clean with soft dry cloth; avoid liquids |
| Safety Features | Overvoltage protection, auto standby |
| Spare Parts Availability | Remote control, power supply available via retailer |
| Repairability | Designed for professional repair only |
Frequently Asked Questions - SSR 576 A1 SILVERCREST
User questions about SSR 576 A1 SILVERCREST
0 question about this device. Answer the ones you know or ask your own.
Ask a new question about this device
Download the instructions for your Satellite receiver in PDF format for free! Find your manual SSR 576 A1 - SILVERCREST and take your electronic device back in hand. On this page are published all the documents necessary for the use of your device. SSR 576 A1 by SILVERCREST.
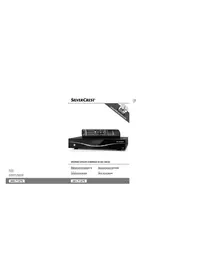
USER MANUAL SSR 576 A1 SILVERCREST
Digital Satellite Receiver
with HDMI connection
GB Digital Satellite Receiver with HDMI connection
User manual and service information *


Table of Contents
Safety Instructions....3
Operating Environment....3
Notice on Mains Separation....4
Batteries....4
Cables....4
Children and Persons with Disabilities....4
Repair and Maintenance....5
Intended Use....5
Copyright....5
Storing When Not Using the Product....5
Conformity Notice 6
Disposal of Old Devices....6
Introduction......6
Package Contents....6
Overview....7
Controls and buttons....7
Connectors and sockets ....7
Remote control....8
Getting Started 9
Inserting the Batteries into the Remote Control....9
Connecting the Satellite Receiver....10
HDMI Connection....10
OSD Menu....11
Main Menu 12
Channel List 12
Edit Entries 12
Favourite lists....12
Sort Channels....14
Search Channels 16
Professional Scan....17
Edit Settings 19
General Options....19
OSD / EPG 21
Reception....22
Satellite Systems 23
Signal Output....23
Timer Configuration....24
Factory Defaults 25
Extras....25
System Info....25
Signal Strength....25
DiSEqC Motor 25
Sleep-Timer 26
Game: Blocks 26
Game: Snake....26
Timers 27
Satellite Update....28
Daily Use....29
Operation....30
EPG - Electronic Program Guide....30
Programme Information....31
Selecting Audio Channels....31
Adjusting the Volume....32
Selecting Channels....32
Using the Numeric Buttons 32
Using the Channel List....32
Teletext....32
Appendix 33
Troubleshooting 33
Technical Specifications 34
Warranty Information....35
Safety Instructions
Before you use this device for the first time, please read the following notes in this manual and heed all warnings, even if you are familiar with handling electronic devices. Keep this manual safe for future reference. If you sell the device or pass it on, it is essential that you also hand over this manual.

This icon denotes important information for safe operation of the product and for the user's safety.

This icon denotes further information on the topic.
Operating Environment
Position the device on a stable, even surface and do not place any heavy objects on the device. The device is not designed for use in environments with high temperatures or humidity (e.g. bathrooms), and must be kept free of dust. Operating temperature and operating humidity: 5°C to 35°C, max. 85% RH.

Always make sure that
- there is free circulation of air (do not place the device on shelves, on a thick carpet, on a bed, or anywhere that obstructs the ventilation slots, and leave at least 10cm clearance on all sides);
- no direct heat sources (e.g. radiators) can affect the device;
- no direct sunlight or bright artificial light reaches the device;
- contact with spray, dripping water and corrosive liquids is avoided and the device is never operated near water; in particular the device may never be immersed in liquids (do not place any objects containing liquids, such as vases or drinks, near the device);
- the device is never placed in the immediate vicinity of magnetic fields (e.g. loudspeakers);
- no fire hazards (e.g. burning candles) are placed on or near the device;
• no foreign bodies enter the device; - the device is not subject to any great temperature changes as this may cause moisture through condensation and short-circuit;
- the device should not be subject to excessive shocks or vibrations.

Notice on Mains Separation
The power switch (22) located on the back panel of this device does not fully disconnect the device from the mains. Furthermore, the device consumes electricity in the Standby mode. In order to completely disconnect the device from the mains, the power plug must be pulled out from the wall outlet. The device should be positioned in such a way that ensures direct and unobstructed access to the wall outlet so that the power plug can be immediately pulled out in an emergency situation. To avoid the risk of fire if the device is not going to be used for a long while (e.g. during holidays), it should always be disconnected from the power socket. Before stormy weather when there is the danger of lightning, disconnect the device from the power supply.

Batteries
Insert the batteries with the correct polarity. Do not try to recharge any non-rechargeable batteries and do not throw batteries into the fire. Do not mix batteries (old and new or carbon and alkaline, etc.). Remove the batteries when the device is not to be used for a long time. Non-intended use may cause explosion and danger to life. Respect the environment! Old batteries do not belong in with domestic waste! They must be handed in to a collection point for waste batteries.

Cables
Unplug all cables by holding the plugs and never pull on the cables themselves. Never place the appliance, pieces of furniture or other heavy objects on the cables and take care that these do not become trapped, especially at the plugs and sockets. Never tie knots in the cable and do not tie it together with other cables. All cables should be positioned so that nobody can trip over them or be obstructed by them. A damaged power cord can cause a fire or an electric shock. Inspect the power cord from time to time. Never use adapter plugs or extension cables that do not comply with the current safety regulations in your country, and do not modify any of the power cords or electrical installations yourself!

Children and Persons with Disabilities
Electrical devices do not belong in the hands of children. People with disabilities should only use electrical devices in appropriate circumstances. Do not allow children or persons with disabilities to use electrical devices when not under supervision. They may not comprehend the presence of potential risks. Batteries and small parts represent potential choking hazards. Keep the batteries in a safe place. If a battery is swallowed, seek medical help immediately. Keep the packaging away from children and persons with disabilities too as there is danger of suffocation.
Repair and Maintenance
Repairs are required when this device has been damaged in any way, for example, when the power plug, power cord or housing is damaged, when liquid or objects have entered the device, when the product has been exposed to rain or moisture, when the product does not work normally or if the product has been dropped. If you notice any smoke, unusual noise or strange smells, switch off the device immediately and pull the plug from the wall outlet. If this occurs the device should no longer be used and should be inspected by authorized service personnel. Please contact qualified personnel when servicing is needed. Never open the housing of the device. Opening the housing exposes you to lethal electric shocks. Only use a clean, dry cloth for cleaning. Never use any corrosive liquids. Do not attempt to open the housing of the device, otherwise you will void your warranty.
Intended Use
This is a consumer electronics device. The SilverCrest SSR 576 A1 is a pure digital receiver for receiving unscrambled satellite programmes. It requires a digital-enabled satellite antenna. It may only be used for private use, not industrial or commercial purposes. Furthermore, the device may not be used outdoors or in tropical climates. This device fulfils all that relates to CE Conformity, relevant norms and standards. Any modifications to the device may result in these directives no longer being met. The manufacturer is not liable for any damage or interference resulting from non-compliance with the above instructions. Only use the accessories recommended by the manufacturer. Any use other than that mentioned above does not correspond to the intended use.
If you are not using the device within the Republic of Germany, you must observe the regulations and laws in the country of use.
Copyright
The entire content of this User's Manual is copyrighted and is provided to the reader for information purposes only. Copying data and information without prior explicit written approval by the author is strictly forbidden. This also applies to any commercial use of the contents and information. All texts and diagrams are up-to-date as per the date of print release.
Storing When Not Using the Product
When left unused for a long period of time, unplug the power cord from the mains and remove the batteries from the remote control. Also make sure that the storage temperature is maintained between 5°C and 40°C. Humidity must not exceed 90% RH.
Conformity Notice

This device complies with the basic and other relevant requirements of the EMC Directive 2004/108/EC, the Low-voltage Directive 2006/95/EC and the ErP Directive 2009/125/EC. The corresponding Declaration of Conformity can be found at the end of this User's Manual.
Disposal of Old Devices

Devices marked with this symbol are subject to the European Directive 2002/96/EC. All electric and electronic devices must be disposed of separately from household waste at official disposal centres. With proper disposal of old devices you avoid damage to the environment and your personal health. For further information about proper disposal, contact your local government, disposal bodies or the shop where you bought the device.
Respect the environment. Old batteries do not belong in with domestic waste. They must be handed in to a collection point for waste batteries.
Recycle the packaging material properly too. Cardboard packaging can be taken to paper recycling containers or public collection points for recycling. Any film or plastic contained in the packaging should be taken to your public collection points for disposal.
Introduction
Thank you for purchasing this satellite receiver SilverCrest SSR 576 A1. The SilverCrest SSR 576 A1 is a pure digital receiver for receiving unscrambled satellite programmes. It requires a digital-enabled satellite antenna. This satellite receiver features a high-end HDMI output for connecting to plasma, LCD or LED TV sets. The digital video signal offers optimum picture quality. You will clearly notice an enhanced sharpness and deepness compared to signals transferred via a conventional SCART (Euro AV) connection. Thanks to its digital audio output you can connect your home cinema to the satellite receiver and enjoy full digital sound quality. Furthermore the device features nine freely programmable favourite lists allowing you quick and easy access to your favourite channels.
Package Contents
Please check that delivery contents are complete using this list:
- Digital SD Satellite Receiver SilverCrest SSR 576 A1
- Remote control
- 2 brand-name batteries type AAA, 1.5V (Micro)
- This User's Manual
If you find any items missing or damaged, please phone our hotline. You will find the corresponding phone number in the last chapter "Warranty Information".
Overview
Controls and buttons

1 Switches the device on or to standby mode.
2 Radio LED
3 Timer LED
4 4-digit display
5 Standby LED
6 To open the channel list and to confirm a menu selection
7 Next channel / menu navigation up
8 Previous channel / menu navigation down
9 Increase volume / menu navigation right
10 Decrease volume / menu navigation left
11 To display information.
Connectors and sockets

12 LNB Input LNB input of the satellite system
13 coaxial S/PDIF Digital audio output (coaxial)
14 optical S/PDIF Digital audio output (optical)
15 HDMI HDMI connector to connect a TV set
16 VIDEO Analog video connector (Composite)
17 S-VIDEO S-Video connector
18 AUDIO L/R Stereo audio output for connecting a Hifi system
19 TV SCART SCART connector to connect a TV set
20 VCR SCART SCART connector to connect a VCR, DVD recorder or DVD player
21 Power cord Power inlet 230VAC, 50 Hz
22 POWER Power switch
Remote control

23 On/Standby
Switches the device on or to standby mode.
24 TV
Toggles to TV Mode.
25 PAUSE
Freezes the picture
26 AV
Toggles between satellite reception and the external device connected to the VCR-SCART input.
27 LIST
To display information.
28 P+
Next channel / menu navigation up
29 -
Decrease volume / menu navigation left
30 P-
Previous channel / menu navigation down
31 INFO
Press this button in normal mode to show information about the current programme.
32 Numeric keys 0 to 9
To toggle to a specific channel or to enter numeric information
33 Red button
To delete a timer or character
34 Green button / EPG
Electronic Program Guide
35 叹
To mute or to restore the audio volume.
36 RADIO
Toggles to Radio Mode.
37 SWAP
Toggles between the two last viewed channels.
38 TEXT
Launches the Teletext display.
39 EXIT
Quits the menu.
40 OK
To open the channel list and to confirm a menu selection
41 +
Increase volume / menu navigation right
42 MENU
Displays the menu
43 Blue button
Displays all available audio channels.
44 Yellow button / FAV
Opens the favourite list for activation.
Getting Started
Inserting the Batteries into the Remote Control
Insert the supplied batteries into the remote control, as shown in the figure below. Take care to insert the batteries into the remote control observing the correct polarity (+ and -).

- Open the battery compartment on the underside of the remote control.
- Insert the supplied batteries (size AAA) into the remote control with the correct polarity (see the illustration).
- Close the battery compartment.

Remove the batteries from the remote control when you are not going to use the device for a long period of time otherwise the remote control may become damaged by leaking batteries.
Connecting the Satellite Receiver

You should only connect your satellite receiver to the mains once all other cable connections have been made. This will avoid any accidental damage to the satellite receiver or any external devices.
A Connect the LNB of the satellite antenna to the LNB Input (12) of your satellite receiver.*
B Connect the TV set (or beamer) to the HDMI connector (15) of your satellite receiver (see next chapter – HDMI Connection).
C If your TV set (or beamer) does not feature an HDMI port, you can use the TV SCART (19) terminal to connect it to the satellite receiver.
D Furthermore, you can connect your TV set (or beamer) to the S-VIDEO (17) or Video output (16) of your satellite receiver.
E You can use the VCR-SCART (20) output of your satellite receiver to connect a VCR or DVD recorder.
F In order to obtain good sound quality, you can use the AUDIO L/R stereo outputs (18) of your satellite receiver to connect an external Hifi amplifier.
G If your amplifier features a coaxial or optical SPDIF connector, you can use the coaxial S/PDIF (13) or optical S/PDIF (14) terminal to connect it to the satellite receiver.
H Connect the power cord (21) to a wall outlet and turn the power switch (22) to position ON after you have finished connecting all cables.
*If you want to use the device with satellite systems capable of receiving more than one satellite, a DiSEqC® LNB must be used instead of a universal LNB.
HDMI Connection
Use an HDMI cable to connect your satellite receiver to the TV set. This connection type guarantees an optimum and loss-free transmission of the video and audio signals to the TV Set. As soon as a TV set is connected to the satellite receiver using an HDMI cable, your satellite receiver will toggle automatically to the HDMI signal output. Next enable the corresponding HDMI input on your TV. See the User's Manual for your TV set.
You can use the satellite receiver menus to optimise the screen resolution for HDMI mode. You can choose from the following resolutions: 576i DVI, 576p DVI, 576i, 576p, 720p and 1080i. For optimum resolution on a modern flat-screen display we recommend using the 1080i or 576i setting. Please note that the picture may disappear when switching the resolution. If the picture remains blank, the resolution you have set is probably not supported by your TV. In this case, use a SCART cable to connect your satellite receiver to the TV set in order to gain access to the menus again.
Video and Audio Signal Connection:
All required settings can be found in the section Edit Settings | Signal Output (see page 23).
The following video signals are supported:
HDMI: The HDMI output guarantees optimum video and audio quality. Note: This device has a standardised HDMI output. However, it is possible that picture or sound distortion may occur when connecting devices of first-generation HDMI input interfaces.
In such cases you can select one of the following connection options:
RGB: Very good picture and sound quality via a common (21-pin) SCART (Euro AV) cable.
S-Video: Only video signals are transmitted. The connection is made via an S-Video cable (4-pin).
Video: This output only provides video signals with embedded colour signals (CVBS).
Dolby Digital Sound (AC3)
Please note that Dolby Digital sound, if broadcast by the tuned-in channel, will only be available on the digital audio output and HDMI output whenever these are connected to an external AV receiver.
OSD Menu
Once you have fully read the Safety Instructions and have finished connecting the devices as described, you can power them on. The satellite receiver has already been configured in factory so that no or only a few changes need to be made.
You can use the OSD (On Screen Display) menu to customise your satellite receiver according to your needs. To open it, press the MENU button (42). To quit the OSD menu, press the EXIT button (39) as many times as necessary to hide all menus. The OSD menu is clearly structured and any buttons that you may need to press to adjust a setting will be shown on screen. Navigating the OSD menu is controlled via the buttons P+ (28), P- (30), - (29) and + (41).
The OSD menu is explained in more detail in the following pages. Press the MENU button (42) to display the OSD menu. From this menu you can open different submenus allowing you to adjust some of your satellite receiver's settings. You can customise the OSD menu appearance, add or remove channels, customise the satellite receiver for your satellite system, install new software via satellite antenna, and much more. However, it is also possible to miss-set some parameters and obtain a blank screen. You should therefore read the following instructions carefully.
Opening and Navigating the Submenus
Press the - (29) or + (41) buttons to toggle between the main menu and the submenu items. Press the OK button (40) to open the submenus. Press the P+ (28) or P- (30) buttons to highlight the desired submenu item and then press OK (40) to open it.
Closing the Menus
The menus either close automatically after confirming your settings with OK (40) or you can close all opened submenus sequentially by pressing EXIT (39) multiple times.


Main Menu
Press the MENU button (42) to display the shown menu. Here you can change the satellite receiver settings.
Channel List
To edit the satellite, transponder, channel and favourite lists. You can furthermore sort channels and start a channel search.
The editing procedure is the same for both TV and radio lists. To edit a radio list, first press the RADIO button (36) to toggle to radio reception before opening the OSD menu.
Edit Entries
Here you can access the "Satellites", "Transponders" and "Channels" submenus. Only experienced technicians should change these settings.
When changing the configuration, please also read the notes displayed on the OSD menu.
Favourite lists
Select the favourite list that you want to edit and press the OK button (40) or the MENU button (42) to rename it.


Editing favourite lists
The current favourite list is displayed on the left, the entire channel list on the right. From the favourite list, select the entry that you want to delete or insert before a channel and press the OK button (40). Select "Insert before" to insert the channel before the selected entry or select "Delete" to erase it.
Insert before
From the channel list on the right, select the channel that you want to add to the favourite list and press the OK button (40) to confirm. Repeat this process to add further channels. Press the EXIT button (39) to quit the selection.
Delete
If you select "Delete" you can choose from the following functions:
Single: Deletes the selected channel from the favourite list.
Block: Deletes multiple consecutive channels from the favourite list. The block to delete starts with the previously selected channel. Select the end of the block and press the OK button (40).
Multiple: Deletes multiple channels from the favourite list. Here you can select individual channels and press OK (40) to delete them from the favourite list. Press the EXIT button (39) to quit the selection.
All: Deletes all channels from the favourite list.
To quit editing the favourite list, press the EXIT button (39) as many times as necessary to hide all menus. If you have made any changes, a corresponding prompt will appear. Press the OK button (40) to save, press SWAP (37) to cancel without saving or press EXIT (39) to continue editing the list.
![Favourite lists > Rename 1/11 Fav 1 ! " # $ % & ' ( ) * + , - . / 0 1 2 3 4 5 6 7 8 9 : ; < = > ? @ A B C D E F G ° a b c d e f g H I J K L M N O h | j k l m n o P Q R S T U V W p q r s t u v w X Y Z [ \ ] ^ _ x y z { | } ~ 'OK' insert character, '+/-/P+/P-' select character, '7/9' select character set, 'delete character to left, '1/3' move cursor, 'EXIT' back with save](/content/2026/06/1311799/images/7a30ea2993e6658ab4bf1ce5074347141d2a8e95407870284b43a4a4a141018d.jpg)


Renaming the Favourite List
Press the P+ (28), P- (30), - (29) and + (41) buttons to select the desired character. Press the OK button (40) to apply the character. Press the [Red] button (33) to delete the character. You can press button 1 to move the cursor to the left and button 3 to move it to the right. The buttons 7 and 9 allow you to toggle between different character sets. There are 11 character sets to choose from.
To quit renaming the favourite list, press the EXIT button (39) as many times as necessary to hide all menus. If you have made any changes, a corresponding prompt will appear. Press the OK button (40) to save, press SWAP (37) to cancel without saving or press EXIT (39) to continue editing the list.
Sort Channels
The channel list appears on the left while the channels that have been copied onto the clipboard are shown on the right. Select the channel you want to edit from the channel list and press the OK button (40).
Press EXIT (39) to quit editing the channel list. If you have made any changes, a corresponding prompt will appear. Press the OK button (40) to save, press SWAP (37) to cancel without saving or press EXIT (39) to continue editing the list.
The following functions are available:
=> Clipboard: To copy a channel onto the clipboard.
<= Clipboard: To copy a channel from the clipboard to the channel list. This function is disabled while no channels have been copied onto the clipboard.
Directly: To edit the selected channel.
Block: To edit a block of multiple channels. The block to be edited starts with the previously selected channel. Select the end of the block and press the OK button (40).

Copy
Copies the selected channel(s) to a different place in the channel list. The target entry will be overwritten.
Move
Moves the selected channel(s) to a different place in the channel list. If you move the entry upwards, it will be positioned before the target entry. If you move it downwards it will be inserted after the target entry. This feature is not available for the clipboard.
Delete
Deletes the selected channel(s) from the channel list. Any erased channels will be labelled
Cut
Deletes the selected channel(s) from the channel list. Any consecutive channels will move up to the empty position.
Note: Only channels that are located before the next
Insert empty
Inserts an empty entry and labels it as
Note: Only channels that are located before the next
Pack
This function can be selected only while a block has been marked but the clipboard is not being used. All channels that belong to the marked block will be move upwards. Any entries labelled


Search Channels
To perform an automatic search for all transponders of a satellite. Select the satellite that you want to scan for new channels and press the OK button (40). This window will show any activated satellites only. If you have only one satellite activated, this window will not appear. You can activate your satellite from the Edit Settings | Satellite Systems menu. For more information, see page 23.
Wait for the channel search to finish. To skip a transponder that you don't want to scan, press the OK (40) button.
After the channel search has finished, the existing channel list will appear on the left and the newly found channel will appear on the right. If the channel list was empty when starting the channel search, all found channels will be added automatically to the channel list. Press SWAP (37) to toggle between the two lists. Any updated channels will be highlighted in green in the left-hand channel list. The bottom-right window shows information about the marked channel, such as Bouquet and the encryption. Please note that information is not available for all channels. You can show or hide this window by pressing the INFO button (31). Press the TV (24) or RADIO (36) button to toggle between TV and radio channels.
To edit the newly found channels (right-hand list), select the desired channel and then press the OK button (40). Here you can choose one of the following options:
Activate To view the selected channel.
Copy above To copy the selected channel in the channel list above a specific channel. This will move the other channels downwards.
Copy over To copy the selected channel in the channel list over a specific channel. This will overwrite the existing channel in the channel list.

To edit the channel list (left-hand list) press the SWAP button (37) to select it. Next select the desired channel and then press the OK button (40). Here you can choose one of the following options:
Activate To view the selected channel.
Restore To avoid updating the selected channel. Any updated channels will be highlighted in green on the channel list.
Cut Cuts the selected channel from the channel list. The cut channel will be moved to the right-hand list. Any subsequent channels will move up to the empty position.
Note: Only channels that are located before the next
Delete Deletes the selected channel from the channel list. The erased channel will be labelled
To finish editing, press the EXIT button (39). If you have made any changes, a corresponding prompt will appear. Press the OK button (40) to save, press SWAP (37) to cancel without saving or press EXIT (39) to continue editing the list.

Professional Scan
To scan one specific transponder, all available transponders or all saved transponders. Select the satellite that you want to scan for new channels and press the OK button (40).
This window will only show activated satellites. If you have only one satellite activated, this window will not appear. You can activate your satellite from the Edit Settings | Satellite Systems menu. For more information, see page 23.
![Search Channels > Professional Scan Frequency: 12.633 GHz Polarisation: horizontal Symbol rate: 22.000 MSym/s Scan mode: Single Transponder Scan scrambled: Off [Continue with OK] Signal Strength C/N 10.8 ■ DVB ■ FEC 5/6 ■ QPSK ASTRA 1 Enter the transponder frequency using the number keys.](/content/2026/06/1311799/images/fb9a647e76cef8f0a4eae9153b136ee27a98754e53cf2b85cc22a5756e3e9cff.jpg)
Frequency
If you only want to scan a transponder for new channels, enter the transponder frequency here. Press the numeric buttons (32) to edit the values directly or press the - (29) or + (41) buttons to edit them step by step.
Polarisation
Satellites broadcast signals with vertical and horizontal polarity. If you only want to scan a transponder for new channels, press the - (29) or + (41) buttons to select the "horizontal" or "vertical" plane. Press the OK button (40) to select them from a list..
The polarisation "left" or "right" is rarely used.
Symbol rate
The most common symbol rates of satellite transponders use the 27,500MSym/s or 22,000MSym/s values. If you only want to scan a transponder for new channels, press the numeric buttons (32) to edit the values directly or press the - (29) or + (41) buttons to edit them step by step.
Note: The common notation such as 12480H means: Frequency 12,480 GHz and horizontal (H) polarisation.
Scan mode
Select the transponders that you want to scan. Press the - (29) or + (41) button to make your selection. Press the OK button (40) to select them from a list..
All Transponders
To perform an automatic search for all transponders of a satellite.
Single Transponder
Performs a search using the entered transponder data.
Channel List
To scan the already-saved transponders.
Scrambled channels
Here you can choose whether to look for unscrambled channels only or scrambled channels also. Select "Off" if you don't want to watch any scrambled channels.
To start scanning, select the [Continue with OK] option and press the OK button (40). Or press EXIT (39) to return to the previous window.
Wait for the channel search to finish. To skip a transponder that you don't want to scan, press the OK button (40).


After the channel search has finished, the existing channel list will appear on the left and the newly found channel will appear on the right. If the channel list was empty when starting the channel search, all found channels will be added automatically to the channel list. Press SWAP (37) to toggle between the two lists. Any updated channels will be highlighted in green on the left-hand channel list. The bottom-right window shows information about the marked channel such as Bouquet and the encryption. Please note that information is not available for all channels. You can show or hide this window by pressing the INFO button (31). Press the TV (24) or RADIO (36) button to toggle between TV and radio channels.
To edit your found channels (right-hand list) or the channel list (left-hand list) please follow the instructions given in the previous chapter "Search Channels".
Edit Settings
General Options
Timezone
Here you can set the time zone for -12 to +12 hours offset. Press the LIST button (27) to change the sign +/-
Select + 01:00 for Western European time.
Summer time control
Here you can enable or disable the automatic daylight saving function.
If you have enabled Summer time control for your region you won't need to re-adjust the clock for summer or winter.
OSD Language
Select the desired language for the on-screen menus. To do this, press the - (29) or + (41) buttons. Press the OK button (40) to select them from a list.. The changes will apply after quitting and re-opening the OSD menu.
Startup volume
Set the volume that should be used when the device powers on. Press the OK button (40) to apply the current volume level as startup volume.
Edit Settings > General Options
| Timezone: | + 01:00 |
| Summer time control: | EU |
| OSD Language: | English |
| Startup volume: | 20 |
| Low power stand-by: | On |
| Scan scrambled: | Off |
| Parental lock: | Off |
| function lock: | Off |
Define your local time offset relative to Greenwich Mean Time (GMT). More eastern timezones have larger numbers. The sign can be changed by pressing the LIST key. The system clock can be reset with OK.
Low power stand-by
You can further reduce power consumption in stand-by mode by selecting "On". This will reduce the power consumption below 1W if no timers have been programmed. However, this mode will lose all collected EPG information, the last-viewed channel, the volume setting and the favourite list. Furthermore, the time will not be shown on the display (4). Select "Off" to disable Low power stand-by mode.
Scan scrambled
Here you can choose whether the channel search should scan for unscrambled channels only or scrambled channels also. Select "Off" to filter for scrambled channels.
Parental lock
You can protect your satellite receiver against unauthorised access. To do this, select the "On" option. It will then only be possible to power on the unit via the remote control. The On/Standby button (1) on the unit will not respond for power-on. Select "Off" to disable the parental lock function.
Tip: If you want your children to watch specific channels only, you can create a children's favourite list so after hiding the remote control your kids can only switch channels from this favourite list by pressing the control buttons on the device. A description of the favourite list editing can be found on page 12.
Function lock
You can lock specific functions of your satellite receiver. The following settings are available:
Off All satellite receiver functions are available.
Menues The menu access will be locked. All other satellite receiver functions are still available.
Hotel The menu, the timer settings and the AV button will be locked. This lock has been designed for hotel installation as these functions are normally not used or allowed in a hotel room.
Easy Only the main functions like channel switching, volume adjustment and TV/Radio reception are available. All other functions are locked. This allows for the easier operation of the device.

If you have enabled any of the function locks, you'll need to enter a security code to be able to open the OSD menu. To do this, enter the code 231618115 and press the MENU button (42).
OSD / EPG
Status Time-out
The menu can be visible for between 0 and 99 seconds. 0 prevents automatic opening; 99 prevents the OSD menu being automatically hidden. If you have selected 99, you'll need to press the EXIT button (39) to hide the OSD messages.
Channel Num. Timeout
Set the time after which you want the entered channel number to be applied. You can set a value between 0 and 10 seconds. 0 disables this function. If you have chosen 0, you'll need to press the OK button (40) to confirm when entering a channel number with fewer than 4 digits.
OSD Transparency
You can set the OSD menu transparency between 1 (background slightly visible) and 16 (high transparency), or select "0" if you do not want the OSD menu to appear transparent.
Radio screen image
Select "On" to show the background image during radio reception. If you select "Off", no background image will appear.

Reception
To successfully launch a channel search, you need to adjust your satellite receiver to the installed antenna. If you want to receive one satellite only, under "Equipment Control" select "Off". If you want to receive more than one satellite, you can use the "DiSEqC easy" function to enable DiSEqC 1.0 antenna motor control. DiSEqC allows channels to be received from multiple satellites in different orbit positions. For instance, instead of using two LNBs pointing to two different satellites (e.g. Astra and Hotbird), you can use a DiSEqC LNB and a DiSEqC switch. For instance, choose "Astra 1" for satellite A and "Hotbird" for satellite B. Press the - (29) and + (41) buttons to select the desired satellites. Press the OK button (40) to show a satellite list. Only the satellites activated via Edit Settings | Satellite Systems (see the following chapter) will appear here.
Note: Some DiSEqC switches are labelled using numbers (1, 2, 3, 4 etc.) instead of letters. However, the order is identical.
When using a motor-driven antenna system, please also read the User's Manual for your antenna motor. Under "Equipment Control" select the corresponding antenna motor control. You can use the "Program motor positions" and "Location configuration" submenus to adjust further motor-driven antenna settings.
When using a single cable device (SCD) you can configure the corresponding setting under "SCD configuration". Please also refer to the User's Manual of your antenna system.
We cannot provide any further descriptions at this stage, as the individual settings for each motor-driven antenna and SCD are very specific. When configuring your system, please also read the notes displayed on the OSD menu.


Satellite Systems
Here you can set what satellites you want to receive with your antenna system. The left-hand list displays all activated satellites while the right-hand list contains all satellites. Press SWAP (37) to toggle between the lists. To activate a satellite, press P+ (28) or P- (30) to select the desired satellite and press OK (40) to confirm. The satellite will be added to the left-hand "Activated Satellites" list. To de-activate a satellite, press SWAP (37) to go to the "Activated Satellites" list, select the desired satellite and then press OK (40) to confirm. The selected satellite will be removed from the "Activated Satellites" list.
Signal Output
TV-screen
If your TV set has a 16:9 aspect ratio screen, select "16:9" or "16:9 (Pillarbox)". Selecting 16:9 will show all 4:3 programmes with filled-in black bars on the left and right of the picture. This will enlarge the overall picture, however, the picture will be expanded. Selecting "16:9 (Pillarbox)" will show all 4:3 programmes with black bars on the left and right of the picture.
For 4:3 screens you can choose from the "4:3 (full screen)" or "4:3 (letterbox)" settings. Selecting "4:3 (full screen)" will show any 16:9 programmes with black bars at the top and bottom of the picture. This will enlarge the overall picture; however, the left and right picture borders will be truncated. The "4:3 (letterbox)" setting will display the entire picture, but black bars will appear at the top and bottom when programmes broadcast in 16:9 format are received.
Video format
Sets the type of video signal to be used on the TV-SCART connector. YUV provides a very good picture quality. The option RGB guarantees a high colour accuracy and picture sharpness through the separate transmission of the red, green and blue colour channels. If the connected device does not support "YUV" or "RGB" output, select "CVBS".
Edit Settings > Signal Output
| TV-Screen: | 16:9 |
| Video format: | RGB |
| HDMI mode: | 1080i |
| HDMI audio mode: | PCM |
| Volume-Bypass: | Off |
| Digital Audio: | PCM |
Screen aspect ratio of your TV. For 4:3 devices black bars (letterbox format) will be generated or left and right side will be cut off (full screen) for 16:9 transmissions.

HDMI mode
Here you can optimise the picture resolution for HDMI output. Please note that the picture may disappear when switching the resolution. The following settings are available: 576i DVI, 576p DVI, 576i, 576p, 720p and 1080i. For optimum resolution on a modern flat-screen display we recommend using the 1080i or 576i setting.
Note: The 576i DVI and 576p DVI settings will not send any sound signal via the HDMI connector.
HDMI audio mode
Here you can adjust the HDMI connector audio mode. Select the format supported by the connected devices. The following settings are available: "PCM" and "SP/DIF".
Volume bypass
Here you can specify if you want to control the volume via your satellite receiver or an external device. Select "Off" to control the volume from your satellite receiver. When selecting "On" the satellite receiver will output the maximum volume and the volume can be controlled via the connected external device only.
Digital audio
Select the digital audio formats supported by the connected devices. The following settings are available: "PCM", "PCM, DolbyD", "PCM, dts" and "PCM, DolbyD, dts".
Timer Configuration
Timer pre-time
Press the - (29) or + (41) buttons to select the timer pre-time between 0 and 30 minutes. If you have programmed a timer via EPG, the timer will start the set time earlier.
Timer post-time
Press the - (29) or + (41) buttons to select the timer post-time between 0 and 30 minutes. If you have programmed a timer via EPG, the timer will stop the set time later.


Factory Defaults
This function lets you restore the factory default settings of your device.
Warning: This will erase all values that have been modified after the first-time setup. Only the custom channel and favourite lists will not be changed.
To execute this command, press the OK button (40) and then SWAP (37) to confirm. Press the EXIT button (39) to cancel erasing.
Extras
System Info
Shows information about the software version of your satellite receiver. You will need this information when contacting Technical Support.
Signal Strength
The signal strength indicator shows the total input signal strength. The C/N value displays the signal quality. The signal quality is decisive for achieving interference-free reception. Orientate your antenna so that the Signal Strength and Signal Quality reach their maximum.
You can press the INFO button (31) to enlarge the C/N value display.
DiSEqC Motor
When using a motor-driven antenna system, you can execute the corresponding command for your antenna motor. First select a position from 1 to 255 (0 is the motor-dependent reference position). Then select "Execute motor command". Now you can execute the motor command with the following buttons:
- (29) Move the antenna to the East.
+ (41) Move the antenna to the West.
OK (40) Stop motor.
1 Move the motor to stored position.
2 Save the current motor position for the value set in the "Position" field.
3 Set the current position as East limit.


4 Set the current position as West limit.
5 Disable limits.
6 Recalculate the limits.
Sleep-Timer
Duration
The device goes into standby automatically after the set time. You can press the numeric keys (32) or the - (29) or + (41) buttons to set a time from 1 to 180 minutes in 10-minutes steps.
Activated
Select "Yes" to enable the sleep timer or "No" to disable it.
Game: Blocks
For your entertainment, the device provides the "Blocks" game. Press the OK button (40) to start the game.
Game: Snake
For your entertainment, the device provides the "Snake" game. Press the OK button (40) to start the game.


Timers
You can program up to 60 timers, so that you can record to external devices (VCR/DVD recorder). To do this, select
Note: You can keep the On/Standby button (23) pressed to pause or cancel a timer recording that is already running. A corresponding dialog box will appear. Then press the OK button (40) to cancel timer recording or press the EXIT button (39) to pause it. To resume a paused timer recording, press the On/Standby button (23).
Channel
Here you can set a channel to be watched or recorded after the device is switched on.
Date
Enter the desired power-on date via the numeric keys (32). Press the - (29) or + (41) buttons to change the date in 1-day steps.
Press the LIST button (27) to set a recurring timer for specific days of the week. Press – (29) or + (41) to select the desired days of the week and press OK (40) to enable or disable them. Enabled days of the week appear in green, disabled days in red.
Start
Enter the 4-digit start time of the programme via the numeric keys (32). Press the - (29) or + (41) buttons to change the time in 1-minute steps.
Stop
Enter the 4-digit stop time of the programme via the numeric keys (32). Press the - (29) or + (41) buttons to change the time in 1-minute steps.
Note: If the stop time is equal or less than the start time, it refers to the following day.
Collision
Displays whether a timer overlaps with another timer. If there is no conflict, "None" is displayed.
EPG title
Displays the EPG title. If there is no EPG title, "None" is displayed.


After you have adjusted all timer settings, press the EXIT button (39). You will see the timer list where you can double-check all details. To edit a timer, highlight it and press the OK button (40). To delete a timer, press the [Red] button (33).
Satellite Update
The most up-to-date software can be obtained (as soon as available) via the ASTRA (19.2° East) satellite. If necessary, you can check if any software update is available. Press the P+ (28) or P- (30) buttons to select "Satellite Update" and then press the OK button (40). Searching and loading may take several minutes.
Daily Use
Powering the Device On/Off
Power the satellite receiver on by pressing the On/Standby button (1) on the device or the On/Standby button (23) on the remote control. Pressing the On/Standby button (1/22) again will power the device back off. In this case the device switches to standby mode. If you cannot switch the device on by using the On/Standby button (1/22), check the main power switch (22) on the back panel and place it in the ON position.
Selecting Channels
Using the Channel Up/Down Buttons
Press the P+ (28) or P- (30) buttons on the remote control to skip to the previous or next channel.
Using the Numeric Buttons
Enter the desired channel number by using the numeric buttons (32).
Using the Channel List
Press the OK button (40) to open the channel list or an activated favourite list. Next you can highlight the desired channel via the P+ (28) or P- (30) buttons. Press the OK button (40) to switch to the highlighted channel. Press the - (29) or + (41) buttons to scroll by page through the channel list downwards or upwards. Press the INFO button (31) to open a window with information about the current programme. Press INFO (31) again to hide the information window.

To activate a different favourite list, in TV or RADIO, mode press the FAV button [Yellow] (44). Next select the desired favourite list and press the OK button (40). If you want to use the channel list, select
Adjusting the Volume
Press the - (29) or + (41) buttons to adjust the volume of your digital receiver. Press the ☑ button (35) to mute or to restore the sound output
Teletext
Press the TEXT button (38) to launch the Teletext view. Pressing the TEXT button (38) multiple times lets you change the Teletext window display mode. Press the SWAP button (37) to zoom the upper half of the Teletext page. Press the SWAP button (37) a second time to enlarge the bottom half of the teletext page and press it a third time to return to normal view.
Helpful Special Functions
Press the EPG [Green] button (34) to open the Electronic Programme Guide. Press the TV (24) or RADIO button (36) to toggle between TV and radio channels. To toggle between the two last-tuned stations, press the SWAP button (37).
INFO Button
The INFO button (31) lets you display information about the current programme. Press the - (29) or + (41) buttons to display information about the next programme. To close the dialog box, press the INFO button (31) again or press EXIT (39).
Operation
EPG - Electronic Program Guide


Your satellite receiver supports the Electronic Program Guide (EPG) feature. Pressing the EPG [Green] button (34) on the remote control will display programme information.
Here you can obtain an overview of the current programme or the next programme.
In the upper-left corner the channel list and the currently selected channel are displayed. Press the P+ (28) or P- (30) buttons to select a different channel. If you know the channel preset number, you can also enter it directly via the numeric buttons (32) and press OK (40) to confirm. Press the - (29) or + (41) buttons for page-by-page channel list scrolling.
In the upper-right corner a live programme preview of the selected channel is shown. The bottom part of the screen contains information on as well as the start and end time of the current programme or the next programme.
Press the [Red] button (33) to show a list of all programmes scheduled for the current channel.
The first row shows the date and day of the week of the currently highlighted programme as well as the clock time. Furthermore, on the right of this row, the number of data found in the list and the current cursor position is shown.
In this EPG summary you can navigate via the P+ (28) or P- (30) buttons. Press the - (29) or + (41) buttons for page-by-page scrolling. Press the [Green] button to highlight the currently broadcast programme. Then press the INFO button (31) to show further information about the highlighted programme. You can press the P+ (28) or P- (30) buttons to scroll through longer text blocks. Press the OK button (40) or the INFO button (31) to return to the EPG overview.
Pressing the LIST button (27) sets a timer with the data of the currently highlighted programme. The timer opens for you to double-check and edit the settings, if necessary. For more information about timers, see page 27.
Note: Scheduled programmes appear with a red clock icon in EPG overview.
To hide the dialog box, press the EXIT button (39).
Programme Information
After powering on or switching to a different channel, an information window about the current programme will appear:
- Programme preset
- TV or radio mode
- Channel name
- Aspect ratio
- Audio format
- Clock time
• Title of the current programme
• Progress bar of the current programme
• Title of the next programme - Radio text
• Radio Screen Show (RASS)
The amount and detail of the displayed information depends on the channel provider. For example, some channels do not broadcast any detailed programme information. Some radio stations offer a radio text. If available, this will be directly displayed for you. This radio text shows, for example, the title and performer of the song playing or current affairs. Furthermore, some radio stations offer Radio Screen Show (RASS). The radio screen show (RASS) is currently supported by the following German radio stations only: SWR3, DasDing, SWRcont.ra. If a Radio Screen Show is broadcast, after a few seconds of loading programme information or current affairs are displayed. You can press the TEXT button (38) to toggle to interactive mode. Interactive mode allows you to select individual pages via the numeric buttons (32). To quit interactive mode, press the TEXT button (38) or EXIT (39).
You can display the information window at any time by pressing the LIST button (27). You can change the timeout for the information display (Edit Settings | OSD/EPG | Status Time-out).
Note: If you can't access a specific channel, the favourite list is probably active. To select the desired list, press the FAV [Yellow] button (44) and then press the P+ (28) or P- (30) buttons to select the desired list.
Selecting Audio Channels
Some programmes are broadcast with multiple audio channels. These audio channels can be different audio languages or different radio channels. To select an audio channel or a language, press the [Blue] button (43). Press P+ (28) or P- (30) to select the desired option and press the OK button (40) to confirm. Press the EXIT button (39) to quit the menu.
To save a specific audio channel for the currently tuned-in channel, keep the OK button (40) pressed until the menu closes automatically.
You can also use the LIST button (27) to choose the left or the right audio channel. The default is Stereo sound. To be able to play Dolby Digital/AC3 sound, your TV set needs a specific decoder or you can connect your satellite receiver to an AC3-compatible amplifier.
Adjusting the Volume
Press the - (29) or + (41) buttons to adjust the volume. To disable the sound immediately, press the button (35). To restore the sound, press this button again or press the - (29) or + (41) buttons.

If you can't adjust the volume by using the - (29) or + (41) buttons, nor restore it by pressing the ☒ button (35) you have probably enabled the "volume bypass". In order to be able to control the volume from the satellite receiver, disable the "volume bypass" (see page 24 - Volume bypass).
Selecting Channels
The increasing number of available channels unfortunately leads to ever greater confusion. Many channels target specific regional audiences (e.g. foreign language), other channels are scrambled and can only be viewed by paying a subscription and others may not lie within your field of interest. To organise the numerous channels available in the Channel Lists there are different channel groups and sorting criteria. Accessing channels can be done in different ways:
Using the Numeric Buttons
If you know the programme preset where the desired channel has been stored in the Channel List you can recall this directly by entering it via the numeric buttons (32). After a few seconds, the satellite receiver will show the desired channel. TIP: You can press the SWAP button (37) to toggle between the current and the last-viewed channel.
Using the Channel List
You can show an overview of all stored channels by pressing the OK button (40) while no favourite list has been activated. You can navigate this list via the P+ (28) or P- (30) buttons. Press the – (29) or +(41) buttons to scroll faster through the list. Once you have found the desired channel, press the OK (40) button to tune it in. An especially convenient way to access a specific channel is via favourite lists. You can create up to nine favourite lists. Press the FAV [Yellow] button (44) to open the favourite lists. Highlight the desired list and press the OK (40) button to confirm. The favourite list will become active and will be opened in TV or radio mode when pressing the OK button (40). If you want to display again all available channels, press the FAV [Yellow] button (44), select
Teletext
Many channels broadcast additional information and services. Teletext pages are like "electronic magazines" allowing you to view news, sport, weather information, commercial offers and much more. The availability and content depends on the channel provider. Its start or Index page is always page number 100. On this page you will find an overview of the other pages. Press the TEXT button (38) to launch the Teletext view. Pressing the TEXT button (38) multiple times lets you change the Teletext window display mode. Press the SWAP button (37) to zoom the upper half of the Teletext page. Press the SWAP button (37) a second time to enlarge the bottom half of the teletext page and press it a third time to return to normal view. Enter the page numbers in 3-digit format via the numeric keys (32). Press EXIT (39) to exit the Teletext pages.
Appendix
Troubleshooting
No signal
No signal is shown on the device nor on the OSD menu signal indicators.
- First check the antenna cable: The braided lead of the external wire and the aluminium film must have good contact with the F connector and must not touch the inner (centre) wire!
- Check the reception settings and edit them, if necessary. To further locate the problem we recommend that you temporarily connect the LNB directly to the receiver and do not use any switches or splitters.
Functional fault
- The device shows the wrong broadcasting times in the EPG or shows the wrong time. Once powered on, the satellite receiver needs to read and process the channel data. Depending on the transponder, this can take some time. Sometimes it may be necessary to re-open the EPG or to switch the channel.
- The device fails to respond. Unplug the power cord (21) or switch the device off by using the main power switch (22). Wait several seconds and reconnect the device to try again.
Small number of channels
- Make sure that you have enabled the correct Channel List. To do this, press the FAV [Yellow] button (44). Press P+ (28) or P- (30) to select the desired channel list and press the OK button (40) to confirm. To obtain the complete channel list, select
. - The antenna has been moved to the wrong satellite. When positioning the antenna you may receive satellite broadcasting on similar frequencies thereby causing the signal indicators of your satellite receiver to increase. When switching channel suddenly foreign channels or the message "No Signal!" appear. Normally it is sufficient to move the antenna a few degrees to the East or West in order to receive the desired channels.
No sound, distorted sound
- If no sound or only interference can be heard, your TV set or AV receiver may not be capable of decoding Dolby Digital/AC3 audio via the HDMI port. Solution: Press the [Blue] button (43) to select Stereo sound. If the channel does not offer any stereo sound, connect the digital coaxial S/PDIF audio output (13) or the optical S/PDIF output (14) to your Surround/AC3/Dolby Digital sound system.
- If no sound can be heard, check if the MUTE function has been enabled. If the sound is muted, press the ☑ button (35) again to resume the sound output.
- If the sound is very low or there is no sound at all, double-check the volume setting and, if necessary, increase the volume via the + button (41). Please also check the volume setting on your TV set or your Hifi amplifier, if connected.
Technical Specifications
General
Dimensions (W x H x D) 280 x 47 x 218 mm
Weight approx. 1.2 kg
Operating temperature 5 °C to 35 °C
Operating humidity max. 85 % rel. humidity
Input voltage 230V AC / 50 Hz
Power consumption Standby < 1W in low-power mode
Powered on max. 25 W
Programme presets 5000 (3500 TV + 1500 radio)
Display 4-digit
Teletext 1800 pages storage capacity
Timers max. 60 events
Tuner
SAT IF input 950 MHz to 2,150 MHz
Impedance 75 Ohms
Antenna
LNB power supply 14 / 18 V 300mA max.
Switching signals DiSEqC 1.0 / DiSEqC 1.2 motor control, Tone Burst 22 kHz, Unicable
Video
Connection HDMI: 576i DVI / 576p DVI /576i / 576p / 720p / 1080i
TV SCART: YUV, RGB and CVBS
VCR SCART: CVBS
S-Video
Video
Picture formats 16:9 / 16:9 Pillarbox / 4:3 (full screen) / 4:3 (letterbox)
Video formats YUV, RGB, CVBS, S-Video
Audio
Outputs Cinch Analog Stereo (L/R)
Digital audio PCM / AC-3 / dts electrical signal on Cinch
Digital audio PCM / AC-3 / dts optical signal
Remote control
Dimensions (W x H x D) 50 x 162 x 26 mm
Weight approx. 70 g
Operating voltage 2x 1.5V AAA-size batteries (Micro)
Warranty Information
36 month warranty from date of purchase
Please read the enclosed documentation or online help carefully before using the product for the first time. If there is a problem which can not be solved in this way, please contact our hotline.
If we are unable to solve the problem over the telephone, our hotline will arrange a further service dependant on the cause of the problem. This will comprise the elimination of production and material defects free of charge.
This warranty is valid in the United Kingdom / Ireland / Malta / Cyprus.
Please note that the warranty period for rechargeable batteries is 12 months. Consumables such as batteries and bulbs are excluded from this warranty.
Your statutory guarantees from the seller are in addition to this warranty and are not limited by it.
Hotline:

Please have your EAN / serial number ready
Manufacturer:
TARGA GmbH
Postfach 22 44
D-59482 Soest
www.targa.de
Spis treści
EC Declaration of Conformity
Address: Targa GmbH Lange Wende 41 59494 Soest, Germany
Product: DVB-S Receiver Model: SilverCrest SSR 576 A1
The product complies with the requirements of the following European directives:
2004/108/EC Electromagnetic Compatibility
2006/95/EC Low Voltage
2009/125/EC Energy Related Products
Compliance was proved by the application of the following standards:
EMC: EN 55013: 2001 +A1: 2003 +A2: 2006 EN 61000-3-2: 2006 EN 61000-3-3: 2008 EN 55020: 2007
Safety: EN 60065: 2002 +A1: 2006 +A11: 2008
ErP: Regulation 107/2009
Year of CE marking: 2011

Soest, 1 ^st of September 2011
Matthias Klauke, Managing Director
- Digital Satellite Receiver
- Table of Contents
- Safety Instructions
- Operating Environment
- Always make sure that
- Notice on Mains Separation
- Batteries
- Cables
- Children and Persons with Disabilities
- Repair and Maintenance
- Intended Use
- Copyright
- Storing When Not Using the Product
- Conformity Notice
- Disposal of Old Devices
- Introduction
- Package Contents
- Overview
- On/Standby
- TV
- PAUSE
- AV
- LIST
- P+
- -
- P-
- INFO
- Getting Started
- Inserting the Batteries into the Remote Control
- Connecting the Satellite Receiver
- HDMI Connection
- Video and Audio Signal Connection:
- The following video signals are supported:
- Dolby Digital Sound (AC3)
- OSD Menu
- Opening and Navigating the Submenus
- Closing the Menus
- Main Menu
- Channel List
- Edit Entries
- Favourite lists
- Editing favourite lists
- Insert before
- Delete
- Renaming the Favourite List
- Sort Channels
- Copy
- Move
- Cut
- Insert empty
- Pack
- Search Channels
- Professional Scan
- Frequency
- Polarisation
- Symbol rate
- Scan mode
- All Transponders
- Single Transponder
- Scrambled channels
- Edit Settings
- General Options
- Timezone
- Summer time control
- OSD Language
- Startup volume
- Low power stand-by
- Scan scrambled
- Parental lock
- Function lock
- OSD / EPG
- Status Time-out
- Channel Num. Timeout
- OSD Transparency
- Radio screen image
- Reception
- Satellite Systems
- Signal Output
- TV-screen
- Video format
- HDMI mode
- HDMI audio mode
- Volume bypass
- Digital audio
- Timer Configuration
- Timer pre-time
- Timer post-time
- Factory Defaults
- Extras
- System Info
- Signal Strength
- DiSEqC Motor
- Sleep-Timer
- Duration
- Activated
- Game: Blocks
- Game: Snake
- Timers
- Channel
- Date
- Start
- Stop
- Collision
- EPG title
- Satellite Update
- Daily Use
- Powering the Device On/Off
- Selecting Channels
- Using the Channel Up/Down Buttons
- Using the Numeric Buttons
- Using the Channel List
- Adjusting the Volume
- Teletext
- Helpful Special Functions
- INFO Button
- Operation
- EPG - Electronic Program Guide
- Programme Information
- Selecting Audio Channels
- Appendix
- Troubleshooting
- No signal
- Functional fault
- Small number of channels
- No sound, distorted sound
- Technical Specifications
- General
- Tuner
- Antenna
- Video
- Audio
- Remote control
- Warranty Information
- month warranty from date of purchase
- Hotline:
- Spis treści
- EC Declaration of Conformity
Brand : SILVERCREST
Model : SSR 576 A1
Category : Satellite receiver