
LFA-013 IX - Blender FAGOR - Free user manual and instructions
Find the device manual for free LFA-013 IX FAGOR in PDF.

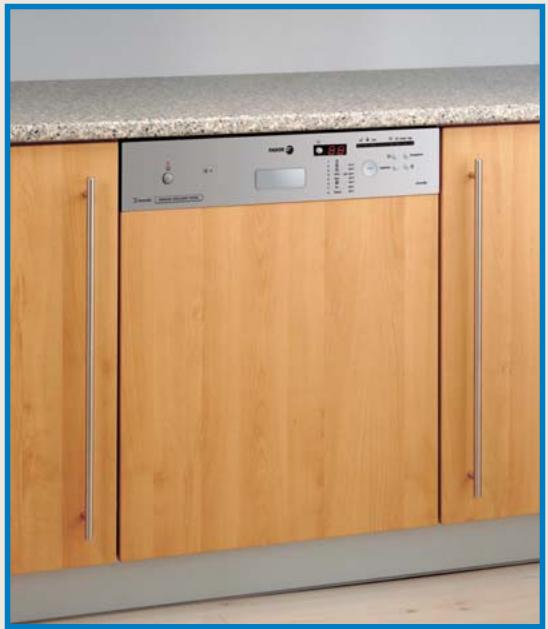
| Product type | Built-in dishwasher |
| Brand | FAGOR |
| Model | LFA-013 IX |
| Installation type | Built-in (integrated) |
| Power supply | 120 V ~ 15 A 60 Hz |
| Voltage | 120 V AC |
| Frequency | 60 Hz |
| Current | 15 A |
| Wash programs | Pre-wash, Super intensive, Intensive, Normal, Automatic, Economic, Rapid, Mixed, Express |
| Number of programs | 9 |
| Additional functions | Delayed start (1-9 h), Time reduction, Hygienizer, Upper/lower load |
| Capacity (place settings) | 12 place settings (estimated) |
| Water consumption per cycle | Approximately 10 L (estimated) |
| Power consumption per cycle | Approximately 1.1 kWh (estimated) |
| Water pressure | 0.05 - 0.1 MPa |
| Drying type | Condensation (estimated) |
| Noise level | Approximately 48 dB (estimated) |
| Dimensions (W x H x D) | 60 x 85 x 60 cm (estimated) |
| Weight | Approximately 50 kg (estimated) |
| Maximum door panel weight | 6.5 kg |
| Minimum door panel weight | 3 kg |
| Rinse aid indicator | Yes (optical or light) |
| Energy class | A (estimated) |
Frequently Asked Questions - LFA-013 IX FAGOR
User questions about LFA-013 IX FAGOR
0 question about this device. Answer the ones you know or ask your own.
Ask a new question about this device
Download the instructions for your Blender in PDF format for free! Find your manual LFA-013 IX - FAGOR and take your electronic device back in hand. On this page are published all the documents necessary for the use of your device. LFA-013 IX by FAGOR.
USER MANUAL LFA-013 IX FAGOR
CARE & INSTRUCTIONS MANUAL GUIDE D'UTILISATION ET D'ENTRETIEN MANUAL DE INSTRUCIONES Y MANTENIMIENTO
SEMI-INTEGRATED AIS DISHWASHERS: LAVE-VAISSELLE D'INTÉRATION: LAVAVAJILLAS INTEGRABLES:
- LFA-019 IX - LFA-019 SS - LFA-013 IX - LFA-013 SS
NOTE: To avoid accident and damage, please read these instructions carefully before operating the appliance.
NOTE: Veuillez direcs instructions attentivement a fin d'eviter accidents et dommages.
APPLIANCE MAINTENANCE AND CLEANING 21
TROUBLESHOOTING 23
FRANÇAIS
GENERAL 27
INSTALLATION ET MONTAGE 28
UTILISATION DE L'APPAREIL ET CONSEILS PRATIQUES 35
NETTOYAGE ET ENTRETIEN DE L'APPAREIL 45
DIAGNOSTIC ET SOLUTION AUX PROBLEMES 47
ESPANOL
GENERAL 51
INSTALLACION Y MONTAJE 52
USO DEL APARATO Y CONSEJOS PRÁCTICOS 59
MANTENIMIENTO Y LIMPIEZA DEL APARATO 69
IMPORTANT SAFETY INSTRUCTIONS
WARNING - When using your dishwasher, follow basic precautions, including the following:
a) Read all instructions before using the dishwasher.
b) Use the dishwasher only for its intended function.
c) Use only detergents or wetting agents recommended for use in a dishwasher and keep them out of the reach of children.
d) When loading items to be washed:
1) locate sharp items so that they are not likely to damage the door seal; and
2) load sharp knives with the handles up to reduce the risk of cut-type injuries.
e) Do not wash plastic items unless they are marked "dishwasher safe" or the equivalent. For plastic items not so marked, check the manufacturer's recommendations.
Note: This statement may be omitted for an appliance that employs a heating element that is located or guarded such that melted plastic items are not likely to contact it.
f) Do not touch the heating element during or immediately after use.
g) Do not operate your dishwasher unless all enclosure panels are properly in place.
h) Do not tamper with controls.
i) Do not abuse, sit on, or stand on the door or dish rack of the dishwasher.
j) To reduce the risk of injury, do not allow children to play in or on a dishwasher.
k) Under certain conditions, hydrogen gas may be produced in a hot-water system that has not been used for two weeks or more. HYDROGEN GAS IS EXPLOSIVE. If the hot-water system has not been used for such a period, before using the dishwasher turn on all hot-water faucets and let the water flow from each for several minutes. This will release any accumulated hydrogen gas. As the gas is flammable, do not smoke or use an open flame during this time.
1) Remove the door to the washing compartment when removing an old dishwasher from service or discarding it.
SAVE THESE INSTRUCTIONS
GROUNDING INSTRUCTIONS
This appliance must be grounded. In the event of a malfunction or breakdown, grounding will reduce the risk of electric shock by providing a path of least resistance for electric current. This appliance is equipped with a cord having an equipment-grounding conductor and a grounding plug. The plug must be plugged into an appropriate outlet that is installed and grounded in accordance with all local codes and ordinances.
WARNING - Improper connection of the equipment-grounding conductor can result in a risk of electric shock. Check with a qualified electrician or service representative if you are in doubt whether the appliance is properly grounded. Do not modify the plug provided with the appliance; if it will not fit the outlet, have a proper outlet installed by a qualified electrician.
1 UNPACKING THE DISHWASHER
UNPACKAGING
Remove the inner protection parts: polystyrene wedges for holding racks firmly.

PLUMBING IN
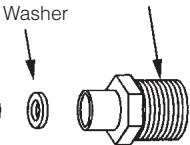
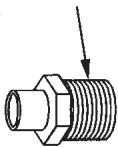
The dishwasher is equipped with a high pressure water connection pipe with a 3/4 (1.905 cm) directional internal pipe thread at normal temperature and pressure values (NPT).
In order to make its installation easier, the dishwasher includes a 3/8'' (0.9525 cm) brass compression part for 3/4 NPT which adapts the pipe connector to a 3/8'' compression part which incorporates the majority of the valves which close the water connection for domestic dishwashers. Alternatively, the pipe can be coupled directly to a male 3/4 brass NPT connector which is available in most hardware stores.
Adjust the direction of the pipe and the connection which comes out of the rear part of the appliance following the installation instructions.
WARNING
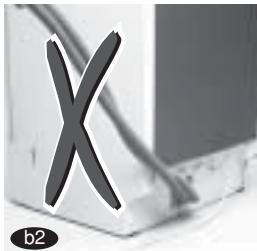
The hose has to pass between the wall and the bottom space at the back of the dishwasher (b1), so that it is not squashed or too rigid (b2).
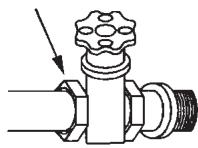
Closing valve
3/8" Comp x 3/4" BSP
Water connection pipe

0
Closing valve
3/4" NPT
Water connection pipe

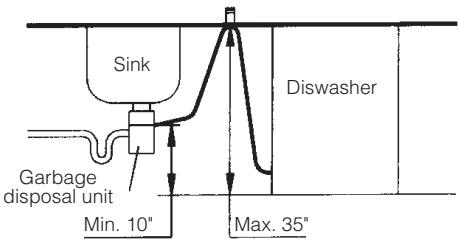
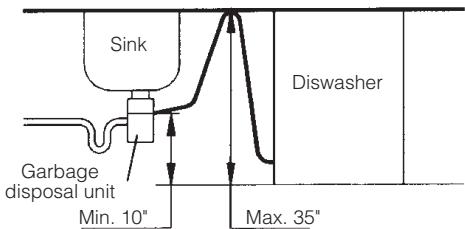
DRAINAGE
Connect the drainage pipe incorporated into a waste disposal unit, on a drainage pipe tap or in a residual gap depending on plumbing standards in force.
It is possible to lengthen the drain pipe with material resistant to hot water and detergent. Always keep an inner diameter of at least 5/8 (1.5875 cm). Never exceed the maximum distance of 9" (22.86 cm) to the drainage piping.
Raise the drain pipe and fasten it to the lower part of the worktop. Lower it again to the drainage connection point following these instructions:
- The connection with the drain pipe must be at least 10" (25.4 cm) from the floor.
- The connection with the drain pipe must be no higher than 35" (88.9 cm) from the floor.
In order to make installation easier, the dishwasher includes an assembly bracket for curved drain pipes.
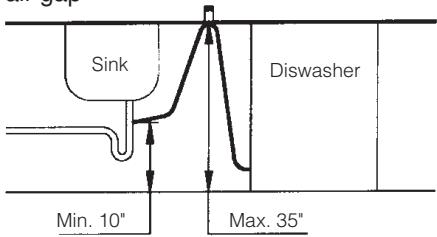
With an air gap
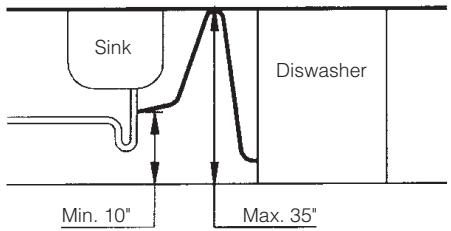
Without an air gap
IMPORTANT
It is important that the bend of the drainage hose is properly anchored in the outlet to avoid falling out and the consequent risk of flooding. The (minimum and maximum) water operating pressure must fall between 0.05 and 0.1 Mpa. Make sure that the connector for the appliance's lower pipe is properly adjusted before installing.

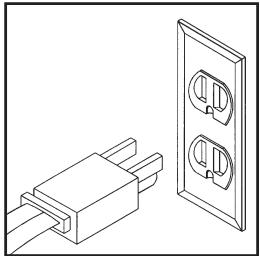
ELECTRICAL CONNECTION
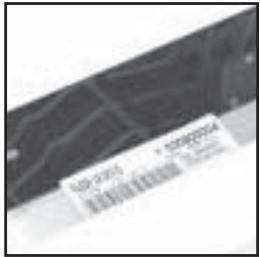
Please refer to the specifications label on the top edge of the door, before making electrical connections. Make sure than the voltage sent to the plug socket is the voltage which appears on the label.
The dishwasher requires an earthed 120 V, 15 Amp, 60 Hz plug socket.
The dishwasher is fitted with a flexible power cable, ending in a three pin earth plug which can be connected to a socket.
The socket for the dishwasher must be located in a cabinet or a wall next to the gap under the worktop where the appliance is going to be installed.
Make a hole with maximum diameter of 1- 1 / 2 "38 mm) in the cabinet wall through which the plug and the cable can be passed.
Instructions for the edges of this hole:
Wooden cabinets: the edge must be filed and rounded.
Metal cabinets: request a special eyelet to be made by the service workshop.
When installing or moving the dishwasher, take care not to damage the power cable.
IMPORTANT
Inside the door, on the top edge, you will find the specifications label. This label should never be removed, as it gives information about the exact model of the dishwasher, power supply, series number and warranty.
IMPORTANT
It is very important that the dishwasher is connected to earth. The electrical installation, plug, socket, fuses or circuit breaker and meter must be capable of managing the maximum power indicated on the specifications label. If the power cable is damaged, it can only be substituted by the manufacturer, After Sales Department, or authorized personnel. In the event of insertion and integration, the plug must be accessible after installation.
To install a built-in dishwasher:
WORKTOP
a If the worktop is made of wood, fit plastic protection over the worktop, which prevents the vapors affecting and damaging this area.
Fit the veneer to the front part of the dishwasher in order to fasten it to the piece of furniture.
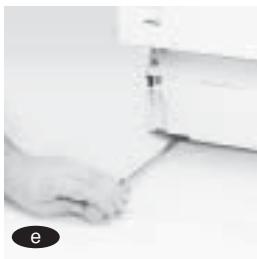
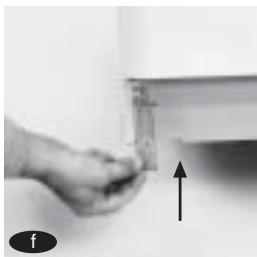
LEGS-LEVELLING
In order to build it into a line of furniture with a single base, loosen the extra bases and remove them.
Bring it to the work top and raise it by turning the rear feet away from the front part leaving a space of around 3 mm with the worktop.
To finish positioning, adjust to desired height using the front feet.

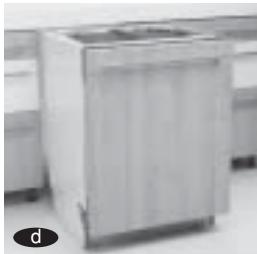

PANELLING
From the accessory bag supplied with the dishwasher, take the two panel adaptors, fit them by sliding them along the groove and fix them with screws also found in said bag.
Screw the panel cover (supplied as an accessory) to the panel adaptors, adjusting to your desired height.
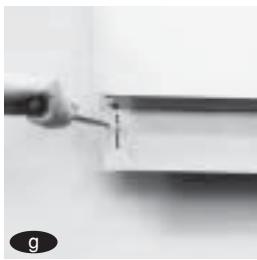
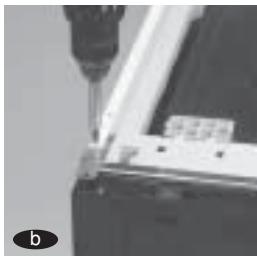
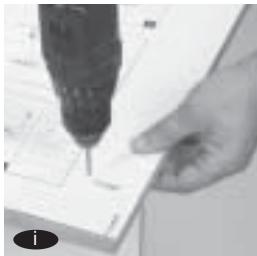
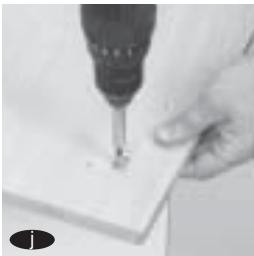
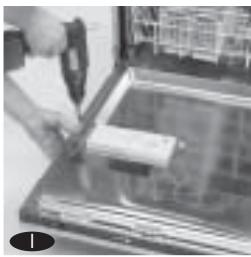
DOOR
There is a useful template with the assembly instructions.
h Using the terminal strips supplied, raise the height of the control panel to reach the height of the furniture drawer.
Fit the corresponding template (J-120:K-110), fasten it down and mark the position of the holes.
Drill, using a 1,16" bit and screw in the supports (part which curves upwards) to the decorative door.
Take the Decorative Door and slide the supports into the door slots. Pull up until touching the control panel making sure that it has been properly fixed down.
1 Open the dishwasher door slowly holding the decorative door and finally fix it with the screws taking care to align the panel with the door.

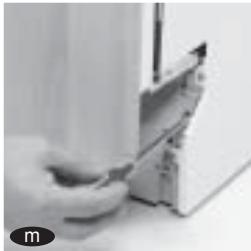
IMPORTANT
The maximum and minimum weight which is recommended for the decorative door to be fitted on the dishwashers is: Maximum 14 lb. Minimum: 6,5 lb.
m
In the event that the door springs are not strong enough, compensate for this with the two additional screws supplied in the accessories bag.
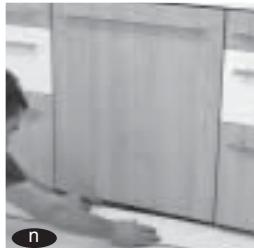
n
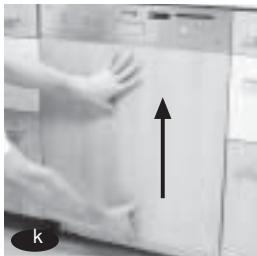
Fit the panel on the kitchen appliance, tightening it until the desired measurement is obtained.
0
Fix the dishwasher to the worktop if it is made of wood. If the worktop is made of granite, fix the dishwasher to the adjoining furniture.


PRE-WASHING
Once the dishwasher has been installed satisfactorily, we recommend prewashing:
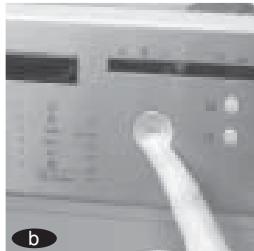
a
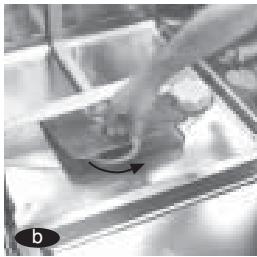
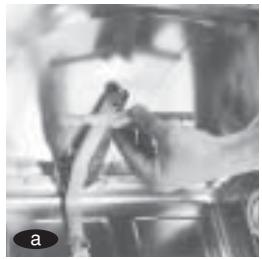
Press in On/Off button.

b
Select program 1 (prewash), without dishes or detergent.
C
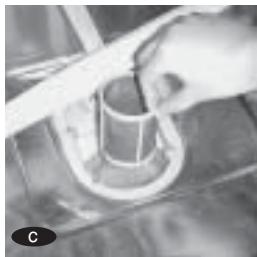
Press the Start/Pause button.

This checks the installation, the connections and the drainage, as well as completely cleaning the interior before running a wash program through the dishwasher.

OPERATING INSTRUCTIONS - A FEW PRACTICAL TIPS
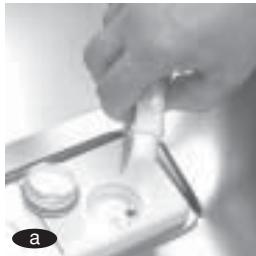
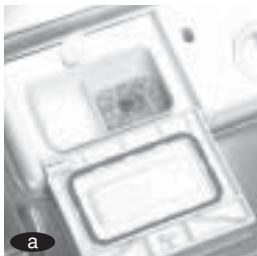
1 RINSE-AID AND DETERGENT
The rinse-aid helps drying and prevents drops of water forming on the dishes after washing. The rinse-aid compartment is inside the door, next to the detergent.
The compartment has a 4 position dispenser to adjust the quantity of rinse-aid depending on the water quality (the dispenser leaves the factory in position 2).
If drops of water can be seen on the dishes, increase the number on the rinse-aid dispenser. If the dishes have white or sticky lines, reduce the number.

Once the level of the dispenser has been set, fill the compartment to the top, without overflowing. If it does overflow, clean the extra off with a cloth.

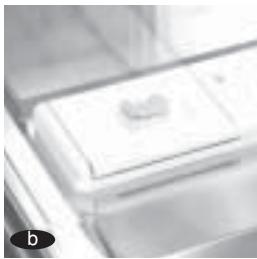
RINSEAID COMPARTMENT
DISPENSER
IMPORTANT
The dishes will not be cleaner by adding more rinse-aid. On the contrary, excess can produce stains.
When should you add more rinse-aid?
The dishwasher itself will tell you when you need to top up the rinse-aid. Depending on the model, there are two types of indicator: window or pilot light.

EMPTY
FULL


WINDOW

PILOT LIGHT
The detergent is poured into a compartment inside the door, next to the rinse-aid compartment.
Once the detergent has been poured in, close the compartment cover.

Some programs also require part of the dose to be put in the slot in the compartment cover.
Detergents come in tablet, powder and liquid form.
Detergent type only use detergent specifically for dishwashers.
Detergent quantity: See table on page 17.
Only sanitizing cycles (2, 3, 4) have been designed to meet requirements for sanitization efficacy.
Transparent window next to the rinse-aid compartment cover. If the window shows a clear background, a top-up is required. If the background is dark, there is enough rinse-aid.
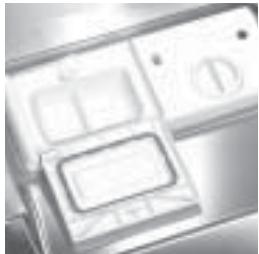
DETERGEN CONTAINER
A light on the front of the dishwasher shows when rinse-aid must be topped up.
ECOLOGICAL WASHING

Using excessive quantities of detergent and rinse-aid does not improve washing results and besides costing you more, it has a negative effect on the environmental
UTENSILS. TYPES AND POSITIONING
Types of utensils
Not all dishes can be used in a dishwasher. It is not advisable to put in wooden or clay utensils, or non heat resistant plastic. Stainless steel cutlery can be washed
easily although make sure it does not come into contact with silver cutlery as this can stain. Aluminum items can fade over time.
The pictures on decorated porcelain could be worn away if it is not good quality.
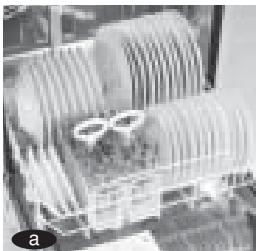
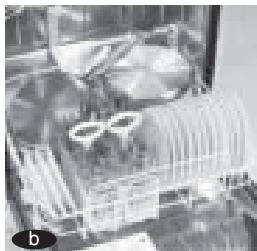
Positioning the dishes
It is very important to fit the dishes into the racks properly to guarantee perfect washing.
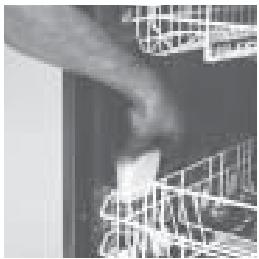
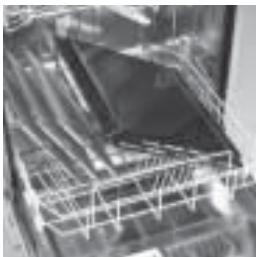
a The lower rack is for the dirtiest and most resistant pieces: pans, serving dishes and plates. Make sure that there is space between them for the water jet to be able to reach them. Pans must be placed facing downwards.
b If you model has folddown racks, you can use then in their vertical position to wash plates, and horizontally for large items such as casserole dishes.
IMPORTANT
Make sure that the utensils can be used in a dishwasher.
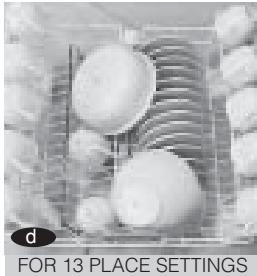
FOR 13 PLACE SETTINGS EN-50242
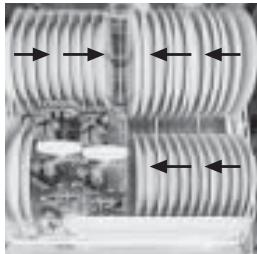
PLATE LOADER
VERTICAL POSITION
HORIZONTAL POSITION
IMPORTANT
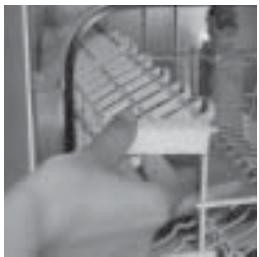
Bowls are positioned on the left and flat plates on the right. Start loading plates from the outside of the rack inwards. Plates should not touch each other.

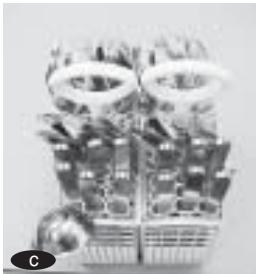
The cutlery, with the exception of knives, should be put in the cutlery rack making sure the handles face down

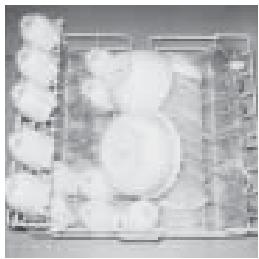
Fit the more delicate pieces such as cups and glasses made of porcelain or glass, and standard sized plates in the top rack. There is an area specifically for large cutlery. There are also racks which, when vertical, can be used to hold wine glasses.
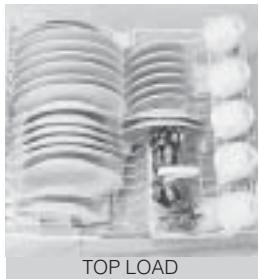
When you choose the Express program, the Top Load or Half Load function the dishes can only be fitted on the top rack.
Alternately, when you opt for the Low Load function, only the lower rack is loaded.

EN-50242
IMPORTANT
Make sure that once the dishwasher has been loaded, the water spray arms can turn without any obstacles and without touching any of the dishes.
Adjusting the racks
The racks can be adjusted depending on the load
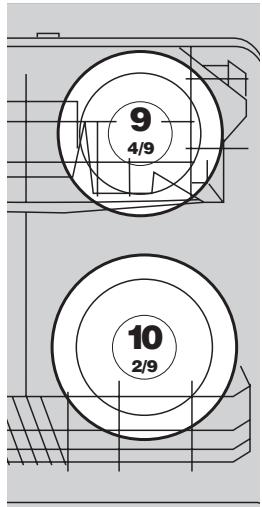
The top rack can be fitted at two different heights so that different size plates can be washed.
In the high position, it is possible to wash standard 7 1/2 plates in the top rack and 12 1/5 plates in the lower rack. Fitting the top rack in the low positions, it is possible to wash 9 4/9 plates on top and 10 2/9 plates below.

a Model A, top rack:
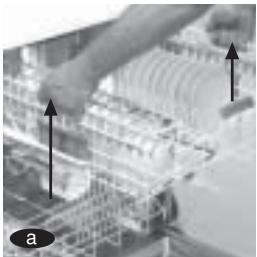
It can be adjusted without removing it from its rails, even with dishes already on it. Both to raise and lower its position, you should pull the rack up by holding on to the side handles. Make sure that both sides are at the same height; if not, level them.

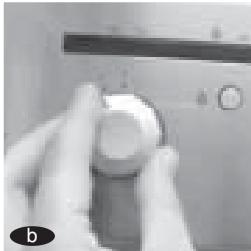
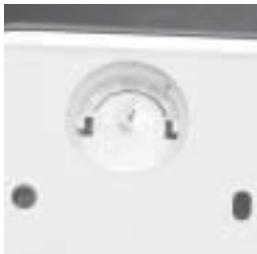
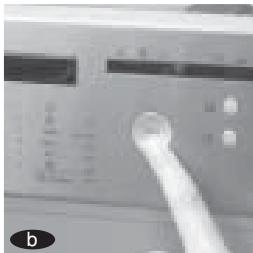
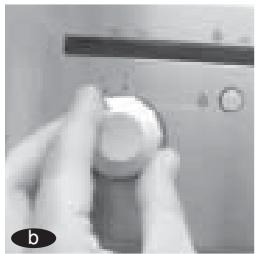
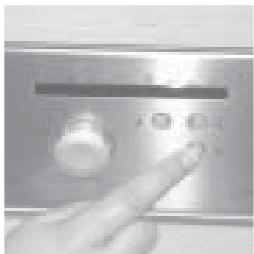
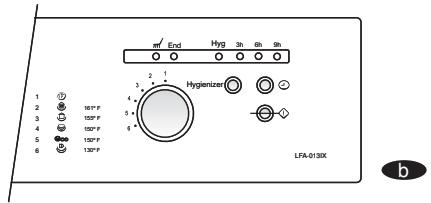
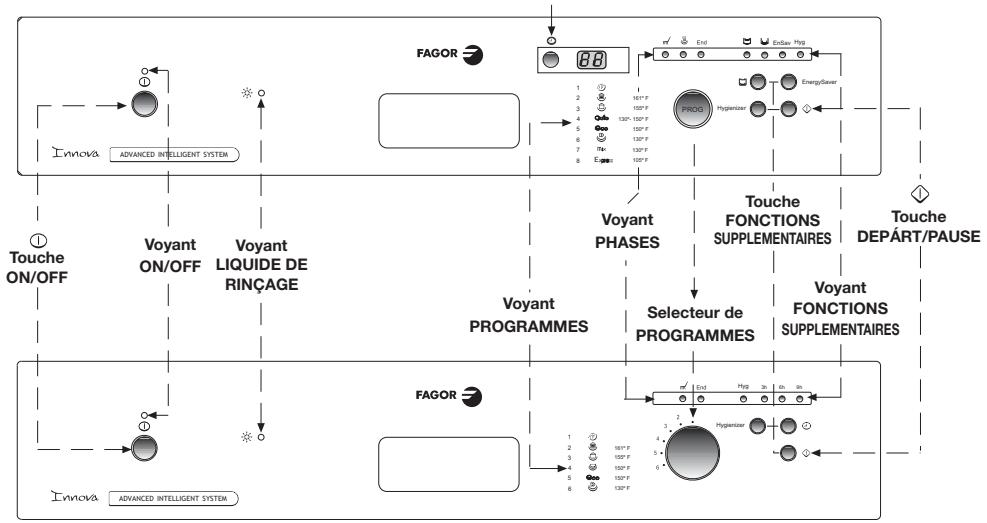
To select the wash program, proceed as follows:

Press the ON button on the dishwasher front panel (corresponding light will come on).

Select the wash program, with a button or a dial, depending on the dishwasher model. If you choose the Express Program, also press the Express button (above).
In some models, a pilot light will come on to show which program has been selected, and in others the program number appears in the display preceded by a "P".

There are several types of program depending on the dishwasher model. It is very important to choose the wash program correctly depending on the dirtiness, quantity and type of dishes.
| PROGRAM | TEMPERATURE (°F) | DISH TYPE | AMOUNT OF DETERGENT (g) | |
| Pre-wash P1 | For dishes which will not be washed immediately | Withou detergent | ||
| Super intensive P2 | 161 | For dishes and pans which are extremely dirty | 25+15 | |
| Intensive P3 | 155 | For dishes and pans which are very dirty | 25+15 | |
| Normal P4 | 150 | For dirty dishes | 25+5 | |
| Automatic P4 | 130-150 | Auto | For dirty dishes | 25+5 |
| Economy P5 | 150 | eco | For slightly dirty dishes | 25+5 |
| Quick-wash P6 | 130 | For barely dirty dishes | 25 | |
| Mixed P7 | 130 | mix | For dirty yet delicate dishes | 25+5 |
| Express*** P8 | 105 | EX | For barely dirty dishes only placed on the top rack | 20 |
*** The Express program should use powder or liquid detergent with optimal dissolving properties.
The wash functions must always be selected after choosing the wash program. Any change of program during selection cancels out the previously selected functions.
These functions allow specific adjustments on the wash load, timing and consumption.
The additional functions depend on the model:

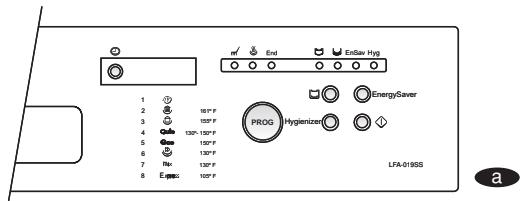
Button: Time delay
Allows you to delay wash start. There are models which can delay the wash by 3, 6 or 9 hours. In this case, pressing the time delay button lights up a pilot light showing the selected option.
In other models, you can choose the time you wish to delay the wash from 1 to 9 hours with 1 hourly intervals. Ideal to make the most of economy electricity at night. For these models, pressing the time delay button, the display will show how many hours you wish to delay the wash start.

Button: Energy Saver
Shortens the washing and drying operation times. This option can be used in the following programs: Intensive, Normal, Automatic, Economy, Mixed and Express.
Button: Hygienize
Special intensive wash cycle guaranteeing hygienic dishes. Option which can be used in the following programs: Express, Intensive and Economy.

Button: Top / Low load
This uses only half the dishwasher capacity. Top Load, in the top rack for more delicate pieces, and Low Load, in the low rack, for very dirty pans or dishes. Valid for all programs.
IMPORTANT
If the program is changed or the ON / OFF button is pressed whilst additional functions are being selected, all selected functions are cancelled.
ECOLOGICAL WASHING
If the model has an Eco-Sensor, 25% of water can be saved using the Intensive or Normal program. The Eco-Sensor detects how dirty the pre-wash water is and, if clean enough, reuses it for the wash.
5 START UP
Once the dishwasher is switched on, the wash program and the additional functions have been chosen, you only have to press the start button.
6 WASH PROGRAM PROGRESS
The active phases at each moment of the program appear successively as the wash progresses. Pilot lights, located over the program selector or button will show which task the dishwasher is currently performing. Depending on the model, the phases are:
a Wash / end / dry
b Or in operation / end
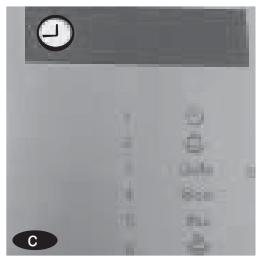
Models with display show the time remaining to finish the program.
IMPORTANT
Do not open the dishwasher door during the wash process. It could disrupt the dishwasher's progress.
When the dishwasher is in operation and ...
- You wish to put an extra plate in the dishwasher.
-
You wish to change the wash program
-
Press the Pause button.
- Put the item in the dishwasher and/or change the wash program.
- Press the Start button.


Except if the change interferes in the duration of the selected wash program or is the delay option. They you should press the ON/OFF button ([0]), to change its status.
IMPORTANT
Please take into consideration that the Start / Pause button is different to the ON / OFF button. 心 If you press the ON / OFF 心 button during the wash process, you must reprogram the dishwasher.
7END OF PROGRAM
Once the program has finished, the End light will come on and a continuous beep sounds for 3 seconds.
8 POWER CUTS
If there is a power cut, when the power comes back on the dishwasher
will continue its normal operation from the point where it was stopped (it
has a minimum memory of 12 hours, depending on the model).
9 BASIC RECOMMENDATIONS
There are a series of issues which must be taken into consideration to help your dishwasher last longer and wash better.
a Fill the dishwasher. Try to make the most of the dishwasher capacity and so reduce water and electricity consumption and lead to quieter operation.
Position the dishes properly. For optimum wash quality, the water spray arms must turn freely without obstacles. In the same way, the pieces must be correctly positioned for the water jet to reach them.
c Choice of program. Choose the wash program and the additional functions properly, according to your needs.
Cleaning. Clean the filters and the water spray arms every three months. Also make sure that they are correctly refitted.
APPLIANCE MAINTENANCE AND CLEANING
It is recommended that cleaning operations are carried out frequently in order to for your dishwasher to last longer. Every three months, the following operations should be carried out:
- Filter cleaning
Water spray arm cleaning - Internal cleaning
- External cleaning.
In this way, your dishwasher will last longer.
IMPORTANT
If you plan to be away for a long period, leave your dishwasher open to let air circulate freely inside the machine.
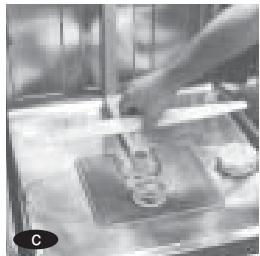
1 WASH FILTER CLEANING
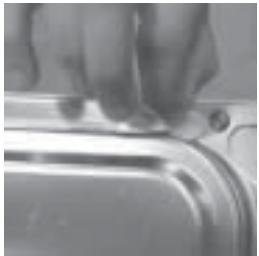
The filter is made up of two or three filters (depending on the model): internal filter, external filter and the filter protector. It is located in the lower part of the dishwasher under the lower rack.
a After removing the lower rack, the internal filter is dismantled by turning it to the left and pulling it up and out.
b Extract the external filter.
c Extract the protective filter (depending on the model).
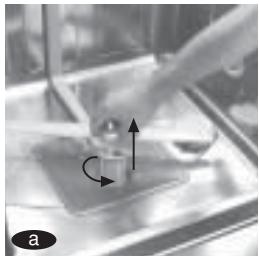
It is vitally important to refit the filters properly. Make sure the filter protector is in place. The external filter fits in its seat.
The internal filter fits into its hole and is turned to the right as far as possible.

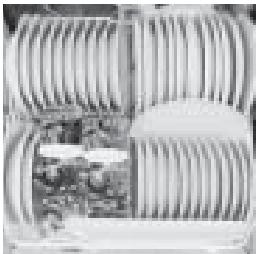
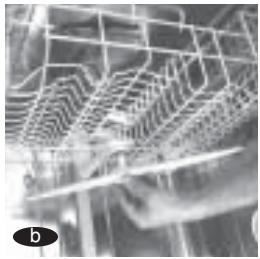
WATER SPRAY ARM CLEANING
The third water spray arm (depending on the model), the upper water spray arm and the lower water spray arm must be cleaned every three months. Dismantling the water spray arms:
The third water spray arm is dismantled by pressing upwards and unscrewing.
The upper water spray arm is mounted on the top rack. It must be totally unscrewed for disassembly.
The lower water spray arm is dismantled by loosening the lower nut to the left and extracting it upwards.
They must be cleaned under a jet of water with a soft sponge. The water
IMPORTANT
Before carrying out any cleaning operations, it is recommended to unplug the dishwasher.

CLEANING INSIDE THE MACHINE
The dishwasher must be cleaned every three months to eliminate the built-up dirt inside the
machine. Instead of using detergent, a machine cleaner should be used (follow the
manufacturer's instructions for use).

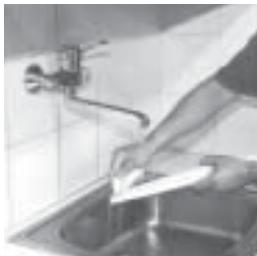
CLEANING THE OUTSIDE OF THE MACHINE
To clean the outside, use a damp cloth with soapy water. Use non abrasive products which do not scour. Dry with a cloth.
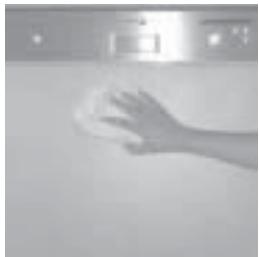
IMPORTANT
For safety reasons, check that the machine is not in operation during the cleaning.
1 TECHNICAL OR FUNCTIONAL PROBLEMS
When the dishwasher detects a dysfunction, it will display this with sounds or visual signals, depending on the model.
On the top edge of the dishwasher door there is a table identifying possible incidents.
| F1 1 7● Datura abietica | F2 2 2● Veneris aegrae | F3 3 3● Nordafrika | F4 4 4● Deutschland | F5 5 5● Südamerika/Nazakhstan | F6 6 6● Norwegen | F7 7 7● Sensoriernatoren | F8 8 8● Malaysia/nongkota | F9 9 9● Alternative |
(F1) Models with
display. In these models, the identification appears with the letter "F" followed by a number (from 1 to 9).
1 Models without
display. When there is a dysfunction, the dishwasher will emit a series of beeps, which stop for seven seconds and then sound again. It is possible to identify the type of dysfunction by counting the number of beeps (1 beep: Door open; 2 beeps: No water; etc.)
To stop the dishwasher emitting the beeps, press the Start / Pause button. Depending on the type of dysfunction, please contact the after sales department to inform them of your problem.
| DYSFUNCTION | MODEL WITH DISPLAY | MODEL WITHOUT DISPLAY |
| NO OF BEEPS | ||
| Close the door | F1 | 1 |
| No water entering | F2 | 2 |
| No drainage | F3 | 3 |
| Overflow | F4 | 4 |
| Overteating | F5 | 5 |
| No heating | F6 | 6 |
| No temperature detection | F7 | 7 |
| Lack of water pressure | F8 | 8 |
| Does not distribute | F9 | 9 |
- Why does the dishwasher not start?
This could be because:
- There is no electricity supply.
- It is not plugged in properly
- The fuses have tripped
- The dishwasher is not connected to the electricity supply
- You have not pressed the On/Off button (the indicator light for this button must be continuously lit)
- The dishwasher door is not closed properly.
- The start button has not been pressed.
- The dishwasher starts but no water enters
This could be because:
- There is no water in the network.
- The stopcock is not open
- The water inlet solenoid valve filter is obstructed.
- It does not drain, water remains inside.
This could be because:
- The drainage is obstructed or badly installed.
- The drain pipe is obstructed or folded
- The filters are blocked
- The selected program has not finished, wait for it to finish.
- There are detergent remains in the dispenser or on the door
This could be because:
- A dish is preventing the dispenser from opening
- The detergent is past its expiry date or is not appropriate
- The water spray arms are hitting a dish
- The water spray arm holes are covered.
- The detergent compartment was damp when the detergent was put it. The compartment must be dry.
- Unusual foam is formed:
- You have put in washing up liquid instead of dishwasher detergent.
- The dishwasher makes strange noises
This could be because:
- You have not positioned the dishes correctly.
- The water spray arms are hitting a dish
(2)
PROBLEMS WITH WASH EFFICIENCY
- Dirt or food remains on the crockery
This could be because:
- The wash filter is incorrectly fitted, dirt or blocked.
- The water spray arm holes are dirty or the water spray arms are blocked by a piece of crockery.
- There is insufficient or inappropriate detergent.
- The crockery is not positioned correctly. There are pieces touching each other.
- The racks are overloaded.
- The wash program is not appropriate
- The drainage is blocked
- There was too much dried on food on the dishes.
- The crockery is whitened
This could be because:
- Insufficient detergent or rinse-aid
- A phosphate-free detergent has been used. Test using a phosphate detergent.
- The crockery does not dry
This could be because:
- There is a lack of rinse-aid
- The rinse-aid adjustment is not appropriate.
- The crockery is badly positioned
- The crockery has been removed too quickly
- The wash program is not appropriate.
Glass looks milky or scratched
This could be because:
- The items should not be used in a dishwasher
- The detergent is not appropriate
Glass looks opaque
- Insufficient rinse-aid
- Glasses and cutlery is blurry and glasses seem metallic
- Excessive rinse-aid
- Stainless steel or steel pieces show stains
This could be due to:
- The pieces should not be used in a dishwasher
- The crockery is badly positioned
- Too much detergent has been used
- Low quality steel.

ECOLOGICAL WASHING
In order to protect the environment, deliver you old machine to a official collection centre or a recyclable material recovery centre.
Before getting rid of your old machine, make it unusable by cutting the plug off the cable.
MESURES DE SECURITE IMPORTANTES
3/8" Comp. x 3/4" BSP
Rondelle
Touche
DEPART DIFFÉRE
3/8" Comp. x 3/4" BSP
Toll Free: 1.800.207.0806
Email: infoappliances@fagoramerica.com
www.fagoramerica.com
- CARE & INSTRUCTIONS MANUAL GUIDE D'UTILISATION ET D'ENTRETIEN MANUAL DE INSTRUCIONES Y MANTENIMIENTO
- FRANÇAIS
- ESPANOL
- IMPORTANT SAFETY INSTRUCTIONS
- SAVE THESE INSTRUCTIONS
- GROUNDING INSTRUCTIONS
- UNPACKING THE DISHWASHER
- UNPACKAGING
- PLUMBING IN
- WARNING
- DRAINAGE
- IMPORTANT
- ELECTRICAL CONNECTION
- WORKTOP
- LEGS-LEVELLING
- PANELLING
- DOOR
- m
- n
- 0
- PRE-WASHING
- a
- b
- C
- OPERATING INSTRUCTIONS - A FEW PRACTICAL TIPS
- RINSE-AID AND DETERGENT
- When should you add more rinse-aid?
- UTENSILS. TYPES AND POSITIONING
- Types of utensils
- Positioning the dishes
- Adjusting the racks
- a Model A, top rack:
- The additional functions depend on the model:
- Button: Time delay
- Button: Energy Saver
- Button: Hygienize
- Button: Top / Low load
- ECOLOGICAL WASHING
- START UP
- WASH PROGRAM PROGRESS
- 7END OF PROGRAM
- POWER CUTS
- BASIC RECOMMENDATIONS
- APPLIANCE MAINTENANCE AND CLEANING
- WASH FILTER CLEANING
- WATER SPRAY ARM CLEANING
- CLEANING INSIDE THE MACHINE
- CLEANING THE OUTSIDE OF THE MACHINE
- TECHNICAL OR FUNCTIONAL PROBLEMS
- (F1) Models with
- Models without
- - Why does the dishwasher not start?
- - The dishwasher starts but no water enters
- - It does not drain, water remains inside.
- - There are detergent remains in the dispenser or on the door
- - Unusual foam is formed:
- - The dishwasher makes strange noises
- (2)
- PROBLEMS WITH WASH EFFICIENCY
- - Dirt or food remains on the crockery
- - The crockery is whitened
- - The crockery does not dry
- Glass looks milky or scratched
- Glass looks opaque
- - Glasses and cutlery is blurry and glasses seem metallic
- - Stainless steel or steel pieces show stains
- MESURES DE SECURITE IMPORTANTES
Brand : FAGOR
Model : LFA-013 IX
Category : Blender