
MultiMix 3 4644 - Food processor BRAUN - Free user manual and instructions
Find the device manual for free MultiMix 3 4644 BRAUN in PDF.
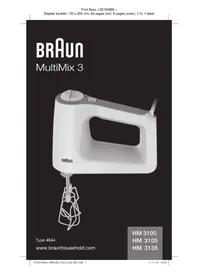


| Product type | Food processor (immersion blender) |
| Brand | Braun |
| Model | MultiMix 3 4644 |
| Power supply | 220-240 V, 50-60 Hz |
| Power | 400 W |
| Number of speeds | 12 speeds + turbo |
| Turbo function | Yes, button activation |
| Shaft material | Stainless steel |
| Package contents | Motor unit, mixing shaft, whisk, measuring cup (600 ml), dough hooks |
| Dimensions (L x W x H) | 7 x 7 x 38 cm |
| Weight | 0.9 kg |
| Cable length | 1.2 m |
| Control type | Sliding knob with 12 positions |
| Safety | Turbo button lock for continuous operation; automatic shut-off in case of overload |
| Maintenance | Clean the motor unit with a damp cloth; accessories are dishwasher safe |
| Repairability | Spare parts available through Braun after-sales service |
| Warranty | 2 years |
| Color | White and orange |
Frequently Asked Questions - MultiMix 3 4644 BRAUN
User questions about MultiMix 3 4644 BRAUN
0 question about this device. Answer the ones you know or ask your own.
Ask a new question about this device
Download the instructions for your Food processor in PDF format for free! Find your manual MultiMix 3 4644 - BRAUN and take your electronic device back in hand. On this page are published all the documents necessary for the use of your device. MultiMix 3 4644 by BRAUN.
USER MANUAL MultiMix 3 4644 BRAUN
Type 4644
www.braunhousehold.com
HM 3100
HM 3105
HM 3135
Deutsch 6
English 9
Français 12
Español 15
Português 18
Italiano 21
Nederlands 24
Dansk 27
Norsk 30
Svenska 33
Suomi 36
Polski 39
Český 43
Slovenský 46
Magyar 49
Hrvatski 52
Slovenski 55
Türkçe 58
Română (RO/MD) 61
Ελληνικά 64
Қазақша 67
Русский 71
Українська 75

De'Longhi Braun Household GmbH
![graph TD A["Start: Switch"] --> B["Check Button"] B --> C["Power Input"] C --> D["Click Button"] D --> E["Power Transfer to Motor"] E --> F["Load Switch"] F --> G["Reset to Power"] style A fill:#f9f,stroke:#333 style B fill:#ccf,stroke:#333 style C fill:#cfc,stroke:#333 style D fill:#fcc,stroke:#333…](/content/2026/06/1302015/images/cdc9504e3c5d9a72509764efc6a1d5ef94946d8a911851fbc8ad70e9e4a6ca27.jpg)
B
C

| max. +/- | turbo | ||
| 300 g | 15 sec | ||
| 200 g | turbo20-25 sec | ||
| 200 g 15-8 sec | |||
| 30 g | turbo20 sec | ||
| 4 / 20 g | 4 | ||
| 200 g 12-15 sec | 3 | ||
| 300 g 15-22 sec | 3 / +5 sec turbo | ||
| 350 g 20-25 sec | 3 / +5 sec turbo | ||
D



German
11d Anti-slip ring
Our products are engineered to meet the highest standards of quality, functionality and design. We hope you thoroughly enjoy your new Braun appliance.
Please read the use instructions carefully before using this appliance.
Caution
• The blades are very sharp! To avoid injuries, please handle blades with utmost care. - This appliance is designed for household use only and for processing normal household quantities. - The supply cord cannot be replaced. If the cord is damaged the appliance should be scrapped. - Always unplug or switch off the appliance when it is left unattended and before assembling, disassembling, cleaning and storing. - Children shall not play with the appliance. Cleaning and user maintenance shall not be made by children without supervision. - This appliance can be used by persons with reduced physical, sensory or mental capabilities or lack of experience and knowledge if they have been given supervision or instruction concerning use of the appliance in a safe way and if they understand the hazards involved. - This appliance shall not be used by children.
- Keep the appliance and its cord out of reach of children.
- Be careful if hot liquid is poured into the food processor or blender as it can be ejected out of the appliance due to a sudden steaming.
- Do not use any part in the microwave.
- Keep hands, hair, clothing, as well as spatulas and other utensils away from whisks and dough hooks during operation to prevent personal injury. Do not contact moving parts during operation.
Description
1 Ejection button 2 On/off switch (I = on, 0 = off) 3 Speed selector 4 Motor part 5 Outlets for whisks / dough hooks 6 Outlet for handblender / chopper 6a Pusher 7 Dough hooks 8 Whisks 9 Handblender attachment (if supplied) 10 Beaker 11 Chopper attachment (if supplied) 11a Chopper lid (with gear box) 11b Blade 11c Chopper bowl 11d Anti-slip ring
Maximum operating time: with the dough hooks 5 minutes with the whisks 15 minutes
Please clean all parts before using for the first time – see paragraph «Cleaning».
Using the handmixer (A)
The dough hooks are perfectly suited for kneading yeast dough, pasta dough, pastries, as well as for mixing heavy minced meat doughs. Use the whisks for mixing cake mixtures, sponges and
mashed potatoes, as well as for whipping cream (minimum 100 ml cream), egg whites and creamy ingredients.
- Position the pusher (6a) as illustrated and insert the dough hooks (7) or whisks (8).
- Put the ingredients into a bowl.
- Depending on the application, select speeds (1 ... turbo) by turning the speed selector (3). To avoid splashing, always start with a low speed setting, and then slowly increase the speed while operating.
- Press the on/off switch (2) to turn the appliance on and off.
- After use, unplug the appliance and eject the dough hooks or whisks by pressing the ejection button (1).
For best results:
- To obtain optimum results when making cake mixtures, etc. all ingredients should have the same temperature. Butter, eggs, etc. should be removed from the refrigerator some time before they are being used.
- Whipped cream has more volume, if the cream is well chilled before being whipped.
- Mashed potatoes will become more creamy, if all ingredients are being used as hot as possible (e.g. potatoes immediately after boiling).
Using the handblender attachment (B)
The handblender attachment blends and mixes fast and easily. Use it to make sauces, soups, mayonnaise, dietary and baby food.
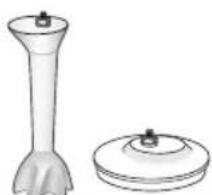
- Position the pusher (6a) as illustrated and insert the handblender attachment. Insert the handblender attachment (9) into the opening so that the marking on the handblender attachment aligns with the marking on the motor part. Then turn the handblender 90° clockwise, until it locks.
- Insert the handblender attachment vertically into the vessel, before switching on the appliance. The handblender may not be immersed more than 2/3 of the shaft.
- To avoid splashing, always start with a low speed setting, and then slowly increase the speed while operating.
- Press and hold the on/off switch as long as you operate your handblender attachment.
- When blending directly in the saucepan while cooking, remove the pan from the stove first to protect your handblender from overheating.
- To turn off the appliance, release the on/off switch, before taking the shaft out of the vessel, then unplug.
- To remove the handblender attachment, turn it 90° anti-clockwise and pull it off.
Important: The beaker (10) may be used only with the handblender attachment for processing smaller quantities. It should not be used with a whisk.
Using the chopper attachment (C)
The chopper attachment is perfectly suited for chopping meat, cheese, onions, herbs, garlic, carrots, walnuts, hazelnuts, almonds etc.
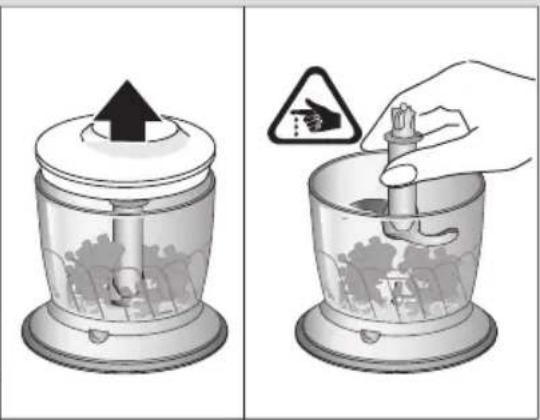
- Before chopping: Pre-cut meat, cheese, onions, garlic, carrots (see table on page 5), remove stalks from herbs, un-shell nuts and remove bones, tendons and gristle from meat.
- Always make sure that the anti-slip ring (11d) is attached to the bowl.
- Caution: Carefully remove the plastic cover from the blade (11b). The blade is very sharp! Always hold it by the upper plastic part.
- Place the blade on the centre pin of the chopper bowl and press it down until it locks.
- Fill the food into the chopper bowl.
- Put the chopper lid (11a) on the chopper bowl and make sure it is properly fitted.
- Position the pusher (6a) as illustrated and insert the pin of the chopper lid into it, so that the marking on the chopper lid aligns with the marking on the motor part. Then turn the motor part 90° clockwise, until it locks.
- Always start with a low speed setting, and then slowly increase the speed while operating.
- Keep the on/off switch pressed down as long as you operate your chopper attachment and always hold the motor part with your hand. For chopping hard
goods (e.g. hard cheese), use the turbo speed setting.
- When chopping cooked food, allow it to cool down for a few minutes before putting it into the chopper bowl.
- Turn the appliance off by releasing the switch and unplug it, before you start disassembling.
- To remove the motor part, hold the chopper attachment with one hand, turn the motor part 90° anti-clockwise and lift it off.
- Remove the blade insert, before you remove the processed food from the chopper bowl.
Important: Do not chop extremely hard food, such as ice cubes, nutmeg, coffee beans or grains.
Recipe example:
Vanilla-Honey-Prunes (as a pancake stuffing or spread):
- Fill the chopper bowl (11) with 300 g prunes and 300 g creamy honey.
- Chop for 10 seconds at maximum speed.
- Add 100 ml of water (vanilla-flavoured).
- Resume chopping for another 3 seconds.
Cleaning the appliance (D)
Always unplug the appliance before cleaning.
- The motor part (4) should be cleaned with a damp cloth only. Do not immerse it in water or hold it under running water.
- The handblender attachment (9) and the chopper lid (11a) can only be cleaned under running water. Do not immerse them in water.
- All other parts can be cleaned in the dishwasher.
When processing foods with colour (e.g. carrots), the plastic parts of the appliance can become discoloured. Wipe these parts with vegetable oil before cleaning.
Subject to change without notice.
Please do not dispose of the product in the household waste at the end of its useful life. Disposal can take place at a Braun Service Centre or at appropriate collection points provided in your country.

For UK Only
Guarantee Information
All Braun Household products carry a minimum guarantee period of two years. The rights and benefits under this guarantee are additional to your statutory rights which are not affected.
Please keep your receipt as this will form the basis of your guarantee.
In the unlikely event of a breakdown you have access to professional help from our team simply by calling:
02392 392333
For service in the Republic of Ireland please call:
012475471
Braun Household undertakes within the specified period to repair or replace any part of the appliance, free of charge (with the exception of any glass or porcelain-ware incorporated in the product) found to be defective provided that;
- We are promptly informed of the defect.
- The product is used and maintained in accordance with the User Instructions.
- The appliance has not been altered in any way or subjected to misuse or repair by a person other than an authorised service agent for Braun Household.
- No rights are given under this guarantee to a person acquiring the appliance second hand or for commercial or communal use.
- Any repaired or replaced appliance will be guaranteed on these terms for the unexpired portion of the guarantee.
- The need for repair has not been caused by insufficient aftercare or cleaning: or damage caused by the chemical or electrochemical effects of water.
Under no circumstances shall the application of this guarantee give rise to the complete replacement of the appliance or entitle the consumer to damages.
Braun Household, New Lane, Havant, Hampshire PO9 2NH
www.braunhousehold.co.uk
Country of origin: Romania
Year of manufacture
To determine the year of manufacture, refer to the 5-digit production code located near the type plate. The first digit of the production code refers to the last digit of the year of manufacture. The next 2 digits refer to the calendar week in the year of manufacture. And the last 2 digits show the print date automatically calculated since 1992.
Example: 30421 - The product was manufactured in week 4 of 2013.
Country of origin: Romania
Year of manufacture:



- GERMAN
- CAUTION
- DESCRIPTION
- USING THE HANDMIXER (A)
- FOR BEST RESULTS
- USING THE HANDBLENDER ATTACHMENT (B)
- USING THE CHOPPER ATTACHMENT (C)
- RECIPE EXAMPLE
- CLEANING THE APPLIANCE (D)
- FOR UK ONLY
- PLEASE KEEP YOUR RECEIPT AS THIS WILL FORM THE BASIS OF YOUR GUARANTEE
- COUNTRY OF ORIGIN: ROMANIA
- YEAR OF MANUFACTURE
Brand : BRAUN
Model : MultiMix 3 4644
Category : Food processor