
VR450 - VCR PHILIPS - Free user manual and instructions
Find the device manual for free VR450 PHILIPS in PDF.
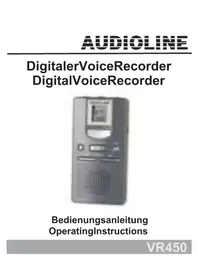


| Product Type | Video Cassette Recorder (VCR) |
| Brand | Philips |
| Model | VR450 |
| Video Format | VHS |
| TV System | PAL |
| Dimensions (W x H x D) | Approx. 430 x 85 x 280 mm |
| Weight | Approx. 3.5 kg |
| Power Supply | 220-240 V ~ 50 Hz |
| Power Consumption | 20 W (typical) |
| Recording Modes | Standard Play (SP), Long Play (LP) |
| Timer Recording | Up to 8 events, 1 month in advance |
| Auto Tracking | Yes |
| Picture Search | Forward and reverse |
| Remote Control | Infrared, included |
| Heads | 4 video heads |
| Audio Output | Mono, RCA |
| Video Output | Composite (RCA), RF modulator |
| Inputs | Antenna, Composite (RCA) |
| Cleaning | Use a VHS cleaning cassette monthly |
| Safety | Do not expose to moisture; unplug during lightning storms |
| Spare Parts | Remote control, power cord, manual |
| Repairability | Belts and heads can be replaced by a technician |
Frequently Asked Questions - VR450 PHILIPS
User questions about VR450 PHILIPS
0 question about this device. Answer the ones you know or ask your own.
Ask a new question about this device
Download the instructions for your VCR in PDF format for free! Find your manual VR450 - PHILIPS and take your electronic device back in hand. On this page are published all the documents necessary for the use of your device. VR450 by PHILIPS.
USER MANUAL VR450 PHILIPS
Operating instructions .... 19
SAFETY INSTRUCTIONS
Operating instructions
FULLY RESPONSIBLE THAT THE PRODUCT
MODEL: VR 450
Name: MANFRED ZINNOW
Installing the batteries 21
Operational elements 22
Display symbols.... 23
Operation 24
Switching on the VR450 24
VR450 Storage Facilities.... 24
Recording Memos 25
Starting next recording directly.... 26
Display remaining recording time.... 26
Direct Recording.... 26
Replaying Memos.... 27
Searching for a memo automatically (Auto Scan)...... 28
Searching for a memo manually.... 28
Erasing individual memos 29
Erasing complete archive files.... 29
Important Information.... 30
User Lock 30
External Microphone/Loudspeaker Jack 30
Recording other signal sources.... 30
Playback via other equipment 31
Fault Finding.... 32
Care Instructions 32
Guarantee 33
Technical Data 34
Declaration of Conformity.... 35
SAFETY INFORMATION
Operating Instructions
Please read these operating instructions carefully. If you should have any questions, please contact our service department on the Hotline number 0180 5 00 13 88. Under no circumstances open the unit yourself and do not try to carry out your own repairs. For any claims under the guarantee, please refer to your dealer.
Batteries/Rechargeable Batteries
The required batteries are included in the scope of supply. When the batteries have to be changed, you will need two type AAA 1.5 V batteries. Please use new, high quality alkaline or NiMH batteries.
Disposal
If the useful life of the batteries or the complete equipment has expired, please dispose of these carefully in accordance with the statutory requirements and in a manner friendly to the environment. Never open used batteries, short circuit them or throw them into the fire.
CE marking
The unit is approved for use on the European market. This unit fulfils the requirements of the EU Directives. Conformity of the unit with these directives is confirmed by the CE mark. You will find the CE mark on the backside of the AUDIOLINE VR450.
PREPARATION
UNPACKING
The following parts will be found in the package:
■ VR450 ■ Operating instructions Batteries Ear piece ■ Audio connection cable
INSTALLING THE BATTERIES
Slide the battery cover on the rear of the unit downwards with light pressure and open the battery compartment. Now insert the two batteries and check that the polarity is correct. The wrong polarity can damage both the batteries and the unit. Close the battery compartment.
Note:
When the batteries become weak and need to be replaced, the battery symbol will flash in the display. Never change the batteries while recording as otherwise a total loss of data could occur.
OPERATIONAL ELEMENTS
1 Display 9 ERASE button 2 Loudspeaker VOL 10 PLAY/STOP button 3 REC button 11 Record LED 4 FILE button 12 Slide control HOLD 5 Forward button 13 MIC connection 6 Loudspeaker 14 Microphone 7 Rewind button 15 EAR connection 8 MODE/PAUSE button
DISPLAY SYMBOLS
1 Battery capacity indicator 2 Appears during playback 3 Appears during recording 4 Appears in Long Play Mode 5 Seconds symbol 6 Recording time in minutes and seconds 7 Appears in Standard Mode 8 Memo number indicator from 1 to 100 in the selected archive file 9 Selected archive file indicator A, B, C, D
OPERATION
SWITCHING ON THE VR450
To switch on the AUDIOLINE VR450 press the REC button once. Ensure that the HOLD slide switch on the left-hand side has not been moved to the top position. Otherwise, it will not be possible to switch on the AUDIOLINE VR450 and the display will show the message HOLD for a few seconds.
The AUDIOLINE VR450 is equipped with a circuit to increase the battery life. If no activity takes place within one minute, the unit switches itself off automatically. The display goes off and the unit must be switched on again.
VR450 STORAGE FACILITIES
You can store memos, messages, ideas, confidential information, etc. in the AUDIOLINE VR450 in four separate archive files. The archive files are identified by the letters A, B, C and D. Each archive file can store up to 100 recordings.
The maximum recording time for the AUDIOLINE VR450 is 116 minutes in standard mode and 252 minutes in long play mode. You will get the better recording quality in standard mode.
RECORDING MEMOS
■ Ensure that the HOLD slide switch is in the OFF position (slide switch down). ■ Press REC to switch the unit on. ■ Using the FILE button select the required archive file A, B, C or D. ■ Now select the required recording mode SP (Standard) or LP (Long-Play) using the MODE button. The selection will be shown in the display. ■ To start recording, press the REC button once more. The display shows the message “REC” and the red recording LED illuminates. During recording, the length of the message and the number of the message will be shown in the display. Now speak into the microphone on the top of the unit. ■ You can break off recording using the MODE/PAUSE button. If the recording is paused for more than 30 minutes, the recording will be stopped. ■ Recording is ended by means of the REC button or the multi switch ▶/□. Every recording will be identified automatically with a number between 1 and 100.
If the maximum capacity of the selected archiving file is reached or if the maximum recording time is exceeded, the display will show the message “FULL”. In order to be able to record new memos you must first erase old or unimportant recordings.
STARTING NEXT RECORDING DIRECTLY
You can start the next recording directly while making the current recording. To do this, press the multi button. The current recording will be stopped and the next recording started immediately under a new number.
You can find out the remaining memory capacity during a recording. To do this, press and hold the FILE button and the display will show you the recording time remaining in minutes and seconds.
DIRECT RECORDING
To start recording directly even when the unit is switched off, press the REC button for 2 seconds.
REPLAYING MEMOS
■ Ensure that the HOLD slide switch is in the OFF position (slide switch down). ■ Using the FILE button select the required archive file A, B, C or D. ■ Now use the buttons and to select the required message. The memo number will be shown in the display. ■ The memo can be played back by pressing button ■ You can interrupt play back by using the MODE/PAUSE button and then continue once more with the multifunction switch ▶/□. ■ To end play back, press the multi switch ▶/□ again or press the REC button. ■ The volume can be adjusted using the small rotary control on the right-hand side of the unit.
Note: If you want to fast forward or rewind a long memo, please use the buttons ◀ and . ►
SEARCHING FOR A MEMO AUTOMATICALLY (AUTO SCAN)
If you want to find a particular memo within an archive file, you can use the SCAN function. Here, only the first 5 seconds of the memo are played back before switching automatically to the next memo.
■ To do this, press the multi switch ▶/□ for one second. The display shows SCAN. The SCAN function always starts from the number currently set. ■ When you have found the right message, press the multi switch ▶/□ once more to hear this memo in its entirety.
SEARCHING FOR A MEMO MANUALLY
■ To select a different memo, use the buttons and. If you want to search quickly within the archive file, hold the or until you see the required number in the display.
■ You can change automatically to the previous or next memo while you are listening to a memo. To do this, simply use the or
ERASING INDIVIDUAL MEMOS
■ First select the message that you want to erase. To do this,
use the FILE button and the buttons
and ▶.
■ Then press the ERASE button for one second. The memo will be played back and the message “ERASE” will flash in the display.
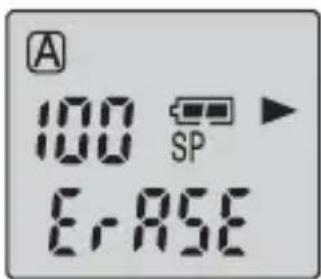
■ Press the ERASE button once more to erase the memo. If however you want to break off the erasing process, press any button other than the ERASE button.
ERASING COMPLETE ARCHIVE FILES
■ First select the required file A, B, C or D that you want to erase by using the FILE button.
■ Now press both the REC and ERASE buttons simultaneously for three seconds. The display shows the message “AL ERASE”.

■ Press the ERASE button once more to erase the memo. If however you want to break off the erasing process, press any button other than the ERASE button.
IMPORTANT INFORMATION
USER LOCK
The HOLD slide switch can be found on the left-hand side of the unit. If the function is switched on (switch in the direction of the arrow), the unit can no longer be used. This prevents any unintentional recording or play back when carrying, for example. The display shows the message “HOLD” if any button is pressed.
Your AUDIOLINE VR450 can be used with an external microphone (optional) and ear piece. The connection for the microphone MIC and the EAR piece can be found on the top of the AUDIOLINE VR450.
RECORDING OTHER SIGNAL SOURCES
Using your AUDIOLINE VR450, you can record signals from other sources such as stereo equipment or a radio, for example. To do this, connect the provided cable between the microphone input MIC and the appropriate audio output connection on the required equipment. With these units, use either the headphones output or an audio output and never a loudspeaker connection.
PLAYBACK VIA OTHER EQUIPMENT
You can also reproduce recorded memos on other audio equipment or, for example, save them digitally on a computer. To do this connect the provided cable between the ear piece connector EAR and the appropriate audio input connection on the required equipment. The volume can be adjusted using the VOL control.
FAULT FINDING
The display is blank.
- Switch the unit on using the REC button.
- Check the battery capacity.
- Check the correct polarity of the batteries.
Memos are not recorded.
- Check the position of the HOLD switch.
- Check whether the maximum storage capacity or the maximum number of memos within one archive file has been exceeded.
- Check the battery capacity.
Memos are not played back.
- Check the position of the volume control.
- If you want to listen to the memos using the inbuilt loud-speaker then an ear piece or headphones must not be connected.
- If you want to listen to the memos using a different loud-speaker then the connection cable must be connected correctly.
CARE INSTRUCTIONS
If used correctly, you will get many years of enjoyment from your AUDIOLINE VR450. The surface of the case can be cleaned with a soft, dry, lint-free cloth. Never use cleaning agents, particularly aggressive solvents. Never put the unit down in a damp or dusty place. Avoid proximity to sources of heat such as radiators and do not expose the unit to direct sunlight.
GUARANTEE
AUDIOLINE units are manufactured and tested in accordance with the most up-to-date manufacturing procedures. Selected materials and highly developed technologies ensure trouble-free operation and long life. If, however, your unit should develop a fault within the warranty period, please contact the shop where you bought your AUDIOLINE unit, taking with you your purchase receipt. The warranty period is 24 months calculated from the day of purchase. This warranty is not applicable to the batteries or battery packs used in the various products.
Warranty conditions:
All defects, which are the result of material or manufacturing faults, will be rectified free of charge within the warranty period. Claims under the warranty shall not be considered if the equipment has been tampered with by the purchaser or third parties. Damage, which results from improper handling or use, incorrect positioning or storage, inappropriate connection or Installation and through Act of God or other external influences are not covered by the warranty. In the case of complaints, we reserve the right to repair or to replace the defective parts or to exchange the unit. Parts or units that have been exchanged shall become our property. Claims for damages shall not be entertained unless they relate to intention or gross negligence on the part of the manufacturer. In accordance with these conditions, all claims under the warranty shall be made exclusively to your dealer. Rights under the warranty can no longer be enforced after the expiry of two years from the purchase and handling over of our products.
TECHNICAL DATA
| Recording time Standard | mode (SP): 116 min. Long play mode (LP): 252 min. |
| Size | 45 x 21.5 x 88 mm (WxDxH) |
| Weight | ca. 35g without batteries |
| Power supply 3V (2 x 1.5V) | |
| Operating time ca. 14 hours in recording mode ca. 10 hours in play back mode via loudspeaker at medium volume ca. 12 hours in play back mode via ear piece at medium volume | |
| Storage medium FLASH memory | |
| Number of memos 100 in each archive file | |
| Output power 80 mW at THD 10%, 8 Ohm | |
| Frequency response 500 to 3,500 Hz | |
| Recording source Inbuilt condenser microphone | |
| Input | MIC |
| Output | Ear piece/earphones (mini plug Impedance greater than 16 Ohm |
| Loudspeaker | 23 mm, 8 Ohm, dynamic |
| Ambient temperature | 0 to 40°C |
Technical data are subject to change without previous notice.
DECLARATION OF CONFORMITY
WE AUDIOLINE GmbH OF HELLERSBERGSTR. 2a 41460 NEUSS GERMANY
DECLARE UNDER OUR SOLE RESPONSIBILITY AS EU DISTRIBUTOR THAT THE PRODUCT
MODEL: VR450 DESCRIPTION: DIGITAL VOICE RECORDER
IS IN CONFORMITY WITH THE BASIC REQUIREMENTS OF DIRECTIVE: 1999/5/EC
AUTHORISED SIGNATORY:
Signature:
Name: MANFRED Position in the company: MANAGING-DIRECTOR Date of issue: 02.09.2003
A copy of this declaration will be retained for 10 years after cessation of production.

AUDIOLINE GmbH, Hellersbergstr. 2a, D-41460
PRODUCT:
NEUSS VR450
This product has been developed for use within Germany.
AUDIOLINE GmbH
Neuss
Service Hotline 0180 5 00 13 88

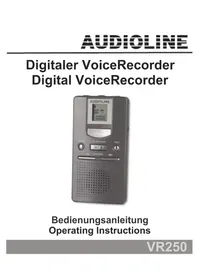

- OPERATING INSTRUCTIONS
- SAFETY INSTRUCTIONS
- OPERATIONAL ELEMENTS
- DISPLAY SYMBOLS
- OPERATION
- IMPORTANT INFORMATION
- DECLARATION OF CONFORMITY
- SAFETY INFORMATION
- BATTERIES/RECHARGEABLE BATTERIES
- DISPOSAL
- CE MARKING
- PREPARATION
- UNPACKING
- INSTALLING THE BATTERIES
- NOTE
- SWITCHING ON THE VR
- VR450 STORAGE FACILITIES
- RECORDING MEMOS
- STARTING NEXT RECORDING DIRECTLY
- DIRECT RECORDING
- REPLAYING MEMOS
- SEARCHING FOR A MEMO AUTOMATICALLY (AUTO SCAN)
- SEARCHING FOR A MEMO MANUALLY
- ERASING INDIVIDUAL MEMOS
- ERASING COMPLETE ARCHIVE FILES
- USER LOCK
- RECORDING OTHER SIGNAL SOURCES
- PLAYBACK VIA OTHER EQUIPMENT
- FAULT FINDING
- THE DISPLAY IS BLANK
- MEMOS ARE NOT RECORDED
- MEMOS ARE NOT PLAYED BACK
- CARE INSTRUCTIONS
- GUARANTEE
- WARRANTY CONDITIONS
- AUDIOLINE GMBH
- NEUSS
Brand : PHILIPS
Model : VR450
Category : VCR