
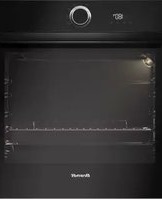
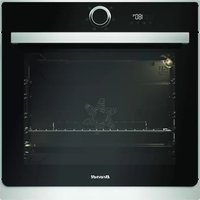
FE811XS1 - Oven BRANDT - Free user manual and instructions
Find the device manual for free FE811XS1 BRANDT in PDF.



| Product Type | Built-in oven |
| Brand | Brandt |
| Model | FE811XS1 |
| Dimensions (W x H x D) | 595 x 595 x 548 mm |
| Usable volume | 71 liters |
| Net weight | 35 kg |
| Power supply | 230 V / 50 Hz / 3.0 kW |
| Cooking power | 3.0 kW |
| Number of functions | 8 (including fan-assisted, bottom heat, top heat, grill, etc.) |
| Temperature range | 50 °C to 250 °C |
| Door type | Cold door with 4 glass panes |
| Interior lighting | Yes, with halogen bulb |
| Cleaning | Pyrolytic (high-temperature self-cleaning) |
| Child safety | Door lock during operation |
| Automatic shut-off | Yes, after a maximum of 12 hours |
| Spare parts available | Yes (on Brandt website and authorized dealers) |
| Repairability index | 8/10 |
| Energy class | A+ |
Frequently Asked Questions - FE811XS1 BRANDT
User questions about FE811XS1 BRANDT
0 question about this device. Answer the ones you know or ask your own.
Ask a new question about this device
Download the instructions for your Oven in PDF format for free! Find your manual FE811XS1 - BRANDT and take your electronic device back in hand. On this page are published all the documents necessary for the use of your device. FE811XS1 by BRANDT.
USER MANUAL FE811XS1 BRANDT
Recommendation

Caution: No laundry
Caution

Caution


Caution
Any maintenance on your equipment should be undertaken by:
- either your dealer,
- or another qualified mechanic who is an authorized agent for the brand appliances.
When making an appointment, state the full reference of your equipment (model, type and serial number). This information appears on the manufacturer's nameplate attached to your equipment.
ES 6 / SERVICIO TÉCNICO
You have just acquired a BRANDT oven and we would like to thank you.
FR 42
We have invested all our dedication and know-how in this appliance so that it would best meet your needs. With innovation and performance, we designed it to be always easy to use.
NL 62
In the BRANDT product range, you will also find a wide choice of microwaves, cooking hobs, ventilation hoods, cookers, dishwashers, washing machines, driers, fridges and freezers, that you can coordinate with your new BRANDT oven.
PT 82
Visit our website www.brandt.com where you will find all of our products, as well as useful and complementary information.
BRANDT
www.brandt.com
As part of our commitment to constantly improving our products, we reserve the right to make changes to them based on technical advances to their technical and functional features and appearance.
Warning:
Before installing and using your appliance, please carefully read this Guide to Installation and Use, which will allow you to quickly familiarise yourself with its operation.
TABLE OF CONTENTS
EN
1 / INFORMATION FOR THE USER
- Safety instructions ____ 24
- Environment 25
2 / INSTALLING YOUR APPLIANCE
- Choice of location 26
- Fitting 26
- Electric connection 27
- Changing the power supply cable 28
3 / DESCRIPTION OF YOUR APPLIANCE
- Introduction to your oven 29 • Description of the accessories ____ 30
4 / USING YOUR APPLIANCE
• Using the timer ____ 31
- Instant cooking 32
- Immediate cooking with programmed duration 33
5 / OVEN COOKING MODES 34
6 / CARING FOR AND CLEANING YOUR APPLIANCE
- Cleaning the outer surfaces 35 • Catalytic walls ____ 36
- Cleaning the cavity 37
7 / TROUBLESHOOTING 38
- Changing the bulb 39
1 / NOTICES TO THE USEREN
Warning Keep this user guide with your appliance. If the appliance is ever sold or transferred to another person, ensure that the new owner receives the user guide. Please become familiar with these recommendations before installing and using your oven. They were written for your safety and the safety of others.
• SAFETY RECOMMENDATIONS
- This oven was designed for use by private persons in their homes. It is intended solely for cooking foodstuffs. This oven does not contain any asbestos-based components.
- This appliance is to be used by adults. Make sure that children do not touch it and that they do not treat it as a toy. Make sure that they do not touch the appliance's control panel.
- When you receive the appliance, unpack or have it unpacked immediately. Give it an overall inspection. Make note of any concerns or reservations on the delivery slip and make sure to keep a copy of this form.
- Your appliance is intended for standard household use. Do not use it for commercial or industrial purposes or for any other purpose than that for which it was designed.
- Do not modify or attempt to modify any of the characteristics of this appliance. This would be dangerous to your safety.
- Keep small children away from the appliance while it is in use. Thus you will prevent them from burning themselves by tipping over cookware. Moreover, the front of your appliance is hot during use and during cleaning (pyrolysis).
- Never pull your appliance by the door handle.
- Before using your oven for the first time, heat it up while empty for approximately 15 minutes. Ensure that the room is sufficiently ventilated. You may notice a particular odour or a small amount of smoke. All of this is normal.
– During cooking, ensure that the door of your oven is firmly closed so that the seal can properly fulfil its function. - When in use, the appliance becomes hot. Do not touch the heating elements located inside the oven. You are at risk of incurring serious burns. - When inserting or removing your dishes from the oven, do not bring your hands near to the upper heating elements; use insulated cooking mitts. - After cooking, do not touch the cookware (grid, turnspit, etc.) with bare hands. - Never place aluminium paper directly in contact with the bottom element (See the "Description of your oven" chapter), the accumulated heat could cause deterioration of the enamel. - Do not place heavy items on the open oven door; ensure that children cannot climb or sit on it. - To avoid damaging the control panel of your appliance, do not leave the door open when the oven is functioning or still hot. - The oven must be turned off for all attempts to clean the cavity. - Intensive and prolonged use of the appliance may require additional ventilation achieved by opening the window or increasing the power of the mechanical fan. - In addition to the accessories provided with your oven, only use dishes that are resistant to high temperatures (follow manufacturer's instructions). - After using your oven, ensure that all the controls are in the off position. - Never use steam or high-pressure devices to clean the oven (requirement imposed by electrical safety). - For your safety, your oven is equipped with an AUTOMATIC STOP, if you forget to turn off your oven by mistake. After 10 hours of operation, the AS (Automatic Stop) feature is activated and your oven stops running. AS appears instead of the time and a series of 2 successive beeps is emitted for a short time.
1 / NOTICES TO THE USER
EN
• CARE FOR THE ENVIRONMENT
- This appliance's packing materials are recyclable. Recycle them and play a role in protecting the environment by depositing them in municipal containers provided for this purpose.
- Your appliance also contains many recyclable materials. It is therefore marked with this logo to indicate that used appliances must not be mixed with other waste. Recycling of the appliances organised by your manufacturer will thus be undertaken in optimum conditions, in accordance with European directive 2002/96/CE relative to electrical and electronic equipment waste. Consult your city hall or your retailer to find the drop-off points for used appliances that is nearest to your home.
- We thank you for your help in protecting the environment.

Warning Installation
Installation should only be performed by qualified installers and technicians.
This appliance complies with the following European directives:
- Low Voltage Directive 73/23/CEE modified by directive 93/68/CEE for attribution of CE approval.
- Electromagnetic Compatibility Directive 89/336/CEE modified by directive 93/68/CEE for attribution of CE approval.
- CE Regulation 1935/2004 concerning materials and objects designed to come into contact with foodstuffs.
2 / INSTALLING YOUR APPLIANCE


Fig. 01
The diagrams above indicate the dimensions of a cabinet that would be acceptable for your oven.
The oven can be installed under a work top or in a column of cabinetry (open* or closed) having the appropriate dimensions for built-in installation (see adjacent diagram).
Your oven has optimised air circulation that allows it to achieve remarkable cooking and cleaning results if the following guidelines are respected:
- Centre the oven in the cabinet so as to guarantee a minimum distance of 5 mm between the appliance and the neighbouring cabinet.
- The destination cabinet must be made of or coated with a material that is heat resistant.
- For greater stability, attach the oven in the cabinet with two screws through the holes
provided for this purpose on either side of the front side panels (fig.1).
• BUILD-IN
To do this:
1) Remove the rubber screw covers to access the mounting holes. 2) Drill a ∅ 2 mm hole in the cabinet panel to avoid splitting the wood. 3) Attach the oven with the two screws. 4) Replace the rubber screw covers (they also serve to absorb the shock caused by closing the oven door). (*) If the cabinet is open, its opening must be 70 mm (maximum).
Tip
To be certain that you have properly installed your appliance, do not hesitate to call on a household appliance specialist.
2 / INSTALLING YOUR APPLIANCE
EN

• ELECTRICAL CONNECTION
Electrical safety must be provided by a correct build-in. During build-in and maintenance operations, the appliance must be unplugged from the electrical grid; fuses must be cut off or removed.
The electrical connections are made before the appliance is installed in its housing.
Ensure that:
- the electrical installation has sufficient voltage, -the electrical wires are in good condition
- the diameter of the wires complies with the installation requirements.
Your oven must be connected with a power cord (standardised) with three 1.5 mm² conductors (1 ph +1 N + ground) that must be connected to a monophase 220-240 V~ net-
work via a CEI 60083 standardised receptacle (1 ph +1 N + ground lead) or an all-pole cut-off device, in compliance with installation regulations.
Warning
The safety wire (green-yellow) is connected to the appliance's terminal and must be connected to the ground lead of the electrical set-up.
In the case of a hook-up with electrical outlet, it must be accessible after installation.
The fuse in your set-up must be 16 amperes. If the power cable is damaged, it must be replaced by a cable or a special kit available from the manufacturer or its After-Sales Service Department.
EN 2 / INSTALLING YOUR APPLIANCE
Warning
We cannot be held responsible for any accident resulting from an inexistent, defective or incorrect ground lead.
If the electrical installation at your residence requires any changes in order to hook up your Appliance, call upon a professional electrician.
If the oven malfunctions in any way, unplug the appliance or remove the fuse corresponding to the sector where the oven is hooked up.
• CHANGING THE POWER CORD
—The power cable (H05 RR-F, H05 RN-F or H05 VV-F) must be of sufficient length to be connected to the built-in oven while it sits on the floor in front of the cabinet. To do this, the appliance must be disconnected from the electrical network: —Open the inspection flap located at the lower right of the back cover by unscrewing the two screws, then pivot the inspection flap. - Strip 12 mm along each wire of the new power cable. —Carefully twist together the strands. —Loosen the screws from the terminal board and remove the power cord to be replaced. - Introduce the power cable through the side of the cover in the cable clip located to the right of the terminal board. —All the strands of the electricity wires must be captured under the screws. —The phase wire on the L terminal. —The green-yellow coloured ground wire should be connected to the terminal. —The neutral conductor (blue) on the N terminal. —Screw down tightly the screws on the terminal board and check the connection by pulling on each wire. - Attach the cable with the cable clip located to the right of the terminal board. - Close the inspection flap using the two screws.
3 / DESCRIPTION OF YOUR APPLIANCE
EN
• INTRODUCTION TO YOUR OVEN
A Timer
D Light
B Temperature selector switch
E Shelf support indicator
C Function selector switch
F Hole for rotisserie

Tip
This Guide to Installation and Use is valid for several models. Minor differences in details and fittings may emerge between your appliance and the descriptions provided.
3 / DESCRIPTION OF YOUR APPLIANCE
• DESCRIPTION OF THE ACCESSORIES
• Anti-rocking safety grid (fig.1)
The grid can be used to hold all dishes and moulds containing foodstuffs to be cooked or browned.
It can be used for barbecues (to be placed directly on the grid).

• Multi-purpose dish (fig.2)
Inserted under the grill, it catches juices and grease from the grilled food. It can also be used half-full of water for double-boiler cooking methods. Avoid placing roasts or meats directly in the dish because this is certain to cause significant spattering on the oven walls.

• Rotisserie (fig.3) optional
In order to use it:
- place the hollow dish on the grid on shelf support number 1 to catch the cooking juices or on the bottom heating element if the item being roasted is too big.
- slide one of the forks onto the spit; skewer the piece of meat to be roasted; slide on the second fork; centre and tighten by screwing the two forks.
- place the spit in its cradle.
- push slightly to insert the point of the spit in the guide slot located at the back of the oven.
- Remove the handle by unscrewing it, in order to be able to close the door. After cooking, screw the spit handle back on to remove the roast without burning yourself.


Tip
To clean dishes with a non-stick enamel coating, let them cool before washing them by hand with dishwashing liquid. Avoid abrasive sponges. Do not cut on them with a knife or a metallic pizza cutter; use plastic or silicone utensils instead.
4 / USING YOUR APPLIANCE
EN
• USING THE TIMER
It allows for the automatic switching off of the oven after the displayed cooking time.
- Turn the knob to the position corresponding to the desired time (in minutes).
Example: 40 minutes (fig.1).
When the time has elapsed, the timer moves to the "0 min" position and the oven is switched off (fig.2).
Should you wish to use the oven without the timer, turn the knob to the “ ” position (fig.3).


4 / USING YOUR APPLIANCE EN
- INSTANT COOKING
The timer must be in the “*” position (fig. 1).
- Turn the function selector to the position of your choice.
Example: position “ (fig.2).
- Turn the temperature selector to the temperature recommended in your recipe.
Example: temperature setting 210° (fig.3).
After these steps, the oven heats up and the temperature selector indicator lights up or turns itself off in accordance with the rate of temperature adjustments.


Warning
Do not hang a towel or cloth on the oven handle.
4 / USING YOUR APPLIANCE
EN
• IMMEDIATE COOKING WITH PROGRAMMED DURATION
- Turn the timer to the position of the desired time.
Example: 40 minutes (fig.1).
- Turn the function selector to the position of your choice.
Example: position “ (fig.2).
- Turn the temperature selector to the temperature recommended in your recipe.
Example: temperature setting 210° (fig.3).
After these steps, the oven starts heating up and the temperature selector indicator lights up.
When your cooking is done, the timer knob is in position 0 and the oven is switched off.
NOTE: There is no audible signal at the end of cooking.
At the end of the cooking session, reset the timer to the "0" position and the functions
and temperature selectors to '0'.


Warning
After a cooking cycle, the cooling fan continues to operate for a period of time in order to guarantee optimal oven reliability.
Warning It is possib
Warning
It is possible to change or cancel the timer's programming at any time
5 / OVEN COOKING MODES
* TRADITIONAL PULSED

- Cooking is controlled by the upper and lower heating elements and by the fan.
- Rapid temperature increase: Some dishes can be placed in the oven while it is still cold.
- Recommended for meats, fish and vegetables, preferably placed in a terracotta dish.
FAN ASSISTED GRILL

- Cooking controlled, alternately, by the upper element and by the fan.
- Preheating is unnecessary. Roasts and poultry are juicy and crispy all over.
- Recommended for all poultry or meat, for sealing and thoroughly cooking leg of lamb, sides of beef. To retain fish steaks' moist texture.
PULSED OVEN SHELF
- Cooking is controlled by the lower element combined with reduced input from the grill and use of the fan.
- Cooking heat from the bottom with a small amount of heat from the top. Place the grid on the lowest shelf support.
- Recommended for moist dishes (quiches, juicy fruit tarts, etc...). The crust will be thoroughly cooked on the bottom. Recommended for dishes that rise (cakes, brioche, kugel-hopf...) and for soufflés that will not be stuck by a crust formed on the top. cooking of multiple items on up to three levels.
TRADITIONAL
- Cooking controlled by the upper and lower heating elements.
- Requires preheating before placing the dish in the oven.
- Recommended for slow, gentle cooking: rich game... For retaining the juices in red meat roasts. For simmering in a covered stew pan dishes that were begun on the hob (coq au vin, stew).
* SPECIAL POULTRY

- Cooking controlled by the upper and lower heating elements with no fan.
- This position provides energy saving of around 25% while preserving the quality of the cooking. The ECO position is used for the energy label performance.
- You will save energy throughout the cooking cycle, but it may take longer.
GRILL • Cooking
- Cooking controlled by the upper element without the fan.
- Preheat the oven for five minutes. Slide the drip tray onto the lower shelf support in order to catch the fat.
- Recommended for grilling chops, sausages, toast or prawns placed on the grill.
* Programme(s) used to obtain the results indicated on the energy label in compliance with European standard EN 50304 and in accordance with European Directive 2002/40/CE.
6 / CARING FOR AND CLEANING YOUR APPLIANCE
EN
• CLEANING THE OUTER SURFACES
To clean the oven door, use a soft cloth moistened with window cleaner.
Do not use abrasive cleaning products or hard metallic scrapers for cleaning the oven's glass door, which could scuff the surface and cause the glass to shatter.
To preserve your appliance, we recommend that you use Clearit cleaning products.

Professional expertise working for you at home
Clearit offers you professional products and solutions designed for the daily care of your household appliances and kitchens.
They are on sale at your regular retailer, along with a complete line of accessories and consumable products.
• CATALYTIC WALLS (OPTIONAL)
- This oven can be fitted with detachable walls covered with a special microporous enamel (catalytic enamel), which provides its self-degreasing properties. As soon as dirt appears, it spreads out and is dispersed into the microporous holes. It is oxidised on both sides and gradually disappears. The self-degreasing enamel is mainly suited to fatty, rather than sugary substances. This is why the oven floor, which is more subject to sugary overflow, is not covered with this enamel.
We strongly recommend:
- That you do not scrub these catalytic walls with metallic brushes, pointed or sharp instruments.
- That you do not try to clean them with commercial scouring products.
- When grilling food, the temperature of the walls is not always sufficient to eliminate major spattering of fat.
In this case, following cooking, prolong the heating of the oven for 20 to 30 minutes, at the maximum temperature of the chosen sequence.
If traces of spatter remain, they will be reduced during subsequent cooking operations.
6 / CARING FOR AND CLEANING YOUR APPLIANCEEN
• ASSEMBLY OF CATALYTIC WALLS (OPTIONAL)
Before commencing disassembly, allow the appliance to cool down and check that the cooking selector switch is in the 0 position.
Lateral walls (1)
Unhook the wire shelf support (2) at the front by lifting it (diagram A). Pull the shelf support structure towards you, lifting it so as to unhook the rear attachment (diagram B). Remove it from the 2 holes (3) in the catalytic wall and from the oven cavity. Then remove the catalytic wall (1). Replace the new elements (wall and/or shelf supports) by performing the reverse operations.
Back wall (4)
Before performing this operation, unplug the oven.
Completely unscrew the screw (5) located at the top of the back wall. Tilt the wall forwards in order to remove it from the oven cavity. Position the new panel by reversing these steps.
Plug in the oven again.


Warning
- The oven must be turned off when cleaning inside the cavity.
6 / CARING FOR AND CLEANING YOUR APPLIANCE
EN
• CLEANING THE CAVITY
Before you clean the cavity, let the oven cool down and confirm that all the knobs are in the OFF position.
General guidelines:
* Do not spray water on the appliance. * Abrasive powders and scouring pads should be avoided.
POLISHED METAL SURFACES
Use commercially available products designed to take care of polished metals.
OVEN DOOR WINDOW
After cooking food that causes spattering, it is recommended that you clean the inside oven door window with soapy water.
Your oven is easy to clean; here are some guidelines to help you:
| Type of smears | How to proceed | Products to use |
| Light | Thoroughly wet the area with hot water | Dish sponge |
| Accumulation of baked-on smears | Allow product to act for 30 minutes on a warm oven or overnight on a cold oven. | "Special oven cleaner" aerosolFollow the instructions for use |


Warning The oven n
The oven must be turned off when cleaning inside the cavity.
7 / TROUBLESHOOTINGEN
If you have a doubt about the correct functioning of your oven, this does not necessarily mean that there is a malfunction. In any event, check the following items:
| YOU OBSERVE THAT... | POSSIBLE CAUSES | WHAT SHOULD YOU DO? |
| The oven is not heating. | - The oven is not connected to the power supply.- Your fuse is out of order.- The selected temperature is too low.- The thermostat is faulty | → Plug in your oven.→ Replace the fuse in your electrical set-up and check its capacity (16A).→ Increase the selected temperature.→ Call the After-Sales Service Department. |
| The oven light is not working. | - The light is out of order.- The oven is not connected or the fuse is not working. | → Change the bulb.→ Plug in your oven or change the fuse. |
| The temperature indicator stays permanently lit. | - Defective thermostat | → Call the After-Sales Service Department. |
| The cooling fan continues to operate after the oven stops. | - The fan should work for 1 hour maximum after cooking.- If it does not stop after 1 hour | → Open the oven door to accelerate the cooling down of the oven→ Call the After-Sales Service Department. |
| The oven light is dimly lit when the oven is switched off. | - The oven is not connected correctly. | → Check your oven's electrical connection. The phase conductor L (black) must be connected to the L phase terminal of your connection box or your power plug. The N neutral conductor (blue) must be connected to the N neutral lead of your connection box or your power plug. |

Warning
- Repairs to your appliance should only be performed by professionals. Non-standard repairs may be a source of danger for the user.

Tip
In all circumstances, if your efforts are not sufficient, contact the After-Sales Service Department without delay.
7 / TROUBLESHOOTING
EN
Warning - Disconne
- Disconnect your oven before performing any task on the bulb to avoid the risk of electric shock and, if necessary, let the appliance cool down.

Tip
To unscrew the port and the bulb, use a rubber glove, which will make disassembly easier.
• CHANGING THE BULB
The bulb is located on the ceiling of your oven's cavity.
a) Unplug the oven. b) Unscrew the lighting port (fig.1). c) Unscrew the bulb in the same direction.
Bulb specifications:
- 15 W
- 220-240 V~
- 300°C
- E 14 cap
d) Replace the bulb then reposition the port and reconnect your oven.

Any maintenance on your equipment should be undertaken by:
- either your dealer,
- or another qualified mechanic who is an authorized agent for the brand appliances.
When making an appointment, state the full reference of your equipment (model, type and serial number). This information appears on the manufacturer's nameplate attached to your equipment.
• Multi-purpose plate (fig.2)
• Rotisserie (fig.3) optional
To use it:

4 / USING YOUR APPLIANCE
EN
• IMMEDIATE COOKING AND PROGRAMMED DURATION


Caution
• CONSUMER RELATIONS
3 / DESCRIPTION OF THE APPLIANCE
2 / INSTALLING THE APPLIANCE NL

Caution
3 / DESCRIPTION OF THE APPLIANCE
NL
• PRESENTATION OF THE OVEN
A Timer
D Lamp
B Temperature knob
E Shelf position display
© Selector knob
3 / DESCRIPTION OF THE APPLIANCE
• DESCRIPTION OF THE OVEN ACCESSORIES
• Rotisserie (fig.3) optional
Advice Before

Caution Hang


Caution


Caution
Any maintenance on your equipment should be undertaken by:
- either your dealer,
- or another qualified mechanic who is an authorized agent for the brand appliances.
When making an appointment, state the full reference of your equipment (model, type and serial number). This information appears on the manufacturer's nameplate attached to your equipment.
- Multi-purpose plate (fig.2)
Advice

Attention

Attention

Caution - For quality
Any maintenance on your equipment should be undertaken by:
- either your dealer,
- or another qualified mechanic who is an authorized agent for the brand appliances. When making an appointment, state the full reference of your equipment (model, type and serial number). This information appears on the manufacturer's nameplate attached to your equipment.
- RECOMMENDATION
- CAUTION: NO LAUNDRY
- CAUTION
- ES 6 / SERVICIO TÉCNICO
- FR
- NL
- PT
- WARNING
- TABLE OF CONTENTS
- EN
- INFORMATION FOR THE USER
- INSTALLING YOUR APPLIANCE
- DESCRIPTION OF YOUR APPLIANCE
- USING YOUR APPLIANCE
- OVEN COOKING MODES
- CARING FOR AND CLEANING YOUR APPLIANCE
- TROUBLESHOOTING
- NOTICES TO THE USEREN
- SAFETY RECOMMENDATIONS
- NOTICES TO THE USER
- CARE FOR THE ENVIRONMENT
- WARNING INSTALLATION
- BUILD-IN
- ELECTRICAL CONNECTION
- ENSURE THAT
- EN 2 / INSTALLING YOUR APPLIANCE
- CHANGING THE POWER CORD
- TIP
- DESCRIPTION OF THE ACCESSORIES
- ANTI-ROCKING SAFETY GRID (FIG.1)
- MULTI-PURPOSE DISH (FIG.2)
- ROTISSERIE (FIG.3) OPTIONAL
- USING THE TIMER
- USING YOUR APPLIANCE EN
- INSTANT COOKING
- IMMEDIATE COOKING WITH PROGRAMMED DURATION
- WARNING IT IS POSSIB
- TRADITIONAL PULSED
- FAN ASSISTED GRILL
- PULSED OVEN SHELF
- TRADITIONAL
- SPECIAL POULTRY
- GRILL • COOKING
- CLEANING THE OUTER SURFACES
- PROFESSIONAL EXPERTISE WORKING FOR YOU AT HOME
- CATALYTIC WALLS (OPTIONAL)
- WE STRONGLY RECOMMEND
- CARING FOR AND CLEANING YOUR APPLIANCEEN
- ASSEMBLY OF CATALYTIC WALLS (OPTIONAL)
- LATERAL WALLS (1)
- BACK WALL (4)
- CLEANING THE CAVITY
- GENERAL GUIDELINES
- POLISHED METAL SURFACES
- OVEN DOOR WINDOW
- WARNING THE OVEN N
- TROUBLESHOOTINGEN
- WARNING - DISCONNE
- CHANGING THE BULB
- MULTI-PURPOSE PLATE (FIG.2)
- IMMEDIATE COOKING AND PROGRAMMED DURATION
- CONSUMER RELATIONS
- DESCRIPTION OF THE APPLIANCE
- INSTALLING THE APPLIANCE NL
- DESCRIPTION OF THE OVEN ACCESSORIES
- ADVICE BEFORE
- CAUTION HANG
- ADVICE
- ATTENTION
- CAUTION - FOR QUALITY
Brand : BRANDT
Model : FE811XS1
Category : Oven