
Comfort Hi206 - Iron PHILIPS - Free user manual and instructions
Find the device manual for free Comfort Hi206 PHILIPS in PDF.
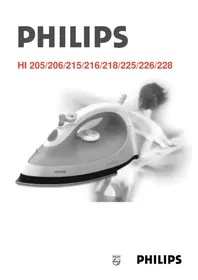


| Product Type | Steam Iron |
| Brand | Philips |
| Model | Comfort Hi206 |
| Power | 2000 W |
| Voltage | 220-240 V |
| Frequency | 50-60 Hz |
| Soleplate Material | Non-stick coating |
| Water Tank Capacity | 200 ml |
| Continuous Steam Output | 20 g/min |
| Steam Burst | 80 g/min |
| Spray Function | Yes |
| Dry Ironing | Yes |
| Anti-Drip System | Yes |
| Self-Cleaning Function | Yes |
| Automatic Shut-Off | Yes, after 8 minutes of inactivity |
| Cord Length | 2 m |
| Dimensions (W x D x H) | 30 x 12 x 18 cm |
| Weight | 1.2 kg |
| Color | White/Blue |
| Included Accessories | Measuring cup, user manual |
| Warranty | 2 years |
Frequently Asked Questions - Comfort Hi206 PHILIPS
User questions about Comfort Hi206 PHILIPS
0 question about this device. Answer the ones you know or ask your own.
Ask a new question about this device
Download the instructions for your Iron in PDF format for free! Find your manual Comfort Hi206 - PHILIPS and take your electronic device back in hand. On this page are published all the documents necessary for the use of your device. Comfort Hi206 by PHILIPS.
USER MANUAL Comfort Hi206 PHILIPS
Keep page 3 and page 46 open when reading these operating instructions.
Important
- Read the instructions for use and look at the illustrations before you start using the steam iron.
- Remove any sticker or protective foil from the soleplate before you use the appliance for the first time. Clean the soleplate with a soft cloth.
- To prevent damage: check if the voltage indicated on the appliance corresponds to the local mains voltage before you connect the appliance.
- Use an earthed wall socket.
- Never use the appliance if it is damaged in any way.
- Unplug the appliance from the mains:
- before filling the iron with water or pouring out the remaining water after use;
- before cleaning the iron.
- When you have finished ironing and also when you leave the iron for a short while, always:
- set the steam control to position O;
- put the iron on its heel;
- remove the mains plug from the wall socket.
- Do not put vinegar, starch, chemically descaled water or descaling agents in the water reservoir.
- Make sure the cord does not touch the soleplate when it is hot.
- The ejected steam is hot and therefore dangerous. Never direct the steam at people.
- Always store the iron by placing it on its heel in a safe and dry place.
- Never immerse the iron in water.
- Some parts of the iron have been slightly greased and, as a result, the iron may give off some smoke when it is switched on for the first time. This phenomenon is harmless and will soon cease.
- This appliance is not intended for use by young or infirm persons without supervision.
- Young children should be supervised to ensure that they do not play with the appliance.
- If the mains cord of this appliance is damaged, it may only be replaced by a special cord assembly available from the manufacturer or its service agent.
General description (fig. 1)
A Temperature control dial
B Steam control dial
O = no steam
♂ = steam
♂ = maximum steam
● = self-clean
● Spray button ⚪ (type HI 215/216/225/226/228)
D Spray nozzle (type HI 215/216/225/226/228)
E Temperature pilot light (amber)
F Water filling opening
©Water reservoir
HType plate
Cord
J Extra steam ⚙ (press) (type HI 225/226/228)
Ironing temperature guide
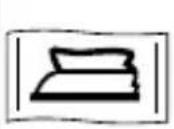
- Follow the ironing instructions on the garment label. If these instructions are missing but you do know the kind of fabric, consult the table.
- This table is only valid for plain fabrics and not for materials to which finishes, glosses etc. have been applied. Textile to which some kind of finish has been applied (gloss, crinkle, relief etc.) is best ironed at lower temperatures.
- First sort the laundry according to ironing temperature: put wool with wool, cotton with cotton, etc.
- The iron heats up more quickly than it cools down. Therefore, start ironing articles that need to be ironed at the lowest temperature, such as those made of synthetic fibres.
- If the fabric consists of various kinds of fibres, always select the temperature required by the most delicate fibre, i.e. the lowest
temperature. If, for example, an article consists of 60% polyester and 40% cotton, it should be ironed at the temperature indicated for polyester (●) and without steam.
- If you do not know what kind(s) of fabric(s) the article is made of, find out the appropriate temperature by ironing a piece of material that will not be visible when you wear or use the article and start ironing at a relatively low temperature.
- Pure woollen fabrics (100% wool) may be pressed with the iron set to a steam position. It is advisable to set the steam control (B) to maximum position and to use a dry pressing cloth.
- When steam-ironing woollen fabrics, shiny patches may occur. You can prevent this by turning the article inside out and ironing the reverse side.
Fabric table
| Instructions on label | Fabric Temperature control | Steam control | Extra Steam | Spray | |
 |  |  |  |  |  |
 | Synthetic fibres, e.g. acryl, viscose, polyamide (nylon), polyester Silk | MIN||||●○|||||||||||||||||||||||||||||||||||||||||||||||||||||||||||||||||||||||||||||||||||||||||||||||||||||||||||||||||||||||||||||||||||||||||||||||||||||||||||||||||||||||||||||||||||||||||||||||||||||||||Wool···········································································································································································································||W4XX||AGZ8||Extrav|| | ○ | Extra |  |
 | Wool |  | |||
 | Cotton Linen | MAX |  | Extrav|| | |
 | Please note that ☑ on the label means: “This article cannot be ironed!” | ||||
- Velvet and other fabrics which tend to acquire shiny spots should be ironed in one direction only (along with the nap) while applying very little pressure.
Always keep the appliance moving while ironing.
- To prevent shiny spots, articles made of synthetic material or silk should be ironed inside out. Do not use the spray function, as spraying could cause stains.
Filling with water (for steam-ironing and spraying)
- Unplug the iron before you fill it (or before you pour out the remaining water). Set the steam control (B) to position O (= no steam) (fig. 2).
- Fill the iron with normal tap water when using it for the first time.
- For refilling, you can also use tap water. However, if the water is very hard, it is advisable to use distilled water.
Do not put vinegar, starch, chemically descaled water or descaling agents in the water reservoir!
- Pour water into the filling aperture to the maximum (MAX) level (fig. 3).
Setting the temperature (see table)
- Put the iron on its heel.
- Set the temperature control (A) to the correct ironing temperature (fig. 4).
- Insert the mains plug into the wall socket.
- The iron is ready to be used after the amber temperature pilot light (E) has first gone off and then come on again.
- The amber pilot light (E) will come on from time to time during ironing.
- If you set the temperature control (A) to a lower setting after ironing at a high temperature, do not resume ironing until after the amber pilot light (E) has come on and has gone off again. If you don’t wait for the light to go out again, you run the risk of scorching the fabric.
Ironing without steam (see table)
- Set the Steam control (B) to position O (= no steam) (fig. 2).
- For more details on how to switch on the iron, see the section headed "Setting the temperature".
Steam-ironing (see table)
- Make sure there is enough water in the water reservoir.
- Set the steam control (fig. 5):
No steam setting (O) for temperature settings MIN to ●●.
Steam setting (☐) for temperature settings ●● to ●●●.
Maximum steam setting (💡) for temperature settings ●●● to MAX.
- Water may leak from the soleplate if a too low temperature (●● or lower) has been selected.
- For more details on how to switch on the iron, see the section headed "Setting the temperature".
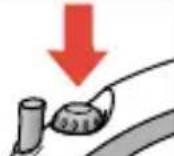
Extra Steam ⚙ (types HI 225/226/228) (see table)
- This feature provides extra steam to remove stubborn creases.
- Apply Extra Steam only at ●●● to MAX temperature setting.
- Set the steam control to the steam position ⚙ (fig. 6).
- Press and hold the Extra Steam button (J) ⚙ (max. 5 seconds) (fig. 7). Then release the button.
Wait at least 1 minute before applying Extra Steam again to prevent water from dripping out of the soleplate.
Spraying ☎ (see table) (type HI 215/216/225/226/228)
- To remove stubborn creases from fabrics at any temperature, push the spray button ⚙ (C) a couple of times to damp the laundry (fig. 8).
- Make sure there is enough water in the water reservoir.
Self-cleaning ●
- The iron has a self-clean function to remove scale and impurities.
- Use the self-clean function once every two weeks. If the water used is very hard, you should use the self-clean function more often.
- Set the Steam control (B) to position O (fig. 2).
- Set the temperature control dial (A) to MAX.
- Fill the water reservoir (G) to the maximum (MAX) level.
- Plug in the iron to the mains, allow the iron to heat up.
- When the amber pilot light (E) goes off, unplug the iron.
- Hold the appliance horizontally over a sink (fig. 9).
- Set the steam control to position ● (self-clean) (fig. 10).
The steam control will then spring up slightly.
- Pull the steam control up slightly (fig. 10).
- Boiling water and steam will now come out of the holes in the soleplate. Impurities and scale (if any) are washed away with it.
Move the iron forwards and backwards while this happens (fig. 11).
- Repeat self-clean if a lot of impurities are flushed out.
- You can pull the steam control further upwards to remove the steam control needle (fig. 12). It is then possible to remove any scale from the needle. For this purpose you may use vinegar.
Avoid bending or damaging the steam control needle!
- Replace the steam control needle. Insert the point of the needle exactly in the centre of the aperture and fit the small notch at the side into the spacing (fig. 13).
- Press the steam control (fig. 14).
- Set the steam control to position O (fig. 2).
Do not put vinegar, starch, chemically descaled water or descaling agents in the water reservoir.
After self-cleaning
- Plug the iron into the mains to dry up the soleplate.
- When the amber pilot light (E) goes off, unplug the iron.
- Move the iron gently over a piece of used cloth to remove water stains.
Cool down the iron for storage.
Cleaning
- Before cleaning remove the mains plug from the wall socket and allow the iron to cool down sufficiently.
- Scale and other stains can be wiped off the soleplate with a damp cloth and a non-abrasive (liquid) cleaner.
Keep the soleplate smooth: avoid hard contact with metal objects.
- The upper part of the appliance can be cleaned with a damp cloth.
- From time to time clean the inside of the water reservoir by filling with water and shaking (fig. 15). Then pour the water back out (fig. 16).
Storage
- Remove the mains plug from the wall socket.
- Pour any remaining water out of the water reservoir (fig. 16).
- Set the Steam control (B) to position O (fig. 2).
- Stand the iron upright and let it cool down sufficiently.
- Wind the mains cord around the cord storage (fig. 17).
- Always store the iron standing on its heel (fig. 18).
- Always keep the iron in a safe dry place.
Regularly check if the mains cord is still in a good and safe condition.


- IMPORTANT
- GENERAL DESCRIPTION (FIG. 1)
- A TEMPERATURE CONTROL DIAL
- B STEAM CONTROL DIAL
- IRONING TEMPERATURE GUIDE
- FILLING WITH WATER (FOR STEAM-IRONING AND SPRAYING)
- DO NOT PUT VINEGAR, STARCH, CHEMICALLY DESCALED WATER OR DESCALING AGENTS IN THE WATER RESERVOIR
- SETTING THE TEMPERATURE (SEE TABLE)
- IRONING WITHOUT STEAM (SEE TABLE)
- STEAM-IRONING (SEE TABLE)
- EXTRA STEAM ⚙ (TYPES HI 225/226/228) (SEE TABLE)
- SPRAYING ☎ (SEE TABLE) (TYPE HI 215/216/225/226/228)
- SELF-CLEANING ●
- AVOID BENDING OR DAMAGING THE STEAM CONTROL NEEDLE
- AFTER SELF-CLEANING
- CLEANING
- KEEP THE SOLEPLATE SMOOTH: AVOID HARD CONTACT WITH METAL OBJECTS
- STORAGE
Brand : PHILIPS
Model : Comfort Hi206
Category : Iron