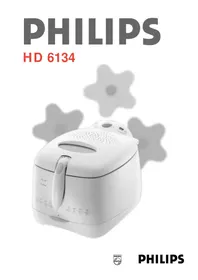
Cucina HD6134 - Deep fryer PHILIPS - Free user manual and instructions
Find the device manual for free Cucina HD6134 PHILIPS in PDF.


| Product type | Electric deep fryer |
| Brand | Philips |
| Model | Cucina HD6134 |
| Frying capacity | 1 kg of potatoes |
| Oil capacity | 1.5 liters |
| Power | 2000 W |
| Adjustable temperature | Yes, with thermostat |
| Odor filter | Yes, integrated in the lid |
| Removable basket | Yes, with cool-touch handle |
| Lid | Transparent with viewing window |
| Indicator light | Yes, temperature indicator |
| Automatic shut-off | Yes, in case of overheating |
| Cool-touch handle | Yes, on basket and lid |
| Dimensions (L x W x H) | 25 × 30 × 25 cm approximately |
| Weight | Approximately 3 kg |
| Power supply | 220-240 V, 50-60 Hz |
| Power cord | Removable, stores in base |
| Cleaning | Removable parts dishwasher safe |
| Filter maintenance | Filter washable with soapy water |
Frequently Asked Questions - Cucina HD6134 PHILIPS
User questions about Cucina HD6134 PHILIPS
0 question about this device. Answer the ones you know or ask your own.
Ask a new question about this device
Download the instructions for your Deep fryer in PDF format for free! Find your manual Cucina HD6134 - PHILIPS and take your electronic device back in hand. On this page are published all the documents necessary for the use of your device. Cucina HD6134 by PHILIPS.
USER MANUAL Cucina HD6134 PHILIPS
English Page 4
- Keep pages 3 and 50 open when reading these operating instructions.
Français Page 9
English
Important
- Read the instructions for use and look at the illustrations before you start using the appliance.
- Check if the voltage indicated on the type plate of the fryer corresponds to the mains voltage in your home.
- Only connect the appliance to an earthed wall socket.
- Clean the separate parts of the fryer thoroughly before you use the appliance for the first time (see 'Cleaning').
- Never immerse the control panel with the heating element in water nor rinse these parts under the tap.
- Make sure all parts are completely dry before you fill the fryer with oil or liquid fat.
- We advise you to use frying oil or liquid frying fat. You can also use solid frying fat, but in that case you will have to take extra precautions to prevent the fat from spattering and the heating element from overheating (see 'Using solid fat' and 'Tips').
- Do not switch the appliance on until you have filled it with oil or liquid fat.
- Only use types of oil or fat that contain an antifoam agent and that are suitable for deep frying. You can find this information on the package or label.
- Make sure the fryer is always filled to a level between the two indication marks on the inside of the inner pot. Always check the oil or fat level before you switch the appliance on.
- A thermal safety cut-out will switch the appliance off if it overheats (see 'Safety').
- In these instructions for use you will find the maximum amounts of food to be fried at one time. Do not exceed these amounts (see 'Table')
- During frying, hot steam is released through the filter. Keep your hands and face at a safe distance from the steam. You should also be careful of the hot steam when you open the lid.
- Keep the appliance out of the reach of children when you use it and do not let the mains cord hang over the edge of the table or worktop on which the appliance is standing.
• After you have used the appliance, set the temperature control to the lowest setting (turn it completely to the left). Remove the plug from the wall socket and let the oil or fat cool down. Do not move the fryer until it has cooled down sufficiently. - If parts of this appliance are damaged, they may only be replaced by Philips or a service centre authorised by Philips, since repair requires special tools and/or parts.
- Save these instructions for use for future reference.
General description (fig. 1)
A Lid
B Viewing window
CHinge
DPermanent anti-grease filter
E Detachable control panel
F Temperature control
On/off switch with 'power-on' light
HTimer
Pilot light of thermostat
J Heating element
K Frying basket
Handle of frying basket
M Release button of handle
Removable inner pot
Oil/fat level indication marks
PHandgrips inner pot
Housing (cool wall)
R Lid release button
S Opening with 'reset' button
T Safety switch
uCord
v Cord storage compartment
WType plate
× Carrying handles
Safety
Thermal safety cut-out
The appliance has been equipped with a thermal safety cut-out that switches the appliance off if it overheats. This may happen if there is no oil or fat or not enough oil or fat in the fryer or if blocks of solid fat are being melted in the fryer, which will prevent the heating element from being able to give off the heat produced quickly enough.
Take the following measures when the thermal safety cut-out has switched the appliance off:
- Let the oil or fat cool down;
- Carefully press the 'reset' button at the back of the control panel with a small screwdriver (fig. 2).
Now the appliance is ready to be used again.
Safety switch
The safety switch in the control panel ensures that the heating element can only be switched on if the control panel has been inserted correctly ('Click') (fig. 3).
Auto shut-off
The fryer will switch off automatically after 2 hours. When this happens, the power-on light in the on/off switch will go out. To switch the appliance back on, press the on/off switch again.

Cool zone
During frying, loose food particles collect on the bottom of the inner pot. As the heating element has been placed some distance above the bottom of the inner pot and primarily heats the oil or fat above it, the oil or fat between the bottom of the inner pot and the heating element remains relatively cool (cool zone). This prevents the food particles that end up in this zone from burning, increasing the number of times you can re-use the oil or fat.
Using solid fat
We advise you to use frying oil or liquid frying fat in this appliance. You can also use solid frying fat, but if you do, you have to take the following precautions to prevent spattering of fat and overheating of the appliance:
Use 3 kg of fat.
- If you want to use new blocks of fat, melt them slowly over a low heat in a normal pan.
- Pour the melted fat carefully into the fryer.
- Put the plug in the wall socket and switch the fryer on (see 'Frying').
- Store the fryer with the resolidified fat still in it at room temperature. If the fat gets very cold, it may start spattering when melted. Punch some holes into the resolidified fat with a fork to prevent this (fig. 4). Be careful not to damage the heating element while doing so.
Before frying
- Clean the separate parts of the fryer thoroughly before you use the fryer for the first time (see 'Cleaning').
- Put the appliance on a horizontal, even and stable surface.
- If you want to place the fryer on top of the cooker, underneath the extractor hood, first check if the rings of the cooker have been turned off.
- Take the entire cord from the cord storage compartment (fig. 5).
- Fill the dry and empty fryer with oil, liquid fat or melted solid fat (see 'Using solid fat' and 'Tips') to the top indication mark on the inner pot: 3.5 litres (fig. 6).
- Never mix two different kinds of oil or fat!
- Put the plug in the wall socket.
- Make sure the cord does not come into contact with the hot parts of the appliance.
Frying
- Switch the fryer on by means of the on/off switch (fig. 7). The power-on light in the switch and the pilot light of the thermostat will go on (fig. 8).
- Set the temperature control to the required temperature (fig. 9). For information about which temperature to select, check the package of the food to be fried or the tables in these instructions for use.
- The oil or fat will be heated to the right temperature in 10 to 15 minutes.
- While the appliance is heating up, the pilot light of the thermostat will come on and go out a number of times. The pilot light will continue to burn as long as the heating element is heating up. If the light stays out for some time, the oil or fat has reached the preset temperature.
- The same procedure applies if you want to fry a number of batches in a row, so wait until the pilot light has been out for some time before you start frying the next batch.
- If you are using oil or liquid fat, you can leave the basket in the fryer while the fryer is heating up. Of course you can also leave the basket in the fryer
if the fryer contains fat that has solidified around the basket.
- Open the lid by pressing the release button (fig. 10). The lid will open automatically.
- Lift the handle to raise the basket to its highest position (Click!) (fig. 11). Now you can remove the basket from the fryer (fig. 12).
- Put the food to be fried in the basket.
- Never exceed the maximum amounts of food to be fried at one time as indicated in these instructions for use (see 'Table').
- Carefully place the basket in the fryer. Make sure the basket has been properly inserted (fig. 13).
- Close the lid.
- Set the required frying time (see 'Timer'). You can also use the fryer without setting the timer.
- Press the release button of the handle and press down the handle to lower the basket to its lowest position, the 'frying position' (fig. 14).
- To obtain a uniform golden frying result, lift the basket out of the oil or fat a few times and carefully shake the contents.
- Be careful of the hot steam that emerges from the appliance when you open the lid.
Timer
Press the timer button to set the required frying time in minutes (fig. 15). If you keep the button pressed in, you can put the minutes forward quickly. The maximum time that can be set is 99 minutes. A few seconds after you have set the timer it will start counting down the time. While the timer is active, the remaining time will blink on the display. The last minute is displayed in seconds. When the preset time has elapsed, you will hear an audible signal (a few beeps). After 20 seconds the audible signal will be repeated. You can stop the audible signal by pressing the button again (fig. 15).
Caution: the timer indicates the end of the cooking time but does not switch the fryer off.
To replace the battery of the timer, please contact the Philips Service Centre.
After frying
- Lift the handle to raise the basket to its highest position, the 'draining position' ('Click') (fig. 16).
- Open the lid.
- Lift the frying basket carefully out of the fryer and, if necessary, shake it over the fryer to remove excess oil or fat.
- Put the fried food in a bowl or colander containing grease-absorbing paper, e.g. kitchen paper.
-
Switch the fryer off by means of the on/off switch. The pilot light in the on/off switch will go out.
-
Remove the plug from the wall socket.
- If you do not use the fryer regularly, it is best to store the oil or liquid fat in well-closed bottles, preferably in the fridge or in a cool place, after it has cooled down. Fill the bottles by pouring the oil or fat through a fine sieve to remove food particles. To empty the fryer, remove the lid, the frying basket and the control panel with the heating element, lift the inner pot from the housing of the fryer and pour out the oil or fat (see ‘Cleaning’).
- If the fryer contains solid fat, let the fat solidify in the fryer and store the fryer with the fat still in it (see ‘Using solid fat’).
Cleaning
- Unplug the appliance.
- Wait until the oil or fat has cooled down before you start cleaning the appliance. Solid fat should not have solidified yet.
- Remove the lid (fig. 17), the frying basket (fig. 18) and the control panel with the heating element (fig. 19).
- Put the control panel with the heating element in a safe, dry place.
- Never immerse the control panel with the heating element in water nor rinse these parts under the tap!
If necessary, clean these parts with a moist cloth and/or kitchen paper. - Lift the inner pot out of the appliance (fig. 20), remove the oil or fat (fig. 21) and dispose of it (see 'Environment').
- Clean the lid, the frying basket and the inner pot in hot soapy water or in the dishwasher and dry them properly.
- Do not use caustic or abrasive cleaning agents or materials such as washing soda, scouring liquid or powder or scouring pads to clean the inner pot. Clean the housing of the fryer with a moist cloth with some washing up liquid and/or kitchen paper.
- Roll up the cord, put it back into the cord storage compartment and insert the plug in the special recess (fig. 22).
- Reassemble the parts of the fryer (in the following order: inner pot, control panel with heating element, lid, frying basket). Make sure you insert the inner pot correctly into the fryer (fig. 23).
- Store the fryer with the lid closed. In this way the inside of the fryer will remain clean and free from dust.
Permanent filter
This fryer has been equipped with a permanent filter. To guarantee optimal functioning of the appliance, the metal filter should be cleaned regularly.
- Clean the lid of the fryer in hot soapy water or in the dishwasher every time you have used the fryer.
- For thorough cleaning: undo the screws on the inside of the lid (fig. 24) and remove the filter (fig. 25).
Let the filter dry properly before you put it back into the lid and before you start using the appliance.
Tips
Home-made French fries
You will make the tastiest and crispiest French fries in the following way:
- Preferably use firm potatoes.
- Cut the potatoes into thick slices and then into sticks. Rinse the sticks with cold water; this will prevent them from sticking to each other during frying.
- Dry the sticks thoroughly.
• Always fry home-made French fries twice:
- the first time for 4-6 minutes at 160°;
- the second time for 2-4 minutes at 190 °C.
- For a uniform golden result, lift the basket out of the fryer a few times during the second frying period and give the fries a shake.
- Frozen fries have already been precooked, so you will only have to fry them once in accordance with the instructions on the package.
Frozen food
Food from the freezer (-16 to -18°C) will cool the oil or fat considerably when it is immersed in it. Because it does not sear right away, the food may absorb too much oil or fat.
Take the following measures to prevent this:
- Do not fry too large amounts of food at one time (see 'Table').
- Heat the oil for at least 15 minutes before you lower a batch of food into it.
- Set the temperature control to the setting indicated in the table in these instructions or on the package of the food to be fried. If there are no instructions for the food you want to fry, select a temperature of 190° C.
- Preferably allow frozen food to defrost at least partly at room temperature before you fry it. Shake as much ice and water as possible off the food before you put it into the fryer.
- Lower the food into the oil or fat very gently, since frozen food may cause the hot oil or fat to start bubbling violently.
Getting rid of unwanted flavours
Certain types of food, particularly fish, may lose some juice when they are being fried. The juices thus ending up in the oil or fat may affect the smell and taste of food that is subsequently fried in the same oil or fat. To neutralise the taste of the oil or fat, do the following:
- Heat the fryer to 160°C and put two thin slices of bread or a few sprigs of parsley in the oil or fat. Wait until no more bubbles appear and then scoop the bread or the parsley out of the fryer with a spatula. The taste of the oil or fat will now be neutral again.
A healthy diet
Specialists in the field of healthy food and drink advise the use of vegetable oils and fats that contain unsaturated fatty acids (such as linoleic acid). However, these oils and fats lose their favourable properties more quickly than other oils and fats, so you will have to change them more often.
- Change the oil or fat regularly. If you mainly use the fryer to prepare French fries and if you sieve the oil or fat after every use, you can re-use the oil or fat 10 to 12 times.
However, do not use it longer than six months and always follow the instructions on the package.
- As a rule, oil or fat keeps less long if you fry food that is rich in proteins, such as meat and fish.
- Do not add fresh oil or fat to used oil or fat.
- Change the oil or fat if it starts foaming when it is heated, when it has a strong taste or smell or when it turns dark and/or syrupy.
Environment
It is best to dispose of used oil or liquid fat by pouring it back into its original plastic bottle with locking cap. You can dispose of solid fat by letting it solidify and then scooping it out of the fryer by means of a spatula and wrapping it in a newspaper.
Put the bottles of oil or the newspaper in the container for non-compostable waste or dispose of them in accordance with the regulations in your country.
Table
The table indicates how much of a particular type of food you can fry at one time and which temperature and preparation time you should select.
- If the instructions on the package of the food to be prepared differ from those in the table, always follow the instructions on the package.
Table
| Temperature Type of food Maximum amount at one time Frying time (minutes) | |||||
| Fresh Frozen Fresh or Frozen partly defrosted | |||||
| 160 °C Home-made French fries*) 600 grams - 4-6 -(first frying cycle)Fresh fish 450 grams - 5-7 - | |||||
| 170 °C Chicken (drumsticks) 3-5 pieces 3-4 pieces 12-15 15-20Cheese croquettes 5 pieces 3 pieces 4-5 6-7Mini potato pancakesVegetable fritters(mushroom, cauliflower) | -8-10 pieces | 3 pieces -2-3 - | 3-4 | ||
| 180 °C Chinese spring rollsChicken nuggetsMini snacksMeatballsFish fingersMusselsSquid rings in batterFish (pieces) in batterPrawnsApple fritters | 2-3 pieces2 pieces 6-7 10-128-10 pieces8-10 pieces6-8 pieces 6 pieces8-10 pieces12-15 pieces8-10 pieces8-10 pieces8-10 pieces5 pieces | 8 pieces 3-4 4-56 pieces 3-4 4-58 pieces 3-4 4-512 pieces8 pieces 3-4 4-58 pieces 3-4 4-58 pieces 3-4 4-5-3-4 - | 2-3 3-4 | ||
| 190 °C Home-made French fries*) 600 gram(2nd frying cycle)Frozen French friesCrisps (very thin potato slices)Aubergine (slices)Potato croquettesMeat/fish croquettesDoughnutsCamembert(breadcrumbed)Escalope with ham and cheeseWiener Schnitzel | -600 gram600 gram5 pieces5 pieces3-4 pieces - 5-62-4 pieces - 2-32 pieces2 pieces | 450 gram450 gram-3-4 -4 pieces 4-5 6-74 pieces 4-5 6-7-4-5 --3-4 - | -3-4 | 5-65-6 | |
*) For the preparation of home-made French fries, see "Tips".
Français
Important
DPermanent anti-vet filter
Q Behuizing (cool wall)
R Dekselontgrendelaar
S Opening "reset"knop


- ENGLISH PAGE 4
- FRANÇAIS PAGE 9
- ENGLISH
- IMPORTANT
- GENERAL DESCRIPTION (FIG. 1)
- SAFETY
- THERMAL SAFETY CUT-OUT
- SAFETY SWITCH
- AUTO SHUT-OFF
- COOL ZONE
- USING SOLID FAT
- USE 3 KG OF FAT
- BEFORE FRYING
- FRYING
- TIMER
- AFTER FRYING
- CLEANING
- PERMANENT FILTER
- TIPS
- HOME-MADE FRENCH FRIES
- FROZEN FOOD
- GETTING RID OF UNWANTED FLAVOURS
- A HEALTHY DIET
- ENVIRONMENT
- TABLE
- FRANÇAIS
Brand : PHILIPS
Model : Cucina HD6134
Category : Deep fryer