
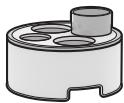
HB 0805 UM0 - Food processor HOTPOINT - Free user manual and instructions
Find the device manual for free HB 0805 UM0 HOTPOINT in PDF.
| Product type | Food processor |
| Brand | HOTPOINT |
| Model | HB 0805 UM0 |
| Power supply | 220-240 V ~ 50/60 Hz, 1600 W |
| Chopper bowl capacity | 500 mL |
| Large bowl capacity | 1250 mL |
| Main functions | Immersion blender, whisk, chopper, grater and slicer |
| Included accessories | Blender, whisk, chopper with 500 mL bowl, large bowl 1250 mL, chopping blade, fine grater, coarse grater, thin slicing blade, thick slicing blade, blade holder, pusher, beaker |
| Speed | Variable with rotary knob, Turbo function |
| Soft start | Yes (special function for blender) |
| Safety device | Lid locking, automatic shut-off in case of overload, protected blades |
| Bowl material | Food-grade plastic |
| Cleaning | Removable parts washable in soapy water (except motor and lid, wipe with damp cloth) |
| Dishwasher safe | Only bowls, whisk and removable accessories (except lid and motor) |
| Storage | Integrated system on the lid for whisk, shaft and motor |
| Intended use | Domestic use only |
| Standards | Compliant with European directives 2006/95/EC and 2004/108/EC |
Frequently Asked Questions - HB 0805 UM0 HOTPOINT
User questions about HB 0805 UM0 HOTPOINT
0 question about this device. Answer the ones you know or ask your own.
Ask a new question about this device
Download the instructions for your Food processor in PDF format for free! Find your manual HB 0805 UM0 - HOTPOINT and take your electronic device back in hand. On this page are published all the documents necessary for the use of your device. HB 0805 UM0 by HOTPOINT.
USER MANUAL HB 0805 UM0 HOTPOINT
natural_image
Illustration of kitchen appliances including a blender, spatula, and blender with no text or symbolsEN Operating instructions
FR Mode d'emploi
flowchart
graph TD
    A["Shake with lid"] --> B["Add funnel"]
    B --> C["Add shaker with whisk"]
    C --> D["Product container"]
C

flowchart
graph TD
    A["Blender with lid"] --> B["Adder into basket"]
    B --> C["Adder into pot with handle"]
    C --> D["Adder into pot with handle"]
    D --> E["Adder into pot with handle"]
D
flowchart
graph TD
    A["Blender with lid"] --> B["Shake cup"]
    B --> C["Top-down blender with lid"]
    C --> D["Shake bulb with lid"]
    D --> E["Shake bulb with lid"]
    E --> F["Shake bowl with lid"]
E
flowchart
graph TD
    A["Beaker with lid"] --> B["Cancaster"]
    B --> C["Chamber with lid"]
    C --> D["Shutter pan with lid"]
    D --> E["Bench with lid and cleaning panel"]
    E --> F["Baby bowl with lid and cleaning panel"]
natural_image
Diagram of a mechanical component with directional arrows indicating motion or movement (no text or symbols)pic. 1
natural_image
Two-step illustration of hands installing or adjusting a mechanical component on a circular base (no text or symbols)pic. 2
natural_image
Technical line drawing of a cleaning or cleaning device with no visible text or symbols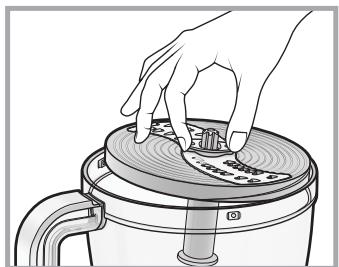
natural_image
Line drawing of a hand pressing down on a kitchen pot with a lid (no text or symbols)pic. 3
natural_image
Illustration of a kitchen appliance assembly showing a hand skew, fan, and base with a brush (no text or symbols) [036W]13 8[2TW3] [036W]13 8[2TW3] 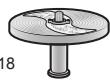 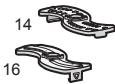 17 17  12 15 12 15 | ◯ | |
  10 9 10 9 | ◯ | |
[25OH]   21 20 19 21 20 19 | ◯ | |
 5 5 | ◯ | |
  7 6 7 6 | ◯ | ◯ |
ISTRUZIONI PER LA SICUREZZA
LEGGERE E RISPETTARE LE SEGUENTI INFORMAZIONI IMPORTANTI
- Before using the appliance carefully read Health and Safety and Use and Care guides.
- Keep these instructions close at hand for future reference.
- YOUR SAFETY AND SAFETY OF OTHERS IS VERY IMPORTANT
- This manual and the appliance itself provide important safety warnings, to be read and observed at all times
- All safety warnings give specific details of the potential risk presented and indicate how to reduce risk of injury, damage and electric shock resulting from improper use of the appliance. Carefully observe the following instructions.
- Failure to observe these instructions may lead to risks. The Manufacturer declines any liability for injury to persons or animals or damage to property if these advices and precautions are not respected.
- This product should not be used by children under 8 years old, unless supervised by an adult.
- Children from 8 years old and above and persons with reduced physical, sensory or mental capabilities or lack of experience and knowledge can use this appliance only if they are supervised. Alternatively these people can use if have been given instructions on safe appliance use and if they understand the hazards involved. Children shall not play with the appliance. Cleaning and user maintenance shall not be made by children without supervision.
- The metal blades and disc are extremely sharp, care shall be taken when handling, emptying the bowl and during cleaning of the appliance. Always hold the blade attachment away from the cutting edges, both when handling and cleaning the unit.
- Avoid contact with any moving parts.
INTENDED USE OF THE PRODUCT
- This appliance is designed solely for domestic use. This product is not intended for commercial use. The manufacturer declines all responsibility
for innapropiate use or incorrect setting of the controls.
- CAUTION : The appliance is not intended to be operated by means of an external timer or separate remote control system.
- Do not use the appliance outdoors.
- Do not store explosive or flammable substances such as aerosol cans and do not place or use gasoline or other flammable materials in or near the appliance: a fire may break out if the appliance is inadvertently switched on.
INSTALLATION
- Repairs must be carried out by a qualified technician, in compliance with the manufacturer's instructions and local safety regulations. Do not repair or replace any part of the appliance unless specifically stated in the user manual.
- Children should not perform installation operations. Keep children away during installation of the appliance. Keep the packaging materials (plastic bags, polystyrene parts, etc.) out of reach of children, during and after the installation of the appliance.
- After unpacking the appliance, make sure that it has not been damaged during transport. In the event of problems, contact the dealer or your nearest After-sales Service.
- Keep children away during installation of the appliance.
- The appliance must be disconnected from the power supply before carrying out any installation operation.
- During installation, make sure the appliance does not damage the power cable.
- Only activate the appliance when the installation procedure has been completed.
ELECTRICAL WARNINGS
- Make sure the voltage specified on the rating plate corresponds to that of your home.
- Regulations require that the appliance is connected to an earthed supply outlet.
en
- For appliances with fitted plug, if the plug is not suitable for you socket outlet, contact a qualified technician.
- Do not use extension leads, multiple sockets or adapters. Do not connect the appliance to a socket which can be operated by remote control.
- The power cable must be long enough for connecting the appliance, once fitted in its housing, to the main power supply.
- Do not pull the power supply cable.
- If the power cable is damaged it must be replaced with an identical one. The power cable must only be replaced by a qualified technician in compliance with the manufacturer instructions and current safety regulations. Contact an authorized service center.
- Do not operate this appliance if it has a damaged mains cord or plug, if it is not working properly, or if it has been damaged or dropped. Do not immerse the mains cord or plug in water. Keep the cord away from hot surfaces.
- Do not touch the appliance with any wet part of the body and do not operate it when barefoot.
ELECTRICAL CONNECTIONS
Socket outlet / plug
If the fitted plug is not suitable for your socket outlet, contact After-Sales Service for further instruction. Do not attempt to change the plug yourself. This procedure needs to be carried out by a qualified technician in compliance with the manufacturer's instructions and current standard safety regulations.
CORRECT USE
- Make sure that all parts and lids are securely locked in palce before operating the appliance.
- The fasteners must be locked in the two clip positions, otherwise during operating the bowl lid may rotate as the motor rotates.
- Do not attempt to tamper with the lid interlock mechanism.
-
Before disassembling the appliance, switch off the unit and wait until the blades have come to a complete stop.
-
Always remove the blade assembly before pouring any contents from the bowl.
- Never insert food by hand. Always use the food pusher.
- Do not put your fingers or other objects into the unit opening while it is in operation. If any food get stuck in the opening, use the food pusher or another piece of fruit gets vegetable to push it down. When this method is not possible, turn the appliance off and disassemble the unit to remove the remaining food.
- Never introduce very hard foods (e.g. Hard chocolate), ice or frozen foods when using the fine chopping attachments.
- Keep your hands and utensils out of the container while blending to reduce the risk of severe injury to persons or damage the blender. A scraper may be used when the appliance is not operating.
- Be careful if hot liquid is poured into the food processor or blender as it can be ejected out of the appliance due to a sudden steaming.
CLEANING AND MAINTENANCE
- The appliance must be disconnected from the power supply before carrying out any cleaning or maintenance.
- Never use steam cleaning equipment.
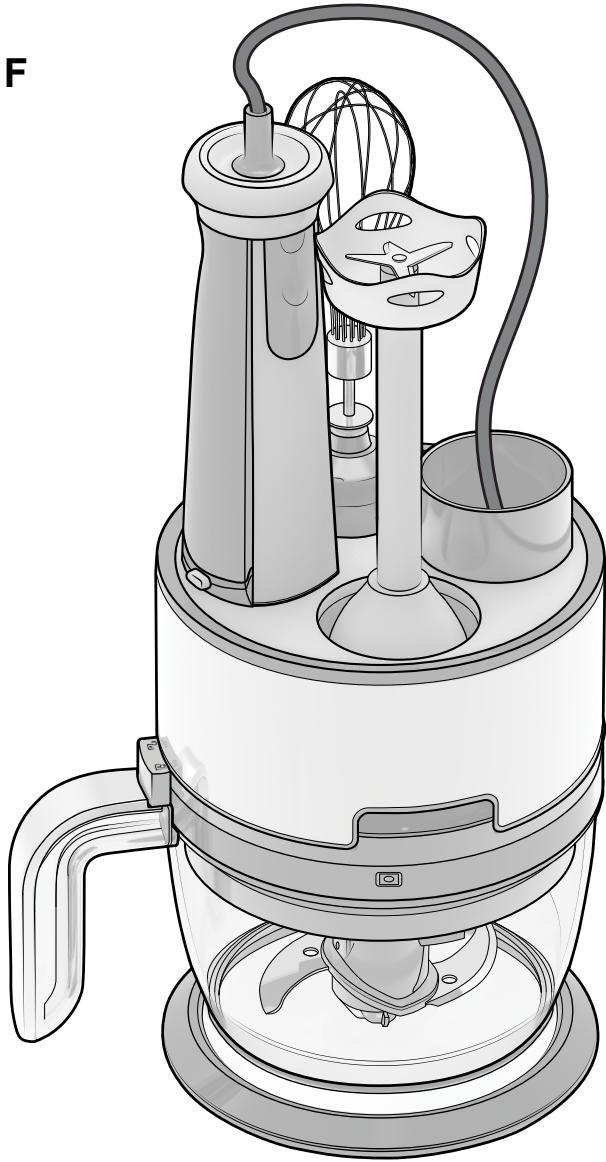
PARTS AND FEATURES

Attachments supplied may vary by model
- Speed-adjusting dial
- ON/OFF button
- Turbo button
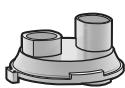
- Motor unit
- Whisk attachment
- Beaker
- Blender attachment
- Food pusher
- Storage unit
- Food processor lid
- Feed tube
- Food processor's knife blade
- Food processor bowl
- Fine shredder
- Coarse slicing blade
- Fine slicer
- Coarse shredder
- Blades support
- Chopper lid
- Chopper's knife blade
- Chopper bowl
INTRODUCTION
Thank you for purchasing our product. In doing so, you have opted for an effective high-performance appliance.
These operating instructions refer to various models. An overview of the different models can be found on the illustrated pages.
If the instructions on the correct use of this appliance are not observed, the manufacturer shall assume no responsibility for any resulting damage. The operating instructions may describe different models: any difference is clearly identified.
BEFORE FIRST USE
Carefully wipe the outside of the appliance to remove any dust that may have accumulated. Dust with a dry cloth.
USING THE PRODUCT
BLENDER ATTACHMENT (A)
This appliance is provided with special SOFT START FUNCTION which makes the motor start slowly before reaching the full blending power, for a more comfortable use and a greater control.
The blender attachment is suitable for blending liquids and vegetables.
- To assemble the blender attachment to the motor unit, just push it until the two small buttons on the left and on the right of the connector have clicked.
- Peel or core the fruits and then cut them into small pieces. Then put the fruit pieces or vegetables into the beaker. Usually a certain amount of water has to be added to facilitate smooth running, the proportion of food and water being 2:3. The mixture amount should not exceed the max capacity of the cup.
- Plug the appliance into the power outlet.
- Lower the hand blender into the food and rotate the speed-adjusting dial to select the desired speed. Pressing and holding the ON/OFF button, the blender starts blending immediately. For maximum-speed blending use the TURBO button for a short time.
WHISK ATTACHMENT (only on some models) (B)
The whisk is mainly suitable for whipping cream, beating egg whites and mixing sponges and Ready-mix cakes.
- To assemble the whisk attachment to the motor unit, just push it until the two small buttons on the left and on the right of the connector have clicked.
- Place the food into the beaker.
- Plug the appliance into the power outlet.
- Lower the whisk into the food and rotate the speed-adjusting dial to select the desired speed. Pressing and holding the ON/OFF button, the attachment starts whisking immediately. For maximum-speed whisking use the TURBO button for a short time.

Don't use the whisk for more than 2 minutes continuously.
CHOPPER ATTACHMENT (only on some models) (C)

The chopper is perfectly suitable for hard food, such as chopping meat, cheese, herbs, garlic, carrots, walnuts, almonds, and etc.

Don't chop extremely hard food, such as ice cubes, nutmeg, coffee beans and grains.
- Carefully remove the plastic cover from the blade.
- Fit the knife blade on the pin in the bowl - always fit the knife blade before adding the ingredients.
- Cut the food into small pieces and put them into the bowl.

A small amount of water can facilitate the smooth running of the appliance.

The mixture amount should not exceed the max capacity of the bowl.
- Close the lid.
- Assemble the motor unit into the bowl lid until the two small buttons on the left and on the right of the connector have clicked.
- Plug the appliance into the power outlet.
- Rotate the speed-adjusting dial to select the desired speed. Pressing and holding the ON/OFF button, the attachment starts chopping immediately. For maximum speed press the TURBO button for a short time.
- Remove the knife blade first before pouring out the mixture.

Don't operate hard food for more than 10 seconds continuously.
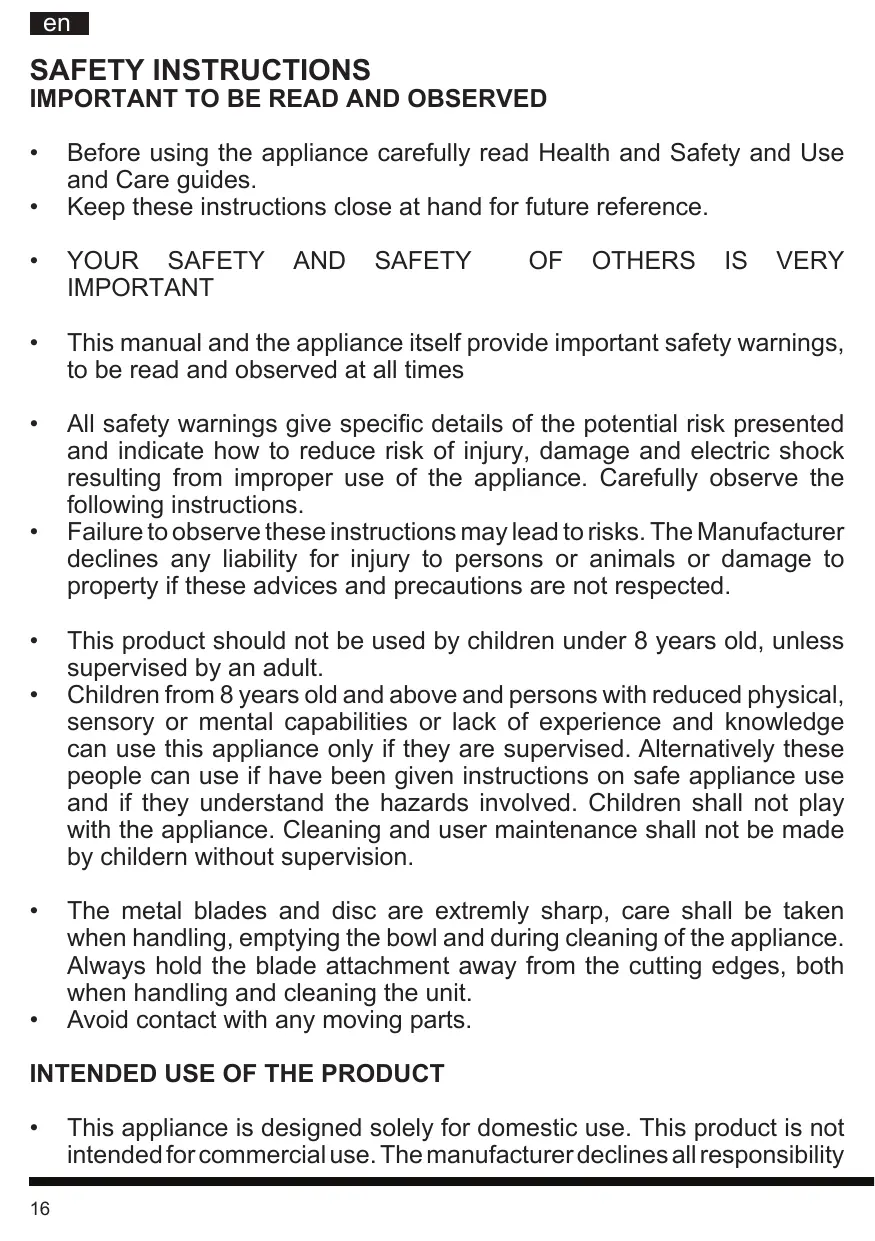
FOOD PROCESSOR ATTACHMENT (only on some models) (D-E)
To use the food processor attachment as a chopper follow these instructions:
- First of all make sure the non-slip ring is fixed to the bottom of the bowl.
- Fit the knife blade on the pin in the bowl - always fit the knife blade before adding the ingredients.
- Cut the food into small pieces and put them into the bowl.

A small amount of water can facilitate the smooth running of the appliance.

The mixture amount should not exceed the max capacity of the bowl.
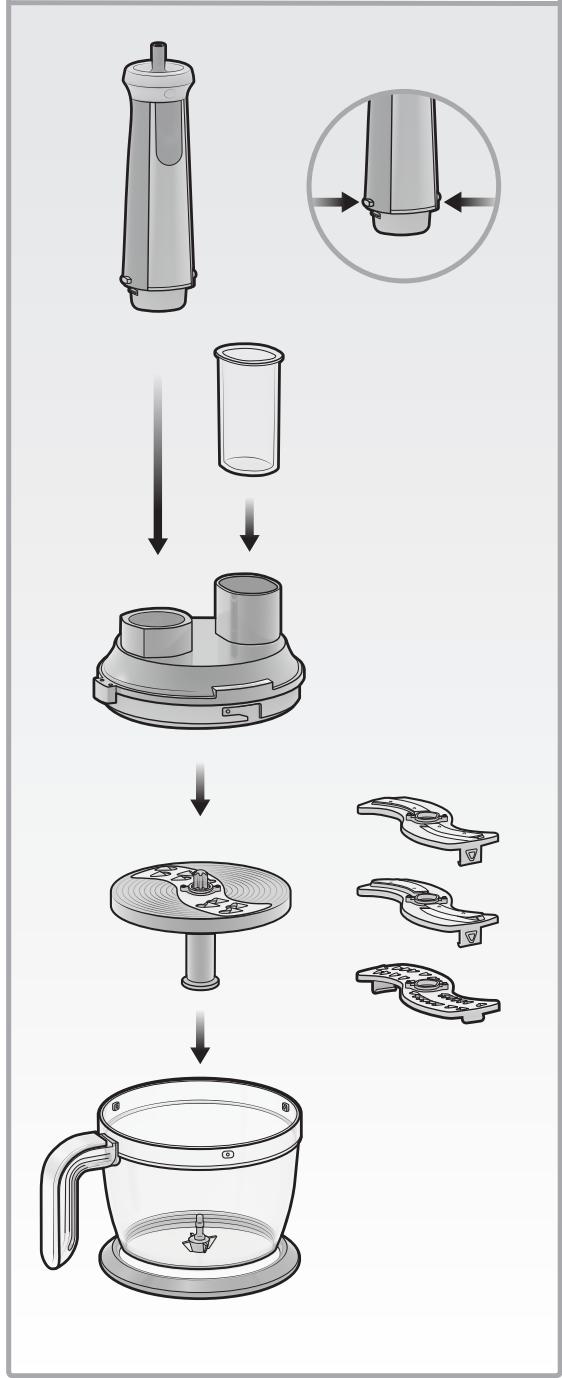
- Rotate counter clockwise the lid until blocked in position, as shown in pic. 1

Make sure the food pusher is properly fitted into its housing on the cover.
- Assemble the motor unit into the bowl lid until the two small buttons on the left and on the right of the connector have clicked.
- Plug the appliance into the power outlet.
- Rotate the speed-adjusting dial to select the desired speed. Pressing and holding the ON/OFF button, the attachment starts chopping immediately. For maximum speed press the TURBO button for a short time.
- Remove the knife blade first before pouring out the mixture.

Don't operate hard food for more than 10 seconds continuously.
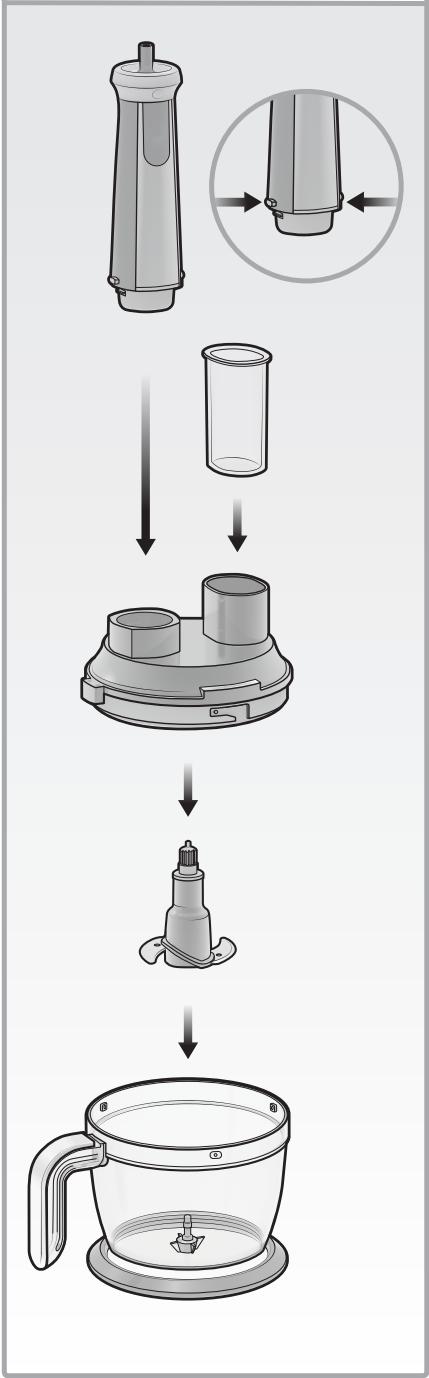
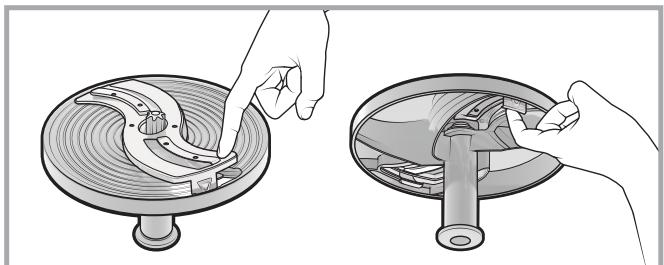
To use the food processor attachment with shredding/slicing inserts follow these instructions:
- First of all make sure the non-slip base is fixed to the bottom of the bowl.
- Fix the desired insert into the blades support as shown in pic. 2
- Put the support into the pin on the bottom of the bowl.
- Rotate counter clockwise the lid until blocked in position, as shown in pic. 1

The fasteners must be locked in the two clip positions, otherwise during operating the lid may rotate as the motor rotates.
- Insert the bottom part of the motor unit into the opening on the bowl lid, until the two small buttons on the left and on the right of the connector have clicked.
- Plug the appliance into the power outlet.
- Put the food inside the feeding tube and push it slowly with the food pusher. Do not push heavily.
- Rotate the speed-adjusting dial to select the desired speed. Pressing and holding the ON/OFF button, the attachment starts chopping immediately. For maximum speed press the TURBO button for a short time.

To remove the blades support after using pull with two fingers as shown in pic. 3.
TIPS
• Use the shredding side for carrots, potatoes and foods of a similar texture.
- Use the slicing side for food items such as carrots, potatoes, cabbages, cucumbers, courgettes and onions.
• Use fresh ingredients.
- Do not cut food too small. Fill the feed tube uniformly. This prevents the food from pouring out during processing.
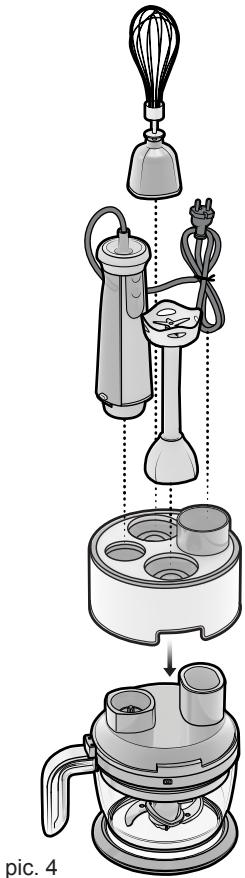
STORAGE SYSTEM (F)
When not in use, the detachable stem, whisk and motor unit can be stored on the bowl lid as shown in pic. 3.

Times and quantities in the tables are approximate and could vary depending on quality of ingredients or preference.
| 500ml Chopping bowl | |||
| Food | Maximum | Operation time | Preparation |
| Meat | 250g | 8sec | 1~2cm |
| Herbs | 50g | 8sec | / |
| Nuts | 100g | 8sec | / |
| Cheese | 100g | 5sec | 1~2cm |
| Bread | 80g | 5sec | 1~2cm |
| Onions | 150g | 8sec | 1~2cm |
| Biscuits | 150g | 6sec | 1~2cm |
| Soft fruit | 200g | 6sec | 1~2cm |
| Flour | 350g | 10sec | / |
| Sugar | 8g | ||
| Salt | 8g | ||
| Big bowl (1250ml) (Chopping) | |||
| Food | Maximum | Operation time | Preparation |
| meat | 500g | 10sec | 1~2cm |
| herbs | 100g | 8sec | / |
| nuts, almonds | 300g | 10sec | / |
| cheese | 200g | 10sec | 1~2cm |
| bread | 160g | 8sec | 1~2cm |
| onions | 300g | 8sec | 1~2cm |
| biscuits | 300g | 8sec | 1~2cm |
| soft fruit | 400g | 10sec | 1~2cm |
| Flour | 500g | 10s | / |
| Water | 300g | ||
| Barm | 10g | ||
| Sugar | 10g | ||
| Salt | 10g | ||
| Big bowl (1250ml) (Slicing/Grating) | |||
| Food | Maximum | Operation time | Preparation |
| Potatoes | 500g | 60s | Suitable for feed inlet |
| Carrots | 500g | 60s | Suitable for feed inlet |
| Cucumber | 500g | 60s | Suitable for feed inlet |
CLEANING AND MAINTENANCE

To prevent any damage to the appliance do not use harsh solvents or abrasive sers when cleaning.
Unplug the appliance from the power supply before cleaning.
- Wash the blender attachments and lids under running water without any abrasive cleaners or detergents. After cleaning, place them upright so that any water that may have got in can drain out.
Do not immerse the blender and lids in water, as the lubrication on the bearings may be washed away over time.
Lids and motor unit aren't suitable for dishwasher
- Wash the containers and whisk in warm soapy water.
All removable parts can be washed in warm soapy water and then carefully rinsed and dried. If necessary, use a nylon-bristle brush to complete the cup cleaning operation.
- Wipe the motor unit with a damp cloth.
- The non-slip base on the bottom of the bowl can be removed and cleaned. Make sure it is replaced correctly before using it again.
- Dry all detachable parts thoroughly.
TIP
For quick cleaning between processing tasks, fill the chopper or food processor bowl with water halfway, assemble the chopper blade into the bowl and the motor unit onto the lid according to the description in the operation section and start chopping function for a few seconds.
SAFEGUARDING THE ENVIRONMENT DISPOSAL OF PACKAGING MATERIALS

The packaging material is 100% recyclable and is marked with the recycle symbol (*). The various parts of the packaging must therefore be disposed of responsibility and in full compliance with
local authority regulations governing waste disposal.
SCRAPPING OF HOUSEHOLD APPLIANCES
When scrapping the appliance, make it unusable by cutting off the power cable and removing the doors and shelves (if present) so that children cannot easily climb inside and become trapped.

This appliance is manufactured with recyclable (*) or reusable materials. Dispose of it in accordance with local waste disposal regulations.
For further information on the treatment, recovery and recycling of household electrical appliances, contact your competent local authority, the collection service for household waste or the store where you purchase the appliance.
This appliance is marked in compliance with European Directive 2012/19/EU, Waste Electrical and Electronic Equipment (WEEE).
By ensuring this product is disposed of correctly, you will help prevent potential negative consequences for the environment and human health, which could otherwise be caused by inappropriate waste handling of this product.

The symbol (*) on the product or on the accompanying documentation indicates that it should not be treated as domestic waste but must be taken to an appropriate collection centre for the recycling of electrical
and electronic equipment.
DECLARATION OF CONFORMITY
This appliance has been designed, constructed and distributed in compliance with the safety requirements of European Directives:
• 2006/95/EC Low Voltage Directive
• 2004/108/EC Electromagnetic Compatibility Directive