USER MANUAL CS1A 300 H HOTPOINT
TROUBLESHOOTING GUIDE
- The red light (if provided) remains on.
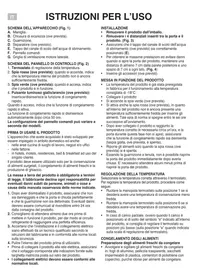
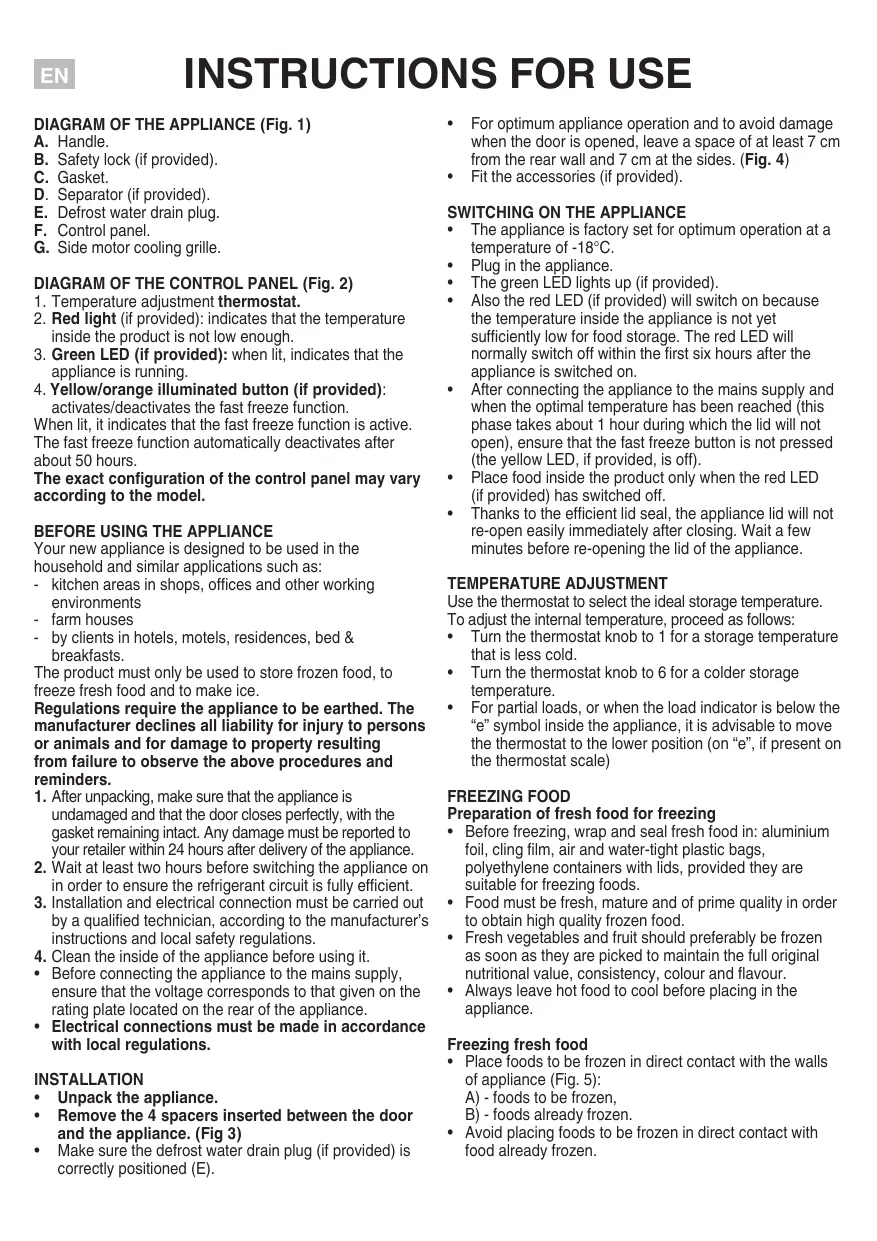
DIAGRAM OF THE APPLIANCE (Fig. 1)
A. Handle. B. Safety lock (if provided). C. Gasket. D. Separator (if provided). E. Defrost water drain plug. F. Control panel. G. Side motor cooling grille.
DIAGRAM OF THE CONTROL PANEL (Fig. 2)
- Temperature adjustment thermostat.
- Red light (if provided): indicates that the temperature inside the product is not low enough.
- Green LED (if provided): when lit, indicates that the appliance is running.
- Yellow/orange illuminated button (if provided): activates/deactivates the fast freeze function.
When lit, it indicates that the fast freeze function is active. The fast freeze function automatically deactivates after about 50 hours.
The exact configuration of the control panel may vary according to the model.
BEFORE USING THE APPLIANCE
Your new appliance is designed to be used in the household and similar applications such as:
- kitchen areas in shops, offices and other working environments
- farm houses
- by clients in hotels, motels, residences, bed & breakfasts.
The product must only be used to store frozen food, to freeze fresh food and to make ice.
Regulations require the appliance to be earthed. The manufacturer declines all liability for injury to persons or animals and for damage to property resulting from failure to observe the above procedures and reminders.
- After unpacking, make sure that the appliance is undamaged and that the door closes perfectly, with the gasket remaining intact. Any damage must be reported to your retailer within 24 hours after delivery of the appliance.
- Wait at least two hours before switching the appliance on in order to ensure the refrigerant circuit is fully efficient.
- Installation and electrical connection must be carried out by a qualified technician, according to the manufacturer's instructions and local safety regulations.
- Clean the inside of the appliance before using it.
- Before connecting the appliance to the mains supply, ensure that the voltage corresponds to that given on the rating plate located on the rear of the appliance.
- Electrical connections must be made in accordance with local regulations.
INSTALLATION
- Unpack the appliance.
- Remove the 4 spacers inserted between the door and the appliance. (Fig 3)
- Make sure the defrost water drain plug (if provided) is correctly positioned (E).
- For optimum appliance operation and to avoid damage when the door is opened, leave a space of at least 7 cm from the rear wall and 7 cm at the sides. (Fig. 4)
- Fit the accessories (if provided).
SWITCHING ON THE APPLIANCE
- The appliance is factory set for optimum operation at a temperature of -18°C. Plug in the appliance. The green LED lights up (if provided).
- Also the red LED (if provided) will switch on because the temperature inside the appliance is not yet sufficiently low for food storage. The red LED will normally switch off within the first six hours after the appliance is switched on.
- After connecting the appliance to the mains supply and when the optimal temperature has been reached (this phase takes about 1 hour during which the lid will not open), ensure that the fast freeze button is not pressed (the yellow LED, if provided, is off).
- Place food inside the product only when the red LED (if provided) has switched off.
- Thanks to the efficient lid seal, the appliance lid will not re-open easily immediately after closing. Wait a few minutes before re-opening the lid of the appliance.
TEMPERATURE ADJUSTMENT
Use the thermostat to select the ideal storage temperature.
To adjust the internal temperature, proceed as follows:
- Turn the thermostat knob to 1 for a storage temperature that is less cold.
- Turn the thermostat knob to 6 for a colder storage temperature.
- For partial loads, or when the load indicator is below the "e" symbol inside the appliance, it is advisable to move the thermostat to the lower position (on "e", if present on the thermostat scale)
FREEZING FOOD
Preparation of fresh food for freezing
- Before freezing, wrap and seal fresh food in: aluminium foil, cling film, air and water-tight plastic bags, polyethylene containers with lids, provided they are suitable for freezing foods.
- Food must be fresh, mature and of prime quality in order to obtain high quality frozen food.
- Fresh vegetables and fruit should preferably be frozen as soon as they are picked to maintain the full original nutritional value, consistency, colour and flavour.
- Always leave hot food to cool before placing in the appliance.
Freezing fresh food
- Place foods to be frozen in direct contact with the walls of appliance (Fig. 5): A) -foods to be frozen, B) - foods already frozen.
- Avoid placing foods to be frozen in direct contact with food already frozen.
- For best and fastest freezing, foods should be split into small portions; this will also be useful when the frozen items are to be used.
- At least 24 hours before storing fresh food in the appliance, press the fast freeze button (4).
- Place the food to be frozen and keep the lid of the appliance closed for 24 hours. The fast freeze function automatically deactivates after about 50 hours.
FOOD STORAGE
Refer to the table on the appliance.
Classification of frozen foods
Load and classify the frozen foods; it is advisable to indicate the storage date on the packs, to ensure consumption before the expiry dates listed in months in Fig. 6 for each type of food.
Advice for storing frozen food
When buying frozen food, make sure that:
- The packaging is intact (food in damaged containers may have deteriorated). If a package is swollen or has damp patches, the product may not have been stored in optimum conditions and therefore undergone partial defrosting.
- When shopping, leave frozen food purchases until last and carry them in a thermally insulated bag.
- On arriving home, immediately place the frozen food in the appliance.
- Avoid or minimise temperature variations. Observe the expiry date on the packaging. Always follow the storage instructions on frozen food packages.
Note:
Eat fully or partially defrosted foods immediately. Do not refreeze unless the food is cooked after it has thawed. Once cooked, the food can be refrozen. - In case of a prolonged power failure: Do not open the appliance door, except to place ice packs (if provided) over the frozen foods on the right and left side of the appliance. This will slow down the rise in temperature.
PRECAUTIONS AND SUGGESTIONS
During installation, make sure the appliance does not damage the power cable. - Do not store glass containers with liquids inside the product as they may break. - Do not eat ice cubes or ice lollies immediately after taking them out of the appliance as they may cause cold burns. - Before carrying out any maintenance or cleaning, always unplug the appliance or disconnect the power supply. - Do not install the appliance in places exposed to direct sunlight or near heat sources in order to avoid increasing power consumption. - Do not put aerosol spray cans or recipients containing propellants or flammable substances in the appliance. - Do not store or use gasoline or other flammable liquids and gases in the vicinity of this or any other domestic appliance. The fumes can create a fire hazard or explosion.
Install the appliance in a perfectly horizontal position, on a floor strong enough to take its weight and in an area suitable for its size and use. - Install the appliance in a dry, well-ventilated place. The appliance is set for operation at specific ambient temperature ranges, according to the climatic class indicated on the data plate located at the rear of the product (Fig. 7). The appliance may not work properly if it is left for a long time at a temperature outside the specified range. It is advisable to leave the appliance connected if left empty even for short periods. - Be careful not to damage the floors when you move the appliance (e.g. parquet). To facilitate product handling, it is advisable to empty it beforehand, if possible.
Note: The appliance must be handled and installed by two or more persons.
- Do not use mechanical devices or any means other than those recommended and/or supplied by the manufacturer to speed up the defrosting process.
- Do not use electrical appliances inside the product, unless such appliances are specifically recommended by the manufacturer.
- The bulb used inside the appliance is specifically designed for domestic appliances and is not suitable for general room lighting within the home (EC Regulation 244/2009).
- This appliance must not be used by children under 8 years of age, or by people with limited physical, sensory or mental abilities or without experience and knowledge of it, unless instructed in its use by those responsible for their safety.
- Do not allow children to play or hide inside the product: risk of becoming trapped inside and suffocating.
- Power cable modification or replacement must only be carried out by qualified personnel or After-sales Service.
- Do not use extension leads or adapters.
- Electrical disconnection must be possible either by unplugging the appliance or by means of a double-pole switch located upline from the socket.
- Ensure that the voltage indicated on the appliance data plate corresponds to the domestic supply voltage.
- Do not ingest the contents (non-toxic) of the ice packs (if provided).
- Restrict the number of times you open the door.
- This appliance features "skin condenser" technology: the condensing unit is integrated into the walls of the freezer. For this reason the side and front walls of the product may become hot while the product is running. This is entirely normal and also reduces the risk of condensation forming in particularly critical environmental conditions (see paragraph "Troubleshooting guide").
APPLIANCE DEFROSTING
The appliance should be defrosted when the thickness of ice on the walls reaches 5-6 mm.
- Disconnect the appliance from the power supply.
- Remove food from the appliance and put it in a very cool place or a thermally insulated bag.
- Leave the appliance door open.
- Remove the internal defrost water drain plug (depending on model) (Fig. 8).
- Remove the external defrost water drain plug (depending on model) and reposition it as shown in fig. 8.
- Use the separator (depending on model) inside the product as a recipient for any remaining water, (D) as shown in fig. 8. If there is no separator, use a shallow container.
- Defrosting can be sped up by using a spatula to detach the frost from the appliance walls.
- Remove the frost from the bottom of the appliance.
- In order to avoid permanent damage to the appliance interior, do not use pointed or sharp metal instruments to remove the ice.
- Do not use abrasive products or heat up the interior artificially.
- Dry the inside of the appliance thoroughly.
- Refit the plug after defrosting.
CLEANING AND MAINTENANCE
- Remove the frost from the upper edges (see Troubleshooting Guide).
- Clean the inside after defrosting, using a sponge dampened with warm water and/or mild detergent. Clean the side vent (if provided).
Unplug the appliance before carrying out maintenance operations. Do not use abrasive products, scourers or stain-removers (e.g. acetone, trichloroethylene) to clean the appliance.
To obtain the best results from your appliance, carry out cleaning and maintenance at least once a year.
HANGING THE LID LIGHT BULB (if provided)
- Disconnect the appliance from the mains power supply.
- Remove the diffuser by following the sequence of steps shown in the figure.
- Unscrew the light bulb and replace it with an identical bulb of the same wattage and voltage.
- Refit the diffuser and plug in the appliance.
TROUBLESHOOTING GUIDE
- The red LED (if provided) remains alight.
Is there a power failure? Is defrosting in progress? Is the appliance lid properly closed? Is the appliance positioned near a heat source? Is the thermostat setting correct? Are the ventilation grille and condenser clean?
- The appliance is too noisy.
Is the appliance perfectly horizontal? Is the appliance in contact with other furniture or objects that may cause vibrations? - Has the packaging been removed from under the appliance?
Note: Gurgling noises from the refrigerating circuit after the compressor cuts out are perfectly normal.
3. The green LED (if provided) is off and the appliance is not working.
Is there a power failure? Is the plug properly inserted in the socket? Is the electric cable intact?
4. The green LED (if provided) is off and the appliance is working.
- The green LED is not working. Contact the After Sales Service for a replacement.
5. The compressor runs continuously.
- Have hot foods been put in the appliance?
- Has the appliance lid been left open for a long time? Is the appliance positioned in a very warm room or near heat sources? Is the thermostat setting correct?
- Has the fast freeze function (depending on model) been pressed by mistake?
6. Too much ice on the upper edge.
- Are the defrost water drainage plugs correctly positioned? Is the appliance lid properly closed? Is the appliance lid seal damaged or deformed? (See chapter "Installation")
- Have the 4 protection pieces been removed? (See chapter "Installation")
- It is normal for condensation to form under certain atmospheric conditions (humidity above 85%) or if the appliance is located in a damp or poorly ventilated room.
The performance of the appliance is in no way affected.
- The layer of ice on the internal walls of the appliance is not uniform. This phenomenon is quite normal.
SAFEGUARDING THE ENVIRONMENT
1. Packing
The packing material is 100% recyclable and bears the recycling symbol. For disposal, comply with the local regulations. Keep the packing materials (plastic bags, polystyrene parts, etc.) out of the reach of children, as they are a potential source of danger.
2. Scrapping/Disposal
The appliance is manufactured using recyclable material. This appliance is marked in compliance with European Directive 2002/96/EC on Waste Electrical and Electronic Equipment (WEEE). By ensuring the correct disposal of this appliance, you can help prevent potentially negative consequences for the environment and the health of persons.
The symbol on the appliance, or on the accompanying documents, indicates that this appliance should not be treated as domestic waste but must be taken to a special collection centre for the recycling of electrical and electronic equipment.
When scrapping the appliance, make it unusable by cutting off the power cable and removing the doors and shelves so that children cannot easily climb inside and become trapped.
Scrap the appliance in compliance with local regulations on waste disposal, taking it to a special collection centre; do not leave the appliance unattended even for a few days, since it is a potential source of danger for children.
For further information on the treatment, recovery and recycling of this product, contact your competent local office, the household waste collection service or the shop where you purchased the appliance.
This appliance does not contain CFCs. The refrigerant circuit contains R134a (HFC) or R600a (HC) (see the rating plate inside the appliance).
Appliances with Isobutane (R600a): isobutane is a natural gas without environmental impact, but is flammable.
Therefore, make sure the refrigerant circuit pipes are not damaged.
This product may contain Fluorinated Greenhouse Gases covered by the Kyoto Protocol; the refrigerant gas is inside a hermetically sealed system.
Refrigerant gas: R134a has a Global Warming Potential of (GWP) 1300.
This appliance has been designed for preserving food and is manufactured in compliance with Regulation (CE) No. 1935/2004. - This appliance has been designed, manufactured and marketed in compliance with:
- safety objectives of the "Low Voltage" Directive 2006/95/CE (which replaces 73/23/CEE and subsequent amendments);
- the protection requirements of Directive "EMC" 2004/108/EC.
Electrical safety of the appliance can only be guaranteed if it is correctly connected to an approved earthing system.
ASSISTANCE
Before calling for Assistance:
- Check if the malfunction can be solved on your own (see Troubleshooting).
- If after all the checks, the appliance still does not operate or the problem persists, call the nearest Service Centre.
Communicating:
type of malfunction; - appliance model (Mod.); - the service number (the number after the word SERVICE on the rating plate on the rear of the appliance).
Never call on unauthorized technicians and always refuse spare parts which are not originals.
SERVICE
0000 000 0000
MODE D'EMPLOI
SCHEMA DE L'APPAREIL (Fig 1):
The appliance must be used only for freezing fresh food, freezing cooked food, and making ice.
According to the rules and standards, the appliance must be earthed. The manufacturer is not responsible for any damage caused by improper use or by ignoring the warnings.
- Connect the appliance to the power supply. If it is not working, it must be switched off and unplugged. In case of any malfunction, contact the service center within 24 hours. 2. The appliance must be connected to the power supply only by qualified personnel in accordance with the instructions and local safety regulations. 3. Installation and connection to the power grid may only be carried out by qualified personnel in accordance with the instructions and local safety regulations. 4. Before first use, clean the interior surfaces.
- Before connecting the appliance to the power supply, make sure that the voltage in the network corresponds to the voltage indicated on the nameplate, which is located on the back of the appliance.
- Electrical connections must be installed in accordance with local standards.
INSTALLATION
- Unpack the appliance. Remove the 4 screws installed with the door and the appliance. (Fig. 3)
- Make sure that the plug is correctly inserted into the hole for draining water (if available) (E).
- To ensure optimal operation of the appliance, leave at least 7 cm of free space between the appliance and the rear wall and between the side walls of the appliance and surrounding objects. (Fig. 4)
- Install the accessories (if available).
SWITCHING ON THE APPLIANCE
The recommended temperature inside the appliance is -18° C. - Connect the appliance to the power outlet. The green indicator light will start to shine (if available). The red indicator light will also start to shine (if available), because the temperature inside the appliance is not low enough for storing products. Within a few hours after switching on the appliance, the red indicator light should go out. After connecting the appliance to the power supply, when the optimal temperature is reached (this phase takes about 1 hour, during which time you should not open the door), make sure that the fast freeze button is not pressed (the yellow indicator light (if available) should not be shining). - Place the products in the appliance only after the red indicator light (if available) has gone out. Be careful when opening the door of the appliance, as it may not open immediately after closing. Wait a few minutes before opening the door again.
TEMPERATURE ADJUSTMENT
Using the thermostat, select the desired storage temperature. To adjust the temperature inside the appliance, turn the knob to position II.
- Turn the thermostat knob to position 1 to set the coldest temperature for storage.
- Turn the thermostat knob to position 6 to set the coldest temperature for storage.
- In case of partial blockage or blockage of the internal cooling system, indicated by the symbol «E», it is recommended to set the thermostat to the lower position (at the «E» mark), if it is on the thermostat scale.
PRODUCT FREEZING
Preparing products for freezing
Before freezing food products, it is necessary to use the following packaging: aluminum foil, food film, airtight plastic bags, and containers with lids.
DEFROSTING THE DEVICE
When the ice thickness on the walls of the device reaches 5-6 mm, it must be defrosted.
Disconnect the device from the power source. Remove the product from the device and place it in a cool place or in a thermal bag. Leave the device door open. - Inside the device, pull out the drain plug for melting water (depending on the model) (Fig. 8). Outside the device, pull out the drain plug for melting water (depending on the model) and install it as shown in Figure 8. - Use the scraper (D) (depending on the model), as shown in Fig. 8, to remove ice residues inside the device. If there is no scraper, use a plastic container. - To speed up the defrosting process, place a container with hot water inside the device. Close the door of the freezer chamber. - Do not use sharp metal objects to remove ice, so as not to damage the inner surface of the device. - Do not use abrasive materials and do not heat the inner part of the device. - Thoroughly wipe the inner surface of the device dry. Defrost the device again by connecting it to the power supply.
CLEANING AND MAINTENANCE
Remove the shelves and the upper edges of the device (see "Troubleshooting"). Wash the defrosted device inside with a soft cloth soaked in warm water and/or a mild detergent.
Clean the side ventilation openings (if available). Before performing any maintenance work, disconnect the device from the power supply. Do not use abrasive products, metal sponges, or means for removing stains (e.g., acetone, trichloroethylene) to clean the device. To ensure the best performance of the device, carry out cleaning and maintenance of the device at least once a year.
REPLACING THE ELECTRIC LAMP (IF AVAILABLE)
Disconnect the device from the power source. Remove the diffuser by following the steps shown in the figure. Unscrew the electric lamp and replace it with an analogous lamp of the same power and voltage. - Return the diffuser to its place and connect the device to the power supply.
TROUBLESHOOTING
- The red indicator light (if available) does not go out.
Is the power supply turned on? Is defrosting in progress? - Are the holes and the device door closed properly? - Is there a heat source near the device? - Is the thermostat installed correctly? - Are the ventilation grille and condenser clean?
- Condensation forms on the outer surface of the device walls.
Under normal atmospheric conditions (humidity level up to 85%) or in case of condensation in the room with increased humidity or poor ventilation, the formation of condensate is normal and does not affect the efficiency of the device. 8. Uneven ice shape on the internal walls of the device. - This is also normal.
PROTECTION OF THE ENVIRONMENT
- Packaging
Packaging material is 100% recyclable, marked with the recycling symbol. Disposal must be carried out in accordance with local regulations.
Keep packaging materials (plastic bags, polystyrene parts, etc.) out of reach of children, as they can be dangerous.
- Disposal
Dispose of the device in accordance with the use of materials that can be reused.
The device complies with the European Directive 2002/96/EC on waste electrical and electronic equipment (WEEE).
By properly disposing of the device, you will help prevent negative consequences for the environment and human health.

The symbol on the device or in the accompanying documentation indicates that it should not be treated as household waste, but must be handed over to an appropriate collection point for recycling of electrical and electronic equipment.
Before disposing of the device, make it unusable by cutting the power cord and removing the door and shelves so that children cannot get inside and get trapped. Dispose of the device in accordance with local regulations for waste disposal, by handing it over to a specialized collection center; do not leave the device unattended, as it can be a source of danger for children. For additional information on use, repair, and recycling of your device, contact competent local authorities, waste collection points, or the store where the device was purchased.
Information.
These devices do not contain ozone-depleting elements. The refrigerant circuit contains R134a (hydrofluorocarbon) or R600a (hydrocarbon) (see the rating plate inside the device).
The device contains isobutane (R600a). Isobutane is a natural gas with zero ozone depletion potential, but it is flammable. Ensure that the refrigerant circuit is not damaged.
The refrigerant is fluorine-containing gas covered by the Kyoto Protocol; the refrigerant is inside a hermetically sealed system.
The nominal cooling capacity (Pi) of the refrigerant R134a is 1300.
Declaration of Conformity CE
This device has been designed for storing food products and manufactured in accordance with the standard (CE) No 1935/2004. - This device has been designed, manufactured and sold in accordance with:
—the safety requirements set out in Directive 2006/95/EC on low-voltage equipment (which replaces Directive 73/23/EEC and its subsequent amendments);
the electromagnetic compatibility requirements set out in Directive 2004/108/EC.
Electrical safety can only be guaranteed if the device is properly connected to an approved earthing system.
HELP
Before contacting help:
- check whether you can fix the problem yourself (see section "Troubleshooting")
- If after these checks the device still does not work or the problem persists, call the nearest service center.
Provide the following information:
the type of fault; - the model of the device (Mod.); - the service number (the number indicated after the word "SERVICE" on the rating plate, which is located on the back of the device).
Never contact unauthorized specialists and do not use non-original spare parts.
SERVICE
0000 000 00000
USER MANUAL
DEVICE DIAGRAM (Fig. 1)
A. Handle. B. Safety lock (if present). C. Gasket. D. Separator (if present). E. Defrost water drain plug. F. Control panel. G. Side motor ventilation grille.
CONTROL PANEL DIAGRAM (Fig. 2)
1
Information: