
WI503Q-2LBGE0001 - Smartwatch ASUS - Free user manual and instructions
Find the device manual for free WI503Q-2LBGE0001 ASUS in PDF.


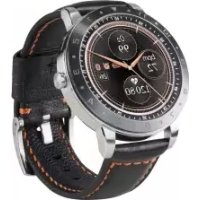
| Product type | Smartwatch |
| Brand | ASUS |
| Model | WI503Q-2LBGE0001 |
| Case dimensions | 45 mm diameter |
| Thickness | 12 mm |
| Weight | 50 g (with strap) |
| Screen type | AMOLED 1.39 inches |
| Screen resolution | 400 x 400 pixels |
| Operating system | Wear OS |
| Processor | Qualcomm Snapdragon Wear 2100 |
| Battery | 340 mAh, lithium-ion |
| Battery life | Up to 2 days |
| Sensors | Accelerometer, gyroscope, heart rate monitor, barometer |
| Connectivity | Bluetooth 4.2, Wi-Fi 802.11 b/g/n |
| Water resistance | IP67 |
| Storage | 4 GB |
| RAM | 512 MB |
| Compatibility | Android 4.4+ / iOS 9+ |
| Main features | Notifications, activity tracking, GPS, NFC payment |
| Care and cleaning | Clean with a soft, dry cloth |
| Safety | Avoid shocks and extreme temperatures |
| Spare parts and repairability | Non-removable battery, repair at authorized center |
| General information | Brand ASUS, model WI503Q-2LBGE0001 |
Frequently Asked Questions - WI503Q-2LBGE0001 ASUS
User questions about WI503Q-2LBGE0001 ASUS
0 question about this device. Answer the ones you know or ask your own.
Ask a new question about this device
Download the instructions for your Smartwatch in PDF format for free! Find your manual WI503Q-2LBGE0001 - ASUS and take your electronic device back in hand. On this page are published all the documents necessary for the use of your device. WI503Q-2LBGE0001 by ASUS.
USER MANUAL WI503Q-2LBGE0001 ASUS
No part of this user guide, including the products and software described in it, may be reproduced, transmitted, transcribed, stored in a retrieval system, or translated into any language in any form or by any means, except documentation kept by the purchaser for backup purposes, without the express written permission of ASUSTeK Computer INC. ("ASUS").
Product warranty or service will not be extended if: (1) the product is repaired, modified or altered, unless such repair, modification of alteration is authorized in writing by ASUS; or (2) the serial number of the is defaced or missing.
ASUS PROVIDES THIS User guide "AS IS" WITHOUT WARRANTY OF ANY KIND, EITHER EXPRESS OR IMPLIED, INCLUDING BUT NOT LIMITED TO THE IMPLIED WARRANTIES OR CONDITIONS OF MERCHANTABILITY OR FITNESS FOR A PARTICULAR PURPOSE. IN NO EVENT SHALL ASUS, ITS DIRECTORS, OFFICERS, EMPLOYEES OR AGENTS BE LIABLE FOR ANY INDIRECT, SPECIAL, INCIDENTAL, OR CONSEQUENTIAL DAMAGES (INCLUDING DAMAGES FOR LOSS OF PROFITS, LOSS OF BUSINESS, LOSS OF USE OR DATA, INTERRUPTION OF BUSINESS AND THE LIKE), EVEN IF ASUS HAS BEEN ADVISED OF THE POSSIBILITY OF SUCH DAMAGES ARISING FROM ANY DEFECT OR ERROR IN THIS User guide OR PRODUCT.
Products and corporate names appearing in this user guide may or may not be registered trademarks or copyrights of their respective companies, and are used only for identification or explanation and to the owners' benefit, without intent to infringe.
SPECIFICATIONS AND INFORMATION CONTAINED IN THIS User guide ARE FURNISHED FOR INFORMATIONAL USE ONLY, AND ARE SUBJECT TO CHANGE AT ANY TIME WITHOUT NOTICE, AND SHOULD NOT BE CONSTRUED AS A COMMITMENT BY ASUS. ASUS ASSUMES NO RESPONSIBILITY OR LIABILITY FOR ANY ERRORS OR INACCURACIES THAT MAY APPEAR IN THIS User guide, INCLUDING THE PRODUCTS AND SOFTWARE DESCRIBED IN IT.
Copyright © 2016 ASUSTeK Computer INC. All Rights Reserved.
LIMITATION OF LIABILITY
Circumstances may arise where because of a default on ASUS' part or other liability, you are entitled to recover damages from ASUS. In each such instance, regardless of the basis on which you are entitled to claim damages from ASUS, ASUS is liable for no more than damages for bodily injury (including death) and damage to real property and tangible personal property; or any other actual and direct damages resulted from omission or failure of performing legal duties under this Warranty Statement, up to the listed contract price of each product.
ASUS will only be responsible for or indemnify you for loss, damages or claims based in contract, tort or infringement under this Warranty Statement.
This limit also applies to ASUS' suppliers and its reseller. It is the maximum for which ASUS, its suppliers, and your reseller are collectively responsible.
UNDER NO CIRCUMSTANCES IS ASUS LIABLE FOR ANY OF THE FOLLOWING: (1) THIRD-PARTY CLAIMS AGAINST YOU FOR DAMAGES; (2) LOSS OF, OR DAMAGE TO, YOUR RECORDS OR DATA; OR (3) SPECIAL, INCIDENTAL, OR INDIRECT DAMAGES OR FOR ANY ECONOMIC CONSEQUENTIAL DAMAGES (INCLUDING LOST PROFITS OR SAVINGS), EVEN IF ASUS, ITS SUPPLIERS OR YOUR RESELLER IS INFORMED OF THEIR POSSIBILITY.
SERVICE AND SUPPORT
Visit our multi-language web site at https://www.asus.com/support/
Table of Contents
About this manual 6
Conventions used in this E-Manual 7
Typography 7
Input mode....7
Chapter 1: Parts and features
Getting to know your ASUS ZenWatch 10
Chapter 2: Using your ASUS ZenWatch
Replacing the strap....14
Charging the ASUS ZenWatch....15
Powering on....17
Restarting your ASUS ZenWatch 17
Pairing with another device 18
Pairing with multiple ASUS ZenWatch devices....18
Powering off....19
Resetting your ASUS ZenWatch....19
Chapter 3: Working with Android Wear
Installing Android Wear app
on your phone....22
Pairing for the first time....23
Navigating your ASUS ZenWatch 26
Watch face....27
Muting notifications and viewing
the battery charge percentage....28
Changing the watch face....29
Dimming the screen....29
Using voice actions....30
Cards 32
Viewing and launching apps....33
Phone audio ....34
Updating your ASUS ZenWatch....35
Chapter 4: Featured ASUS ZenWatch phone apps
Where to get ASUS ZenWatch apps....38
ASUS ZenWatch Manager app 39
ASUS ZenWatch Manager home screen....39
Watch faces....40
ASUS ZenWatch Manager Tools screen....41
General 42
FoneHelper 42
Others 42
ASUS ZenFit....43
Setting activity goals....44
ASUS Remote Camera app....45
Remote Camera home screen....46
ASUS Zenwatch FaceDesigner app....47
Editing a watch face ....48
ZenTalk Fans Forum......48
Appendices
Safety precautions....50
Battery precautions ....51
Regulatory information....51
Storing your device for long periods of time ....52
Federal Communications Commission Interference Statement...53
RF exposure warning....54
Canada, Industry Canada (IC) Notices ....54
Canada, avis d'Industry Canada (IC) 55
Radiation Exposure Statement: 56
RF Exposure information (SAR) - CE ....58
CE Marking....58
Global Environmental Regulation Compliance and Declaration ..59
ASUS Recycling/Takeback Services....59
Proper disposal....60
Rechargeable Battery Recycling Service in North America......60
Regional notice for California....60
Regional notice for India....60
Japan Technical Conformity Mark....61
Regional notice for Singapore 61
Australian Communication and Media Authority......61
National Telecommunications Commission (NTC)
of the Philippines....61
Notices for removable batteries ....62
Prevention of Hearing Loss....62
Nordic Lithium Cautions (for lithium-ion batteries)....63
About this manual
This manual provides information about the hardware and software features of your ASUS ZenWatch, organized through the following chapters:
Chapter 1: Parts and features
This chapter details the hardware components of your ASUS ZenWatch.
Chapter 2: Using your ASUS ZenWatch
This chapter shows you how to use the different parts of your ASUS ZenWatch.
Chapter 3: Working with Android Wear
This chapter provides an overview of using Android Wear in your ASUS ZenWatch
Chapter 4: Featured ASUS ZenWatch phone apps
This chapter provides information on some of the features ASUS ZenWatch apps that you can download and use on your paired phone.
Appendices
This section includes notices and safety statements for your ASUS ZenWatch.
Conventions used in this E-Manual
To highlight key information in this E-Manual, some text are presented as follows:
IMPORTANT! This message contains vital information that must be followed to complete a task.
NOTE: This message contains additional information and tips that can help complete tasks.
WARNING! This message contains important information that must be followed to keep you safe while performing tasks and prevent damage to your ASUS ZenWatch's data and components.
Typography
Bold = This indicates a menu or an item that must be selected. Italic = This indicates sections that you can refer to in this user guide.
Input mode
The icons below indicate the input features you can use to complete a series of tasks or procedures on your ASUS ZenWatch.

= Use gestures.

= Use voice command.
1
Parts and features
Getting to know your ASUS ZenWatch


NOTE: DO NOT insert foreign objects into the speaker or microphone hole.
1 Touch screen display panel
Use the touch screen display panel to operate your ASUS ZenWatch using gestures.
NOTE: For more details, refer to the Navigating your ASUS ZenWatch section in this E-Manual.
2 Loop
Use the loop to tuck away the excess strap of your ASUS ZenWatch.
3 Strap
The strap allows you to wear your ASUS ZenWatch on your wrist.
NOTE: The watch strap and the watch buckle/clasp varies per model.
4 Spring bar
Press the pin on this spring bar to remove the current strap of your ASUS ZenWatch.
NOTE: To replace the current strap of your ASUS ZenWatch, refer to the Replacing the straps section in this E-Manual.
5 Shortcuts button
Press this button to access shortcuts on your ASUS ZenWatch. You can configure the shortcut through the Button setting app on your ASUS ZenWatch.

Microphone
The built-in microphone allows you to operate your ASUS ZenWatch using voice command.
NOTE: DO NOT insert foreign objects into the speaker or microphone hole.

Power and reset button
Press this button to power your ASUS ZenWatch on or off, or to reset it to its factory settings.
NOTE: For details on using the power and reset button, refer to the Powering on, Powering off, and Resetting your ASUS ZenWatch sections in this E-Manual.

ECO mode button
Press this button to enter ECO mode and save power.

Charging connectors
Align and connect these charging connectors to the charging pins of your charging cradle to charge the battery of your ASUS ZenWatch.

Speaker
The built-in audio speaker allows you to hear audio straight from the ASUS ZenWatch.
NOTE: DO NOT insert foreign objects into the speaker.
2
Using your ASUS ZenWatch
Replacing the strap
IMPORTANT! Your ASUS ZenWatch is compatible with ASUS WI503Q watch straps.
- Slide and hold the pin to an unlocked position and carefully pull out one end of the spring bar, then remove the current strap.
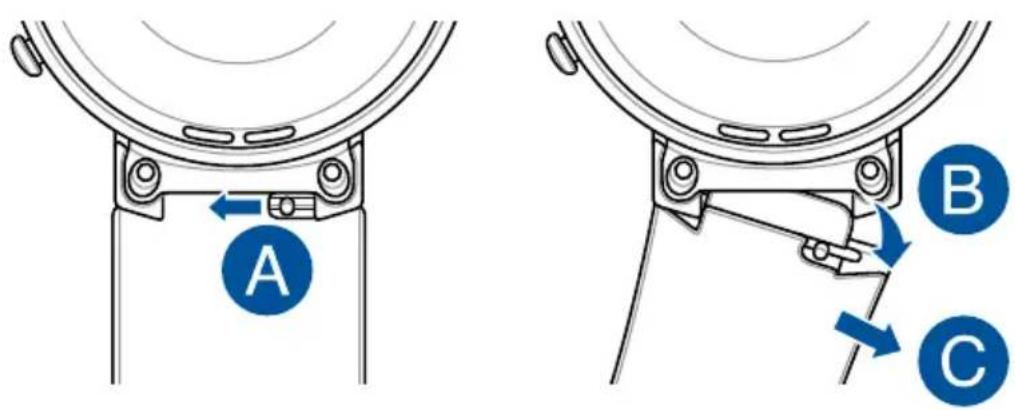
- Insert one end of the spring bar on your new strap into the ASUS ZenWatch, then slide and hold the pin to an unlocked position and push the strap into the ASUS ZenWatch.
NOTE: Make fine adjustments to the spring bar to ensure that your new strap is secured.

Charging the ASUS ZenWatch
IMPORTANT! Sweat, dirt, grime, grease or other stains may prevent your ASUS ZenWatch from charging properly. Ensure to clean the charging connectors with a dry, nonabrasive, lint-free cloth before charging.
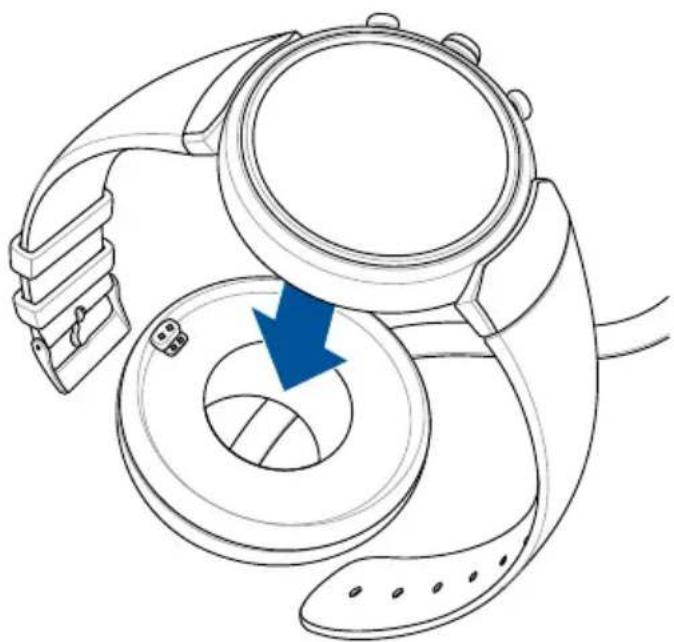
- Connect your ASUS ZenWatch to the charging cable. Ensure that the connectors are aligned correctly to prevent damage to the pins.
natural_image
Diagram of a handbag with a blue arrow indicating a specific component (no text or symbols present)NOTE: The charging cable is designed to connect to the ASUS ZenWatch in only one orientation.
- Connect the charging cable to your power adapter, then connect the power adapter to a nearby power outlet.

natural_image
Diagram showing connection between a USB device and a device with an output panel (no text or symbols)NOTE:
• Ensure to use the bundled charging cable and power adapter.
- Rating input current for the wearable device is +5Vdc, 2A, 10W, see product's label for details.
Powering on
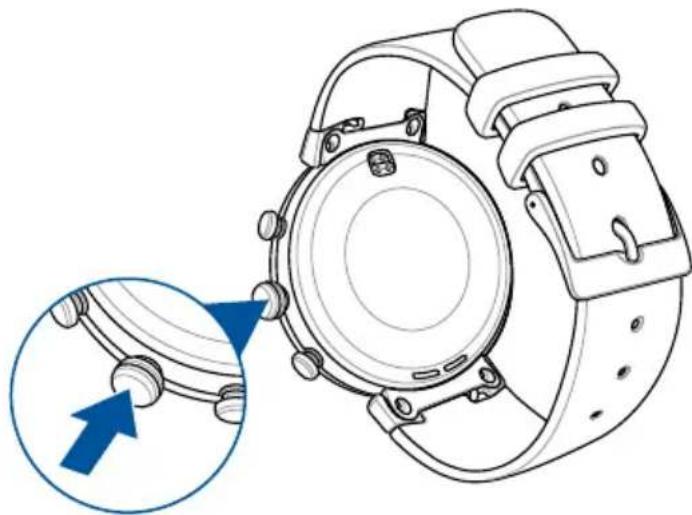
Press and hold the power and reset button for five (5) seconds.
natural_image
Technical line drawing of a smartwatch with a close-up inset showing the mechanical component (no text or symbols)Restarting your ASUS ZenWatch
- Press and hold the power and reset button on your ASUS ZenWatch to launch the app list.
- Swipe upward and tap Settings.
- Swipe upward and tap Restart, then tap the check mark.
Pairing with another device
IMPORTANT! Reset your ASUS ZenWatch to its factory settings before you start pairing it with another phone.
- Press and hold the power and reset button on your ASUS ZenWatch to launch the app list.
- Swipe upward and tap Settings.
- Swipe upward and tap Factory reset, then tap the check mark.
- The next time your ASUS ZenWatch powers on, it will display Install Android wear on your phone.
- Refer to Working with Android Wear for details on pairing your ASUS ZenWatch with a phone.
Pairing with multiple ASUS ZenWatch devices
- Power on your ASUS ZenWatch.
- Enable Bluetooth on your phone, then place it near your ASUS ZenWatch.
- Launch Android Wear on your phone then ta> Pair with a new watch.
- Check the model name on your ASUS ZenWatch, then select the same model name on your phone.
- Ensure that the passkey on your phone and ASUS ZenWatch are the same, then tap Pair on your phone.
Powering off
- Press and hold the power and reset button on your ASUS ZenWatch to launch the app list.
- Swipe upward and tap Settings.
- Swipe upward and tap Power off, then tap the check mark.
Resetting your ASUS ZenWatch
Resetting your ASUS ZenWatch restores it to its factory settings.
- Press and hold the power and reset button on your ASUS ZenWatch to launch the app list.
- Swipe upward and tap Settings.
- Swipe upward and tap Factory reset, then tap the check mark.
IMPORTANT! After resetting your ASUS ZenWatch, you will need to pair it again with your phone. For more details, refer to the Working with Android Wear chapter.
3
Working with Android Wear
Installing Android Wear app on your phone
IMPORTANT!
- Requires a phone running Android 4.3+ or iOS 8.2+. Visit g.co/WearCheck on your phone to see if it is compatible.
• Supported features may vary between Android and iOS.
-
Connect your phone to the Internet, then log in or sign up for a Google account or Apple ID.
-
Launch Play Store or App Store.

natural_image
Two app icons: a shopping bag with a colorful play button and an Apple App logo (no text or symbols)- Search for Android Wear, then install the app.
natural_image
Two icons: a magnifying glass and a smartwatch, both without any text or symbols.NOTE: Android Wear is a trademark of Google Inc.
Pairing for the first time
IMPORTANT! Turn on the Bluetooth of your phone before pairing.
- Connect your phone to the Internet.
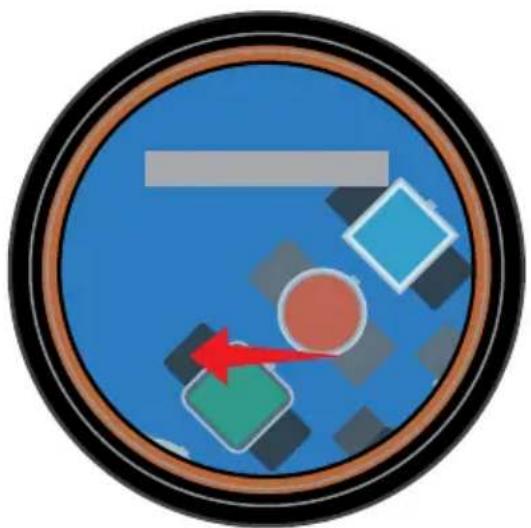
- Power on your ASUS ZenWatch and swipe left.
natural_image
Circular diagram with geometric shapes and a red arrow, no text or symbols presentNOTE: Ensure to connect your watch to a power source.
- Select the language similar to your phone.
NOTE: When selecting your country list, keep in mind that for voice actions to work, the phone and watch must use the same language.

natural_image
Circular diagram with a blue dot, gray dots, and a horizontal bar inside, no text or symbols present.- Prepare your phone and ASUS ZenWatch for pairing then swipe left.

natural_image
Circular icon with smartwatches and smartphones, no text or symbols present- Next, install Android Wear on your phone then swipe left.

flowchart
graph TD
    A["Download Device"] -->|↓| B["Smart Phone"]
NOTE: For more details, refer to the Installing Android Wear app on your phone section.
- On your phone, select the same model name shown on your ASUS ZenWatch.

- Ensure that the passkey on your phone and ASUS ZenWatch are the same, then tap Pair on your phone.
Navigating your ASUS ZenWatch
Waking your ZenWatch
Tap to wake up your ASUS ZenWatch.

natural_image
Circular icon with clock face showing 10:08, featuring a stylized sphere inside a blue sky with clouds (no text or symbols beyond time and frame)You can also tilt your wrist to wake up your ASUS ZenWatch.

natural_image
Illustration of a wristwatch with a hand and blue arrow indicating clockwise motion (no text or symbols)Watch face
The watch face is the screen that displays the time on your ASUS ZenWatch.
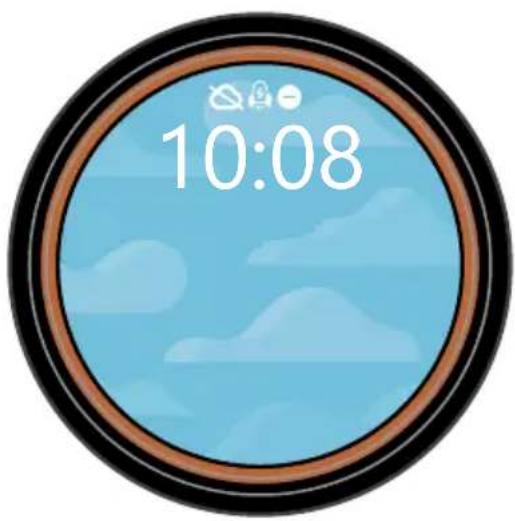

ASUS ZenWatch is currently disconnected.

ASUS ZenWatch is being charged.

Mute notifications.

Mute notifications.
NOTE: HyperCharge mode is only available when using the bundled charging cable and power adapter.
Muting notifications and viewing the battery charge percentage

Go to the watch face and swipe down, then tap the screen to mute or unmute notifications. You can also view the current battery percentage.
Changing the watch face

- Tap and hold the watch face for two (2) seconds.
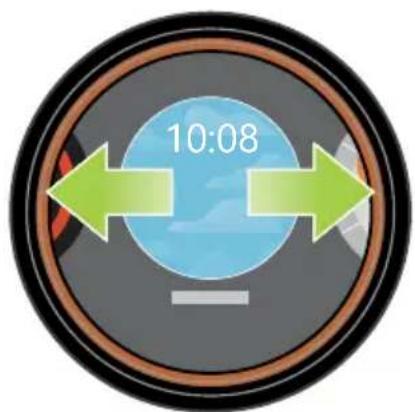
- Swipe left or right then tap to select your watch face.
NOTE: Use ASUS ZenWatch Manager app to personalize your own watch face.
Dimming the screen

natural_image
Line drawing of a hand holding a wristwatch with a blue speedometer, no text or symbols presentPress your palm on the ASUS ZenWatch to dim your touch screen display.
Using voice actions
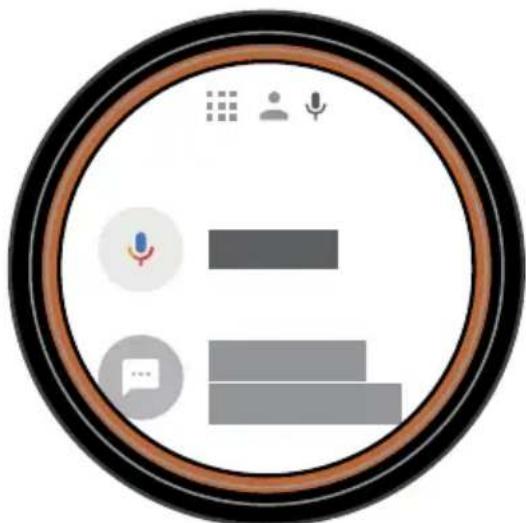
Using voice action allows you to call out features and apps. To start using voice action:
natural_image
Circular icon with abstract icons and text, no readable document text or symbolsWake your ASUS ZenWatch, say "OK Google", then say any voice command from the list. For example: "Take a note."
NOTE: Refer to the Action list section for more details.
Action list
Remind me - Use this to create reminders that automatically sync with your Google account. On the date of the task/event, Google Now sends a notification card to remind you of it.
Show me my steps - This option allows you to track your daily number of steps, for fitness purposes.
Send a text - Use this to send a text message to any contact saved on your paired device.
Email - Use this to create or read emails received from your paired device.
Agenda - Use this to view all events scheduled on your paired device's calendar.
Navigate - Use this to locate specific places and destinations.
Set a timer - Use this to set a countdown timer. After choosing this option, swipe up to view a list of timer options.
Start stopwatch - Use this to enable the stopwatch feature. After choosing this option, tap on the white dot to begin the stopwatch.
Set an alarm - Use this to set an alarm. After choosing this option, swipe up or down to view a list of alarm time options.
Settings - Use this to configure the display, connectivity, and device settings of your ASUS ZenWatch.
Start - Use this option to access the bundled apps you can use with your ASUS ZenWatch.
Cards
Notifications, information, apps, and features are displayed on your ASUS ZenWatch as cards.
Reading your cards

natural_image
Circular icon with a blue sky, sun, and green upward arrow inside, no text or symbols present.Swipe up to go to the next card.
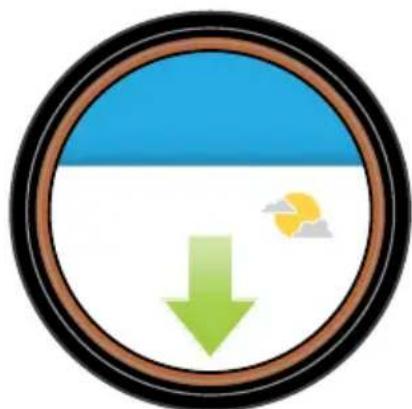
natural_image
Circular icon with a blue sky, green downward arrow, and sun symbol (no text or numbers)Swipe down to go back to the previous card.

natural_image
Circular diagram with a blue vertical bar, green arrow, and dotted line inside, no readable text or symbolsSwipe left to see more information about the card you are viewing.
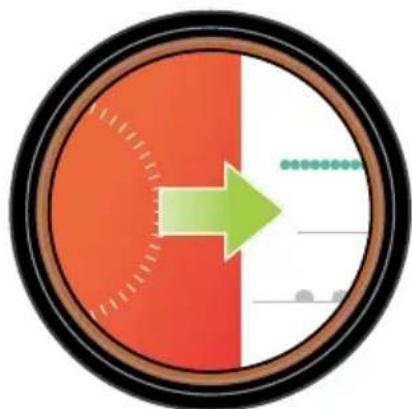
natural_image
Circular diagram with a red-orange ring and a green arrow pointing right, no text or symbols present.Swipe right to close the card you are viewing or go back to your previous action.
Viewing and launching apps

- Tap on the watch face, or wake up your ASUS ZenWatch then swipe left.

natural_image
Circular icon with a green left-pointing arrow and icons including a printer, clock, and user profile (no text or symbols)- Swipe up or down to view the app list then tap the app you want to launch.

flowchart
graph TD
    A["Monitor Icon"] --> B["Upward Arrow"]
    B --> C["Downward Arrow"]
    C --> D["Circle Frame"]
    style A fill:#f9f,stroke:#333
    style D fill:#bbf,stroke:#333
NOTE: Swipe left or right to switch between the app list, contacts, and voice action.

Wake your ASUS ZenWatch, say "OK Google", then say Start plus the name of the app you would like to launch.
Phone audio
Enable this feature to listen to audio straight from your ASUS ZenWatch when you make or receive calls.
To enable phone audio:
- Press and hold the power and reset button on your ASUS ZenWatch to launch the app list.
- Swipe upward and tap Settings.
- Swipe upward and tap Bluetooth.
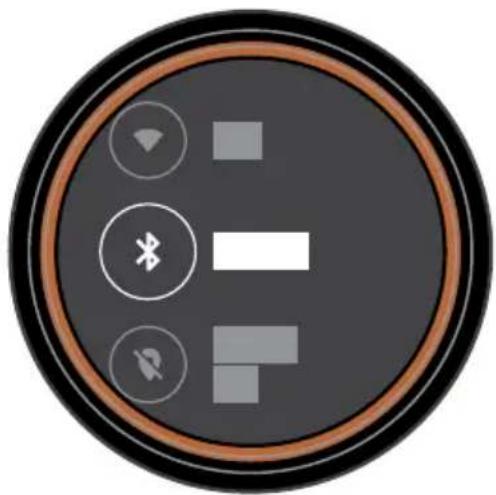
natural_image
Circular icon with three circular icons and a horizontal bar, no text or symbols present- Tap Play phone audio on watch to enable phone audio.
NOTE: Ensure Phone audio is enabled on your phone.
Updating your ASUS ZenWatch
Note: The steps in this section are for phones running Android.
- Connect your ASUS ZenWatch to the charging cable. Ensure that the connectors are aligned correctly to prevent damage to the pins.
- Connect the charging cable to your power adapter, then connect the power adapter to a nearby power outlet.
IMPORTANT!
- Ensure to keep your watch connected to a power source during the update process.
-
Ensure your watch is paired with your phone during the update process.
-
Press and hold the power and reset button on your ASUS ZenWatch to launch the app list.
-
Swipe upward and tap Settings.
-
Swipe upward and tap About.
-
Swipe upward and tap System updates to check for updates.
-
Follow the onscreen instructions to complete the update.
4
Featured ASUS ZenWatch phone apps
Where to get ASUS ZenWatch apps
Download ASUS ZenWatch apps on your paired device via Play Store so you can maximize the features of your ASUS ZenWatch.
To download ASUS ZenWatch apps:
- Connect your phone to the Internet then log on or sign up for a Google account.
- Launch Play Store on your phone.
- Key in the name of the ASUS ZenWatch app on the search field then tap INSTALL.

natural_image
Two gray icons: a magnifying glass and a shopping bag with a colorful play button (no text or symbols)NOTE:
- Visit Play Store to view the latest list of ASUS ZenWatch apps.
• ASUS ZenWatch apps support Android devices only.
ASUS ZenWatch Manager app
This app allows you to configure the settings of your ASUS ZenWatch. It also includes security features that help keep track of your ASUS ZenWatch and your paired device.
NOTE: This app is available in selected countries only.
ASUS ZenWatch Manager home screen
The ASUS ZenWatch Manager home screen reflects the same watch status shown on your paired ASUS ZenWatch. It also allows access to various tools for you to use with your ASUS Zenwatch.

Watch faces
This feature allows you to personalize and setup your watch face to display other information such as step count, weather updates, second time zone option, and the current ASUS ZenWatch battery status.
To personalize your watch face:
-
Launch ASUS ZenWatch Manager then tap watch faces.
-
Swipe up or down to browse through the available watch faces.

- Tap the watch face you would like to use to complete.
NOTE: Tap Customize to personalize it according to your preferences.
ASUS ZenWatch Manager Tools screen
The ASUS ZenWatch Manager Tools screen contains various handy tools that you can use with your ASUS Zenwatch. Tap Tools on the ASUS ZenWatch Manager home screen to enter the Tools screen.

General
- Face settings - Allows you to manage settings for your watch face.
FoneHelper
- Remote call control - Control your calls remotely with your watch.
- Forgot phone warning - Alert you when your phone is out of connection range.
- ECO mode - Change ECO mode settings to save more battery power.
- Cover to mute (for Zenfone only) - Cover your watch to automatically mute the alarms from ASUS Clock.
- Find my watch - Make your watch vibrate to help find your watch.
- Unlock my phone - Unlock your phone without the need for PIN codes.
Others
- Flashlight - Use this feature to activate the flashlight feature of your ASUS ZenWatch using your paired phone.
- SOS - This feature allows you to select the contacts you can automatically send an emergency message to when you select the SOS app in your ASUS ZenWatch.
ASUS ZenFit
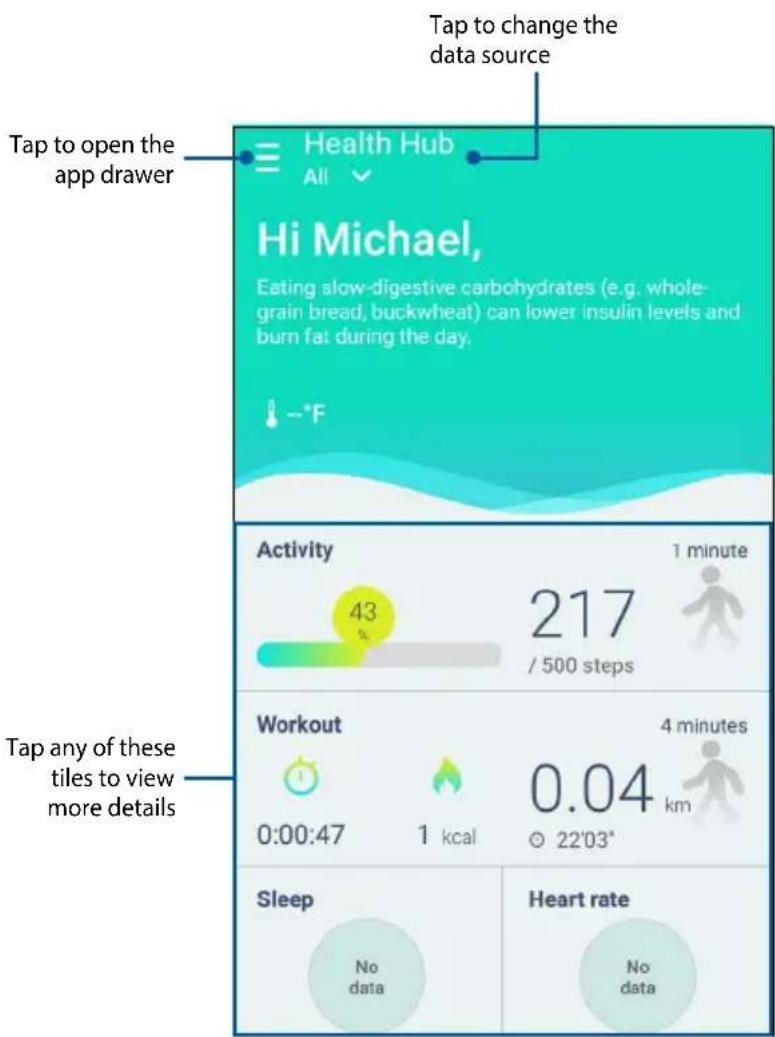
Using this app allows you to track daily features such as: calories burned, activity, exercise intensity, and energy. You can track your fitness activities on a daily or weekly basis.
NOTE:
• This app is available in selected countries only.
- The ASUS ZenFit app are not intended for medical purposes and are for reference only. The results may vary per environment, measuring conditions, and physical status of the user.
Setting activity goals
To set activity goals:
-
Launch the ASUS ZenFit app on your phone.
-
Tap the Activity tile, then tap 🔒.
-
On the Today's target screen, input the number on the number of steps inside the box or move the slide button to the left or to the right to set your targeted daily number of steps.
-
Tap Done to complete.

ASUS Remote Camera app
This app allows you to use your ASUS ZenWatch as a remote controller and extension of your paired phone's camera. Once downloaded, you can start using the following camera features on your ASUS ZenWatch:
• To launch your paired phone's camera
• As a live preview for taking photos
- To switch between the photo and video functions of your paired phone's camera
• As a remote shutter
• To change the settings of your paired phone's camera
After downloading, launch Remote Camera from your paired phone to start using this app.
IMPORTANT! This feature can only be used if your ASUS ZenWatch is currently paired with your phone.
Remote Camera home screen
Refer to the following actions when navigating your Remote Camera home screen.

ASUS Zenwatch FaceDesigner app
Make your own unique watch face to stand out of the crowd. You can create thousands of watch faces and customize them to your preference. After downloading, launch FaceDesigner from your paired phone to start using this app.

Editing a watch face
- Tap a watch face to enter the editing screen.
- Customize your watch face, then tap Done to complete.

ZenTalk Fans Forum

www.asus.com/zentalk/global_forward.php
Appendices
Safety precautions
- Your ASUS ZenWatch is water-resistant, not waterproof. Keep it dry and refrain from using it near liquids, rain, moisture, and other sources of water or liquid. If it gets wet, wipe immediately using a soft dry cloth.
- Ensure that your ASUS ZenWatch is dry before using it with app features.
- Follow the warning labels for your personal safety.
- Never attempt to short-circuit the battery inside your ASUS ZenWatch. Never attempt to disassemble and reassemble the battery.
• Discontinue usage if leakage is found. - Discontinue usage if you experience any allergic reaction or discomfort. Consult a doctor immediately.
- The ASUS ZenWatch and the charging cradle must be recycled or disposed of properly.
- Keep any small components away from children.
- Your ASUS ZenWatch should only be used in environments with ambient temperatures between 5 °C and 40 °C.
Battery precautions
- The battery used in this device may present a risk of fire or chemical burn if removed or disassembled.
• Follow the warning labels for your personal safety. - Risk of explosion if battery is replaced by an incorrect type.
• Do not dispose of in fire.
• Never attempt to short-circuit the battery.
• Never attempt to disassemble and reassemble the battery.
• Discontinue usage if leakage is found. - The battery and its components must be recycled or disposed of properly.
- Keep the battery and other small components away from children.
Regulatory information
For regulatory information, go to Setting > About > Regulatory information.
Storing your device for long periods of time
If you need to store your device for a long period of time, we recommend following these guidelines:
- Charge your device to around 50%, then power down to avoid additional battery use.
- DO NOT fully charge your device, if you store your device when its battery is fully charged for an extended period of time, the battery may lose some capacity, leading to shorter battery life.
- DO NOT fully drain your device, if you store your device when its battery is fully discharged for an extended period of time, the battery could fall into a deep discharge state, which renders it incapable of holding a charge.
- Place your device in a cool and dry environment that is less than 90^ (32°C).
- If you store your device for longer than six months, charge its battery to around 50% every six months.
- After removing your device from storage, it may require 20 minutes of charging with the original adapter before you can use it.
Federal Communications Commission Interference Statement
This device complies with Part 15 of the FCC Rules. Operation is subject to the following two conditions: (1) this device may not cause harmful interference, and (2) this device must accept any interference received, including interference that may cause undesired operation.
This equipment has been tested and found to comply with the limits for a Class B digital device, pursuant to part 15 of the FCC Rules. These limits are designed to provide reasonable protection against harmful interference in a residential installation. This equipment generates, uses and can radiate radio frequency energy and, if not installed and used in accordance with the instructions, may cause harmful interference to radio communications. However, there is no guarantee that interference will not occur in a particular installation. If this equipment does cause harmful interference to radio or television reception, which can be determined by turning the equipment off and on, the user is encouraged to try to correct the interference by one or more of the following measures:
• Reorient or relocate the receiving antenna.
- Increase the separation between the equipment and receiver.
- Connect the equipment into an outlet on a circuit different from that to which the receiver is connected.
- Consult the dealer or an experienced radio/ TV technician for help.
CAUTION:
Any changes or modifications not expressly approved by the grantee of this device could void the user's authority to operate the equipment.
This transmitter must not be co-located or operating in conjunction with any other antenna or transmitter.
RF exposure warning
This device meets the government's requirements for exposure to radio waves.
This device is designed and manufactured not to exceed the emission limits for exposure to radio frequency (RF) energy set by the Federal Communications Commission of the U.S. Government.
The exposure standard for wireless device employs a unit of measurement known as the Specific Absorption Rate, or SAR. The SAR limit set by the FCC is 1.6W/kg. *Tests for SAR are conducted using standard operating positions accepted by the FCC with the device transmitting at its highest certified power level in all tested frequency bands.
NOTE: The country code selection is for non-US model only and is not available to all US model. Per FCC regulation, all WiFi product marketed in US must fixed to US operation channels only.
Canada, Industry Canada (IC) Notices
This device complies with Canada licence-exempt RSS standard(s).
Operation is subject to the following two conditions: (1) this device may not cause interference, and (2) this device must accept any interference, including interference that may cause undesired operation of the device.
This Class B digital apparatus complies with Canadian ICES-003.
This device complies with RSS-310 of Industry Canada. Operation is subject to the condition that this device does not cause harmful interference.
This device and its antenna(s) must not be co-located or operating in conjunction with any other antenna or transmitter, except tested built-in radios. The County Code Selection feature is disabled for products marketed in the US/Canada.
Canada, avis d'Industry Canada (IC)
Radiation Exposure Statement:
The product comply with the Canada portable RF exposure limit set forth for an uncontrolled environment and are safe for intended operation as described in this manual. The further RF exposure reduction can be achieved if the product can be kept as far as possible from the user body or set the device to lower output power if such function is available.
RF Exposure information (SAR) - CE
This device meets the EU requirements (1999/519/EC) on the limitation of exposure of the general public to electromagnetic fields by way of health protection.
The limits are part of extensive recommendations for the protection of the general public. These recommendations have been developed and checked by independent scientific organizations through regular and thorough evaluations of scientific studies. The unit of measurement for the European Council's recommended limit for mobile devices is the "Specific Absorption Rate" (SAR), and the SAR limit is 2.0 W/Kg averaged over 10 gram of body tissue. It meets the requirements of the International Commission on Non-Ionizing Radiation Protection (ICNIRP).
For next-to-body operation, this device has been tested and meets the ICNRP exposure guidelines and the European Standard EN 50566 and EN 62209-2. SAR is measured with the device directly contacted to the body while transmitting at the highest certified output power level in all frequency bands of the mobile device.
CE Marking
CE
This device complies with the R&TTE Directive 1999/5/EC (replaced in 2017 by RED 2014/53/EU), the EMC Directive 2004/108/EC (replaced in April 2016 by 2014/30/EU), and the Low Voltage Directive 2006/95/EC (replaced in April 2016 by 2014/35/EU) issued by the Commission of the European Community.
Global Environmental Regulation Compliance and Declaration
ASUS follows the green design concept to design and manufacture our products, and makes sure that each stage of the product life cycle of ASUS product is in line with global environmental regulations. In addition, ASUS disclose the relevant information based on regulation requirements.
Please refer to http://csr.asus.com/english/Compliance.htm for information disclosure based on regulation requirements ASUS is complied with:
Japan JIS-C-0950 Material Declarations
EU REACH SVHC
Korea RoHS
ASUS Recycling/Takeback Services
ASUS recycling and takeback programs come from our commitment to the highest standards for protecting our environment. We believe in providing solutions for you to be able to responsibly recycle our products, batteries, other components as well as the packaging materials. Please go to http://csr.asus.com/english/Takeback.htm for detailed recycling information in different regions.
Proper disposal

Do not throw your ASUS ZenWatch in municipal waste. This product has been designed to enable proper reuse of parts and recycling. The symbol of the crossed out wheeled bin indicates that the product (electrical, electronic equipment and mercury-containing button cell battery) should not be placed in municipal waste. Check local regulations for disposal of electronic products.

Do not throw the battery in municipal waste. The symbol of the crossed out wheeled bin indicates that the battery should not be placed in municipal waste.
Rechargeable Battery Recycling Service in North America

For US and Canada customers, you can call 1-800-822-8837 (toll-free) for recycling information of your ASUS products' rechargeable batteries.
Regional notice for California
WARNING! This product may contain chemicals known to the State of California to cause cancer, birth defects or other reproductive harm. Wash hands after handling.
Regional notice for India
This product complies with the “India E-waste (Management and Handling)Rule 2011” and prohibits use of lead, mercury, hexavalent chromium, polybrominated biphenyls(PBBs) and polybrominated diphenyl ethers (PBDEs) in concentrations exceeding 0.1 % by weight in homogenous materials and 0.01 % by weight in homogenous materials for cadmium, except for the exemptions listed in Schedule-II of the Rule.
Japan Technical Conformity Mark
The internal wireless module of this ASUS ZenWatch has been certified by Japan Telec.

R201-160571 TD 16 0125 201
Regional notice for Singapore
Complies with IDA Standards DB103778
This ASUS product complies with IDA Standards.
Australian Communication and Media Authority

View the regulatory information for your ASUS ZenWatch via Setting > About > Regulatory information.
National Telecommunications Commission (NTC) of the Philippines

This ASUS product complies with NTC Standards. No.: ESD-1613465C
Notices for removeable batteries
- Risk of explosion if battery is replaced by an incorrect type.
- The battery and its component must be recycled or disposed of properly.
Prevention of Hearing Loss
To prevent possible hearing damage, do not listen at high volume levels for long periods.

While user turns up the volume past this point
(27mV), the system will show a pop-up with the following information: High volume can cause hearing loss. Your ears are important. Turning up the volume past this point can cause permanent hearing damage.

Nordic Lithium Cautions (for lithium-ion batteries)
CAUTION! Danger of explosion if battery is incorrectly replaced. Replace only with the same or equivalent type recommended by the manufacturer. Dispose of used batteries according to the manufacturer's instructions. (English)

- LIMITATION OF LIABILITY
- SERVICE AND SUPPORT
- Table of Contents
- Chapter 1: Parts and features
- Chapter 2: Using your ASUS ZenWatch
- Chapter 3: Working with Android Wear
- Chapter 4: Featured ASUS ZenWatch phone apps
- Appendices
- About this manual
- Conventions used in this E-Manual
- Typography
- Input mode
- 1
- Parts and features
- Getting to know your ASUS ZenWatch
- Touch screen display panel
- Loop
- Strap
- Spring bar
- Shortcuts button
- Microphone
- Power and reset button
- ECO mode button
- Charging connectors
- Speaker
- 2
- Using your ASUS ZenWatch
- Replacing the strap
- Charging the ASUS ZenWatch
- NOTE:
- Powering on
- Restarting your ASUS ZenWatch
- Pairing with another device
- Pairing with multiple ASUS ZenWatch devices
- Powering off
- Resetting your ASUS ZenWatch
- 3
- Working with Android Wear
- Installing Android Wear app on your phone
- IMPORTANT!
- Pairing for the first time
- Navigating your ASUS ZenWatch
- Waking your ZenWatch
- Watch face
- Muting notifications and viewing the battery charge percentage
- Changing the watch face
- Dimming the screen
- Using voice actions
- Action list
- Cards
- Reading your cards
- Viewing and launching apps
- Phone audio
- Updating your ASUS ZenWatch
- 4
- Featured ASUS ZenWatch phone apps
- Where to get ASUS ZenWatch apps
- ASUS ZenWatch Manager app
- ASUS ZenWatch Manager home screen
- Watch faces
- To personalize your watch face:
- ASUS ZenWatch Manager Tools screen
- General
- FoneHelper
- Others
- ASUS ZenFit
- Setting activity goals
- ASUS Remote Camera app
- Remote Camera home screen
- ASUS Zenwatch FaceDesigner app
- Editing a watch face
- ZenTalk Fans Forum
- Safety precautions
- Battery precautions
- Regulatory information
- Storing your device for long periods of time
- Federal Communications Commission Interference Statement
- CAUTION:
- RF exposure warning
- Canada, Industry Canada (IC) Notices
- Canada, avis d'Industry Canada (IC)
- Radiation Exposure Statement:
- RF Exposure information (SAR) - CE
- CE Marking
- CE
- Global Environmental Regulation Compliance and Declaration
- ASUS Recycling/Takeback Services
- Proper disposal
- Rechargeable Battery Recycling Service in North America
- Regional notice for California
- Regional notice for India
- Japan Technical Conformity Mark
- Regional notice for Singapore
- Australian Communication and Media Authority
- National Telecommunications Commission (NTC) of the Philippines
- Notices for removeable batteries
- Prevention of Hearing Loss
- Nordic Lithium Cautions (for lithium-ion batteries)
Brand : ASUS
Model : WI503Q-2LBGE0001
Category : Smartwatch