
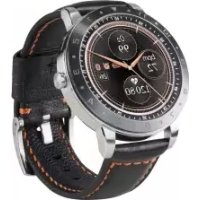
VivoWatch 5 AERO HC-C05 - Smartwatch ASUS - Free user manual and instructions
Find the device manual for free VivoWatch 5 AERO HC-C05 ASUS in PDF.


| Product Type | Smartwatch / Activity Tracker |
| Brand | ASUS |
| Model | VivoWatch 5 AERO HC-C05 |
| Dimensions (without strap) | Approx. 45 x 38 x 10.5 mm |
| Weight (without strap) | Approx. 50 g |
| Display | 1.3-inch AMOLED touchscreen, 360x360 pixels |
| Battery Life | Up to 14 days typical use; 7 days with always-on display |
| Charging | Magnetic charging cable |
| Water Resistance | 5 ATM (suitable for swimming, showering) |
| Sensors | Optical heart rate, SpO2, accelerometer, gyroscope, ambient light |
| Connectivity | Bluetooth 5.0 |
| Compatibility | Android 6.0+ / iOS 12+ |
| Key Functions | Step count, sleep tracking, heart rate, SpO2, stress, activity modes, smart notifications |
| GPS | Connected GPS (via phone) |
| Storage | Not user-expandable; internal memory for firmware |
| Cleaning | Wipe with soft, damp cloth; dry thoroughly. Avoid solvents |
| Safety Precautions | Do not expose to high-pressure water; avoid MRI; keep away from strong magnetic fields |
| Spare Parts & Repairability | Battery not user-replaceable; only authorized service centers |
| General Information | User manual available at ASUS support website; FCC/CE certified |
Frequently Asked Questions - VivoWatch 5 AERO HC-C05 ASUS
User questions about VivoWatch 5 AERO HC-C05 ASUS
0 question about this device. Answer the ones you know or ask your own.
Ask a new question about this device
Download the instructions for your Smartwatch in PDF format for free! Find your manual VivoWatch 5 AERO HC-C05 - ASUS and take your electronic device back in hand. On this page are published all the documents necessary for the use of your device. VivoWatch 5 AERO HC-C05 by ASUS.
USER MANUAL VivoWatch 5 AERO HC-C05 ASUS

iOS AppAndroid Ap
Table of Contents
Introduction......4
About this manual....5
Conventions used in this manual....6
Typography....6
Safety precautions....7
Battery precautions....8
Chapter 1: Getting started
Getting to know your VivoWatch 5 AERO....10
Charging your device....13
Wearing your device....15
Chapter 2: Using your ASUS VivoWatch 5 AERO
Pairing for the first time....20
Navigating your VivoWatch 5 AERO....21
Scrolling through ASUS VivoWatch 5 AERO features....22
Viewing more information for the selected feature....23
VivoWatch 5 AERO features....24
Home screen....24
PTT index screen 25
Pulse O2 level screen 28
Heart rate screen....29
Exercise screen....30
Settings....32
Activity screen....33
Sleep screen....34
Updating your VivoWatch 5 AERO....35
Through the ASUS HealthConnect App....35
Troubleshooting....36
Device specifications....37
Appendix
Introduction
Thank you for purchasing the ASUS VivoWatch 5 AERO! ASUS VivoWatch 5 AERO is the wearable device that packs ASUS HealthAI technology and some fitness functions with all the benefits of being accurate, smart, and compact. Please fill in the following information for future reference:
DATE PURCHASED: ____
SERIAL NUMBER: ____
Staple your receipt here
Register your product at https://account.asus.com/product_reg.aspx
About this manual
This manual provides information about the hardware and software features of your ASUS VivoWatch 5 AERO, organized through the following chapters:
Chapter 1: Getting started
This chapter details the hardware components of your ASUS VivoWatch 5 AERO and shows you how to use the different parts of your ASUS VivoWatch 5 AERO.
Chapter 2: Using your ASUS VivoWatch 5 AERO
This chapter provides an overview of using your ASUS VivoWatch 5 AERO.
Appendix
This section includes notices for your ASUS VivoWatch 5 AERO.

Read all of the information in the instruction manual and any other literature in the box before operating the device. For the full manual version of your ASUS VivoWatch 5 AERO, visit our multi-language web site at: https://www.asus.com/mobile-handhelds/wearable-healthcare/asus-vivowatch/asus-vivowatch-5-aero-hc-c05/
Conventions used in this manual
To highlight key information in this manual, some text are presented as follows:

This message contains vital information that must be followed to complete a task.

This message contains additional information and tips that can help complete tasks.
This message contains important information that must be followed to keep you safe while performing tasks and prevent damage to your ASUS VivoWatch 5 AERO's data and components.
Typography
Bold = This indicates a menu or an item that must be selected.
Italic = This indicates sections that you can refer to in this user guide.
Safety precautions
- The ASUS VivoWatch 5 AERO and the charging cable must be recycled or disposed of properly.
- Keep any small components away from children.
- Your ASUS VivoWatch 5 AERO should only be used in environments with ambient temperatures between 5^ and 40^ , and stored in environments with ambient temperatures between -20^ and 45^ .
- Do not leave your ASUS VivoWatch 5 AERO in a hot car. Temperatures in a parked car on sunny days can exceed the recommended ambient temperatures.
- Some people may experience irritations to certain materials used in jewelry, watches, and other wearable items that are in prolonged contact with their skin. This can be due to allergies, environmental factors, extended exposure to irritants like soap, sweat, or other causes.
- Wear your ASUS VivoWatch 5 AERO firmly around your lower arm (away from your wrist bone) with the bottom of the device touching your skin. An overly tight strap may cause skin irritation, while a loose strap may result in inaccurate heart rate readings.
- Keeping your ASUS VivoWatch 5 AERO and the strap clean and dry will reduce the possibility of skin irritation.
- Unauthorized changes to your ASUS VivoWatch 5 AERO can be dangerous.
- If you experience redness, swelling, itchiness, or any other irritation or discomfort on your skin around, or beneath, your ASUS VivoWatch 5 AERO, please remove the device and consult your physician.
- The ASUS VivoWatch 5 AERO is not a medical device and is not intended to diagnose health conditions. The measurement results are only for your reference.
Battery precautions
- Do not place your device or battery near any sources of heat with temperature exceeding 60^ (140°F).
- Never attempt to short-circuit the battery.
- Never attempt to disassemble and reassemble the battery.
- Discontinue usage if leakage is found.
- Do not use your device or expose the battery to high temperature or extremely low air pressure.
1
Getting started
Getting to know your VivoWatch 5 AERO
Watch (Model Name: HC-C05)


Interchangeable strap

natural_image
Line drawing of a belt buckle with textured grip and mounting brackets (no text or symbols)Charging cable

natural_image
Line drawing of a USB cable with two connected components (no text or symbols)
- Your ASUS VivoWatch 5 AERO can be used as a standalone device.
- Download and install the companion app for a complete overview of your health data. For more details, refer to the Pairing for the first time section in this manual.
• ASUS VivoWatch 5 AERO features 5 ATM water resistance that withstands pressures equivalent to a depth of 50 meters. Suitable for splashes, rain, showering and swimming.
- DO NOT use your ASUS VivoWatch 5 AERO in liquids with chemicals or salt water (such as sea water, swimming pools, or hot springs) as it may damage the charging connectors. If your ASUS VivoWatch 5 AERO has been in contact with the mentioned liquids, ensure to thoroughly rinse the connectors with fresh water and dry it with a clean cloth to prevent corrosion.
• Always adjust the brightness to your preference. It is recommended to turn up the brightness when you are outside in the sun.
Charging your device
- Remove the rubber cover on the bottom of your device to reveal the charging connectors.
- Align and place the charging pins of the USB charging cable onto the charging connectors.
- Connect the USB charging cable to a power source to start charging.

natural_image
Line drawing of a smartwatch with a power adapter and blue directional arrows indicating movement (no text or symbols)
Your device will turn on automatically once it is fully charged.

- Align and connect these charging connectors (Input: 5Vdc, 0.5A) to the charging cable to charge the battery of your ASUS VivoWatch 5 AERO.
-
Before connecting the charging cable to your ASUS VivoWatch 5 AERO, ensure that the charging connectors and the bottom of the ASUS VivoWatch 5 AERO are clean and dry to prevent corrosion and malfunction:
-
Gently wipe the charging connectors with a clean flannel.
-
Wipe dry your ASUS VivoWatch 5 AERO.
-
Do not short circuit the charging connectors on the charging cable.
- Some power banks cannot detect low current devices, and will therefore not be able to charge the ASUS VivoWatch 5 AERO.
Wearing your device
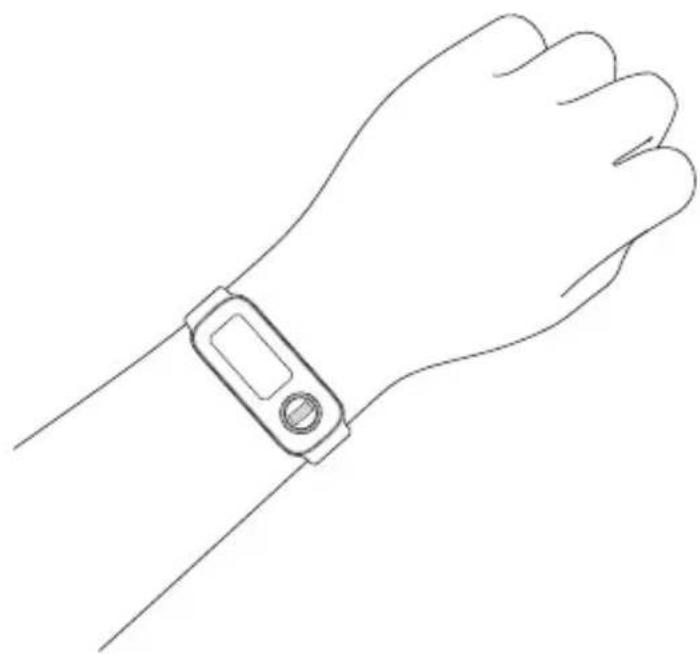
Wear your device firmly around your lower arm (away from your wrist bone) with the bottom touching your skin in order to have more accurate information and data.
Do not fasten your device too tightly or too loosely. Your device should remain in place when you move your arm.
natural_image
Line drawing of a human wristwatch with a digital display (no text or symbols)Removing the strap
- Hold the watch with two hands and make sure the screen is facing upwards.
- Pull the strap horizontally from one end, then gently push the watch upwards from the bottom with your index finger.

natural_image
Illustration of hands holding a smartphone with tape measure, showing two blue arrows indicating movement (no text or symbols)Attaching the strap
-
Hold the strap with one hand and make sure the front opening is facing upwards.
-
Insert one end of the watch into the strap opening, then gently press down the other end of the watch until all edges of the watch are securely fitted in place.

natural_image
Illustration of hands holding a smartphone with a tape measure, showing a blue arrow indicating compression or adjustment (no text or symbols present)2
Using your ASUS VivoWatch 5 AERO
Pairing for the first time
Pair your ASUS VivoWatch 5 AERO with the companion app to take advantage of all its features.
- Log in or sign up for a Google account or Apple ID on your phone.
- Launch Play Store or App Store.
- Search for ASUS HealthConnect, then install the companion app.

natural_image
Two app icons: a magnifying glass and a heart-shaped icon on a dark background (no text or symbols)- Launch ASUS HealthConnect and log in to your account. Follow the instructions on the screen to proceed with device pairing and calibration.
Navigating your VivoWatch 5 AERO

- The screens shown in this manual are for reference only.
- The screen turns off automatically after a period of idle time to save battery power.
Swipe
- Move your finger horizontally across the screen to scroll through the ASUS VivoWatch 5 AERO features, or go to the previous screen.
- Move your finger vertically across the screen to scroll through the list of apps, or see more information or options.
Tap
Tap the screen to select a menu item or launch an app.
Scrolling through ASUS VivoWatch 5 AERO features
Swipe left or right to scroll through the ASUS VivoWatch 5 AERO features.

flowchart
graph TD
    A["Health\nPTT Index"] --> B["WED 26\n08 00"]
    C["Sports\nRecently"] --> B
    B --> D["Blue Arrow Left"]
    B --> E["Blue Arrow Right"]

You can press the Electrical heart sensor and PPG sensor to return to the Home screen.
Viewing more information for the selected feature
Swipe up or down to scroll through the list of apps, or see more information or options when available.

VivoWatch 5 AERO features
Home screen
The ASUS VivoWatch 5 AERO Home screen displays the time, date, and status of your ASUS VivoWatch 5 AERO.

| Icon Description | |
 | Connected |
 | Battery level |
 | Alarm |
PTT index screen
This screen allows you to measure your health data. Your ASUS VivoWatch 5 AERO can also estimate your emotional stress by using the PTT (Pulse Transit Time) Index.
Enter the PTT index screen and place your index finger onto the Electrical heart sensor and PPG sensor.

pie
| Metric | Value | |--------|-------| | PTT Index | 80% | | Keep still | |
natural_image
Line drawing of two hands adjusting a wristband (no text or symbols)Your ASUS VivoWatch 5 AERO uses the PPG sensor in conjunction with the electrical heart sensor to allow you to pick up your health data, and the way you wear your ASUS VivoWatch 5 AERO can affect the accuracy of the measurements.
To get more accurate results:
- Wear your ASUS VivoWatch 5 AERO firmly around your lower arm (away from your wrist bone) with the bottom of the device touching your skin.
- Wear your ASUS VivoWatch 5 AERO in a way without being uncomfortable. Do not strap the ASUS VivoWatch 5 AERO too tight to your wrist.
- Place your finger gently on the electrode and cover the Electrical heart sensor and PPG sensor while measuring your health data.
- Remain still while measuring to get the most accurate results.

- The accuracy of the PPG sensor may vary depending on measurement conditions and surroundings. If the PPG sensor is dirty, clean the sensor and try again.
- Do not look directly into the PPG sensor, the sensor light may impair your vision.
- Please make sure children do not look directly into the sensor light.
- The ASUS VivoWatch 5 AERO is not a medical device and makes no medical claims. It is not intended to diagnose health conditions. The measurement results are only for your reference. Only a physician is qualified to diagnose and treat the disease.
Pulse O2 level screen
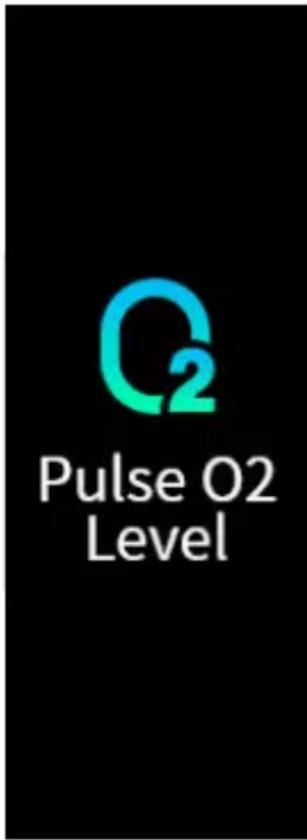
Your ASUS VivoWatch 5 AERO features a wrist-based Pulse O2 level function. It will help you determine how your body is acclimating to high altitudes for alpine sports and expeditions.
Entering Pulse O2 level mode
To enter Pulse O2 level mode, swipe right from the Home screen to the Health screen, then scroll down to Pulse O2 Level. Please wear your ASUS VivoWatch 5 AERO on your wrist and place your index finger onto the Electrical heart sensor and PPG sensor. Make sure your device sits properly on your wrist, the measurement will begin automatically.
Heart rate screen
This screen shows your current heart rate. The PPG sensor on your ASUS VivoWatch 5 AERO automatically determines your current heart rate.
To get more accurate results:
- Wear your ASUS VivoWatch 5 AERO firmly around your lower arm (away from your wrist bone) with the bottom of the device touching your skin.
- Wear your ASUS VivoWatch 5 AERO in a way without being uncomfortable. Do not strap the ASUS VivoWatch 5 AERO too tight to your wrist.
- You can get the most accurate results from the heart rate monitor when you are warmed up.

Exercise screen
This screen allows you to keep track of your exercise sessions. When you start an exercise session, your ASUS VivoWatch 5 AERO will record information about the current exercise session and show the information as it is recorded.
Entering an exercise mode
To enter an exercise mode, swipe left from the Home screen to the Exercise screen, then scroll down to select the exercise you prefer to start.

- When you select the outdoor exercise, wait for the GPS signal to lock on in an outdoor open area before you start your exercise session.
- The GPS icon will stop blinking when the GPS signal is locked on.
Pausing exercise mode
To pause exercise mode, swipe right, then tap to pause your current exercise mode.

Settings
This screen allows you to change settings directly on your ASUS VivoWatch 5 AERO. Swipe up from the Home screen and scroll down to Settings.
| Item Description | |
| Time | Adjust the time. |
| Power saving mode | Activate Power saving mode. |
| Brightness Adjust | st the brightness of the touch screen. |
| Language | Change device language. |
| GPS mode Select | your preferred satellite navigation system combination. |
| Restart | Restart your device. |
| Power off Turn off | your device. (Charge the device to turn your device on again.) |
| Reset device Restart and reset your device to factory settings. | |
| About View more information about your device, such as firmware version, serial number, etc. | |

Activity screen
Your ASUS VivoWatch 5 AERO automatically records your daily activities and displays them on this screen. Swipe up from the Home screen to enter the Activity screen.
Here you can view your daily activities such as steps you have taken, or calories you have burned.

Sleep screen
Your ASUS VivoWatch 5 AERO automatically tracks your sleep pattern activities and displays them on this screen. Swipe up from the Home screen and scroll to Sleep.
Here you can view your sleep data, such as the total sleep time, the percentage you were awake, in REM, or deep sleep.

Updating your VivoWatch 5 AERO
Through the ASUS HealthConnect App
- Launch the ASUS HealthConnect App.
- From the Home screen, tap Device on the bottom.
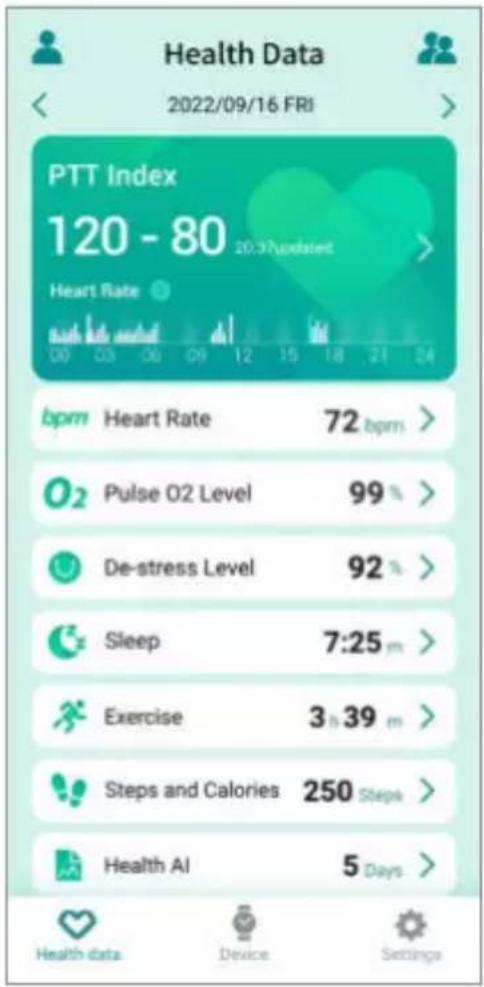
- On Device screen, select Firmware version and tap Check update to check if your current version is up to date.
Troubleshooting
| Issue Solution | |
| Abnormal ECG waveforms | Ensure the Wrist setting is correct for your ASUS VivoWatch 5 AERO.To check your Wrist setting, open theASUS HealthConnectapp>go to theHealth data tab>tap the profile icon in the top-left corner to enter theProfilescreen>scroll down toWrist, and make sure to select the wrist you are wearing your ASUS VivoWatch 5 AERO on. |
Device specifications
| Device name ASUS Vivo | Watch 5 AERO |
| Model HC-C05 | |
| Display PMOLED 0.96" | |
| Type of measurement Electrocardiography | |
| Heart rate range 30 bpm ~ 190 bpm | |
| Heart rate accuracy ± 1 bpm | |
| SpO2 range 70% ~ 100% | |
| SpO2 accuracy ± 2% | |
| Connectivity Bluetooth 4.2 | |
| System requirements | Android 8.0 or lateriOS 13.0 or later |
| Waterproof rating IP68 | |
| Usage environment | Temperature: 5 ~ 40°CRelative humidity: 20 ~ 85% (non-condensing)Atmospheric pressure: 700 hPa ~ 1060 hPaAltitude: 0 ~ 3,000 m |
| Storage and transportation environment | Temperature: -30 ~ 60°CRelative humidity: 20 ~ 95% (non-condensing)Atmospheric pressure: 500 hPa ~ 1060 hPa |
| Product lifetime 3 years | |
| Dimensions (watch case) | 47.4 x 18.6 x 12.7 mm |
| Weight 26 g | |
| Dimension (wristband) | 15 mm wide |
Appendix
Federal Communications Commission Interference Statement
This equipment has been tested and found to comply with the limits for a Class B digital device, pursuant to part 15 of the FCC Rules. These limits are designed to provide reasonable protection against harmful interference in a residential installation. This equipment generates, uses and can radiate radio frequency energy and, if not installed and used in accordance with the instructions, may cause harmful interference to radio communications. However, there is no guarantee that interference will not occur in a particular installation. If this equipment does cause harmful interference to radio or television reception, which can be determined by turning the equipment off and on, the user is encouraged to try to correct the interference by one or more of the following measures:
- Reorient or relocate the receiving antenna.
- Increase the separation between the equipment and receiver.
- Connect the equipment into an outlet on a circuit different from that to which the receiver is connected.
- Consult the dealer or an experienced radio/ TV technician for help.
CAUTION:
Any changes or modifications not expressly approved by the grantee of this device could void the user's authority to operate the equipment.
This device complies with Part 15 of the FCC Rules. Operation is subject to the following two conditions: (1) this device may not cause harmful interference, and (2) this device must accept any interference received, including interference that may cause undesired operation.
RF exposure warning
The equipment complies with FCC RF exposure limits set forth for an uncontrolled environment.
The equipment must not be co-located or operating in conjunction with any other antenna or transmitter.
Compliance Statement of Innovation, Science and Economic Development Canada (ISED)
This device complies with Innovation, Science and Economic Development Canada licence exempt RSS standard(s). Operation is subject to the following two conditions: (1) this device may not cause interference, and (2) this device must accept any interference, including interference that may cause undesired operation of the device.
CAN ICES-3(B)/NMB-3(B)
Radio Frequency (RF) Exposure Information
The radiated output power of the Wireless Device is below the Industry Canada (IC) radio frequency exposure limits. The Wireless Device should be used in such a manner such that the potential for human contact during normal operation is minimized.
This device has also been evaluated and shown compliant with the IC RF Exposure limits under portable exposure conditions (antennas are less than 20 cm of a person's body).
Regional notice for Mexico


Simplified EU Declaration of Conformity
ASUSTek Computer Inc. hereby declares that this device is in compliance with the essential requirements and other relevant provisions of Directive 2014/53/EU. Full text of EU declaration of conformity is available at https://www.asus.com/support/.
| ATBE | BG CZ DK EE FR | ||||
| DE IS | IE IT EL ES CY | ||||
| LVLI | LTLU HU MT NL | ||||
| NO PL | PT RO SI SK TR | ||||
| FI SE | CH HR UK(NI) |
CE

The Simplified EU Declaration of Conformity of this device has been updated. This device now complies with Radio Equipment Directive 2014/53/EU, and no longer complies with R&TTE Directive 1999/5/EC.
CE RED RF Output table (Directive 2014/53/EU)
| Function Frequency | Maximum Output Power (EIRP) | |
| Bluetooth | 2402 - 2480 MHz | 1 dBm |
Simplified UKCA Declaration of Conformity
ASUSTek Computer Inc. hereby declares that this device is in compliance with the essential requirements and other relevant provisions of The Radio Equipment Regulations 2017 (S.I. 2017/1206). Full text of UKCA declaration of conformity is available at https://www.asus.com/support/.
UKCA RF Output table
(The Radio Equipment Regulations 2017)
| Function Frequency Maximum Output Power (EIRP) | ||||||
| Bluetooth 2402 - 2480 MHz 1 dBm | ||||||
Global Environmental Regulation Compliance and Declaration
ASUS follows the green design concept to design and manufacture our products, and makes sure that each stage of the product life cycle of ASUS product is in line with global environmental regulations. In addition, ASUS disclose the relevant information based on regulation requirements.
Please refer to http://csr.asus.com/english/Compliance.htm for information disclosure based on regulation requirements ASUS is complied with:
EU REACH SVHC
ASUS Recycling/Takeback Services
ASUS recycling and takeback programs come from our commitment to the highest standards for protecting our environment. We believe in providing solutions for you to be able to responsibly recycle our products, batteries, other components as well as the packaging materials. Please go to http://csr.asus.com/english/Takeback.htm for detailed recycling information in different regions.
Do not throw your ASUS VivoWatch 5 AERO in municipal waste. This product has been designed to enable proper reuse of parts and recycling. The symbol of the crossed out wheeled bin indicates that the product (electrical, electronic equipment and mercury-containing button cell battery) should not be placed in municipal waste. Check local regulations for disposal of electronic products.

Do not throw the battery in municipal waste. The symbol of the crossed out wheeled bin indicates that the battery should not be placed in municipal waste.
Rechargeable Battery Recycling Service in North America
For US and Canada customers, you can call 1-800-822-8837 (toll-free) for recycling information of your ASUS products' rechargeable batteries.
Regional notice for Singapore
Complies with IMDA Standards DB103778
This ASUS product complies with IMDA Standards.
Notices for removable batteries
- Risk of explosion if battery is replaced by an incorrect type.
- The battery and its component must be recycled or disposed of properly.
natural_image
Green abstract geometric symbol with interlocking arrows (no text or symbols)Nordic Lithium Cautions (for lithium-ion batteries)
CAUTION! Danger of explosion if battery is incorrectly replaced. Replace only with the same or equivalent type recommended by the manufacturer. Dispose of used batteries according to the manufacturer's instructions. (English)
No part of this user guide, including the products and software described in it, may be reproduced, transmitted, transcribed, stored in a retrieval system, or translated into any language in any form or by any means, except documentation kept by the purchaser for backup purposes, without the express written permission of ASUSTeK Computer INC. ("ASUS").
Product warranty or service will not be extended if: (1) the product is repaired, modified or altered, unless such repair, modification of alteration is authorized in writing by ASUS; or (2) the serial number of the is defaced or missing.
ASUS PROVIDES THIS User guide "AS IS" WITHOUT WARRANTY OF ANY KIND, EITHER EXPRESS OR IMPLIED, INCLUDING BUT NOT LIMITED TO THE IMPLIED WARRANTIES OR CONDITIONS OF MERCHANTABILITY OR FITNESS FOR A PARTICULAR PURPOSE. IN NO EVENT SHALL ASUS, ITS DIRECTORS, OFFICERS, EMPLOYEES OR AGENTS BE LIABLE FOR ANY INDIRECT, SPECIAL, INCIDENTAL, OR CONSEQUENTIAL DAMAGES (INCLUDING DAMAGES FOR LOSS OF PROFITS, LOSS OF BUSINESS, LOSS OF USE OR DATA, INTERRUPTION OF BUSINESS AND THE LIKE), EVEN IF ASUS HAS BEEN ADVISED OF THE POSSIBILITY OF SUCH DAMAGES ARISING FROM ANY DEFECT OR ERROR IN THIS User guide OR PRODUCT.
Products and corporate names appearing in this user guide may or may not be registered trademarks or copyrights of their respective companies, and are used only for identification or explanation and to the owners' benefit, without intent to infringe.
SPECIFICATIONS AND INFORMATION CONTAINED IN THIS User guide ARE FURNISHED FOR INFORMATIONAL USE ONLY, AND ARE SUBJECT TO CHANGE AT ANY TIME WITHOUT NOTICE, AND SHOULD NOT BE CONSTRUED AS A COMMITMENT BY ASUS. ASUS ASSUMES NO RESPONSIBILITY OR LIABILITY FOR ANY ERRORS OR INACCURACIES THAT MAY APPEAR IN THIS User guide, INCLUDING THE PRODUCTS AND SOFTWARE DESCRIBED IN IT.
Copyright © 2023 ASUSTeK Computer INC. All Rights Reserved.
LIMITATION OF LIABILITY
Circumstances may arise where because of a default on ASUS' part or other liability, you are entitled to recover damages from ASUS. In each such instance, regardless of the basis on which you are entitled to claim damages from ASUS, ASUS is liable for no more than damages for bodily injury (including death) and damage to real property and tangible personal property; or any other actual and direct damages resulted from omission or failure of performing legal duties under this Warranty Statement, up to the listed contract price of each product.
ASUS will only be responsible for or indemnify you for loss, damages or claims based in contract, tort or infringement under this Warranty Statement.
This limit also applies to ASUS' suppliers and its reseller. It is the maximum for which ASUS, its suppliers, and your reseller are collectively responsible.
UNDER NO CIRCUMSTANCES IS ASUS LIABLE FOR ANY OF THE FOLLOWING: (1) THIRD-PARTY CLAIMS AGAINST YOU FOR DAMAGES; (2) LOSS OF, OR DAMAGE TO, YOUR RECORDS OR DATA; OR (3) SPECIAL, INCIDENTAL, OR INDIRECT DAMAGES OR FOR ANY ECONOMIC CONSEQUENTIAL DAMAGES (INCLUDING LOST PROFITS OR SAVINGS), EVEN IF ASUS, ITS SUPPLIERS OR YOUR RESELLER IS INFORMED OF THEIR POSSIBILITY.
SERVICE AND SUPPORT
Visit our multi-language web site at https://www.asus.com/support/.

| Manufacturer ASUSTek COMPUTER INC. | |
| Address 1F., No. 15, Li de Rd., Beitou Dist., Taipei City 112 | |
| Authorized Representative in Europe | ASUS COMPUTER GmbH |
| Address Harkortstrasse 21-23, 40880 Ratingen, Germany | |
ASUS®
IN SEARCH OF INCREDIBLE

- Table of Contents
- Chapter 1: Getting started
- Chapter 2: Using your ASUS VivoWatch 5 AERO
- Appendix
- Introduction
- About this manual
- Conventions used in this manual
- Typography
- Safety precautions
- Battery precautions
- 1
- Getting started
- Getting to know your VivoWatch 5 AERO
- Interchangeable strap
- Charging cable
- Charging your device
- Wearing your device
- Removing the strap
- Attaching the strap
- 2
- Using your ASUS VivoWatch 5 AERO
- Pairing for the first time
- Navigating your VivoWatch 5 AERO
- Swipe
- Tap
- Scrolling through ASUS VivoWatch 5 AERO features
- Viewing more information for the selected feature
- VivoWatch 5 AERO features
- Home screen
- PTT index screen
- Pulse O2 level screen
- Entering Pulse O2 level mode
- Heart rate screen
- Exercise screen
- Entering an exercise mode
- Pausing exercise mode
- Settings
- Activity screen
- Sleep screen
- Updating your VivoWatch 5 AERO
- Through the ASUS HealthConnect App
- Troubleshooting
- Federal Communications Commission Interference Statement
- CAUTION:
- RF exposure warning
- Compliance Statement of Innovation, Science and Economic Development Canada (ISED)
- Radio Frequency (RF) Exposure Information
- Regional notice for Mexico
- Simplified EU Declaration of Conformity
- CE
- Simplified UKCA Declaration of Conformity
- UKCA RF Output table
- (The Radio Equipment Regulations 2017)
- Global Environmental Regulation Compliance and Declaration
- EU REACH SVHC
- ASUS Recycling/Takeback Services
- Rechargeable Battery Recycling Service in North America
- Regional notice for Singapore
- Notices for removable batteries
- Nordic Lithium Cautions (for lithium-ion batteries)
- LIMITATION OF LIABILITY
- SERVICE AND SUPPORT
Brand : ASUS
Model : VivoWatch 5 AERO HC-C05
Category : Smartwatch