
XF 3000 PRO - Receiver Trevi - Free user manual and instructions
Find the device manual for free XF 3000 PRO Trevi in PDF.


| Product type | HD digital satellite receiver |
| Brand | Trevi |
| Model | XF 3000 PRO |
| Dimensions (L x W x H) | 28 x 18 x 5 cm |
| Weight | 1.2 kg |
| Power supply | 12V DC, mains adapter included |
| Maximum resolution | 1080p Full HD |
| Number of channels | Up to 10,000 (depending on satellite) |
| Main features | Satellite reception, automatic search, electronic program guide (EPG), timer, USB recording, favorites list, parental control |
| Connectivity | LNB input (F-type), HDMI output, composite AV output, USB 2.0 port, optical audio output |
| Supported video formats | MPEG-2, MPEG-4, H.264, H.265 |
| Supported audio formats | MPEG-1, MPEG-2, AAC, AC3 |
| Included accessories | Remote control, batteries, mains adapter, HDMI cable, user manual |
| Maintenance and cleaning | Unplug before cleaning, use a soft dry cloth, do not use chemicals |
| Safety | Do not expose to moisture or dust, avoid shocks, do not open the casing |
| Spare parts and repairability | Remote control and adapter available separately; repair by authorized center |
| General information | Satellite receiver for domestic use, compatible with major satellites (Hot Bird, Astra, etc.) |
Frequently Asked Questions - XF 3000 PRO Trevi
User questions about XF 3000 PRO Trevi
0 question about this device. Answer the ones you know or ask your own.
Ask a new question about this device
Download the instructions for your Receiver in PDF format for free! Find your manual XF 3000 PRO - Trevi and take your electronic device back in hand. On this page are published all the documents necessary for the use of your device. XF 3000 PRO by Trevi.
USER MANUAL XF 3000 PRO Trevi
Connection and Operation Manual
HAUT-PARLEUR AMPLIFIE AVEC TROLLEY
natural_image
Exterior view of a black multi-functional electronic device with dual speakers and control knobs (no visible text or symbols)NOTE D'USO
This is a precision electronic appliance; avoid using it in the following cases:
- Near strong heat sources, such as central heating plants or stoves.
- In very humid places such as bathrooms, swimming pools, etc.
- In very dusty places.
- In places subject to strong vibrations.
- Position the appliance in such a way that there is always enough room for free air circulation (at least 5 cm).
- Do not block the air inlets.
- If any liquid enters the appliance, unplug it immediately from the socket and take it to the nearest TREVI authorised service centre.
- Before switching on the appliance, always check that the power cable and the connection cable are properly installed.
CARE AND MAINTENANCE
Use a slightly damp soft cloth for cleaning. Do not use solvents and abrasive substances.
IMPORTANT
This device is designed for home use (not professional use). This appliance has been carefully built to ensure long-lasting perfect performance.
However, should any inconvenience occur, please contact your local authorised TREVI Service Centre.
TREVI follows a policy of ongoing research and development. Therefore products may have different features from those described.
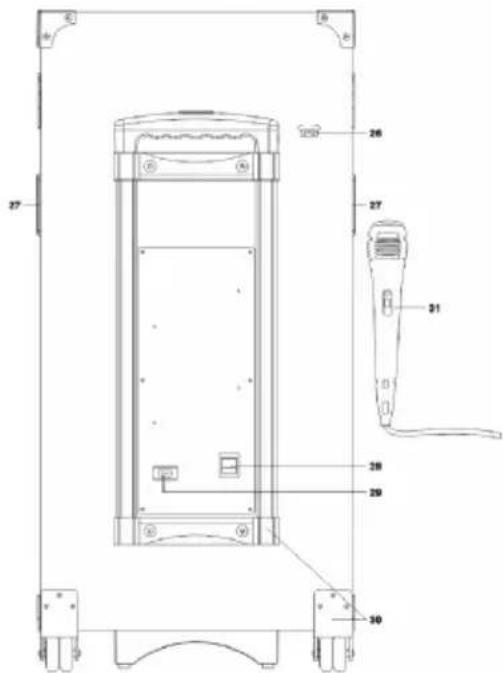
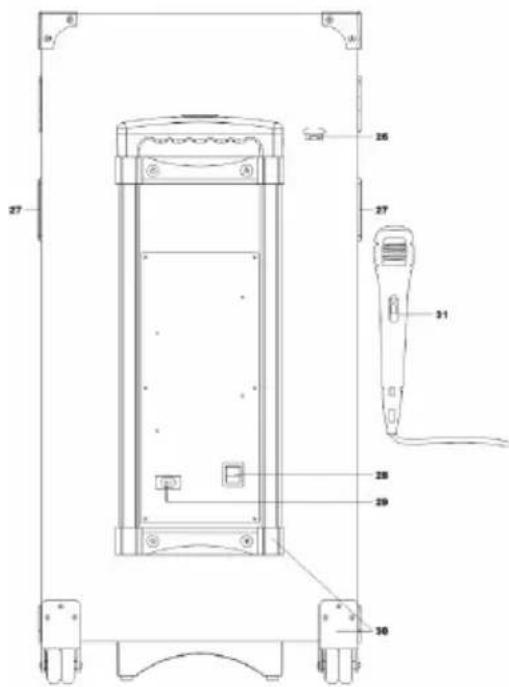
LOCATION OF CONTROL

Controls and sockets
- AUX IN
- GUITAR 1 input
- GUITAR 2 input
- MIC input
- USB 1 input
- Equalizer
- Display
- USB 2 input
- FUNC. / LIGHT button, input selection / activation light effect
- P-MODE button
- Key ◀◀, previous track selection, fast back search
- Key ▶ / II / PAIR / STANDBY
- Key▶, select the next track, fast forward search
- Keys FOLDER +, - 10
- Volume control
- Adjusting bass
- Adjusting treble
- Guitar volume
- ECHO
- Mic volume
- Power switch ON/OFF
- Tweeters
- Speaker
- Subwoofer
- Subwoofer guard
- Microphone holder
- Handles
- Main switch ON/OFF
- AC Power Socket
- Trolley and rear wheels
- Microphone
TRANSPORTATION
Press the PUSH button present on the trolley handle, lift the handle up to lock (you will hear a metallic click). It's possible to adjust the height in two positions. For transport, using the handle of the trolley, slightly bend the box and use the two rear wheels.
For unlocking and locking the trolley, press the PUSH button and fully lower the handle.
POWER
This unit works with mains supply AC 100-240V 50/60Hz.
Do not connect the device to voltage other than that indicated.
BASIC FUNCTIONS
POWER ON/OFF
After connecting the power, switch the power ON/OFF button on the rear cabinet to turn on the power, then switch the power button on the front cabinet to turn the unit ON/OFF.
NOTE: After about 15 minutes of inactivity, the unit automatically switches to standby mode. To turn on the unit again, press the ▶ / II / PAIR / STANDBY button.
MODE SETTING FUNCTION
To change the function modes, press the FUNC./LIGHT button to choose USB1/USB2/BLUETOOTH/AUX function.
ADJUSTING THE VOLUME
- Rotate the VOLUME knob on the unit to increase or decrease the music volume.
- Rotate the GUITAR VOL. knob on the unit to increase or decrease the guitar volume.
- Rotate the MIC VOL. knob on the unit to increase or decrease the microphone volume.
EQUALIZER
This unit has a built-in equalizer system, adjust the EQ bar by five frequencies on unit to select a setting that best matches the music style.
SETTING TONE TREBLE AND BASS
Rotate the TREBLE knob on unit to increase or decrease the treble effect that best matches the music style.
Rotate the BASS knob on unit to increase or decrease the bass effect that best matches the music style.
ECHO EFFECT
Rotate the ECHO knob on unit to increase or decrease the microphone echo effect that best matches the style.
DISCO-LIGHT EFFECTS
To change the disco light effects, press and hold the FUNC./LIGHT button on unit. You can choose from five different flashing modes.
To disable the disco light, press and hold the FUNC./LIGHT button on unit until the display shows "OFF".
USB1/USB2 INPUTS
- Press the FUNC./LIGHT button on unit to select "USB1" or "USB2" mode.
- Connect the USB memory stick to the USB port found on the front of the unit. Playback will start automatically from Track 1.
- To pause playback, press the PLAY/PAUSE/PAIR /STANDBY button on unit. The current track No. and P will show on the display.
- To resume playback, press the PLAY/PAUSE/PAIR /STANDBY button again.
- To select a desired track, press the ◀ or ▶ button respectively during playing until the desired track appears on the display. The unit will start play automatically.
- To search for a particular passage during playback, press and hold the ◀◀ o ▶▶ button to scan the current playing track at high speed until desired point (passage) appears, then release the button for normal playback mode.
- To select a song which track number exceeds 10, press the FOLDER +/+ 10 or FOLDER -/- 10 button each time to skip forward/backward 10 tracks, then press the ◀◀ or ▶▶ button to select desired track.
- To select a desired folder (if the USB contains more than one folder), press and hold the FOLDER +/+10 or FOLDER -/-10 button each time to skip forward/backward a folder, then press the ◀◀ or ▶▶ button to select desired track.
NOTES
- The player may not support some USB devices, this is due to the incompatibility of some processors.
- To avoid harmful interference, always connect USB devices directly to the unit, do not use extension cords.
REPEAT PLAY
You can play one track or all tracks on the USB repeatedly.
To Repeat a Single Track:
-
Press P-MODE button on unit during play, the display will show "→" and the current track will be played over an over again till you press the PLAY/PAUSE/PAIR/STANDBY button on unit.
-
To cancel repeat play, press P-MODE button on unit until "→" disappears from the display.
To repeat all the Tracks:
- Press P-MODE button on unit until the "⊂⊃" shows steadily on the display, all tracks on the USB will be played over and over again till you press the PLAY/PAUSE/PAIR /STANDBY button on unit.
- To cancel repeat play, press the P-MODE button on unit until "⊂⊃" disappears from the display.
To repeat the folder (only for USB which contains more than one folder):
- Press the P-MODE button on unit until "⊂⊃ FOLDER" show steadily on the display, the current folder will be repeated over and over again till you press the PLAY/PAUSE/PAIR /STANDBY button on unit.
- To cancel repeat play, press the P-MODE button on unit until "⊂⊃ FOLDER" disappears from the display.
Random play:
Press the P-MODE button on unit in play mode till the "RAND" shows steadily on the display, the random play will start from next track automatically, until all tracks are played over and then it will stop. Press the P-MODE button on unit again until the "RAND" disappears from the display to cancel.
BLUETOOTH OPERATION
- Press the FUNC./LIGHT button on unit to switch to BLUETOOTH function, the LCD will display "bt" and the pair indicator will flash at high speed.
- Turn on the Bluetooth function on the device, scan the unit "XF3000PRO" and connect, then input the password 0000 if required, the pair indicator keep light up to indicate connection done, and the display will show "bt". Press Play to start playback.
- Rotate the VOLUME knob on the unit or adjust the volume on the external device to increase or decrease the music volume to your desired level.
- Press and hold the PAIR button to disconnect Bluetooth.
AUX-IN
- Press the FUNC./LIGHT button on unit to select "AUX" mode.
- Connect your audio device to the AUX IN jack found on the front of the unit with an AUX IN cable.
- Rotate the VOLUME knob on the unit or adjust the volume on the external device to increase or decrease the music volume to your desired level.
- Control playback with your audio device.
- Connect your microphone to the 6.5mm MIC jack found on the front of the unit.
- Turn on the microphone using the switch on the handle of the microphone to the ON position.
- Adjust the volume of the microphone input and the echo effect as desired using the appropriate commands.
Note: it's not possible to use the microphone in USB1/2 mode if devices usb are not inserted; to use a microphone, insert a USB device and, once playback starts, push the PAUSE button.
INPUT GUITAR
This device can amplify a guitar or other preamp music instrument.
- Connect your guitar to the 6.3mm Guitar jack found on the front of the unit (GUITAR1 or 2)
- Rotate the GUITAR VOL. knob on the unit to increase or decrease the guitar volume.
SPECIFICATIONS
Power Supply: AC 100-240V 50/60Hz
Consumption: 360W
Maximum output power: 300W
Dimensions: 406x484x845mm
Weight: 23 kg
NOTES D'EMPLOI

Commandes et prises
Controles y tomas
WARNING: DO NOT OPEN THE SET. NEITHER CONTROLS OR SPARE PARTS TO BE USED BY THE USER ARE TO BE FOUND INSIDE IT. APPLY TO AUTHORISED TREVI CENTERS FOR SERVICE OPERATIONS.

ACHTUNG
WIRES CONNECTIONS TO A UK THREE-PIN PLUG
The wires in this mains lead are coloured in accordance with the following wiring codes:
Blue: Neutral
Brown: Live
The wires in this mains lead must be connected to the terminals in the plug as follows:
Blue wire: N or Black
Brown wire: L or Red
Neither wire is to be connected to the earth (E or W) terminal of three-pin plug.
Should the fuse fail in the plug remove the plug form the wall socket and replace the fuse with a 3 Amp. ASTA approved BS 1362 fuse.


Precautions for correct disposal of the product.
The symbol shown on the equipment indicates that waste must be disposed of in "separate collection" and so the product must not be disposed of together with urban waste.
The user must take the product to special "separate waste collection centres" provided by local government, or deliver it to the retailer against the purchase of a new product.
Separate collection of waste and subsequent treatment, recycling and disposal operations promotes the production of equipment with recycled materials and limits negative effects on the environment and on health caused by improper handling of waste.
Illegal disposal of the product leads to the enforcement of administrative penalties.

- NOTE D'USO
- CARE AND MAINTENANCE
- IMPORTANT
- LOCATION OF CONTROL
- Controls and sockets
- TRANSPORTATION
- POWER
- BASIC FUNCTIONS
- POWER ON/OFF
- MODE SETTING FUNCTION
- ADJUSTING THE VOLUME
- EQUALIZER
- SETTING TONE TREBLE AND BASS
- ECHO EFFECT
- DISCO-LIGHT EFFECTS
- USB1/USB2 INPUTS
- NOTES
- REPEAT PLAY
- To Repeat a Single Track:
- BLUETOOTH OPERATION
- AUX-IN
- INPUT GUITAR
- SPECIFICATIONS
- NOTES D'EMPLOI
- Commandes et prises
- Controles y tomas
Brand : Trevi
Model : XF 3000 PRO
Category : Receiver