
SR 2185 - Sander METABO - Free user manual and instructions
Find the device manual for free SR 2185 METABO in PDF.


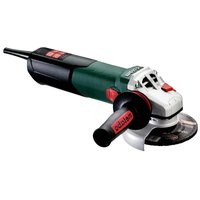
| Product type | Random orbital sander |
| Brand | Metabo |
| Model | SR 2185 |
| Pad diameter | 150 mm |
| No-load speed | 4000 - 10000 rpm (variable) |
| Power consumption | 400 W |
| Weight | 1.5 kg |
| Dimensions (L x W x H) | 250 x 120 x 150 mm |
| Power supply | Mains 230 V ~ 50 Hz |
| Sanding system | Hook-and-loop discs (Velcro) |
| Dust collector | Integrated dust bag |
| Variable speed control | Yes, adjustment wheel |
| Sound level | 78 dB(A) |
| Vibration level | 5.5 m/s² |
| Protection class | II (double insulation) |
| Power cord | 4 m |
| Included accessories | Dust bag, sanding pad, 10 abrasive discs |
| Maintenance | Regular cleaning of ventilation grilles and dust bag |
| Safety | Lockable switch, safety stop in case of jamming |
| Spare parts | Available through Metabo after-sales service |
| Warranty | 2 years (parts and labor) |
Frequently Asked Questions - SR 2185 METABO
User questions about SR 2185 METABO
0 question about this device. Answer the ones you know or ask your own.
Ask a new question about this device
Download the instructions for your Sander in PDF format for free! Find your manual SR 2185 - METABO and take your electronic device back in hand. On this page are published all the documents necessary for the use of your device. SR 2185 by METABO.
USER MANUAL SR 2185 METABO
natural_image
Two metalworking machines with visible branding and mounting base (no text or symbols on the machines themselves)
Original Instructions
1. Declaration of Conformity
We, being solely responsible, hereby declare that these sanders, identified by type and serial number *1), meet all relevant requirements of directives *2) and standards *3). Technical documents for *4) - see page 3.
2. Specified Use
The machine is suitable for dry sanding of flat and elliptical surfaces, wood, plastics, non-ferrous metals, sheet metal and similar filled and painted surfaces.
The user bears sole responsibility for any damage caused by inappropriate use.
Generally accepted accident prevention regulations and the enclosed safety information must be observed.
3. General Safety Instructions

For your own protection and for the protection of your power tool, pay attention to all parts of the text that are marked with this symbol!

WARNING – Reading the operating instructions will reduce the risk of injury.
Pass on your power tool only together with these documents.
General Power Tool Safety Warnings

WARNING – Read all safety warnings, instructions, illustrations and cifications provided with this power tool.
Failure to follow all instructions listed below may result in electric shock, fire and/or serious injury.
Save all safety warnings and information for future reference! The term "power tool" in the safety warnings refers to your mains-operated (corded) power tool or battery-operated (cordless) power tool.
3.1 Work area safety
a) Keep work area clean and well lit. Cluttered or dark areas invite accidents.
b) Do not operate power tools in explosive atmospheres, such as in the presence of flammable liquids, gases or dust. Power tools create sparks which may ignite the dust or fumes.
c) Keep children and bystanders away while operating a power tool. Distractions can cause you to lose control.
3.2 Electrical safety
a) Power tool plugs must match the outlet. Never modify the plug in any way. Do not use any adapter plugs with earthed (grounded)
power tools. Unmodified plugs and matching outlets will reduce risk of electric shock.
b) Avoid body contact with earthed or grounded surfaces, such as pipes, radiators, ranges and refrigerators. There is an increased risk of electric shock if your body is earthed or grounded.
c) Do not expose power tools to rain or wet conditions. Water entering a power tool will increase the risk of electric shock.
d) Do not abuse the power tool. Never use the cord for carrying, pulling or unplugging the power tool. Keep cord away from heat, oil, sharp edges or moving parts. Damaged or entangled cords increase the risk of electric shock.
e) When operating a power tool outdoors, use an extension cord suitable for outdoor use. Use of a cord suitable for outdoor use reduces the risk of electric shock.
f) If operating a power tool in a damp location is unavoidable, use a residual current device (RCD) protected supply. Use of an RCD reduces the risk of electric shock.
3.3 Personal safety
a) Stay alert, watch what you are doing and use common sense when operating a power tool. Do not use a power tool while you are tired or under the influence of drugs, alcohol or medication. A moment of inattention while operating power tools may result in serious personal injury.
b) Use personal protective equipment. Always wear eye protection. Protective equipment such as a dust mask, non-skid safety shoes, hard hat or hearing protection used for appropriate conditions will reduce personal injuries.
c) Prevent unintentional starting. Ensure the switch is in the off-position before connecting to power source and/or battery pack, picking up or carrying the tool. Carrying power tools with your finger on the switch or energising power tools that have the switch on invites accidents.
d) Remove any adjusting key or wrench before turning the power tool on. A wrench or a key left attached to a rotating part of the power tool may result in personal injury.
e) Do not overreach. Keep proper footing and balance at all times. This enables better control of the power tool in unexpected situations.
f) Dress properly. Do not wear loose clothing or jewellery. Keep your hair, clothing and gloves away from moving parts. Loose clothes, jewellery or long hair can be caught in moving parts.
g) If devices are provided for the connection of dust extraction and collection facilities, ensure these are connected and properly used. Use of dust collection can reduce dust-related hazards.
h) Do not let familiarity gained from frequent use of tools allow you to become complacent
and ignore tool safety principles. A careless action can cause severe injury within a fraction of a second.
3.4 Power tool use and care
a) Do not force the power tool. Use the correct power tool for your application. The correct power tool will do the job better and safer at the rate for which it was designed.
b) Do not use the power tool if the switch does not turn it on and off. Any power tool that cannot be controlled with the switch is dangerous and must be repaired.
c) Disconnect the plug from the power source and/or remove the battery pack, if detachable, from the power tool before making any adjustments, changing accessories, or storing power tools. Such preventive safety measures reduce the risk of starting the power tool accidentally.
d) Store idle power tools out of the reach of children and do not allow persons unfamiliar with the power tool or these instructions to operate the power tool. Power tools are dangerous in the hands of untrained users.
e) Maintain power tools and accessories with care. Check for misalignment or binding of moving parts, breakage of parts and any other condition that may affect the power tool's operation. If damaged, have the power tool repaired before use. Many accidents are caused by poorly maintained power tools.
f) Keep cutting tools sharp and clean. Properly maintained cutting tools with sharp cutting edges are less likely to bind and are easier to control.
g) Use the power tool, accessories and tool bits etc. in accordance with these instructions, taking into account the working conditions and the work to be performed. Use of the power tool for operations different from those intended could result in a hazardous situation.
h) Keep handles and grasping surfaces dry, clean and free from oil and grease. Slippery handles and grasping surfaces do not allow safe handling and control of the tool in unexpected situations.
3.5 Service
a) Have your power tool serviced by a qualified repair person using only identical replacement parts. This will ensure that the safety of the power tool is maintained.
4. Special Safety Instructions
Pull the plug out of the socket before making any adjustments, changing tools, carrying out maintenance or cleaning.
Secure the workpiece against slipping, e.g. with the help of clamping devices.
Wear ear protectors when working for long periods of time. High noise levels over a prolonged period of time may affect your hearing.
Hold the machine from the handles provided.
Reducing dust exposure:
Some of the dust created using this power tool may contain substances known to cause cancer, allergic reaction, respiratory disease, birth defects or other reproductive harm. Some examples of these substances are: lead (from lead-based paints), crystalline silica (from bricks cement, etc.), additives for wood treatment (chromate, wood preservative), some types of wood (like oak and beech dust), metals, asbestos.
The risk from exposure to such substances will depend on how long the user or nearby persons are being exposed.
Do not let particles enter the body.
To reduce exposure to these substances: work in a well ventilated area and wear protective equipment, such as dust masks that are specially designed to filter out microscopic particles.
Observe the relevant guidelines for your material, staff, application and place of application (e.g. occupational health and safety regulations, disposal).
Collect the generated particles at the source, avoid deposits in the surrounding area.
Use only suitable accessories. In this way, fewer particles enter the environment in an uncontrolled manner.
Use a suitable extraction unit.
Reduce dust exposure with the following measures:
- Do not direct the escaping particles and the exhaust air stream at yourself or nearby persons or on dust deposits.
- Use an extraction unit and/or air purifiers.
- Ensure good ventilation of the workplace and keep it clean using a vacuum cleaner. Sweeping or blowing stirs up dust.
- Vacuum or wash protective clothing. Do not blow, beat or brush.
5. Overview
See page 2.
1 Sanding plate
2 Clamping element
3 Ejection nozzle
4 Adjustment wheel *
5 Trigger switch
6 Handle
7 Lock button
8 Dust bag*
9 Closure band*
10 End cap*
* depending on the model / equipment
6. Commissioning
Before plugging in, check that the rated mains voltage and mains frequency, as stated on the type plate match your power supply.
Always install an RCD with a maximum trip current of 30 mA upstream.
ENGLISHen
6.1 Installation of sanding disc
Sanding sheet with velcro-type fastening
Simple attachment and removal thanks to the velcro-type fastening. Simply press on the sanding disc such that the holes in the sanding disc are aligned with the sanding plate (1).
Sanding sheet without velcro-type fastening
Push both clamping elements (2) up. Secure the sanding disc using a clamping element. Pull it across the sanding plate (1) so it is taut; then fasten in place with the other clamping element.
7. Use
7.1 Switching On and Off
Press the trigger switch (5) to switch on the machine.
The trigger switch can be locked using the lock button (7) for continuous operation. Press the trigger switch again to stop the machine.
7.2 Setting the oscillating frequency
(depending on the model)
Set the oscillating frequency on the adjustment wheel (4). This can also be done during operation.
The best way to determine the ideal setting is through a practical trial.
7.3 Dust extraction
Fit the sanding disc so that the holes on the sanding disc and sanding plate (1) are aligned to optimise the dust extraction performance.
Note: We recommend connecting a suitable extraction device when sanding abrasive material (e.g. plaster, etc.).
Own extraction units:
Fit dust bag (8) to the ejection nozzle (3). Pull the dust bag (8) backwards to remove it.
Empty the dust bag (8) in good time to optimise dust extraction.
(The dust bag is dependent on the equipment and therefore may not be included with the delivery. It is available as an accessory: see page 2 for order no.)
Third-party extraction units:
Pull the dust bag (8) or end cap (10) backwards.
Connect a suitable extraction device to the ejection nozzle (3).
8. Cleaning, Maintenance
Emptying the dust bag (depending on the equipment): remove the closure band (9). Empty the dust bag (8), clean with an extraction device if necessary. Close the dust bag again with the closure band (9).
Clean the machine regularly. This includes vacuum cleaning the ventilation louvres on the motor.
Clean the sanding sheet with velcro-type fastening as required (vacuum off the dust). This increases the service life of the velcro-type fastening.
9. Accessories
Use only genuine Metabo accessories.
Note: Metabo accessories are adapted to suit the machine's velcro-type fastening. This increases the service life of the velcro-type fastening.
Use only accessories which fulfil the requirements and specifications listed in these operating instructions.
See www.metabo.com or the catalogue for a complete range of accessories.
10. Repairs

Repairs to electrical tools must ONLY be carried out by qualified electricians!
Contact your local Metabo representative if you have Metabo power tools requiring repairs. See www.metabo.com for addresses.
You can download a list of spare parts from www.metabo.com.
11. Environmental Protection
Observe national regulations on environmentally compatible disposal and on the recycling of disused machines, packaging and accessories.

Only for EU countries: never dispose of power tools in your household waste! Used power tools must be collected separately and
handed in for environmentally compatible recycling in accordance with European Directive 2002/96/EC on waste electrical and electronic equipment and its implementation in national legal systems.
12. Technical Specifications
Explanatory notes on the specifications on page 3. Changes due to technological progress reserved.
P1 =Rated input power
P2 =Power output
s0 =Oscillating frequency at idle speed
s1 =Oscillating frequency at rated load
S = Oscillating circuit diameter
A = Sanding plate
C = Dust bag
m = Weight without mains cable
Measured values determined in conformity with EN 60745.
Machine in protection class II
\~ AC Power
The technical specifications quoted are subject to tolerances (in compliance with the relevant valid standards).
Emission values These values mak
These values make it possible to assess the emissions from the power tool and to compare different power tools. The actual load may be higher
or lower depending on the operating conditions, the condition of the power tool or the accessories.
Please allow for breaks and periods when the load is lower for assessment purposes. Arrange protective measures for the user e.g. organisational measures based on the adjusted estimates.
Vibration total value (vector sum of three directions) determined in accordance with EN 60745:
ah =Vibration emission value (surface grinding)
Kh = Uncertainty (vibration)
Typical A-effective perceived sound levels:
LpA = Sound-pressure level
LWA = Acoustic power level
KpA , KWA = Uncertainty
The noise level can exceed 80 dB(A) during operation.

Wear ear protectors!
FRANÇAISfr
Notice originale
Kh =incertitude (vibration)


- Original Instructions
- Declaration of Conformity
- Specified Use
- General Safety Instructions
- General Power Tool Safety Warnings
- Work area safety
- Electrical safety
- Personal safety
- Power tool use and care
- Service
- Special Safety Instructions
- Reducing dust exposure:
- Overview
- Commissioning
- ENGLISHen
- Installation of sanding disc
- Sanding sheet with velcro-type fastening
- Sanding sheet without velcro-type fastening
- Use
- Switching On and Off
- Setting the oscillating frequency
- Dust extraction
- Own extraction units:
- Third-party extraction units:
- Cleaning, Maintenance
- Accessories
- Repairs
- Environmental Protection
- Technical Specifications
- Emission values These values mak
- FRANÇAISfr
- Notice originale
Brand : METABO
Model : SR 2185
Category : Sander