
AG 1212 - Battery charger AEG - Free user manual and instructions
Find the device manual for free AG 1212 AEG in PDF.


| Product Type | Battery Charger |
| Brand | AEG |
| Model | AG 1212 |
| Input Voltage | 100-240 V AC, 50/60 Hz |
| Output Voltage | 1.2 - 12 V DC |
| Charging Current | 0.5 - 2 A |
| Number of Charging Slots | 4 slots |
| Supported Battery Types | Ni-MH, Ni-Cd, Li-ion, Li-Po |
| Battery Sizes Compatible | AAA, AA, C, D, 9V |
| Dimensions (W x H x D) | 160 x 80 x 50 mm |
| Weight | 350 g |
| Charging Indicator | LED indicator per slot |
| Safety Features | Overcharge protection, short circuit protection, reverse polarity protection |
| Automatic Cut-off | Yes, when battery is fully charged |
| Power Supply | Built-in AC adapter |
| Operating Temperature | 0°C to 40°C |
| Storage Temperature | -20°C to 60°C |
| Certifications | CE, RoHS |
| Package Contents | Charger, user manual |
Frequently Asked Questions - AG 1212 AEG
User questions about AG 1212 AEG
0 question about this device. Answer the ones you know or ask your own.
Ask a new question about this device
Download the instructions for your Battery charger in PDF format for free! Find your manual AG 1212 - AEG and take your electronic device back in hand. On this page are published all the documents necessary for the use of your device. AG 1212 by AEG.
USER MANUAL AG 1212 AEG
natural_image
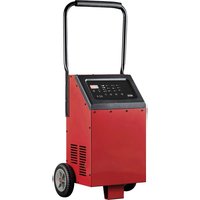
Red portable electronic device with black handle and display screen (no visible text or symbols)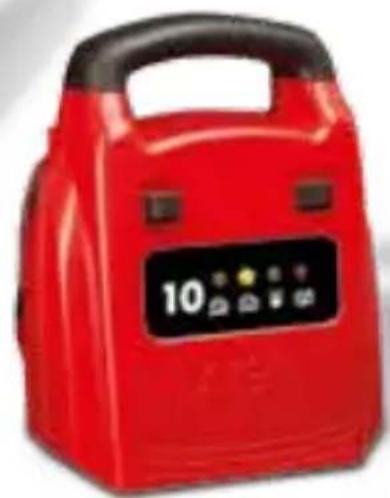
natural_image
Red portable electronic device with black handle and display screen showing '10' (no readable text or symbols beyond branding)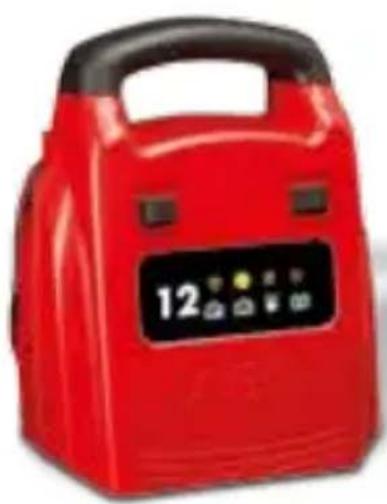
natural_image
Red portable electronic device with black handle and display screen showing '12' (no readable text or symbols beyond branding)DE - Seite 3
Read these instructions before using the charger. Follow all instructions and recommendations.
FR - Page 31
Automatic charging device AG 1208, AG 1210 and AG 1212 for 12 V batteries....19
Contents....19
Technical data.... 19
Safety....20
General safety guidelines 20
Safety notices for chargers 21
Operation 23
Before charging batteries 23
Connecting the battery 24
Product overview AG 1208, AG 1210, AG 1212 24
Operating 25
Charging phases 26
End charging process.... 27
Cleaning, care and service 28
Service....28
INTRODUCTION
In this operating manual the following pictograms are used:

Read the operating manual!

Explosion hazard!

Observe warnings and safety guidelines!

Danger of electric shock!

Only use device in locations protected from weather!

Consider the environment when disposing of the packaging!
Intended use
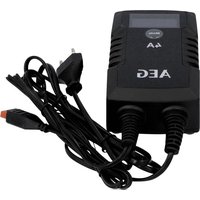
This charging device is only intended for charging 12 V direct current batteries (only rechargeable, maintenance-free, closed batteries, lead-acid batteries (SLA) or GEL batteries) as installed in cars, boats, lorries and other vehicles.
This includes different types of lead-acid batteries such as:
■Wet batteries / closed lead batteries (liquid electrolyte)
■Maintenance-free batteries and VRLA batteries (valve regulated lead-acid batteries)
■Gel batteries (gelatinous electrolyte)
The charging device can be directly connected to the batteries using the clamps. The charging devices is not intended for charging battery types not listed above. The device is solely approved private use. Any other use or modification of the device is considered inappropriate and involve substantial hazards. The manufacturer assumes no liability for damages arising from improper use.
Automatic charging device AG 1208, AG 1210 and AG 1212 for 12 V batteries
Familiarise yourself with all device functions and learn how to correctly use the device before first using it. For this purpose please carefully read the following operating instructions. Store this manual in a safe location. When passing the device on to other be sure to also include all documentation.
Contents
Please check the contents immediately after opening the package. Check the device and all parts for damage. Do not operate a defective device or parts.
■ Automatic charging device AG 1208 or AG 1210 or AG 1212
■ Operating instructions
Technical data
| Model AG 1208 AG 1 | 210 AG 1212 | ||
| Item number 97003 97004 97005 | |||
| Max. charging current 8 A (effective) 10 A (effective) 12 A (effective) | |||
| Battery voltage 12 V 12 V 12 V | |||
| Battery capacity 2 Ah - 80 Ah 12 Ah - 100 Ah 20 Ah - 120 Ah | |||
| Charge indicator LED LED LED | |||
| Input voltage 230 V / 50 Hz 230 V / 50 Hz | 230 V / 50 Hz | ||
SAFETY
General safety guidelines
Read all safety guidelines and instructions. Non-compliance with safety guidelines and instructions can cause electric shock, fire and / or serious injury. Keep all safety guidelines and instructions for future reference.

Warning!

Life-threatening danger to infants and children. Never leave children unsupervised with the packing material as this can cause suffocation. Never allow children to play with cables - strangulation hazard! Never allow children to play with components or mounting parts, they could be swallowed and result in suffocation.
This device is not intended for use by persons (including children) with reduced physical, sensory or mental abilities or who lack experience and / or knowledge, unless they are supervised by a person who is responsible for their safety or unless they receive instructions from this person on how the equipment is to be used. Children must be supervised in order to ensure that they do not play with the device.
The manufacturer is not responsible for damages caused by:
■Improper connection and / or operation.
■Exterior force, damage to the device and /or damage to parts of the device caused by mechanical impact or overload.
■Any type of modification to the device.
■Use of the device for purposes that are not described in this instruction manual.
■Consequential damages caused by non-intended and / or improper use, and / or defective batteries.
■Moisture and / or insufficient ventilation.
■The unauthorised opening of the device. This will void the guarantee.
Safety notices for chargers
- Keep the device away from children. Children do not understand or perceive possible risks when handling electrical devices. Children must be supervised to ensure that they do not play with the charger.
■Ensure that the device is always stored in a safe place. Do no expose the device to rain or wet conditions. Avoid pouring or dripping water or other liquids over it. If water penetrates electrical devices, the risk of electric shock increases.
- Ensure that all plugs and cables are free of moisture. Never connect the device to the mains with wet or moist hands.
- Never touch battery terminals or battery clamps whilst the device is connected to alternating current.
■Remove all device cables from the battery before attempting to drive your vehicle.
■Always disconnect the device from the mains when you are not using it.
■Always disconnect the device by pulling out the power plug, never by unclamping a connecting cable.
If the cables need to be run through walls with sharp edges, for example metal sheets, use tubes or cable ducts to prevent damage to the cables. Lay electrical cables in such a way that it is not possible to stumble over them, thereby preventing damage.
Never place the device over or close to the battery to be charged. Gases from the battery make the charger corrode and damage it. Set up the charger as far away from the battery as the direct current cable allows.
■Do not cover the device while charging.
Never pull the cable or use it to carry the device. Damaged cables increase the risk of electric shock.
■Only operate the device if all cables and the casing are intact.
If the supplied cables are damaged they must be replaced by qualified specialists to prevent hazards.
Never operate the device if it has been dropped or damaged in any other way. For inspection and repair, take it to a qualified electrician.
■All maintenance work must be conducted by qualified electricians.
Never disassemble the device. In correct assembly may cause electric shock or fire.
■Never short circuit the device or connect the inlets and outlets of the device using metal objects. Only use the supplied connecting cables to connect the device to a battery.
If an extension cable is used, the cable diameter must be sufficient for the power required by the device.
- Check the input voltage (230 V AC) and ensure that it corresponds to the mains voltage; otherwise the device may be damaged.
■Always make sure that the device is disconnected from the mains when you connect it and disconnect it to a battery.
■Always connect the positive clamp (red) to the positive battery pole (not connected to the chassis of the car, marked with P or +).
■Then connect the negative clamp (black) to the car chassis, away from the battery casing of the car, away from the battery and the fuel line. The charger can then be connected to a suitable power socket.
■After charging, first disconnect the charger from the power supply. Then, in this sequence, disconnect the cable to the car chassis (-), and then the battery connection (+).
■Do not look at the battery when connecting the charger to the power supply.
Warning!
■Never try to charge damaged, non-rechargeable or frozen batteries.
■This charger is only suitable for the listed batteries (maintenance-free, sealed, lead-acid batteries (SLA) or gel batteries) and may not be used to charge non-rechargeable, NiCd or other types of batteries. Do not use it for any other purposes.
■Do not use the charger to charge dry cell batteries. These may explode and cause injury to persons or material damage to property.
■Do not use the device as a power supply for an electrical low voltage system.
■Ensure that you have read and understood the instruction manual and all safety instructions that were supplied with the battery to be charged or the vehicle.
■Avoid all contact with battery electrolyte acid. If your skin comes into contact with battery fluid, rinse it thoroughly under running water and contact your doctor. Should your eyes come into contact with battery acid, rinse them with running water for at least five minutes and contact your doctor.
■Always pay attention to the correct polarity if you connect the device to a battery.
This charger was not designed to supply RVs with power.
This charger was not designed to be installed as an accessory in the vehicle.

Explosion HAZARD! When charging, bubbles may form due to the release of gas. This gas is inflammable and explosive!
Never charge the battery close to an open fire or in places where sparks may occur.
■Always ensure sufficient ventilation.
- Only connect and disconnect the battery connecting cables when the charger is disconnected from the mains.
OPERATION
Before charging batteries
If the battery must be removed from the vehicle before charging, always disconnect the earthed connector from the battery first. Also ensure all other loads in the vehicle are off.
■ Ensure adequate ventilation to allow any toxic vapours or gasses to disperse.
■Ensure the battery poles are clean. If the battery has a removable vent cap, fill each battery cell with distilled water to the manufacturer recommended level. Do not overfill the cells.
If the battery does not have caps, refer to the manufacturer instructions on charging and the charging speed.
Connecting the battery
Risk of electrical shock!
Always verify the charging device is disconnected from the 230 V AC outlet when connecting to a battery..
■Always ensure the area around the battery is well ventilated during the charging process.
- Connect the positive charging clamp (red) to the positive battery terminal (marked P or +).
- Connect the negative charging clamp (black) to the body of the vehicle, or in exceptions to the negative battery terminal (marked N or -).
- Verify both terminal clamps make good contact with the respective terminals.
- Plug the power plug into a suitable AC mains outlet
In the event of reverse polarity the "Polarity" LED will light up red.
Charging will not start.
Product overview AG 1208, AG 1210, AG 1212

- Charging speed selector Left position: gentle charging Right position: quick charging
- Red "POLARITY" LED
- Green "POWER" LED
- Amber "CHARGING" LED
-
Green "FULL" LED
-
Charging cable (-) with charging clamp (black)
- Charging cable (+) with charging clamp (red)
- Power cable with plug
- Battery selector switch Left position: Lead-acid batteries Right position: GEL batteries
Operating
Start charging (lead-acid batteries)
Before connecting the battery be sure the battery selector switch (9) is set to Normal. Then select the charging speed with the charging speed selector switch (1). If the charging device is correctly connected it will automatically start charging. This process is indicated by the Power LED (green (3)) and the charging LED (yellow (4)).
The charging process is completely automatic and completed when the green FULL LED (5) lights up. The battery is now charged to 100 % and can be disconnected from the charging device.
Start charging (GEL batteries)
Before connecting the battery be sure the battery selector switch (9) is set to GEL. Then select the charging speed with the charging speed selector switch (1). If the charging device is correctly connected it will automatically start charging. This process is indicated by the Power LED (green (3)) and the charging LED (yellow (4)). The charging process is completely automatic and completed when the green FULL LED (5) lights up. The battery is now charged to 100 % and can be disconnected from the charging device.
Charging phases
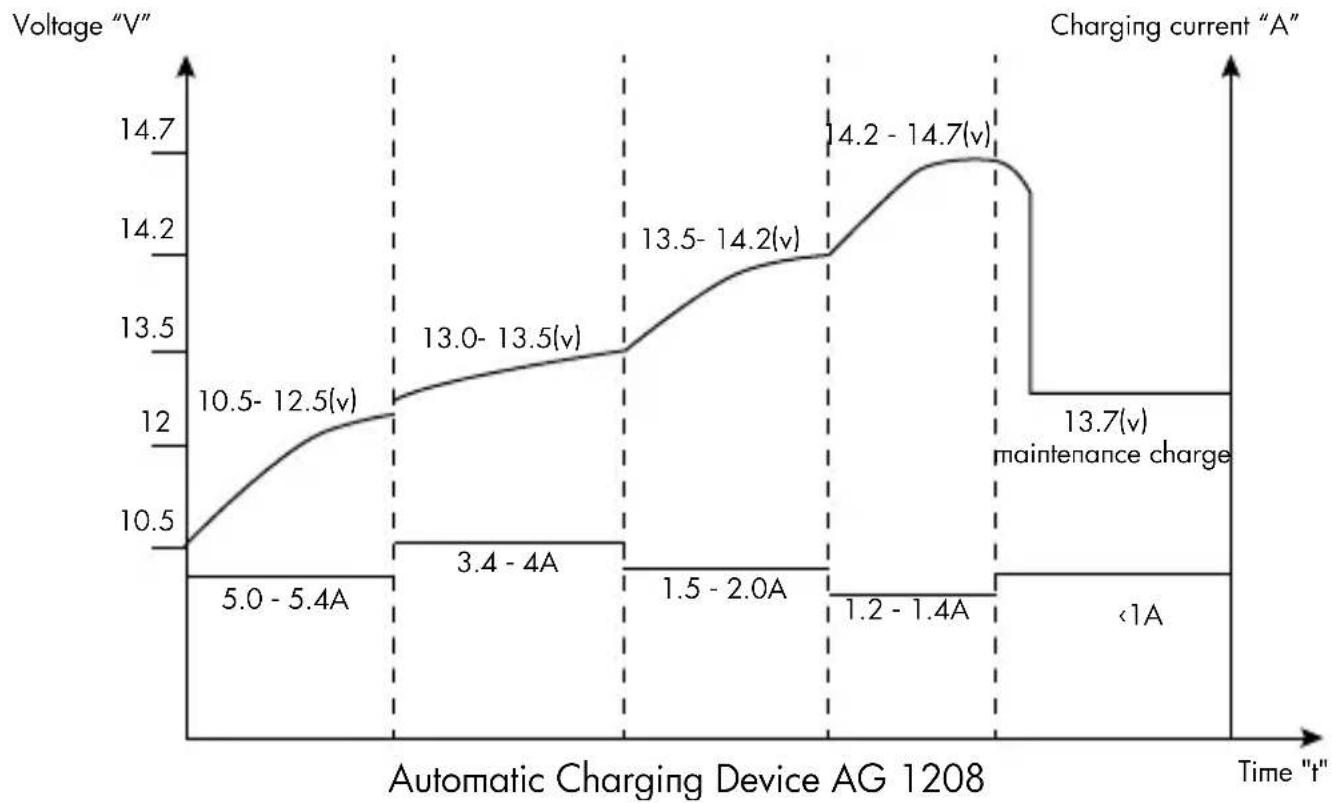
line
| Time Range | Voltage (V) | | ------------------ | ----------- | | 5.0 - 5.4A | 10.5 | | 10.5 - 12.5(v) | 12.5 | | 13.0 - 13.5(v) | 13.0 | | 13.5 - 14.2(v) | 14.2 | | 14.2 - 14.7(v) | 14.7 | | >1.2 | 13.7 |
line
| Time Range | Voltage (V) | | ---------------- | ----------- | | 6.7 - 7A | 10.5 | | 4.5 - 5.7A | 12.0 | | 3.2 - 4.0A | 12.5 | | 1.4 - 1.7A | 13.0 | | >1A | 14.2 | | >1A | 14.7 | | >1A | 13.7 |
line
| Time range (A) | Voltage (V) | | -------------- | ----------- | | 7.4 - 8A | 10.5 | | 6.3 - 7A | 12.0 | | 4.3 - 5.2A | 12.5 | | 1.8 - 2.7A | 13.0 | | >1A | 13.5 | | >1A | 14.2 | | >1A | 14.7 | | >1A | 13.7 |End charging process
- Unplug from the AC outlet.
- Disconnect the charging clamp (black) from the vehicle's body, in exceptions from the negative battery terminal (marked N or -).
- Disconnect the positive charging clamp (red) from the positive battery terminal (marked P or +).
CLEANING, CARE AND SERVICE
Your charger can be kept functional for years with minimum care.
■After the charging process is completed, clean the clamps. To prevent corrosion, wipe off any battery fluid that has come into contact with the clamps.
■Roll up the cables properly when you store the charger. This helps to prevent damage to the cables and the charger.
- Occasional cleaning of the charger casing with a soft cloth keeps the surface shiny and helps to prevent corrosion.
■Store the charger in a clean and dry location.

Caution!
Only qualified technical personnel should change the plug or the connecting cables. This will guarantee the safety of the device is maintained.
If the product is no longer suitable for use dispose of it in an environmentally friendly manner in accordance with your local ordinances.
Disposal

Do not dispose of packaging or the product through your household waste! The product and packaging are made from recyclable materials (plastics, metals, paper).
If the product is no longer suitable for use dispose of it in an environmentally friendly manner in accordance with your local ordinances.
Service
Should you have any questions regarding commissioning or operating in spite of studying these operating instructions, or if a problem should occur against all expectations, please get in contact with your specialist supplier.
TABLE DES MATIÈRES
INTRODUCTION 32
www.aeg-automotive.com
AEG is a registered trademark used under license from AB Electrolux (publ)


- DE - Seite 3
- FR - Page 31
- Safety....20
- Operation 23
- Cleaning, care and service 28
- INTRODUCTION
- Intended use
- Automatic charging device AG 1208, AG 1210 and AG 1212 for 12 V batteries
- Contents
- SAFETY
- General safety guidelines
- Warning!
- Safety notices for chargers
- Explosion HAZARD! When charging, bubbles may form due to the release of gas. This gas is inflammable and explosive!
- OPERATION
- Before charging batteries
- Connecting the battery
- Risk of electrical shock!
- Product overview AG 1208, AG 1210, AG 1212
- Operating
- Start charging (lead-acid batteries)
- Start charging (GEL batteries)
- End charging process
- CLEANING, CARE AND SERVICE
- Caution!
- Disposal
- Service
- TABLE DES MATIÈRES
- INTRODUCTION 32
Brand : AEG
Model : AG 1212
Category : Battery charger