
CM15Pro - Security and Access Control System MARMITEK - Free user manual and instructions
Find the device manual for free CM15Pro MARMITEK in PDF.


| Product type | Home automation interface for security system and access control |
| Brand | Marmitek |
| Model | CM15Pro |
| Dimensions | Approximately 85 x 55 x 25 mm |
| Weight | Approximately 100 g |
| Power supply | USB port (5 V, 500 mA) |
| Main functions | Control of X10 devices, schedule programming, custom scenes, integration with PC software |
| Compatibility | X10 modules, Marmitek software or compatible |
| Maintenance and cleaning | Clean with a soft, dry cloth. Avoid liquids. |
| Safety | Use exclusively with official software. Do not expose to moisture. |
| Spare parts and repairability | USB cable included. No user-replaceable internal parts. |
| General information | USB interface for home automation. Allows centralized control of lighting and appliances. |
Frequently Asked Questions - CM15Pro MARMITEK
User questions about CM15Pro MARMITEK
0 question about this device. Answer the ones you know or ask your own.
Ask a new question about this device
Download the instructions for your Security and Access Control System in PDF format for free! Find your manual CM15Pro - MARMITEK and take your electronic device back in hand. On this page are published all the documents necessary for the use of your device. CM15Pro by MARMITEK.
USER MANUAL CM15Pro MARMITEK
QUICK INSTALLATION GUIDE 3
KURZ INSTALLATIONSANLEITING 9
GUIDE D'INSTALLATION RAPIDE 15
BREVE MANUAL DE INSTRUCCIONES 21
- To prevent short circuits, this product should only be used inside and only in dry spaces. Do not expose the components to rain or moisture. Do not use the product close to a bath, swimming pool etc.
- Do not expose the components of your systems to extremely high temperatures or bright light sources.
- In case of improper usage or if you have altered and repaired the product yourself, all guarantees expire. Marmitek does not accept responsibility in the case of improper usage of the product or when the product is used for purposes other than specified. Marmitek does not accept responsibility for additional damage other than covered by the legal product responsibility.
- This product is not a toy. Keep out of reach of children.
- Do not open the product (battery panel excepted): the device may contain live parts. The product should only be repaired or serviced by a qualified repairman.
- Keep batteries out of the reach of children. Dispose of batteries as chemical waste. Never use old and new batteries or different types of batteries together. Remove the batteries when you are not using the system for a longer period of time. Check the polarity (+/-) of the batteries when inserting them in the product. Wrong positioning can cause an explosion.
- Only connect the adapter to the mains after checking whether the mains voltage is the same as the values on the identification tags. Never connect an adapter or power cord when it is damaged. In that case, contact your supplier.
- Automatic switching devices provide comfort, but can also be dangerous. They can surprise people or can ignite clothing hanging over an electric heat source. Please be careful and take appropriate measures to avoid accidents.
HOW DOES MARMITEK X-10 WORK?
Marmitek X-10 components use the existing mains wiring to communicate (using Marmitek X-10 signals). You can build a complete system using the three different kind of components of the Marmitek X-10 System:
- Modules These components will receive Marmitek X-10 signals and will switch or dim the attached lamp or appliance. Examples of these modules are lamp modules and appliance modules. These are available as build-in, micro, DIN rail and plug-in modules.
- Controllers These components will transmit Marmitek X-10 signals and thus will control the Modules.
- Transmitters Wireless components like remotes. The signals of these components will be received by a controller with transceiver functionality (IRRF 7243,
TM13 or CM15Pro). The Transceiver will translate the signals into Marmitek X-10 signals on the power line.
ADRESSES
Up to a maximum of 256 different addresses can be preset. These are subdivided into a so-called HouseCode (A to P incl.) and a UnitCode (1 to 16 incl.). The HouseCode can also be set on the controllers, so that the controllers and modules become part of the same system. The address can be set either using code dials or by pressing buttons, depending on the type of module.
The Marmitek X-10 System uses standard commands, which control all units with the same HouseCode at the same time (e.g. all lights on, all off, etc.).
SIGNAL RANGE
Range of Marmitek X-10 signals over the Power Line and how to increase the range.
The Marmitek X-10 System is based on power line communication. The range of the Marmitek X-10 signals very much depends on the local circumstances. On average the range is a cable length of 80 meters.
If you have difficulties with the range of your Marmitek X-10 signals, please pay attention to the following facts:
- When more than one phase is used for your electrical system, it is necessary to couple these phases for the Marmitek X-10 signals. For coupling you can use FD10 Phase Couplers/Filters. You only need to install a Phase Coupler/Filter when your wall outlets and light switches are divided over more than one phase (more than one group is no problem). For bigger buildings or longer distances we advice you to use an active repeater instead of passive FD10's.
- It is possible that Marmitek X-10 signals are attenuated by devices and lights which are connected to the power line. In a normal home situation this effect is negligible (the Marmitek X-10 system is using active gain control to eliminate the effects). However, it is possible that a particular device in your house is attenuating the signals so much that the range of Marmitek X-10 signals is decreased significantly. When you have range problems, it is wise to try to locate the device which is attenuating the signals simply by unplugging devices from the power line, and testing the differences in range for your Marmitek system. When e.g. your conclusion is that e.g. your computer monitor is attenuating the signal, you can use a FM10 Plug-in Filter between the power line and the monitor to eliminate the effects.
Known devices which can cause attenuation are:
PC Monitors PCs with heavy internal power supplies
Old Televisions Copiers
Fluorescent Lights Gas Discharge Lamps (Energy Saving Lamps)
-
Some (old) devices are able to disturb the signal by transmitting noise on the power line. Because the Marmitek X-10 signals are transmitted on 120 kHz, only noise on or near this frequency will have influence on the range. When you use a FM10 Filter to connect this device to the power line, the noise will be filtered.
-
The Marmitek X-10 protocol has several mechanisms to avoid modules to be switched on or off by other sources than your Marmitek X-10 Controllers. However, it is possible that the Marmitek X-10 signals are disturbed by e.g. baby phones which are in TALK mode (continuous transmission). When these kind of signals are present on the power line it is possible that the Marmitek X-10 signals will not come through.
-
The mains do not stop at the front door of your home. Everything that is attached to mains nearby your home can have influence on Marmitek X-10 signals (e.g. heavy machinery). If you think that your system is influenced by devices out of your house, it is advisable to install FD10 Phase Coupler/Filter on each phase entering the house. These filters will block signals coming into or going out of your house, but will also match the impedance for the mains. Hereby make your house Marmitek X-10 compatible for these units. The FD10's will not only filter but will also couple the phases (please see 1).
USER MANUAL
Introduction
The Marmitek ActiveHomePro (AHP) software, in conjunction with the CM15Pro Programmable Computer Interface, lets you control lights and appliances around your home when used with Marmitek X-10 Modules.
The CM15Pro is a controller with Transceiver function: When it receives a command from a wireless remote control (f.e. EasyControl8/EasyTouch35/KR21/SS13), it sends digital signals over your existing house wiring to Modules that receive the signals and execute the command.
You now have the power to control your whole home from your computer! With the Marmitek AHP software and your X-10 Modules you can create schedules for your lights and appliances, set up groups of commands for your daily life, and keep lights and appliances off when they're not in use. You can make AHP save the timer's schedules and Macro Events in the CM15Pro memory, so that they run even when your computer is turned off! Use Marmitek AHP to make your home more comfortable, and more secure.
This Installation guide shows you how to install your CM15Pro and Marmitek AHP software. Use this Installation guide as a guide to get you started, but be sure to read the help information after installation.
CONTENTS
1x CM15Pro Programmable Computer Interface
1x USB Cable
1x ActiveHomePro installation CD
1x Installation guide
1x 9 Volt 6LR61 alkaline block battery
1x Metal bracket
1x Antenna sleeve
SYSTEM REQUIREMENTS
Windows based Personal Computer
Available USB port
CD ROM or DVD player
Windows XP or Windows Vista operating system
HARDWARE SETUP AND SOFTWARE INSTALLATION
Please read through these installation steps completely before you start to install your AHP software.

Please install the Marmitek AHP software before you plug in the CM15Pro!
- Unpack the interface, USB cable, antenna sleeve, battery and CD with the setup software.
- Slide the antenna sleeve over the CM15Pro's wire antenna.
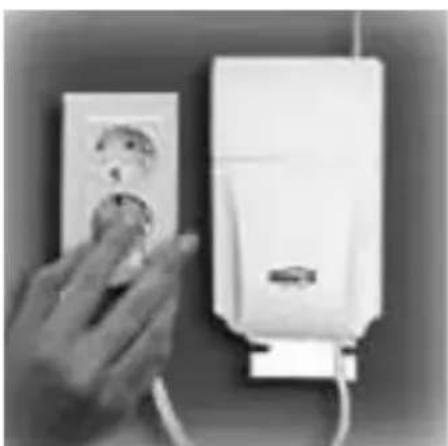
- Plug the AC connector into an AC outlet near your PC. The unit should be mounted at a height of 1 meter for best performance and located away from any sources of RF interference such as computers, monitors, etc.


-
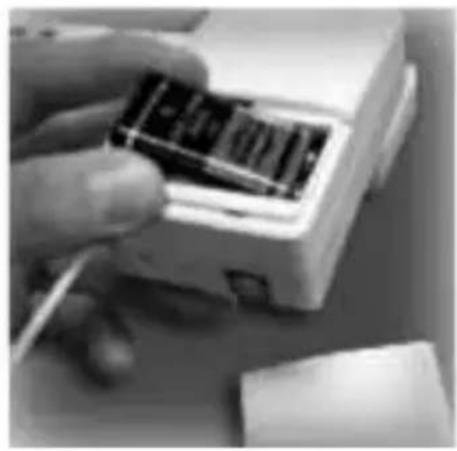
Open the battery compartment and insert the 9V alkaline block battery in the battery compartment (for retaining the time of day if there's a power outage). Respect the polarity. Replace the cover.
-
Turn on your PC.
- Disable or turn off your antivirus software before you install the software as some antivirus programs interfere with the installation.
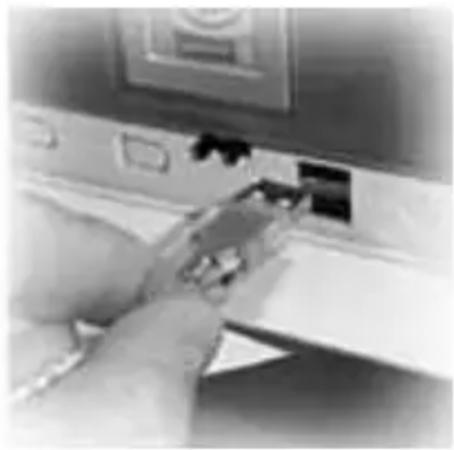
- Plug the USB cable into your PC (Wait for connecting the other end of the USB cable to the CM15Pro till the software tells you to.)
- Insert the ActiveHomePro CD in your CD-ROM drive. After a few seconds the installation should start and the AHP Setup windows should appear on your PC screen. The software installation process will install the driver for your CM15Pro and the
main AHP Application. If the installer does not start automatically, open your CD drive using Explorer and double-click on Setup_ahp_eu_xxx.exe. (where xxx is the version of the software) Follow the installer prompts which appear on your screen.
- Connect the other end of the USB cable to the CM15Pro when the software tells you to.
- After the installation is complete, please review the Help file in the application for further assistance.
- You can now turn on your anti-virus program again.

OPERATION
Using Marmitek ActiveHomePro
To familiarize you with the AHP software, we will explain shortly how to operate a lamp and appliance module and what you can do with macros and timers.
All you need to do is run your Marmitek AHP software — your software controls the Interface. Use the entry in your Windows Start Menu to open the program.
When the AHP opens for the first time, the AHP Intro Wizard will start to make you familiar with the software.
When you have finished the AHP Intro Wizard, it has loaded a standard profile and will show a graphical representation of a Lamp Module and Appliance Module as well as 2 sample Macros.

You can always start the AHP Intro Wizard again by going to Help, Run Intro Wizard....
The Lamp Module has been named "My Lamp Module" and the Appliance Module is named "My Appliance."
"My Lamp Module" is already set to address A1 (HouseCode A, Unit Code 1 located on the bottom center of the "on screen" module). This should correspond to the setting of the physical Lamp Module that you will install (sold separately).
The "My Appliance" on screen module is set to HouseCode A and Unit Code 2 to cor-
respond to the setting of the physical Appliance Module that you will install (sold separately).

Make sure the Address Dials on the face of the Modules are set correctly. The red dial should be set to A on both Modules. The black dial on the Lamp Module should be set to 1 and the black dial on the Appliance Module should be set to a 2. If they are not set correctly, you can reset the dials with a small screw-driver (anything small enough to fit the slot in the dials).
LAMP MODULE LM12 (sold separately)
To control a lamp using AHP, follow these steps.
Please read through these installation steps completely before you start to install a Lamp Module.
- Select a nearby lamp, one that uses a standard light bulb, and make sure its on/off switch is switched on.
- Unplug the lamp from the wall outlet and plug it into the Lamp Module.
- Plug the Lamp Module into a nearby AC outlet. If this outlet is controlled by a wall switch, make sure the wall switch is turned on.
- If you have not already done so, start your AHP software by double clicking on the AHP icon.
- Using your mouse, click the switch of "My Lamp Module" as shown on your computer screen. There may be a delay of one or two seconds from the time you click the "on screen" module switch and when the light actually turns on. You can also dim the lamp by moving the slide switch up and down.
APPLIANCE MODULE AM12 (sold separately)
Controlling an appliance is just as easy!
Please read through these installation steps completely before you start to install an Appliance Module.
- Select a small appliance, such as an AC powered radio, and make sure its on/off switch is switched on.
- Unplug the appliance from the wall outlet and plug it into the Appliance Module.
- Plug the Appliance Module into a nearby AC outlet. If this outlet is controlled by a wall switch, make sure the wall switch is turned on.
- If your AHP software is not running, start it by double clicking on the AHP icon.
- Using your mouse, click the switch of "My Appliance" as shown on your computer screen. There may be a delay of one or two seconds from the time you click the "on screen" module switch and when the appliance actually turns on.
Timers
You can schedule each of your Modules to turn on or off any time by clicking on the small clock at bottom left hand side of your "on screen" modules. If you have trouble
scheduling modules, check the on-line helps for details on how to schedule events (turning Modules on or off).
Macros
You can also define your own automated Macros for the lights and appliances in your home!
Macros are a useful way to group commands for your X10 modules. If you have lights and appliance that you frequently use in similar ways, you can easily turn them into a macro. You can tell a macro only to be executed when specific conditions are true. F.e.: the outdoor lamp should only turn on when motion is detected and it is dark outside. Included with your AHP software are two sample macros: Sample Macro 1 and Sample Macro 2. These 2 sample Macros show up as "on screen" modules also. Click on the Edit button located on the "on screen" macro to get an idea of what you can do with macro.
Sample Macro 1 with House Code/Unit Code of address of A3-On will be executed when the command A3-On is received.
Sample Macro 2 with House Code/Unit Code of address A3-Off will be executed when the command A3-Off is received.
Again, check the on-line helps for details on how setup macro.
Save changes in the CM15Pro
AHP will automatically ask you if you want to save your data to the CM15Pro when you've made changes, before you close the program. If you want to save your changes to the interface immediately, use the Tools menu and choose "Download Timers and Macros." To save changes on the CM15Pro, you temporarily have to connect the CM15Pro to your computer (with the USB cable supplied). When the download is complete, you'll get a message telling you it's done.
When the download is complete, you can switch of your PC and disconnect the USB cable. The adjustments, timers and macros will be saved in the CM15Pro.
FREQUENTLY ASKED QUESTIONS
Do I always have to leave my computer on to make the Timers and Macro's work?
No, you can make ActiveHomePro save the timer's schedules and Macro Events in the CM15Pro computer module memory, so that they run even when your computer is turned off.
Do Marmitek ActiveHomePro and CM15Pro work with all my existing X-10 modules and witches?
Absolutely. ActiveHomePro and the CM15Pro are using the Marmitek X-10 protocol.
Is there a Software Developers Kit (SDK) for Marmitek ActiveHomePro?
Yes there is. Use it to develop your own applications that work with Marmitek ActiveHomePro. Go to www.activehomepro.eu for more information on the Marmitek ActiveHomePro SDK.
Does Marmitek ActiveHomePro need a separate transceiver (TM13 or IRRF7243)?
No. The CM15Pro has a built-in transceiver that constantly monitors all 256 X-10 addresses.
How many lights and appliances can I control using X-10?
X-10 can control up to 256 unique addresses (combination of 16 house codes and 16 units codes). However, each address can have an unlimited number of modules. This means you could set three lamps, with lamp modules, in the living room to use the same X-10 address and they will a respond to Marmitek ActiveHomePro at the same time. This is particularly useful for holiday decorative lighting allowing you to control many different electrical decorations using a single X-10 command.
What is the reason for modules to switch on/off spontaneously?
It is possible that a Marmitek X-10 System is installed at one of your neighbors using the same House Code. To solve this problem try to change the House Code (A...P) of your system, or have FD10 Phase Coupler/Filter installed at your incoming mains.
My modules will not respond to my controller.
Make sure that the HouseCode on all Modules and Controllers are set to the same HouseCode (A .. P).
Am I able to increase the range of my remotes by using more Transceivers?
Yes, you can use more than one TM13 Transceiver in your home when the range of your remotes is not sufficient. Both the TM13 and CM15Pro use so called collision detection to prevent signals to be disturbed when more than one transceiver is transmitting. To prevent your Marmitek X-10 System to become slow or to prevent dimming from becoming less smooth, make sure that the TM13 units are placed as far away from each other as possible.
Do you still have questions? Please check out www.marmitek.com for more information.
TECHNICAL SPECIFICATIONS
Power: 230 VAC 50 Hz, 7 Watt
Backup battery: 1x 9V 6LR61 alkaline block battery
Backup time: 1 week typ
Supply current : <30 mA
X-10 Powerline: 120 kHz ± 2 kHz / 2.5 Vpk-pk
Signal sensitivity: 15 mVpp min, 50 mVpp max at 120 kHz
Signal / noise ratio 1,35 : 1
X-10 transmission: 1 pulse burst at 0, 60 and 120 degrees.
X-10 Key codes it can transmit: All units Off, All Lights On, On, Off, Dim, Bright,
All Lights Off, Extended Code 1 type 0, Extended Code 1 type 3, Hail Acknowledge, Pre-Set Dim, Status Request, RF commands
X-10 Key codes to respond to: All units Off, All Lights On, On, Off, Dim, Bright, All Lights Off, Extended Code 1 type 3, Hai I Request, Pre-Set Dim, Status Request, RF commands
X-10 Collision detection: Present
Input impedance: > 180 Ohm (P-N) at 120 kHz
RF Range: 30 meters (note: the unit should be mounted at
a height of 1 metre for best performance and located away from any sources of RF interference such as computers, monitors, etc).
RF Power: 10 mW (maximum)
RF receiver frequency: 433,92 MHz
RF transmitter frequency: 433,92 MHz
Ambient temperature: -10°C - +50°C (operation) -20°C - +70°C (storage)
Weight: 20 grams
Dimensions: 66.7 (w) x 113.5 (L) x 45.3 (H)
Specifications may be modified without prior notice.

Environmental Information for Customers in the European Union
European Directive 2002/96/EC requires that the equipment bearing this symbol on the product and/or its packaging must not be disposed of with unsorted municipal waste. The symbol indicates that this product should be disposed of separately from regular household waste streams. It is your responsibility to dispose of this and other electric and electronic equipment via designated collection facilities appointed by the government or local authorities. Correct disposal and recycling will help
prevent potential negative consequences to the environment and human health. For more detailed information about the disposal of your old equipment, please contact your local authorities, waste disposal service, or the shop where you purchased the product.
CM15PRO™
Programmierbares Computer-Interface + ActiveHomePro™ Software
SICHERHEITSHINWEISE

BEDIENUNG
X-10 Keycodes senden: All units Off, All Lights On, On, Off, Dim, Bright,
All Lights Off, Extended Code 1 type 0, Extended Code 1 type 3, Hail Acknowledge, Pre-Set Dim, Status Request, RF commands
X-10 Keycodes empfangen: All units Off, All Lights On, On, Off, Dim, Bright,
All Lights Off, Extended Code 1 type 3, Hail
Request, Pre-Set Dim, Status Request, RF commands
X-10 Collision Detection: Anwesend


UTILISATION
Transmission du signal : > 120 kHz ± 2 kHz / 2.5 Vpk-pk
Extended Code 1 type 3, Hail Acknowledge,
Pre-Set Dim, Status Request, RF commands
Request, Pre-Set Dim, Status Request, RF commands


MANEJO
Extended Code 1 type 3, Hail Acknowledge,
Pre-Set Dim, Status Request, RF commands
Códigos llave X-10 recibir: All units Off, All Lights On, On, Off, Dim, Bright,
All Lights Off, Extended Code 1 type 3,
Hail Request, Pre-Set Dim, Status Request,
RF commands
X-10 "Collision detection": Existente
Impedancia de entrada: > 180 Ohm (P-N) a 120 kHz


COMANDO
All Lights Off, Extended Code 1 type 0, Extended
Code 1 type 3, Hail Acknowledge, Pre-Set
Dim, Status Request, RF commands
Ricevere i codici Chiave X-10: All units Off, All Lights On, On, Off, Dim, Bright,
All Lights Off, Extended Code 1 type 0, Extended
Code 1 type 3, Hail Acknowledge, Pre-Set Dim,
Status Request, RF commands
VEILIGHEIDSWAARSCHUWINGEN
BEDIENING
All Lights Off, Extended Code 1 type 0, Extended
Code 1 type 3, Hail Acknowledge, Pre-Set Dim,
Status Request, RF commands
X-10 Key codes ontvangen:
All units Off, All Lights On, On, Off, Dim, Bright,
All Lights Off, Extended Code 1 type 3, Hail
Request, Pre-Set Dim, Status Request, RF commands
X-10 Collision detection: Aanwezig
DECLARATION OF CONFORMITY
Hereby, Marmitek BV, declares that this CM15PRO is in compliance with the essential requirements and other relevant provisions of the following Directives:
Directive 1999/5/EC of the European Parliament and of the Council of 9 March 1999 on radio equipment and telecommunications terminal equipment and the mutual recognition of their conformity
DIRECTIVE 2004/108/EC OF THE EUROPEAN PARLIAMENT AND OF THE COUNCIL of 15 December 2004
on the approximation of the laws of the Member States relating to electromagnetic compatibility
Council Directive 73/23/EEC of 19 February 1973 on the harmonization of the laws of Member States relating to electrical equipment designed for use within certain voltage limits
Marmitek is a trademark of Marmidenko B.V., ActiveHomePro™ + CM15Pro™ are trademarks of Marmitek B.V. All rights reserved.
Copyright and all other proprietary rights in the content (including but not limited to model numbers, software, audio, video, text and photographs) rests with Marmitek B.V. Any use of the Content, but without limitation, distribution, reproduction, modification, display or transmission without the prior written consent of Marmitek is strictly prohibited. All copyright and other proprietary notices shall be retained on all reproductions.
MARMITEK
Visit www.activehomepro.eu for the latest free software updates




- HOW DOES MARMITEK X-10 WORK
- ADRESSES
- SIGNAL RANGE
- RANGE OF MARMITEK X-10 SIGNALS OVER THE POWER LINE AND HOW TO INCREASE THE RANGE
- IF YOU HAVE DIFFICULTIES WITH THE RANGE OF YOUR MARMITEK X-10 SIGNALS, PLEASE PAY ATTENTION TO THE FOLLOWING FACTS
- KNOWN DEVICES WHICH CAN CAUSE ATTENUATION ARE
- USER MANUAL
- INTRODUCTION
- CONTENTS
- SYSTEM REQUIREMENTS
- HARDWARE SETUP AND SOFTWARE INSTALLATION
- OPERATION
- USING MARMITEK ACTIVEHOMEPRO
- LAMP MODULE LM12 (SOLD SEPARATELY)
- APPLIANCE MODULE AM12 (SOLD SEPARATELY)
- TIMERS
- MACROS
- SAVE CHANGES IN THE CM15PRO
- FREQUENTLY ASKED QUESTIONS
- DO I ALWAYS HAVE TO LEAVE MY COMPUTER ON TO MAKE THE TIMERS AND MACRO'S WORK
- DO MARMITEK ACTIVEHOMEPRO AND CM15PRO WORK WITH ALL MY EXISTING X-10 MODULES AND WITCHES
- IS THERE A SOFTWARE DEVELOPERS KIT (SDK) FOR MARMITEK ACTIVEHOMEPRO
- DOES MARMITEK ACTIVEHOMEPRO NEED A SEPARATE TRANSCEIVER (TM13 OR IRRF7243)
- HOW MANY LIGHTS AND APPLIANCES CAN I CONTROL USING X-10
- WHAT IS THE REASON FOR MODULES TO SWITCH ON/OFF SPONTANEOUSLY
- MY MODULES WILL NOT RESPOND TO MY CONTROLLER
- AM I ABLE TO INCREASE THE RANGE OF MY REMOTES BY USING MORE TRANSCEIVERS
- DO YOU STILL HAVE QUESTIONS? PLEASE CHECK OUT WWW.MARMITEK.COM FOR MORE INFORMATION
- TECHNICAL SPECIFICATIONS
- ENVIRONMENTAL INFORMATION FOR CUSTOMERS IN THE EUROPEAN UNION
- CM15PRO™
- SICHERHEITSHINWEISE
- BEDIENUNG
- UTILISATION
- MANEJO
- COMANDO
- VEILIGHEIDSWAARSCHUWINGEN
- BEDIENING
- DECLARATION OF CONFORMITY
- MARMITEK
Brand : MARMITEK
Model : CM15Pro
Category : Security and Access Control System