
TL-PA101KIT - Network card / adapter TP-LINK - Free user manual and instructions
Find the device manual for free TL-PA101KIT TP-LINK in PDF.


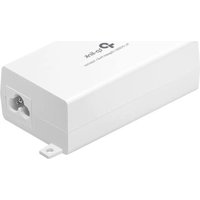
| Product Type | Powerline Adapter (Network Card/Adapter) |
| Brand | TP-Link |
| Model | TL-PA101KIT |
| Dimensions | 95 x 60 x 30 mm (approx.) |
| Weight | 150 g (approx.) |
| Power Supply | Integrated mains plug, 100-240V, 50/60Hz |
| Data Transfer Rate | Up to 200 Mbps (via powerline) |
| Port Type | 1 x 10/100Mbps Ethernet port (RJ45) |
| Frequency Band | Powerline: 2-68 MHz |
| Encryption | 128-bit AES with pairing button |
| Range | Up to 300 meters over household wiring |
| Operating Temperature | 0°C to 40°C |
| Storage Temperature | -20°C to 70°C |
| Humidity | 10% to 90% non-condensing |
| LED Indicators | Power, Powerline, Ethernet |
| Plug Type | EU (Type C/F) or UK (Type G) – depends on variant |
| Power Consumption | Average: 3W, Standby: <1W |
| Main Functions | Extends wired network via electrical wiring; plug-and-play; QoS; IGMP snooping |
| Maintenance & Cleaning | Disconnect from mains; wipe with dry cloth; do not use liquids or abrasives |
| Safety | Overheat protection; short-circuit protection; CE certified |
| Spare Parts & Repairability | No user-serviceable parts; disposal of end-of-life unit per local regulations |
| General Information | HomePlug AV compliant; compatible with all major routers |
Frequently Asked Questions - TL-PA101KIT TP-LINK
User questions about TL-PA101KIT TP-LINK
0 question about this device. Answer the ones you know or ask your own.
Ask a new question about this device
Download the instructions for your Network card / adapter in PDF format for free! Find your manual TL-PA101KIT - TP-LINK and take your electronic device back in hand. On this page are published all the documents necessary for the use of your device. TL-PA101KIT by TP-LINK.
USER MANUAL TL-PA101KIT TP-LINK
Specifications are subject to change without notice. TP-LINK® is a registered trademark of
TP-LINK TECHNOLOGIES CO., LTD. Other brands and product names are trademarks or registered trademarks of their respective holders.
No part of the specifications may be reproduced in any form or by any means or used to make any derivative such as translation, transformation, or adaptation without permission from TP-LINK TECHNOLOGIES CO., LTD. Copyright © 2009 TP-LINK TECHNOLOGIES CO., LTD. All rights reserved.
http://www.tp-link.com
CE Mark Warning

This is a class B product. In a domestic environment, this product may cause radio interference, in which case the user may be required to take adequate measures.
Important Safety Instructions
- Do not open this product or attempt to service this product; it may expose you to dangerous high voltage and other risks.
- Do not operate this product near water.
- Do not place or operate near or over radiator or heat register.
- Do not expose this product to dampness, dust, or corrosive liquids.
- Do not connect this product and disconnect from wall socket during a lightning or thunderstorm.
- Do not obstruct this product's ventilation slots, as insufficient airflow may harm this product.
- Do not put anything on this product.
- Plug directly into wall socket (100Vac~240Vac). Do not use an extension cord between this product and the AC power source.
- When plugging this product into a wall socket, make sure that the electrical socket is not damaged and that there is no leakage from gas or water pipes.
- Place the connecting cables carefully so that people won't stumble or walk on them.
- The Powerline Adapter should be operated from the type of power indicated on the marking label. If you are not sure of the type of power available, consult a qualified technician.
- Unplug the Powerline Adapter from the mains and refer the product to qualified service personnel under the following conditions: If liquid has been spilled on the product, or if the product has been exposed to rain or water.
- Unplug from the wall socket before cleaning. Use a damp cloth for cleaning. Do not use liquid cleaners or aerosol cleaners.
CONTENTS
Chapter 1 Introduction ......1
Chapter 2 Connecting Mechanism....2
2.1 Introduction ...... 2 2.2 LED Indicator 2 2.3 Physical Interface....3 2.4 Hardware Connection – Computer....3 2.5 Hardware Connection – Internet 4
Chapter 3 Installing Management Utility....6
Chapter 4 Using The Management Utility....9
4.1 Main 9
4.1.1 Rename 10 4.1.2 Enter Password....10 4.1.3 Add Device....11
4.2 Privacy 12 4.3 QoS....13 4.4 Diagnostics....14 4.5 About....16
Appendix A: Troubleshooting Guide....16
Chapter 1 Introduction
Congratulations on your purchase of this outstanding Powerline Ethernet Adapter. This device is an 85Mbps Powerline Ethernet Adapter that transforms your house's existing electrical wiring into a ubiquitous networking infrastructure. Simply plug this 85Mbps Powerline Ethernet Adapter into an ordinary AC power outlet, and it will easily extend your Cable/xDSL broadband connection or existing Ethernet (LAN) network to any other electrical outlet in any room of a house without the need for any new cabling.
This Powerline Ethernet Adapter supports data rates of up to 85Mbps over the existing household power circuit. With data rates of 85Mbps, full multimedia applications can easily be supported throughout the whole house in addition to Internet access. This Powerline Ethernet Adapter uses the existing power lines installed in a home as a path to transmit digital data, voice, audio, and video between devices.
To ensure data communication security and multimedia applications, this Powerline Ethernet Adapter supports built-in 56-bit DES encryption and Quality of Service features. With minimal setup, you can install and use this Powerline Ethernet Adapter within minutes.
A. System Requirements
a) At least two AC 100V~240V power outlets with standard home power wiring. b) A computer with the following:
▶ Operating System with TCP/IP installed ➢ Pentium III compatible processor and above ➢ Ethernet LAN card installed with TCP/IP protocol ➤ 64 MB RAM or more - 50 MB of free disk space (Minimum) CD-ROM Drive
B. Package Contents
The 85Mbps Powerline Ethernet Adapter package contains the following items:
One 85Mbps Powerline Ethernet Adapter (There are two 85Mbps Powerline Ethernet Adapters in Starter Kit) One Quick Installation Guide One CAT-5 Ethernet Cable (There are two CAT-5 Ethernet Cables in Starter Kit) One CD-ROM (Utility / Manual / Quick Installation Guide / Acrobat Reader)
If any of the above items are damaged or missing, please contact your dealer immediately.
Chapter 2 Connecting Mechanism
2.1 Introduction
The Powerline Ethernet Adapter supports data rates of up to 85Mbps. With this high-speed connection rate, this Powerline Ethernet Adapter allows you to set up a high-speed home network by using your home's existing electrical wiring. Simply plug this Powerline Ethernet Adapter into an ordinary power outlet to extend your Cable/xDSL broadband connection or existing LAN network to any other electrical outlet in any room of your house.
Note that this Powerline Ethernet Adapter works in pairs. You need to plug one Powerline Ethernet Adapter into a power outlet for each computer (connected to the computer's LAN card) you want to connect (for network access); you will also need another Powerline Ethernet Adapter connected to your Cable/xDSL broadband (Ethernet port) in order to extend your broadband connection or Internet surfing.
Section below describes the Powerline Ethernet Adapter's LED indicators, physical interface and hardware connection mechanism.
2.2 LED Indicator
The LED indicator displays information about the device's status.

| Label Status Description | ||
| Power | ON The Powerline Ethernet Adapter is power on | |
| OFF The Powerline Ethernet Adapter is not receiving power | ||
| Powerline | ON Another Powerline port is detected on the same Powerline network | |
| OFF Did not detect any other Powerline port on the same powerline network | ||
| Flashing The Powerline port is transmitting/receiving data | ||
| Ethernet | ON The Ethernet port is on and ready to receiving/transmitting data | |
| OFF The Ethernet port is not connected or not power on | ||
| Flashing The Ethernet port is receiving/transmitting data | ||
2.3 Physical Interface
There are two physical interfaces on this Powerline Ethernet Adapter.


| Interface Description | |
| Ethernet | One 10/100Mbps Ethernet port connected to PC LAN card or broadband device. |
| Power Plug Power | Plug connected to any 100V ~ 240V AC power socket. |
2.4 Hardware Connection – Computer
For those computers you wish to be networked by Powerline Ethernet Adapter, each of the computers must be properly connected with a Powerline Ethernet Adapter through an Ethernet (RJ-45) cable.
Following are the steps to properly connect the Powerline Ethernet Adapter to your computer:
- Power off your PC or Notebook.
- Connect the provided Ethernet (RJ-45) cable to the Powerline Ethernet Adapter's Ethernet port.
- Connect the other end of the Ethernet (RJ-45) cable to your computer's LAN port.
- Plug the Powerline Ethernet Adapter into a wall socket next to the computer.
- Turn on your computer.
- Check and confirm that the Power and Ethernet LEDs on the Powerline Ethernet Adapter are ON. The hardware connection mechanism is shown below:
![graph TD A["TP-LINK Device"] -->|RJ-45| B["PC Laptop"] C["TP-LINK Device"] -->|RJ-45| D["PC Laptop"]](/content/2026/06/1279411/images/6c7d69399a2f0725ab50770f56c1c9099d7386dc2156edf6e856b40937c2d677.jpg)
2.5 Hardware Connection – Internet
This section describes how to connect the Powerline Ethernet Adapter to your existing ADSL broadband connection via the ADSL Ethernet port. Follow the procedures described below to connect the Powerline Ethernet Adapter to your ADSL broadband connection:
- Power off your PC or Notebook.
- Connect the provided Ethernet (RJ-45) cable to the Powerline Ethernet Adapter's Ethernet port.
- Connect the other end of the Ethernet (RJ-45) cable to an available Ethernet port of your ADSL broadband Router.
- Plug the Powerline Ethernet Adapter into a wall socket next to the computer.
- Turn on your computer.
- Check and confirm that the Power, Powerline, and Ethernet LEDs on the Powerline Ethernet Adapter are ON.
The hardware connection mechanism is shown below:
![graph TD A["Internet"] -->|ADSL| B["ADSL Router"] B --> C["TP-LINK"] C --> D["RJ-45"] D --> E["PC"] C -.-> F["TP-LINK"] F --> G["RJ-45"] style A fill:#f9f,stroke:#333 style B fill:#ccf,stroke:#333 style C fill:#cfc,stroke:#333 style D fill:#fcc,stroke:#333 style E fill:#ffc,stroke:#333 style F fill:…](/content/2026/06/1279411/images/32cd75f45c6667458de6b9f30988638c2faff96f14317add9526a8ab88a2cf4f.jpg)
Chapter 3 Installing Management Utility
Please verify that no other Powerline Ethernet Adapter or any Encryption Management Utilities are installed before installing the provided software. If other Homeplug Utilities are installed, uninstall them and restart your personal computer before installing this provided software.
Follow the following procedures to properly install the provided Management Utility:
Step 1: The program installation process will carry out and copy all the necessary files to your system.


Step 2: After the installation, a shortcut to the "TL-PA101 Powerline Utility" application icon is provided on the Windows desktop.

Step 3: Finally, there is an "Auto install Finish" icon on the Windows desktop.
Chapter 4: Using the Management Utility
After you have successfully installed the Powerline Ethernet Adapter hardware and Management Utility software, you can set up or configure the devices according to your needs.
This Powerline Ethernet Adapter Configuration Utility enables users to identify HomePlug devices on the powerline network, measure data rate performance, ensure privacy, and perform diagnostics by setting user-defined secure powerline networks.
Double-click on the "TL-PA101 Powerline Utility" from your Windows desktop; the following screen will be displayed. This Management Utility consists of a set of four property sheets, viz., "Main", "Privacy", "QoS", "Diagnostics", and "About".
4.1 Main
The Main tab shows all the Powerline Ethernet Adapters that are logically connected to the current computer where the Management Utility is running.

Local Device(s) on your computer: This shows all local Powerline Ethernet Adapters found connected to the computer's LAN card. In most cases, only one device will be displayed in this panel. Click and select the local device shown on the screen, then click the "Connect" button to manage the Powerline Ethernet Adapter. The status message shown above the "Connect" button indicates that your PC is connected to the same device. Once the chosen Powerline Ethernet Adapter is properly connected, this Management Utility will automatically scan the power line periodically for any other existing powerline devices. "x" Powerline Devices detected: This displays all the Powerline Ethernet Adapters found on the current logical network. "x" shows the number of remote Powerline Ethernet Adapters discovered by this Management Utility. ➢ Network Type: Displays the type of logical network: "Public" or "Private". Autoscan: Shows the scanning status (default is "ON").
- Device Name: Shows the default device name. One may redefine or change the name by clicking on the name and editing in place or by clicking the "Rename" button.
- Password: Shows the current password of the Powerline Ethernet Adapter. • Quality: Shows the quality of the Powerline Ethernet Adapter connection.
- Rate (Mbps): Shows the current transmission rate of the selected Powerline Ethernet Adapter. • MAC Address: Shows the Powerline Ethernet Adapter's MAC address.
➢ Rename: Click to change the name of the selected Powerline Ethernet Adapter.
Enter Password: Shows the supplied Powerline Ethernet Adapter's password (initially left blank). To set the Powerline Ethernet Adapter password (which is required when creating a private network), click and select the device shown in the lower panel and click on the "Enter Password" button. Follow the pop-up dialog box to complete your password setting. Add: Click this button to add a remote Powerline Ethernet Adapter to your network that is not on the lower panel displayed list. You will be advised to locate the passwords for all Powerline Ethernet Adapters you wish to manage and add them to the local logical network by clicking the "Add" button. Follow the pop-up dialog box to complete your setting. ➢ Scan: Click the "Scan" button to perform an immediate search of the Powerline Ethernet Adapters connected to the computer. The Management Utility will automatically perform the scanning process and update the display every few seconds by default.
4.1.1 Rename
This Management Utility allows you to change the name of the listed Powerline Ethernet Adapter. Click and select the Powerline Ethernet Adapter you wish to change from the list, then click on the "Rename" tab and edit in place to change the name.

4.1.2 Enter Password
To set or change your Powerline Ethernet Adapter's password, click and select the Powerline Ethernet Adapter you wish to change from the list, then click on the "Enter Password" tab. The following screen will be displayed:
Enter your password (take note of the password format) and click "OK" after setup.


Note:
The Powerline Ethernet Adapter device must be present on the power line (plugged in) in order for the password to be confirmed and added to the network. If the Powerline Ethernet Adapter device could not be located, a warning message will be shown.
4.1.3 Add Device
The following dialog box pops up when clicking the "Add" button under the main configuration homepage. The dialog box allows you to enter both the selected device's name and password. Note that the Powerline Ethernet Adapter must be present on the power grid in order to activate the set password and be added to the local network.
Enter your device name and password (take note of the password format) and click "OK" after setup.

The following screen is displayed after the naming and password setting process, which is also the Diagnostics configuration homepage.

4.2 Privacy
The Privacy configuration page provides a means for managing the local network and providing additional security for the logical network, and also to select the devices that have to be included in the network. All HomePlug devices are shipped using a default logical network (network name), which is normally "HomePlug".
The Privacy configuration homepage allows you to change the Network Name of the Powerline Ethernet Adapter that is currently connected to this computer into a private network. Reset the private network to the universal public network by clicking on the "Use Default (Public Network)" or
entering/editing "HomePlug" under column of "Private Network Name" is always available.
Note that every Powerline Ethernet Adapter on your home network MUST have the same Network Password for connectivity to be established throughout your home

Note:
Changing the network name to anything other than "HomePlug" will show the network type on the Main configuration screen as "Private".

Set Local Device Only: Click this tab to change the network name of the local Powerline Ethernet Adapter device only. All Powerline Ethernet Adapter devices seen on the Main configuration homepage prior to this will be no longer present in the new network, effectively making the local devices not to communicate to the devices who were in the old logical network. Devices previously set up with the same logical network (same network name) will appear in the device list afterward selecting this option. Set All Devices: The Set All Devices button is used to change the logical network of all devices that appear on the Main configuration homepage whose Device's Password had been entered for the same logical network. A dialog window will appear to report the success of this operation. For devices whose device passwords were not entered, this operation will fail and will report a failure message.
4.3 QoS
The third tabbed window, labeled 'QoS' for Quality of Service, is shown in Figure.
![TL-PA101 Powerline Utility Main | Privacy QoS | Diagnostics About | Simple Application Mapping Choose what type of traffic you will use your local HomePlug device for by pitching on one of the four radios [choose one only]: Internet Online Game Audio or Video Voice over IP Advanced VLAN Priority Map…](/content/2026/06/1279411/images/26895fd5d0d3e75cf7ac6f3f0458cf17ddba8cccbc7a182e6804316a4b9ccf5c.jpg)
QoS requirements are different for various data types such as streaming video or music, voice and raw data. To provide higher QoS for streaming data, priority levels can be set using tags at the beginning of data frames. Virtual Local Area Network (VLAN) 802.1p priority tags on Ethernet frames are used to specify 8 (0~7) levels of 'user priority'. Powerline AV powerline allows for 4 levels of Channel Access Priority (CAP(0-3)). Therefore, the 8 levels of VLAN Ethernet tags must be mapped to the 4 levels of CAP priority, where CAP 3 is the highest priority and CAP 0 is the lowest. CAP 3 priority might be used for voice and network management frames, CAP 2 is used for streaming video, while CAP 1 and CAP 0 are used for data. Mapping VLAN tags to CAP levels is easily done using the VLAN Priority Mapping function on the QoS tab window.
Simple Application Mapping: The group allows you to choose the type of traffic you will use your local HomePlug device for by picking on one of the following four radios. Please select the radio type according to your demand.
Advanced VLAN Priority Mapping: The group sets VLAN priority to CAP mapping and default priority. Note that in HomePlug, CAP 3 is the highest priority while CAP 0 is the lowest priority. The values shown in VLAN Tags Priority are the default settings for the first running.
Get QoS: Click this button and you will see the current QoS information showed below Advanced VLAN Priority Mapping.
4.4 Diagnostics
The Diagnostics homepage shows the System Information and Remote Device History of all remote devices seen over a period of time, which are only readable. Click on the “Diagnostics” tab and the following screen will be displayed.

The Diagnostics information displayed can be saved to a text file. One can email the saved text file to the local supplier when technical support is required, or print the saved text file as a reference during a technical support conference.
The Upper Panel shows technical data concerning software and hardware present on the host computer that were used to communicate over the Powerline Ethernet Adapter on the Powerline network. It may include the following:
▶ Operating System Platform/Version, Host Network Name, User Name, MAC Address of all NICs (Network Interface Card) connected to the host. ➢ Identify versions of all Driver DLLs and Libraries used (NDIS) and optionally MAC addresses of all devices connected locally to the host.
Click the "Delete" tab when there are Powerline Ethernet Adapter devices that are no longer part of the network.
The Lower Panel contains a history of all remote Powerline Ethernet Adapter devices seen on the computer over a certain period of time. All devices that were on the powerline network are listed here along with a few other parameters. Powerline Ethernet Adapter devices that are active on the current logical network will show a transfer rate in the Rate column; devices on other networks, or devices that may no longer exist, are shown with a “?” in the Rate column. The following remote Powerline Ethernet Adapter devices information is available from the diagnostics screen:
➢ Device Alias Name, Device MAC Address, Device Password. ➢ Device Last known rate.
➢ Device Last Known Network name, Date device last seen on the network.
The diagnostics information displayed may be saved to a text file for later use, or can be printed for reference for a technical support call. Powerline Ethernet Adapter devices that are not part of the network anymore can be deleted using the delete button. A dialog window pops up with a confirmation message if we try to delete a device whose password has been entered.
4.5 About
The About homepage shows the Management Utility software version.

AutoScan: When enabled (place a check), the Management Utility will automatically scan for Powerline Ethernet Adapter devices on the local network every few seconds and update the scanning information on the Main configuration homepage.
Appendix A: Troubleshooting Guide
The Troubleshooting Guide provides answers to common problems regarding the Powerline Ethernet Adapter.
1. The Power LED does not light up.
Answer: Check the following:
- Make sure that the Powerline Ethernet Adapter is properly plugged into a power outlet.
- Make sure the power outlet is active (working) by plugging another electric device into it.
- Re-plug the Powerline Ethernet Adapter to the power outlet again. If the Power LED still fails to light up, contact your local dealer for technical support.
2. The Ethernet LED does not light up.
Answer: Check the following:
- Make sure that the Ethernet cable (RJ-45) is properly connected to the Powerline Ethernet Adapter's Ethernet port.
- Make sure that the other end of the Ethernet cable (RJ-45) is properly connected to the computer LAN card or to your Cable/xDSL Ethernet port.
- Make sure your computer LAN card is properly installed and configured.
- Make sure your Cable/xDSL broadband access is working and configured correctly.
- Contact your local dealer for technical support if the Ethernet LED still fails to light up after the above procedures.
3. Powerline LED does not light up.
Answer: Check the following:
- Double-click to enable the Management Utility and click the "Scan" tab under the Main configuration homepage. The Management Utility will automatically detect all other Powerline Ethernet Adapters on your power line network.
- Try to plug a second Powerline Ethernet Adapter into a nearby power outlet and check whether the Powerline LED lights up or not.
- Contact your local dealer for technical support if the Powerline LED still fails to light up after the above procedures.
- CE MARK WARNING
- IMPORTANT SAFETY INSTRUCTIONS
- CONTENTS
- CHAPTER 1 INTRODUCTION
- CHAPTER 2 CONNECTING MECHANISM
- CHAPTER 3 INSTALLING MANAGEMENT UTILITY
- CHAPTER 4 USING THE MANAGEMENT UTILITY
- APPENDIX A: TROUBLESHOOTING GUIDE
- SYSTEM REQUIREMENTS
- PACKAGE CONTENTS
- INTRODUCTION
- LED INDICATOR
- PHYSICAL INTERFACE
- HARDWARE CONNECTION – COMPUTER
- HARDWARE CONNECTION – INTERNET
- CHAPTER 4: USING THE MANAGEMENT UTILITY
- MAIN
- RENAME
- ENTER PASSWORD
- NOTE
- ADD DEVICE
- PRIVACY
- QOS
- DIAGNOSTICS
- ABOUT
- THE POWER LED DOES NOT LIGHT UP
- ANSWER: CHECK THE FOLLOWING
- THE ETHERNET LED DOES NOT LIGHT UP
- POWERLINE LED DOES NOT LIGHT UP
Brand : TP-LINK
Model : TL-PA101KIT
Category : Network card / adapter