
DUCATI RACE TRACK - Racing toy CHICCO - Free user manual and instructions
Find the device manual for free DUCATI RACE TRACK CHICCO in PDF.

| Product type | Race track set with remote-controlled motorcycles |
| Brand | CHICCO |
| Model | DUCATI RACE TRACK |
| Recommended age | From 2 years |
| Power supply | 8 AA batteries (not included): 2 per motorcycle, 2 per remote control (for 2 motorcycles and 2 remote controls) |
| Number of motorcycles included | 2 |
| Number of remote controls included | 2 (handlebar-shaped) |
| Remote control type | Infrared (IR) |
| Remote control range | Approximately 6 meters (may vary depending on battery charge) |
| Main functions | Forward, reverse (off track), direction via track rails, turning via lever |
| Track features | Rails to hold motorcycles, lever for garage and exit from track |
| Safety | Do not use on roads, wet, sandy or dusty surfaces. Avoid heat sources. Check condition regularly |
| Warning | Do not touch wheels while in operation. Keep out of reach of children if damaged |
| Cleaning | Dry soft cloth. Protect from shocks, heat, dust, sand, humidity |
| Battery replacement | By an adult. Observe polarity. Use identical alkaline batteries |
| Battery precautions | Do not mix different types or old/new batteries. Remove if not used for a long time. Recycle used batteries |
| Compliance | EU Directive 2002/96/EC (WEEE), RoHS, IEC EN 60825-1:2003 |
| Material | Plastic (estimated) |
| Track dimensions | Not specified in the manual |
| Weight | Not specified |
Frequently Asked Questions - DUCATI RACE TRACK CHICCO
User questions about DUCATI RACE TRACK CHICCO
0 question about this device. Answer the ones you know or ask your own.
Ask a new question about this device
Download the instructions for your Racing toy in PDF format for free! Find your manual DUCATI RACE TRACK - CHICCO and take your electronic device back in hand. On this page are published all the documents necessary for the use of your device. DUCATI RACE TRACK by CHICCO.
USER MANUAL DUCATI RACE TRACK CHICCO
2 anni+ years
Ducati Race Track
Circuit Ducati
Pista Ducati
Ducati Rennbahn
Pista Ducati
natural_image
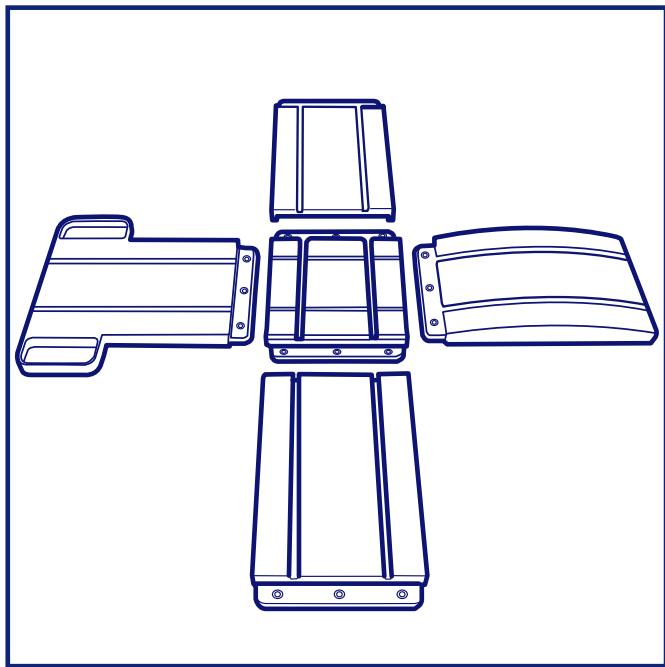
Technical line drawing of three mechanical components with mounting holes and brackets (no text or symbols)Figura 1
natural_image
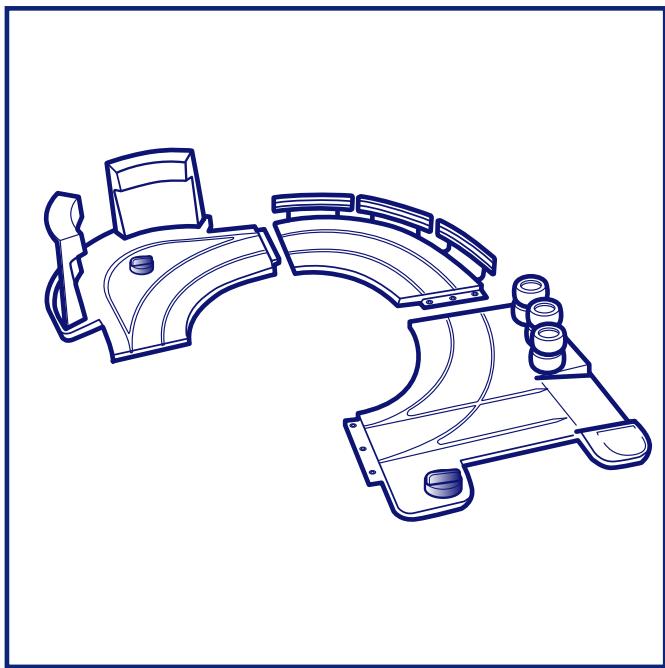
Technical line drawing of a mechanical assembly with curved components and mounting holes (no text or symbols)Figura 2
natural_image
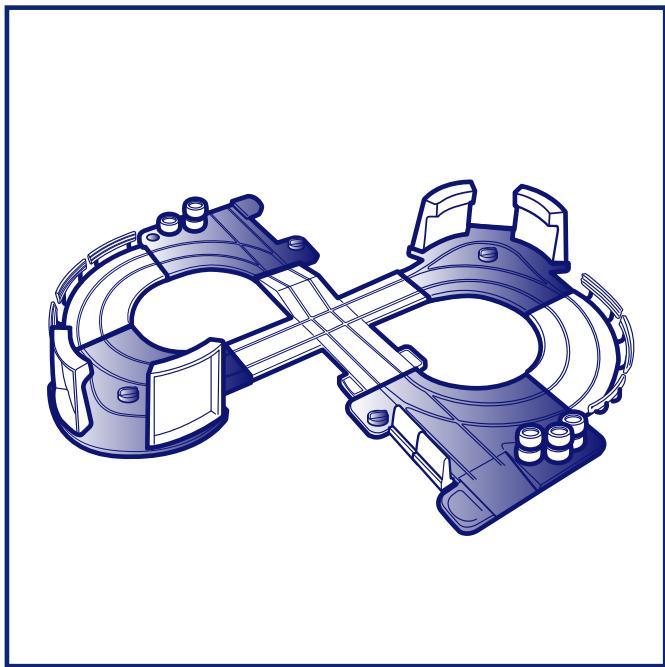
Technical illustration of a mechanical assembly with two interlocking components (no text or symbols)Figura 3
natural_image
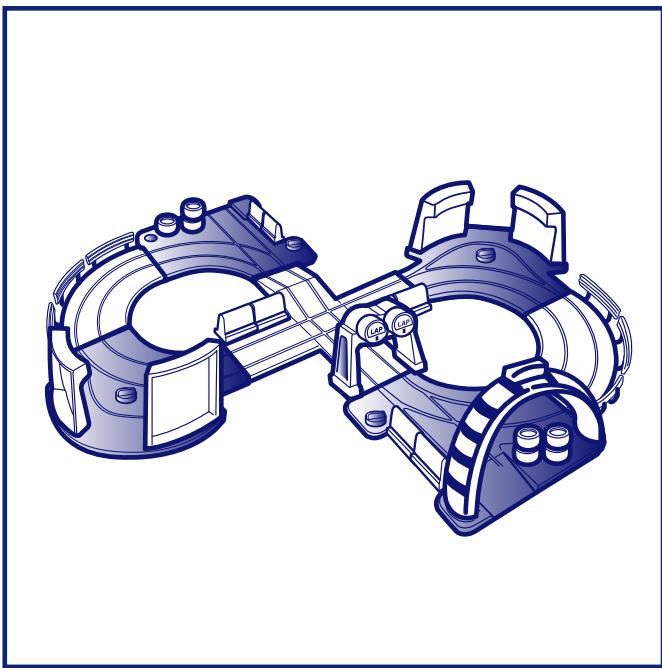
Technical illustration of a mechanical assembly with two circular components and internal components (no text or symbols)Figura 4
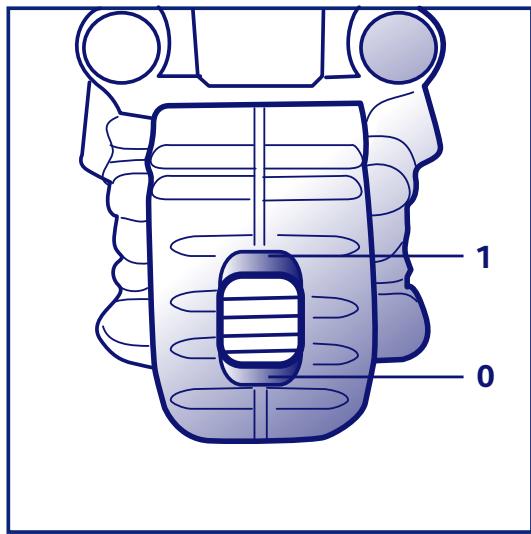
Figura 5
Figura 6
natural_image
Line drawing of a handheld gaming controller with labeled buttons (no text or symbols beyond basic labels)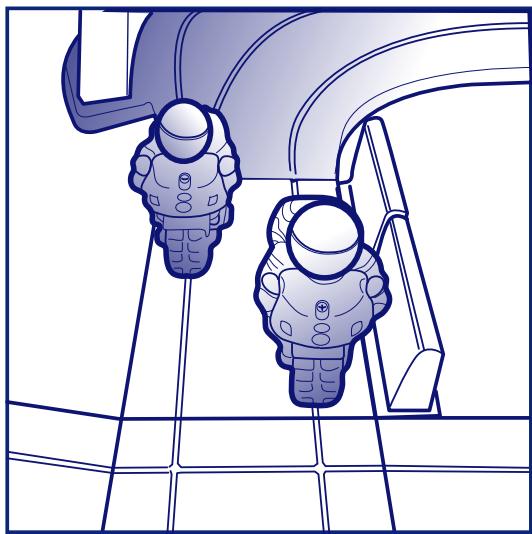
natural_image
Illustration of two astronauts in spacesuits standing on a curved platform (no text or symbols)Figura 7
Figura 8
natural_image
Technical line drawing of a mechanical component with no visible text or symbolsFigura 9
natural_image
Technical line drawing of a mechanical component with two LAP buttons and a handle (no text or symbols)Figura 10
Please read these instructions and keep them for future reference.
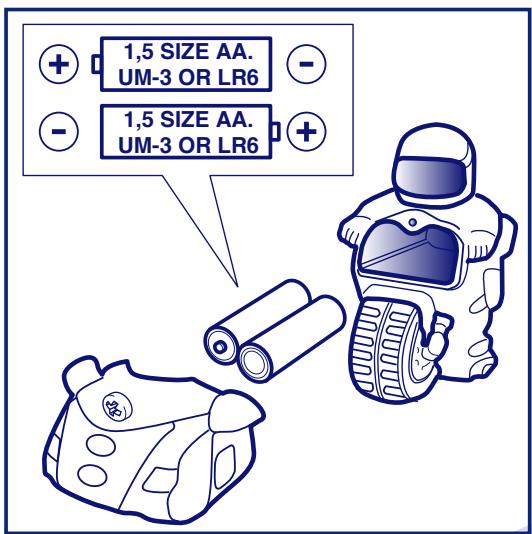
- Each bike requires 2 x “AA” 1.5 Volt alkaline type batteries. Each remote control requires 2 x “AA” 1.5 Volt alkaline type batteries. The batteries are not included.
For your child's safety:
WARNING!
Before use remove and dispose of any plastic bags and any other packaging (e.g. fasteners, fixing ties, etc.), and keep them out of reach of children.
WARNINGS
- Check the toy regularly for signs of wear and damage. Should any part be damaged, do not use and keep out of reach of children.
Warning!
- Do not touch the wheels of the vehicle when in movement.
- Do not use the toy on roads.
- Do not use the toy on wet or dusty surfaces, or sand.
- Keep the motorbike and remote control away from sources of heat.
- The remote control unit has an effective range of approximately 6 metres. This could be reduced if the batteries are low.
- Any obstacles or excessive light in the effective range of operation between the transmitter and the receiver could reduce or prevent the operation of the remote control.
- For the correct operation of the toy aim the transmitter of the remote control in the direction of the motorbike.
- During use, the remote control could create interferences with televisions, video recorders or other products operated by infrared remote controls. In the unlikely event that this should happen, do not use the 2 products at the same time.
- Do not look at the infrared rays with optical instruments (for example, eyeglasses, magnifying glasses, microscopes).
CEI EN 60825-1: 2003
INTRODUCTION TO THE TOY
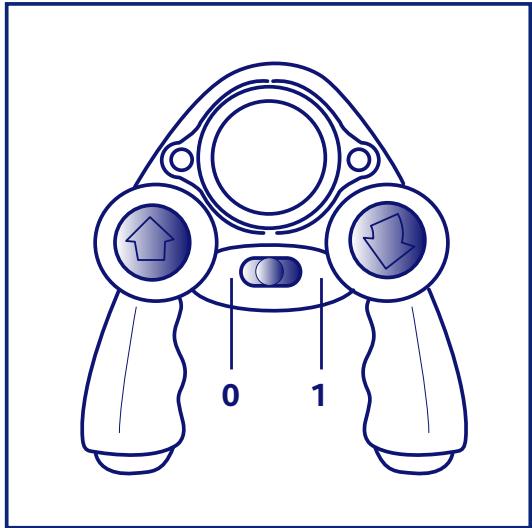
The motorbikes can be operated both on the racing track and on the floor with the remote control that is similar to a real handlebar.
To “race” the bikes on the track, it is sufficient to keep pressed down the “FORWARD” button – located on the left – because the bike is kept on the racing track by the grooves on the track. When riding the bikes on the floor, it is sufficient to press the FORWARD button to ride the bikes in a forward direction, and the REAR LEFT button to reverse them.
HOW TO USE THE TOY
How to assemble the racing track
Assemble the racing track as shown in diagrams 1, 2, 3. Insert the sides of the racing track
components with holes under the sides of the corresponding components, and fit them together. All the accessories of the racing track can be simply fitted by exercising pressure on the components. To fit the accessories on the racing track, please refer to diagrams 2, 3, 4.
Racing the Bikes on the Track
- Switch on both the bike (see diagram 5) and the remote control (see diagram 6), after inserting the batteries as indicated the FITTING AND/OR REPLACING BATTERIES section. To fit the batteries into the bike, open the battery cover located at the front; to fit the batteries into the remote control open the battery cover located at the bottom.
- Place the bike onto the racing track, inserting the wheels into the groove (diagram 7).
- Press the FORWARD button and play.
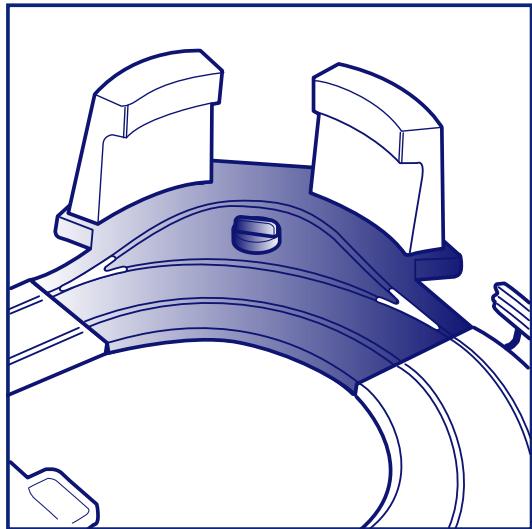
Pit Stop
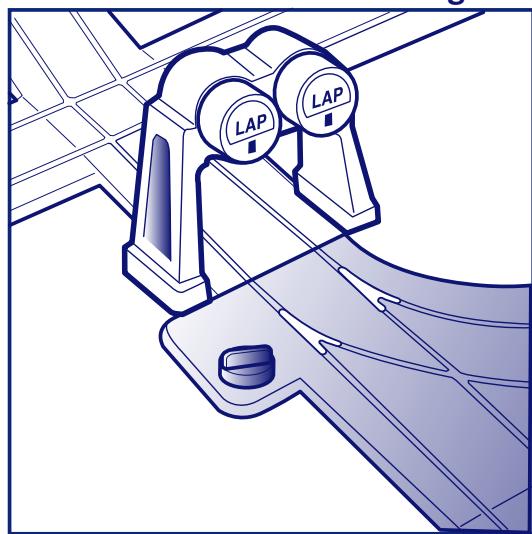
To make the race more realistic, it is possible to stop at the pit by riding the bike along the access lane. To stop the bike at the pit, it is sufficient to turn the knob indicated in diagram 8 to allow the bike trough.
Off Track
To start playing directly on the floor without interrupting the race, it is sufficient to turn the knob indicated in diagram 9. This will “open” the groves of the track and allow the bike to ride off track.

THIS PRODUCT IS APPROVED TO EU 2002/96/EC REGULATION.
The crossed bin symbol on the appliance indicates that the product, at the end of its life, must be disposed of separately from domestic waste, either by taking it to a separate waste disposal site for electric and electronic appliances or by returning it to your dealer when you buy another similar appliance. The user is responsible for taking the appliance to a special waste disposal site at the end of its life. If the disused appliance is collected correctly as separate waste, it can be recycled, treated and disposed of ecologically; this avoids a negative impact on both the environment and health, and contributes towards the recycling of the product's materials. For further information regarding the waste disposal services available, contact your local waste disposal agency or the shop where you bought the appliance.
Approved to RoHS n° 2002/95/EEC Regulation.
FITTING AND/OR REPLACING BATTERIES
- Batteries must only be fitted by an adult.
• To replace spent batteries: Loosen the screw on the battery compartment cover, with a screwdriver and open the cover. Then remove the spent batteries and fit new ones, ensuring that they have been fitted in the correct polarity, close the battery cover, and tighten the screw.
• Always keep batteries and tools out of reach of children. - Always remove spent batteries from the toy to avoid the danger of leakage from the battery damaging the product.
• Always remove the batteries if the toy will not be used for a long period of time. -
Only use alkaline batteries of the same type or equivalent to the type recommended for the correct function of this product.
-
Never mix new and old or different types of batteries.
- Do not burn or dispose of spent batteries into the environment. Dispose of them at an appropriate differentiated collection point.
- Do not short-circuit the battery terminals.
- Do not attempt to recharge non-rechargeable batteries, they might explode.
- The use of rechargeable batteries is not recommended, since they might impair the toy's functionality.
- If rechargeable batteries are used, remove them from the toy before recharging; this operation must be carried out only under adult supervision.
CARE & MAINTENANCE
- Clean the toy with a soft, dry cloth.
- Protect the toy from shocks, heat, dust, sand, humidity and water.
MISE EN PLACE ET/OU REMPLACEMENT DES PILES
DIT PRODUCT IS CONFORM DE EU RICHTLIJN 2002/96/EG.
natural_image
Illustration of a multi-level motorcycle racing simulator with DUCATI branding and control panels (no text or symbols on main objects)Cod. 70602
Ducati racebaan
Ducati-Rata
Ducati tävlingsbana
Ducati bane
Πίστα αγώνων Ducati