
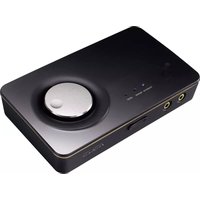
Xonar DGX - Soundcard ASUS - Free user manual and instructions
Find the device manual for free Xonar DGX ASUS in PDF.


| Product Type | Internal Sound Card |
| Interface | PCI Express |
| Audio Chipset | ASUS AV100 (C-Media CMI8788 based) |
| Audio Channels | 5.1 / 7.1 with headphone amplifier |
| Sample Rate | Up to 96 kHz |
| Bit Depth | 24-bit |
| Signal-to-Noise Ratio (SNR) | 116 dB (front out) |
| Output Impedance | 80 ohms (headphone) |
| Frequency Response | 10 Hz – 90 kHz |
| Supported Audio Technologies | Dolby Digital Live, DTS Connect |
| Output Connectors | 3x 3.5mm jacks (front, rear, center/sub), 1x S/PDIF optical, 1x S/PDIF coaxial, 1x headphone jack |
| Input Connectors | 1x 3.5mm microphone input, 1x 4-pin auxiliary input |
| Dimensions (H x L x D) | 120 mm x 30 mm x 170 mm (approx.) |
| Weight | 180 g (approx.) |
| Power Consumption | Less than 10 W via PCI Express |
| Operating System Support | Windows 10, 8.1, 7, Vista, XP (32/64-bit) |
| Included Accessories | Low-profile bracket, driver CD, user manual |
| Recommended Cleaning | Use compressed air to remove dust from PCIe connectors; avoid liquids |
Frequently Asked Questions - Xonar DGX ASUS
User questions about Xonar DGX ASUS
0 question about this device. Answer the ones you know or ask your own.
Ask a new question about this device
Download the instructions for your Soundcard in PDF format for free! Find your manual Xonar DGX - ASUS and take your electronic device back in hand. On this page are published all the documents necessary for the use of your device. Xonar DGX by ASUS.
USER MANUAL Xonar DGX ASUS
PCIE 5.1 & Headphone Amp Audio Card
User manual

E7798
Second Edition (V2)
Oct. 2012
Copyright © 2012 ASUSTeK Computer Inc. All Rights Reserved.
No part of this manual, including the products and software described in it, may be reproduced, transmitted, transcribed, stored in a retrieval system, or translated into any language in any form or by any means, except documentation kept by the purchaser for backup purposes, without the express written permission of ASUSTeK COMPUTER INC. ("ASUS").
Product warranty or service will not be extended if: (1) the product is repaired, modified or altered, unless such repair, modification of alteration is authorized in writing by ASUS; or (2) the serial number of the product is defaced or missing.
ASUS PROVIDES THIS MANUAL "AS IS" WITHOUT WARRANTY OF ANY KIND, EITHER EXPRESS OR IMPLIED, INCLUDING BUT NOT LIMITED TO THE IMPLIED WARRANTIES OR CONDITIONS OF MERCHANTABILITY OR FITNESS FOR A PARTICULAR PURPOSE. IN NO EVENT SHALL ASUS, ITS DIRECTORS, OFFICERS, EMPLOYEES OR AGENTS BE LIABLE FOR ANY INDIRECT, SPECIAL, INCIDENTAL, OR CONSEQUENTIAL DAMAGES (INCLUDING DAMAGES FOR LOSS OF PROFITS, LOSS OF BUSINESS, LOSS OF USE OR DATA, INTERRUPTION OF BUSINESS AND THE LIKE), EVEN IF ASUS HAS BEEN ADVISED OF THE POSSIBILITY OF SUCH DAMAGES ARISING FROM ANY DEFECT OR ERROR IN THIS MANUAL OR PRODUCT.
SPECIFICATIONS AND INFORMATION CONTAINED IN THIS MANUAL ARE FURNISHED FOR INFORMATIONAL USE ONLY, AND ARE SUBJECT TO CHANGE AT ANY TIME WITHOUT NOTICE, AND SHOULD NOT BE CONSTRUED AS A COMMITMENT BY ASUS. ASUS ASSUMES NO RESPONSIBILITY OR LIABILITY FOR ANY ERRORS OR INACCURACIES THAT MAY APPEAR IN THIS MANUAL, INCLUDING THE PRODUCTS AND SOFTWARE DESCRIBED IN IT.
Products and corporate names appearing in this manual may or may not be registered trademarks or copyrights of their respective companies, and are used only for identification or explanation and to the owners' benefit, without intent to infringe.
Contents
Notices iv
Safety information ...... v
Trademarks ...... v
License
- Introduction
1.1 Package contents 1 1.2 System requirements 1 1.3 Specifications summary 2
- Xonar DGX card layout 4
- Installing the hardware 6
3.1 Installing the audio card 6 3.2 Connecting to a TV tuner card 7
- Installing software 8
- Connecting speakers and peripherals 9
5.1 Connecting digital speaker systems (Home Theater) 9 5.2 Connecting stereo headphones 10 5.3 Connecting Analog Speaker Systems 12 5.4 Connecting microphone 16 5.5 Connecting Line-In audio sources 17
- Xonar Audio Center 18
6.1 Xonar Audio Center GUI 18 6.2 Main Setting 20 6.3 Mixer/Volume 28 6.4 Effects 31 6.5 Karaoke 33 6.6 FlexBass 35 6.7 AEC (Acoustic Echo Cancellation) 36 6.8 Smart Volume Normalization 38 6.9 DS3D GX and DSP Modes 40 6.10 VocalFX 42
- Troubleshooting and FAQs 45
Notices
Federal Communications Commission Statement
This device complies with Part 15 of the FCC Rules. Operation is subject to the following two conditions:
• This device may not cause harmful interference, and • This device must accept any interference received, including interference that may cause undesired operation.
This equipment has been tested and found to comply with the limits for a Class B digital device, pursuant to Part 15 of the FCC Rules. These limits are designed to provide reasonable protection against harmful interference in a residential installation. This equipment generates, uses and can radiate radio frequency energy and, if not installed and used in accordance with the manufacturer's instructions, may cause harmful interference to radio communications. However, there is no guarantee that interference will not occur in a particular installation. If this equipment does cause harmful interference to radio or television reception, which can be determined by turning the equipment off and on, the user is encouraged to try to correct the interference by one or more of the following measures:
• Reorient or relocate the receiving antenna. • Increase the separation between the equipment and receiver. • Connect the equipment to an outlet on a circuit different from that to which the receiver is connected. • Consult the dealer or an experienced radio/TV technician for help.
Canadian Department of Communications Statement
This digital apparatus does not exceed the Class B limits for radio noise emissions from digital apparatus set out in the Radio Interference Regulations of the Canadian Department of Communications.
This Class B digital apparatus complies with Canadian ICES-003.
Australia statement notice
From 1 January 2012 updated warranties apply to all ASUS products, consistent with the Australian Consumer Law. For the latest product warranty details please visit http://support.asus.com. Our goods come with guarantees that cannot be excluded under the Australian Consumer Law. You are entitled to a replacement or refund for a major failure and compensation for any other reasonably foreseeable loss or damage. You are also entitled to have the goods repaired or replaced if the goods fail to be of acceptable quality and the failure does not amount to a major failure.
If you require assistance please call ASUS Customer Service 1300 2787 88 or visit us at http://support.asus.com
Safety information
- Before installing the device on a motherboard, carefully read all the manuals that came with the package.
- To prevent electrical shock hazard or short circuits, switch off the power supply before installing the device on a motherboard or connecting any signal cables to the device.
- If the device is broken, do not try to fix it by yourself. Contact a qualified service technician or your retailer.
- Before using the product, make sure all cables are correctly connected. If you detect any damage, contact your dealer immediately.
- To avoid short circuits, keep paper clips, screws, and staples away from connectors, sockets and circuitry.
- Avoid dust, humidity, and temperature extremes. Do not place the product in any area where it may become wet.
- Place the product on a stable surface.
- If you encounter technical problems with the product, contact a qualified service technician or your retailer.

This symbol of the crossed out wheeled bin indicates that the product (electrical and electronic equipment) should not be placed in municipal waste. Check local regulations for disposal of electronic products.
Trademarks
Xonar and ASUS logo are trademarks of ASUSTek Computer Inc. "Dolby" and "Dolby Digital Live", "Dolby Pro Logic IIx", "Dolby Virtual Speaker", "Dolby Headphone" are trademarks of Dolby Laboratories. EAX and A3D are trademarks of Creative Technology Ltd. Microsoft, DirectSound3D, Windows are trademarks of Microsoft Corporation. Other company and product names may be trademarks of the respective companies with which they are associated. ASIO is a trademark and software of Steinberg Media Technologies GmbH
License
Dolby Master Studio driver is manufactured under license from Dolby Laboratories.
1. Introduction
1.1 Package contents
• ASUS Xonar DGX PCIE audio card - Low Profile Bracket x1 - Support CD x1 - Quick Start Guide x1
1.2 System requirements
• One PCIE 1.0 (or higher) compatible slot for the audio card - Microsoft® Windows® 7 (32/64-bit) / Vista (32/64-bit) / XP (32/64-bit) / MCE2005 - Intel® Pentium® 4 1.4 GHz or AMD® Athlon 1400 CPU or faster CPU • 256 MB (or above) DRAM system memory - 60 MB available HDD space for driver installation package - CD-ROM drive (or DVD-ROM drive) for software installation - High-quality headphones or powered analog speakers to enjoy the ultra-high fidelity sound of the card
1.3 Specifications summary
| Items Description | |
| Audio Performance | |
| Output Signal-to-Noise Ratio (A-Weighted): | 105dB for 5.1CH100dB for Headphone-out@150ohm loading |
| Input Signal-to-Noise Ratio (A-Weighted): | 103dB |
| Output Total Harmonic Distortion + Noise at 1kHz(A-Weighted): | Up to 0.0025% (-92dB) |
| Input Total Harmonic Distortion + Noise at 1kHz(A-Weighted): | Up to 0.0022% (-93dB) |
| Frequency Response (-3dB, 24-bit/96kHz input ): <10Hz to 48kHz | |
| Output/Input Full-Scale Voltage | 1Vrms (3Vp-p) |
| Headphone Impedance Optimized for 32~150ΩΩ | |
| Bus Compatibilityus Compatibilityus Compatibility | |
| PCIE PCIE bus compatible | |
| Main Chipset | |
| Audio Processor | C-Media CMI8786 High-Definition Sound Processor (Max. 96KHz/24bit) |
| D-A Converter of Digital Sources: | Cirrus Logic CS4245*1 (104dB DNR, Max. 192KHz/24bit) / Cirrus Logic CS4361*1 (103dB DNR, Max. 192KHz/24bit) |
| A-D Converter for Analog Inputs: | Cirrus Logic CS4245*1 (104dB DNR, Max. 192KHz/24bit) |
| Sample Rate and Resolution | |
| Analog Playback Sample Rate and Resolution | 44.1K/48K/96KHz @ 16/24bit for all channels |
| Analog Recording Sample Rate and Resolution | 44.1K/48K/96KHz @ 16/24bit |
| S/PDIF Digital Output | 44.1K/48K/96KHz @ 16/24bit, Dolby Digital, DTS, WMA-Pro |
| ASIO 2.0 Driver Support: | 44.1K/48K/96KHz @ 16/24bit |
| I/O Ports | |
| Analog Output Jack: | 3.50mm mini jack *3 (Front/Side/Center-Subwoofer) |
| Analog Input Jack: | 3.50mm mini jack *1 (Line-In/Mic-In) |
| Other line-level analog input (for CD-IN/TV Tuner): | Aux-In (4-pin header on the card) |
| Digital S/PDIF Output | High-bandwidth Optical Connector supports 96KHz/24bit-additional SPDIF-out header for HDMI audio output |
| Front-Panel Audio Header | Supports headphone jack-detection, automatically switch audio output from back-panel to front |
| Driver Features | |
| Operation System | Windows7/ Vista/XP(32/64bit)/MCE2005 |
| Dolby® Headphone | Dolby Headphone technology allows users to listen to music, watch movies, or play games with the dramatic 5.1-channel surround or realistic 3D spacious effects through any set of stereo headphones. |
| DirectSound3D Game Extensions 2.5 (DS3D GX 2.5)/DirectX | DS3D GX 2.5.0 supports EAX gaming sound effects and DirectSound 3D hardware enhanced functions on Windows Vista. (DirectX/DirectSound 3D compatible) |
| Smart Volume NormalizerTM | Normalizes the volume of all audio sources into a constant level and also enhances your 3D sound listening range and advantages in gaming |
| VocalFXTM | The latest vocal effect technologies for gaming and VoIP, including:- VoiceEX: produces vivid environmental reverberation for your voice in EAX games- ChatEX: emulates different background environment effects when you chat online- Magic Voice: changes your voice pitch to different types (Monster/ Cartoon...) for disguising your real voice or just for fun in online chatting |
| Karaoke Functions | Music Pitch-Shifting, Vocal Cancellation, and Microphone Echo effects with Stereo Mix recording (Wave and Mic-in) for online Karaoke or online DJ applications |
| FlexBassTM | Professional Bass Management/Enhancement system |
| Xear 3DTMVirtual Speaker Shifter | Adjustable virtual 7.1-speaker positioning |
(continued on the next page)
Other Effects 10-band Equalizer/27 Environment Effects
3D Gaming Sound Engines/APIs
7: DirectSound3D® GX 2.5, EAX® 2.0&1.0, DirectSound® HW, DirectSound SW, A3D® 1.0, OpenAL generic modes, 128 3D sounds processing capability
Vista: DirectSound3D® GX 2.5, EAX® 2.0&1.0, DirectSound® HW, DirectSound SW, A3D® 1.0, OpenAL generic modes, 128 3D sounds processing capability
XP: DirectSound3D® GX 2.5, EAX® 2.0&1.0, DirectSound® HW, DirectSound SW, A3D® 1.0, OpenAL generic modes, 128 3D sounds processing capability
Accessories
Accessories - Low-profile bracket
*Specifications are subject to change without notice.
2. Xonar DGX card layout


| No Item Description | ||
| 1 | Microphone In port | Connect your external PC microphone to this 3.5mm port for voice input. Built-in high-quality Microphone pre-amplifier. |
| Line In port | Connect analog devices like MP3 players, CD players, music synthesizers and other line-level sound sources to this 3.5mm port for audio recording or processing. | |
| 2 | Headphone/Front Out port | Connect your headphones or 2/2.1 channel speakers to this 3.5mm port. For multi-channel speaker systems, connects to the front left/right input on the powered speakers. |
| 3 | Side Surround Out port | Connects to the surround channel input on 4/4.1/5.1 powered analog speakers. |
| 4 | Center/Subwoofer Out port | Connects to the center/subwoofer input on 5.1 powered analog speakers. |
| 5 S/PDIF Out port | Optical TOSLINK digital output port. Connects to external digital decoder or digital speaker systems, Home Theater systems, AV receivers for outputting digital audio including PCM, DTS Digital, DTS, WMA-Pro, etc. | |
| 6 | Front panel audio header | 9-pin Intel AC'97 / HDA front-panel which supports audio jack-detection and audio FP Headphone selection for Analog Out on the Audio Center. |
| 7 Aux Input Header | 4-pin header. Usually connects to the Analog Audio output of TV tuner card or other sound source inside your PC system. (To monitor your TV tuner card's audio from this Aux-In, you must enable the “monitor” function for Aux-In in the Xonar DGX Audio Center's recording mixer.) | |
| 8 S/PDIF Out header | Connects to the supported graphics card with HDMI. | |
3. Installing the hardware
3.1 Installing the audio card

Before you proceed with the following installation steps, it's recommended that you disable your onboard audio device in your BIOS settings, or uninstall any other audio cards on your PC. (For BIOS setting or uninstallation of other sound cards, refer to the user manuals of your motherboard and audio card.)
Installing the Xonar DGX card
- Power OFF the computer, the monitor, and all other peripheral devices connected to your computer.
- Unplug the computer power cord from your computer and power outlet.
- Touch the metal back or side panel of the computer to avoid static electricity.
- Remove the chassis cover.
- Remove the metal bracket from an available PCIE slot for the Xonar DGX audio card.
- Carefully insert the audio card into the PCIE slot. Ensure the audio card sits properly in place.
- Secure the audio card with screws and the metal bracket.
- Put back the chassis cover.
- Reconnect all cables.
- Plug the power cord to the computer and to a power outlet.
- Power ON the computer.

3.2 Connecting to a TV tuner card
- If you have a PCIE TV tuner card on your PC, you may need to connect it to the Xonar DGX card to send the tuner card's sound to your PC speakers.
- Secure the PCIE TV tuner card and screw it into the back-panel.
- Connect the audio output header from the TV tuner card to the Aux-In header of the Xonar DGX card.

For optimum TV audio quality, Xonar DGX uses ADC recording to digitize the signal and loops it back to DAC playback. Select Aux-In as the recording source in the Xonar DGX Center's recording mixer and enable the monitoring button to pass this signal to the audio output. Using this setup, you can even turn on sound effects such as Dolby Headphone to expand the stereo TV audio to 5.1 channel surround sound in any set of headphones. TV audio on your PC will become even better than on your TV set.
4. Installing software
Installing the card driver

Ensure that you have installed the audio card driver before installing the Xonar DGX driver. Otherwise, driver installation error may occur.
- After you have installed the Xonar DGX card, turn on your computer. Windows® automatically detects the audio card and searches for device drivers. When prompted for the drivers, click Cancel.
- Insert the support CD into the optical drive. If Autorun is enabled in your system, the setup starts automatically. If not, run setup.exe from your support CD.
- Follow the onscreen instructions to finish the installation.

The version and content of the support CD are subject to change without notice.
5. Connecting speakers and peripherals
5.1 Connecting digital speaker systems (Home Theater)
The Xonar DGX makes playback through your home theater system possible, creating an immersive and impressive cinema surround sound experience. A single digital cable connection can carry high-quality digital audio from any of your PC audio sources to any digital speakers or AV Receivers.

| No Item Description | |
| 1 Optical cable | Plug your decoder's TOSLINK optical cable into the S/PDIF-Out connector. |
5.2 Connecting stereo headphones
5.2.1 Connecting Stereo Headphones

| No Item Description | |
| 1 Front Out/Headphone Jack | The Front Out jack has a built-in high-quality amplifier to drive headphones. Connect your stereo headphones directly to this jack. |
5.2.1 Connecting 5.1 channel Headphones

| No Item Description | |
| 1 Front Out | Connect the front-channel 3.5mm plug of your 5.1 headphone into this jack. |
| 2 Side Surround Out | Connect the surround-channel 3.5mm plug of your 5.1 headphone into this jack. |
| 3 Center/Subwoofer Out | Connect the Center/Bass-channel 3.5mm plug of your 5.1 headphone into this jack. |
5.3 Connecting Analog Speaker Systems
5.3.1 Connecting Analog Power Amplifier

| No Item Description | |
| 1 Front Out | Connects to the “left front” and “right front” input ports of the analog amplifier with the mini-jack to RCA cable. |
| 2 Side Surround Out | Connects to the “left surround” and “right surround” input ports of the analog amplifier with the mini-jack to RCA cable. |
| 3 Center/Subwoofer | Connects to the “Center” and “subwoofer” input ports of the analog amplifier with the mini-jack to RCA cable. |
5.3.2 Connecting 2/2.1 channel speakers
2 Speakers
2.1 Speakers
| No Item Description | |
| 1 Front Out/Headphone Jack | Connect the 2/2.1 speaker set’s 3.5mm plug into this Front Out jack. |
5.3.3 Connecting 4/4.1 Channel Speakers
4 Speakers![graph TD A["Computer monitor"] --> B["Audio INPUTS Side"] A --> C["Audio INPUTS Front"] B --> D["Computer monitor"] C --> E["Computer monitor"] D --> F["Output 1"] E --> G["Output 2"]](/content/2026/06/1275905/images/ac82413b6bd0eb9d9eb94162427d7400298d9bfc3e4e47ef5524d6e2ca951134.jpg)
4.1 Speakers
| No Item Description | |
| 1 Front Out | Connects to the Front input port of the 4/4.1 speakers with the mini-jack cable. |
| 2 Side Surround Out | Connects to the Surround input port of the 4/4.1 speakers with the mini-jack cable. |
5.3.4 Connecting 5.1 Channel Speakers
5.1 Speakers![graph TD A["Speaker 1"] --> B["Audio INPUTS"] C["Speaker 2"] --> B D["Speaker 3"] --> B B --> E["Speaker 4"] B --> F["Speaker 5"] B --> G["Speaker 6"] B --> H["Speaker 7"] B --> I["Speaker 8"] style A fill:#f9f,stroke:#333 style C fill:#f9f,stroke:#333 style D fill:#f9f,stroke:#333 style E fill:#ccf…](/content/2026/06/1275905/images/fb6f8cb75f1c3430796b817eb104c033e7e3d41fc83288000c35784cc6f1d3a5.jpg)
| No Item Description | |
| 1 Front Out | Connects to the Front input port of the 5.1 speakers with the mini-jack cable. |
| 2 Side Surround Out | Connects to the Surround input port of the 5.1 speakers with the mini-jack cable. |
| 3 Center/Subwoofer | Connects to the Center/Subwoofer input port of the 5.1 speakers with the mini-jack cable. |
5.4 Connecting microphone


| No Item Description | |
| 1 Microphone Input Jack | Connect the microphone's 3.5mm plug into this Mic-In jack for voice communication, recording, or karaoke. |
| 2 Headphone Jack | The Front Out jack has a built-in high-quality amplifier to drive headphones. Connect your stereo headphones directly to this jack. |
5.5 Connecting Line-In audio sources

| No Item Description | |
| 1 Line Input Jack | Connect the 3.5mm plug of the CD/MP3 Player or any other Line level analog audio sources into this Line-In jack for sound recording (See the “Mixer” section of the driver guide). |
6. Xonar Audio Center
6.1 Xonar Audio Center GUI
- After the driver installation is complete and your computer has been rebooted, you will find the Xonar Audio Center's icon in the

system tray on the bottom right-hand corner of the screen. Double click this icon to open the Xonar Audio Center utility.

If the icon could not be found in the system tray, launch the Xonar Audio Center from the Windows desktop by clicking Start > All Programs > ASUS Xonar DGX Audio > Xonar DGX Audio Center.
- The Xonar Audio Center is the Graphic User Interface (GUI) for the Xonar DGX driver. You can control the functions and features of the Xonar DGX driver on the Xonar Audio Center. The following picture shows a basic overview of the Xonar Audio Center. The following sections of this manual will describe its functions in more detail.

| No Item Description | |
| 1 Display Area | This display area shows the 10-band signal meter, volume level, and the status of the Dolby/DTS technologies, EQ, and DSP modes.Note: This area just displays information, but is not used to alter settings. |
| 2 Menu Open/Close | Clicking this button will move the display area and reveal the configuration area below. Clicking it again will move the display area back down. |
| 3 Master Volume | This rotary knob controls the master playback volume. Drag the small circle inside it to change the volume level. |
| 4 SVN Button | Click this button to enable the “Smart Volume Normalization” feature for constant volume from all playback sources. It will display a blue light when enabled. |
| 5 Mute Button | Click this button to mute audio playback; it will display a red light when playback is muted. |
| 6 DSP Mode | These 2 buttons give access to quick gaming surround sound effect (GX2.5) and effect-free (Hi-Fi) modes. |
| 7 Setting Menu Panel | This panel gives access to setting tabs, including Main Settings, Mixer/volume, Effects, Karaoke, FlexBass, and VocalFX. |
| 8 Information icon | Clicking this icon will pop up driver's Information window. |
6.2 Main Setting
6.2.1 Sample Rate
The Sample rate determines the number of audio samples per second that the Digital-to-Analog Converters (DAC) and S/PDIF digital interface will output. The Xonar DGX audio card can support sample rates up to 96KHz (44.1K, 48K, 96KHz). Usually audio CDG and MP3 files are 44.1KHz; DVD-Video uses 48KHz; DVD-Audio or other HD media may contain 96KHz high-definition audio content. Please select the corresponding sample rate for your playback sources to get the best audio fidelity.

| No Item Description | |
| 1 Sample Rate | Select the sample rate that corresponds to (or exceeds that of) your playback sources, for optimal audio fidelity. The Xonar DGX card supports sample rates up to 96KHz (44.1K, 48K, 96K). Typical values:-Audio CD, MP3, WMA, Wave files are 44.1KHz;-The audio of DVD-Video is 48KHz;-DVD-Audio or other HD media may contain 96KHz high-definition audio content. |
6.2.2 Analog Out mode
Headphone

| No Item Description | |
| 1 Analog Out | The Analog Out setting is used to match your actual speaker setting, such as headphones, 2 speakers (or 2.1), 4 speakers (or 4.1), 5.1 speakers, Front Panel Headphone and Front Panel 2 speakers (or 2.1). Xonar DGX will play the channels and do the proper 3D surround sound processing accordingly. Select the correct speaker type for your connected speakers. |
| 2 Speaker Test | Click this button to show the speaker test window in the right pane. Click the “play” button to test each speaker one by one or click each speaker manually to test. |
| 3 HP Advanced Setting | Clicking this button allows you to select the gain tuning according to your usage scenario or matching headphone impedance. The setting is also available for FP Headphone. |
| Usage scenario or Headphone impedance DAC settingExciter Mode or for >64ohms headsets 16 dB boostPro-gaming Mode or for 32~64ohms headsets 9 dB boostVOIP Mode or for <32ohms headsets 0 dB boost | |
| 4 Dolby Headphone enable/disable | Tick this checkbox to enable Dolby Headphone. Click the textbar to switch the right window to Dolby Headphone page for manual adjusting.* 7.1 Virtual Speaker Shifter can be selected only when Dolby Headphone is enabled. |
2 Speakers & 4 Speakers
| No Item Description | |
| 1 Analog Out | The Analog Out setting is used to match your actual speaker setting, such as headphones, 2 speakers (or 2.1), 4 speakers (or 4.1), 5.1 speakers, Front Panel Headphone and Front Panel 2 speakers (or 2.1). Xonar DGX will play the channels and do the proper 3D surround sound processing accordingly. Select the correct speaker type for your connected speakers. |
| 2 Speaker Test | Click this button to show the speaker test window in the right pane. Click the “play” button to test each speaker one by one or click each speaker manually to test. |
5.1 Speakers

| No Item Description | |
| 1 Analog Out | The Analog Out setting is used to match your actual speaker setting, such as headphones, 2 speakers (or 2.1), 4 speakers (or 4.1), 5.1 speakers, Front Panel Headphone and Front Panel 2 speakers (or 2.1). Xonar DGX will play the channels and do the proper 3D surround sound processing accordingly. Select the correct speaker type for your connected speakers. |
| 2 Speaker Test | Click this button to show the speaker test window in the right pane. Click the “play” button to test each speaker one by one or click each speaker manually to test. |
| 3 Speaker Swap | Clicking this button will pop up an advanced setting window to allow you to:– Swap center/bass outputs for 5.1-speaker set upsCheck the box if your speakers are outputting the incorrect channel. Otherwise, leave them blank. |
6.2.3 SPDIF Out
It enables a single digital connection to carry high quality audio from your PC to digital speakers and AV Receivers.

| No Item Description | |
| 1 S/PDIF Out enable/disable | Click this check box to enable S/PDIF output. |
| 2 S/PDIF Output Formats/Functions | PCM (Pulse Code Modulation, which is a typical raw audio data format.) |
6.2.4 Audio Channels (For Vista only)
This setting only appears in Windows Vista. Vista will deliver the audio channels to the audio driver according to this setting, no matter what the original audio content is or how many channels they have. Therefore, you need to set this in accordance with your audio content before you play it. Please note that this setting is synchronized with Vista's system speaker configuration and changing the setting during playback will cease the audio playback program. You may have to restart the program after the change. It's recommended that you close all playing programs before you change the setting.

| No Item Description | |
| 1 Audio Channels | Here are some typical suggestions:-MP3, WMA, AAC, CD, VCD, 2D games => 2 channels-DVD-Video with Dolby Digital or DTS 5.1 => 6 channels-DVD-Video with Dolby Digital EX or DTS ES => 8 channels-3D games => 8 channels |
6.2.5 7.1 Virtual Speaker Shifter
The 7.1 Virtual Speaker Shifter has the following major features:
- Expanding/upmixing audio to 7.1-channel surround sound • Virtualizing 7.1 surround sound over any set of speakers
- Shiftable virtual speaker positioning allows you to adjust the best sound field easily without moving physical speakers and wires

| No Item Description | |
| 1 Shifter enable/disable | Click this check box to enable the 7.1 Virtual Speaker Shifter. Clicking the text bar will switch the right window to the Speaker Shifter page for manual adjustments. |
| 2 Drag speaker or listener | You can drag each speaker or listener to a different relative position “virtually” using only your mouse. The Xonar DGX card will process it and virtualize each speaker position in real-time. The Subwoofer has no directional sounds, and hence can be moved only closer or further away. |
| 3 Reset | Reset all Speaker Shifter settings to the defaults. |
| 4 Increase/decrease volume | Click + to increase volume (move speakers closer); click – to decrease volume (move speakers further away) |
| 5 Counter-clockwise | Make all speakers (except Subwoofer) rotate counter-clockwise |
| 6 Clockwise | Make all speakers (except Subwoofer) rotate clockwise |
| 7 Manual Rotation | Manually drag and rotate all speakers (except Subwoofer) |
| 8 Manual Drag Mode | This is the default mode that allows you to manually drag each speaker or the listener with your mouse. |
6.2.6 Dolby Headphone

| No Item Description | |
| 1 Dolby Headphone enable/disable | Tick this checkbox to enable Dolby Headphone. Click the textbar to switch the right window to Dolby Headphone page for manual adjusting.* 7.1 Virtual Speaker Shifter and Dolby Pro-Logic IIx can be selected only when Dolby Headphone is enabled. |
| 2 DH1 | Dolby Headphone (DH) provides three room filters that may be used with any type of audio. They differ in the sense of the “spatial dimension” they impart.DH1—Reference Room: Small, acoustically damped room. |
| 3 DH2 | DH2—Livelier Room: More acoustically live than DH1 |
| 4 DH3 | DH3—Larger Room: Larger room than DH1; more distant and diffused effect. |
6.3 Mixer/Volume
The mixer page is designed to control the volume for playback and recording on the Xonar DGX. In addition, the Xonar DGX also provides a high-quality digital monitoring function for hearing the recorded audio from the speakers.
6.3.1 Playback Volume

| No Item Description | |
| 1 Playback volume tab | Click this button to show the playback volume page. |
| 2 Source / path name | This shows the source name for each volume control slider, including:- WAVE: All digital audio sources except MIDI files- SW: Software Synthesizer; control the playback volume of the MIDI files- CD: CD-ROM digital playback (CD-DA) volume control- LEFT, RIGHT...: the volume control for each speaker/channelNOTE: Windows® Vista does not support WAVE, Synthesizer and CD-In volume controls. |
| 3 Mute button | Click this button to mute the audio channel; click this button again to restore the audio output. |
| 4 Volume slider | Drag this slider down to decrease the volume; drag it up to increase the volume. The tool-tip reveals the percentage number from 1 to 100 in terms of the full scale level. |
| 5 Left/Right balance | The horizontal slider controls the volume between the left and right channels. (On Windows XP only) |
| 6 Reset | Reset all volume controls to the default settings. |
6.3.2 Recording/Monitoring Volume

| No Item Description | |
| 1 Recording Volume Tab | Click this button to show the recording volume page. |
| 2 Left/Right balance | The horizontal slider controls the volume between the left and right channels. |
| 3 Recording volume slider | Drag this slider down to decrease the recording volume; drag up to increase the recording volume. The tool-tip reveals the percentage number from 1 to 100 in terms of the full scale level. |
| 4 Recording Selector button | Click this button to select the path/source you are going to record. Note that the recording function on Windows is a one-path selector. So, you can select only one default recording source at a time. You may have to restart the recorder program if you switch to a different source. (Note: On Vista, some application programs may allow you to select the recording device/path in the recording programs themselves.) |
| 5 Microphone-In Advanced Setting | Click this button [IMAGE] open the advanced settings for the Microphone-In: Enabling “Microphone Boost” will increase a volume gain to boost microphone input signals. For typical low-cost PC microphone, it’s recommended to enable this function. You can check with “Front Mic” to enable microphone of front panel. Enabling “Microphone Boost” will increase a volume gain to boost microphone input signals. For typical low-cost PC microphone, it’s recommended to enable this function. You can check with “Front Mic” to enable microphone of front panel. |
(continued on the next page)
| 6 Monitoring button | Click this button to monitor and loopback recording audio to outputs (PC speakers). Therefore, the recording volume will influence the monitoring signals from speaker outputs. The audio will be mixed into the streams you are playing out from your PC and all DGP effects will be applied to the source, too. |
| 7 Source / path name | This shows the source name for each volume control slider, including:Mix: Stereo Mix which will record analog inputs (MIC and Aux) and digital wave audio (Wave) you are playing on PCMIC: recording from MIC jackAux: recording from Aux-In for typically TV-tuner card audio or other sound sourcesLine-In: recording from Line-in jack for external audio devicesWAVE: recording from digital wave audio you are playing on PC |
| 8 Reset | Click to reset all volume controls to the default settings. |
6.4 Effects
6.4.1 Environment Effects
Environment effects can be used to create realistic listening experiences that mimic different environments. There are a total of 27 environment options, which can be applied to all 2D sound sources, like music.

| No Item Description | |
| 1 Default environments | These four buttons activate Bathroom, Concert hall, Underwater, and Music Pub environments, respectively. |
| 2 More options | Clicking this button will apply the environment effect that you select from the pull-down menu on the right side. There are another 23 options in this menu. |
| 3 Environment size | There are three size settings for each environment: Large, Medium, and Small. |
6.4.2 10-Band Equalizer
The equalizer can modify the audio output for different frequencies, and be used to compensate for deficiencies in your speakers/systems. There are 12 default patterns and you can also make your own settings.

| No Item Description | |
| 1 Default equalizer options | There are 12 available equalizer patterns. Click one to apply it. |
| 2 User Defined | You can click this button to apply your own defined parameters saved in the pull-down menu. |
| 3 Equalier slider | Adjust the gain for each band (30~16KHz) |
| 4 Save name | Key in a name for your own “User Defined” equalizer setting |
| 5 Add / save | Click this “+” button to save the parameters into User Defined list |
| 6 Delete | Click this “-” button to delete the parameters from User Defined list |
6.5 Karaoke
The Xonar DGX provides powerful features for Karaoke, including Key-Shifting, Vocal Cancellation, and Microphone Echo. Microphone Echo can generate natural echo effects on your singing voice just like a karaoke machine. Key-Shifting can change the pitch of Karaoke background music, and Vocal Cancellation can reduce the original vocal in songs and keep the music and symphony for karaoke.

| No Item Description | |
| 1 On/Off | Click the switch to turn on or off the functions on this page. |
| 2 Key-Shifting | Check the box to enable or disable the key shifting feature for music playback from 4 semitones below, to 4 semitones above. |
| 3 Vocal Cancellation | Check the box to enable or disable the vocal cancellation function and adjust the voice cancellation level from 0 to +100. +100 will eliminate most original vocals (default value is 50). |
| 4 Mic Echo | Select the Mic Echo function and adjust the gain for echo signals (30~16KHz) |
| 5 Reset | Reset all settings to the default. |

The following message appears when Mic Echo is selected:

This message implies that the recording device will be set according to your requirement. With Mic, you will only record audio source from microphone with echo effects; but you are able to record all audio sources from Wave, Aux, and Mic with microphone echo effect. Click OK to accept it or Cancel if you want to enable it later. Checking Don't remind me again and this message will not show up again.
6.6 FlexBass
FlexBass, an advanced bass management and enhancement mechanism, allows you to select each satellite speaker's type for optimal sound performance from the speakers. (Small: common speaker that cannot produce low frequencies; Large: wide-band speakers that can produce low frequencies well). It comes with an adjustable crossover frequency for the boundary of the bass signals. FlexBass will filter out the bass signals from small speaker channels and redirect them all to the subwoofer or Large speakers.

| No Item Description | |
| 1 On/Off | Click this switch to turn on or off all functions on this FlexBass page. |
| 2 Small / Large speaker option | Select the speaker type that you connected. If your speaker type cannot perform low-frequency signals (bass), select “Small” speaker type and Xonar DGX will filter out the bass signals and send them to the subwoofer channel. If those speakers are full-range, you can select the “Large” speaker type.Note: Usually, low-cost PC’s 2-channel speakers are small-type speakers. Refer to the speaker’s specification. If you have any questions, consult your speaker vendor. However, common 2.1 speakers with a subwoofer should be categorized as Large speakers because the subwoofer can redirect the bass signals inside the two channels to the subwoofer speaker automatically. |
| 3 Picture for Small/Large speaker | Colors for small/large speakers are different.Orange: large speakersGreen: small speakers |
| 4 LFE Crossover Frequency | Adjusts the cut-off frequency (50~250Hz) for LFE (low-frequency effects) signals. Xonar DGX will filter out the bass signals below the crossover frequency from small speaker channels and forward them to the subwoofer. The higher the crossover frequency, the more bass signals will be subtracted. |
6.7 AEC (Acoustic Echo Cancellation)
Xonar DGX provides advanced Acoustic Echo Cancellation (AEC) for best voice communication quality over your speakers. AEC technology can eliminate up-to-40dB speaker echo return and suppress noises into your microphone for easier conversation experience. AEC is an innovative feature to make Xonar DGX the best sound card choice for online chatting in VOIP applications (Skype, MSN, Google, QQ, etc.) or online gaming. AEC provides the following benefits to you:
- Reduce the voice acoustic echoes like speakerphone devices when others talk to you on line
- Minimize the playback sound echoes into your microphone during gaming or music playback • Effectively suppress background or system noises into your microphone
- 32-bit floating point algorithm providing precisely adaptive echo cancellation performance up to 40dB • Supports all VOIP applications and online games
To achieve the best performance of AEC function, the ideal system requirements are as follows:
- Speakers and microphone are low distortion (max. THD < 2%)
- Flat frequency response between 300\~4KHz
- Use omni-direction electret microphone with >=40dB sensitivity
- The microphone is more than 30cm far from PC's speakers (fix the distance) and do NOT turn your speakers too loud
- Put your microphone 20~30cm away from you (fix the distance) and do NOT speak too close or too loud into the microphone to avoid signal clipping and distortion. Enable "microphone boost" on Xonar DGX audio center mixer to get proper input signal level.
- It's suggested to disable original AEC function residing in some of the softphones or voice communication programs to get best performance from Xonar DGX audio card.

AEC function will be only suitable for bi-direction voice communication applications. The speaker type will be set as 2 speakers and special voice processing mode while AEC is applied (all audio effects will be suspended and those controls on audio center will be frozen.). After you finish the voice-over-IP applications, please remember to turn it off for normal high-fidelity audio playback mode.

| No Item Description | |
| 1 AEC | Click AEC function page. |
| 2 Enable AEC | Click the checkbox to enable AEC function. A alert message will pop up: This message implies the speaker configuration will be set to 2 speakers and all sound effect processors will suspended except AEC function. Click “OK” to accept it; Click “Cancel” if you want to enable it later. Check “Don’t remind me again” will not show this message again. This message implies the speaker configuration will be set to 2 speakers and all sound effect processors will suspended except AEC function. Click “OK” to accept it; Click “Cancel” if you want to enable it later. Check “Don’t remind me again” will not show this message again. |
6.8 Smart Volume Normalization
Smart Volume NormalizationTM (SVN) automatically keeps all music or video/TV audio output at a constant level to reduce manual adjustment hassles inherent with sound sources of different loudness. It allows you to listen to various content, like MP3, TV program, DVD video and even games with consistent sound level. The following graph shows how different signals 1 & 2 will become the same level (for example, 10dB below full scale) after you turn on SVN. Please note that for lower volume music 2, it will become louder when you turn on SVN; and for higher volume music 1, it will become quieter.


| No Item Description | |
| 1 SVN On/Off | Click this button to enable SVN. This button is outlined blue when active. |
| 2 SVN display | When SVN is enabled, “Smart Volume” will be lit up at the bottom of the volume meter and the volume meter will show the level. |
| 3 SVN blue light | When SVN is enabled, the master volume knob will be illuminated by a blue light. It will be lit red if the volume is muted. |
Xonar DGX is introducing an innovative technology –DirectSound 3D Game Extensions v2.5 (DS3D GX 2.5)- to restore DirectSound 3D Hardware acceleration mode and its subsidiary EAX effects on Windows Vista for 3D games. Unlike some proprietary API like OpenAL, DS3D GX doesn't require games to support OpenAL API. All existing games compatible with Microsoft DirectX and DirectSound 2D/3D will be supported with DS3D GX technology. Before you start EAX and DS3D HW games, enable DS3D GX on the Xonar Audio Center, and disable the function after the games.
In addition, Xonar DGX also offers a Hi-Fi mode for hi-fidelity playback without any effect processing to keep the original audio fidelity. Every time you turn on Hi-Fi mode, Xonar DGX will clear all sound effects. It's also recommended to use Hi-Fi mode for audio quality tests (using RMAA software or another machine-based measurement). Use the DSP mode button as the quick setup if you don't wish to know the details of the effect setup.

No sound effects will be applied to high-definition 96KHz/192KHz content.

| No Item Description | |
| 1 GX Mode | DirectSound 3D Game Extensions mode to support EAX and DirectSound 3D Hardware extensions for lots of DirectX/ DirectSound3D games on Windows 7 / Vista / XP. |
| 2 Hi-Fi Mode | This mode is set for Hi-Fidelity playback, where all effects will be cleared to keep the original digital data and analog output quality as high as possible. |
6.10 VocalFX
VocalFX is an innovative voice processing technology to let your voice get into the realistic game landscape (VoiceEX) or to emulate the background scenes in online chat (ChatEX). It also allows you to change your voice pitch to disguise who you are (Magic Voice). These features dramatically increase the fun for voice communication on PC.

| No Item Description | |
| 1 VoiceEX | It produces realistic and dynamic environmental reverberation for your voice in 3D gaming communication. |
| 2 Local VoiceEX | It produces realistic and dynamic environmental reverberation for your voice in 3D gaming communication.(You can hear your voice form speakers) |
| 3 App List | You can add VOIP application into VOIP application List. |
| 4 ChatEX | It emulates different background environment effects when you chat online. |
| 5 Magic Voice | Changes your voice pitch to different types for disguising your real voice or just for fun in online chatting. |
For 3D Games
- Check the check box of VoiceEX and Local VoiceEX.
- Make sure you and your team member can talk to each other in the game.
For VOIP
- Press App List
- If you don't see your VOIP application in the list, press Add. (Make sure Skype and MSN Messenger are the latest versions.)

- Look for the application's location and open it.

- Your VOIP application has been added to the list.

- Check the check box of ChatEX and Magic Voice.
- You can use ChatEX and Magic Voice when you chat online.

* Click the checkbox to enable VocalFX function, then a prompt message will pop up:

This message implies the record device will be set to microphone. Make sure the GX function is enabled. Click "OK" to accept it, or "Cancel" if you want to enable it later. Check "Don't remind me again" if you don't want to see this message pop up next time.
* Microphone input source must be selected from advanced settings under the MIC volume control slider in the Mixer page.
7. Troubleshooting and FAQs
[Troubleshooting]
The audio card driver could not be installed on my PC.
Instructions:
- Make sure that you have properly plugged the audio card in the PCIE slot on your motherboard.
- Check that the Windows hardware device manager has discovered a multimedia audio device. If no device is found, please try scanning for new hardware.
- Try soft reboot (restart) your Windows.
- Remove the card, plug it into another PCIE slot, and try again.
I cannot find the Xonar DGX Audio Center
Instructions:
- Make sure you have installed the driver
- Locate the Xonar DGX Audio Center icon in the system tray on the bottom right-hand corner of the screen. Double-click the icon to open the Xonar DGX Audio Center utility.

- If the icon could not be found in the system tray, go to the Windows Control Panel and double click the "Xonar DGX Audio Center" icon to make it visible in the system tray again.
- After the driver installation is complete, it's recommended that you reboot your computer to complete the setup. If the icon still doesn't appear, please try installing the driver package again.
I cannot hear any sound from my analog speakers
Instructions:
- Ensure that you have connected speakers properly and have powered on your speakers.
- Ensure that the device master volume or the software player has NOT been muted on the Xonar DGX Audio Center.
- Go to the sound and audio device of Windows Control Panel to check if the playback default device is set to Xonar DGX Audio Device, instead of other onboard AC97 or HDA codec device. If it's not, please set it to Xonar DGX Audio Device and restart your applications.
- Try restarting your Windows.
I cannot hear any sound from the S/PDIF output
Instructions:
- Ensure that you have enabled S/PDIF output in the Audio Center GUI (Main page).
- Ensure that you are connecting the correct S/PDIF output jack on the card to the decoder's (AV receiver) S/PDIF input jack.
- You may need to select the correct input and mode of your decoder or AV receiver.
- If you are using 96KHz PCM output, please make sure your decoder can support 96KHz decoding. Try changing it to 44.1K or 48KHz first.
I cannot hear audio input (Mic, Line-in, AUX, etc.) from my speakers
Instructions:
- Go to the mixer recording page in the Audio Center and select the correct input as the recording source. If you are using Windows Vista, also go to system audio control panel to see the current default recording/input device is right.
- Remember to turn on the digital monitoring button for that recording source.
I cannot hear the TV tuner audio from my speakers
Instructions:
- If you are using a traditional TV tuner card which has analog audio output, please connect it to the Aux-In header on the audio card
- Select Aux-In as the recording source and remember to turn on the digital monitoring button on the recording mixer page
- If you are using a TV tuner card which has digital audio output instead of analog, check that the sound is not muted and whether other applications can play sound out. If you still have problem, read the TV tuner card's software user guide.
[FAQ]
Q1: Does the Xonar DGX support Windows 7/Vista?
Answer:
Yes, the Xonar DGX driver package does support Windows 7/Vista 32/64 bit and most key features are available. In addition, Xonar DGX supports unique DS3D GX on Windows 7/Vista, which can recover DirectSound 3D hardware and EAX gaming sound effects on Windows 7/Vista for a lot of existing DirectX games.
Q2: Why does the Xonar DGX support Dolby® Headphone?
Answer:
Dolby is the ONLY brand and technology recognized by the CE industry and available on a wide range of audio equipment. Xonar DGX includes the feature to make your PC a powerful media and entertainment center.
Q3: Does the Xonar DGX support EAX on Vista?
Answer:
Yes, Xonar DGX can support the latest EAX on Windows 7/Vista/XP through innovative DirectSound3D Game EXtensions v2.5 (DG3D GX 2.5) technology.
Q4: Why do I need Dolby Headphone for PC games?
Answer:
Dolby Headphone is the best 3D sound positioning, spatial modeling and 5.1-channel virtualization technology for regular stereo headphones and speaker headphones.
Q5: What is the most important benefit of the Xonar DGX for gamers?
Answer:
- Headphone amplifier: Enables accurate sound positioning in superb quality for unparalleled gaming experience.
- Dolby headphone: Delivers a realistic and spacious 2-to-5.1 surround and 3D positional sound field over any set of stereo headphones.
- GX 2.5: Enables the latest EAX gaming audio and restore surround gaming in Windows Vista/7 without additional software.
Q6: Will PCM sound output through S/PDIF be just 2 channels even with different analog output channels?
Answer:
The S/PDIF protocol specification (IEC-60958) can only carry 2-channel PCM data or non-PCM AC3/DTS data. So, when a user selects PCM output for S/PDIF, the Xonar sound card will always deliver 2 channel PCM data through the S/PDIF output port.
Q7: Why can I hear and record sound from other recording devices when Wave/Digital is selected in Record on Vista?
Answer:
Different from Windows XP, Vista has a multiple devices/streams concept in audio structure, in which the concept can be categorized into Digital Input and Analog Input. In other words, multiple recording devices can be used and working at the same time. In this case, Wave In or SPDIF-In, considered as a Digital Input, is an independent recording device from Analog Devices such as Mic In, Line In, or Aux In. Therefore, if you have analog inputs other than Wave In and set to be monitored, you are able to hear and even record sound from those analog devices even Wave In / SPDIF-In is selected as the default recording device.
If you don't want to hear the analog input sounds in that situation, simply turn off the "monitoring" function on other analog input devices.


- PCIE 5.1 & HEADPHONE AMP AUDIO CARD
- USER MANUAL
- COPYRIGHT © 2012 ASUSTEK COMPUTER INC. ALL RIGHTS RESERVED
- CONTENTS
- NOTICES
- FEDERAL COMMUNICATIONS COMMISSION STATEMENT
- CANADIAN DEPARTMENT OF COMMUNICATIONS STATEMENT
- AUSTRALIA STATEMENT NOTICE
- SAFETY INFORMATION
- TRADEMARKS
- LICENSE
- INTRODUCTION
- PACKAGE CONTENTS
- SYSTEM REQUIREMENTS
- SPECIFICATIONS SUMMARY
- XONAR DGX CARD LAYOUT
- INSTALLING THE HARDWARE
- INSTALLING THE AUDIO CARD
- INSTALLING THE XONAR DGX CARD
- CONNECTING TO A TV TUNER CARD
- INSTALLING SOFTWARE
- INSTALLING THE CARD DRIVER
- CONNECTING SPEAKERS AND PERIPHERALS
- CONNECTING DIGITAL SPEAKER SYSTEMS (HOME THEATER)
- CONNECTING STEREO HEADPHONES
- CONNECTING 5.1 CHANNEL HEADPHONES
- CONNECTING ANALOG SPEAKER SYSTEMS
- CONNECTING ANALOG POWER AMPLIFIER
- CONNECTING 2/2.1 CHANNEL SPEAKERS
- CONNECTING 4/4.1 CHANNEL SPEAKERS
- CONNECTING 5.1 CHANNEL SPEAKERS
- CONNECTING MICROPHONE
- CONNECTING LINE-IN AUDIO SOURCES
- XONAR AUDIO CENTER
- XONAR AUDIO CENTER GUI
- MAIN SETTING
- SAMPLE RATE
- ANALOG OUT MODE
- HEADPHONE
- SPEAKERS
- SPDIF OUT
- AUDIO CHANNELS (FOR VISTA ONLY)
- VIRTUAL SPEAKER SHIFTER
- DOLBY HEADPHONE
- MIXER/VOLUME
- PLAYBACK VOLUME
- RECORDING/MONITORING VOLUME
- EFFECTS
- ENVIRONMENT EFFECTS
- BAND EQUALIZER
- KARAOKE
- FLEXBASS
- AEC (ACOUSTIC ECHO CANCELLATION)
- SMART VOLUME NORMALIZATION
- VOCALFX
- FOR 3D GAMES
- FOR VOIP
- TROUBLESHOOTING AND FAQS
- [TROUBLESHOOTING]
- INSTRUCTIONS
- I CANNOT FIND THE XONAR DGX AUDIO CENTER
- I CANNOT HEAR ANY SOUND FROM MY ANALOG SPEAKERS
- I CANNOT HEAR ANY SOUND FROM THE S/PDIF OUTPUT
- I CANNOT HEAR AUDIO INPUT (MIC, LINE-IN, AUX, ETC.) FROM MY SPEAKERS
- I CANNOT HEAR THE TV TUNER AUDIO FROM MY SPEAKERS
- [FAQ]
- Q1: DOES THE XONAR DGX SUPPORT WINDOWS 7/VISTA
- ANSWER
- Q7: WHY CAN I HEAR AND RECORD SOUND FROM OTHER RECORDING DEVICES WHEN WAVE/DIGITAL IS SELECTED IN RECORD ON VISTA
Brand : ASUS
Model : Xonar DGX
Category : Soundcard