
MBP85CONNECT - Baby monitor MOTOROLA - Free user manual and instructions
Find the device manual for free MBP85CONNECT MOTOROLA in PDF.


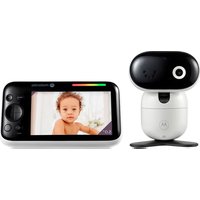
| Product Type | Connected Video Baby Monitor |
| Brand | Motorola |
| Model | MBP85CONNECT |
| Parent Unit Screen | 5-inch Color LCD |
| Camera Resolution | HD 720p |
| Night Vision | Infrared, range up to 5 meters |
| Two-Way Communication | Yes, with noise reduction |
| Cry Detection | Yes, adjustable |
| Room Temperature | Displayed on parent unit screen |
| Lullabies | 5 built-in lullabies |
| Connectivity | Wi-Fi 802.11 b/g/n |
| Mobile App | Compatible with Motorola Nursery (iOS/Android) |
| Wireless Range | Up to 300 m outdoors |
| Camera Power Supply | AC adapter (included) |
| Parent Unit Power Supply | Rechargeable Li-ion battery |
| Parent Unit Battery Life | Approximately 10 hours continuous use |
| Camera Dimensions | 70 x 60 x 110 mm (approx.) |
| Parent Unit Dimensions | 140 x 25 x 80 mm (approx.) |
| Camera Weight | 150 g (approx.) |
| Parent Unit Weight | 200 g (approx.) |
| Care and Cleaning | Clean with a soft, dry cloth. Do not use abrasive products. |
| Security | AES 128-bit encryption, CE compliant |
| Spare Parts and Repairability | Available on Motorola official website, repairability index 8/10 |
Frequently Asked Questions - MBP85CONNECT MOTOROLA
User questions about MBP85CONNECT MOTOROLA
0 question about this device. Answer the ones you know or ask your own.
Ask a new question about this device
Download the instructions for your Baby monitor in PDF format for free! Find your manual MBP85CONNECT - MOTOROLA and take your electronic device back in hand. On this page are published all the documents necessary for the use of your device. MBP85CONNECT by MOTOROLA.
USER MANUAL MBP85CONNECT MOTOROLA
motorola

USER'S GUIDE
Wi-Fi ® Video Baby Monitor Camera
Model: MBP85CONNECT
The features described in this user's guide are subject to modifications without prior notice.
Welcome...
to your new Motorola Wi-Fi® Video Baby Monitor Camera!
Thank you for purchasing your new Motorola Wi-Fi ® Video Baby Monitor Camera. Now you can view and hear your baby sleep in its room or you can monitor your older children in their playroom. You can install the Camera only from your iPhone ® /iPad ® or devices for Android ™ and view the Camera video from your PC or Notebook, as well as devices for Android ™ or iPhone ® /iPad ® .
Please keep your original dated sales receipt for your records. For warranty service of your Motorola product, you will need to provide a copy of your dated sales receipt to confirm warranty status. Registration is not required for warranty coverage.
For product related questions, please call:
+49 (0) 1805 938 802 in Europe
Email: motorola-mbp@tdm.de
This User's Guide has all the information you need to make the most of your product.
Please read the Safety Instructions on pages 5 - 6 before you install the Unit.
Inside the Box
- 1 x Wi-Fi Camera Unit
- 1 x Power Adapter
- 1 x Quick Start Guide
- 1x User Guide
In multi-camera packs, you will find one or more additional Camera Units with power adapter units.
Overview of your Camera

- Light Sensor (for night mode detection)
- Camera Lens
- Infrared LEDs (for night vision)
- Power / Status indicator
-
Microphone
-
PAIR Button
- Speaker
- Antenna
- Micro USB socket
- ON/OFF Switch
- Temperature Sensor
Important guidelines for installing your Wi-Fi® Camera Unit
- Use of other 2.4 GHz products, such as other wireless networks, Bluetooth systems or microwave ovens may cause interference with this product. Keep the Wi-Fi Camera Unit away from these types of products, or turn them OFF if they appear to be causing interference.
- Always ensure that you have a good Wi-Fi ® connection available.
Table of contents
- Safety Instructions....5
- System Requirements......8
- Getting Started - Connecting Devices....9
3.1 Setup....9
3.2 User Account and Camera Setup on Android™ Devices ...... 10
3.2.1 Powering ON and connecting the MBP85CONNECT Camera ..... 10
3.2.2 Download the Hubble for Motorola Monitors application 10
3.2.3 Run the Hubble for Motorola Monitors App on Android™ device ... 11
3.2.4 Add Camera to your account 12
3.3 User Account and Camera Setup: Working with iPhone ® /iPad ® .... 16
3.3.1 Powering ON and connecting the MBP85CONNECT Camera ..... 16
3.3.2 Download the Hubble for Motorola Monitors App 16
3.3.3 Run the Hubble for Motorola Monitors on your iPhone ® /iPad ® ..... 17
3.3.4 Add Camera to your account 18
- Camera....22
4.1 Connecting the Camera to Power 22
4.2 Camera Functions:
Working with Android TM devices.... 22
4.2.1 Add more Cameras 22
4.2.2 Remove a Camera 24
4.2.3 Change your Account Information 25
4.2.4 Camera Settings 26
4.2.5 General Settings 27
4.2.6 Features of the Hubble Application 28
4.3 Camera Functions: Working with iPhone ® /iPad ® 32
4.3.1 Add more Cameras 32
4.3.2 Remove a Camera 33
4.3.3 Change your Account Information 34
4.3.4 Camera Settings 35
4.3.5 General settings 36
4.3.6 Hubble App Settings 37
4.3.7 Features of the Hubble App 38
4.4 Camera Functions: Working with PC/Notebook...... 42
- Procedure for Resetting the Camera 43
- Help 44
- General Information....51
- Technical Specifications.... 56
1. Safety Instructions

WARNING:
Strangulation Hazard: Children have STRANGLED in cords. Keep this cord out of the reach of children (more than 3ft (1m) away). Never use extension cords with AC Adapters. Only use the AC Adapters provided.

Wi-Fi® CAMERA UNIT SET UP & USE:
- Choose a location for the Wi-Fi® Camera Unit that will provide the best view of your baby in the cot.
- Place the Wi-FF® Camera Unit on a flat surface, such as a chest of drawers, desk, shelf or wall-mount it using the keyhole slot in the Camera base.
- NEVER place the Wi-Fi® Camera Unit or cords within the cot.
WARNING
This Wi-Fi® Camera Unit is compliant with all relevant electromagnetic field standards and is, when handled as described in the User's Guide, safe to use. Therefore, always read the instructions in this User's Guide carefully before using the device.
- Adult assembly is required due to small parts. Keep all small parts away from children.
- This product is not a toy. Do not allow children to play with it.
- This Wi-Fi Camera Unit is not a substitute for responsible adult supervision.
- Keep this User's Guide for future reference.
- Do not cover the Wi-Fi Camera Unit with a towel or blanket.
- Test the Wi-Fi Camera Unit and its functions, so that you are familiar with it prior to use.
- Do not use the Wi-Fi Camera Unit near water.
- Do not place the Wi-Fi Camera Unit near a heat source.
- Do not touch the plug contacts with sharp or metal objects.
2. System Requirements
Web Portal
- Windows® 7
- Mac OS 10.7
- Chrome™ 24
- Internet Explore® 9
- Safari® 6
- Java™ 7
- Firefox®18.0
- Adobe®Flash® Player 15.0
Android TM System
- Version 4.2 or above
iPhone ® /iPad ® iOS
- Version 7.0 or above
High Speed (Wi-Fi®) Internet
- At least 0.6 Mbps upload bandwidth per Camera (you can test your internet speed on this site: http://www.speedtest.net)
3. Getting Started - Connecting Devices
How does it work?
![graph TD A["MBP85 CONNECT"] --> B["Wi-Fi Router"] B --> C["Hubble Service"] D["View your Camera from any compatible device remotely"] --> C](/content/2026/06/1274531/images/b26796873fc9b1c427c81a92e2ed80d63b07e4436195743f687e17af18ff1932.jpg)
When a user tries to access the Camera, our secure server authenticates the user's identity and permits access to the Camera.
3.1 Setup
Connect the Camera to the Power Adapter, then plug it into mains power socket and make sure the Switch is in the ON position. The Camera must be within range of the Wi-Fi ® router with which you want to connect. Make sure the password of the router is available for entering during the in-app setup process.
Status of LED Indication:
- Pair / Setup state: LED is red and blue and flashing slowly
- Unconnected state: LED is red and flashing slowly
- Connected state: LED is blue and always on
- Ready for connection state: LED is red and flashing slowly
Note: You can only setup via a compatible smartphone or tablet and not via a PC.
3.2 User Account and Camera Setup on Android™ Devices
What you need
• MBP85CONNECT Camera
• MBP85CONNECT Camera Power Adapter
• Device with Android™ system version 4.2 or above
3.2.1 Powering ON and connecting the MBP85CONNECT Camera
- Connect the power adapter to mains power socket and insert the plug into the micro USB socket on the back of the Camera.
- Make sure that the ON/OFF switch is in the ON position.
- The Camera’s Red LED flashes after the Camera has finished booting. When you hear two beeps, this means the Camera is ready for setup.
3.2.2 Download the Hubble for Motorola Monitors application
- Go to the Google Play™ Store to search for “Hubble for Motorola Monitors”.
- Download the Hubble for Motorola Monitors App from the Google Play™ Store and install it on to your Android™ device.
3.2.3 Run the Hubble for Motorola Monitors App on Android™ device
- Ensure your Android™ device is connected to your Wi-Fi® router.
- Run the Hubble for Motorola Monitors App and key in your account information, select “I agree to the Terms of Use” before you tap on Create. (Picture A1)
Note: If you already have a Hubble for Motorola Monitors account, please select Already have a Account? to go to the next step.

A1
3.2.4 Add Camera to your account
- Create a new account and Login.
- Tap on Add Camera. (Picture A2)
- Tap on Continue. (Picture A3)

A2 A3

- The setup instructions will appear on the following screen. (Picture A4)

A4
- Press and hold the PAIR button for 3 seconds at the side of the MBP85CONNECT Camera, you will hear a beep tone and a voice saying "Ready to Pairing" from Camera Unit. Tap on Search for Camera.
- The App will automatically search for and connect to your Camera as shown in the below pictures (Pictures A5, A6) and the LED on the Camera will flash green/red.

A5 A6

- Select your Wi-Fi Network and tap Continue, enter the password for the selected network then tap on OK. (Pictures A7, A8)

A7 A8

- It will take a few minutes for the Camera to connect to the Wi-Fi ® network before showing the connection status (Pictures A9, A10). If connection fails, please tap on the Retry button and repeat the steps starting from 3.2.4.

A9 A10

- Tap on Watch Live Camera to view the Camera video. The Camera's Blue LED will flash. (Picture A11)
- Tap on the Hubble logo to go back to the Camera tab for a list of available Cameras. (Picture A12)

A11 A12

3.3 User Account and Camera Setup: Working with iPhone®/iPad®
What you need
• MBP85CONNECT Camera
• MBP85CONNECT Camera Power Adapter
- iPhone®/iPad® with iOS version 7.0 and above
3.3.1 Powering ON and connecting the MBP85CONNECT Camera
- Connect the MBP85CONNECT adapter to mains power socket, insert the plug into the micro USB socket at back of the MBP85CONNECT Camera.
- Make sure that the ON/OFF switch is in the ON position.
- The Camera's red LED begins to flash after the Camera has completed the booting process. This means the Camera is ready for setup.
3.3.2 Download the Hubble for Motorola Monitors App
- Go to the App Store to search for “Hubble for Motorola Monitors”.
- Download the Hubble for Motorola Monitors App and install it on your iPhone® /iPad®.
3.3.3 Run the Hubble for Motorola Monitors on your iPhone ® /iPad ®
- Ensure your iPhone®/iPad® is connected to your Wi-Fi® Router.
- Run the Hubble for Motorola Monitors App and key in your account information, read through the Terms of Service then select “I agree to the Terms of Service” before you tap on Create. (Picture i1)
Note: If you already have a Hubble for Motorola Monitors account, please select Already have a Account? to go to the next step.

il
3.3.4 Add Camera to your account
- Create a new account and Login.
- Tap on Add Camera. (Picture i2)
- Tap on "MBP85CONNECT". (Picture i3)

i2 i3

- Follow on-screen instructions to turn on the Bluetooth™ function on your iPhone® /iPad®.

i4
- Tap on the Home button, then enter the "Settings" menu to turn on the Bluetooth™ function on your iPhone®/iPad®.

i5 i6

- Press the HOME button to exit the Settings menu and tap on the “Hubble for Motorola Monitors” App to enter the start-up screen.

i7
- Follow the steps above to locate the camera with identification number "CameraHD-xxxxxxxxxx", then tap on Continue once your iPhone® or iPad® has connected to the camera. (Picture i8)

i8
- Select your Wi-Fi Network and tap Continue, enter your password and then tap Next. (Pictures i9, i10)

i9 i10

- It will take a few minutes for the Camera to connect to the Wi-Fi network before showing the connection status (Pictures i11, i12). If connection fails, please tap on the Retry button and repeat Step 3.3.4 as instructed above.

i11 i12

- Tap on Watch Live Camera to view the Camera video. (Picture i13)
- Tap on the Hubble logo to go back to the Camera tab for a list of available Cameras. (Picture i14)

i13 i14

4. Camera
4.1 Connecting the Camera to Power
- Insert the small end of the Power Adapter into the Power Adapter Connector and plug the Power Adapter into a power socket.
- Slide the ON/OFF switch to ON, the blue Power LED will light up. (Note: To switch the device off, slide the ON/OFF switch to OFF.)
4.2 Camera Functions:
Working with Android™ devices
- Run the Hubble App on your Android™ device.
- The Camera view appears on the screen.
4.2.1 Add more Cameras
- On Camera view, tap on the Hubble logo to go to the Add Camera page. (Picture A13)
- Tap on Add Camera to add one more Camera by following steps for Android™ device setup in section 3.2.4. (Picture A14)
- Once the Camera has been added, the Camera view will automatically be displayed.

A13 A14


4.2.2 Remove a Camera
You can remove a Camera from your account by following these steps:
- Tap the Settings icon on the Camera list screen/page, then tap on Camera Details. (Picture A15)
- Select Remove Camera and tap on Yes to delete the unit from the Camera list. (Picture A16)

A15 A16


4.2.3 Change your Account Information
You can change the account information using your Android TM device.
- Tap Account on the General page, the Account Settings will appear on screen. (Picture A17)
- Tap on Change Password to change your password and follow the instructions.
- Tap on Log Out to leave the account.
- Tap on Freemium plan, and you will be brought to the Cloud Video Recording Service. To obtain more information, please visit our website http://www.hubbleconnected.com.
- Tap on Use to access Remote Connection Setting, use Remote Only by Selecting Yes.
- Enable Disconnect Alert provides a beep alert when there is a disconnection. Enable the disconnect Alert by selecting Yes.
- Tap on Send Log to send your Hubble App report to our server via e-mail; this should be sent if requested by a customer service agent.

A17
4.2.4 Camera Settings
You can change the Camera settings by tapping on the Settings icon on the Camera page. (Picture A18)
- Tap on Camera Details to review Camera Name, Change Image, Firmware version, Model ID and Remove Camera. (Picture A19)

A18 A19

- Tap on Notification Sensitivity to set the sensitivity of sound & motion detection, and to set an Alert for High/Low temperature. (Picture A20)

A20
4.2.5 General Settings
- Tap Settings on General page.
- Tap on General Settings to shift the format of Clock (12hr/24hr) & the Temperature (°C / °F) and activate Notification Sound or Vibration. (Picture A21)

A21 A22

- Tap on Do Not Disturb, set the timer to the desired time and select ON, the Camera will not send any sound or alert to your Android™ device for the duration of your setting. (Picture A22)
4.2.6 Features of the Hubble Application
Tap on the viewing area and the function icons will appear as shown below.
Two Way Communication – Tap on the Microphone icon to turn on the talk back function to the Camera, press the circle button once to speak. Toggle again to listen from the Camera. (Pictures A23, A24)

A23 A24

Pan and Tilt Function:
Tap the up and down buttons to tilt, the left and right buttons to pan. (Pictures A25, A26)

A25 A26


Photo/Video - Take a photo or record a video from your Camera.
Tap the on-screen Video icon to activate the photo/video function. Select the video record function by selecting the small video icon to the right of the large blue button, press the large blue button to start recording. The button will turn red, press again to stop recording. (Pictures A27, A28)
Tap on the small Camera icon to the right of the large blue button to switch to Camera mode, press the large blue button to capture photos from Camera view. (Picture A29)

A27 A28


A29
Note:
Photos and videos will be stored in the internal flash memory of your device for Android TM , they can be accessed via the Gallery or Media Player. To play videos, please use the Hubble App or a 3 rd party application, such as MX player (found in the Google Play TM Store), which is able to play MJPG (Motionjpeg) files.
Melody – To play one of the pre-set 5 melodies, tap on Melody to show the Melody menu and select one you prefer to play on your Camera. (Picture A30)
Temperature Measure – The temperature reading from the temperature sensor at the back of the Camera will display at your Android™ device CD screen (Picture A31). The reading will turn RED if the temperature exceeds the High/Low Temperature range as set in your Account. (see section 4.2.4)

A30 A31

21°C
4.3 Camera Functions:
Working with iPhone®/iPad®
- Run the Hubble App on your iPhone /iPad .
• The Camera view appears on the screen.
4.3.1 Add more Cameras
- Whilst in the Camera view, tap on the Motorola logo to go to the Add Camera page. (Picture i15)
- Tap on Add Camera to add another Camera (follow steps for iPhone® /iPad® setup 3.3.4.) (Picture i16)
- Once the Camera has been added, the Camera view will automatically be displayed.

Note:
You can only add up to 4 Cameras connected to one account.
4.3.2 Remove a Camera
You can remove a Camera from your Account by following these steps:
- Tap the Settings icon (Picture i17)

on General page, then tap on Camera Detail.
- Select Remove Camera and tap on Yes to delete the unit from Camera list. (Picture i18)

i17 i18


4.3.3 Change your Account Information
You can change your account information using iPhone ® /iPad ® .
- Tap Account on the General page, the Account settings will appear on screen. (Picture i19)
- Tap on Change Password to change your password by following the instructions.
- Tap on Log Out to leave account.
- Tap on Current Plan, and you will be brought to the Cloud Video Recording Service. To obtain more information, please visit our website www.hubbleconnected.com/motorola/plans.
- Tap on Send app log to send your Hubble App report to our server via e-mail; this should be sent if requested by a customer service agent.

i19
4.3.4 Camera Settings
You can change the Camera settings by tapping on the Settings icon on the General page (Picture i20). You can review the Camera Name and Firmware version (Picture i21) and are allowed to change the Camera name by tapping on the existing name and following the instructions.

i20 i21

- Tap on Notification Sensitivity to set the sensitivity of sound & motion detection, and set an Alert for High/Low temperature. (Picture i22)

i22
4.3.5 General settings
- Tap Settings on the General page. (Picture i23)
- Tap on General Settings to change the format for Clock (12hr/24hr) & Temperature (°C / °F) and activate Notification Sound or Vibration. (Picture i24)

i23 i24

- Tap on Do Not Disturb, set the timer to the desired time and select ON, the Camera will not send any sound or alert to your iPhone®/iPad® for the duration of your setting. (Picture i25)

i25
4.3.6 Hubble App Settings
- Tap on Settings on your iPhone®/iPad®, and a list of applications will appear, tap on and the settings will be shown on screen. (Picture i26)

i26
4.3.7 Features of the Hubble App
On Camera view, tap the viewing area and Function Icons will appear as follows.
Two Way Talk – Tap on the microphone icon to turn on the talkback function to the Camera, press the circle button once to speak. Toggle again to listen from the Camera. (Pictures i27, i28)

i27 i28

Pan and Tilt Function:
Tap the 4 Way Arrow icon to activate the pan/tilt function. Press the up/down arrows to tilt the Camera up and down, press the left/right arrows to pan the Camera left and right. (Pictures i29, i30)

i29 i30

Photo Function - Tap the on-screen Camera icon 📷 to activate the photo capture function. Press the large blue Camera button to take a photograph. (Picture i31)

i31
Note: Photos will be stored in the internal flash memory of your iPhone ® /iPad ® .
Melody – To play one of the pre-set melodies sound in system, tap on Melody to show the Melody menu and select the one you prefer to play on your Camera. (Picture i32)
Temperature Measure – The temperature reading from the temperature sensor at the back of the Camera will display on your iPhone ® /iPad ® LCD screen (Picture i33). The readings will turn RED if the temperature exceeds the High/Low Temperature range as set in your Account. (see section 4.3.5)

i32 i33

4.4 Camera Functions:
Working with PC/Notebook
- Go to: http://www.hubbleconnected.com/motorola/login/
- Enter your User Name and Password and then click Login if you have already created an account.
- Click on the Camera list paired in your account via Android™ device or iPhone®/iPad®, and the Camera view will appear on screen. You can easily stay connected with your favourite people, places and pets with live video streaming.
- You can change the settings by following the Menu instructions on the website.
5. Procedure for Resetting the Camera
Note: If your Camera is moved from one router (e.g. home) to another (e.g. office) or you have Camera setup issues, then this Camera must be reset. Please reset the Camera with the following procedure:
- Slide the ON/OFF switch to OFF.
- Press and hold the PAIR button then slide the ON/OFF switch to ON.
- Release the PAIR button when you hear a confirmation beep and wait for Camera to compete internal reset procedure, the LED indicator will turn red and flashes slowly when Camera is reset successfully.
- You can add your Camera again by following the steps in section 3.2.4 for Android devices or section 3.3.4 for iOS devices.
6. Help
Noise interference
To avoid background noise or echoes, ensure that there is enough distance between your device and the Wi-Fi® Camera Unit.
Use of other 2.4 GHz products, such as Bluetooth ® systems or microwave ovens, may cause interference with this product. Keep the Wi-Fi ® Camera Unit at least 1.5m away from these types of products, or turn them off if they appear to be causing interference.
Lost connection
Check your Wi-Fi® settings. If necessary, reconnect your Wi-Fi®. Ensure the Wi-Fi® Camera Unit is switched ON. Wait a few minutes to connect to the Wi-Fi® network.
If you forgot your password
If you do not remember your password, tap "Forgot Password" and submit your e-mail address. A new password will be sent to your e-mail address immediately.
Trouble Shooting
| Category Problem Description / Error | Solution |
| Account I am unable to login even after registration. | Please check your user name and password. |
| Account I receive an error message saying: "Email ID is not registered". | Please ensure that you have registered an account with us. Tap Create Account to create an account to be able to use the Wi-Fi® Video Baby Monitor. |
| Account What | do I do if I forget my password? | Click on the "Forgot Password" link on the website http://www.hubbleconnected.com/motorola/login/OR on your AndroidTM or iOS application. An email will be sent to your registered email address. |
| Account I am unable to receive a new password although I have used the "Forgot Password" option. | 1. The e-mail might have been sent to your Junk Mail Folder. Please check your Junk Mail Folder.2. There might be a delay in getting your e-mail. Please wait a few minutes and refresh your email account. | |
| Connectivity Issues | I get a message: We are having problems accessing your Camera. This could be due to the lack of an internet connection. Please wait and try again later. | 1. Please try again in a few minutes. This could be because of any issue with your internet connection.2. If the problem persists, please restart your Camera to check if this fixes the problem.3. Please restart your Wireless Router. |
| Viewing Camera | When I am in "Remote Mode", the video stops after 5 minutes. How do I view it for longer? | When you are accessing your Camera via a network different from your home network (over the internet) your video time-outs after 5 minutes.You can click on the Camera again from the AndroidTM/iOS application to start streaming again.If you are accessing from your web-browser, you can press the Reload button to start viewing your Camera video stream again. |
| Features The sound alert setting threshold is not right. | You can adjust Sound Sensitivity to trigger notifications under the Camera Settings menu. | |
| Connectivity Issues | My phone application displays the following message: "Unable to connect to BMS server". | 1. Check the Wi-Fi®network strength.2. Check if you are connected to the internet by starting the phone browser and going to a website like www.google.com.3. Try again if you successfully connect to the internet. |
| Setting Up While I am adding a new Camera to my account, I am not able to find any Cameras to add. | If you are trying to add a Camera which has previously been added into your account or another account, you will first have to reset the Camera. This can be done by pressing and holding the PAIR button at the bottom of the Camera for 5 seconds. | |
| General What are the supported browsers for access from my PC/Mac®? | On PC and Mac , we recommend using Google ChrometM. However the following browsers are also supported:PC : Internet Explorer 8®and above.Mac : Safari 6.0®. | |
| General What | is the significance of LED flashing? | A flashing LED indicates the following status:Slow flashing: 1. Your Camera is in setup mode. You can add the Camera to your account in this mode. Out of the box, the Camera is in Setup mode. To reset to Setup mode, press and hold the PAIR button on the bottom of the Camera until you hear a beep.Slow flashing: 2. The Camera is either connecting to the router or has lost the link to the router. Please ensure that the Camera is in the Wi-Fi®signal range.LED is stable: The Camera is connected to the Wi-Fi®network. |
| Connectivity Issues | I am not able to access my Camera. | Please check if the Camera is within Wi-Fi®range. If the LED on your Camera is flashing slowly, please try to move the Camera closer to the router for better Wi-Fi®connectivity and try again. |
| Setting Up During | ing setup on devices for AndroidTM and iOS, I am not able to find my Camera during the last step and the setup fails. | Please reset the Camera to Setup mode and try again. Press and hold the PAIR button on the bottom of the Camera until you hear a beep. Wait for a minute for the Camera to restart. The Camera LED, indicates that it is in setup mode. Now restart the Setup from your smartphone again. |
| Connectivity Issues | Even though I am accessing my Camera from the same Wi-Fi® network, I still find my Camera is shown as remote. I can only access it for 5 minutes at a time. | Please check your wireless router settings. For example, for Buffalo brand routers there is an option called Wireless Isolation. Please disable this option. |
| Camera When | I try to view the Camera, I get a prompt for Camera firmware upgrade. What should I do? | Please upgrade your firmware. This takes around 5 minutes. We push upgrades from time to time to improve Camera features. |
| General Which | platforms are supported for accessing my Camera? | Minimum requirement:Windows®7**Java browser plug-in neededMac OS®version 10.7ChromeTM version 24Internet Explorer®version 9Safari®version 6JavaTM version 7Firefox®version 18.0Adobe®Flash Player 15.0AndroidTM 4.2iPhone®iPad iOS®version 7.0 |
| General I do not hear sound when I am accessing a remote Camera. | You can tap on the Speaker icon in the video stream screen to hear audio. By default, the audio is not ON when you are accessing a remote Camera. | |
| General What is the meaning of "Local Camera" and "Remote Camera"? | When you are accessing your Camera from the same wireless network (Home) in which it is configured, it is a local Camera. When you are accessing your Camera away from your home, it is a Remote Camera. You may be using 3G, 4G or 4G LTE or a Wi-Fi® connection outside of your home. | |
| General How do I download the Application for AndroidTM and iOS devices? | AndroidTM:- Open the Google Play Store on your AndroidTM device- Select Search- Type in "Hubble for Motorola Monitors"- The results will show the Hubble App- Select to install itiOS Device:- Open the App Store SM- Select Search- Type in "Hubble for Motorola Monitors"- The results will show the Hubble App- Select to install it | |
| Setting up When the video is cut off, the application attempts to reconnect and this results in lost sound and choppy video. | You will need to turn off the auto lock function on your smart device to ensure continuous video/audio feeding. | |
| Features How | many users can access the Camera at one time? | If you are accessing in local more, two users are supported. For more than two users all streaming will go through remote server. This allows for unlimited user access to a single Camera at one time. |
| Connectivity issues | I found interference caused by my other webcam devices. | Video streaming performance is related to internet bandwidth, especially if you have 2 or more video streaming devices that are working through the same router. |
7. General Information
If your product is not working properly....
- Read this User's Guide.
- Contact Customer Service at:
+49 (0) 1805 938 802 in Europe
Email: motorola-mbp@tdm.de
Consumer Products and Accessories Limited Warranty ("Warranty")
Thank you for purchasing this Motorola branded product manufactured under license by Binatone Electronics International Ltd ("BINATONE").
What Does this Warranty Cover?
Subject to the exclusions contained below, BINATONE warrants that this Motorola branded product ("Product") or certified accessory ("Accessory") sold for use with this product is manufactured to be free from defects in materials and workmanship under normal consumer usage for the period outlined below. This Warranty is your exclusive warranty and is not transferable.
Who is covered?
This Warranty extends only to the first consumer purchaser, and is not transferable.
What will BINATONE do?
BINATONE or its authorized distributor at its option and within a commercially reasonable time, will at no charge repair or replace any Products or Accessories that does not conform to this Warranty. We may use functionally equivalent reconditioned/ refurbished/ pre-owned or new Products, Accessories or parts.
What Other Limitations Are There?
ANY IMPLIED WARRANTIES, INCLUDING WITHOUT LIMITATION THE IMPLIED WARRANTIES OF MERCHANTABILITY AND FITNESS FOR A PARTICULAR PURPOSE, SHALL BE LIMITED TO THE DURATION OF THIS LIMITED WARRANTY, OTHERWISE THE REPAIR OR REPLACEMENT PROVIDED UNDER THIS EXPRESS LIMITED WARRANTY IS THE EXCLUSIVE REMEDY OF THE CONSUMER, AND IS PROVIDED IN LIEU OF ALL OTHER WARRANTIES, EXPRESS OR IMPLIED. IN NO EVENT SHALL MOTOROLA OR BINATONE BE LIABLE, WHETHER IN CONTRACT OR TORT (INCLUDING NEGLIGENCE) FOR DAMAGES IN EXCESS OF THE PURCHASE PRICE OF THE PRODUCT OR ACCESSORY, OR FOR ANY INDIRECT, INCIDENTAL, SPECIAL OR CONSEQUENTIAL DAMAGES OF ANY KIND, OR LOSS OF REVENUE OR PROFITS, LOSS OF BUSINESS, LOSS OF INFORMATION OR OTHER FINANCIAL LOSS ARISING OUT OF OR IN CONNECTION WITH THE ABILITY OR INABILITY TO USE THE PRODUCTS OR ACCESSORIES TO THE FULL EXTENT THESE DAMAGES MAY BE DISCLAIMED BY LAW.
Some jurisdictions do not allow the limitation or exclusion of incidental or consequential damages, or limitation on the length of an implied warranty, so the above limitations or exclusions may not apply to you. This Warranty gives you specific legal rights, and you may also have other rights that vary from one jurisdiction to another.
| Products Covered Length of Coverage | |
| Consumer Products | Two (2) years from the date of the Products, original purchase by the first consumer purchaser of the product. |
| Consumer Accessories | Ninety (90) days from the date of the Accessories, original purchase by the first consumer purchaser of the product. |
| Consumer Products and Accessories that are Repaired or Replaced | The balance of the original warranty or for Ninety (90) days from the date returned to the consumer, whichever is longer. |
Exclusions
Normal Wear and Tear. Periodic maintenance, repair and replacement of parts due to normal wear and tear are excluded from coverage.
Batteries. Only batteries whose fully charged capacity falls below 80% of their rated capacity and batteries that leak are covered by this Warranty.
Abuse & Misuse. Defects or damage that result from: (a) improper operation, storage, misuse or abuse, accident or neglect, such as physical damage (cracks, scratches, etc.) to the surface of the product resulting from misuse; (b) contact with liquid, water, rain, extreme humidity or heavy perspiration, sand, dirt or the like, extreme heat, or food; (c) use of the Products or Accessories for commercial purposes or subjecting the Product or Accessory to abnormal usage or conditions; or (d) other acts which are not the fault of MOTOROLA or BINATONE, are excluded from coverage.
Use of Non-Motorola branded Products and Accessories. Defects or damage that result from the use of Non-Motorola branded or certified Products or Accessories or other peripheral equipment are excluded from coverage.
Unauthorized Service or Modification. Defects or damages resulting from service, testing, adjustment, installation, maintenance, alteration, or modification in any way by someone other than MOTOROLA, BINATONE or its authorized service centres, are excluded from coverage.
Altered Products. Products or Accessories with (a) serial numbers or date tags that have been removed, altered or obliterated; (b) broken seals or that show evidence of tampering; (c) mismatched board serial numbers; or (d) nonconforming or non-Motorola branded housings, or parts, are excluded from coverage.
Communication Services. Defects, damages, or the failure of Products or Accessories due to any communication service or signal you may subscribe to or use with the Products or Accessories is excluded from coverage.
How to Obtain Warranty Service or Other Information?
To obtain service or information, please call:
+49 (0) 1805 938 802 in Europe
Email: motorola-mbp@tdm.de
You will receive instructions on how to ship the Products or Accessories at your expense and risk, to a BINATONE Authorized Repair Centre.
To obtain service, you must include: (a) the Product or Accessory; (b) the original proof of purchase (receipt) which includes the date, place and seller of the Product; (c) if a warranty card was included in your box, a completed warranty card showing the serial number of the Product; (d) a written description of the problem; and, most importantly; (e) your address and telephone number.
These terms and conditions constitute the complete warranty agreement between you and BINATONE regarding the Products or Accessories purchased by you, and supersede any prior agreement or representations, including representations made in any literature publications or promotional materials issued by BINATONE or representations made by any agent employee or staff of BINATONE, that may have been made in connection with the said purchase.
BINATONE TELECOM PLC
1 Apsley Way London NW2 7HF, United Kingdom.
Tel: +44(0) 20 8955 2700 Fax: +44(0) 20 8344 8877
e-mail: binatoneuk@binatonetelecom.co.uk

EC Declaration of Conformity
We the manufacturer / Importer : Binatone Telecom Plc
1 Apsley Way London
NW2 7HF, United Kingdom.
Declare under our sole responsibility that the following products
Type of equipment: Model Name:
Wi-Fi Video Camera
FOCUS85, FOCUS85-B, FOCUS85-S, FOCUS85-W
SCOUT85, MBP85CONNECT
Country of Origin: Brand:
China
Motorola
complies with the essential protection requirements of R&TTE Directive 1999/5/EC on the approximation of the laws of the Member States relating to Radio Spectrum Matters, the Council Directive 2004/108/EC on the approximation of the laws of the Member States relating to electromagnetic compatibility (EMC) and the European Community Directive 2006/95/EC relating to Electrical Safety. Directive 2011/65/EC on the restriction of use of hazardous substances (RoHS) and 2009/125/EC relating to ecodesign requirement for Energy-Related Products (ErP).
Assessment of compliance of the product with the requirements relating to the essential requirements according to Article 3 R&TTE was based on Annex III of the Directive 1999/5/EC and the following standard:
Radio Spectrum: EN300328 V1.8.1:2012
EMC: EN301489-17 V2.2.1:2012
EN301489-1 V1.9.2:2011
Electrical Safety:
EN60950-1/A12:2011
RF Safety:
EN62311:2010
The product is labelled with the European Approval Marking CE as show. Any Unauthorised modification of the product voids this Declaration.

Manufacturer / Importer
(Signature of authorised person)

London, 30 May, 2014
Karl Heinz Mueller / Chief Technical Officer Place & Date
8. Technical Specifications
Camera Unit
Wi-Fi®02.11 b/g/n
Image sensor Color CMOS 1M Pixels
Lens f = 2.5 mm, F = 2.8
IR LED 8 pcs
Power Adapter Ten Pao International Ltd.
S009GV0500150
Input: 100-240V AC, 50/60Hz, 300mA
Output: 5V DC, 1500mA

motorola
Manufactured, distributed or sold by Binatone Electronics International LTD., official licensee for this product. MOTOROLA and the Stylized M logo are trademarks or registered trademarks of Motorola Trademark Holdings, LLC. and are used under license. Apple logo and Safari are trademarks of Apple Inc., registered in the U.S. and other countries. App Store is a service mark of Apple Inc. Google Play, Android, and Chrome are trademarks of Google Inc. Wi-Fi is a trademark of the Wi-Fi Alliance. Internet Explorer and Windows are trademarks of the Microsoft group of companies. Firefox is a registered trademark of the Mozilla Foundation. Adobe and Flash are either registered trademarks or trademarks of Adobe Systems Incorporated. Java is a registered trademark of Oracle and/or its affiliates. All other trademarks are the property of their respective owners. © 2015 Motorola Mobility LLC. All rights reserved.


EN_EU Version 4.0
Printed in China

motorola

BEDIENUNGSANLEITUNG
High-Speed (Wi-Fi®)-Internet
A1
A2 A3

A4
A5 A6

A7 A8

A9 A10

A11 A12

il
i2 i3

i4
i5 i6

i7
i8
i9 i10

i11 i12

i13 i14

4. Kamera


A13 A14
A15 A16


A17
4.2.4 Kameraeinstellungen
A18 A19

A20
A21 A22

A23 A24


A25 A26


A27 A28


A29
Hinweis:
21°C
i17 i18
i20 i21

i22

i23 i24
i25
i27 i28


i29 i30

i31
EC Declaration of Conformity
We the manufacturer / Importer : Binatone Telecom Plc
1 Apsley Way London
NW2 7HF, United Kingdom.
Declare under our sole responsibility that the following products
Type of equipment: Model Name:
Wi-Fi Video Camera
FOCUS85, FOCUS85-B, FOCUS85-S, FOCUS85-W
SCOUT85, MBP85CONNECT
Country of Origin: Brand:
China
Motorola
complies with the essential protection requirements of R&TTE Directive 1999/5/EC on the approximation of the laws of the Member States relating to Radio Spectrum Matters, the Council Directive 2004/108/EC on the approximation of the laws of the Member States relating to electromagnetic compatibility (EMC) and the European Community Directive 2006/95/EC relating to Electrical Safety. Directive 2011/65/EC on the restriction of use of hazardous substances (RoHS) and 2009/125/EC relating to ecodesign requirement for Energy-Related Products (ErP).
Assessment of compliance of the product with the requirements relating to the essential requirements according to Article 3 R&TTE was based on Annex III of the Directive 1999/5/EC and the following standard:
Radio Spectrum: EN300328 V1.8.1:2012
EMC: EN301489-17 V2.2.1:2012
EN301489-1 V1.9.2:2011
Electrical Safety:
EN60950-1/A12:2011
RF Safety:
EN62311:2010
The product is labelled with the European Approval Marking CE as show. Any Unauthorised modification of the product voids this Declaration.

Manufacturer / Importer
(Signature of authorised person)

London, 30 May, 2014
Karl Heinz Mueller / Chief Technical Officer Place & Date
8. Technische Daten
Kamera
Wi-Fi®02.11 b/g/n
motorola

GUIDE DE L'UTILISATEUR
INSTALLATION ET CONFIGURATION DE LA CAMÉRA Wi-Fi® :
A1
A2 A3

A4
A5 A6

A7 A8

A9 A10

A11 A12

il
i2 i3

i4
i5 i6

i7
i8
i9 i10

i11 i12

i13 i14

4. Caméra
A13 A14


A15 A16


A17
A18 A19

A20
A21 A22

A23 A24


A25 A26


A27 A28


A29
Remarque :
21°C
i15 i16
Remarque :
i20 i21

i22
i23 i24

i25
i27 i28


i29 i30

i31
Remarque :
EC Declaration of Conformity
We the manufacturer / Importer : Binatone Telecom Plc
1 Apsley Way London
NW2 7HF, United Kingdom.
Declare under our sole responsibility that the following products
Type of equipment: Model Name:
Wi-Fi Video Camera
FOCUS85, FOCUS85-B, FOCUS85-S, FOCUS85-W
SCOUT85, MBP85CONNECT
Country of Origin: Brand:
China
Motorola
complies with the essential protection requirements of R&TTE Directive 1999/5/EC on the approximation of the laws of the Member States relating to Radio Spectrum Matters, the Council Directive 2004/108/EC on the approximation of the laws of the Member States relating to electromagnetic compatibility (EMC) and the European Community Directive 2006/95/EC relating to Electrical Safety. Directive 2011/65/EC on the restriction of use of hazardous substances (RoHS) and 2009/125/EC relating to ecodesign requirement for Energy-Related Products (ErP).
Assessment of compliance of the product with the requirements relating to the essential requirements according to Article 3 R&TTE was based on Annex III of the Directive 1999/5/EC and the following standard:
Radio Spectrum: EN300328 V1.8.1:2012
EMC: EN301489-17 V2.2.1:2012
EN301489-1 V1.9.2:2011
Electrical Safety:
EN60950-1/A12:2011
RF Safety:
EN62311:2010
The product is labelled with the European Approval Marking CE as show. Any Unauthorised modification of the product voids this Declaration.

Manufacturer / Importer
(Signature of authorised person)

London, 30 May, 2014
Karl Heinz Mueller / Chief Technical Officer Place & Date
motorola

GEBRUIKERSHANDLEIDING
Wi-Fi ® Video Baby Monitor Camera
Model: MBP85CONNECT
De Wi-Fi® CAMERA OPSTELLEN EN GEBRUIKEN:
A1
A2 A3

A4
A5 A6

A7 A8

A9 A10

A11 A12

i1
i2 i3

i4
i5 i6

i7
i8
i9 i10

i11 i12

i13 i14

4. Camera
A13 A14


A15 A16


A17
4.2.4 Camera-instellingen
A18 A19

A21 A22

A23 A24


A25 A26


A27 A28


A29
Opmerking:
21°C
i20 i21

i22
4.3.5 Algemene instellingen

i23 i24
i25
4.3.6 Hubble App instellingen
i27 i28

i29 i30

i31
Opmerking:
EC Declaration of Conformity
We the manufacturer / Importer : Binatone Telecom Plc
1 Apsley Way London
NW2 7HF, United Kingdom.
Declare under our sole responsibility that the following products
Type of equipment: Model Name:
Wi-Fi Video Camera
FOCUS85, FOCUS85-B, FOCUS85-S, FOCUS85-W
SCOUT85, MBP85CONNECT
Country of Origin: Brand:
China
Motorola
complies with the essential protection requirements of R&TTE Directive 1999/5/EC on the approximation of the laws of the Member States relating to Radio Spectrum Matters, the Council Directive 2004/108/EC on the approximation of the laws of the Member States relating to electromagnetic compatibility (EMC) and the European Community Directive 2006/95/EC relating to Electrical Safety. Directive 2011/65/EC on the restriction of use of hazardous substances (RoHS) and 2009/125/EC relating to ecodesign requirement for Energy-Related Products (ErP).
Assessment of compliance of the product with the requirements relating to the essential requirements according to Article 3 R&TTE was based on Annex III of the Directive 1999/5/EC and the following standard:
Radio Spectrum: EN300328 V1.8.1:2012
EMC: EN301489-17 V2.2.1:2012
EN301489-1 V1.9.2:2011
Electrical Safety:
EN60950-1/A12:2011
RF Safety:
EN62311:2010
The product is labelled with the European Approval Marking CE as show. Any Unauthorised modification of the product voids this Declaration.

Manufacturer / Importer
(Signature of authorised person)

London, 30 May, 2014
Karl Heinz Mueller / Chief Technical Officer Place & Date
Lens f = 2.5 mm, F = 2.8
IR LED 8 stuks
Voedingsadapter Ten Pao International Ltd.
S009GV0500150
Input: 100-240V AC, 50/60Hz, 300mA
Output: 5V DC, 1500mA

motorola
motorola

MANUAL DE USUARIO
A1
A2 A3

A4
A5 A6

A7 A8

A9 A10

A11 A12

i1
i2 i3

i4
i5 i6

i7
i8
i9 i10

i11 i12

i13 i14

4. Cámara
A13 A14


A15 A16


A17
A18 A19

A20
A21 A22

A23 A24


A25 A26

A27 A28


A29
Nota:
i15 i16
Nota:
i20 i21

i22
4.3.5 Ajustes generales
i23 i24

i25
i27 i28


i29 i30

i31
EC Declaration of Conformity
We the manufacturer / Importer : Binatone Telecom Plc
1 Apsley Way London
NW2 7HF, United Kingdom.
Declare under our sole responsibility that the following products
Type of equipment: Model Name:
Wi-Fi Video Camera
FOCUS85, FOCUS85-B, FOCUS85-S, FOCUS85-W
SCOUT85, MBP85CONNECT
Country of Origin: Brand:
China
Motorola
complies with the essential protection requirements of R&TTE Directive 1999/5/EC on the approximation of the laws of the Member States relating to Radio Spectrum Matters, the Council Directive 2004/108/EC on the approximation of the laws of the Member States relating to electromagnetic compatibility (EMC) and the European Community Directive 2006/95/EC relating to Electrical Safety. Directive 2011/65/EC on the restriction of use of hazardous substances (RoHS) and 2009/125/EC relating to ecodesign requirement for Energy-Related Products (ErP).
Assessment of compliance of the product with the requirements relating to the essential requirements according to Article 3 R&TTE was based on Annex III of the Directive 1999/5/EC and the following standard:
Radio Spectrum: EN300328 V1.8.1:2012
EMC: EN301489-17 V2.2.1:2012
EN301489-1 V1.9.2:2011
Electrical Safety:
EN60950-1/A12:2011
RF Safety:
EN62311:2010
The product is labelled with the European Approval Marking CE as show. Any Unauthorised modification of the product voids this Declaration.

Manufacturer / Importer
(Signature of authorised person)

London, 30 May, 2014
Karl Heinz Mueller / Chief Technical Officer Place & Date

- USER'S GUIDE
- WELCOME
- TO YOUR NEW MOTOROLA WI-FI® VIDEO BABY MONITOR CAMERA
- INSIDE THE BOX
- OVERVIEW OF YOUR CAMERA
- IMPORTANT GUIDELINES FOR INSTALLING YOUR WI-FI® CAMERA UNIT
- TABLE OF CONTENTS
- SAFETY INSTRUCTIONS
- WARNING
- WI-FI® CAMERA UNIT SET UP & USE
- SYSTEM REQUIREMENTS
- WEB PORTAL
- ANDROID TM SYSTEM
- IPHONE ® /IPAD ® IOS
- HIGH SPEED (WI-FI®) INTERNET
- GETTING STARTED - CONNECTING DEVICES
- 3.1 SETUP
- STATUS OF LED INDICATION
- 3.2 USER ACCOUNT AND CAMERA SETUP ON ANDROID™ DEVICES
- WHAT YOU NEED
- 3.2.1 POWERING ON AND CONNECTING THE MBP85CONNECT CAMERA
- 3.2.2 DOWNLOAD THE HUBBLE FOR MOTOROLA MONITORS APPLICATION
- 3.2.3 RUN THE HUBBLE FOR MOTOROLA MONITORS APP ON ANDROID™ DEVICE
- 3.2.4 ADD CAMERA TO YOUR ACCOUNT
- 3.3 USER ACCOUNT AND CAMERA SETUP: WORKING WITH IPHONE®/IPAD®
- 3.3.1 POWERING ON AND CONNECTING THE MBP85CONNECT CAMERA
- 3.3.2 DOWNLOAD THE HUBBLE FOR MOTOROLA MONITORS APP
- 3.3.3 RUN THE HUBBLE FOR MOTOROLA MONITORS ON YOUR IPHONE ® /IPAD ®
- 3.3.4 ADD CAMERA TO YOUR ACCOUNT
- CAMERA
- 4.1 CONNECTING THE CAMERA TO POWER
- 4.2 CAMERA FUNCTIONS
- WORKING WITH ANDROID™ DEVICES
- 4.2.1 ADD MORE CAMERAS
- 4.2.2 REMOVE A CAMERA
- 4.2.3 CHANGE YOUR ACCOUNT INFORMATION
- 4.2.4 CAMERA SETTINGS
- 4.2.5 GENERAL SETTINGS
- 4.2.6 FEATURES OF THE HUBBLE APPLICATION
- PAN AND TILT FUNCTION
- PHOTO/VIDEO - TAKE A PHOTO OR RECORD A VIDEO FROM YOUR CAMERA
- NOTE
- 4.3 CAMERA FUNCTIONS
- WORKING WITH IPHONE®/IPAD®
- 4.3.1 ADD MORE CAMERAS
- 4.3.2 REMOVE A CAMERA
- 4.3.3 CHANGE YOUR ACCOUNT INFORMATION
- 4.3.4 CAMERA SETTINGS
- 4.3.5 GENERAL SETTINGS
- 4.3.6 HUBBLE APP SETTINGS
- 4.3.7 FEATURES OF THE HUBBLE APP
- 4.4 CAMERA FUNCTIONS
- WORKING WITH PC/NOTEBOOK
- PROCEDURE FOR RESETTING THE CAMERA
- HELP
- NOISE INTERFERENCE
- LOST CONNECTION
- IF YOU FORGOT YOUR PASSWORD
- GENERAL INFORMATION
- CONSUMER PRODUCTS AND ACCESSORIES LIMITED WARRANTY ("WARRANTY")
- WHAT DOES THIS WARRANTY COVER
- WHO IS COVERED
- WHAT WILL BINATONE DO
- WHAT OTHER LIMITATIONS ARE THERE
- EXCLUSIONS
- HOW TO OBTAIN WARRANTY SERVICE OR OTHER INFORMATION
- BINATONE TELECOM PLC
- EC DECLARATION OF CONFORMITY
- TECHNICAL SPECIFICATIONS
- CAMERA UNIT
- MOTOROLA
- BEDIENUNGSANLEITUNG
- HIGH-SPEED (WI-FI®)-INTERNET
- KAMERA
- 4.2.4 KAMERAEINSTELLUNGEN
- HINWEIS
- TECHNISCHE DATEN
- GUIDE DE L'UTILISATEUR
- INSTALLATION ET CONFIGURATION DE LA CAMÉRA WI-FI®
- CAMÉRA
- REMARQUE
- GEBRUIKERSHANDLEIDING
- DE WI-FI® CAMERA OPSTELLEN EN GEBRUIKEN
- 4.2.4 CAMERA-INSTELLINGEN
- OPMERKING
- 4.3.5 ALGEMENE INSTELLINGEN
- 4.3.6 HUBBLE APP INSTELLINGEN
- MANUAL DE USUARIO
- CÁMARA
- NOTA
- 4.3.5 AJUSTES GENERALES
Brand : MOTOROLA
Model : MBP85CONNECT
Category : Baby monitor