
PulseRelief PR3840 - Pain therapy device PHILIPS - Free user manual and instructions
Find the device manual for free PulseRelief PR3840 PHILIPS in PDF.


| Product Type | Electrical Stimulation Therapy Device (TENS/EMS) |
| Brand | Philips |
| Model | PulseRelief PR3840 |
| Dimensions (approx.) | 10 x 5 x 2 cm |
| Weight (approx.) | 120 g (with batteries) |
| Power Supply | 2 AAA batteries or built-in rechargeable battery |
| Battery Life | Approximately 40 hours of continuous use |
| Output Channels | 2 independent channels |
| Maximum Intensity | 60 mA (adjustable) |
| Frequencies | 1 – 150 Hz |
| Pulse Width | 60 – 300 µs |
| Preset Programs | 12 programs (including massage, acupuncture, etc.) |
| Operating Modes | Classic TENS, Pulsed TENS, EMS, Massage |
| Included Electrodes | 4 self-adhesive electrodes (repositionable) |
| Screen | Backlit LCD |
| Timer | 15, 30, 60 minutes or continuous |
| Lock Function | Yes (to prevent accidental adjustments) |
| Maintenance and Cleaning | Clean the electrodes with a damp cloth; do not immerse |
| Safety Features | Automatic shutdown after inactivity; child lock |
| Included Accessories | Electrodes, batteries, connection cables, carrying case |
| Repairability | Spare parts available (electrodes, cables) |
| Warranty | 2 years |
Frequently Asked Questions - PulseRelief PR3840 PHILIPS
User questions about PulseRelief PR3840 PHILIPS
0 question about this device. Answer the ones you know or ask your own.
Ask a new question about this device
Download the instructions for your Pain therapy device in PDF format for free! Find your manual PulseRelief PR3840 - PHILIPS and take your electronic device back in hand. On this page are published all the documents necessary for the use of your device. PulseRelief PR3840 by PHILIPS.
USER MANUAL PulseRelief PR3840 PHILIPS
Always here to help you
Register your product and get support at www.philips.com/welcome
PR3840


natural_image
Two Philips medical electrodes with purple and gray connectors, one with a green laser indicator (no text or symbols on device body)
ENGLISH 4
FRANÇAIS 45

126

161
Table of contents
Introduction 4
Contra-indications, reactions and side effects 6
Important safety information 8
Pre-set programs 12
Product overview 18
Preparing for use 18
Using the device 20
After use 28
Troubleshooting 30
Signals on the device 32
Replacement 33
Ordering accessories 33
Guarantee and support 34
Recycling 34
Specifications 34
Explanation of symbols 36
Electromagnetic emissions and immunity 42
Electrode placement guide 43
Introduction
Congratulations on your purchase and welcome to Philips! To benefit fully from the support that Philips offers, register your product at www.philips.com/pain-relief/register.
Read this user manual carefully before you use the PulseRelief device. The PulseRelief device is available without prescription. To achieve optimal treatment success with your PulseRelief device, we recommend that you use it according to the treatment instructions in this user manual. If you need further information or have questions, please visit www.philips.com/pain-relief or contact the Philips Consumer Care Centre in your country.
Intended use
The PulseRelief is intended to be used by adult consumers who experience mild to moderate chronic pain or acute post-surgical pain. The purpose of this device is to provide pain relief through transcutaneous electrical nerve stimulation (TENS). You can also use it for electrical muscle stimulation (EMS). The device is suitable for home use.
TENS and pain management
Transcutaneous electrical nerve stimulation (TENS) is a non-invasive pain relief method for which clinical proof exists that it can help relieve pain. Physiotherapists and other healthcare professionals use TENS daily as part of their treatment. TENS treatment passes electrical pulses across the intact surface of the skin to activate the underlying nerves. Clinical evidence suggests that TENS produces pain relief in a similar way to the nervous system's own pain-relief mechanisms, for instance similar to massaging a painful area. The device uses a rechargeable battery to generate pulses. These pulses are applied to the skin through self-adhesive hydrogel electrodes. You can choose one of the 15 pre-set TENS programs with different pulse settings and you can adjust the intensity of the pulse according to your own preference.
Electrical muscle stimulation
Electrical muscle stimulation (EMS), also known as neuromuscular electrical stimulation (NMES) or electromyostimulation, uses electric pulses to evoke muscle contraction. A stimulation device generates pulses and delivers them through electrodes on the skin close to the muscles you want to stimulate. The pulses mimic the way the central nervous system makes the muscles contract. You can choose one of the 5 pre-set EMS programs.
Pain management
We all want to enjoy doing our daily activities. When you experience pain, however, the instinctive reaction is to avoid pain by reducing your activity level. As a result, you become less fit and less able to enjoy doing the things you like. Staying active, without overdoing it, is important to avoid being trapped in a persistent pain cycle. The key to self-managing your pain is pacing: distributing periods of activity and periods of rest over the day in a way that feels most comfortable for you. The key to pacing is spreading out your activities and ‘taking a break before you need it’. To get more tips on pacing and how to self-manage your pain, tap the info icon in the Philips Treatment App and select ‘Pain Toolkit’.
Contra-indications, reactions and side effects
Contra-indications
Do not use the device if:
- you have a cardiac pacemaker, implanted defibrillator or other implanted metallic or electronic device (e.g. a drug delivery system), as use in these cases could cause electric shock, burns, electrical interference, or even death.
- you have a heart disease.
- you have epilepsy.
- you are in the first trimester of your pregnancy, as the effects of TENS on the development of the foetus are as yet unknown. Avoid use over the uterus during pregnancy to reduce the risk of inducing labour. If you are pregnant, always consult your doctor or midwife before use.
-
you have a cognitive impairment.
-
you have venous or arterial thrombosis or thrombophlebitis. If you use the device for EMS, there is a risk of mobilising the blood clot.
- you have undiagnosed pain, unless your doctor recommends use of this device.
Reactions
Stop using the device and consult your doctor if you experience adverse reactions from the device.
Possible adverse reactions may include the following:
- skin irritation beneath the electrodes, although the gel used on the electrodes is not known to cause allergic reactions
- burns beneath the electrodes
- headaches or other painful sensations
- nausea or feeling faint
Side effects
- After EMS, some muscle soreness may occur some time after the treatment.
- Some reddening of the skin under or around the electrodes may occur during and shortly after EMS treatment. Skin reddening usually disappears within two hours after treatment. If the skin continues to be red for more than a day, please consult your doctor.
Important safety information
Warnings

General warnings
- Read this user manual carefully and always adhere to the treatment instructions.
- This is a medical device. Keep the device out of the reach of children. Children may not be able to use it according to the instructions in this user manual.
- This appliance is not intended for use by adults with reduced sensory or mental capabilities.
They may not be able to use it according to the instructions in this user manual and they may become agitated by the treatment. - Do not use the device on children, as the device is not designed to use on children.
- Do not modify the device or the electrodes. This could cause improper functioning.
- Only use the adapter supplied to charge the device. Use of another adapter may cause a hazardous situation.
- This device is designed for use by and on a single adult person.
Do not apply to or treat the following parts or areas
- Stimulation on the sides of the neck over the carotid sinus may have severe adverse effects on your heart rhythm or blood pressure.
- Stimulation on the front of the neck may cause severe muscle spasms that could close your airway and result in breathing difficulties.
- Do not apply stimulation across your chest because the introduction of electrical current into the chest may cause rhythm disturbances to your heart, which could be lethal.
- Stimulation across the head or on opposite sides of the head must be avoided, as the effects on the brain are unknown.
- Do not place the electrodes on skin that is not intact, clean or healthy. Open, irritated or otherwise damaged skin may lead to the delivery of too much current to the area, which may potentially cause burns.
- Do not place the electrodes near cancerous lesions, as this may have a negative impact on the cancerous lesion.
- Do not place the electrodes on areas of skin that lack normal sensation. This may cause you to be unaware of the high intensity current administered, which may result in electrical skin burns.
- Do not place the electrodes over open wounds or rashes. Open wounds may lead to the delivery of too much current to the area, potentially leading to burns. It might also cause substances in the electrode to enter the skin.
- Do not place the electrodes over swollen, red, infected or inflamed areas or skin eruptions (e.g. phlebitis, thrombophlebitis and varicose veins). Stimulation must not be applied to areas with known thrombosis or thrombophlebitis, as stimulation may increase circulation, resulting in a greater risk of emboli.
- Do not place the electrodes inside body cavities, e.g. the mouth. This device is not designed for internal application.
Do not use the device in the following conditions
- Do not use the device if you are in the care of a doctor and have not consulted your doctor first.
- Do not use the device if you have a tendency to bleed internally due to any impact or injury.
- Do not use EMS stimulation to contract a muscle if contraction of the muscle may disrupt healing. For instance, if the muscle or tendon is torn, muscle contraction may exacerbate the tear, just like a voluntary contraction. This may also be the case after a recent surgical procedure or following acute trauma or fracture. Muscle contraction in case of tendinitis may also worsen symptoms.
- Do not use the device while driving, operating machines or performing any other activity in which electrical stimulation can put you at risk of injury.
- Do not use if you are likely to fall asleep during the treatment, as this may cause you to sense injuries too late. If you use the device at bedtime, set the timer to make it switch off automatically.
- Do not use while in the bath, shower or swimming pool. This increases the risk of electric shocks and burns to the skin.
- Do not apply stimulation in the presence of electronic monitoring equipment (e.g., cardiac monitors, ECG alarms), which may not operate properly when the electrical stimulation device is in use.
- Do not use the device when you are connected to high-frequency surgical equipment. This may result in burns on the skin under the electrodes and may damage the device.
- Do not use the device within less than 1 metre from shortwave or microwave medical equipment. Close proximity to this equipment may cause unstable device output.
- Portable RF communications equipment (including peripherals such as antenna cables and external antennas) should be used no closer than 30 cm (12 inches) to any part of the device including cables specified by the manufacturer. Otherwise, degradation of the performance of this equipment could result.
- Use of accessories, transducers and cables other than those specified or provided by the manufacturer of this equipment could result in increased electromagnetic emissions or decreased electromagnetic immunity of this equipment and result in improper operation.
Cautions
- If you had surgery recently, consult your doctor before you use the device. Using the device may disrupt the healing process.
- Use Burst TENS programs while resting, as these programs can result in muscle contraction in the treatment area.
- Make sure that you end the treatment in the Philips Treatment App or press the on/off button on the device before you remove the device or the electrodes. If you do not end the treatment, you may experience an unpleasant sensation in your fingers when you touch the magnets. This sensation is not harmful, but can be unpleasant.
- Only use this device with the adapter, cord and accessories recommended by the manufacturer.
- Always check the device and the electrodes for damage before use. Do not use the device or an electrode if it is damaged.
- The device is not waterproof. Do not use the device in wet surroundings and prevent it from getting wet.
- Although you can use the device indoors and outdoors, it does not withstand all weather conditions.
-
The device does not withstand high and low temperatures. Please check the operating conditions in chapter ‘Specifications’.
-
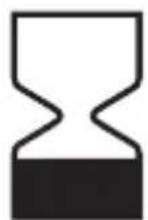
The electrodes have a limited shelf life. Please check the packaging for the use-by date prior to use. Do not use electrodes whose use-by date has expired. For ordering replacement electrodes, see chapter ‘Ordering accessories’.
- Do not use plaster or tape to attach the electrodes to the skin.
- Always use and store the electrodes according to the instructions in chapters ‘Using the device’ and ‘After use’.
- If the device does not function as described here, stop using it and contact the Consumer Care Centre. For contact details, see chapter ‘Guarantee and support’.
Compliance with standards
- The device meets the relevant standards for this type of Class IIa electrical medical appliance and appliances using electrical stimulation for home use.
- This Philips appliance complies with all applicable standards and regulations regarding exposure to electromagnetic fields.
Pre-set programs
The device comes standard with 15 pre-set programs for TENS and 5 pre-set programs for EMS. Please note that the order of the programs in the list does not signify a recommendation of specific programs for specific conditions. As the effect of a treatment program may strongly differ from person to person, we advise you to try out different treatment programs to find out which one works best for you.
Program overview
Conventional TENS programs
Conventional TENS is a common TENS program with high-frequency stimulation. It is based on the Gate Control Theory that states that this type of stimulation will block transmission of pain signals in the nervous system. It is comparable to ‘rubbing the pain away’. Most people use Conventional TENS for 30 minutes per session, but you can use it as often and as long as it feels comfortable. The effect is usually most perceptible during stimulation and generally wears off rather quickly after stimulation. You have to adjust the intensity of the program so that you clearly feel the stimulation. Stimulations must not feel unpleasant or painful.
| Name of Conventional TENS program | Program description Suggested | treatment time |
| Conventional May give you a continuous tingling stimulation | No limit | |
| Thorough stimulus | May give you a more thorough stimulating sensation | No limit |
| Pre-activity May give you a more local and soft stimulating sensation | No limit | |
| Soft stimulus May give you a softer stimulating sensation, e.g. for sensitive body parts | No limit | |
| Deep stimulus May give you a deeper stimulating sensation | No limit | |
| Radiating pulse May give you a more radiating stimulation sensation | No limit | |
Burst TENS programs
Burst TENS offers a high-frequency stimulation that comes in trains of pulses. This type of stimulation is known to trigger endorphin release. Endorphins are painkillers produced by the body. You can use Burst TENS around 30 minutes multiple times a day, for example 3 times. We advise you to adjust the intensity of the Burst program so that you feel the stimulation strongly. Burst programs generally give a sharper sensation, which can feel somewhat unpleasant. It is also advised to adjust the intensity up to a level that produces visible muscle contractions in the treatment area. These contractions are not harmful. If you find these contractions too uncomfortable, you can decrease the intensity, choose a different program or move the electrodes to a different place. Apply Burst TENS programs while resting, as they can result in muscle contraction in the treatment area.
| Name of Burst TENS program | Program description Suggested | treatment time |
| Continuous burst | May give you a pulsing burst stimulation to release endorphins in your body | 30 min.* |
| Slow kneading | May give you a slower and massaging burst stimulation to release endorphins | 30 min.* |
| Mild kneading | May give you a milder burst stimulation to release endorphins in your body | 30 min.* |
| Deep kneading | May give you a more local and deeper burst stimulation to release endorphins in your body | 30 min.* |
| Diffuse burst | May give you a more diffuse burst stimulation to release endorphins in your body | 30 min.* |
* optionally multiple times a day, can be changed in the app
Frequency-modulated TENS programs
Frequency-modulated TENS is a program in which the frequency of the pulse varies from high to low. This can be more comfortable or effective than the other programs in some cases. You can use frequency-modulated TENS for around 30 minutes multiple times a day, for example 3 times.
| Name of Freq. Mod. TENS program | Program description Suggested | treatment time |
| Mixed frequency | May give you a flowing stimulation sensation | 30 min.* |
| Pulsing massage | May give you a more pulsing stimulation sensation | 30 min.* |
| Deep massage | May give you a slower and deeper flowing sensation | 30 min.* |
| Gentle massage | May give you a mild flowing stimulation sensation | 30 min.* |
* optionally multiple times a day, can be changed in the app
Electrical muscle stimulation (EMS) programs
Electrical muscle stimulation (EMS), also known as neuromuscular electrical stimulation (NMES) or electromyostimulation, uses pulses to evoke muscle contraction. This can for example help to strengthen muscles. Use EMS only on healthy, uninjured muscles. Apply EMS programs while resting (sitting, lying), as they result in muscle contraction. First-time users can experience electrical muscle stimulation as an unfamiliar and unusual sensation. We therefore advise you to start at a low intensity setting to get
used to the sensation before you choose a higher intensity setting. In general, stimulation must always feel comfortable. The muscle contractions must not feel exhausting, strenuous or tiring. After strenuous exercise or exertion, we advise you to use a lower setting to avoid muscle fatigue.
| Name of EMS program Program description Suggested | treatment time | |
| Muscle stimulation pulse | May give you a nice soothing sensation | 30 min.* |
| Muscle stimulation flow | May give you a comfortable tingling sensation | 20 min.* |
| Muscle stimulation wave | May give you a mild contracting and relaxing sensation | 30 min.* |
| Muscle stimulation flux | May give you an energising muscle sensation | 25 min.* |
| Muscle stimulation bounce | May give you a rhythmically relaxing sensation | 20 min.* |
* optionally multiple times a day, can be changed in the app
Program specifications
The table below gives information on the frequency, pulse width and pre-set time of each program. The current pulse in all programs has a symmetrical bi-phase waveform.
| Program name | Program type | Frequency Pulse | width | Pre-set time |
| Conventional Conventional 100 Hz 200μs continuous | ||||
| Thorough stimulus | Conventional 40 Hz 200μs continuous | |||
| Pre-activity Conventional 100 Hz 150μs continuous | ||||
| Soft stimulus Conventional 80 Hz 60μs continuous | ||||
| Deep stimulus Conventional 80 Hz 150μs continuous | ||||
| Radiating Pulse Conventional 60 Hz 150μs continuous | ||||
| Continuous burst Burst 100 Hz, 2 | Hz | 250μs 30 min. | ||
| Slow kneading Burst 80 Hz, 1 | Hz | 200μs 30 min. | ||
| Mild kneading | Burst 80 Hz, 3 | Hz | 200μs 30 min. | |
| Deep kneading Burst 80 Hz, 2 | Hz | 150μs 30 min. | ||
| Diffuse burst | Burst 80 Hz, 2 | Hz | 180μs 30 min. | |
| Mixed frequency | Freq. Mod. | 8-100 Hz | 250μs | 30 min. |
| Pulsing massage | Freq. Mod. | 2-8 Hz | 250μs | 30 min. |
| Deep massage Freq. Mod. 2-80 Hz | 180μs 30 min. | |||
| Gentle massage | Freq. Mod. | 8-80 Hz | 150μs | 30 min. |
| Muscle stimulation pulse | Ampl. Mod. | 40 Hz 200μs | 30 min. | |
| Muscle stimulation flow | Ampl. Mod. | 50 HZ | 150μs 20 min. | |
| Muscle stimulation wave | Ampl. Mod. 65 Hz | 200μs 30 min. | ||
| Muscle stimulation flux | Ampl. Mod. 40 Hz | 350μs 25 min. | ||
| Muscle stimulation bounce | Ampl. Mod. 50 Hz | 300μs 20 min. | ||
Product overview (Fig. 1)
| 1 | On/off button |
| 2 | Status indicator |
| 3 | Detachable connector |
| 4 | Micro-USB socket of device |
| 5 | Battery indicator |
| 6 | Adapter |
| 7 | Socket for standard USB plug |
| 8 | Standard USB plug |
| 9 | Micro-USB plug |
| 10 | Self-adhesive hydrogel electrodes |
Preparing for use
Charging the device
To be able to use the device, you first have to charge it. Charging the device takes approx. 5 hours at room temperature. When the rechargeable battery is fully charged, it contains sufficient energy for approx. 8 hours of continuous use under normal operating conditions.

natural_image
Diagram showing a device with a blue connector and an open socket, with a blue arrow indicating direction (no text or symbols present)Note: If the device is not fully charged when you start a treatment, the battery may run out during the treatment. We advise you to always fully charge the device before you start a treatment.
Note: Treatment is not possible when the device is charging.
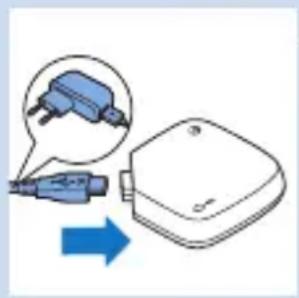
1 Unplug the cable that connects the two units from the micro-USB socket of the device unit with the battery indicator.
2 Insert the micro-USB plug of the adapter cable into the micro-USB socket of the device.
natural_image
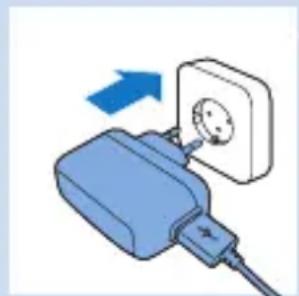
Diagram showing a blue connector inserted into a white device with an arrow indicating direction (no text or symbols present)3 Insert the USB plug into the socket of the adapter and insert the adapter into a wall socket.
natural_image
Illustration of a blue electrical plug with an open socket connected to a wall, showing a blue arrow indicating direction (no text or symbols present)Note: Insert the USB plug into a wall socket that is properly accessible so that the USB plug can be removed easily. The device is only connected to the mains during charging.
The battery indicator is solid orange during charging. When the battery is fully charged, the battery indicator turns solid green.
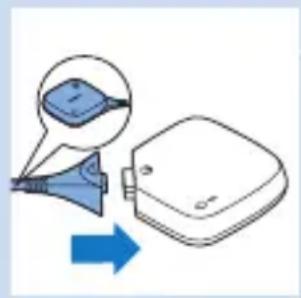
4 Remove the micro-USB plug from the micro-USB socket of the device.

natural_image
Diagram showing a blue connector inserted into a white device with an arrow indicating direction (no text or symbols present)Note: The USB socket may only be used for charging with the adapter supplied or for connecting the cable that connects the two units. Do not use this socket for any other purpose.
natural_image
Diagram showing a device with a blue connector and a white housing, with an arrow indicating direction (no text or symbols present)5 Reconnect the cable that connects the two units by inserting the device connector into the micro-USB socket of the device.
Installing and setting up the Treatment App
You need the Philips Treatment app to operate the device. Please go to the Apple App Store or GooglePlay, search for the 'Philips Treatment' app and press install. Refer to the quick start guide for more details.
Note: The Treatment App is an app that can be used for PulseRelief (PR3840) and BlueTouch (PR3733). The installation procedure is the same for both devices.
Using the device
Attaching the electrodes and the device
1 Make sure that the skin you want to place the electrodes on looks healthy and is free from wounds or rashes.
For TENS: Do not place the electrodes on red or inflamed skin and skin with open wounds, cancerous lesions or rashes.
For EMS: Only place the electrodes on healthy, uninjured muscles.
2 Clean the skin with a moist cloth and dry it. The skin you want to place the electrodes on must be dry, clean and free from cream or lotion.
Note: Dirt, grease or particles left on the skin may lodge themselves in the hydrogel of the electrodes. This has an adverse effect on the adhesive power of the electrodes.

natural_image
Illustration of a hand holding a blue object, possibly a medical or cosmetic item (no text or symbols visible)
3 Take the electrodes from the plastic bag and check them for damage and signs of wear.
Caution: Do not use electrodes whose use-by date has expired. The use-by date is shown on the resealable plastic bag.
Note: Replace the electrodes when they are damaged or dirty, when they have lost their adhesive power or when stimulation becomes uncomfortable, i.e. when you experience an unpleasant stinging or biting sensation.
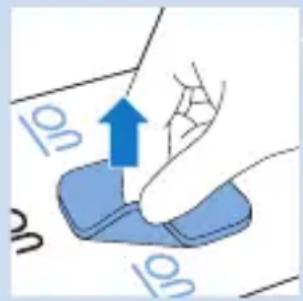
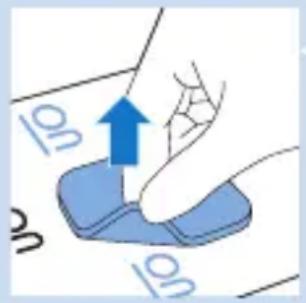
4 Pull the electrode off the liner and place it on the skin at the place you want to treat. See section ‘Electrode placement’ below and the placement guide.

natural_image
Illustration of a hand holding a small object with a blue arrow pointing to it, next to a blue square (no text or symbols)5 Place the second electrode on the body part you want to treat.
Note: Always place the electrodes on the skin before you connect the device.
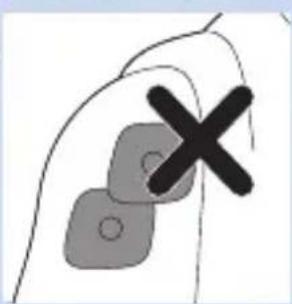
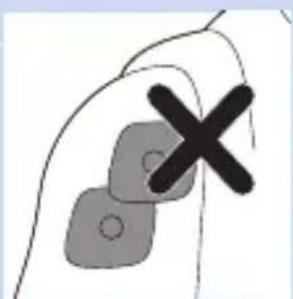
Note: Do not place the electrodes on top of each other or so close to each other that they touch each other.

natural_image
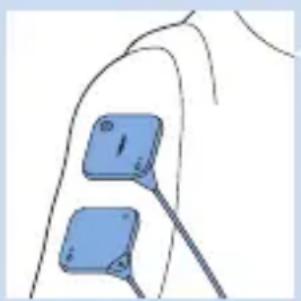
Illustration of a hand holding a medical or electronic device with blue arrows indicating motion (no text or symbols)6 Attach the device to the electrodes. The device units have magnets in the centre to ensure easy connection to the metal connectors of the electrodes. When the device units lock onto the electrodes properly, you hear a click.
Note: You can wear the electrodes with the device units attached to them under your clothes, also during treatment.
natural_image
Close-up of a finger with two blue square electronic components attached to a wire (no text or symbols visible)Note: Consult the electrode placement guide for the recommended position for the electrodes during treatment. This is only a recommendation. You can perform all activities allowed as intended use and not warned against in chapter ‘Important’ when you wear the device on your body. You can also continue to wear the device on your body in between treatments.
Electrode placement
To get maximum results from stimulation, it is important to place the electrodes correctly. Always make sure that you have normal skin sensation in the treatment area before you attach the electrodes. The optimal place may vary slightly from person to person, so try moving the electrodes around until you get the most effective results. In some cases, it can be helpful to mark the spot for future use. For suggestions regarding placement of the electrodes, see the ‘Electrode Placement Guide’. Please note that you may need assistance to place the electrodes on certain spots on your body.
As a rule, place the electrodes on or near the treatment area. Stimulation may result in visible muscle contraction, especially in burst TENS programs (programs 7 to 11). This is not harmful, but if you find these contractions uncomfortable, try moving the electrodes to a different place. Please note that when you use EMS programs (programs 16 to 20), muscle contraction is a desired effect. If no muscle contraction occurs in an EMS program, you have not placed the electrodes correctly or you have chosen a too low intensity.
Do not place electrodes over the carotid sinus on the sides of your neck or on the front of your neck, across your chest or on your head. Do not place electrodes on red or inflamed skin and skin with open wounds, on cancerous lesions or rashes (see chapter 'Contra-indications, reactions and side effects').
Using the app to start and stop a treatment



1 Switch on Bluetooth on your mobile device.
2 Use the on/off button to switch the device to standby.
The status indicator on the device lights up solid green to indicate that the device is in standby mode and ready for treatment.
If you do not start the treatment within 5 minutes, the device switches off automatically. If this happens, you first have to press the on/off button again to start a treatment.
3 Open the Philips Treatment App.
4 The app automatically selects PulseRelief if only a PulseRelief device is paired to the app. If both a PulseRelief and a BlueTouch device are paired to the app, tap 'PulseRelief' to select the device.
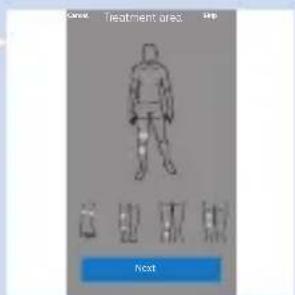
Selecting a treatment area
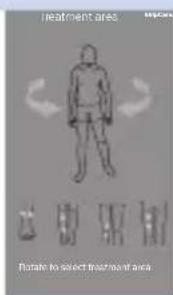
At first-time use, you always have to select a treatment area. If you have used the device before, you can choose between ‘My previous treatment’ to repeat the previous treatment, or ‘Select new treatment’ to start a different treatment.
1 Rotate the body animation on the screen.
2 Tap on one of the suggested locations for the electrodes to select the area you want to treat.
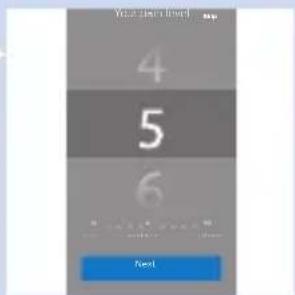
Rating your pain intensity
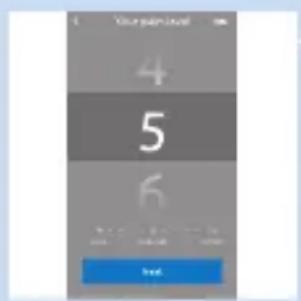
1 Swipe vertically to rate the intensity of your pain on a scale from 0 to 10. If you experience no pain tap 0 and if you experience the worst pain ever tap 10. If your pain is somewhere in between, rate it by tapping the appropriate number.


Note: The pain intensity you indicate is not used by the app to determine the intensity of the treatment. The rating is only stored in your treatment diary. You can switch off this feature in the settings tab of the app.
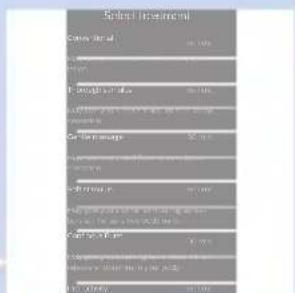
Selecting your treatment
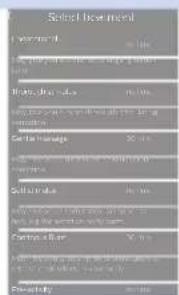
1 Scroll through the list of programs and tap a program to select it.
2 The start screen of the treatment appears.
Starting and stopping a treatment
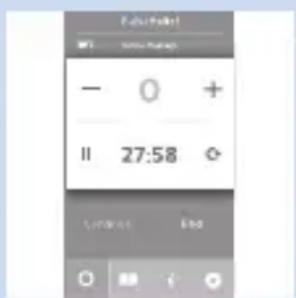
1 Tap the play button on the screen.
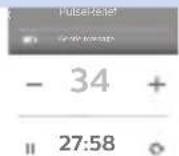
The treatment screen opens and the time starts to count down.
The status indicator on the device starts to flash orange.
2 On the treatment screen, you can tap the + or the - to increase or decrease the intensity to a comfortable level.
3 In programs with a specified maximum treatment time, treatment continues until the timer has counted down to 0. In programs that have no specified maximum treatment time, the timer counts up from 0. It continues to count up until you stop the treatment. If you want to stop or interrupt the treatment, tap the square in the centre of the pulsing treatment indicator to stop the program.
- To resume the program, tap 'Continue' or the arrow next to the time.
- To end the program, tap 'End treatment'.
Switching to another program
1 If you want to switch to another treatment program while a program is running:
- on a smartphone or iPod, tap the name of the program in the treatment screen.
- on a tablet, tap 'Treatment list'
2 The list of programs opens. Tap the treatment program you want to use.
3 The start screen of the treatment appears. Tap the play button to start the treatment.
4 Tap the + to increase the intensity to a comfortable level.
Note: When you switch to another program during treatment, the intensity is automatically reset to 0. This is a safety measure. The intensity level of the previous program may be too high for the new program.
Adapting the treatment time
1 Tap the time displayed in the treatment screen.
2 Change the remaining treatment time.
Quick start
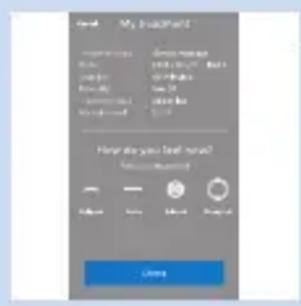
From the start screen, you can immediately start the program you used during your previous treatment.
1 From the start screen, tap the name of the treatment under ‘My previous treatment’.
2 Swipe vertically to rate the intensity of your pain on a scale from 0 to 10.
3 Start the treatment.


Other app features
1 After the program finishes, you get to a screen that asks you to describe how you feel. You can indicate this by tapping one of the icons.
2 Tap the book symbol to open your diary. The diary shows when treatments took place, which program you used and how long the treatment lasted.
- Tap the arrow to see more details.
3 Tap the ‘i’ to open the information screen. This screen contains the following items:
- Using your PulseRelief
- Using your BlueTouch device
- Contact us
- Pain toolkit
- Terms and conditions
- Privacy policy
4 Tap the settings symbol to open the settings screen. This screen contains the following items:
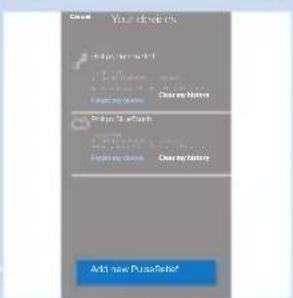
- Your devices
- Pain level tracking
- Sensation tracking
- Treatment area tracking
- Run treatment in background
- About
Using a second device
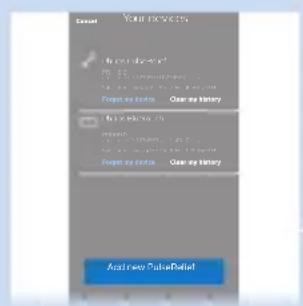
To treat a larger area of the body or to treat different body areas at the same time, you can pair a second PulseRelief device to the app.
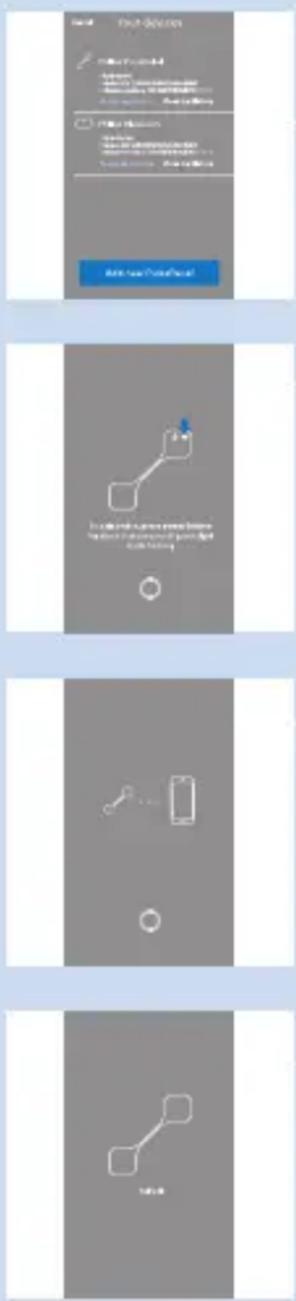
1 Tap the settings symbol and then tap 'Your Devices'.
2 At the bottom of the screen, tap the device you want to pair: PulseRelief.
3 Switch on the device when the app tells you to.
4 The app enters pairing mode.
5 When the device is paired to the app, the smart phone icon disappears and only the device is shown.
6 Tap 'Back' to go back to the treatment screen.
After use
Caution: Make sure that you end the treatment in the app or press the on/off button to switch off the device before you remove the device or the electrodes. If the treatment has not ended when you remove the device or the electrodes, you may experience an unpleasant sensation in your fingers when you touch the connectors. This sensation is not harmful, but can be unpleasant.

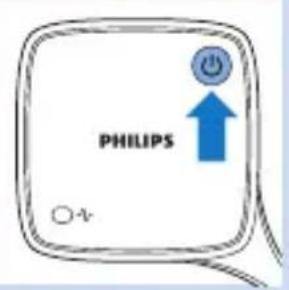
1 Press the on/off button to switch off the device.

natural_image
Illustration of a hand holding a blue object with an arrow indicating direction (no text or symbols)2 Detach the device from the electrodes by pulling it off.
Note: If you forget to switch off the device, it will switch off automatically 5 minutes after you detach it.
3 If you have used the device quite frequently during the day, it is advisable to recharge it before your next treatment.
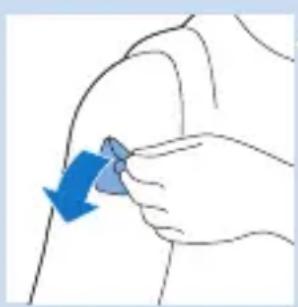
4 Peel the electrodes off the skin by pulling at the edge.
Note: You can leave the electrodes at the same spot as long as the treatment is effective and no skin irritation occurs underneath the electrodes. If treatment at a spot is no longer effective or skin irritation occurs, move the electrodes to a different spot.
natural_image
Illustration of a hand holding a small object with a blue arrow pointing downward (no text or symbols)Storage of the electrodes

1 Place the electrodes back on the liner.

2 Slide the liner with the electrodes back into the bag.

natural_image
Hand holding a small object with a blue arrow pointing to it, no text or symbols present3 Reseal the bag for dust-free storage.
Note: To keep the electrodes in good condition and to prevent the hydrogel layer from drying out, always store them in the resealable bag when they are not attached to your body for treatment. Seal the resealable bag to guarantee dust-free storage.
Note: If you want to store electrodes for more than a month, keep them at temperatures between +5^ and 27^ . Do not store the electrodes in the freezer or the refrigerator. Avoid high temperatures and exposure to direct sunlight.
Cleaning
Do not immerse the device in water or rinse it under the tap.
Do not immerse the electrodes in water.
1 Clean the device with a damp cloth and a mild cleaning agent, e.g. dishwashing liquid.
Note: You can also clean the device with 70% isopropyl alcohol (IPA).
Caution: Do not use any other cleaning agents than the ones mentioned above, as other cleaning agents could damage the material, e.g. cause loss of gloss.
2 If the electrodes are dirty, put a drop of water on your finger and gently rub the dirt off the surface.
Note: Do not use soap or alcohol to clean the electrodes.
Troubleshooting
This chapter summarises the most common problems you could encounter with the PulseRelief. If you are unable to solve the problem with the information below, visit www.philips.com/support for a list of frequently asked questions or contact the Philips Consumer Care Centre in your country.
| Problem Possible cause | Solution | |
| The battery indicator on the device was orange and then the device switched off. | The battery is empty. | Charge the device (see chapter ‘Preparing for use’). |
| The battery indicator on the device is solid orange. | The battery is low. | This means that the battery has 30% of its capacity left. Recharge the device as soon as possible (see chapter ‘Preparing for use’). |
| I experienced an unpleasant sensation when I touched the connectors of the device or the electrodes. | You did not end the treatment in the app or did not press the on/off button on the device before you removed the device. | Always end the treatment in the app or press the on/off button on the device before you remove the device from your skin. In this way, you avoid the unpleasant sensation when you touch the connectors of the device or touch the electrodes. This sensation is unpleasant but not harmful. |
| The treatment feels different or less pleasant than usual. | The intensity is too high or too low. | On the program settings screen in the app, tap + or - to increase or decrease the intensity. You can also choose a different treatment program. |
| The electrodes are not in the right place. | Switch off the device and detach it from the electrodes. Remove the electrodes from the skin and move them to a slightly different place. | |
| The electrodes are not properly attached. | Switch off the device and detach it from the electrodes. Check if the electrodes are attached to the skin properly. | |
| The electrodes are too dirty. | You can try to clean the electrodes (see chapter ‘Cleaning’). If this does not help, replace the electrodes. | |
| Problem Possible cause | Solution |
| The electrodes are worn. | Replace the electrodes. |
| You are using electrodes that are past their use-by date. | Remove the electrodes and use new ones that are not past their use-by date. |
Signals on the device
Indicator signals on the device

natural_image
Simple line drawing of a square object with a triangular base and circular element, no text or symbols present.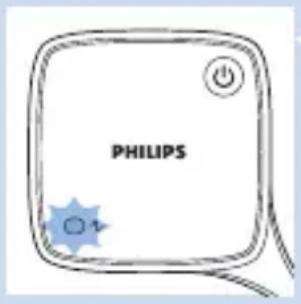
Battery indicator
- The battery indicator shows the following signals:
1 The battery indicator is solid orange when the rechargeable battery of the device is low and during charging.
2 The battery indicator is solid green when the device is connected to the mains and when the rechargeable battery is fully charged.
Status indicator
- The status indicator on the device shows the following signals:
1 The status indicator is solid green when the device is switched on and in standby mode.
2 The status indicator flashes orange during treatment to indicate that the treatment is in progress.
3 The status indicator flashes green when the device is pairing.
Replacement
Electrodes
Replace the electrodes if:
- they are damaged or torn.
- they are past the use-by date indicated on the resealable bag.
- they have lost their adhesive power. Never use plaster or tape to attach them to your skin.
- stimulation feels less strong.
- when stimulation is uncomfortable, i.e. when you experience an unpleasant stinging or biting sensation.
Note: Always replace the electrodes with electrodes recommended for this device by the manufacturer. You can order new electrodes at www.philips.com.
Ordering accessories
To buy accessories or spare parts, visit www.shop.philips.com/service or go to your Philips dealer. You can also contact the Philips Consumer Care Centre in your country.
Electrodes
You can order new electrodes on www.philips.com.
Caution: Only use this device with the adapter, cord and electrodes recommended by the manufacturer.
Guarantee and support
Your device has been designed and developed with the greatest possible care to guarantee an expected service life of 5 years.
If you need service or information or if you have a problem, please visit our website at
www.philips.com/support. You can reach this centre at telephone number +971 6 5178727.
Guarantee restrictions
The terms of the guarantee do not cover the electrodes, as the electrodes are subject to wear and have to be replaced regularly.
Manufacturer's legal address
Philips Consumer Lifestyle B.V. Tussendiepen 4, 9206 AD Drachten, Netherlands
Recycling
Do not throw away the product with the normal household waste at the end of its life, but hand it in at an official collection point for recycling. By doing this, you help to preserve the environment.
Specifications
Model PR3840
Rated voltage(V) - adapter 100-240 \~ 150mA
Rated frequency (Hz) - adapter 50-60
Rated output - adapter 5V ... 500 mA
Class Medical device Class IIa
Ingress of water - device IP22
Model PR3840
Battery type - device Li-Ion
Adapter
The adapter is specified as part of the medical device.
Pulse output parameters
Frequency range 1-100 Hz
Pulse duration 60-350 s for programs 1 to 20
Maximum current output 60mA at 500-1000 Ohm
Maximum output voltage 60V
Current pulse shape Biphasesymmetrical (net current 0 DC)
Operating conditions
Temperature from +5^ C to +40^ C
Relative humidity from 15% to 93% (non-condensing)
Atmospheric pressure from 700hPa to 1060hPa
Storage and transport conditions
Temperature - electrodes from 0°C to +40°C
Temperature - device from -10^ to +50^
Relative humidity less than 93% (non-condensing)
Atmospheric pressure from 700hPa to 1060hPa
Note: If you want to store the electrodes for more than a month, keep them at temperatures between +5^ and +27^ .
Note: Do not store the electrodes in the freezer or refrigerator. Do not expose them to high temperatures, nor immerse them in water, or leave them outside of the plastic bag.
Explanation of symbols

natural_image
Simple geometric diagram with two concentric squares (no text or symbols)Symbols on the adapter and the device
- This symbol indicates that the adapter is double insulated (Class II), according to IEC 60601-1.

natural_image
Symbol of a waste bin with crossed lines indicating no waste, and a solid black rectangle below (no text or labels)- This symbol means: Do not throw away with the normal household waste. For further instructions, see chapter 'Recycling'.
SN
Symbols on the device
- This is the symbol for serial number. This symbol is followed by the manufacturer's serial number.
REF
- This is the symbol for reference number. This symbol is followed by the manufacturer's reference number, which is the type number of the device.

- This symbol on the device means: protected against access to hazardous parts with a finger and against vertically falling water drops when tilted up to 15 degrees.

natural_image
Simple black-and-white icon of a human figure inside a square frame (no text or symbols)- This symbol means that the part of the device that comes into physical contact with the user (also known as the applied part) is of type BF (Body Floating) according to IEC 60601-1. The applied parts are the electrodes.

natural_image
Symbol of a radio with signal waves, no text or labels present- This symbol means that this device emits non-ionising radiation. All devices and systems that include RF transmitters or that intentionally apply RF electromagnetic energy must have a label with this symbol.

- This symbol means: caution TENS output. You find this symbol near all electrode connections.

natural_image
Abstract black-and-white graphic of a factory or industrial structure with triangular peaks and a vertical bar (no text or symbols)- This symbol means ‘Manufactured by’ and appears next to the address of the legal manufacturer.
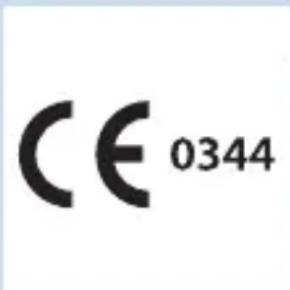
- This symbol means: Conforms to EC Directives. CE stands for ‘Conformité Européenne’. 0344 is the number of the notified body.

- This symbol means: read the user manual before you start using the device.
- This symbol is the mark that identifies the standby button.
- This is the pulse symbol. It appears next to the status indicator.
- This is the battery symbol. It appears next to the battery indicator.
Symbols on the adapter
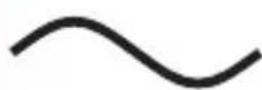
- This symbol means: alternating current.
- This symbol means: direct current.

- This symbol means: Conforms to EC Directives. CE stands for ‘Conformité Européenne’.
- This symbol means: may only be used indoors.
- This symbol means: USB connector.
- This symbol means: micro-USB connector.
- This symbol is the certification logo that includes identification of the accredited compliance test house.
- This symbol is the certification mark for technical equipment. The GS mark is based on the German Equipment and Product Safety Act.

- This symbol shows that the no-load power CEC (California Energy Commission) Efficiency Level is V (five) in order to meet EU requirements.
natural_image
Icon showing a car with a 'X' symbol above and a key beside it, indicating no text or symbols present.Symbols on electrode bag
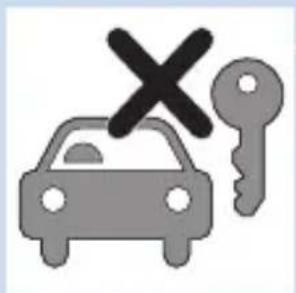
- This symbol means: Do not use while driving, operating machines or performing other activities that may present a risk of injury.

natural_image
Simple line drawing of a hand holding a padlock with a black X mark (no text or symbols)- This symbol means: Do not use damaged or worn electrodes or electrodes that have lost their adhesive power.
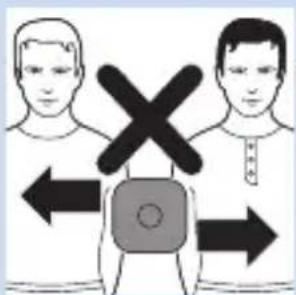
- This symbol means: The electrodes should be used by one person and not shared with others.

natural_image
Simple line drawing of a hand holding two gray rectangular objects with a black 'X' mark (no text or symbols)- This symbol means: Do not place the electrodes on top of each other or so close to each other that they touch each other.


natural_image
Illustration of a hand holding a padlock and a cross symbol (no text or labels)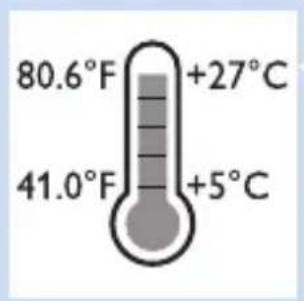
natural_image
Simple black-and-white hourglass icon with no text or symbols- This symbol means: Do not place electrodes on your head or on your neck.
- This symbol means: Do not place the electrodes on your chest.
- This symbol means: Do not put the electrodes on open wounds, cancerous lesions, rashes and infected or inflamed skin.
- This symbol indicates the minimum and maximum storage temperature for electrodes if they are stored for more than a month.
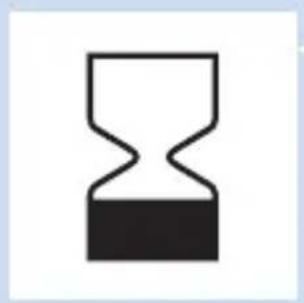
- This is the symbol for 'use by'. It indicates after which date the electrodes must not be used anymore.
Electromagnetic emissions and immunity
Electromagnetic Compatibility (EMC)
The PulseRelief device is approved according to EMC safety standard EN 60601-1-2. It is designed to be used in typical domestic or clinical environments.
Electrode placement guide
TENS
For a description of the TENS programs (programs 1 - 15), refer to chapter 'Pre-set programs'.

EMS
For a description of the EMS programs (programs 16 - 20), refer to chapter 'Pre-set programs'.
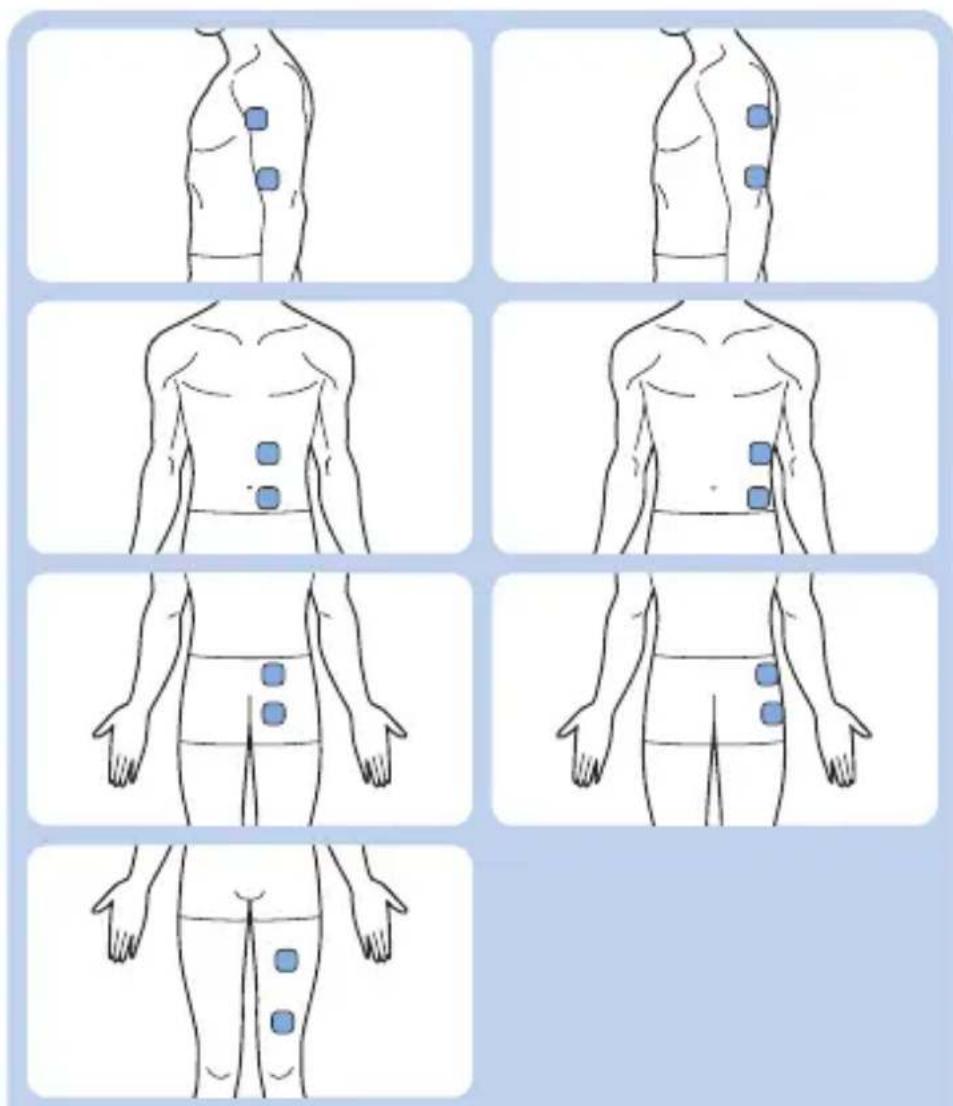
Table des matières
Introduction 45
natural_image
Diagram showing a device with a blue arrow pointing to a component, no text or symbols presentnatural_image
Diagram showing a blue USB connector being inserted into a white device, with an arrow indicating direction (no text or symbols present)natural_image
Illustration of a blue electrical plug with a wall socket connected to its socket, showing a blue arrow indicating direction (no text or symbols present)natural_image
Diagram showing a blue plug inserted into a device with an arrow indicating direction (no text or symbols present)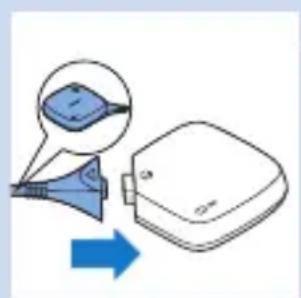
natural_image
Diagram showing a device with a blue arrow pointing to a device component, with an inset magnified view of a blue object (no text or symbols present)natural_image
Illustration of a hand holding a blue object with droplets, no text or symbols present
natural_image
Illustration of a hand holding a small blue object with a blue arrow pointing to it, no text or symbols present.natural_image
Illustration of a hand holding a medical device with blue arrows indicating motion or force (no text or symbols)natural_image
Illustration of a finger with two blue square sensors attached to a wire, no text or symbols present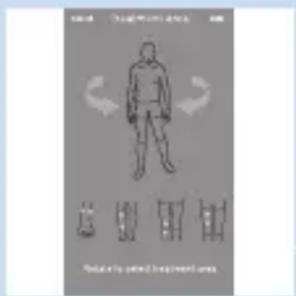

natural_image
Illustration of a hand holding a blue object with an arrow indicating direction (no text or symbols)natural_image
Illustration of a hand holding a small object with a blue arrow pointing downward (no text or symbols)natural_image
Hand inserting a blue component into a white surface, with an arrow indicating direction (no text or symbols)natural_image
Hand holding a small object with a blue arrow pointing to it, no text or symbols presentnatural_image
Simple line drawing of a square object with a small circle and triangle on the left side (no text or symbols)natural_image
Simple geometric diagram with two concentric squares (no text or symbols)natural_image
Symbol of a waste bin with crossed lines indicating no waste, and a solid black rectangle below (no text or labels)natural_image
Simple black-and-white icon of a human figure inside a square frame (no text or symbols)natural_image
Symbol of a radio with signal waves, no text or labels presentnatural_image
Silhouette of a factory with smokestacks and chimney (no text or symbols)natural_image
Icon of a person reading a book inside a circle (no text or symbols)natural_image
Abstract black wavy line on white background (no text or symbols)natural_image
Simple black-and-white icon of a battery with a lightning bolt symbol (no text or numbers)natural_image
Icon showing a car with a 'X' symbol above and a key beside it, indicating no text or symbols present.natural_image
Simple line drawing of a hand holding a medical or anatomical object with a black X mark (no text or symbols)natural_image
Simple line drawing of a hand holding two gray rectangular objects with a black 'X' mark overlay (no text or symbols)natural_image
Frontal view of a human head with a black X mark on the forehead and two gray square buttons on the forehead (no text or symbols)natural_image
Illustration of a human torso with a medical cross mark and a button (no text or symbols)natural_image
Illustration of a hand holding a padlock and a square device with a black X mark (no text or symbols)natural_image
Simple black-and-white hourglass icon with no text or symbols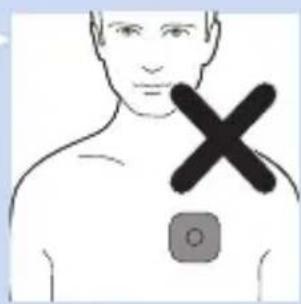

natural_image
Illustration of a hand holding a medical padlock with a black X mark, no text or symbols present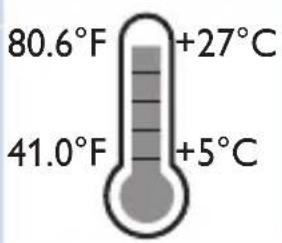
تشعشعات ال kidnappingسی و مصنبیت
natural_image
Icon showing a car with a 'X' symbol and a key, suggesting no text or symbols present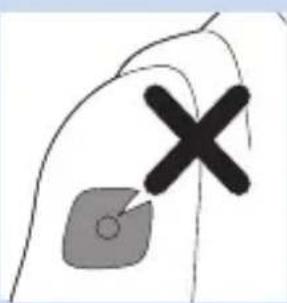
natural_image
Simple line drawing of a hand holding a medical or anatomical object with a black X mark and a gray square (no text or symbols)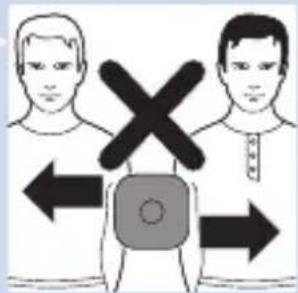
natural_image
Simple line drawing of a hand holding two gray rectangular objects with a black 'X' mark overlay (no text or symbols)natural_image
Icon of a person reading a book inside a circle (no text or symbols)
natural_image
Simple black power button symbol on white background (no text or numbers)
natural_image
Abstract black wavy line on white background (no text or symbols)

natural_image
Simple black-and-white icon of a human figure inside a square frame (no text or symbols)
natural_image
Symbol of a radio emitting signal waves, no text or labels present

natural_image
Silhouette of a factory chimney with three chimneys (no text or symbols)Toyashim obligations
natural_image
Simple geometric diagram with two concentric squares (no text or symbols)
natural_image
Symbol of a trash bin with crossed lines indicating no waste or restriction, and a solid black rectangle below (no text or labels)SN
natural_image
Simple line drawing of a rounded square object with a small circular element and triangular base (no text or symbols)natural_image
Hand holding a small object with a blue arrow indicating downward motion (no text or symbols)natural_image
Two vertical panels with simple line and square icons, no text or symbols presentبعد ازاستفاده
natural_image
Illustration of a hand holding a blue object with an arrow indicating direction (no text or symbols)natural_image
Illustration of a hand holding a small object with a blue arrow indicating direction (no text or symbols)

قراردان الكتاب
The image is too blurry to recognize any text content.
D
natural_image
Illustration of a hand holding a small object with a blue arrow pointing to it, no text or symbols present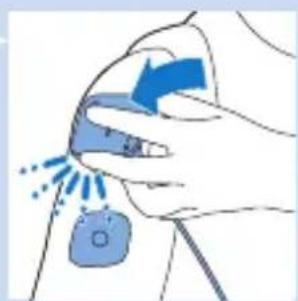
natural_image
Illustration of a hand holding a medical device with blue arrows indicating force or movement (no text or symbols)
natural_image
Close-up of a finger with two blue square electronic components attached to a wire (no text or symbols visible)natural_image
Illustration of a medical device with a magnified view of its internal structure (no text or symbols)natural_image
Illustration of a hand holding a blue object with droplets, no text or symbols present
natural_image
Diagram showing a device with a blue connector and an open socket, with a magnified inset highlighting the component (no text or symbols present)
natural_image
Diagram showing a blue USB connector connected to a white electronic device with a blue arrow indicating direction (no text or symbols present)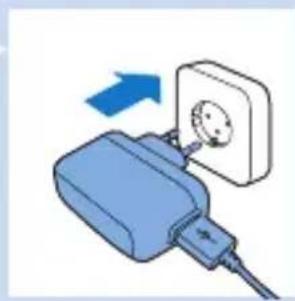
natural_image
Illustration of a blue electrical plug with a white socket connected to its side, showing an arrow indicating direction (no text or symbols present)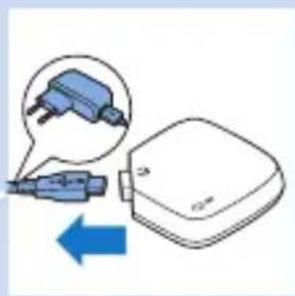
natural_image
Diagram showing a blue plug inserted into a device with an arrow indicating direction (no text or symbols present)natural_image
Frontal view of a human head with a black X mark on the cheek and two square markers on the forehead (no text or symbols)

natural_image
Illustration of a hand holding a padlock and a cross symbol (no text or labels)

natural_image
Icon showing a car with a 'X' symbol above and a key beside it (no text or symbols present)
natural_image
Simple line drawing of a hand holding a small object with a black X mark (no text or symbols)
natural_image
Simple line drawing of a hand holding two shaded rectangular objects with a black 'X' mark, no text or symbols present.natural_image
Icon of a person reading a book inside a circle (no text or symbols)
natural_image
Simple black power button symbol on white background (no text or numbers)
natural_image
Abstract black wavy line on white background (no text or symbols)
natural_image
Simple black-and-white icon of a human figure inside a square frame (no text or symbols)
natural_image
Symbol of a radio emitting signal waves (no text or labels)

natural_image
Abstract black silhouette of a factory or industrial structure with three triangular peaks (no text or symbols)ظروف التخزين والنقل
natural_image
Simple geometric diagram of two concentric squares (no text or symbols)
natural_image
Symbol of a trash bin crossed with no visible text or labelsSN
المواصفات
www.philips.com/support
natural_image
Simple line drawing of a square device with a circular button and triangular pointer (no text or symbols)Ye qui est la
natural_image
Illustration of a hand holding a blue object with an arrow indicating direction (no text or symbols)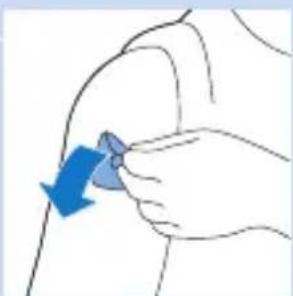
natural_image
Illustration of a hand holding a small object with a blue arrow pointing to it (no text or symbols)natural_image
Hand holding a blue switch labeled 'GO' with an arrow indicating direction (no text or symbols on the switch itself)natural_image
Hand holding a small object with a blue arrow pointing downward (no text or symbols)



30:00


natural_image
Illustration of a hand holding a small object with a blue arrow pointing to it, no text or symbols present.
natural_image
Illustration of a hand holding a medical device with blue arrows indicating force or movement (no text or symbols)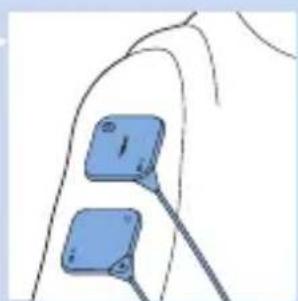
natural_image
Close-up of a finger with two blue square electronic components attached to a wire (no text or symbols visible)natural_image
Illustration of a hand holding a blue object with a droplet, no text or symbols present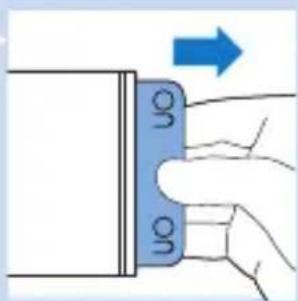

natural_image
Diagram showing a device with an inset close-up of its internal components, no text or symbols present
natural_image
Diagram showing a blue USB connector connected to a rectangular device with an arrow indicating direction (no text or symbols present)
natural_image
Illustration of a blue electrical plug with a wall socket and cable, showing an upward arrow (no text or symbols)
natural_image
Diagram showing a blue connector inserted into a device with an arrow indicating direction (no text or symbols present)
natural_image
Diagram showing a device with a blue connector and a blue magnified inset, with an arrow indicating direction (no text or symbols present).www.philips.com/pain-relief/register
Philips Consumer Lifestyle BV
Tussendiepen 4, 9206 AD Drachten, Netherlands
Fax: +31 (0)512594316


- Always here to help you
- Table of contents
- Introduction
- Intended use
- TENS and pain management
- Electrical muscle stimulation
- Pain management
- Contra-indications, reactions and side effects
- Contra-indications
- Do not use the device if:
- Reactions
- Side effects
- Important safety information
- Warnings
- General warnings
- Do not apply to or treat the following parts or areas
- Do not use the device in the following conditions
- Cautions
- Compliance with standards
- Pre-set programs
- Program overview
- Conventional TENS programs
- Burst TENS programs
- Frequency-modulated TENS programs
- Electrical muscle stimulation (EMS) programs
- Program specifications
- Installing and setting up the Treatment App
- Using the device
- Attaching the electrodes and the device
- Electrode placement
- Using the app to start and stop a treatment
- Selecting a treatment area
- Rating your pain intensity
- Selecting your treatment
- Starting and stopping a treatment
- Switching to another program
- Adapting the treatment time
- Quick start
- Other app features
- Using a second device
- After use
- Storage of the electrodes
- Cleaning
- Troubleshooting
- Signals on the device
- Indicator signals on the device
- Battery indicator
- Status indicator
- Replacement
- Electrodes
- Ordering accessories
- Guarantee and support
- Guarantee restrictions
- Manufacturer's legal address
- Recycling
- Specifications
- Model PR3840
- Pulse output parameters
- Operating conditions
- Storage and transport conditions
- Explanation of symbols
- Symbols on the adapter and the device
- Symbols on the device
- Symbols on the adapter
- Symbols on electrode bag
- Electromagnetic emissions and immunity
- Electromagnetic Compatibility (EMC)
- Electrode placement guide
- TENS
- EMS
- Table des matières
- بعد ازاستفاده
- قراردان الكتاب
- Ye qui est la
Brand : PHILIPS
Model : PulseRelief PR3840
Category : Pain therapy device