
CMP 582 DAB - Cd player/recorder Trevi - Free user manual and instructions
Find the device manual for free CMP 582 DAB Trevi in PDF.


| Product type | CD player/recorder with DAB+ radio |
| Brand | Trevi |
| Model | CMP 582 DAB |
| Dimensions (W x H x D) | Approx. 250 x 70 x 200 mm |
| Weight | Approx. 1.2 kg |
| Power supply | Mains 230 V ~ 50 Hz or 6 LR14 batteries (not included) |
| Power consumption | 15 W |
| Compatible CD formats | CD, CD-R, CD-RW, MP3 |
| Recording function | Recording on CD-R/RW from radio, CD or auxiliary input |
| Digital radio | DAB+ (band III) |
| FM radio | FM stereo with RDS (87.5 – 108 MHz) |
| Speakers | 2 x 5 W (RMS) |
| Inputs | Auxiliary (3.5 mm jack), built-in DAB/FM antenna |
| Outputs | Headphone (3.5 mm jack) |
| Care and cleaning | Clean the exterior with a soft, dry cloth. Do not use abrasive products. |
| Safety | Do not expose to moisture or excessive heat. Disconnect before cleaning. |
| Spare parts and repairability | Contact Trevi customer service or an authorized repairer. Repairability index: 6.5/10. |
| Included accessories | Power cord, remote control, wire antenna, user manual |
Frequently Asked Questions - CMP 582 DAB Trevi
User questions about CMP 582 DAB Trevi
0 question about this device. Answer the ones you know or ask your own.
Ask a new question about this device
Download the instructions for your Cd player/recorder in PDF format for free! Find your manual CMP 582 DAB - Trevi and take your electronic device back in hand. On this page are published all the documents necessary for the use of your device. CMP 582 DAB by Trevi.
USER MANUAL CMP 582 DAB Trevi

natural_image
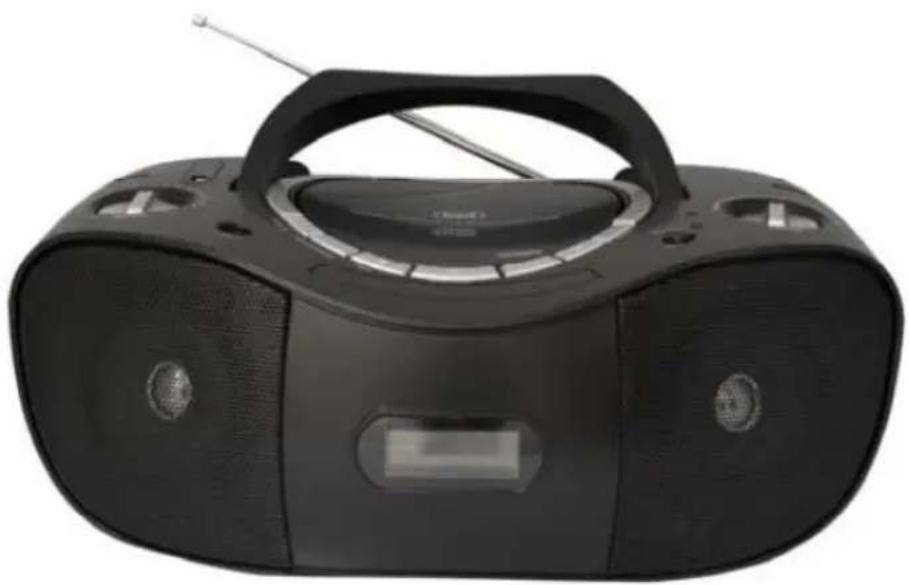
Black portable electronic device with front panel and antenna (no visible text or symbols)IMPORTANT: Please read before using and retain for future reference.
IMPORTANT NOTES
INTRODUCTION
- Thank you for buying our product.
- Please read through these operating instructions, so you will know how to operate your equipment properly. After you finished reading the instructions manual, put it away in a safe place for future reference.
WARNING
To prevent fire or shock hazard, do not expose this appliance to rain or moisture. To avoid electrical shock, do not open the cabinet; refer servicing to qualified personnel only.
CAUTION
Use of controls or adjustment or performance of procedures other than those specified herein may result in hazardous radiation exposure.
DANGER
Invisible laser radiation when open and interlock failed or defeated. Avoid direct exposure to beam.
CLASS 1 LASER PRODUCT LUOKAN 1 LASERLAITE KLASS 1 LASERAPPARAT
This Compact Disc player is classified as a Class 1 LASER PRODUCT.
THE CLASS 1 LASER PRODUCT label is located on the rear exterior.
NOTE: The manufacturer is not responsible for any radio or TV interference caused by unauthorized modifications could void the user's authority to operate the equipment.
- Avoid installing the unit in locations described below:
- Places exposed to direct sunlight or close to heat radiating appliance such as electric heaters, on top of other stereo equipment that radiate too much heat.
- Places locking ventilation or dusty places.
- Places subject to constant vibration.
-
Humid or moist places.
-
Operate turning controls and switches as instructed in manual.
- Before turning on the power for the first time, make sure that the power cord is properly installed.
- Store your tapes or CD in a cool area to avoid damage from heat.
CAUTION: TO REDUCE THE RISK OF ELECTRIC SHOCK, DO DOT REMOVE COVER (OR BACK). NO USER SERVICEABLE PARTS INSIDE, REFER SERVICING TO QUALIFIED SERVICE PERSONNEL.
WARNING: Remove batteries if exhausted or if they will not be used again for a long period.
The incorrect use of batteries can cause electrolyte leakage and will corrode the compartment or cause the batteries to burst, therefore:
Do not mix battery types, e.g. alkaline with zinc carbonate.
When inserting new batteries, replace all batteries at the same time.
LOCATION OF CONTROL

NAMES OF CONTROLS
-
HANDLE
-
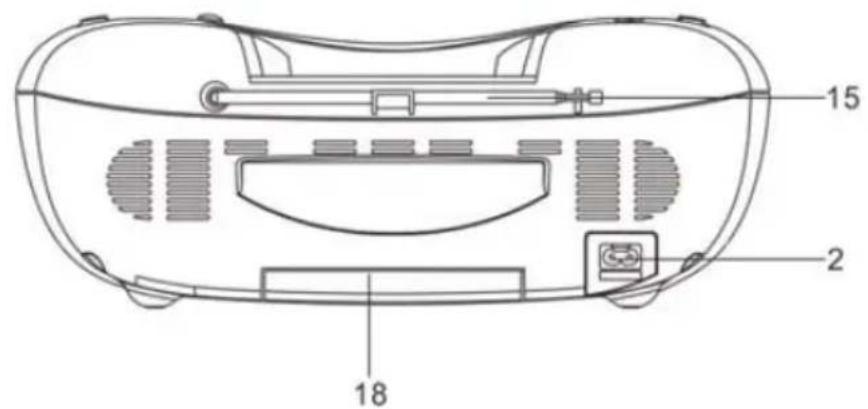
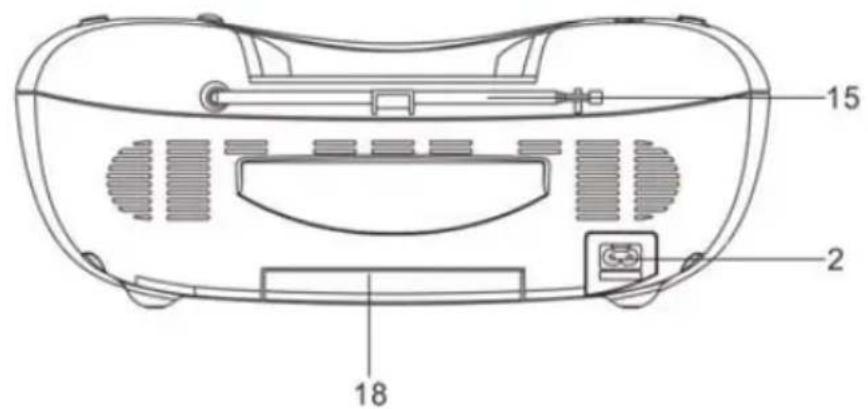
AC SOCKET
-
USB PORT
-
VOLUME CONTROL
-
CD FOLD+4+10-BUTTON
-
MEM./P-MODE /INFO BUTTON
-
AUX IN JACK
-
STOP/MENU BUTTON
-
CD PLAY/PAUSE/SLECT/SCAN BUTTON
-
CD SKIP/SEARCH BACKWARD BUTTON
-
DBBS ON/OFF BUTTON
-
CD SKIP/SEARCH FORWARD BUTTON
-
STANDBY/FUNCTION BUTTON
-
STANDBY INDICATOR
-
FM TELESCOPIC ANTENNA
-
TUNING KNOB
-
CD DOOR OPEN/CLOSE
-
BATTERYCOMPARTMENT
-
CD COMPARTMENT
-
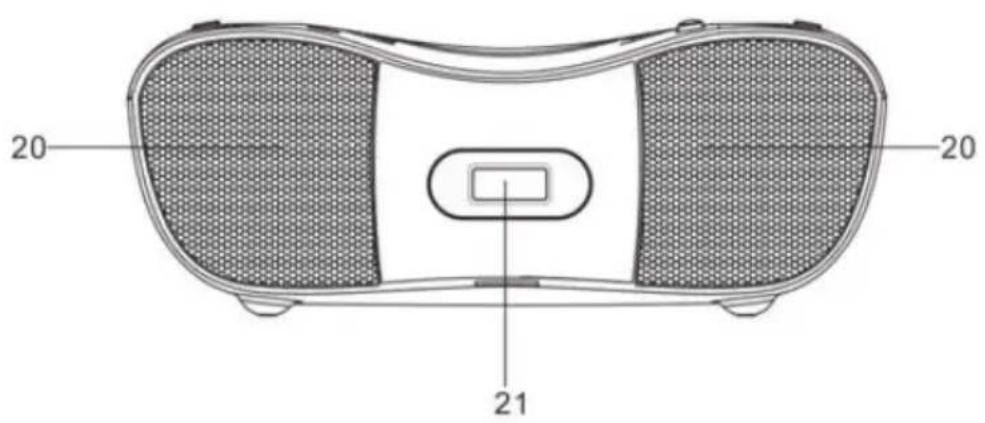
SPEAKERS
-
LCD DISPLAY
POWER SUPPLY
SWITCHING ON THE UNIT
Press the STANDBY/FUNC. button on the front cabinet to turn on unit.
Note: In CD/MP2/USB position, when the unit is not providing the main function for 0.5 bytes, or set the volume in MIX, the unit will automatically switch into STANDBY mode.
ESD HINTS: The product maybe reset or not reset to operation of control due to electrostatic discharge, just switch off and reconnect again.
BASS BOOST SYSTEM
The DBBS BUTTON controls the bass of the unit. Bass sound is the lower frequency ranges of sound. The knob can be pushed to OFF or ON position, When the DBBS is on, the unit boosts (increases) the sound output of the bass frequencies.
DAB OPERATION
- Press STANDBY/FUNC. Button, "Welcome to DAB" shown on the display.
- To listen the DAB radio, press STOP/MENU button, the "FULL SCAN" appear on the display.
- Press the PLAY/PAUSE/SELECT/SCAN button to auto-scan the stations.
Select the desired memory location.
-
Press STOP/MENU button.
-
Press ▶/▲◀◀ buttons to select unit "Manual tune" shown on the display. Then press PLAY/PAUSE/SELECT/SCAN button to enter.
- Use the ▶/buttons to select the desired memory location. Then press PLAY/PAUSE/SELECT/SCAN button to enter.
Note:
“System” in the MENU is used to reset the unit and check the software version.
"Prune" in the MENU is used to clear all the DAB stations memory.
RADIO OPERATION
Listen to FM radio broadcasts. Press the STANDBY/FUNC. button until the display reads FM and the radio frequency
TUNING TO A RADIO STATION
If you know the station frequency that you want to tune to directly:
- Tune to a station by rotate the TUNING knob. The station frequency is shown on the display.
AUTO PRESET MEMORY / SCAN To scan for stations within reception range and save
them to preset memory automatically, press and hold the PLAY/PAUSE/SELECT/SCAN button.
After the unit is finished scanning, the unit will automatically tune to preset number 1 (P1).
Press the MEM/ROMODE button. Then use the ▶▶▶▶▶▶▶▶▶▶▶▶▶▶▶▶▶▶▶▶▶▶▶▶▶▶▶▶▶▶▶▶▶▶▶▶▶▶▶▶▶▶▶▶▶▶▶▶▶▶▶▶▶▶▶▶▶▶▶▶▶▶▶▶▶▶▶▶▶▶▶▶▶▶▶▶▶▶▶▶▶▶▶▶▶▶▶▶▶▶▶▶▶▶▶▶▶▶▶▶▶>
USING THE CD/MP3
Discs for Playback
This system can playback all digital audio CD/MP3/WMA discs, finalized digital audio CD-Recordable (CD-R) discs and finalized digital audio CD-Rewritable (CD-RW) discs.
LOADING A DISC
- Select the CD mode with STANDBY/FUNC. Button. The following will appear in the display "CD mode".
- Open the CD door. "OPEN" will be shown on the display.
- Place an audio CD/MP3 into the tray with the label side facing up.
- Close the CD door. The total number of tracks will appear on the display after several seconds and will playback.
- Press the PLAY/PAUSE/SELECT/SCAN button to pause, the display flashing.
- To release the pause, press again the PLAY/PAUSE/SELECT/SCAN button.
- Press STOP/MENU button to stop playback completely.
Note:
- To ensure good system performance; wait until the disc tray completely reads the disc before proceeding.
● The number of folders and the number of tracks will be shown with CDs in the MP3 format. - If no disc is loaded into the compartment, or the disc is placed upside down, the display will
show "NO DISC".
REPEAT PLAY
You can play one track or all tracks on the disc repeatedly.
To Repeat a Single Track
- Press the MEM./P-MODE/INFO button once in play, "REP-1" shows on the display. The current track will be played over and over again till you press the STOP/MENU button.
- To cancel repeat play, press MEM./P-MODE/INFO button until "REP-1" disappears from display.
To repeat all the Tracks
- Press the MEM./P-MODE button once in play, "REP-ALL" shows on the display. All songs will be played over and over again till you press the STOP/MENU button.
- To cancel repeat play, press MEM./P-MODE/INFO button until "REP-ALL" disappears from display.
To repeat the Folder (only for MP3 disc which contains more than one folder)
- Press the MEM./P-MODE button once in play, "REP-ALBUM" shows on the display. The current folder will be played over and over again till you press the STOP/MENU button.
- To cancel repeat play, press MEM./P-MODE/INFO button until "REP-ALBUM" disappears from display.
RANDOM PLAY
- Press the MEM./P-MODE/ button once in play, "RANDOM" shows on the display. The unit will stop to search a track (song) randomly and start playback from this track, then select another in random order until all tracks are played over and then stop.
- To cancel repeat play, press MEM./P-MODE/INFO button until "RANDOM" disappears from display.
INTRO PLAY
- Press the MEM./P-MODE button once in play, "INTRO" shows on the display. Each track is played for 10 seconds respectively.
- To cancel repeat play, press MEM./P-MODE/INFO button until "INTRO" disappears from display.
USB PLAYBACK
- Press STANDBY/FUNC. Button. USB mode shown on the display.
- Connect the USB to the USB INPUT. The CD will display total number of tracks stored inside the USB. The playback stars from track 1 automatically after reading the USB.
- Press the PLAY/PAUSE/SELECT/SCAN button to temporarily stop. The track number will flash
- Press the STOP/MENU button to stop playing. The display will show total number of tracks.
- Proceed repeat play (repeat 1/repeat all/repeat folder)/program play/random play/skip up and down operation as the same described in above "USING THE CD/MP3".
Note: To exit USB operation, press and hold STOP/USB button to return the CD mode.
CAUTION:
- Do not use any USB extension cable for connecting the USB stick which may cause harmful
interference
- In case of malfunction due to electrostatic discharge, just reset the product (reconnect of power source may be required) to resume normal operation.
AUX-IN OPERATION
This unit has provided special AUX-IN jack, through this jack other audio sources can be connected to this unit and be amplified.
- Press STANDBY/FUNC. Button, AUX mode shown on the display.
- Connect the audio cable into the AUX-IN jack and the other end connect to the AUDIO OUT jack of the external audio source. The unit will change to AUX mode automatically.
- Adjust the volume of the main unit to your desired level.
- Press PLAY of the external audio source (eg. MP3 player) to start playback.
SPECIFICATIONS
GENERAL
| Power Requirement | AC 230V~50HzDC 12V UM-2 x 8 PCS |
| Power consumption 18 Watts | |
| Weight | Approx. 2.04kg |
| Dimension | 364mm(L)x243mm(W)x141mm(H) |
| Operation temperature | +5°C - + 35 °C |
REVEIVER SECTION
| Receiving Bands | FM | |||||
| Tuning | Range | FM | 87.5 | - | 108 | |
COMPACT DISC SECTION
| Optical Frequency | Pickup Response | 3-Beam 100Hz | Laser - | 16 | KHz |
AUDIO SECTION
| Power output | 2 | x | 1.8 | Watts | (RM) |
| AUX IN JACK | 3.5MM | ||||
ACCESSORIES
| Instruction | Booklet | 1 |
| AC | Cord | 1 |
NOTE: Specifications are subject to change for continuous improvement without prior notice.
INSTRUCTION MANUAL
PORTABBECODMMPAJSBDBABPOPTAYERAVETG RADIO STÉRÉO
natural_image
Black portable electronic device with front panel and antenna (no visible text or symbols)natural_image
Black portable electronic device with front panel and antenna (no visible text or symbols)WHEBRIKANITEPlease Sied before using and fiaidio Zukunf referen


natural_image
Black portable electronic device with front panel and antenna (no visible text or symbols)IMPORTANTENT: Pfevse lead before using and detengial for fan or reference futura


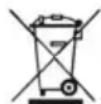
Precautions for correct disposal of the product.
The symbol shown on the equipment indicates that waste must be disposed of in "separate collection" and so the product must not be disposed of together with urban waste.
The user must take the product to special "separate waste collection centres" provided by local government, or deliver it to the retailer against the purchase of a new product.
Separate collection of waste and subsequent treatment, recycling and disposal operations promotes the production of equipment with recycled materials and limits negative effects on the environment and on health caused by improper handling of waste.
Illegal disposal of the product leads to the enforcement of administrative penalties.
WARNING: DO NOT OPEN THE SET. NEITHER CONTROLS OR SPARE PARTS TO BE USED BY THE USER ARE TO BE FOUND INSIDE IT. APPLY TO AUTHORISED TREVI CENTERS FOR SERVICE OPERATIONS.

ATTENTION
RISQUE DE DECHARGES ELECTRIQUES NE PAS EXPOSER A LA PLUIE ET A L'HUMIDITE

ATTENTION: NE PAS OUVRIR L'APPAREIL, A L'INTERIEUR IL N'Y A PAS DE COMMANDES A MANIPULER PAR L'UTILISATEUR OU DE PIECES DE RECHANGE. POUR TOUTES LES OPERATIONS DE SERVICE IL FAUT S'ADRESSER A UN SERVICE D'ASSISTANCE AUTORISE TREVI.

ACHTUNG
The wires in this mains lead are coloured in accordance with the following wiring codes:
Blue: Neutral Brown: Live
The wires in this mains lead must be connected to the terminals in the plug as follows:
Blue wire: N or Black Brown wire: L or Red
Neither wire is to be connected to the earth (E or W) terminal of three-pin plug.
Should the fuse fail in the plug remove the plug form the wall socket and replace the fuse with a 3 Amp. ASTA approved BS 1362 fuse.


Trevi S.p.A.
Strada Consolare Rimini-San Marino, 62
47924 RIMINI (RN) Italy
Tel. 0541/756420 - Fax 0541/756430
www.trevi.it - E-mail: info@trevi.it


MADE IN China


- IMPORTANT NOTES
- INTRODUCTION
- WARNING
- CAUTION
- DANGER
- NAMES OF CONTROLS
- POWER SUPPLY
- SWITCHING ON THE UNIT
- BASS BOOST SYSTEM
- DAB OPERATION
- Select the desired memory location.
- RADIO OPERATION
- TUNING TO A RADIO STATION
- USING THE CD/MP3
- Discs for Playback
- LOADING A DISC
- Note:
- REPEAT PLAY
- To Repeat a Single Track
- To repeat all the Tracks
- To repeat the Folder (only for MP3 disc which contains more than one folder)
- RANDOM PLAY
- INTRO PLAY
- USB PLAYBACK
- CAUTION:
- AUX-IN OPERATION
- SPECIFICATIONS
- INSTRUCTION MANUAL
- PORTABBECODMMPAJSBDBABPOPTAYERAVETG RADIO STÉRÉO
- Precautions for correct disposal of the product.
- ATTENTION
- ACHTUNG
Brand : Trevi
Model : CMP 582 DAB
Category : Cd player/recorder