
NP03Wi - Projector Accessory NEC - Free user manual and instructions
Find the device manual for free NP03Wi NEC in PDF.


| Product Type | Wireless Presentation Adapter |
| Brand | NEC |
| Model | NP03Wi |
| Dimensions (W x D x H) | Approx. 80 x 50 x 15 mm |
| Weight | Approx. 50 g |
| Power Supply | USB 5V / 500mA |
| Wireless Connectivity | Wi-Fi 802.11 a/b/g/n/ac, 2.4/5 GHz |
| Supported Protocols | Miracast, AirPlay, Google Cast, DLNA |
| Video Output | HDMI 1.4b |
| Max Resolution | 1920 x 1080 @ 60Hz |
| Operating Temperature | 0°C to 40°C |
| Storage Temperature | -20°C to 60°C |
| Humidity Range | 20% to 80% (non-condensing) |
| Main Functions | Wireless screen mirroring from smartphones, tablets, laptops to projector via HDMI |
| Compatible OS | Windows, macOS, iOS, Android, Chrome OS |
| Maintenance & Cleaning | Wipe with dry cloth; avoid liquids; keep vents free of dust |
| Safety | Use only provided USB cable; do not disassemble; keep away from moisture |
| Spare Parts & Repairability | Contact NEC support; no user-serviceable parts inside |
| General Information | Designed for NEC projectors; plug-and-play setup; firmware update via USB |
Frequently Asked Questions - NP03Wi NEC
User questions about NP03Wi NEC
0 question about this device. Answer the ones you know or ask your own.
Ask a new question about this device
Download the instructions for your Projector Accessory in PDF format for free! Find your manual NP03Wi - NEC and take your electronic device back in hand. On this page are published all the documents necessary for the use of your device. NP03Wi by NEC.
USER MANUAL NP03Wi NEC
Interactive White Board Kit
NP03Wi
Installation Manual
CONTENTS
Introduction ...... ENG-2
Read This Before Starting ...... ENG-4
Features ...... ENG-5
Packaged Items ...... ENG-6
Part Names ...... ENG-7
Setup Procedure ...... ENG-9
Troubleshooting ENG-15
Specifications ...... ENG-15
Introduction
Thank you very much for purchasing the NEC Interactive White Board (Model Name: NP03Wi).
By connecting to an NEC projector to this product, the white board or wall can be used as your interactive white board.
The supplied stylus pen has a built-in super-capacitor charge storage. Charge the super-capacitor for 3 minutes before using the stylus pen for the first time.
This manual uses the example of connection with the UM330X.
HDMI is a trademark or registered trademark of HDMI Licensing LLC.
Disposing of your used product

EU-wide legislation as implemented in each Member State requires that used electrical and electronic products carrying the mark (left) must be disposed of separately from normal household waste. When you dispose of such products, please follow the guidance of your local authority and/or ask the shop where you purchased the product.
After collecting the used products, they are reused and recycled in a proper way. This effort will help us reduce the wastes as well as the negative impact such as mercury contained in parts to the human health and the environment at the minimum level.
The mark on the electrical and electronic products only applies to the current European Union Member States.
Cautions
(1) Unauthorized reprinting of the contents of this manual is prohibited.
(2) The contents of this manual are subject to change in the future without notice.
(3) The contents of this manual have been prepared with scrupulous care, but please notify NEC should you have any doubts or notice any mistakes or omissions.
(4) Please note that NEC will accept no responsibility whatsoever for claims for damages, lost earnings, etc., arising from the use of this product, regardless of article (3) above.
(5) NEC will replace any manuals presenting incorrect collation or missing pages.
ENG-2
DOC Compliance Notice (for Canada only)
This Class B digital apparatus complies with Canadian ICES-003.
RF Interference (for USA only)
WARNING
The Federal Communications Commission does not allow any modifications or changes to the unit EXCEPT those specified by NEC Display Solutions of America, Inc. in this manual. Failure to comply with this government regulation could void your right to operate this equipment. This equipment has been tested and found to comply with the limits for a Class B digital device, pursuant to Part 15 of the FCC Rules. These limits are designed to provide reasonable protection against harmful interference in a residential installation. This equipment generates, uses, and can radiate radio frequency energy and, if not installed and used in accordance with the instructions, may cause harmful interference to radio communications. However, there is no guarantee that interference will not occur in a particular installation.
If this equipment does cause harmful interference to radio or television reception, which can be determined by turning the equipment off and on, the user is encouraged to try to correct the interference by one or more of the following measures:
- Reorient or relocate the receiving antenna.
- Increase the separation between the equipment and receiver.
- Connect the equipment into an outlet on a circuit different from that to which the receiver is connected.
- Consult the dealer or an experienced radio / TV technician for help.
WARNING TO CALIFORNIA RESIDENTS:
Handling the cables supplied with this product will expose you to lead, a chemical known to the State of California to cause birth defects or other reproductive harm. WASH HANDS AFTER HANDLING.
DECLARATION OF CONFORMITY
This device complies with Part 15 of FCC Rules. Operation is subject to the following two conditions (1) This device may not cause harmful interference, and (2) this device must accept any interference received, including interference that may cause undesired operation.
U.S.Responsible Party: NEC Display Solutions of America, Inc.
Address: 500 Park Boulevard, Suite 1100
Itasca, Illinois 60143-1248
Tel. No.: (630) 467-3000
Type of Product: Interactive White Board Kit
Equipment Classification: Class B Peripheral
Model No.: NP03Wi

We hereby declare that the equipment specified above conforms to the technical standards as specified in the FCC Rules.
Read This Before Starting
About the pictograms
To ensure safe and proper use of the product, this installation manual uses a number of pictograms to prevent injury to you and others as well as damage to property.
The pictograms and their meanings are described below. Be sure to understand them thoroughly before reading this manual.

WARNING
Failing to heed this pictogram and handling the product erroneously could result in accidents leading to death or major injury.

CAUTION
Failing to heed this pictogram and handling the product erroneously could result in personal injury or damage to surrounding property.
Examples of pictograms

The symbol indicates instructions urging caution (including warnings). A concrete indication of the caution is given within the symbol.

The symbol indicates prohibited actions. A concrete indication of the prohibited action is given within the symbol.

The symbol indicates required actions. A concrete indication of the required action is given within the symbol.

WARNING

- When mounting or removing the camera unit, do not remove any screws other than those specified.
- Do not dissemble or remodel the stylus pen. Do not give a shock to the stylus pen or bend it.
Installation environment

- Avoid dripping or splashing water near the product. If water has been spilled into the camera unit, contact your dealer.
Cautions on using the stylus pen
- Use a flat and hard screen with a screen size of 100 inches or less.
- Some screen surfaces can be scratched by the stylus pen tip. Before using the stylus pen, test it in an inconspicuous part of the screen to be sure the pen tip will not damage the screen surface.
- Do not use the stylus pen in the below mentioned areas.
It may cause of malfunction of the stylus pen. - In the area direct sunlight strikes the screen surface and the camera unit.
- In the area light of halogen or filament lamps directly strikes the screen surface and the camera unit.
- In the case, materials reflects light is used within the stylus pen operation area. (ex. screen frame)
- Do not use the stylus pen in the below mentioned environment. It may cause of malfunction of the stylus pen.
- When the infrared remote is used.
- The guaranteed operation temperature range for the function of the stylus pen is 5^ to 40^ C ( 41^ to 104^ F).
- Disposing of this product
When disposing of this product, contact your store of purchase or local government for instructions.
Features
- Interactive electronic white board function
With a drawing software, the white board or wall can be used as your interactive white board, and you can take handwritten notes or draw pictures on the screen with the supplied stylus pen.
Supported projectors: - UM330X, UM280X, UM330W, UM280W
- M352WS, M302WS, M332XS
• One or more people can take notes or draw pictures with stylus pens at the same time
Two stylus pens come standard with the product. The stylus pen is also available as an option (NP02Pi).
Up to 255 stylus pens can be used at the same time on the product.
However, this number will vary depending on drawing software you use.
For using drawing software, refer to the user manual included with the drawing software.
• Auto Calibration function
Position adjustment is easily done thanks to the auto calibration function.
Packaged Items
Make sure your box contains everything listed. If any pieces are missing, contact your dealer.
- Camera unit x 1

natural_image
Simple 3D illustration of a rectangular electronic component with a circular top and a V-shaped notch (no text or symbols)- Adapter (24F5014□) x 1 (Supported models: M352WS/M302WS/M332XS)

- Adapter (24F5012) x 1 (Supported models: UM330X/UM280X/UM330W/UM280W)
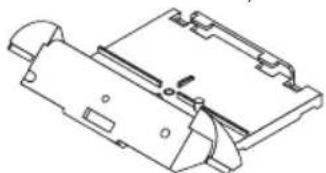
natural_image
Technical line drawing of a mechanical component with no visible text or symbols- Adapter cover (24F5013□) x 1 (Supported models: UM330X/UM280X/UM330W/UM280W)
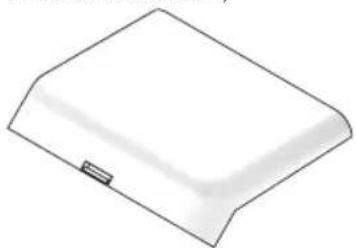
natural_image
Simple line drawing of a rectangular object with a small protrusion at the bottom (no text or symbols)The adapter and the adapter cover for UM330X/UM280X/UM330W/UM280W are attached together before shipment.
- Stylus pen x 2

- USB cable x 1 For charging the stylus pen

natural_image
Pure electrical connector diagram without any text, numbers, or symbols- USB cable (4.5 m/14.8 feet) x 1 For connecting the computer with the camera unit

natural_image
Line drawing of a coiled cable or hose with connectors (no text or symbols)• Installation Manual (this document) x 1
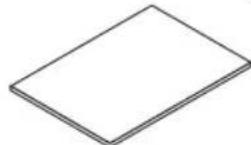
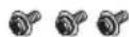
- Screw (M3) x 3
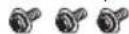
NOTE
- Download the driver and the calibration software from our website to install them on the computer. URL: http://www.nec-display.com/dl/en/index.html
- Drawing software is required to use the interactive white board function. No drawing software is included with the product. Get commercially available drawing software.
ENG-6
Part Names
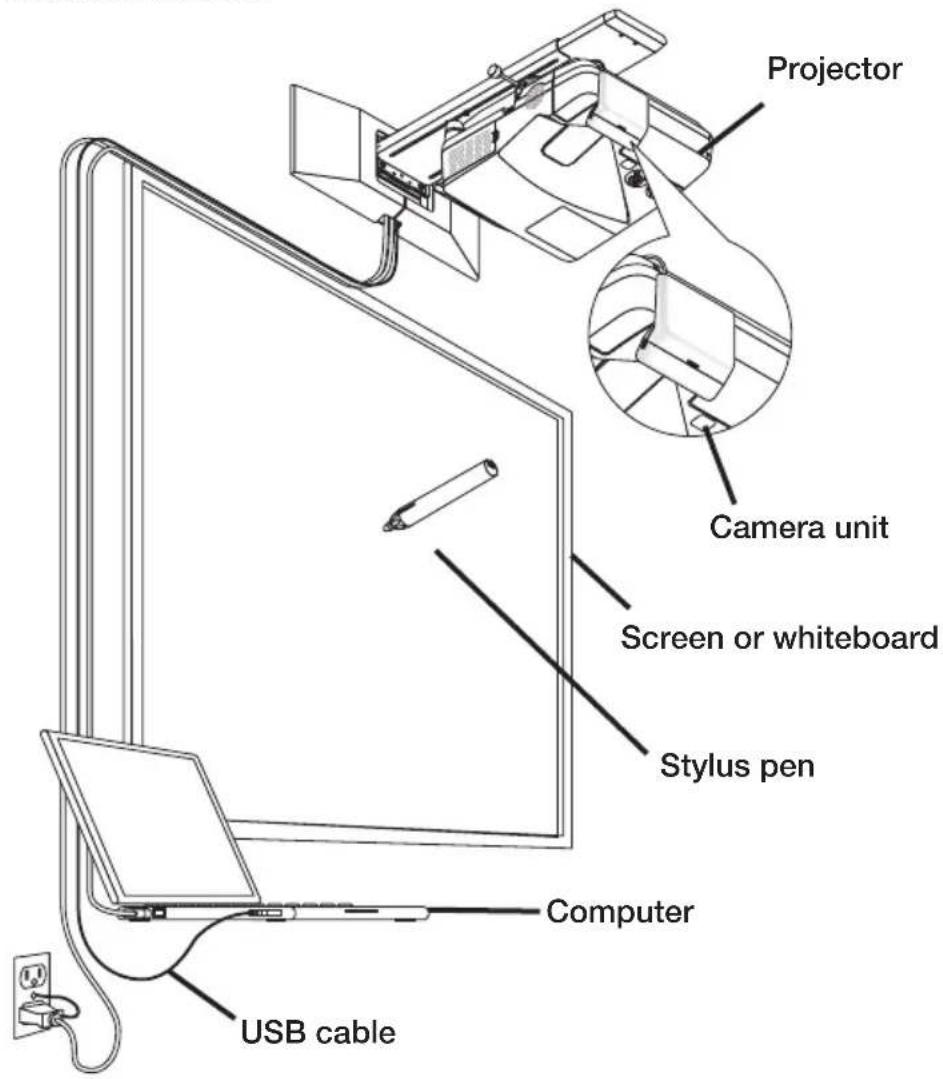
The drawing shows an example of the optional wall mount unit (Model name: NP04WK) with the projector mounted on it.
ENG-7
Part names of the supplied stylus pen

Charging the stylus pen
Use the supplied USB cable for charging the stylus pen to connect the charging port (USB) of the stylus pen with the USB port of the computer.

natural_image
Line drawing of a laptop connected to a cable with a pen, showing no text or symbolsThe stylus pen will start charging. Charging will complete in about 3 minutes.
- Pressing the pen tip against a screen or white board will turn the indicator LED to red, which indicates that charging is completed and you are ready to use the stylus pen. If the red LED turns off, charge the stylus pen.
Cautions on using the stylus pen
- Do not damage the stylus pen by dropping it on the floor or mishandling it.
- Keep the stylus pen away from water and other liquids. If the stylus pen gets wet, wipe the stylus pen dry immediately.
- Avoid heat and humid when possible.
ENG-8
Setup Procedure
Setup Flow
- Mount the camera unit onto the projector.
• For UM330X/UM280X/UM330W/UM280W
• For M352WS/M302WS/M332XS
- Connect the projector to the computer.
- Turn on the projector power and adjust the position and focus of the projected image.
- Connect the computer and the camera unit with the included USB cable.
- Download and install the driver and the calibration software on the computer to perform the calibration.
1. Mount the camera unit onto the projector.
Two kinds of adapters are included. One is for UM330X/UM280X/UM330W/UM280W and the other for M352WS/M302WS/M332XS.
• For UM330X/UM280X/UM330W/UM280W:
Use the camera unit, adapter (24F5012□), adapter cover (24F5013□), and two screws.
Preparation:
• Prepare a plus-headed screwdriver.
- If the cable cover is attached to the projector, remove it.
To attach and remove the cable cover, follow the procedure provided in the user's manual included with the projector.
- The adapter and the adapter cover for UM330X/UM280X/UM330W/UM280W are attached together before shipment.
Before working, push and pull the top of the adapter cover to separate them each other.

ENG-9
1. Attach the adapter to the cable cover.
Engage the two protrusions of the adapter with the tab holes of cable cover and align the screw hole of the cable cover with the one of the adapter. Tighten the screw inside the cable cover.

2. Attach the cable cover to the projector.

natural_image
Technical line drawing of a mechanical device with no visible text or symbols3. Connect the USB cable to the camera unit.
Insert the L-shaped connector of the included USB cable (4.5 m/ 14.8 feet) into the USB port (type B) of the camera unit.

natural_image
Diagram of a device with a cable and connector, showing no text or symbolsENG-10
4. Attach the camera unit to the adapter.
Engage the two protrusions of the camera unit in the holes of the adapter to align the screw hole.
Tighten the screw to ensure safety.

natural_image
Technical line drawing of a mechanical device with an inset showing a close-up of the internal components (no text or symbols present)
5. Attach the adapter cover to the adapter.
Engage the two tabs of the lower end of the adapter cover in the mounting holes of the adapter and push them until they click into place. Put the USB cable inside the adapter cover.

ENG-11
- For M352WS/M302WS/M332XS:
Use the camera unit, adapter (24F5014□), and two screws
Preparation:
• Prepare a plus-headed screwdriver.
1. Attach the camera unit to the adapter.
Engage the two protrusions of the camera unit in the holes of the adapter to align the screw hole.
Tighten the screw to ensure safety.

natural_image
Technical illustration of a mechanical assembly with a tool and component, showing a rotating shaft and housing (no text or symbols)2. Attach the adapter to the projector.
Engage the two protrusions of the adapter in the holes of the projector to align the screw hole.
Tighten the screw to ensure the safety.

natural_image
Technical line drawing of a mechanical assembly with no visible text or symbolsNOTE
- Do not allow the screws to be loosened. Doing so may cause the camera unit to fall, resulting in personal injury.
- Do not hold the camera unit to lift the projector. Doing so may result in damage to the camera unit, causing failure or malfunction.
ENG-12
2. Connect the projector to the computer.
The projector can be connected to a computer using the computer cable (supplied with the projector) or a commercially available HDMI cable.

3. Turn on the projector power and then adjust the position / focus of the projected image.
For the adjustment procedure, see the projector user's manual.
4. Connect the computer and the camera unit with the included USB cable.
Insert the L-shaped connector of the included USB cable (4.5 m/ 14.8 feet) into the USB port (type B) of the camera unit and insert the other end into a USB port (type A) of the computer.
For UM330X/UM280X/UM330W/UM280W, insert the L-shaped connector of the supplied USB cable into the USB port of the camera unit in advance according to Step 3 of the section "1. Mount the camera unit onto the projector."

5. Download the driver and the calibration software and install them on the computer for calibration.
Download the driver and the calibration software from our website and install them on the computer. URL: http://www.nec-display.com/dl/en/index.html
The operation on installing and calibrating is available in PDF (Portable Document Format). To view or print the PDF files Adobe Reader ^™ is required.
If you cannot open a PDF file on your computer, obtain the current version of Adobe Reader for your OS from the home page of Adobe Systems and install it on your computer.
NOTE
- Drawing software is required to use the interactive white board function. No drawing software is included with the product. Get commercially available drawing software.
Troubleshooting
Stylus pen does not work.
- Is the USB cable connected between the computer (type A USB port) and the camera unit (type B USB port)?
- Have the driver and the calibration software been installed on your computer?
-
Are you using the stylus pen in one of the following environment?
-
If direct sunlight strikes the screen surface and/or camera unit, change the installation place where it is not exposed to direct sunlight.
- If light of a halogen and/or a filament lamp strikes the screen surface and/or camera unit, change the installing direction of the screen and/or camera unit, or block off lamp light.
- Do not use a screen whose material of frame reflects light.
Influence of external light is described at the troubleshooting in the NP03Wi software guide. Refer to the software guide on the support page for our projectors uploaded in our web site and set them up in an appropriate place where does not get influence of light.
• Is the camera unit set to the correct position?
- Does the stylus pen have proper charge?
If pressing the pen tip will not turn LED to red, charge the stylus pen.
• Is the screen size and usage temperature within appropriate range?
Use a screen within the effective range.
Use the stylus pen within a temperature range of 5^ to 40^ C ( 41^ to 104^ F).
• Is the lens of the camera unit soiled?
If the lens is soiled, wipe it with a soft, dry, non-fluffy cloth.
Lines traced with the stylus pen do not match screen.
- Has the sensor been properly calibrated?
- If performing the calibration automatically will not resolve the problem, try to perform the calibration manually.
Specifications
Camera unit
- Input terminal: USB Type B × 1
• Power consumption: 145 mA/5 V, 725 mW
• Weight: 70 g/2.5 oz - External dimensions: 135 (W) x 35 (H) x 36 (D) mm/5.3" (W) x 1.38" (H) x 1.4" (D) (not including protrusions)
• Effective range: 60" to 100" - Operating temperature and humidity: 5° to 40°C (41° to 104°F)/20% to 80% (non-condensing)
- Storage temperature and humidity: -10^ to 50^ (14° to 122°F)/20% to 80% (non-condensing)
Stylus pen
• Weight: 25 g/0.9 oz
• Power supply: Charging type (supercapacitor)
- Charging time: 3 minutes
• Estimated number of charging the battery: 100,000
• Operating time: about 2 hours
- Operating temperature and humidity: 5° to 40°C (41° to 104°F)/20% to 80% (non-condensing)
- Storage temperature and humidity: - 20° to 80°C (-4° to 176°F)/20% to 80% (non-condensing)
ENG-15

NEC
Interaktives Whiteboard-Set
NP03Wi
Installationshandbuch
INHALT
Einführung ....GER-2
- UM330X, UM280X, UM330W, UM280W
- M352WS, M302WS, M332XS
natural_image
Technical line drawing of a mechanical component with no visible text or symbolsnatural_image
Simple line drawing of a rectangular object with a small protrusion at the bottom (no text or symbols)natural_image
Pure electrical connector diagram without any text or symbolsnatural_image
Line drawing of a coiled electrical cable with connectors (no text or symbols)- Installationshandbuch (dieses Dokument) x 1

• Schraube (M3) x 3
HINWEIS
natural_image
Line drawing of a laptop connected to a cable with a pen, showing no text or symbolsGER-8
natural_image
Technical line drawing of a mechanical device with no visible text or symbolsnatural_image
Diagram of a cable connector with a USB cable inserted into a cylindrical device (no text or symbols visible)GER-9
natural_image
Technical line drawing of a mechanical device with an inset showing a close-up of the internal components (no text or symbols present)natural_image
Technical illustration of a mechanical assembly with a tool and component, showing a rotating shaft and housing (no text or symbols)natural_image
Technical line drawing of a mechanical device with internal components and a blue arrow indicating motion (no text or symbols)HINWEIS


- NP03Wi
- Installation Manual
- CONTENTS
- Introduction
- Disposing of your used product
- Cautions
- ENG-2
- DOC Compliance Notice (for Canada only)
- RF Interference (for USA only)
- WARNING
- WARNING TO CALIFORNIA RESIDENTS:
- DECLARATION OF CONFORMITY
- Read This Before Starting
- About the pictograms
- CAUTION
- Examples of pictograms
- Installation environment
- Cautions on using the stylus pen
- Features
- Packaged Items
- NOTE
- ENG-6
- Part Names
- Part names of the supplied stylus pen
- Charging the stylus pen
- ENG-8
- Setup Procedure
- Setup Flow
- Mount the camera unit onto the projector.
- Preparation:
- Attach the adapter to the cable cover.
- Attach the cable cover to the projector.
- Connect the USB cable to the camera unit.
- Attach the camera unit to the adapter.
- Attach the adapter cover to the adapter.
- - For M352WS/M302WS/M332XS:
- Attach the camera unit to the adapter.
- Attach the adapter to the projector.
- ENG-12
- Connect the projector to the computer.
- Turn on the projector power and then adjust the position / focus of the projected image.
- Connect the computer and the camera unit with the included USB cable.
- Download the driver and the calibration software and install them on the computer for calibration.
- Troubleshooting
- Stylus pen does not work.
- Lines traced with the stylus pen do not match screen.
- Specifications
- Camera unit
- Stylus pen
- ENG-15
- NEC
- Installationshandbuch
- INHALT
- HINWEIS
Brand : NEC
Model : NP03Wi
Category : Projector Accessory