
VL 2944 - Fan CLATRONIC - Free user manual and instructions
Find the device manual for free VL 2944 CLATRONIC in PDF.


| Product type | Pedestal fan |
| Brand | Clatronic |
| Model | VL 2944 |
| Blade diameter | 40 cm |
| Number of speeds | 3 |
| Oscillation | Yes |
| Timer | No |
| Remote control | No |
| Adjustable height | Yes |
| Blade material | ABS plastic |
| Power | 45 W |
| Power supply | 220-240 V, 50 Hz |
| Weight | 3.5 kg |
| Dimensions (H x W x D) | 120 x 40 x 40 cm |
| Maximum noise level | 55 dB |
| Color | White |
| Main functions | 3 speeds, oscillation, tilt |
| Safety | Protective grille, anti-slip base |
| Maintenance and cleaning | Clean with a damp cloth, do not immerse |
| Spare parts and repairability | Parts available (blade, grille, motor) |
Frequently Asked Questions - VL 2944 CLATRONIC
User questions about VL 2944 CLATRONIC
0 question about this device. Answer the ones you know or ask your own.
Ask a new question about this device
Download the instructions for your Fan in PDF format for free! Find your manual VL 2944 - CLATRONIC and take your electronic device back in hand. On this page are published all the documents necessary for the use of your device. VL 2944 by CLATRONIC.
USER MANUAL VL 2944 CLATRONIC
natural_image
White electric fan with visible blades and a 'Cool Air' label on the front panel (no other text or symbols)VL 2944
C€
Inhalt
Inhoud • Sommaire • Indice • Índice • Indice • Innhold
Contents • Spis treści • Obsah • Tartalom • Содержание
D Übersicht Bedienelemente . . . . . . . . . . . . . . . . . . . . . . . . . . . . . . . . . . . . . . . . . . . . . . . . . . . . . . . . . . . . . . . . . . . . . . . 3
Bedienungsanleitung . . . . . . . . . . . . . . . . . . . . . . . . . . . . . . . . . . . . . 4
Garantie . . . . . . . . . . . . . . . . . . . . . 6
NL Overzicht bedieningselementen ...... Pagina 3
Gebruiksaanwijzing ...... Pagina 8
Garantie ...... Pagina 10
F Aperçu des éléments de commande .... Page 3
Mode d'emploi .... Page 12
Garantie .... Page 14
E Vista de conjunto Elementos de mando....Página 3
Instrucciones de servicio....Página 16
Garantia....Página 18
P Vista geral dos elementos de comando .... Página 3
Manual de instruções .... Página 20
Garantía .... Página 22
Descrizione dei singoli pezzi ...... Pagina 3
Istruzioni per l'uso ...... Pagina 24
Garanzia ...... Pagina 26
N Oversikt over betjeningselementer .... Side 3
Bruksanvisning .... Side 28
Garanti .... Side 30
GB Control element overview Page 3
Instruction Manual Page 31
Guarantee Page 33
PL Przegląd elemetów obsługi .... Strona 3
Instrukcja obsługi .... Strona 34
Gwarancja .... Strona 36
CZ Přehled obsluhovací prvky....Strana 3
Návod k použití....Strana 38
Záruka....Strana 40
H A hasznalt elemek megtekintése .... Oldal 3
A hasznalati utasítás .... Oldal 42
Garancia .... Oldal 44
RUS Обзор управляющих элементов .... стр. 3
Руководство по эксплуатации .... стр. 46
Гарантия .... стр. 48
1 = langzaam, 2 = snel.
General Safety Instructions
GB
- Read the operating instructions carefully before putting the appliance into operation and keep the instructions including the warranty, the receipt and, if possible, the box with the internal packing.
- The appliance is designed exclusively for private use and for the envisaged purpose. This appliance is not fi t for commercial use. Do not use it outdoors (except if it is designed to be used outdoors). Keep it away from sources of heat, direct sunlight, humidity (never dip it into any liquid) and sharp edges. Do not use the appliance with wet hands. If the appliance is humid or wet, unplug it immediately. Do not put it in water.
- When cleaning or putting it away, switch off the appliance and always pull out the plug from the socket (pull on the plug, not the cable) if the appliance is not being used and remove the attached accessories.
- Do not operate the machine without supervision. If you should leave the workplace, always switch the machine off or remove the plug from the socket (pull the plug itself, not the lead).
- To protect children from the dangers posed by electrical appliances, make sure that the cable is hanging low and that children do not have access to the appliance.
- Check the appliance and the cable for damage on a regular basis. Do not use the appliance if it is damaged.
- Do not try to repair the appliance on your own. Always contact an authorized technician. To avoid the exposure to danger, always have a faulty cable be replaced only by the manufacturer, by our customer service or by a qualified person and with a cable of the same type.
- Use only original spare parts.
- Pay careful attention to the following "Special Safety Instructions".
Special safety instructions
- Never stick fingers or other objects through the protection grid!
- Watch out for long hair! It can be caught in the fan owing to the air turbulence!
- Use the appliance only with the protection grids on!
- The appliance must be assembled completely before use!
- Select a stable base to avoid the tipping of the fan during use!
Overview of the components
1 Front protection grid 6 Rear protection grid
2 Fastening screw 7 Motor shaft
3 Fastening hooks 8 Motor
4 Propeller 9 Setting knob
5 Safety bolt for the rear 10 Stand protection grid 11 Operating mode selector
GB
Assembly instructions
The device must be completely assembled before use! While reading the text it is advisable to refer to the „Overview of the Components“.
- Mount the rear protection grid (6) into the relevant slots and screw on the safety bolt (5) for the rear protection grid (6) by turning it clockwise.
- Press the propeller (4) firmly on to the motor shaft (7).
- Insert the front protective grille (1).
Note: Ensure that the holes for the attachment screw in the front and rear protective grille are aligned one above the other. - Tighten the protective grille with the attachment screw supplied.
- Close the attachment hooks.
Putting into Service
- Connect the device to a duly installed 230V/50Hz protective contact socket.
- Before inserting the plug into the socket. Make sure that the mains voltage to be used matches that of the device. You can find this information on the nameplate.
Use
Basic Settings
Set the blower inclination angle before starting the device. You can adjust the inclination angle by tipping the blower casing with both hands. Caution! The inclination angle amounts to approx. 15^ .
Operating
To select the fan speed use the selector on the front to set one of the following speeds:
1 = slow, 2 = fast. Shift to „0“ to switch off the device.
Blower Direction/Oscillation
You can choose from the two following options:
- Turn the device carefully with by hand by holding the fan on the sides and turning it either to the left or to the right until the limit stop. Warning: do not exceed this limit. The device must have been switched off before. The setting knob must be pulled out.
- Select the automatic swinging direction by pressing in the knob. The device swings automatically within a range of 60^ . This function is active only when the fan is on. To deactivate the function pull out the setting knob.
Cleaning
Never dip the device in water when cleaning. Use a soft dry cloth for cleaning. If the device is very dirty wet a cloth with water and then wipe the device dry once you have fi nished.
This device has been tested according to all relevant current CE guidelines, such as electromagnetic compatibility and low voltage directives, and has been constructed in accordance with the latest safety regulations.
Subject to technical changes without prior notice!
Guarantee
The device supplied by our Company is covered by a 24 month guarantee starting on the date of purchase (receipt).
During the life of the guarantee any fault of the device or its accessories *) ascribable to material or manufacturing defects will be eliminated free of charge by repairing or, at our discretion, by replacing it. The guarantee services do not entail an extension of the life of the guarantee nor do they give rise to any right to a new guarantee!
Proof of the guarantee is provided by the proof of purchase. Without proof of purchase no free replacement or repair will be carried out.
If you wish to make a claim under the guarantee please return the entire machine in the original packaging to your dealer together with the receipt.
*) Damage to accessories does not mean automatic free replacement of the whole machine. In such cases please contact our hotline. Broken glass or breakage of plastic parts are always subject to a charge.
Defects to consumables or parts subject to wearing (e.g. motor pistons, kneading blades, drive shafts, spare remote control, spare toothbrushes, saw blades, etc.) as well as cleaning, maintenance or the replacement of said parts are not covered by the guarantee and hence are to be paid!
The guarantee lapses in case of unauthorized tampering.
After the expiry of the guarantee
After the expiry of the guarantee repairs can be carried by the competent dealer or repair service against the payment of the ensuing costs.
GB
PL


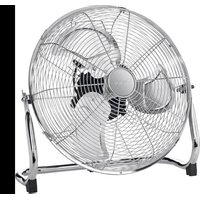
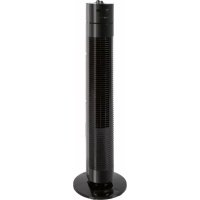
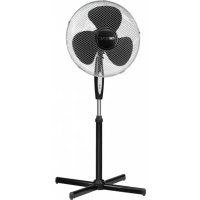
Brand : CLATRONIC
Model : VL 2944
Category : Fan