
Series 1000 QC5040 - Beard trimmer PHILIPS - Free user manual and instructions
Find the device manual for free Series 1000 QC5040 PHILIPS in PDF.


| Product Type | Beard and hair trimmer |
| Brand | Philips |
| Model | Series 1000 QC5040 |
| Power Supply | Rechargeable battery (NiCd or NiMh), mains voltage 220-240V |
| Charging Time | 8 hours (NiCd) or 12 hours (NiMh) |
| Max Cordless Runtime | 35 minutes (NiCd) or 50 minutes (NiMh) |
| Noise Level | Lc = 69 dB [A] |
| Hair Length Settings | 7 settings: 3mm, 6mm, 9mm, 12mm, 15mm, 18mm, 21mm |
| Comb Attachment | Adjustable comb for uniform cutting |
| Cutting Unit | Replaceable Philips cutting unit |
| Usage | Cordless or corded (when battery is empty) |
| Cleaning | Detachable cutting unit for easy cleaning with brush |
| Safety Features | Do not use with damaged adapter; keep dry; charge between 15°C and 35°C |
| Spare Parts | Original Philips cutting unit available |
| Included Accessories | Cleaning brush, adapter, comb attachment |
| Battery Disposal | Removable battery for recycling |
Frequently Asked Questions - Series 1000 QC5040 PHILIPS
User questions about Series 1000 QC5040 PHILIPS
0 question about this device. Answer the ones you know or ask your own.
Ask a new question about this device
Download the instructions for your Beard trimmer in PDF format for free! Find your manual Series 1000 QC5040 - PHILIPS and take your electronic device back in hand. On this page are published all the documents necessary for the use of your device. Series 1000 QC5040 by PHILIPS.
USER MANUAL Series 1000 QC5040 PHILIPS
natural_image
Black Philips 1100 electric toothbrush with spiked tip, no visible text or symbols on bodyENGLISH 4
ROMÂNĂ 15
РУССКИЙ 26
ČESKY 39
MAGYAR 50
SLOVENSKY 61
УКРАЇНСЬКА 72
HRVATSKI 84
SLOVENŠČINA 95
Introduction
Dear customer, you have made the right choice! Your new Philips hair clipper adapts to the contours of the head and enables comfortable use.
To enjoy using the hair clipper for a long time, we advise you to read the following information.
Important
Read these instructions for use carefully before using the appliance and save them for future reference.
▶ Check if the voltage indicated on the adapter corresponds to the mains voltage in your home before you connect the appliance.
This appliance is suitable for mains voltages from 220 to 240 volts.
▶ Only use the adapter supplied.
The adapter contains a transformer. Do not cut off the adapter to replace it with another plug, as this will cause a hazardous situation.
Do not use a damaged adapter.
If the adapter is damaged, always have it replaced by one of the original type in order to avoid a hazard.
- Keep the appliance and the adapter dry.
- Keep the appliance out of the reach of children.

natural_image
Abstract black-and-white graphic with a stylized 'X' and wavy lines, no text or symbols present.
▶ Use, charge and store the appliance at a temperature between 15^ and 35^ .
This appliance is only intended for clipping human hair. Do not use it for any other purpose.
▶ Noise level: Lc = 69 dB [A]
Charging
Charge the appliance for 8 hours (NiCd battery) or 12 hours (NiMh battery) before you start using it for the first time.
A fully charged appliance has a cordless clipping time of up to 35 minutes (NiCd battery) or 50 minutes (NiMh battery).
Do not charge the appliance for more than 24 hours.

natural_image
Close-up of a medical or electronic device with a black arrow pointing to a connector (no text or symbols visible)Make sure the appliance is switched off while charging.
2 Insert the appliance plug into the appliance.
3 Insert the adapter into the wall socket.
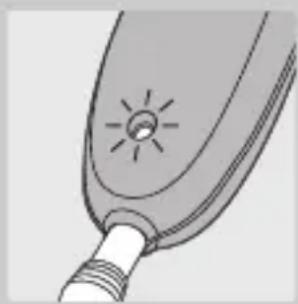
The charging light will go on to indicate that the appliance is charging.
The charging light will not go out or change colour when the appliance is fully charged.
natural_image
Illustration of a handheld device with a lit fuse and bulb (no text or symbols)Optimising the lifetime of the battery
After the appliance has been charged for the first time, do not recharge it between clipping sessions. Continue using it and recharge it only when the battery is (almost) empty.
- Discharge the battery completely twice a year by letting the motor run until it stops.
- Do not keep the appliance plugged into a wall socket all the time.
- If the appliance has not been used for a long time, it must be recharged for 8 hours (NiCd battery) or 12 hours (NiMh battery).
Corded clipping
Do not run the appliance from the mains when the battery is fully charged.
To use the hair clipper connected to the mains:
Switch the hair clipper off, connect it to the mains and wait a few seconds before switching it on. If the battery is completely empty, wait a few minutes before switching the appliance on.
Preparing for use
Clipping with comb attachment

natural_image
Side-view line drawing of a person standing upright and facing forward, with a dashed line indicating a reference or measurement (no text or symbols present)I Before you start clipping, make sure the head of the person whose hair you are cutting is at the same level as your chest.
2 To get the best results, use the hair clipper only on dry hair. Do not use it on freshly washed hair.
3 First comb the hair into the direction of hair growth.
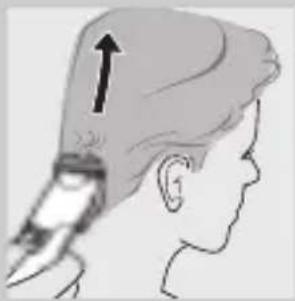
4 Always move the clipper against the direction of hair growth, otherwise it will not cut the hair properly.
5 Move the clipper through the hair slowly.
Using the appliance
Clipping with comb attachment
natural_image
Side profile illustration of a person with an upward arrow pointing to the head area, no text or symbols presentI Slide the comb attachment onto the rails on the appliance until you hear a click.
2 Make sure that the arms of the comb attachment have been properly slid onto the rails on both sides.


3 Choose the appropriate hair length setting.
Press the adjustment button on the back of the appliance and slide the comb attachment to the desired position.
The clipper has 7 different hair length settings:
- 3 mm
- 6 mm
- 9 mm
- 12 mm
- 15 mm
- 18 mm
-21mm
Start at the setting for maximum hair length (2 l mm) to familiarise yourself with the clipper.
4 Make sure that the flat part of the comb attachment is always fully in contact with the scalp to obtain an even cutting result.
5 Pass the clipper slowly over the crown from different directions to achieve an even cutting result.
6 Make overlapping passes over the head to ensure that the clipper catches all the hairs that need to be cut.
7Comb the hair in the direction of hair growth from time to time so that the clipper can catch the hair more easily.
8 To achieve a good result with curly, sparse or long hair, you can use a comb to guide the hair towards the clipper.
9 We advise you to regularly remove clipped hair from the comb while clipping.
Graduation
The Philips hair clipper not only allows you to cut the hair evenly at the same length all over the head, it also enables you to achieve a smooth transition from longer hair on top of the head to shorter hair on the back and sides of the head.
I Start clipping at the setting for maximum hair length (i.e. position 21 mm).
2 Then choose a shorter setting and cut the hair on all parts of the head except the top, where you want the hair to be longer.
3 You can repeat this procedure until the hair on every part of the head has the desired length.
Precise contouring without comb attachment
You can use the clipper without comb attachment to contour the neckline and the area around the ears.
Be careful when you are clipping without comb attachment, for the clipper will remove every hair it touches.

natural_image
Illustration of a hand holding an object with an arrow indicating direction (no text or symbols)
natural_image
Illustration of a small insect-like creature interacting with a surface (no text or symbols)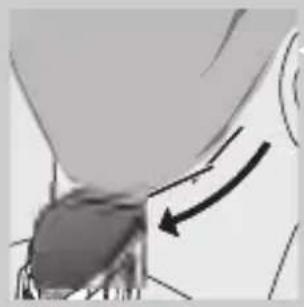
natural_image
Medical illustration showing a surgical procedure with an arrow indicating direction (no text or symbols present)
natural_image
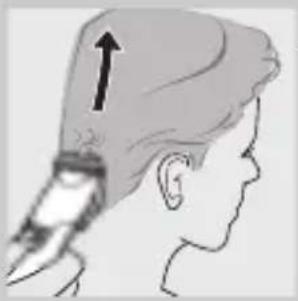
Illustration of a person's head in profile with a hand pointing to the ear area (no text or symbols)■ Remove the comb attachment by pulling it off the clipper.
2 Before contouring the hairline round the ears, comb the hair ends over the ear.
3 Bend the person's ear to get it out of the way.
4 Tilt the clipper in such a way that only one edge of the cutting element touches the hair ends.
5 Only cut the hair ends. The hairline should be close to the ear.
6 To contour the nape hairline and the sideburns, turn the clipper and make downward strokes.
7 Move slowly and smoothly.
8 just follow the natural hairline.
Cutting over styling comb or fingers
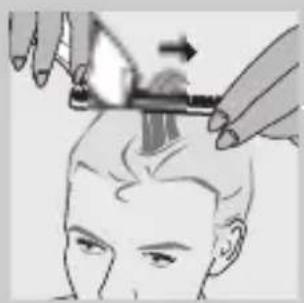
This technique can be used to obtain hair lengths over 21 mm. Bear in mind that this technique is difficult to master and should only be applied by experienced users.
natural_image
Illustration of a person applying a hair styling tool to their head (no text or symbols visible)
natural_image
Illustration of a person applying hair to their forehead with a comb (no text or symbols)I Remove the comb attachment.
2Comb a small section of hair upwards. Lift the hair with a styling comb or hold it between your fingers until only the length that needs to be cut sticks out.
3 Cut the hair protruding from the comb or fingers.
4 Continue this procedure and comb frequently to remove cut hair and to check for unevenly cut sections.
Cleaning
Clean the appliance every time you have used it.
Do not use abrasives, scourers or liquids such as alcohol, petrol or acetone to clean the appliance.
natural_image
Illustration of a mechanical device with a lever and handle, showing motion lines without any text or symbols.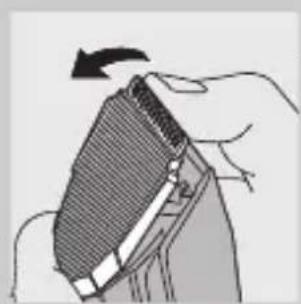
natural_image
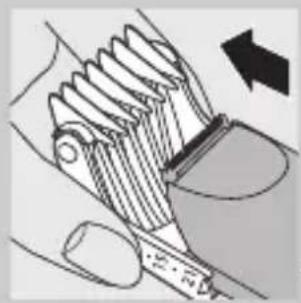
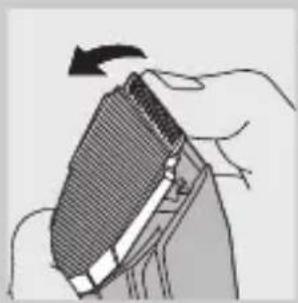
Illustration of a hand holding a textured object with a black arrow indicating rotation (no text or symbols)I Make sure the appliance is switched off and disconnected from the mains before you start cleaning it.
2 Remove the comb attachment.
3 Push the middle part of the cutting unit upwards with your thumb until it opens and then pull it off the appliance.
Be careful that the cutting unit does not fall to the floor.
natural_image
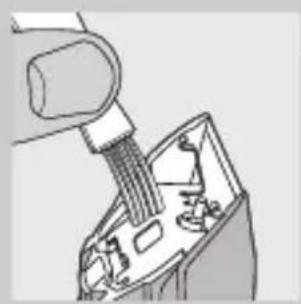
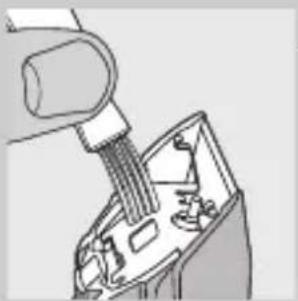
Illustration of a hand inserting a screw into an open electrical socket (no text or symbols visible)4 Clean the cutting unit and the inside of the appliance with the brush supplied.

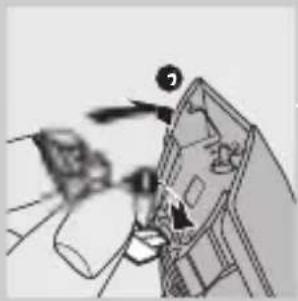
5 Place the lug of the cutting unit into the slot and push the unit back onto the appliance.
6 Make sure you push the cutting unit back until you hear a click.
Replacement

natural_image
Illustration of a hand holding a textured object with a black arrow indicating rotation (no text or symbols)A worn or damaged cutting unit should only be replaced with an original Philips cutting unit.
Push the middle part of the cutting unit upwards with your thumb until it opens and then pull it off the appliance.
natural_image
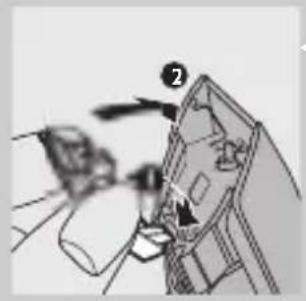
Illustration of a hand operating a computer monitor with an open screen (no text or symbols visible)2 Place the lug of the cutting unit into the slot and push the cutting unit back until you hear a click.
Environment
natural_image
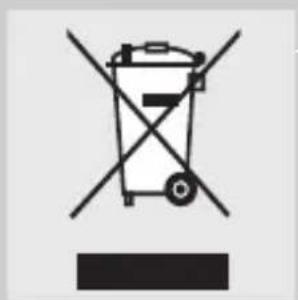
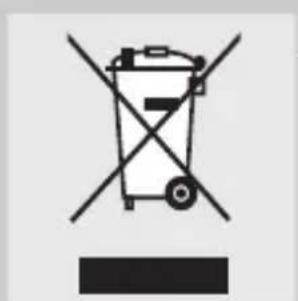
Symbol of a trash bin with crossed lines indicating no waste or discharge (no text or numbers present)Do not throw the appliance away with the normal household waste at the end of its life, but hand it in at an official collection point for recycling. By doing this you will help to preserve the environment.
The built-in rechargeable battery contains substances that may pollute the environment. Always remove the battery before discarding the appliance or handing it in at an official collection point. Dispose of the battery at an official collection point for batteries. If you have trouble removing the battery, you can also take the appliance to a Philips service centre, which will remove the battery for you and will dispose of it in an environmentally safe way.
Disposal of the battery
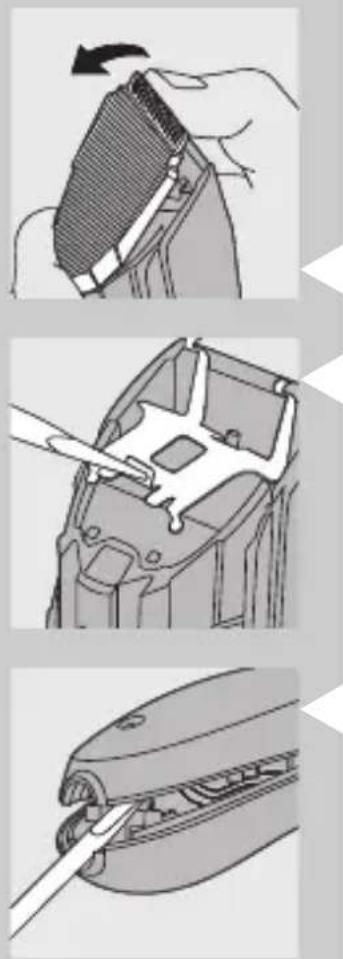
I Disconnect the appliance from the mains and let the appliance run until the motor stops.
2 Open and remove the cutting unit.
3 Remove the metal clip by means of a screwdriver.
4 Open the housing.
Insert a screwdriver into one of the grooves next to the socket for the appliance plug. Turn the screwdriver to separate the two housing halves.

natural_image
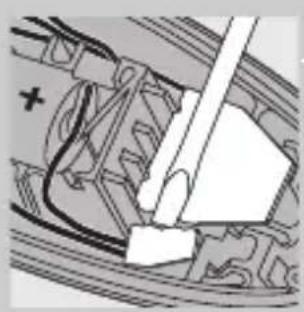
Close-up of a car's engine compartment showing wiring and a switch (no text or symbols visible)5 Insert a screwdriver into the small slot in the printed circuit board marked with an arrow. Push the screwdriver down until part of the printed circuit board breaks off.

natural_image
Illustration of a cannon firing with a mounted gun, no visible text or symbols6 Pull the battery out of the appliance.
Do not connect the appliance to the mains again after the battery has been removed!
Guarantee & service
If you need information or if you have a problem, please visit the Philips website at www.philips.com or contact the Philips Customer Care Centre in your country (you will find its phone number in the worldwide guarantee leaflet). If there is no Customer Care Centre in your country, turn to your local Philips dealer or contact the Service Department of Philips Domestic Appliances and Personal Care BV.
Introducere
natural_image
Illustration of a hand holding a large 'X' sign with abstract background patterns (no text or symbols)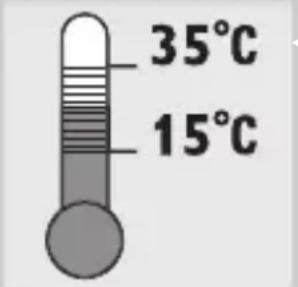
natural_image
Close-up of a medical or laboratory device with a pointed tip and arrow indicating direction (no text or symbols)natural_image
Side-view illustration of a person standing and addressing a child's face, with no text or symbols present.natural_image
Side profile illustration of a person's head with an upward arrow indicating motion or pressure (no text or symbols)3 Alegeti reglajul potrivit lungimii dorite.
natural_image
Illustration of a person's head and shoulders with an arrow indicating motion (no text or symbols)
natural_image
Illustration of a small insect-like figure with wings, possibly a gill or insect, against a plain background (no text or symbols)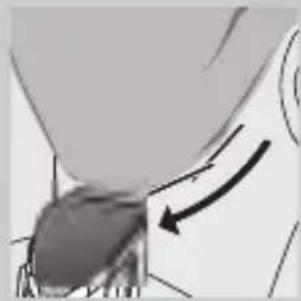
natural_image
Close-up of a mechanical component with an arrow indicating motion or force direction (no visible text or symbols)
natural_image
Illustration of a person's head and neck with a directional arrow indicating movement or pressure (no text or symbols)natural_image
Illustration of a person styling their hair with a comb (no text or symbols)
natural_image
Illustration of a person styling hair with a comb, showing hand placement and motion arrow (no text or symbols)natural_image
Illustration of a hand gripping a mechanical component with a tool and arrow indicating motion (no text or symbols)natural_image
Illustration of a hand holding a textured object with a directional arrow indicating rotation (no text or symbols)
natural_image
Illustration of a hand inserting a plug into an open electronic device (no text or symbols visible)natural_image
Illustration of a hand holding a textured object with a black arrow indicating rotation (no text or symbols)natural_image
Illustration of a person using a computer to interact with a device (no text or symbols visible)natural_image
Symbol of a trash bin with crossed lines indicating no waste or discharge (no text or numbers present)natural_image
Illustration of a hand holding a mechanical component with a curved arrow indicating rotation (no text or symbols)
natural_image
Technical line drawing of a mechanical component with a tool inserted (no text or symbols)
natural_image
Illustration of a medical device with a tool inserted into the internal cavity (no text or symbols visible)
natural_image
Close-up of a car's front wheel assembly with visible wiring and a tool (no text or symbols)natural_image
Diagram of a wind turbine blade assembly with no visible text or symbolsnatural_image
Simple black-and-white illustration of a crossed X sign with a hand holding a pen, set against a patterned background (no text or symbols)
natural_image
Close-up of a medical or surgical tool tip with an arrow indicating direction (no text or symbols visible)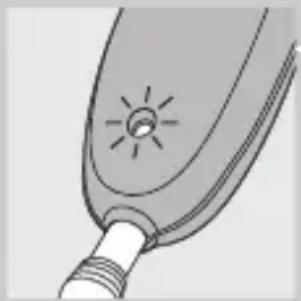
natural_image
Illustration of a stylized light bulb with a sun icon on its tip (no text or symbols)natural_image
Side-view illustration of two human figures in profile view, one standing and one seated, with a dashed line indicating measurement or alignment (no text or symbols)natural_image
Side profile illustration of a person's head with an upward arrow indicating motion or pressure (no text or symbols)natural_image
Illustration of a hand holding an object with an arrow indicating direction (no text or symbols)
natural_image
Illustration of a hand holding an object with curved lines, no visible text or symbols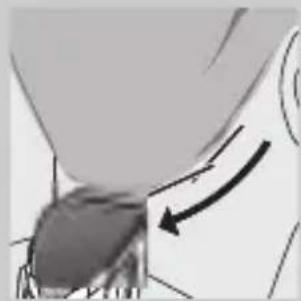
natural_image
Close-up of a mechanical component with an arrow indicating motion (no visible text or symbols)
natural_image
Illustration of a person's head and neck with a hand pointing to the lower side of the ear (no text or symbols present)natural_image
Illustration of a person styling hair with a brush (no text or symbols)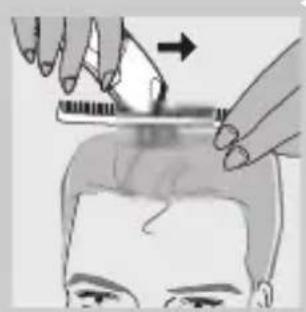
natural_image
Illustration of a person applying a hair accessory to their forehead (no text or symbols present)natural_image
Diagram of a hand gripping a mechanical component with a curved arrow indicating motion (no text or symbols present)natural_image
Illustration of a hand holding a folded or mesh object with a black arrow indicating rotation (no text or symbols)natural_image
Illustration of a hand inserting a plug into an open electrical socket (no text or symbols visible)natural_image
Illustration of a hand holding a textured object with a black arrow indicating rotation (no text or symbols)natural_image
Diagram of a mechanical device with labeled parts and directional arrows (no readable text or symbols)natural_image
Illustration of a hand holding a textured object with a curved arrow indicating rotation (no text or symbols)natural_image
Technical line drawing of a mechanical component with a tool inserted (no text or symbols)natural_image
Illustration of a mechanical component with a tool inserted, showing internal structure (no text or symbols)natural_image
Close-up of a car's front wheel assembly with visible wiring and a tool (no text or symbols)natural_image
Diagram of a mechanical component with a cylindrical shaft and attached rod, mounted on a railway track (no text or symbols visible)natural_image
Black and white illustration of a crossed X sign with abstract background patterns (no text or symbols)
natural_image
Close-up of a medical or laboratory device with a black arrow pointing to a connector (no text or symbols visible)natural_image
Side-view illustration of a person standing and addressing a child's face, with no text or symbols present.natural_image
Illustration of a hand holding an object with an arrow indicating direction (no text or symbols)natural_image
Illustration of a bee on a branch with visible legs and antennae (no text or symbols)
natural_image
Medical illustration showing a surgical procedure with an arrow indicating direction (no text or symbols present)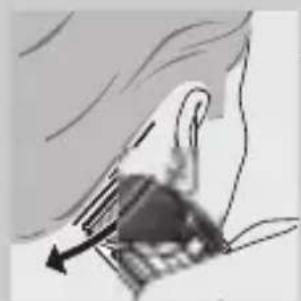
natural_image
Illustration of a person's head and neck with a directional arrow indicating movement or pressure (no text or symbols)
natural_image
Illustration of a person applying hair to their head with a tool (no text or symbols visible)
natural_image
Illustration of a person styling hair with a comb, showing hand placement and arrow (no text or symbols)natural_image
Diagram of a hand gripping a mechanical component with a tool, no text or symbols presentnatural_image
Illustration of a hand holding a textured object with a black arrow indicating rotation (no text or symbols)natural_image
Illustration of a hand inserting a screw into an open electrical socket (no text or symbols)
natural_image
Illustration of a hand holding a textured object with a curved arrow indicating rotation (no text or symbols)natural_image
Illustration of a hand operating a device with a numbered label (2), no visible text or symbolsnatural_image
Symbol of a trash bin crossed with no text or numbers, representing waste sorting or disposal (no text present)natural_image
Illustration of a hand holding a textured object with a black arrow indicating rotation (no text or symbols)
natural_image
Diagram of a mechanical component with a tool inserted, showing internal structure without any text or symbols.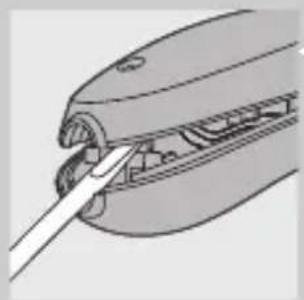
natural_image
Illustration of a medical device with a tool inserted into the internal cavity (no text or symbols visible)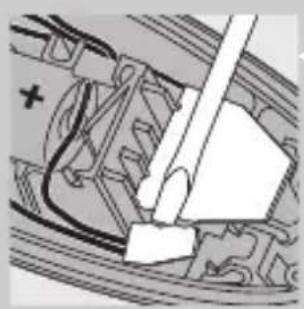
natural_image
Mechanical assembly diagram showing a lever interacting with a car body panel (no text or symbols visible)natural_image
Diagram of a wind turbine blade assembly with no visible text or symbolsnatural_image
Illustration of a hand holding a large 'X' symbol, with abstract leaf-like patterns in the background (no text or symbols)
natural_image
Close-up of a medical or laboratory device with a black arrow pointing to a connector (no text or symbols visible)natural_image
Illustration of a handheld device with a circular button and bulb (no text or symbols)natural_image
Side-view line drawing of a person standing upright and facing forward, with a dashed line indicating a reference or measurement (no text or symbols present)natural_image
Illustration of a hand holding an object with an arrow indicating direction (no text or symbols)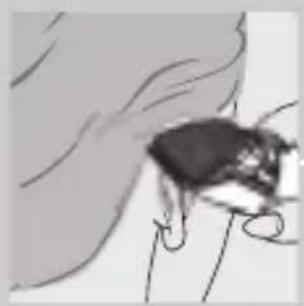
natural_image
Illustration of a small insect-like creature interacting with a surface (no text or symbols)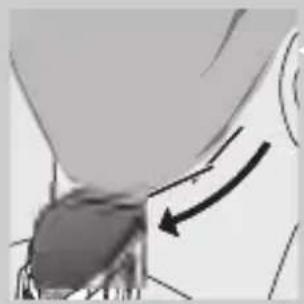
natural_image
Medical illustration showing a surgical procedure with an arrow indicating direction (no text or labels)
natural_image
Illustration of a person's head in profile with a hand pointing to the ear area (no text or symbols)natural_image
Illustration of a person styling hair with a brush (no text or symbols)
natural_image
Illustration of a person styling hair with a comb, showing hand placement and motion arrow (no text or symbols)natural_image
Illustration of a hand gripping a tool with a curved blade and a black arrow indicating direction (no text or symbols)MAGYAR58

natural_image
Illustration of a hand holding a textured object with a curved arrow indicating rotation (no text or symbols)natural_image
Illustration of a hand inserting a plug into an open electrical socket (no text or symbols visible)natural_image
Illustration of a hand holding a folded or mechanical component with a black arrow indicating rotation (no text or symbols)natural_image
Line drawing of a mechanical component with no visible text or symbolsnatural_image
Illustration of a hand holding a textured object with a black arrow indicating rotation (no text or symbols)natural_image
Technical line drawing of a mechanical component with a tool inserted (no text or symbols)
natural_image
Illustration of a mechanical component with a tool inserted, showing internal structure (no text or symbols)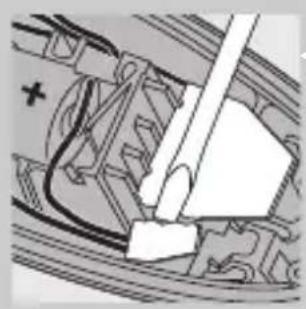
natural_image
Mechanical assembly diagram showing a motor or engine component with no visible text or symbols
natural_image
Illustration of a mechanical component with a cylindrical shaft and attached parts, no visible text or symbolsnatural_image
Black-and-white illustration of a crossed X sign with abstract background patterns (no text or symbols)
natural_image
Close-up of a medical or laboratory device with a black arrow pointing to a connector (no text or symbols visible)Počas nabíjania musí byt' strojček vypnutý.
2 Koncovku zasuňte do zariadenia.
3 Adaptér pripojte do siete.
Po pripojení do siete sa rozsvieti indikátor nabíjania batérie.
Ked' sa zariadenie úplne nabije, kontrolné svetlo nabíjania sa nevypne, ani nezmení farbu.

natural_image
Illustration of a handheld device with a circular button and starburst symbol (no text or labels)Optimalizácia životnosti batérie
natural_image
Side-view illustration of a person standing and behind a child's head, with no text or symbols present.natural_image
Illustration of a person's head and shoulders with an arrow indicating motion (no text or symbols)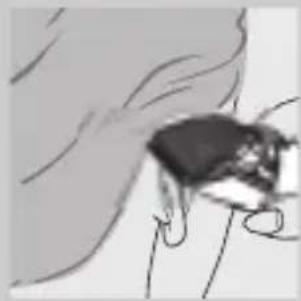
natural_image
Illustration of a small insect-like figure with wings, possibly a gill or insect, against a plain background (no text or symbols)
natural_image
Close-up of a mechanical component with an arrow indicating motion or force direction (no visible text or symbols)
natural_image
Illustration of a person's head and neck with a directional arrow indicating movement or pressure (no text or symbols)natural_image
Illustration of a person applying a hair styling tool to their head (no text or symbols visible)
natural_image
Illustration of a person styling hair with a comb, showing hand placement and motion direction (no text or symbols)natural_image
Illustration of a hand gripping a tool with a curved handle and a black arrow indicating direction (no text or symbols)natural_image
Illustration of a hand inserting a plug into an open electronic device (no text or symbols visible)natural_image
Illustration of a hand holding a textured object with a black arrow indicating rotation (no text or symbols)natural_image
Diagram of a mechanical device with an arrow pointing to a component (no visible text or symbols)natural_image
Symbol of a trash bin with crossed lines indicating no waste or discharge (no text or numbers present)natural_image
Illustration of a hand holding a meshed object with an arrow indicating rotation (no text or symbols)
natural_image
Technical line drawing of a mechanical component with a tool interacting with a central part (no text or symbols)
natural_image
Diagram of a mechanical component with internal parts and a tool inserted (no text or symbols)natural_image
Mechanical assembly diagram showing a motor or gear assembly with no visible text or symbolsnatural_image
Illustration of a vintage cannon on a railway track, no text or symbols visible6 Vyberte dobíjatel'nú batériu zo zariadenia.
natural_image
Illustration of a hand holding a large 'X' symbol, with abstract background patterns (no text or symbols)
natural_image
Close-up of a medical or laboratory device with a black arrow pointing to a connector (no text or symbols visible)natural_image
Illustration of a stylized lamp with a sunburst design on its body (no text or symbols)natural_image
Side-view illustration of a person standing and behind a child's head, with no text or symbols present.natural_image
Medical illustration showing a hand holding an object with an arrow indicating motion (no text or symbols present)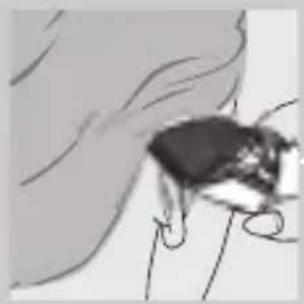
natural_image
Illustration of a small insect-like creature with curved legs and antennae, partially enclosed in a textured surface (no text or symbols)
natural_image
Medical illustration showing a surgical procedure with an arrow indicating direction (no text or symbols present)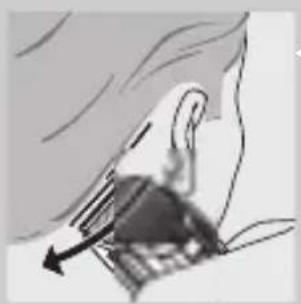
natural_image
Illustration of a person in profile with motion arrows indicating movement (no text or symbols)natural_image
Illustration of a person applying a hair styling tool to their head (no text or symbols present)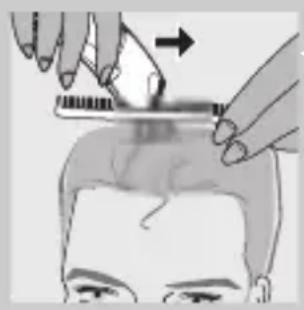
natural_image
Illustration of a person styling hair with a comb, showing step 1 (no text or symbols)natural_image
Illustration of a mechanical tool with a curved handle and lever mechanism (no text or symbols)natural_image
Illustration of hands holding a mechanical component with a curved arrow indicating rotation (no text or symbols)natural_image
Illustration of a hand inserting a screw into an open electrical socket (no text or symbols visible)natural_image
Illustration of a car interior with a hand pointing at the window, no visible text or symbolsnatural_image
Illustration of a hand holding a folded garment with a zipper, showing a black arrow indicating rotation (no text or symbols present)natural_image
Illustration of a hand holding a device with an arrow pointing to a component (no text or symbols visible)natural_image
Symbol of a trash bin with crossed lines indicating no waste or discharge (no text or numbers present)natural_image
Illustration of a hand holding a textured object with a black arrow indicating rotation (no text or symbols)natural_image
Technical line drawing of a mechanical component with a tool inserted (no text or symbols)natural_image
Diagram of a mechanical component with a tool inserted, showing internal structure (no text or symbols)4 Відкрийте корпус.
natural_image
Close-up of a car's front wheel assembly showing battery, screw, and housing (no text or symbols visible)natural_image
Technical illustration of a mechanical component with no visible text or symbolsnatural_image
Abstract black-and-white graphic with crossed X and curved shapes on a dotted background (no text or symbols)
▶ Razina buke: Lc = 69 dB [A]
Punjenje
Aparat punite 8 sati (NiCd baterija) ili 12 sati (NiMh) baterija prije prve uporabe aparata.
natural_image
Close-up of a medical or surgical tool tip with an arrow pointing to it (no text or symbols visible)natural_image
Illustration of a handheld device with a circular button and starburst symbol (no text or labels)- Dva puta godišnje poptpuno ispraznite baterije tako da ostavite motor da radi sve dok ne stane.
- Ne držite aparat uključen na napajanje cijelo vrijeme.
- Ako se aparat nije koristio duže vrijeme, mora se puniti 8 sati (NiCd baterija) odnosno 12 sati (NiMh baterija).
natural_image
Side-view illustration of a person standing and behind a child, both facing slightly different angles (no text or symbols)Prije nego počnete šišati, provjerite da li je glava osobe koju šišate u ravnini s Vašim prsima.
2 Za najbolje rezultate, aparat za šišanje koristite samo za šišanje suhe kose. Ne koristite ga za šišanje svježe oprane kose.
natural_image
Side profile illustration of a person's head with an upward arrow indicating motion or pressure (no text or symbols)natural_image
Illustration of a person's head and shoulders with an arrow indicating motion (no text or symbols)
natural_image
Illustration of a hand holding an object, possibly a small insect or tool, with no visible text or symbols.natural_image
Close-up of a biological structure with an arrow indicating a specific region (no text or symbols present)
natural_image
Illustration of a person's head in profile with motion lines indicating movement (no text or symbols)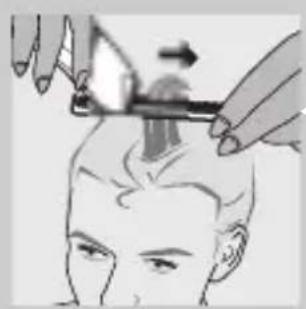
natural_image
Illustration of a person styling their hair with a tool (no text or symbols visible)
natural_image
Illustration of a person styling hair with a brush (no text or symbols)6 Za oblikovanje linije kose na zatiljku i zaliscima, okrenite aparat za šišanje i povlačite ga prema dolje.
7 Radite spore i ravnomjerne pokrete.
8 Slijedite prirodnu liniju kose.
Šišanje i oblikovanje češljem ili prstima
Ova tehnika se može koristiti za duljinu kose preko 21 mm. Imajte na umu da je ovu tehniku teško savladati i da bi ju trebali primijenjivati samo iskusni korisnici.
■ Skinite češalj.
2 Počešljajte mali pramen kose prema gore. Podignite kosu češljem za stiliziranje i držite među prstima tako da samo duljina kose koju treba ošišati viri prema van.
3 Odrežite kosu koja viri iz češlja ili prstiju.
4 Nastavite s ovim postupkom i često češljajte da biste uklonili kosu i provjerili da li ima nejednakih pramenova.
Cišćenje
Očistite aparat nakon svake uporabe.
natural_image
Illustration of a hand gripping a mechanical component with a curved handle and arrow indicating direction (no text or symbols)I Prije čišćenja aparat mora biti isključen i odspojen iz napajanja.
2 Skinite češalj.
natural_image
Illustration of a hand holding a device with a black arrow indicating rotation (no text or symbols)3 Pritisnite srednji dio rezaće jedinice prema gore sve dok se ne otvori te ga izcucite sa aparata.
Pazite da Vam rezna jedinica ne padne na pod.
natural_image
Illustration of a hand inserting a plug into an open electronic device (no text or symbols visible)4 Očistite reznu jedinicu i unutrašnjost aparata isporučenom četkicom.

5 Stavite jezičac rezaće jedinice u utor epritisnite jedinicu nazad u aparat.
natural_image
Illustration of a hand holding a textured object with a curved arrow indicating rotation (no text or symbols)Pritisnite srednji dio rezaće jedinice prema gore sve dok se ne otvori te ga izcucite sa aparata.
natural_image
Line drawing of a mechanical device with a numbered component (no text or symbols)2 Stavite jezičac rezaće jedinice u utor epritisnite jedinicu nazad u aparat.
Zaštita okoliša

natural_image
Symbol of a trash bin with crossed lines indicating no waste or discharge (no text or labels)Aparat ne odbacujte zajedno s ostalim kućnim smećem, već ga odložite na za to predviđena prikupljališta. Na taj način pridonosite zaštiti okoliša.
natural_image
Illustration of a hand holding a textured object with a curved arrow indicating rotation (no text or symbols)2 Otvorite i skinite reznu jedinicu.

natural_image
Technical line drawing of a mechanical component with a tool inserted (no text or symbols)natural_image
Illustration of a mechanical component with a tool inserted, showing internal structure (no text or symbols)4 Otvorite kućište.
Stavite odvijač u utore pored utičnice za utikač aparata. Okrenite odvijač da biste odvojili dvije polovice kućišta.
natural_image
Close-up of a car's front wheel assembly with visible wiring and a tool (no text or symbols)5 Umetnite odvijač u mali utor ploče s kontaktima označen strelicom. Pritisnite odvijač dok se dio ploče s kontaktima ne polomi.

natural_image
Illustration of a railway track with a curved ramp and tracks, no visible text or symbols6 Izvucite bateriju iz aparata.
Na spajajte aparat na mrežni napon nakon što ste izvadili baterije.
Jamstvo i servis
Trebate li informaciju ili imate problem, molimo Vas da posjetite PHILIPS website na www.philips.com ili da kontaktirate PHILIPS predstavništvo u Vašoj zemlji. Brojeve telefona možete pronaći u priloženom jamstvenom listu.
Predstavitev
natural_image
Illustration of a hand holding a large 'X' sign with abstract background patterns (no text or symbols)
▶ Aparat uporabljajte, polnite in hranite na temperaturi med 15°in 35°.
Ta aparat je namenjen le za striženje ljudi. Ne uporabljajte ga za nobene druge namene.
Raven hrupa: Lc = 69 dB [A]
Polnjenje
Pred prvo uporabo polnite aparat 8 ur (NiCd baterije) ali 12 ur (NiMh baterije).
natural_image
Close-up of a medical or laboratory device with a black arrow pointing to a tip, no visible text or symbols.natural_image
Illustration of a handheld device with a bulb and starburst symbol (no text or labels)natural_image
Side-view illustration of a person standing and behind a child's head, with no text or symbols present.natural_image
Illustration of a hand holding an object with an arrow indicating direction (no text or symbols)4 Nagnite aparat tako, da se bo le en rob strižnega rezila dotikal konic las.

natural_image
Close-up illustration of a small insect with wings and legs, no visible text or symbols5 Porežite le konice las. Linija las naj bo blizu ušes.
natural_image
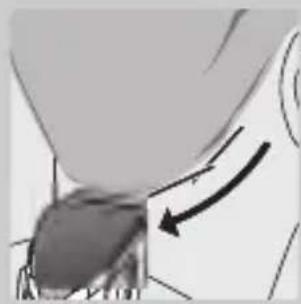
Close-up of a mechanical component with an arrow indicating motion (no visible text or symbols)6 Da očrtate liniji na tilniku in zalizcev, obrnite aparat in premikajte aparat navzdol.

natural_image
Illustration of a person's head and neck with a directional arrow indicating movement or pressure (no text or symbols)natural_image
Illustration of a person applying a hair styling tool to their head (no text or symbols visible)Striženje čez glavnik ali prste
natural_image
Illustration of a person styling hair with a comb, showing hand placement and arrow (no text or symbols)dokler ne štrli ven le dolžina, ki jo nameravate odrezati.
3 Odrežite lase, ki štrlijo iz glavnika oz. prstov.
4 Nadaljujte s tem postopkom in pogosto česite lase, da odstranite odrezane in preverite enakomerno striženje.
Čiščenje
natural_image
Illustration of a hand gripping a car seatbelt with a tool, no text or symbols presentnatural_image
Illustration of a hand holding a textured object with a black arrow indicating rotation (no text or symbols)4 S priloženo krtačko očistite rezilno enoto in notranjost aparata.

natural_image
Illustration of a hand inserting a screw into an open mechanical component (no text or symbols visible)
5 Vstavite zatič brivne enote v zarezo in jo potisnite nazaj na aparat.
6 Pazite, da boste strižno enoto dovolj dobro potisnili nazaj, tako da boste zaslišali klik.
Zamenjava

natural_image
Illustration of a hand holding a meshed object with a curved arrow indicating rotation (no text or symbols)natural_image
Diagram of a mechanical device with an arrow pointing to a component (no visible text or symbols)2 Vstavite zatič brivne enote v zarezo in jo potisnite nazaj na aparat, dokler ne zaslišite klika.
Okolje
natural_image
Symbol of a trash bin crossed with no text or numbers, representing waste sorting or disposal (no text present)natural_image
Illustration of a hand holding a textured object with a black arrow indicating rotation (no text or symbols)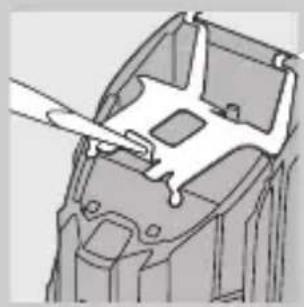
natural_image
Technical line drawing of a mechanical component with a tool inserted (no text or symbols)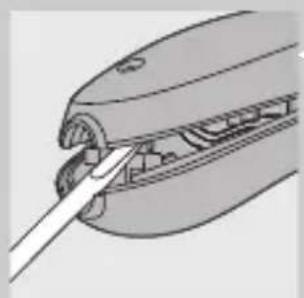
natural_image
Illustration of a medical device with a surgical tool inserted into the internal cavity (no text or symbols visible)
natural_image
Mechanical assembly diagram showing a lever and housing component (no text or labels)natural_image
Diagram of a wind turbine blade assembly with no visible text or symbols6 Potegnite baterijo iz aparata.
- Introduction
- Important
- Charging
- Optimising the lifetime of the battery
- Corded clipping
- To use the hair clipper connected to the mains:
- Preparing for use
- Clipping with comb attachment
- Using the appliance
- Choose the appropriate hair length setting.
- Graduation
- Precise contouring without comb attachment
- Cutting over styling comb or fingers
- Cleaning
- Replacement
- Environment
- Disposal of the battery
- Guarantee & service
- Introducere
- Alegeti reglajul potrivit lungimii dorite.
- MAGYAR58
- Optimalizácia životnosti batérie
- Punjenje
- Šišanje i oblikovanje češljem ili prstima
- Cišćenje
- Zaštita okoliša
- Jamstvo i servis
- Predstavitev
- Polnjenje
- Striženje čez glavnik ali prste
- Čiščenje
- Zamenjava
- Okolje
- Potegnite baterijo iz aparata.
Brand : PHILIPS
Model : Series 1000 QC5040
Category : Beard trimmer