
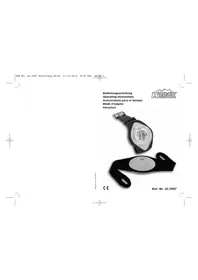
42.4001 - Sports Watch TFA - Free user manual and instructions
Find the device manual for free 42.4001 TFA in PDF.


| Product Type | Sports Watch |
| Brand | TFA |
| Model | 42.4001 |
| Category | Sports Watch |
| Weight | 100 g (approx.) |
| Dimensions | 50 x 45 x 15 mm (approx.) |
| Case Material | Plastic |
| Strap Material | Silicone |
| Display Type | Digital LCD |
| Water Resistance | 50 meters (5 ATM) |
| Power Source | 1 x CR2032 lithium coin cell battery |
| Battery Life | Approximately 2 years |
| Functions | Time, Date, Stopwatch, Countdown Timer, Alarm, Backlight |
| Activity Tracking | Not available |
| Backlight | Yes, LED |
| Calendar | Automatic date display |
| Maintenance | Clean with a soft, damp cloth. Avoid solvents and abrasives. |
| Safety Precautions | Keep away from children. Do not expose to extreme temperatures or magnetic fields. |
| Spare Parts | Battery readily available. Strap can be replaced. |
| Warranty | 2 years (as per local regulations) |
Frequently Asked Questions - 42.4001 TFA
User questions about 42.4001 TFA
0 question about this device. Answer the ones you know or ask your own.
Ask a new question about this device
Download the instructions for your Sports Watch in PDF format for free! Find your manual 42.4001 - TFA and take your electronic device back in hand. On this page are published all the documents necessary for the use of your device. 42.4001 by TFA.
USER MANUAL 42.4001 TFA
INTRODUCTION
This device is a digital product that provides altimeter, barometer, compass, altimeter data, dual time, chronograph, chronograph data and alarm functions.
Features:
Altimeter
- 1 meter (or foot) resolution and with working range from -700 meters (-2296 feet) to 9000 meters (29520 feet).
- Graphical expression of changes provided.
- Unit in meters or feet selectable.
- 20 memories with date, time and altitude reading.
Barometer
- 1 hPa resolution and with working range from 300 hpa to 1100 hpa.
- Graphical expression of changes provided.
- Both sea level pressure and absolute pressure can be shown.
- Weather forecast.
- Temperature displayed in °F or °C selectable.
Compass
- Electronic compass providing 16 cardinal indications together with bearing in degrees.
- Declination correction provided.
Time
- 2 time modes selectable.
- Presents day of the week, day, hours, minutes and seconds (year and month can also be set).
- 12/24-hour formats selectable.
- Auto-calendar from 2000 to 2049.
Chronograph
- 1/100-second resolution with working range up to 24 hours.
- 100 memories for lap/split times stored in a maximum of 30 runs.
Alarm
- 2 daily alarms.
- Hourly chime.
Electro-luminescent backlight
- 3 seconds light up EL backlight.
Altimetermode with altitude change: measures every 2,5 seconds
Altimetermode without altitude change (barometer mode): every 2,5 minutes
Barometermode: measures every 2,5 minutes. Changes to Time mode after 24 hours
Temperature: measures every 2,5 minutes.
BASIC OPERATION OF BUTTONS

A: - SWITCH AMONG DISPLAYS
- TAKE BEARING
- STORE ALTITUDE DATA (PRESS AND HOLD)
- FORWARD SELECTION OF ALTITUDE DATA
- START/LAP OF CHRONOGRAPH
- RETRIEVE DATA IN RUN
- TURN ALARM ON AND OFF
- FORWARD SETTING (SET OR CALIBRATION)
B: - SWITCH BETWEEN NORMAL TIME AND DUAL TIME (PRESS AND HOLD)
- SWITCH BETWEEN UNITS OF TEMPERATURE (PRESS AND HOLD)
- SWITCH BETWEEN UNITS OF ALTITUDE (PRESS AND HOLD)
- REVERSE SELECTION OF ALTITUDE DATA
- STOP CHRONOGRAPH
- STORE CHRONOGRAPH DATA (PRESS AND HOLD)
- SELECT RUN NUMBER
- SWITCH BETWEEN ALARM 1 AND ALARM 2
- REVERSE SETTING (SET OR CALIBRATION)
C: - MODE CHANGE
- DIRECT CHANGE TO TIME MODE (PRESS AND HOLD)
- ADVANCE TO NEXT SETTING (SET OR CALIBRATION)
D: - EL BACKLIGHT
- ENTER SET OR CALIBRATION (PRESS AND HOLD)
- CLEAR DATA (PRESS AND HOLD)
- EXIT (SET OR CALIBRATION)
EL BACKLIGHT
Press E for EL backlight with 3 seconds auto light up.
There are 9 modes: Normal Time, Dual Time, Compass, Barometer, Altimeter, Altimeter Data, Chronograph, Chronograph Data and Alarm. Press C to change from mode to mode, hold down B to switch between Normal Time mode and Dual Time mode as in the following:

flowchart
graph TD
    A["NORMAL TIME"] -->|C| B["COMPASS"]
    B -->|C| C["BAROMETER"]
    C -->|C| D["ALTIMETER"]
    D -->|C| E["ALTIMETER DATA"]
    E -->|C| F["CHRONOGRAPH"]
    F -->|C| G["CHRONOGRAPH DATA"]
    G -->|C| H["ALARM"]
    I["DUAL TIME"] <--|Hold B| A
    style A fill:#f9f,stroke:#333
    style H fill:#f9f,stroke:#333
* At any mode, holding down C will change to Time mode directly.
TIME MODE

Use C to enter Time mode.
* Mode prompt "TIME" is displayed first.
- There are 2 time modes, Normal Time (indicated by T1) and Dual Time (indicated by T2), and they count up
individually with the same second.
- There are 3 displays for time. They are Time, Time with Barometer and Time with Weather.
- There is an auto-calendar from 2000 to 2049.
To switch between Normal Time and Dual Time
Hold down B until the mode indicator (T1 or T2) stops flashing to switch between Normal Time mode and Dual Time mode.
To switch among the 3 time displays
Use A to switch among the 3 displays for time.
* "TIME", "BAROMETER" or "WEATHER" is displayed first.

* Graph of sea level pressure is described in BAROMETER MODE.
To set time
- Hold down D until the hour digits start to flash on the display, which indicates the setting screen.
-
Use A (+) and B (-) to change the setting. Holding down either button scrolls the setting at high speed.
-
Press C to advance to the next setting as in the following:

flowchart
graph LR
    A["HOUR MINUTE"] --> B["SECOND YEAR"]
    B --> C["12/24H"]
    C --> D["DAY"]
    D --> E["MONTH"]
    E --> F["CCCC"]
* When second digits are flashing, press A or B to reset the digits to 00. Resetting seconds when the digits are between 00 to 29 will leave the minute digits unchanged, or between 30 to 59 will increase the minute digits by one.
* When 12 or 24 is flashing, press A or B to switch between 12- or 24-hour formats. If 12-hour format is chosen, AM or PM indicator will be shown.
- Press D to exit the setting screen and day of the week will be adjusted automatically.
* If there is no button operation for 2-3 minutes at setting screen, the display will return to Time mode automatically.

Use C to enter Compass mode.
* Mode prompt "COMP" is displayed first and bearings will be taken automatically.
- Compass mode indicator is shown.
- When you take bearings, readings are shown in 16 cardinal indications together with bearing in degrees.
* Reading shown indicates the direction that the LCD's 12 o'clock position is pointing to.
- North-South arrow is shown on circumference of the LCD.
* North is indicated by 1 flag and South is indicated by 3 flags.
- Declination correction is provided.
* Declination is the difference between true north and magnetic north.
Importance
-
The compass should be calibrated before use.
-
The compass must be kept in a level position when in use.
-
Compass readings are easily affected by disturbing sources of magnetism, so the compass should always be used in the open air.
To calibrate the compass
-
Hold down D until "CAL" is shown on the display, which indicates the calibration screen.
-
Rotate the product clockwise slowly for 2 complete rotations.
* Each rotation must last for at least 15 seconds. Keep the watch in a level position when calibrating. Do avoid close contact to metal parts or other electrical instruments, when calibrating.
- Press D and the ten-degree digit starts to flash on the display, which indicates the declination angle setting screen.
* Press A will end calibration skipping the declination angle setting. In this case, the declination angle is set to 0 degree.
-
Use A (+) and B (-) to change the setting. Holding down either button scrolls the setting at high speed.
-
Press C to advance to the next setting as in the following:

flowchart
graph TD
    A["TENS OF DEGREE"] -->|C| B["DEGREE"]
    B -->|E/W| C["End"]
* When E or W is flashing, press A or B to switch between East and West.
* You should consult your local organization for information of declination. Declination angles for major cities are listed below for reference only.
| City Declination Angle | City Declination Angle | City Declination Angle | |||
| Anchorage | 22° E London 4° W | Rio De Janeiro | 21° W | ||
| Atlanta 4° W | Little Rock 3° E San Francisco 15° E | ||||
| Bombay 1° | W Livingston, MT | 14° E Seattle 19° E | |||
| Boston | 16° W | Munich | 1° E | Shanghai | 5° W |
| Calgary | 18° W | New York City | 14° W | Toronto | 11° W |
| Chicago | 3° W | Orlando | 5° W | Vancouver | 20° W |
| Denver | 10° E Oslo | 2° W Washington DC 10° W | |||
| Jerusalem | 3° E | Paris | 2° W | Waterbury, CT | 14° W |
- Press D to end calibration.
* If "ERR" indicating error is displayed, calibrate the compass again.
* If there is no button operation for 2-3 minutes during calibration or at declination angle setting screen, the display will return to Compass mode automatically.
To take bearings
- Press A, bearings will be taken and shown for about 10 seconds.
* If no bearing is being taken, the display shows “----”. - Hold down A, bearings will be taken and shown continuously and for 10 seconds more after A is released.
BAROMETER MODE

Barometer mode indicator
Use C to enter Barometer mode.
* Mode prompt "BARO" is displayed first.
- Barometer mode indicator is shown.
- The barometer is of 1 hPa resolution and with working range from 300 hpa to 1100 hpa.
- Both sea level pressure and absolute pressure can be shown.
- Graph showing the changes in sea level pressure is provided.
* Graph will be cleared only after battery replacement or reset.
- Weather forecast (indicated by the weather indicators) for the coming 24-48 hours is provided.
* Forecast is accurate only if the barometer has been functioning for at least 12 hours.
- Temperature is of 0.1 degree resolution and with working range from -4°F (-20°C) to 158°F (70°C). And unit in °F or °C selectable.
- There are 3 displays for Barometer mode.
To switch among the 3 displays for barometer mode
Use A to switch among the 3 displays for barometer mode.

flowchart
graph TD
    A["10:13"] --> B["A"]
    B --> C["10:13"]
    C --> D["A"]
    D --> E["10:13"]

flowchart
graph LR
    A["Temperature"] --> B["Absolute pressure"]
    B --> C["PM indicator"]
    C --> D["Time"]
Reading the graph of sea level pressure
The graph shows the relative changes in sea level pressure in the past with the current pressure represented on the right. Each horizontal point represents one hour while each vertical point represents the relative reading of pressure in that time.
* It is not possible to get the exact reading from the graph. User can only get the trend of changes from the graph.
To switch between °F and °C
- Use A to switch to the barometer display with temperature.
- Hold down B until the unit indicator (°F or °C) stops flashing to switch temperature between °F and °C.
To set sea level pressure reading
- Hold down D until "SET CURRENT WEATHER" scrolls on the display, which indicates the weather setting screen.
* The weather indicators start to flash. - Press C, "SET SEA LEVEL PRESSURE" scrolls on the display, which indicates reading setting screen.
* The current sea level pressure reading starts to flash. - Use A (+) and B (-) to change the setting. Holding down either button scrolls the setting at high speed.
- Press D to exit the setting screen.
* If there is no button operation for 2-3 minutes at setting screen, the display will return to Barometer mode automatically.
To set current weather
- Hold down D until "SET CURRENT WEATHER" scrolls on the display, which indicates the weather setting screen.
* The weather indicators start to flash. - Use A (+) and B (-) to change the setting as in the following:

flowchart
graph TD
    A["SET *"] -->|A| B["SET *"]
    B -->|A| C["SET *"]
    C -->|A| D["SET *"]
    D -->|A| E["SET *"]
    E -->|B| B
    B <-->|B| A
    C <-->|B| B
    D <-->|B| C
    E <-->|B| D
B
- Press D to exit the setting screen.
* If there is no button operation for 2-3 minutes at setting screen, the display will return to Barometer mode automatically.

Use C to enter Altimeter mode.
* Mode prompt "ALTI" is displayed first.
- Altimeter mode indicator is shown.
- The altimeter is of 1 meter (or foot) resolution and with working range from -700 meters (-2296 feet) to 9000 meters (29520 feet).
- Altitude reading in meters or feet selectable.
- Graph showing the changes in altitude is provided.
* Graph will be cleared only after battery replacement or reset.
- Maximum 20 altitude data can be stored.
Reading the altitude graph
The altitude graph shows the relative changes in altitude in the past with the current altitude represented on the right. Each horizontal point represents 15 minutes while each column represents the relative reading of altitude in that time.
* It is not possible to get the exact reading from the graph. User can only get the trend of changes from the graph.
To switch between meters and feet
Hold down B until the unit indicator (M or Ft) stops flashing to switch altitude reading between meters and feet.
To store altitude data
Hold down A until "DATA" stops flashing to store the current altitude data.
* "STORED" and data number are shown.
To calibrate altitude reading
-
Hold down D until the current altitude reading starts to flash on the display, which indicates the setting screen.
-
Use A (+) and B (-) to change the setting. Holding down either button scrolls the setting at high speed.
-
Press D to exit the setting screen.
* If there is no button operation for 2-3 minutes at setting screen, the display will return to Altimeter mode automatically.
ALTIMETER DATA MODE

Use C to enter Altimeter Data mode.
* Mode prompt "ALTI DATA" is displayed first.
- Data number, time, date and altitude reading can be retrieved.
* Altitude data are shown in 2 different displays.
To retrieve the altitude data
Use A (+) and B (-) to select the altitude data to be retrieved.
To clear the altitude data
Hold down D until “----” is shown on the display to clear all altitude data stored.
* Altitude data cannot be cleared individually.
CHRONOGRAPH MODE


Use C to enter Chronograph mode.
* Mode prompt "CHRO" is displayed first.
- The chronograph is of 1/100-second resolution for the first hour and 1-second resolution for the rest and with working range up to 24 hours, then the chronograph stops automatically.
- For the first hour, the chronograph shows minutes, seconds and 1/100-seconds, then it shows hours, minutes and seconds.
* Leading zeros will not be shown.
- There are 100 memories for lap/split times stored in a maximum of 30 runs.
- The chronograph lets you measure elapsed time, lap/split times and two (or more) finishes.
* When you take lap/split times, the display will be frozen to show lap time, split time and lap number for about 6 seconds, then the display will show the current running times automatically.
To measure elapsed time
-
Press A to start the chronograph.
-
Press B to stop the chronograph.
* You can resume the measurement operation by pressing A.
- Hold down B until the next run number is shown on the display.
* Data of the current run is stored and chronograph is reset to all zeros.
To measure lap/split times
-
Press A to start a time measurement.
-
Press A again when you want to take the first lap/split time.
-
Press A again when you want to take the next lap/split time.
* You may take up to 100 lap/split times by pressing A.
-
Press B to stop the time measurement.
-
Hold down B until the next run number is shown on the display.
* Data of the current run is stored and chronograph is reset to all zeros.
To measure two (or more) finishes
-
Press A to start a time measurement.
-
Press A again when the first runner finishes.
-
Press A again when the second runner finishes.
* You may record the finish time of up to 100 runners by pressing A.
- Press B when the last runner finishes.
* Time measurement is stopped.
- Hold down B until the next run number is shown on the display.
* Data of the current run is stored and chronograph is reset to all zeros.
* The finish times for the runners are the split times stored in Chronograph Data mode.
To clear times in current run
-
Press B to stop the chronograph.
-
Hold down D until the chronograph shows all zeros.
* Times in current run are cleared.
CHRONOGRAPH DATA MODE

Use C to enter Chronograph Data mode.
* Mode prompt "CHRO DATA" is displayed first.
- Run number, date, lap/split time of each lap, best lap time and average lap time can be retrieved.
- If chronograph is running, chronograph data cannot be cleared.
To retrieve the chronograph data
- Use B to select the run to be retrieved.
* Run number and date are shown for about 2 seconds first.
- Press A to retrieve the data one by one.
* Display examples:

Lap/split time of lap 1

Best lap time
Lap number

Average lap time
To clear one particular run
- Use B to select the run to be cleared.
- Hold down D until "CLEAR HOLD ALL" is shown on the display, release D and the selected run will be cleared.
To clear all runs
Hold down D until “----” is shown on the display.
* All runs are cleared.
ALARM MODE

Alarm on indicator
Use C to enter Alarm mode.
* Mode prompt "ALRM" is displayed first.
- There are 2 daily alarms and they can be set to refer to Normal Time (indicated by T1) or Dual Time (indicated by T2).
- Daily alarm sounds at the same time each day, while it is turned on.
- The alarm sounds at the preset time for about 20 seconds, or until you stop it by pressing any button.
- The alarm on indicator is only displayed at the time mode that the alarm is set to refer to.
- Hourly chime sounds at every full hour, while it is turned on.
* If chime is turned on, confirmation sound will be given whenever a button is pressed.
To switch between alarm 1 and alarm 2
Press B to switch between alarm 1 (indicated by AL-1) and alarm 2 (indicated by AL-2).
To set alarm time and turn chime on and off
- Hold down D until the hour digits start to flash on the display, which indicates the setting screen.
-
Use A (+) and B (-) to change the setting. Holding down either button scrolls the setting at high speed.
-
Press C to advance to the next setting as in the following:

flowchart
graph TD
    A["HOUR MINUTE"] --> B["C"]
    B --> C["REFER TO T1/T2"]
    C --> D["C"]
    D --> E["CHIME ON/OFF"]
* When TIME 1 or TIME 2 is flashing, press A or B to switch between setting the alarm to refer to Normal Time (TIME 1) and Dual Time (TIME 2).
* When ON or OFF is flashing, press A or B to turn the chime on (indicated by ON) and off (indicated by OFF). If chime is turned on, the chime on indicator will be shown after exiting setting screen.
- Press D to exit the setting screen.
* The alarm turns on, which is indicated by ON and the appearance of the alarm on indicator.
* If there is no button operation for 2-3 minutes at setting screen, the display will return to Alarm mode automatically.
To turn the alarm on and off
Press A to turn the alarm on (indicated by ON) and off (indicated by OFF).
* If the alarm is turned on, the alarm on indicator will be shown.
RESETTING THE PRODUCT
Hold down A, B, C and D simultaneously, all segments will be "on", then release the buttons and the product will be reset.
* After reset, there will not be any measurement of altitude, pressure or temperature until A or C is pressed.
* After reset, entering Compass mode will change to calibration screen directly.
BATTERY REPLACEMENT
Replace the exhausted battery with a CR2032 cell or equivalent.
Please contact a specialized dealer for battery change. Thereby the sealing ring must not be damaged. No guarantee if the instrument is handled or opened improperly.
Attention: Do not dispose of empty batteries in household waste. Take them to special local collection sites.
CE


- INTRODUCTION
- Features:
- Altimeter
- Barometer
- Compass
- Time
- Chronograph
- Alarm
- Electro-luminescent backlight
- BASIC OPERATION OF BUTTONS
- EL BACKLIGHT
- To switch between Normal Time and Dual Time
- To switch among the 3 time displays
- To set time
- Importance
- To calibrate the compass
- To take bearings
- Barometer mode indicator
- To switch among the 3 displays for barometer mode
- Reading the graph of sea level pressure
- To switch between °F and °C
- To set sea level pressure reading
- To set current weather
- Reading the altitude graph
- To switch between meters and feet
- To store altitude data
- To calibrate altitude reading
- To retrieve the altitude data
- To clear the altitude data
- To measure elapsed time
- To measure lap/split times
- To measure two (or more) finishes
- To clear times in current run
- To retrieve the chronograph data
- To clear one particular run
- To clear all runs
- To switch between alarm 1 and alarm 2
- To set alarm time and turn chime on and off
- To turn the alarm on and off
- RESETTING THE PRODUCT
- BATTERY REPLACEMENT
Brand : TFA
Model : 42.4001
Category : Sports Watch