
tipmatic 1147 - Sewing machine PFAFF - Free user manual and instructions
Find the device manual for free tipmatic 1147 PFAFF in PDF.
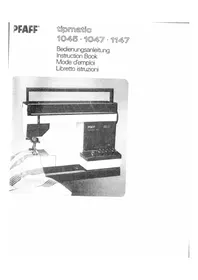


| Product type | Mechanical sewing machine |
| Brand | Pfaff |
| Model | tipmatic 1147 |
| Width | 40 cm |
| Depth | 18 cm |
| Height | 30 cm |
| Weight | 7.5 kg |
| Power supply | 220-240 V, 50/60 Hz |
| Power | 70 W |
| Maximum speed | 800 stitches per minute |
| Number of stitches | 5 built-in stitches |
| Buttonhole | Semi-automatic 4-step |
| Bobbin system | Drop-in |
| Stitch length | Adjustable from 0 to 4 mm |
| Stitch width | Adjustable from 0 to 5 mm |
| Needle threader | Manual |
| Lighting | Incandescent bulb |
| Functions | Reverse, bobbin winder |
| Maintenance | Regular cleaning of hook and oiling |
| Warranty | 2 years |
| Repairability | Spare parts available |
Frequently Asked Questions - tipmatic 1147 PFAFF
User questions about tipmatic 1147 PFAFF
0 question about this device. Answer the ones you know or ask your own.
Ask a new question about this device
Download the instructions for your Sewing machine in PDF format for free! Find your manual tipmatic 1147 - PFAFF and take your electronic device back in hand. On this page are published all the documents necessary for the use of your device. tipmatic 1147 by PFAFF.
USER MANUAL tipmatic 1147 PFAFF
Fold out this page
Safety instructions
a) Take care to avoid injury to your fingers by the needle during sewing. b) Be sure to unplug the power cord whenever you leave the machine or wish to clean it, oil it or change mechanical and accessory parts. c) Be sure to use only a 15-watt light bulb in the sewing lamp. d) The drive belt must never be adjusted by anyone but an authorized Pfaff agent.
For safety rules applicable to the UK please see page 84.
Safety measures
Lift off the cover. Fold down the carrying handle. Tilt cover 101 backwards.
Take foot control and instruction book out of compartment N. Put back again as shown in the illustration above.
Electrical connection: Set the foot control on the floor. Insert plug N in the machine and plug O in the wall socket.
Push master switch P; the sewing light goes on. Operating the foot control: The farther you press the pedal down the faster the machine runs.
Electronic foot control (slide Q) Position ▶ = half the top speed Position ◀◀ = full top speed
Bobbin winding preparations: Reach under the work support and swing it out toward the left.
Open free arm cover 119.
Switch off master switch 104. Raise latch N and pull out the bobbin case. Release latch A and take out the bobbin.
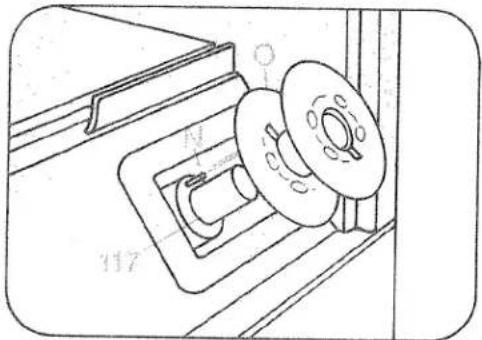
Place a bobbin on spindle 117, making sure pin N enters slot O.
Disengaging the sewing mechanism: Hold the hand wheel steady and turn knob 103 toward you.
Swing the sewing spool holder toward the back.
Push a spool of thread and small thrust collar P onto the holder.
Winding the bobbin from a second spool: tilt spool pin 125 forward. Pull the thread into guide 123 and into guide 125 as shown in the drawing, making sure that the thread passes between the guide and tension spring N. Now wind the thread a few turns around the bobbin. Push the bobbin to the right. Press the foot control to wind the bobbin. Push the filled bobbin to the left, remove it, pull the thread to the front and cut it in thread cutter O.
Important note: On spools with thread retaining slots the slot must face right when the spool is fitted.
Engaging the sewing mechanism: Hold the hand wheel firmly and turn disk 103 toward the back, then turn the hand wheel forward again until it snaps in.
Winding through the needle eye (0) Raise the sewing foot. The needle must be in its 'up' position. Place a bobbin on spindle 117. Disengage the sewing mechanism. Draw the needle thread under the sewing foot, up and into guide 125 (see drawing. Wind the thread around the bobbin a few times and push the bobbin toward the right). Press the foot control pedal and wind the bobbin. Push the full bobbin toward the left and take it out. Cut the thread in thread cutter "N".
Engaging the sewing mechanism: Hold the hand wheel firmly and turn disc 103 toward the back, then turn the hand wheel forward again until it snaps in.
Inserting the bobbin (N), with the thread unreeling toward the back. Draw the thread into slot O and into eye P.
Checking the bobbin thread tension: With a brief, sharp upward movement of your hand, the bobbin must gradually slip downwards. (Turn screw Q counter-clockwise for a weaker tension, or clockwise for a tighter tension.)
- Switch off master switch 104. Raise latch N and push the bobbin case onto stud O as far as it will go, making sure cutout P points upwards.
Placing spool of thread on pin: Place the small or medium-size unwinding collar Q in front of small spools, and the large unreeling disc R in front of large spools.
Threading the upper thread:
- Switch off master switch 104. With the needle positioned at the top, raise the sewing foot. Draw the thread into slot N to the left past guide P, from below into slot O and take-up lever 124 (see arrows), then back into slot O and into the right thread guide on the needle holder. Press button B (see page 20/21).
Place the needle thread behind hook Q and hold it there. Pull thread 110 fully downwards.
Push the threader forward against the needle.
Place the thread in hook R from below.
Turn the threader to the left, letting go of the thread at the same time, and allow the threader to move upwards. Pull the thread fully through the needle eye.
Hold the needle thread taut. Turn the balance wheel towards you until the needle moves down and up again. Needle and take-up lever must be raised. Pull the bobbin thread out of the needle hole.
Place both threads toward the right under the sewing foot.
Close the free arm cover 119.
Close cover 119.
Swing work support 107 back against the free arm.
Place fabric under the sewing foot.
Lower presser bar lifter 112. (N shows the darning position).
Needle thread tension 122
N = Setting mark.
Checking the needle thread tension:
The normal setting is in the white range between 3 and 5. The higher the
number, the tighter the tension. To
check the tension, set the machine at the zigzag stitch.
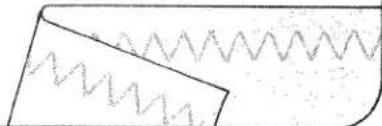
Sew a short seam. The threads should interlock in the middle of the material.
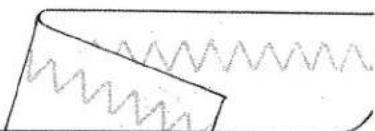
Thread tensions:
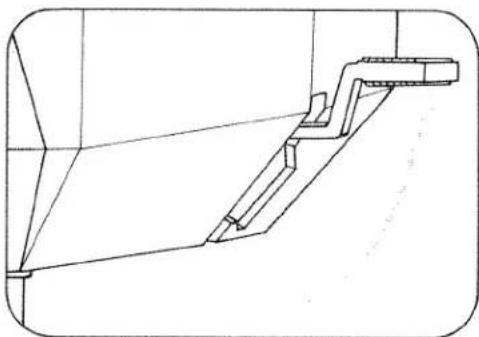
Raise presser bar lifter 112. Remove the fabric by pulling it toward the back.
Thread cutter N. Draw the threads into the slot and pull them downwards.
Regulating the stitch length
The numbers on stitch length control 106 indicate the stitch length in millimeters. The stitch length range is 0 to 6 mm. Turn the desired stitch length to the indicating mark "N".
Fig. O (bottom) shows how to set the stitch length control for sewing stretch stitches (red stitch symbols on push buttons).
Press button 114. As long as you hold this button the machine sews backwards.
Finger-tip controls:
The various models have differing numbers of finger-tip controls and programs.
A, B, C: Buttons for buttonholing. Button B is also used as clearing button for releasing the pushed buttons and for setting the left needle position (see page 26).
D Elastic triple zigzag stitch, 2 mm 2-mm zigzag stitch E Elastic triple zigzag stitch, 3.5 mm 3.5 mm zigzag stitch F Elastic triple zigzag stitch, 5.0 mm 5-mm zigzag stitch G Elastic triple straight stitch Straight stitch H Pullover stitch Blindstitch I Closed overlock stitch Joining stitch K Overlock stitch Shell-edge stitch
L Feather stitch Elastic decorative stitch M Honeycomb stitch Elastic stitch
On Model 1147 the fancy-stitch thumb wheel has to be disengaged in order to sew the stitches on the finger-tip buttons. To do so, set the white dot at the setting mark, see page 27.
A stitch program chart is found on the inside of the hinged top cover. This chart is also reproduced on pages 72–75 of this booklet and shows all stitches and stitch combinations together with their possible applications.
The letters of the buttons on your machine determine the programs and combinations that can be sewn.
Touches:
Automatic buttons:
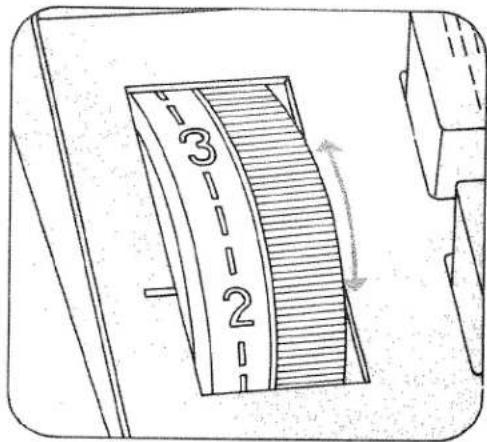
Selecting utility stitches
(white symbols)
Push the button required and set the stitch length between 1 and 6.
All zigzag, and utility stitches are halved in width when button G is pressed.
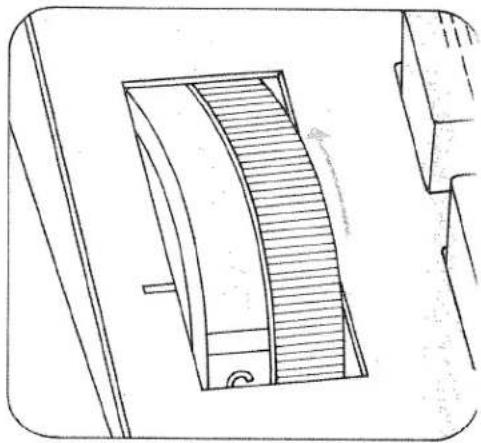
Selecting stretch stitches
(red symbols)
Push the button required and turn the stitch length control as far as it will go (red symbol).
By also pressing button G, all stretch stitches can be halved in width.
Utility- and stretch-stitch combinations
The various stitch combinations are shown in the chart on the inside of the hinged top cover and at the end of this booklet, together with sewing instructions. For example, if you want to sew an elastic blindstitch, push buttons M and F, select a stitch length between 1 and 4.
a) Take care to avoid injury to your fingers by the needle during sewing. b) Be sure to unplug the power cord whenever you leave the machine or wish to clean it, oil it or change mechanical and accessory parts. c) Be sure to use only a 15-watt light bulb in the sewing lamp.
Safety measures
valid for United Kingdom only
The wires in this mains lead are coloured according to the following code:
Blue: Neutral
Brown: Live
As the colours of the wires in the mains lead of this appliance may not correspond with the colour coding of the terminals in your plug, proceed as follows: the wire
which is coloured blue must be connected to the terminal which is marked with the letter N or coloured black.
The wire which is coloured brown must be connected to the terminal which is marked with the letter L or coloured red.
Please note:
When a 13-ampere plug is used, a
3-ampere fuse has to be fitted.
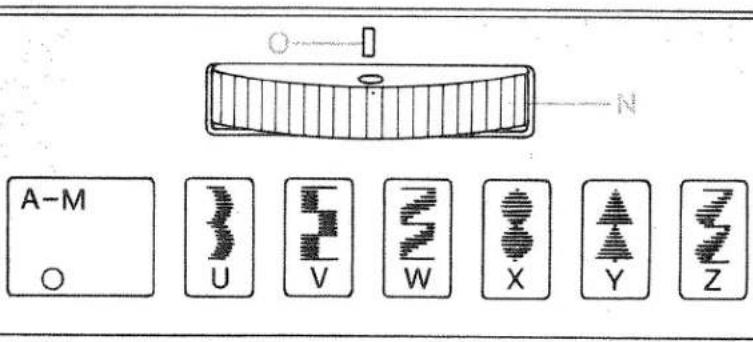
Thumb wheel for fancy stitches
(Model 1147)
Every fancy stitch is provided with a letter. Select the fancy stitch from the table. Set the corresponding letter at mark "O" by turning thumb wheel N.
For sewing utility stitches, thumb wheel N for fancy stitches must be disengaged. To do so, set the white dot at mark "O".
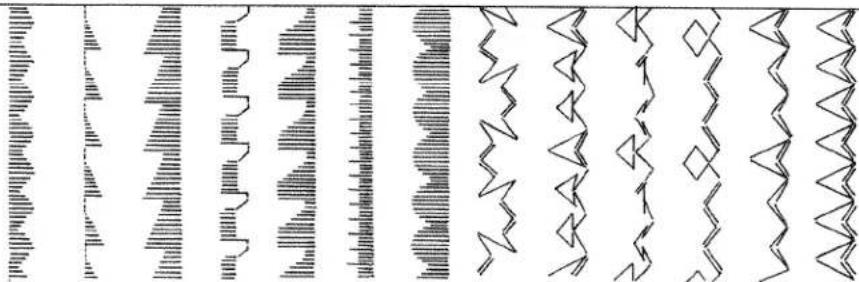
Fancy stitches and combinations, Model 1147
Pattern combinations can be produced by pressing the keys in connection with the fancy stitches.
The table shows the stitches and under them the corresponding buttons to push. If they are marked "stretch", set the stitch length control at "stretch".
Reach under the work support and swing it out toward the left.
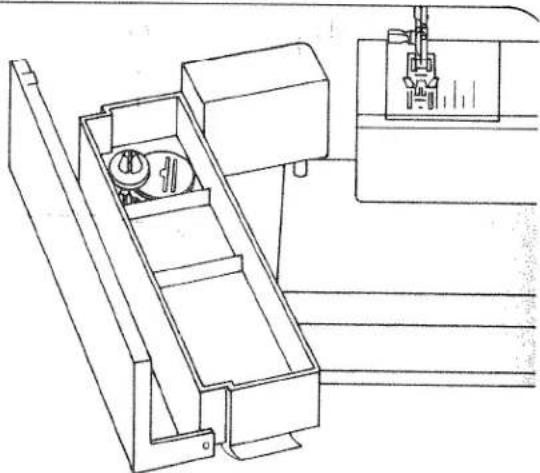
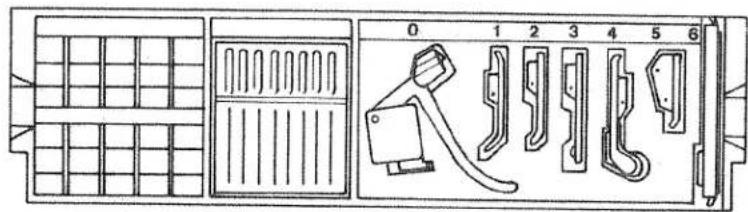
Detachable work support and accessories:
The work support can be lifted out (N). Open its lid and take out accessory box P. Underneath the box is an accessory compartment O. Illustration Q shows how to arrange sewing feet, needles and bobbins in the accessory box.
0 Darning foot 1 Standard sewing foot 2 Clear-view foot 3 Hemmer foot 4 Blindstitch foot 5 Zipper foot 6 Buttonhole foot 7 Edge guide
Changing the sewing foot:
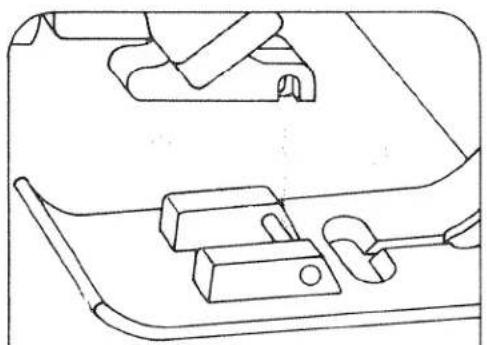
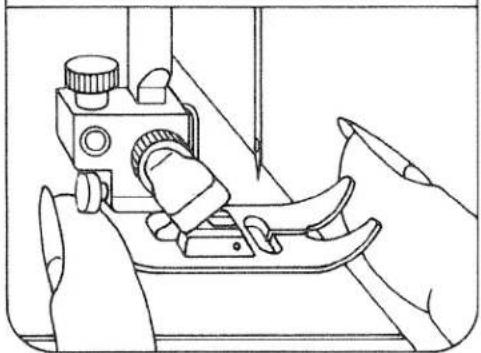
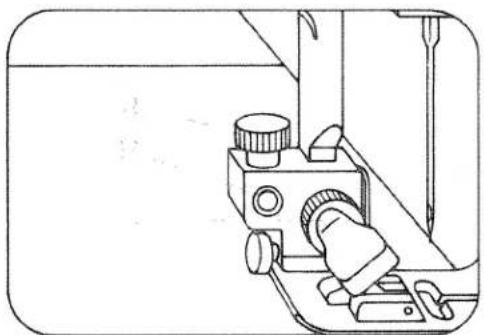
Changing the sewing foot:
- Switch off master switch 104. Pull the foot downwards at the front. The foot then comes out.
Replacing the sewing foot: lower the presser bar lifter and move the foot so that pins N snap into grooves O.
Screws P and Q are for securing accessories. R is the sewing foot retaining screw.
Sewing feet (standard accessories)
0 Darning foot 4 Blindstitch foot 1 Standard sewing 5 Zipper foot foot 6 Buttonhole foot 2 Clear-view foot 7 Edge guide
3 Hemmer foot
Presser feet (standard accessories)
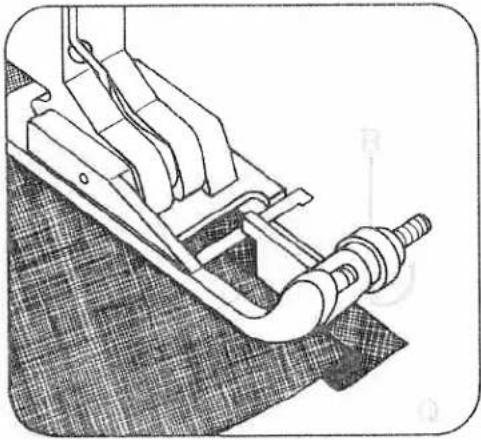
Guide ruler (N):
Push the edge guide into hole O, set the required edge distance and tighten it there.
Blindstitching foot
Blindstitching (Q): turn screw R to set guide at the left. The guide is then adjusted according to the needle penetrations. The folded edge of the material runs along guide edge S.
Edge guide (N):
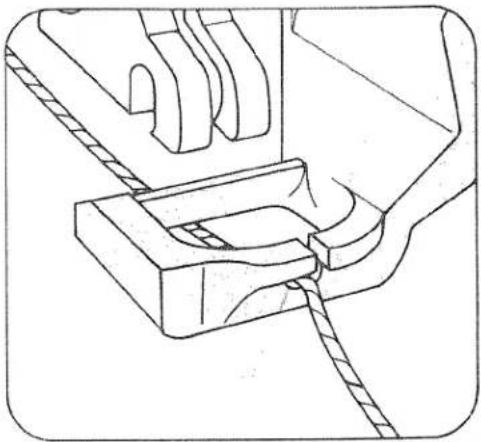
Darning foot:
Position the needle up. Push bar P to the back and hold it there. Fit the pin of the foot in hole N; at the same time, fork R engages the presser bar, and push the foot fully in. Let go of bar P, which then rests on retaining screw Q. Tighten screw O.
For wool darning the woollen thread is pulled into guide S.
Darning foot:
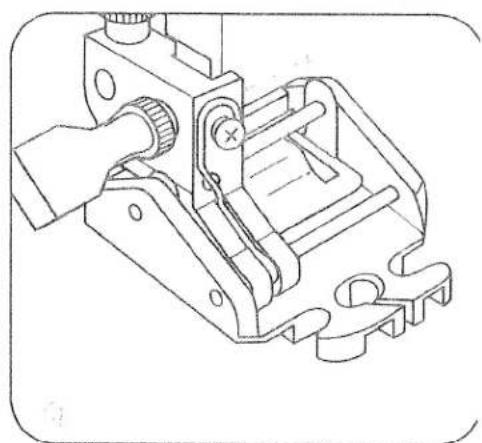
Zipper foot:
Push the rear stud into slot N. Then push the foot up until it snaps in place in slot O.
The zipper foot can be moved to the left (Fig. P) or right (Fig. Q), as required.
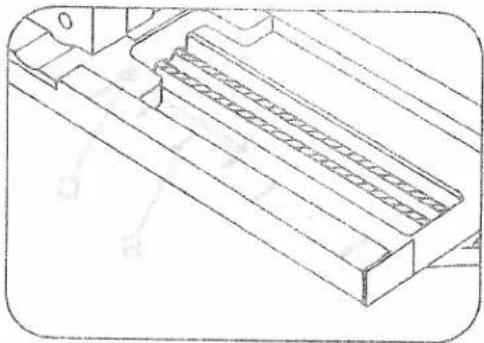
Push button C. Set the needle thread tension at range 3 for buttonhole sewing. Attach the buttonhole foot. Set the stitch density at range N. Insert a gimp thread in the sewing foot as shown in the illustration: Place the thread over the back ridge, and pull it taut so that it is hold in tab P at the front. During sewing, arrow Q runs along scale R. This is how the buttonhole length is determined. For sewing buttonholes use light sewing thread.
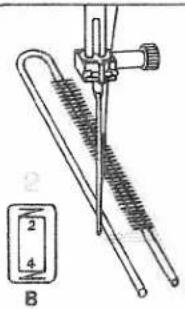
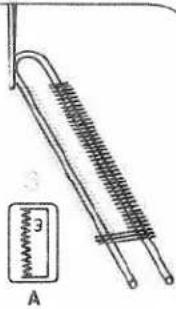
Buttonhole sewing:
Pull the bottom of the buttonhole foot forward as far as it will go.
1. Sew the first buttonhole seam. Raise the needle. 2. Push button B in until 4 to 6 bartacking stitches are sewn, holding the workpiece firmly, then release the button. 3. Push button A. Sew the second buttonhole seam the same length as the first. 4. Push button B in until 4 to 6 bartacking stitches are sewn, holding the material firmly, then release the button. 5. Sew a few tying stitches. Remove the fabric, pull the filler cord taut, and trim. 6. Cut the buttonhole open.
Before sewing buttonholes in the garment, it is recommended to sew a test buttonhole.
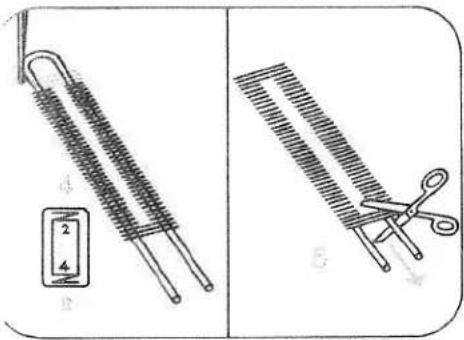
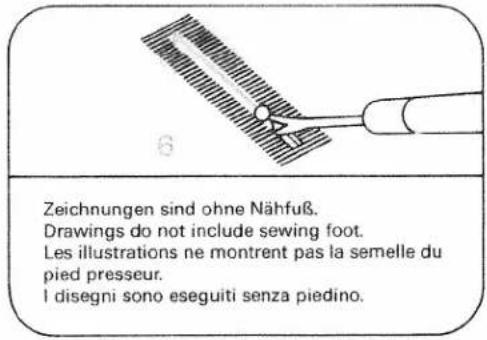
Changing the needle (System 130/705 H): Switch off the master switch 104. Loosen screw N. Take out the needle. Push the needle up as far as it will go (with its flat side facing toward the back). Tighten the screw.
Dropping the feed dog:
Open the free arm cover 119. Push the drop-feed control toward D (feed dog dropped) or toward O (sewing position).
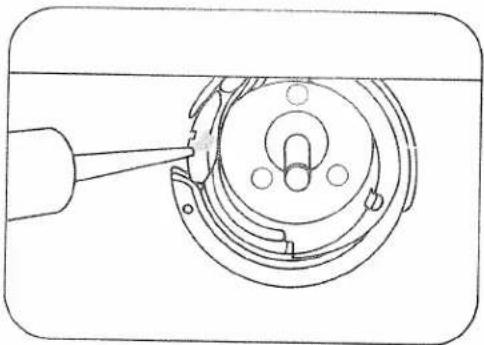
Cleaning and oiling:
Pull out the mains plug. Tilt the needle plate up at the back (N) and take it out (O). Clean the feed dog and the parts in the sewing hook area with a soft brush. Do not oil the machine. Only apply a drop of oil in the hook raceway (see illustration) occasionally.
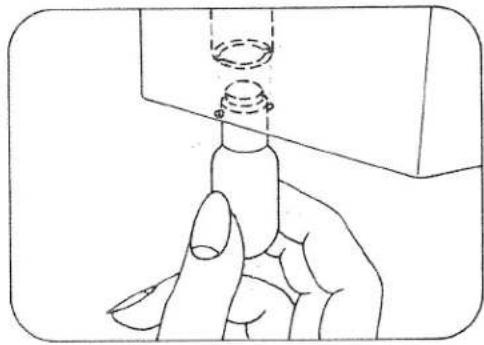
Changing the light bulb:
Pull out the mains plug. Close the hinged top cover and swing up the carrying handle. Insert the edge guide into cutout Q, push down the lamp housing and hold it there. Turn the light bulb toward N and take it out. Insert the new bulb so that its pins slide in slots P. Push it up and turn it toward O. Pull out the edge guide.
Using the adequate needle guarantees better working of the material.
| Fabric weight: light Needle size: 60, 70, 75 | Fabric weight: medium Needle size: 80, 90 | Fabric weight: heavy Needle size: 100, 110, 120 | ||
| Needle points | ||||
| System & No. | Profile | Point & eye | Suitable for | |
| 130/705 H 70, 80 | 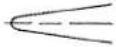 | Light ball point | Universal needle for fine-meshed synthetics, fine linen, chiffon, batiste, organdy, woolens, velvet, fancy seams and embroidery work. | |
| 130/705 H-SUK 70, 110 | 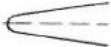 | Medium ball point | Coarse knitted fabrics, Lastex, double-jersey fabrics, Quiana and Simplex. | |
| 130/705 H-PS 75, 90 | 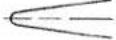 | Medium ball point | Stretch-fabric needle developed especially for Pfaff. Particularly suitable for delicate stretch and knitted fabrics. | |
| 130/705 H-SKF 70, 110 | 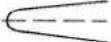 | Heavy ball point | Wide-meshed corsetry, Lycra, Simplex and Lastex. | |
| 130/705 H-J 90-110 | 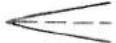 | Acute round point | Twill, workwear, heavy linen, blue jeans and light canvas. | |
| 130/705 H-LR 70-120 | 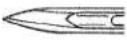 | Narrow twist point | Leather, suede, calf and goatskin leathers. | |
| 130/705 H-PCL 80-110 | 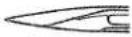 | Narrow wedge point with left-twist groove | Imitation leathers, plastic materials, plastic sheeting and oilcloth. | |
| 130 H-N 70-110 | 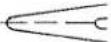 | Light ball point, long eye | Seams topstitched with buttonhole silk or No. 30/3 synthetic thread. | |
| 130/705 H-WING 100 | 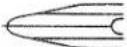 | Hemstitching point | Attractive hemstitching on heavily dressed materials, organdy and glass cambric. | |
| [7045] | System & No. | Stitch length | Stitch width | Needle spacing | Suitable for |
| 130/705 H-ZWI80 | 2.5 mm2.5 mm | -- | 1.6 mm2.0 mm | Medium-wide cording | |
| 130/705 H-ZWI8090100 | 2.5 mm2.5 mm3.0 mm | --------- | 2.5 mm3.0 mm4.0 mm | Wide cordingExtra wide cordingExtra-wide cording | |
| Decorative designs sewn with twin needlesBefore you start sewing, turn the handwheel and check to make sure the needles stitch into the fabric properly. In this way, needle breakage can be largely avoided. | |||||
| [2026] | Decorative and zigzag patterns | ||||
| 130/705 H-ZWI808080 | 0.5-1.5 mm0.5-1.5 mm0.5-1.5 mm | widenarrownarrow | 1.6 mm2.0 mm2.5 mm | OrnamentationsOrnamentationsOrnamentations | |
| [727X] | Special hemstitching twin needle | ||||
| 130/705H-ZWI-Ho80100 | 2.0-3.0 mm2.0-3.0 mm | very narrowvery narrow | --------- | Decorative hem-stitching effect.Heavily dressed fabrics are par-ticularly suitable. | |
Needle not inserted correctly.
Push needle up as far as it will go, its flat shank side facing toward the back.
Wrong needle used.
Insert system 130/705 H needle.
Machine threaded incorrectly.
Check threading.
Needle too thin for thread used.
Insert thicker needle.
2. Needle thread breaks
For any of the above reasons.
See par. 1 above.
Thread tension too strong.
Regulate thread tensions.
Poor-quality or knotty thread used, or thread that has become too dry by excessive storage.
Use only good-quality thread.
3. Needle breaks
Needle not pushed up as far as it will go.
Insert new needle and push it up as far as it will go.
Needle bent.
Insert new needle.
Needle too thin or too thick.
Refer to needle table.
Needle bent and strikes needle plate because work is pushed or pulled.
Allow machine feed to work alone.
Bobbin case improperly inserted.
Only guide the material lightly.
When inserting the bobbin case, push it in as far as it will go.
4. Seam is not uniform
Tension out of adjustment.
Check upper and lower tensions.
Thread too thick, knotty or hard.
Use first-class thread only.
Bobbin thread wound unevenly.
During bobbin winding, do not hold thread in hand, but pass it through the bobbin tension stud.
Kinks appear on top and bottom of material
Thread machine properly and check both tensions.
Cause:
Remedy:
5. Machine feeds irregularly or not at all
Lint has accumulated between tooth rows of feed dog.
Remove needle plate and clean out lint.
Feed dog dropped. (Drop-feed control is at right.)
Set drop-feed control at left.
6. Machine runs with difficulty
Thread ends in hook raceway
Remove thread ends and put a drop of oil into hook raceway.
7. The machine (1147) does not sew the stitches on the push-buttons
Fancy-stitch thumb-wheel is engaged
Disengage thumb-wheel: set at white dot.
9. Important note:
Before exchanging either sewing foot or needle, switch off master switch 104. Never run a threaded machine unless there is a piece of fabric under the sewing foot. If you have to leave the machine, even for a short while, be sure to switch off the master switch. This is particularly important when children are around.
The special accessories listed below are intended for special sewing jobs.
They can be obtained from your dealer at an extra charge.
| Accessory | Part. No. | Sewing Operation |
| Applique foot | 93-035 920-91 | For appliqué work |
| Binder (remove sewing foot holder) | 98-053 484-91 | For binding edges with tape |
| Cording foot, 5 grooves(twin needle with 1.8-2.5 mm needle gauge) | 93-035 950-91 | For cording work(Needle size 80,for fine cordingneedle size 70) |
| Cording foot, 7 grooves(twin needle with 1.4-1.8 mm needle gauge) | 93-035 953-91 | |
| Cording blade (2 ea.) | 93-035 952-45 | |
| Fringe sewing foot | 93-035 943-91 | For sewing fringes and for basting |
| Straight-stitch foot | 98-694 803-00 | For topstitching andsewing very delicateand soft fabrics (silk jersey, etc.) |
| Needle plate with round hole | 98-694 810-00 | |
| Felling foot, 4.5 mm | 93-035 946-91 | For felled seams |
| Felling foot, 6.5 mm | 93-035 948-91 | |
| Shirring foot | 93-035 998-91 | For shirring valances |
| Single-needle cording foot | 93-035 915-91 | For single-needle cording |
| Eyeletting plate | 93-036 975-45 | For eyeletting |
| Overlock foot | 98-620 404-00 | For finishing raw edges or for joiningelastic fabrics and simultaneouslyovercasting their edges |
| Hemmer foot (rolled edge), 2 mm | 98-694 804-00 | For hemming edges with zigzag stitches |
| Knitted edge foot | 98-035 957-91 | For sewing knitted materials |
| Teflon foot | 98-694 801-00 | For sewing plastic materials |
| Fancy-stitch foot | 98-694 879-00 | For sewing fancy patterns |
Contents
Page
Bobbin winding preparations.... 4
Buttonholing 37-39
Changing the fuse 43
Changing the light bulb 42
Changing the needle 40
Changing the sewing feet. 32
Checking the bobbin thread tension 10
Checking the needle thread tension.... 16
Cleaning and oiling 41
Detachable work support and accessory box.... 30, 31
Disengaging the sewing mechanism 5
Drawing up bobbin thread 14
Dropping the feed dog 40
Electrical connection 2
Fancy stitches and combinations, Model 1147....28-29
Fault finding 54, 55
Finger-tip controls 20
Foot control.... 3,16
Inserting the bobbin 10
Inserting the bobbin case.... 11
Needle chart 46,47
Placing spool of thread on pin.... 11
Presser bar lifter.... 15
Regulating the stitch length.... 18
Reverse sewing.... 19
Selecting the needle position for straight stitching.... 26
Selecting stretch stitches.... 24
Selecting utility stitches 23
Sewing feet 33
Special sewing feet 34-37
Stitch program chart....72-75
Thread cutter 17
Upper threading and threading of needle.... 12,13
Utility and stretch stitch combinations 25
Winding the bobbin from a second spool.... 6,7
Winding through the needle eye.... 8,9
| 14 | 15 | 16 | 17 | 18 | 19 | 20 |
| M stretch F | M stretch G | I | I D | I F | I G | K |
| 21 | 22 | 23 | 24 | 25 | 26 | 27 |
| K | K | I stretch | I F stretch | I G stretch | I K stretch | K stretch |
| D | G | D |
| 28 | 29 | 30 | 31 | 32 | 33 | 34 |
| K stretch D | K stretch G | K stretch M | H | H D | L C | L D |
Stitch program chart
Tested in this chart are the stitch program number, the corresponding stitch and, in the lower half, the buttons to be pressed
to sew this seam pattern. For all stitch programs marked "stretch", turn the stitch length control toward "stretch" as far as it
| 01 | 02 | |||||
| G | H | D | DE | E | F |
| 03A | B | C | 04stretch | G | 05stretch | 06M |
| No. | Stitch | Application |
| 01 | Straight stitch | All ordinary sewing operations and 6-mm fancy stitching operations. |
| 02 | Zigzag stitch | Edge finishing, applique work, inserting lace, button sewing, satin stitching, embroidering, darning etc. |
| 03 | Buttonholes | Just push the buttons and the buttonhole is finished. The stitch density can be regulated. |
| 04 | Elastic triple straight stitch | Seams exposed to great stress which stretch under stress. |
| 05 | Elastic triple zigzag stitch | Flat, elastic reinforcing seams, as well as sewing and mending corsetry. |
| 06 | Elastic stitch | Inserting patches and darning rips on elastic fabrics. |
| 07 | Elastic ornamental stitch | Inserting patches and darning tears on elastic materials or sewing ornamental seams on elastic fabrics. |
| 08 | Crown stitch | An ornamental seam, e.g. on night gowns. |
| 09 | Elastic blindstitch | Hemming elastic fabrics with invisible stitches. |
| 10 | Scallop stitch | For decorating handkerchiefs, for example. |
ll go. For all other programs, select the tch length as desired. The individual tch programs and their application are
Described in more detail in the table below.
| 07 | 08 | 09 | 10 | 11 | 12 | 13 |
| L | ME | MF | MG | M stretch | MD stretch | ME stretch |
| 14 | 15 | 16 | 17 | 18 | 19 | 20 |
| M stretch F | M stretch G | I | I D | I F | I G | K |
| lo. | Stitch | Application |
| 1 | Honeycomb stitch | Sewing on elastic threads or covering seams on terry cloth. |
| 2 | Joint stitch | A durable ornamental joining seam. |
| 3 | Florentine stitch, narrow | For decorating hems, e.g. on bed linen. |
| 4 | Florentine stitch, wide | Ornamental seams, e.g. on bed linen. |
| 5 | Houndstooth stitch | Ornamental seams, e.g. on table linen. |
| 6 | Lampshade stitch, wide | Classical ornamental seam on all plain fabrics. |
| 7 | Viennese stitch, narrow | Ornamental seams, e.g. on napkins. |
| 8 | Viennese stitch, wide | Ornamental seams, e.g. on table cloths. |
| 9 | Lampshade stitch, narrow | Classical ornamental seam on plain fabrics. |
| 20 | Shell-edge stitch, wide | Effective edge finish on dainty fabrics. |
| 21 | 22 | 23 | 24 | 25 | 26 | 27 |
| K | K | I stretch | I stretch | I stretch | I stretch | K stretch |
| D | G | F | D |
| 28 | 29 | 30 | 31 | 32 | 33 | 34 |
| K stretch | K stretch | K stretch | H | HD | LC | LD |
| No. | Stitch | Application |
| 21 | Elastic edge stitch | Finishing edges that do not fray |
| 22 | Shell-edge stitch narrow | Ornamental seams, e.g. on girls' dresses. |
| 23 | Closed overlock stitch, wide | Covering folded fabric edges with a fancy seam. |
| 24 | Pennant stitch | Decorative joining seam and sewing on borders. |
| 25 | Closed overlock stitch, narrow | Sewing on dainty lace. |
| 26 | Turkish stitch | Topstitching patches. |
| 27 | Overlock stitch, wide | Elastic assembly and edge finishing seams on knitted fabrics. |
| 28 | Peacock stitch | Festive ornamental seam, e.g. on table linen. |
| 29 | Overlock stitch, narrow | Dainty border ornamentation. |
| 30 | Knurl stitch | Ornamental seams on light clothing. |
| 31 | Blindstitch, wide | Hemming heavier fabrics with invisible stitches. |
| 32 | Blindstitch, narrow | Hemming light-weight fabrics with invisible stitches. |
| 33 | Peak stitch | A dainty ornamental seam, e.g. on ladies' handkerchiefs. |
| 34 | Mound stitch | Ornamental seam, e.g. on children's napkins. |
| 35 | 36 | 37 | 38 | 39 | 40 | 41 |
| L | L | H stretch | H D stretch | H G stretch | L stretch | L D stretch |
| F |
| 42 | 43 | 44 | 45 | 46 | 47 | 48 |
| L stretch | L stretch | L stretch | L stretch | L stretch | L stretch | L stretch |
| F | K | I stretch | G stretch | M stretch |
| No. | Stitch | Application |
| 35 | Viennese stitch, narrow | Ornamental seams, e.g. on table linen. |
| 36 | Lampshade stitch, narrow | Classical ornamental seam on plain fabrics. |
| 37 | Pullover stitch, wide | Elastic edge finishing seams on jersey fabrics. |
| 38 | Pullover stitch, medium | Elastic edge finishing seams on polo shirt farbrics. |
| 39 | Pullover stitch, narrow | Elastic edge finishing seams on lightweight jersey crepe. |
| 40 | Feather stitch | Decorative cover seams, e.g. on aprons. |
| 41 | Dutch stitch | Ornamental seam, e.g. on kitchen textiles. |
| 42 | Snail stitch | Ornamental seam, e.g. for bath room furrishings. |
| 43 | Loom stitch | Ornamental seam, e.g. for country-look dresses. |
| 44 | Diagonal stitch | Ornamental seam, e.g. for plain-look, modern dresses. |
| 45 | Trellis stitch | Ornamental seam, e.g. for airy ladies' dresses. |
| 46 | Twig stitch | Ornamental seam, e.g. for hiking wear. |
| 47 | Border stitch | Ornamental seam, e.g. for border ornamentations on pockets. |
| 48 | Triangular stitch | Ornamental seam, e.g. for children's night dresses. |
| 14 | 15 | 16 | 17 | 18 | 19 | 20 |
| M stretch F | M stretch G | I | I D | I F | I G | K |
| 42 | 43 | 44 | 45 | 46 | 47 | 48 |
| stretch | stretch | stretch | stretch | stretch | stretch | stretch |
| L F | L I | L K | L D K | L E I | L G K | L M K |
| 14 | 15 | 16 | 17 | 18 | 19 | 20 |
| M stretch F | M stretch G | I | I D | I F | I G | K |
| 21 | 22 | 23 | 24 | 25 | 26 | 27 |
| K | K | I stretch | I F stretch | I G stretch | I K stretch | K stretch |
| D | G |
| 28 | 29 | 30 | 31 | 32 | 33 | 34 | ||||||
| K stretch | K stretch | K stretch | H | H | L | L | ||||||
| D | G | M | D | C | D |
| 42 | 43 | 44 | 45 | 46 | 47 | 48 |
| L stretch | L stretch | L stretch | L stretch | L stretch | L stretch | L stretch |
| F | K | E I | G K | M K |
Subject to alterations in design.
Printed in West Germany.
- FOLD OUT THIS PAGE
- SAFETY INSTRUCTIONS
- SAFETY MEASURES
- THREADING THE UPPER THREAD
- CHECKING THE NEEDLE THREAD TENSION
- THREAD TENSIONS
- REGULATING THE STITCH LENGTH
- FINGER-TIP CONTROLS
- TOUCHES
- AUTOMATIC BUTTONS
- SELECTING UTILITY STITCHES
- SELECTING STRETCH STITCHES
- UTILITY- AND STRETCH-STITCH COMBINATIONS
- VALID FOR UNITED KINGDOM ONLY
- PLEASE NOTE
- THUMB WHEEL FOR FANCY STITCHES
- FANCY STITCHES AND COMBINATIONS, MODEL
- DETACHABLE WORK SUPPORT AND ACCESSORIES
- CHANGING THE SEWING FOOT
- SEWING FEET (STANDARD ACCESSORIES)
- PRESSER FEET (STANDARD ACCESSORIES)
- GUIDE RULER (N)
- BLINDSTITCHING FOOT
- EDGE GUIDE (N)
- DARNING FOOT
- ZIPPER FOOT
- BUTTONHOLE SEWING
- CLEANING AND OILING
- CHANGING THE LIGHT BULB
- NEEDLE THREAD BREAKS
- NEEDLE BREAKS
- SEAM IS NOT UNIFORM
- MACHINE FEEDS IRREGULARLY OR NOT AT ALL
- MACHINE RUNS WITH DIFFICULTY
- THE MACHINE (1147) DOES NOT SEW THE STITCHES ON THE PUSH-BUTTONS
- IMPORTANT NOTE
- CONTENTS
- PAGE
- STITCH PROGRAM CHART
Brand : PFAFF
Model : tipmatic 1147
Category : Sewing machine