USER MANUAL Creative 4.5 PFAFF
creative™ 4.5
Owner's Manual
This household sewing machine is designed to comply with IEC/EN 60335-2-28 and UL1594.
IMPORTANT SAFETY INSTRUCTIONS
When using an electrical appliance, basic safety precautions should always be followed, including the following:
Read all instructions before using this household sewing machine. Keep the instructions at a suitable place close to the machine. Make sure to hand them over if the machine is given to a third party.
DANGER – To reduce the risk of electric shock:
- A sewing machine should never be left unattended when plugged in. Always unplug this sewing machine from the electric outlet immediately after using and before cleaning, removing covers, lubricating or when making any other user servicing adjustments mentioned in the instruction manual.
WARNING – To reduce the risk of burns, fire, electric shock, or injury to person:
- Do not allow to be used as a toy. Close attention is necessary when this sewing machine is used by or near children.
- Use this sewing machine only for its intended use as described in this manual. Use only attachments recommended by the manufacturer as contained in this manual.
- Never operate this sewing machine if it has a damaged cord or plug, if it is not working properly, if it has been dropped or damaged, or dropped into water. Return the sewing machine to the nearest authorized dealer or service center for examination, repair, electrical or mechanical adjustment.
- Never operate the sewing machine with any air openings blocked. Keep ventilation openings of the sewing machine and foot control free from the accumulation of lint, dust, and loose cloth.
- Keep fingers away from all moving parts. Special care is required around the sewing machine needle.
• Always use the proper needle plate. The wrong plate can cause the needle to break.
- Do not use bent needles.
- Do not pull or push fabric while stitching. It may deflect the needle causing it to break.
- Wear safety glasses.
- Switch the sewing machine off ("0") when making any adjustment in the needle area, such as threading needle, changing needle, threading bobbin, or changing presser foot, etc.
- Never drop or insert any object into any opening.
- Do not use outdoors.
- Do not operate where aerosol (spray) products are being used or where oxygen is being administrated.
- To disconnect, turn all controls to the off ("0") position, then remove plug from outlet.
- Do not unplug by pulling on cord. To unplug, grasp the plug, not the cord.
- The foot control is used to operate the machine. Avoid placing other objects on the foot control.
- Do not use the machine if it is wet.
- If the LED lamp is damaged or broken, it must be replaced by the manufacturer or it's service agent or a similarly qualified person, in order to avoid a hazard.
- If the supply cord connected with the foot control is damaged, it must be replaced by the manufacturer or its service agent or a similarly qualified person, in order to avoid a hazard.
- This sewing machine is provided with double insulation. Use only identical replacement parts. See instructions for Servicing of Double-Insulated Appliances.
SAVE THESE INSTRUCTIONS
FOR EUROPE ONLY:
This appliance can be used by children aged from 8 years and above and persons with reduced physical, sensory or mental capabilities or lack of experience and knowledge if they have been given supervision or instruction concerning use of the appliance in a safe way and understand the hazards involved. Children shall not play with the appliance. Cleaning and user maintenance shall not be made by children without supervision.
The noise level under normal operating conditions is less than 75dB(A).
The machine must only be used with foot control of type "FR5" manufactured by Shanghai Bioao Precision Mould Co., Ltd.
FOR OUTSIDE EUROPE:
This sewing machine is not intended for use by persons (including children) with reduced physical, sensory or mental capabilities, or lack of experience and knowledge, unless they have been given supervision or instruction concerning use of the sewing machine by a person responsible for their safety. Children should be supervised to ensure that they do not play with the sewing machine.
The noise level under normal operating conditions is less than 75dB(A).
The machine must only be used with foot control of type "FR5" manufactured by Shanghai Bioao Precision Mould Co., Ltd.
SERVICING OF DOUBLE INSULATED PRODUCTS
In a double-insulated product, two systems of insulation are provided instead of grounding. No ground means is provided on a double-insulated product, nor should a means for grounding be added to the product. Servicing of a double-insulated product requires extreme care and knowledge of the system and should be done only by qualified service personnel. Replacement parts for a double-insulated product must be identical to those parts in the product. A double-insulated product is marked with the words 'DOUBLE INSULATION' or 'DOUBLE INSULATED'.
Congratulations!
Congratulations on purchasing your new PFAFF® creative™ 4.5 sewing and embroidery machine.
As a sewing enthusiast, you have acquired one of the most advanced and comprehensive sewing and embroidery machines in the world; it will enable you to transform all your creative ideas into reality using the most highly tuned technology and features.
Before you start, please spend some time reading this owner's manual. You will soon discover how to maximize the use of your machine. Our authorized PFAFF® dealers will of course also be pleased to advise you at any time.
Your PFAFF ® creative ™ 4.5 sewing and embroidery machine will definitely enable you to experience a totally new dimension of sewing and embroidery.
TABLE OF CONTENTS
1
Introduction 1:7
Machine overview 1:8
Front side....1:8
Rear side 1:9
Top parts....1:9
Accessory tray 1:9
Included accessories 1:10
Presser feet....1:10
Stitch overview 1:12
Utility stitches....1:12
Decorative stitches 1:15
Alphabets....1:21
2
Preparations 2:1
Unpacking 2:2
Connecting the foot control cord 2:2
Connect the power cord and foot control 2:2
Pack away after sewing 2:3
LED lights 2:3
Free arm 2:3
Thread cutter 2:3
Electronic knee-lift 2:3
Spool pins 2:4
Threading the machine 2:5
Needle threader 2:5
Thread sensor 2:6
Bobbin winding 2:7
Inserting the bobbin 2:8
IDT™ System (Integrated Dual Feed) 2:9
Attaching the Dynamic spring foot 6D 2:9
Changing the presser foot 2:10
Needles 2:10
Changing the needle 2:11
USB ports 2:11
USB embroidery stick 2:11
Complimentary software (PC) 2:12
How to update your machine 2:12
Buttons and indicators 2:13
3
PFAFF® creative™ Color Touch Screen 3:1
Start view 3:2
Main parts 3:2
Task bar....3:2
Option bar....3:3
Common icons 3:3
Selection menu 3:4
Selection menu - overview 3:4
Embroidery edit 3:6
Embroidery stitch-out 3:7
Settings menu 3:8
Machine settings....3:8
Screen settings....3:11
Sound settings....3:11
Info menu 3:12
Quick help 3:12
4
Sewing mode 4:1
Sewing mode - overview 4:2
Select a stitch 4:3
Sewing recommendations 4:3
Machine settings 4:3
Raise and lower the presser foot 4:3
Stitch settings 4:4
Stitch width 4:4
Stitch positioning....4:4
Stitch length....4:4
Stitch density....4:5
Mirroring 4:5
Balance 4:5
Buttonhole slit length....4:6
Button stitch repetition....4:6
Adjust thread tension 4:7
Free-motion options 4:8
Sequence start position 4:9
Save options 4:9
Option bar 4:11
Speed control....4:11
Tie-off options 4:11
Sewing programs....4:12
Sequencing 4:13
Stitch CreatorTM feature 4:13
Sewing techniques 4:14
Sewing in zippers 4:14
Sewing hems in heavy fabric 4:14
Three-step zigzag stitch....4:15
Blindhem stitch 4:15
Buttonholes....4:16
Sew on a button 4:18
Darning 4:18
Special sewing techniques 4:21
Four direction sewing....4:21
Stacking stitches....4:22
Ribbon stitches 4:22
Common sewing pop-ups 4:23
5
Sequencing 5:1
Sequencing - overview 5:2
Open and exit sequencing 5:3
Create a sequence 5:3
Sequence commands....5:4
Horizontal preview 5:5
Directional stitches....5:5
Zoom to all 5:6
Loading and sewing a sequence 5:6
Saving a sequence 5:7
Important sequencing information 5:8
Common sequencing pop-ups 5:8
6
Stitch Creator™ feature 6:1
Stitch Creator™ feature - overview 6:2
Open and exit Stitch Creator 134 feature....6:3
Definition of a stitch point 6:3
Start creating - add a stitch or stitch point......6:3
Select stitches/stitch points 6:3
Multi-select 6:4
Delete selected stitch point 6:4
Duplicate selected stitch point....6:4
Insert a new stitch point 6:4
Zoom 6:4
Mirroring side to side 6:5
Mirroring end to end 6:5
Triple stitch....6:5
Touch functions 6:6
Position of the marked stitch point 6:6
Loading and sewing a stitch 6:7
Saving a stitch 6:7
Common Stitch Creator™ feature pop-ups 6:8
Important Stitch Creator™ feature information 6:8
7
Embroidery mode – preparations 7:1
Embroidery unit overview 7:2
Embroidery hoop overview 7:3
Built-in designs 7:3
Embroidery collection 7:3
Connect the embroidery unit 7:3
Remove the embroidery unit 7:4
Attaching the Dynamic spring foot 6D 7:4
Slide on the hoop 7:5
To hoop the fabric 7:5
Getting started embroidering 7:6
8
Embroidery mode - edit 8:1
Embroidery edit - overview 8:2
Load a design 8:3
Load a font 8:3
Load a stitch 8:4
Zoom Options 8:4
Select design(s) 8:5
Stitch-out order 8:6
Adjustments 8:6
Group 8:6
Delete....8:6
Duplicate....8:6
Mirroring....8:6
Move design into hoop....8:6
Undo....8:6
Redo....8:6
Touch functions 8:7
Move....8:7
Rotate 8:7
Scale 8:7
Pan 8:7
Option bar
Save to Personal designs 8:8
More options....8:9
Select hoop....8:9
Thread color edit 8:10
Basic Shape Creator™ feature 8:11
Embroidery stitch editor 8:18
Embroidery text editor 8:21
Embroidery edit pop-ups
8:23
9
Embroidery mode - stitch-out 9:1
Embroidery stitch-out - overview 9:2
Embroidery information 9:2
Crosshair 9:3
Color list 9:3
Zoom options 9:3
Current stitch 9:3
Go to stitch 9:3
Basting 9:4
Thread tension 9:4
Option bar 9:5
More options 9:5
Hoop position 9:6
Speed control....9:6
Precise positioning 9:7
Common Embroidery stitch-out pop-ups
9:11
10
Files & Folders 10:1
Files & Folders - overview 10:2
File formats 10:3
Browse Files & Folders 10:3
Load a file 10:5
Open a folder 10:5
Organize 10:6
Common Files & Folders pop-ups 10:7
11
Maintenance 11:1
Cleaning the machine 11:2
Non-original parts and accessories 11:2
Troubleshooting 11:3
Index 11:5
Introduction
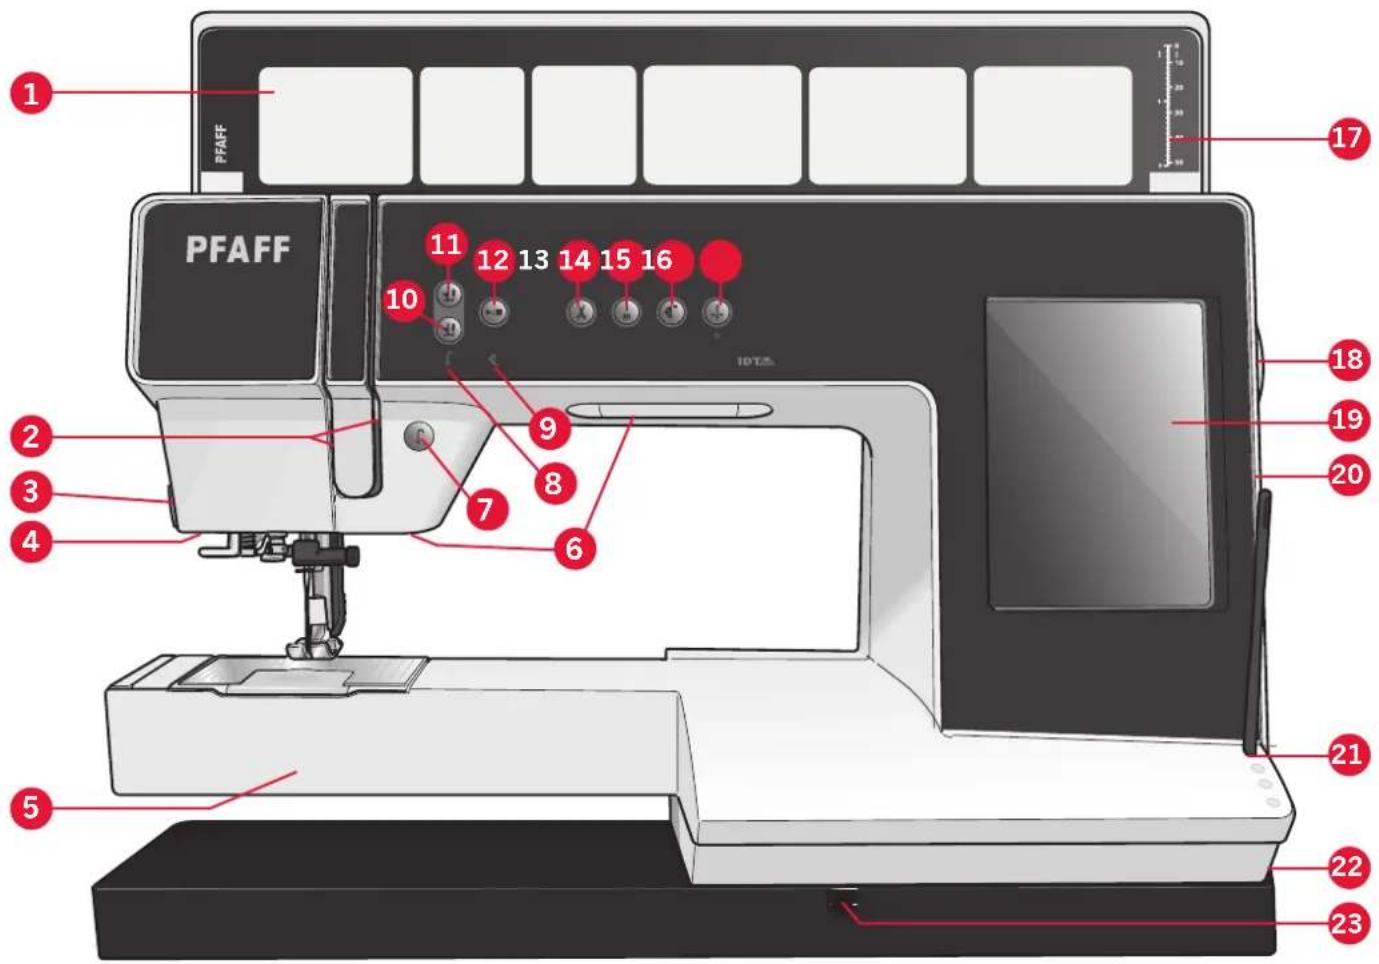
Machine overview
Front side
- Lid with stitch categories
- Threading slots
- Thread cutter
- Sensormatic buttonhole foot socket
- Free arm
- LED lights
- Reverse
- Reverse indicator
- Action indicator
- Presser foot down and pivot toggle
- Presser foot up and extra lift toggle
- Start/stop
- Thread snips
- Immediate tie-off
- Stitch restart
- Needle up/down
- Button ruler
- Handwheel
- PFAFF ® creative TM Color Touch Screen
- Built-in USB ports
- Stylus holder
- Main switch, connectors for power cord and foot control
- Connection for knee-lift
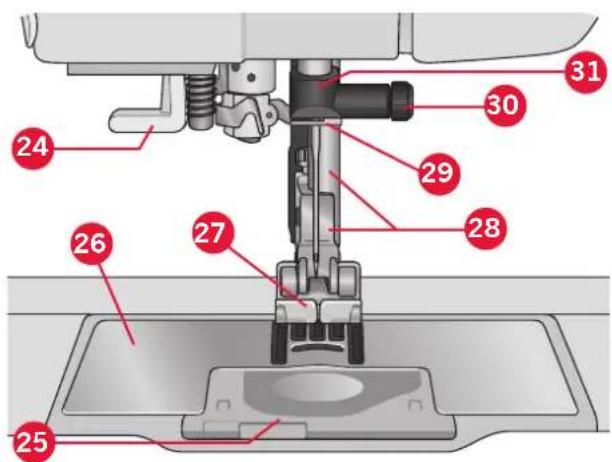
Needle area
- Built-in needle threader
- Bobbin cover
- Needle plate
- Presser foot
- Presser foot bar and presser foot holder
- Needle thread guide
- Needle screw
- Needle bar
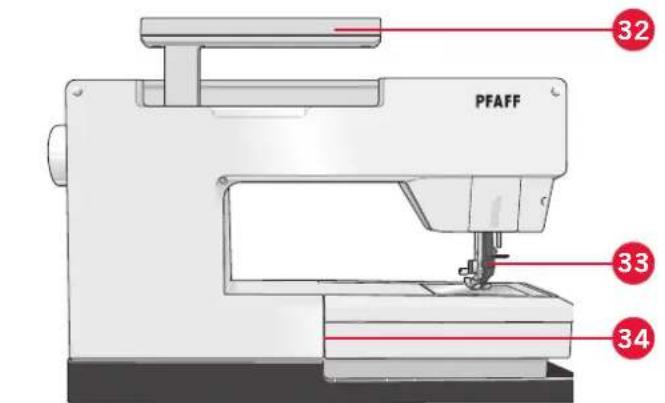
Rear side
- Handle
- IDT TM system
- Embroidery unit connection socket
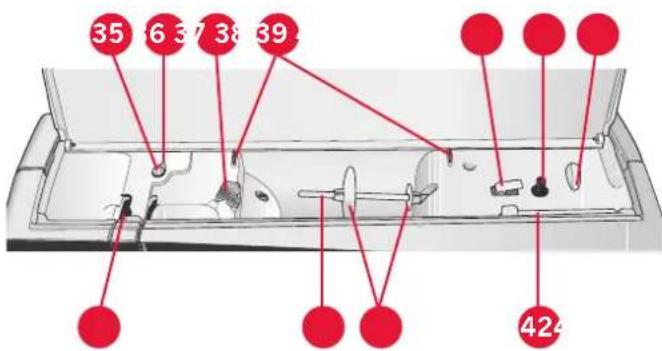
Top parts
- Thread guide for needle thread and for bobbin winding
- Bobbin winder thread guide and pre-tension device
- Thread guide
- Bobbin thread guides
- Bobbin winder lever
- Bobbin spindle
- Bobbin thread cutter
- Auxiliary spool pin
- Spool caps
- Spool pin
- Take-up lever
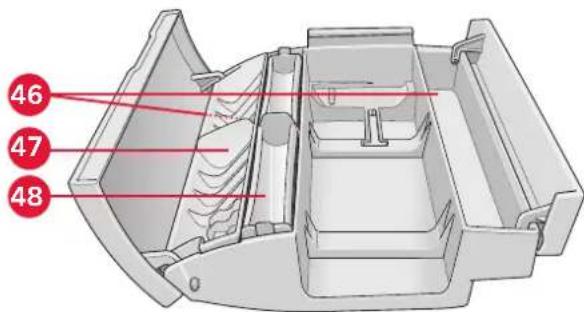
Accessory tray
The accessory tray features special compartments for presser feet and bobbins, plus space for needles and other accessories. Store the accessories in the tray so they are easily accessible.
- Space for accessories
- Removable tray for presser feet
- Removable bobbin holder
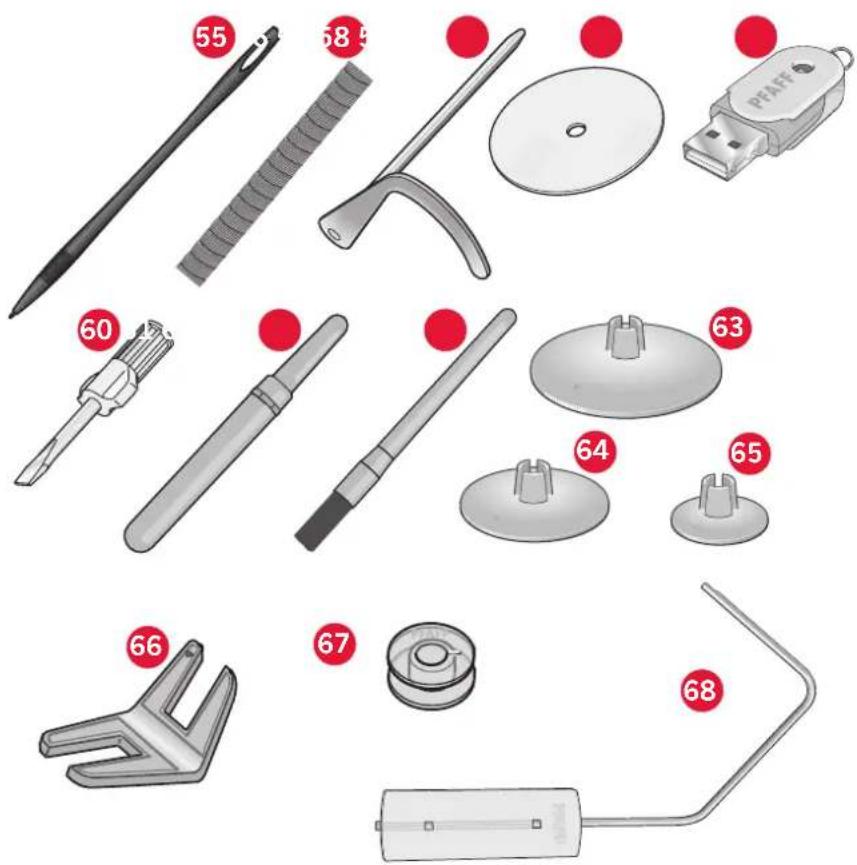
Included accessories
Accessories
- Stylus
- Thread net (2)
- Edge guide
- Felt pad (2)
- USB Embroidery stick
- Screwdriver
- Seam ripper
- Brush
- Spool cap, large (2)
- Spool cap, medium
- Spool cap, small
- Multi-purpose tool
- Bobbins (10)
- Knee-lift
Included accessories not in picture
• Complimentary software (PC) to download
- Foot control
- Power cord
• USB cord (P/N:412 62 59-04)
- Needles
- Microfiber cloth
• creative™ 4.5 Embroidery collection
Presser feet
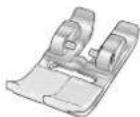
This foot is used mainly for straight stitching and zigzag stitching with a stitch length longer than 1.0mm.
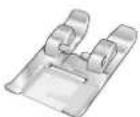
This foot is used for decorative stitches. The groove on the underside of the foot is designed to flow smoothly over the stitches.
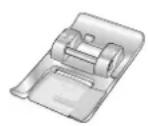
When sewing decorative stitches or short zigzag stitches and other utility stitches with less than 1.0mm stitch length, use this foot. The groove on the underside of the foot is designed to flow smoothly over the stitches.
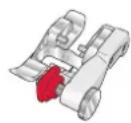
This foot is used for blindhem stitches. The toe on the foot guides the fabric. The red guide on the foot is designed to ride along the fold of the hem edge.
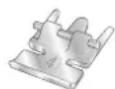
This foot can be snapped on either the right or the left of the needle, making it easy to sew close to both sides of the zipper teeth. Move needle position to right or left to sew closer to zipper teeth.
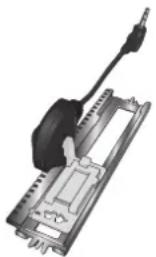
When connected to the machine, the buttonhole is sewn in a suitable length to the button size that has been entered into the machine.
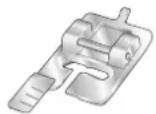
This foot is used for sewing manual buttonholes. Use the markings on the foot to position the garment edge. The finger on the back of the foot holds cording for corded buttonhole.

This foot is used for embroidery and free-motion sewing. This foot can also be used for darning.
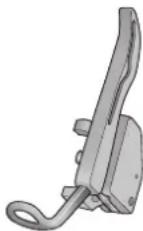
This foot is always recommended for embroidery. It is also used for free-motion sewing, quilting and embroidering on especially thick or spongy fabric. When using the Dynamic spring foot for free-motion, select Dynamic spring foot free-motion setting in the Free-motion options window in sewing mode.
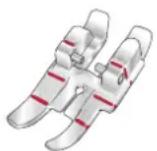
This foot is perfect for piecing and patchwork, especially when used in conjunction with the straight stitch needle plate. The distance from the needle to the outer edge of the right toe is 1/4'' (6mm). The distance from the needle to the inner edge of the right toe is 1/8'' (3mm).
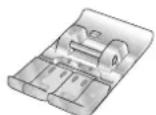
This foot is used for side-motion stitches.
Important: Make sure that the IDT ™ system is disengaged when using presser foot 2A, 5A, 5M, 6A, 6D and 8.
Stitch overview
Utility stitches
| Stitch Stitch number Name | Description | |
| 1.1.1 Straight stitch For seaming and topstitching. Select from 37 different needle positions.Note: This stitch makes a stronger tie-off than stitch 2.1.1. | |
| 1.1.2 Stretch triple straight stitch | Reinforced seam. Topstitching. |
| 1.1.3 Straight stitch reverse Sew continuous reverse with strong tie-off. | |
| 1.1.4 Basting stitch Single stitch used for basting. Touch foot control to sew one stitch.Move fabric manually to desired position and touch foot control again to sew another stitch. | |
| 1.1.5 Zigzag stitch Reinforce seams, clean finish, stretch sewing, lace insertion. | |
| 1.1.6 Zigzag stitch, right or left needle position | Reinforce seams, clean finish, stretch sewing. |
| 1.1.7 Z-zigzag stitch Applique, couching, eyelets. | |
| 1.1.8 Stretch triple zigzag stitch | Elastic stitch for decorative hems or topstitching. |
| 1.1.9 Three-step zigzag stitch | Sewing elastic, darning, patching. |
| 1.1.10 Elastic stitch Sewing elastic, darning, patching. | |
| 1.1.11 Triple stretch stitch Sewing elastic, darning, patching and decorative sewing. | |
| 1.1.12 Honeycomb stitch Decorative stitch for stretch fabrics and hems. Also used with elastic thread in the bobbin. | |
| 1.1.13 Bridging stitch Joining fabrics and quilt batting, decorative stitch for quilting, hemstitching. | |
| 1.1.14 Foundation elastic stitch | Joining stitch for undergarments, terry cloth, leather, bulky fabrics where overlapping the seams. |
| 1.1.15 Crosshem stitch Elastic decorative hem for stretch fabrics. | |
| 1.1.16 Blindhem stitch Sewing blindhems on woven fabrics. | |
| 1.1.17 Elastic blindhem stitch Sewing blindhems on stretch fabrics. | |
| 1.1.18 Stretch tricot stitch Sewing seams on stretch fabrics. | |
| 1.2.1 Closed | overlock Seam and overcast | stretch fabrics in one step. |
| 1.2.2 Closed | overlock Seam and overcast | in one step. |
| 1.2.3 Closed | overlock Seam and overcast | in one step with reinforced edge. |
| 1.2.4 Elastic | overcast Seam and overcast | stretch fabrics in one step. |
| 1.2.5 Standard | overcast Seam and overcast | stretch fabrics in one step with reinforced edge. |
| 1.2.6 Overlock | Seam and overcast stretch fabrics in one step. |
| 1.2.7 Closed | overlock Seam and overcast | in one step, patch, hem. |
| 1.2.8 Stretch | knit overlock Seam and overcast | stretch fabrics in one step. |
| 1.2.9 Reinforced | overlock Seam and overcast | stretch fabrics in one step and reinforce. |
| 1.2.10 Finished | edge overlock Seam and overcast | stretch fabrics in one step with reinforced edge. |
| 1.2.11 Mock | cover hem Create the look of a serger cover hem for stretch fabrics. |
| 1.2.12 Open | overlock blindhem | Create decorative overlock blindhem for woven fabrics. |
| 1.2.13 Closed | overlock blindhem | Create decorative overlock blindhem for stretch fabrics. |
| 1.3.1 Linen | buttonhole Buttonhole for blouses, shirts and linen. |
| 1.3.2 Standard | buttonhole Basic buttonhole for blouses, shirts and jackets. Also for pillowcases. |
| 1.3.3 Rounded | buttonhole with pointed tack | Buttonhole for garments. |
| 1.3.4 Rounded | buttonhole with lengthwise tack | Buttonhole for garments. |
| 1.3.5 Rounded | buttonhole with crosswise tack | Buttonhole for garments. |
| 1.3.6 Eyelet | buttonhole with pointed tack | Tailors buttonhole or decorative buttonhole. |
| 1.3.7 Eyelet | buttonhole with lengthwise tack | Tailors buttonhole for jackets and trousers. |
| 1.3.8 Rounded | buttonhole Buttonhole for light garments or jackets. |
| 1.3.9 Decorative buttonhole with triangle tack | Decorative buttonhole. |
| 1.3.10 Stretch buttonhole Buttonhole for stretch fabrics. |
| 1.3.11 Cross stitch buttonhole Decorative buttonhole. |
| 1.3.12 Decorative buttonhole Decorative buttonhole. |
| 1.3.13 Professional eyelet buttonhole | Professional tailors buttonhole for jackets and trousers. |
| 1.3.14 Decorative eyelet buttonhole | Decorative buttonhole for jackets. |
| 1.3.15 Heirloom round buttonhole with pointed tack | Decorative heirloom buttonhole. |
| 1.3.16 Button sewing Sew on buttons or tacking. |
| 1.3.17 Bound buttonhole Foundation stitch for bound buttonhole. |
| 1.4.1 Eyelet Heirloom sewing decorative trim. |
| 1.4.2 Decorative eyelet Heirloom sewing decorative trim. |
| 1.4.3 Decorative eyelet Heirloom sewing decorative trim. |
| 1.4.4 Decorative eyelet Heirloom sewing decorative trim. |
| 1.5.1 Programmable darning stitch | Darning holes or damaged fabric. |
| 1.5.2 Programmable reinforced darning stitch | Reinforced darning holes or damaged fabric. |
| 1.5.3 Bartack Automatically reinforce seams and pockets. |
| 1.5.4 Denim bartack Automatically reinforce seams and pockets decoratively. |
| 1.5.5 Decorative bartack Automatically reinforce seams and pockets decoratively. |
| 1.5.6 Cross bartack Automatically reinforce seams and pockets. |
| 1.5.7 Decorative tack Automatically decorative topper for seams and pockets. |
Decorative stitches
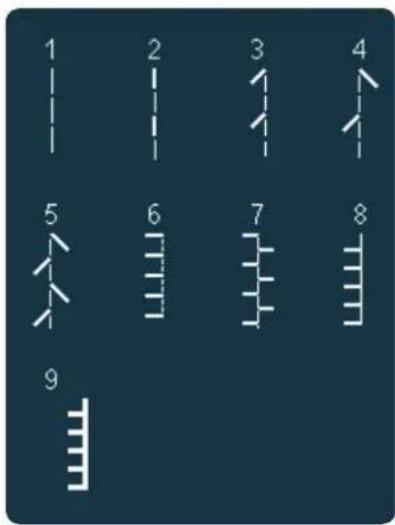
2.1 Quilt stitches - Handlook stitches
2.2 Quilt stitches - Antique quilt stitches
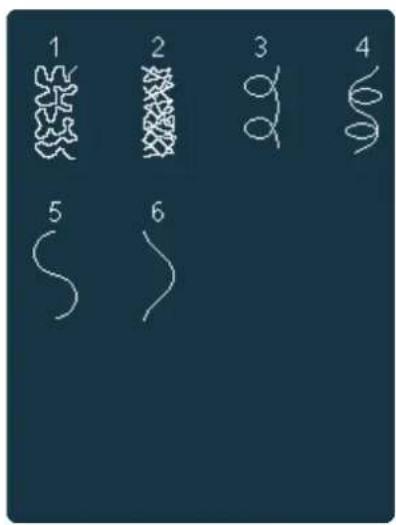
2.3 Quilt stitches - Stippling stitches
2.4 Quilt stitches - Crazy patch stitches
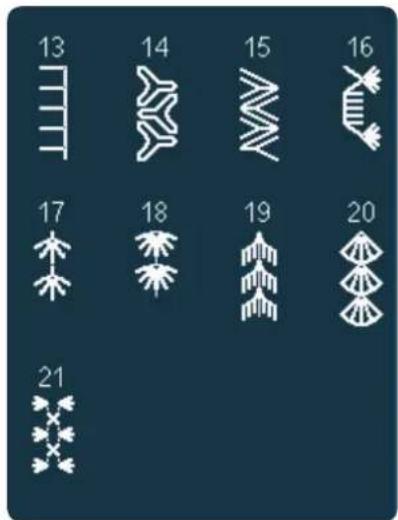
2.4 Quilt stitches - Crazy patch stitches
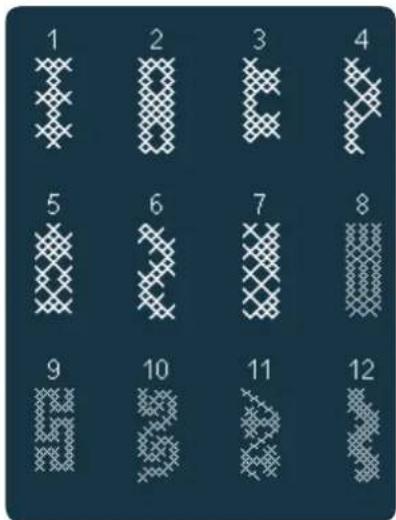
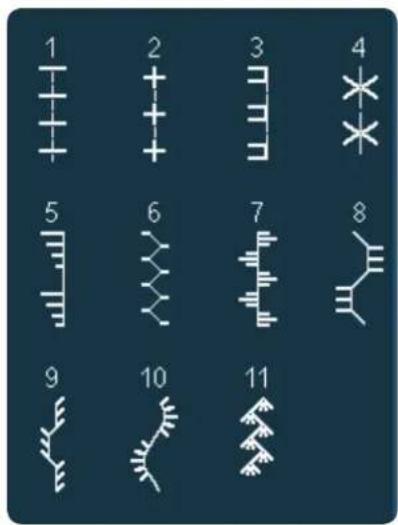
3.1 Needle art stitches - Cross stitches
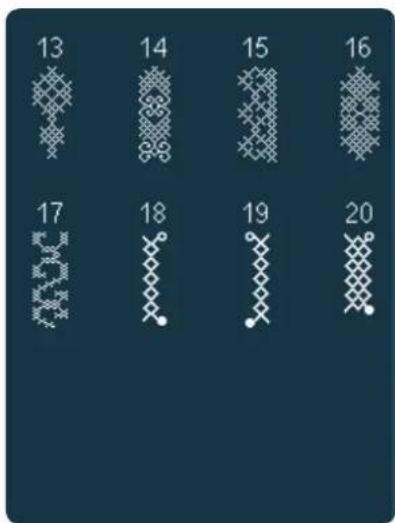
3.1 Needle art stitches - Cross stitches
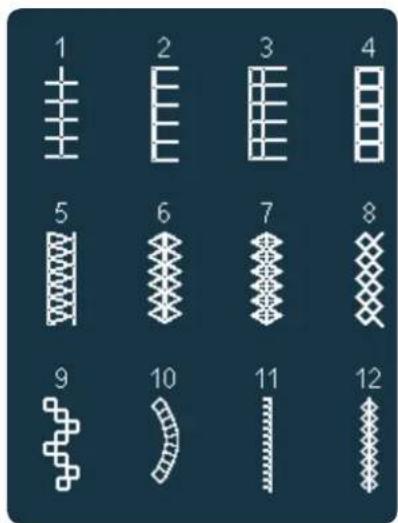
3.2 Needle art stitches - Hemstitches
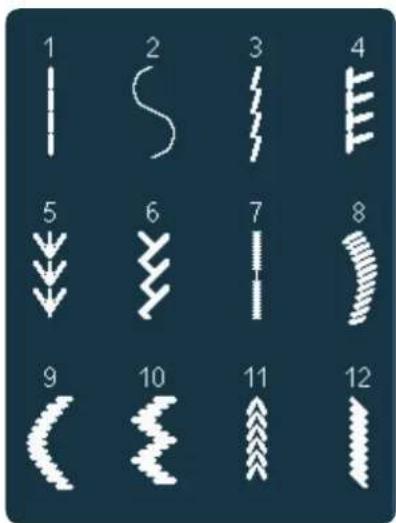
3.3 Needle art stitches - Antique hand embroidery stitches
3.3 Needle art stitches - Antique hand embroidery stitches
3.3 Needle art stitches - Antique hand embroidery stitches
3.4 Needle art stitches - Smocking stitches
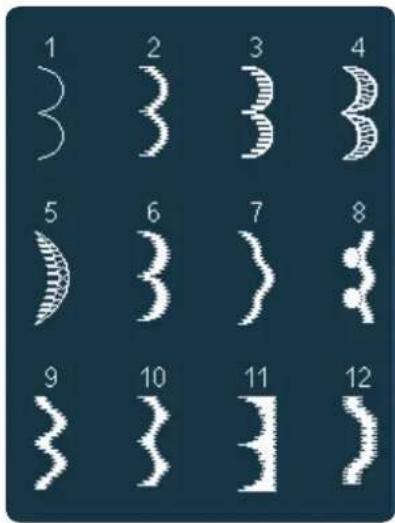
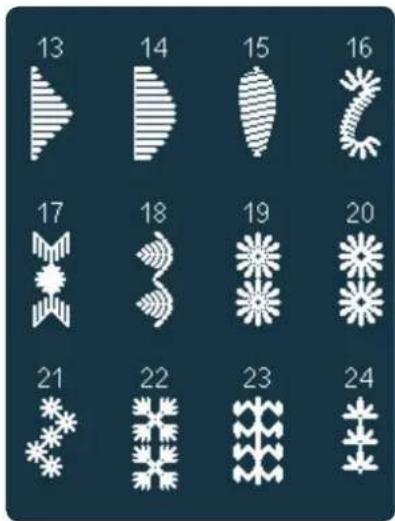
4.1 Decorative stitches - Scallop edges
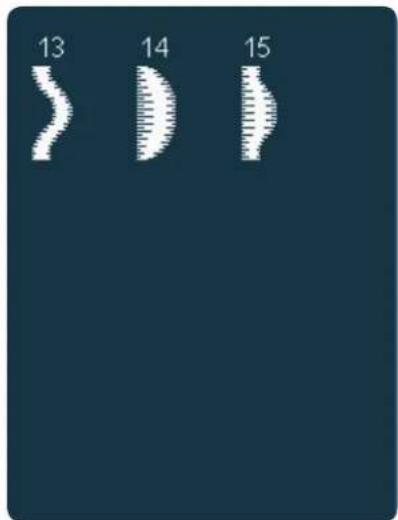
4.1 Decorative stitches - Scallop edges
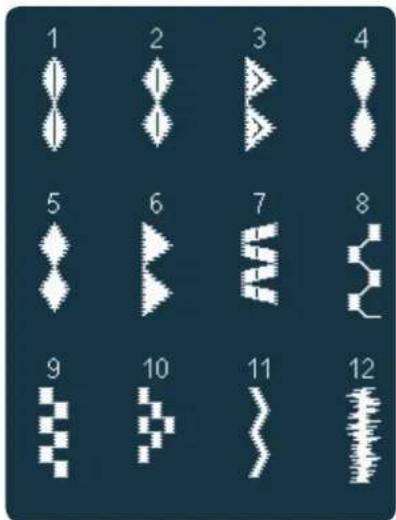
4.2 Decorative stitches - Satin stitches
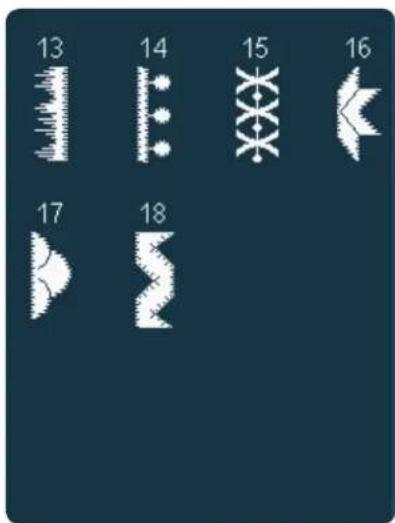
4.2 Decorative stitches - Satin stitches
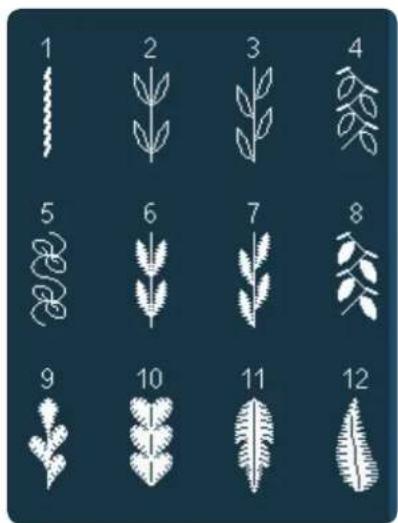
4.3 Decorative stitches - Leaves and flowers
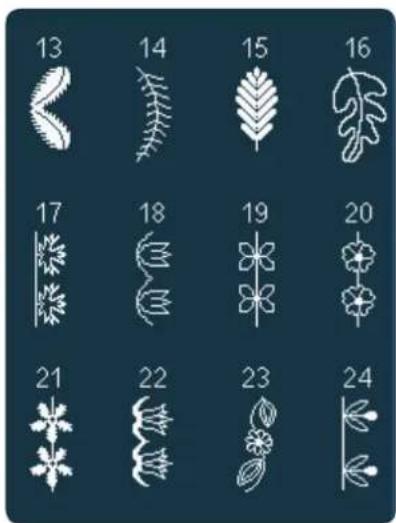
4.3 Decorative stitches - Leaves and flowers
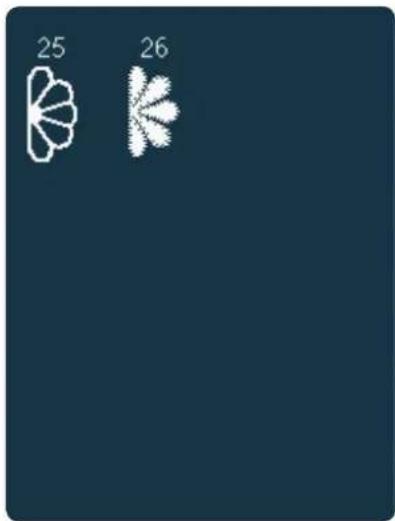
4.3 Decorative stitches - Leaves and flowers
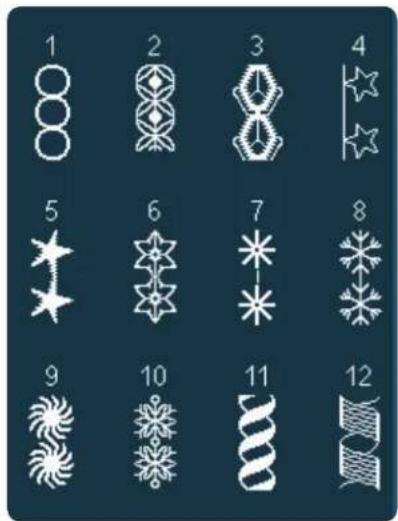
4.4 Decorative stitches - Art stitches
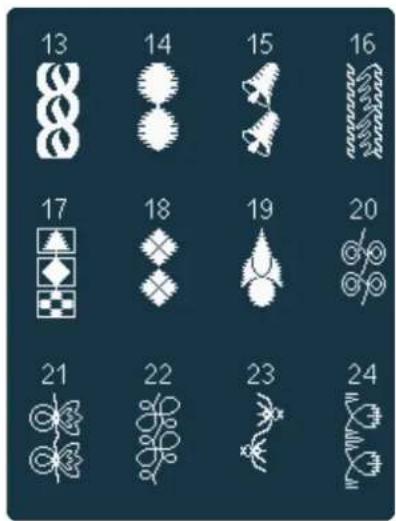
4.4 Decorative stitches - Art stitches
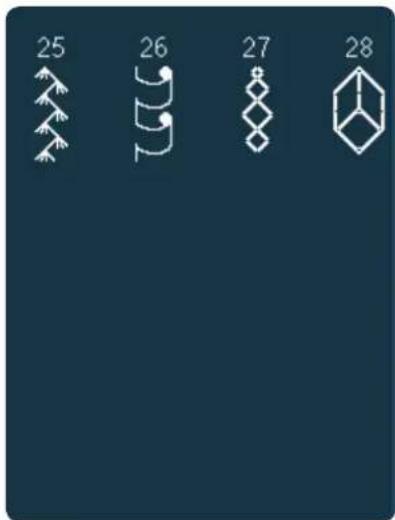
4.4 Decorative stitches - Art stitches
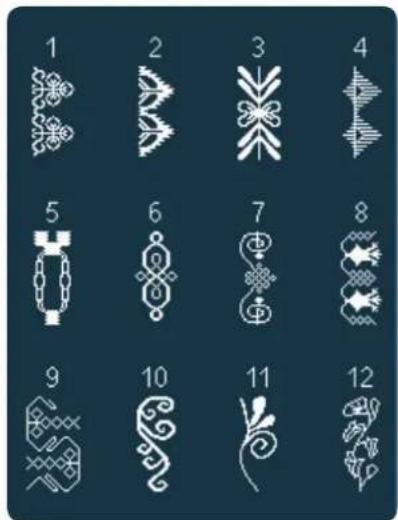
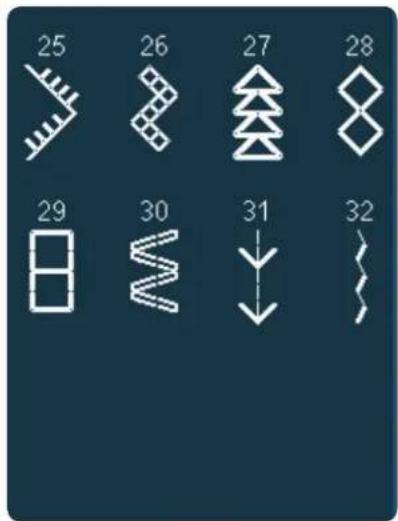
4.5 Decorative stitches - Ornamental stitches
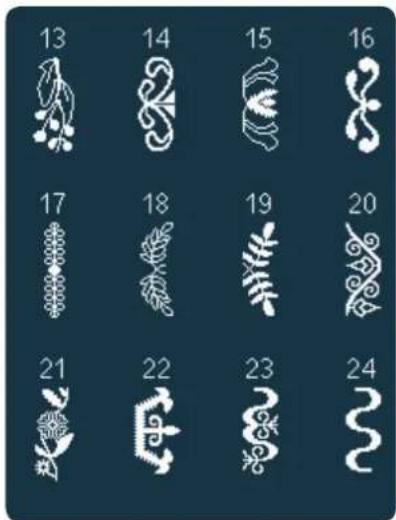
4.5 Decorative stitches - Ornamental stitches
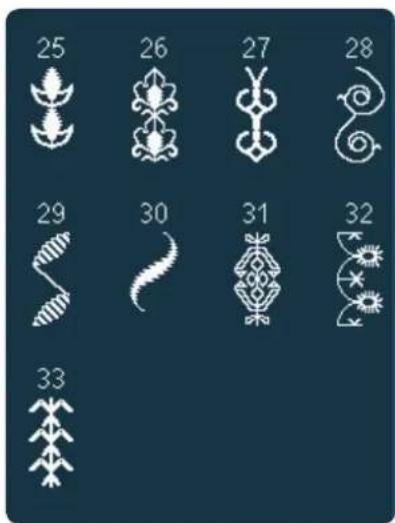
4.5 Decorative stitches - Ornamental stitches
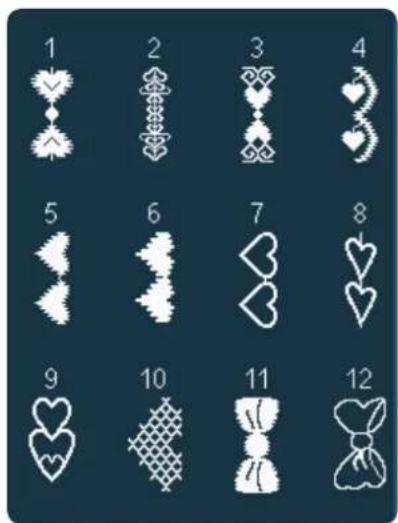
4.6 Decorative stitches - Bows and hearts
4.6 Decorative stitches - Bows and hearts
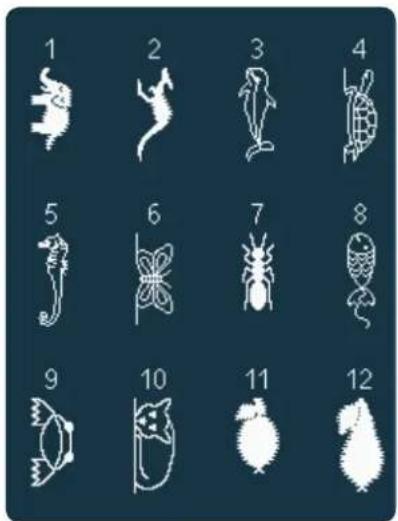
4.7 Decorative stitches - Fun stitches
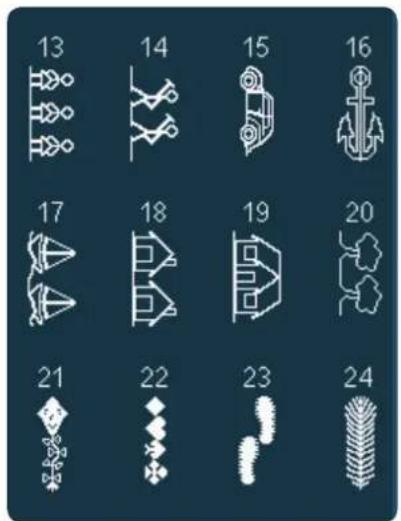
4.7 Decorative stitches - Fun stitches
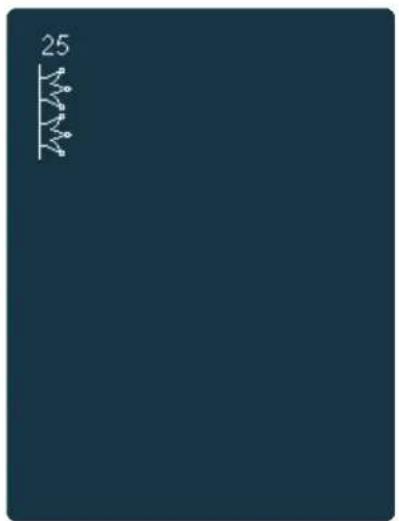
4.7 Decorative stitches - Fun stitches
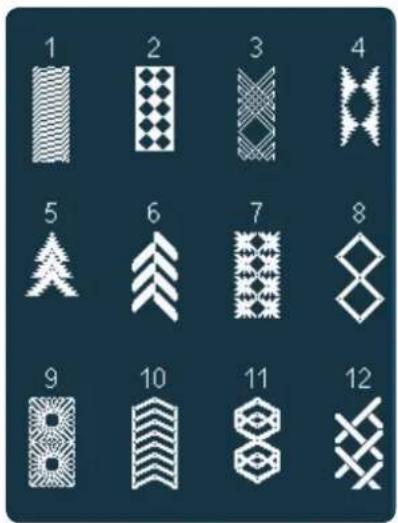
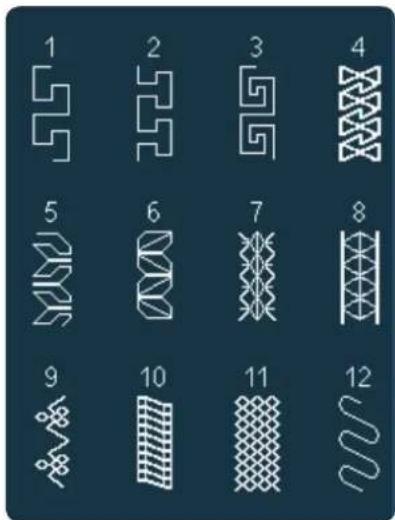
4.8 Decorative stitches - Borders 4.8 Decorative stitches - Borders
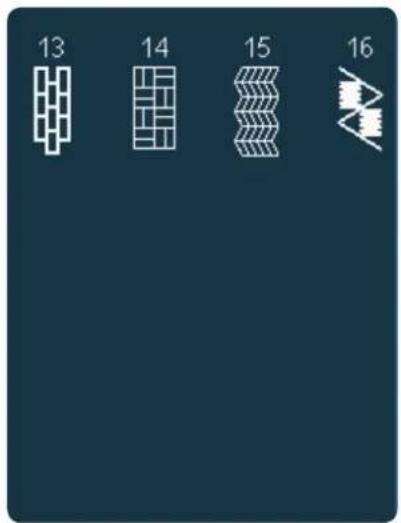
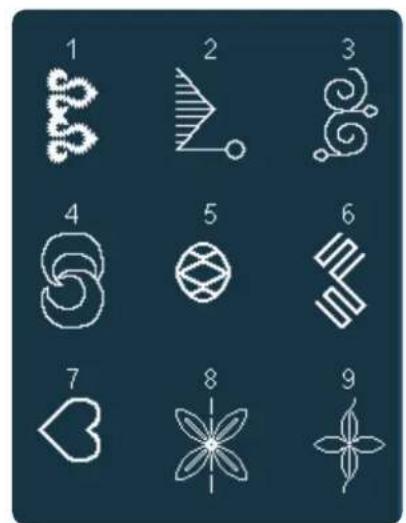
5.3 Maxi stitches - Art stitches
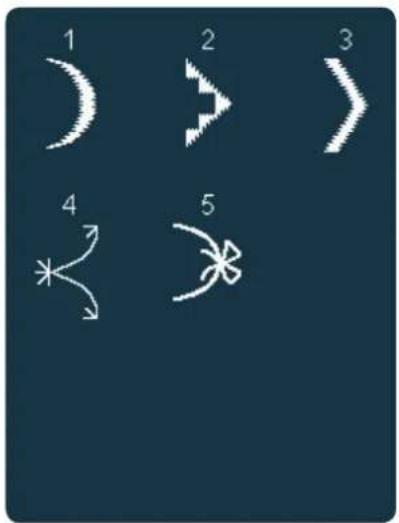
5.1 Maxi stitches - Scallop and satin stitches
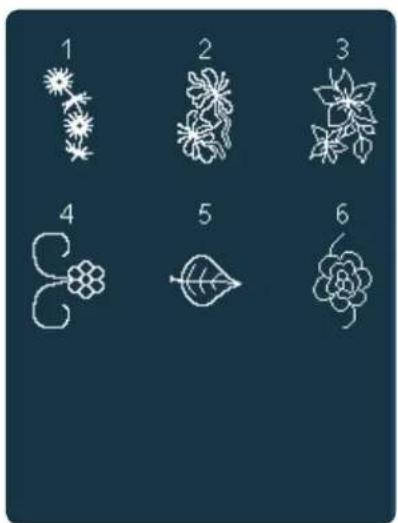
5.2 Maxi stitches - Leaves and flowers
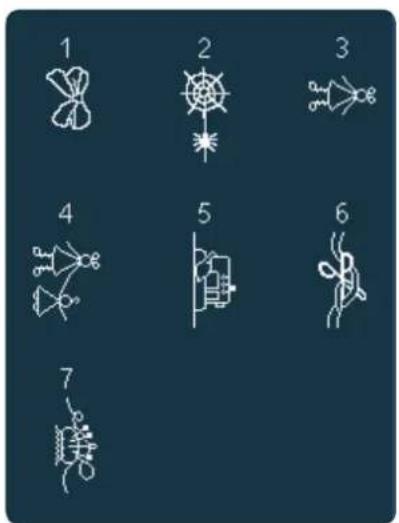
5.4 Maxi stitches - Fun stitches
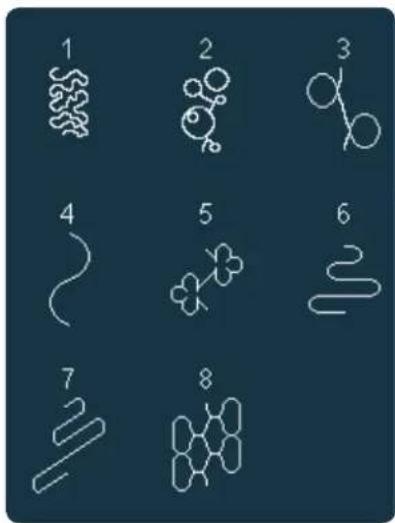
5.5 Maxi stitches - Stippling stitches
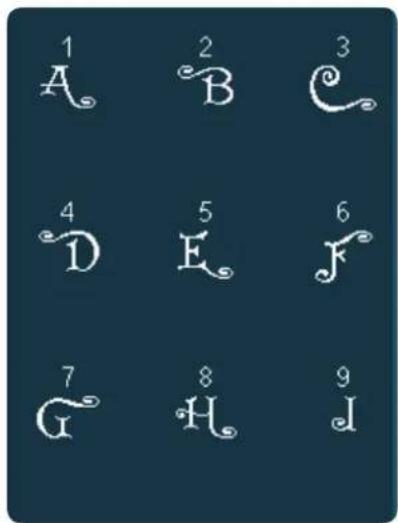
5.6 Monogram 5.6 Monogram
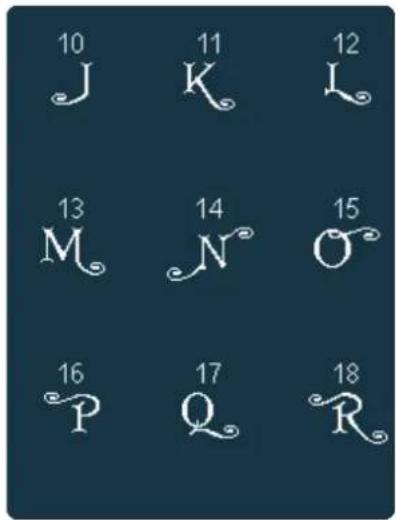
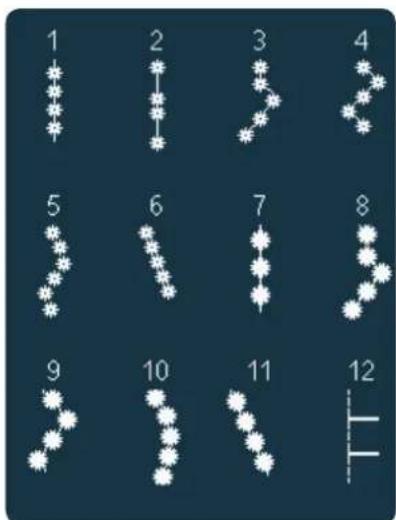
6.1 Sewing techniques - Optional feet stitches
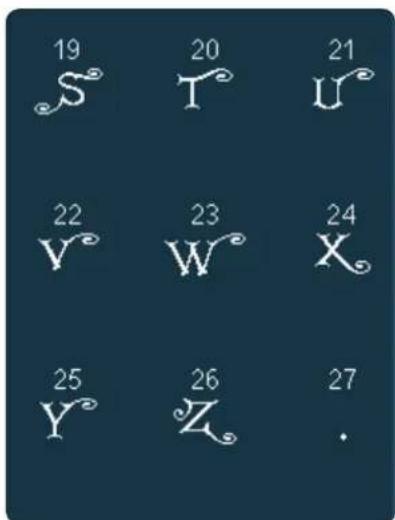
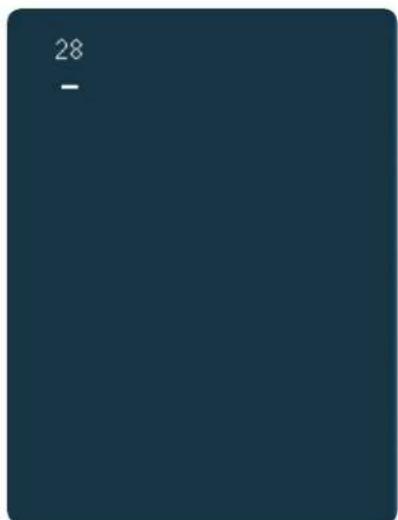
5.6 Monogram 5.6 Monogram
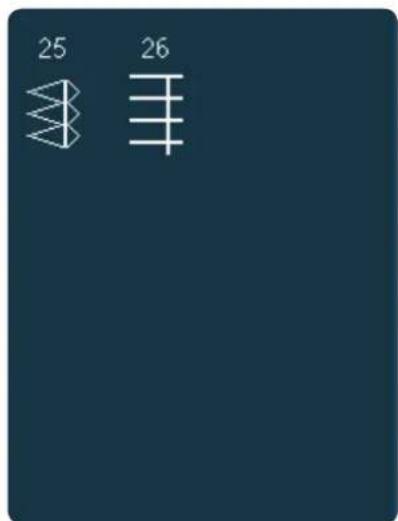
6.1 Sewing techniques - Optional feet stitches
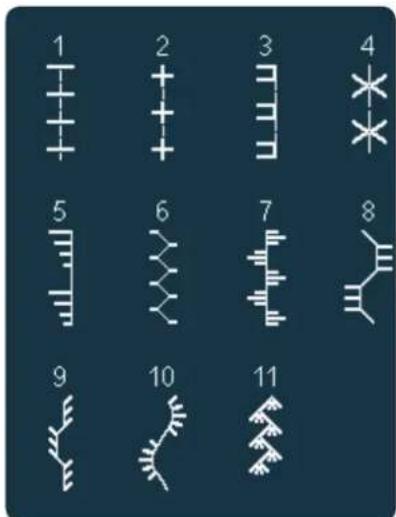
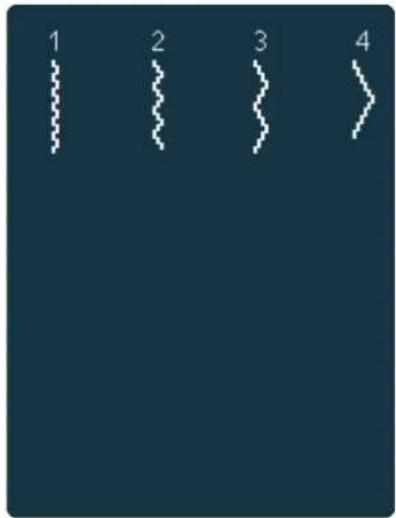
6.2 Sewing techniques - Handlook quilt stitches
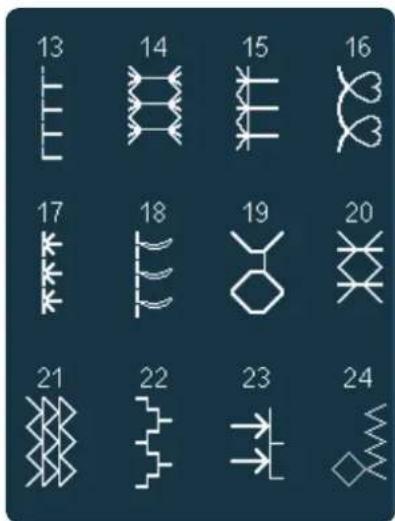
6.1 Sewing techniques - Optional feet stitches
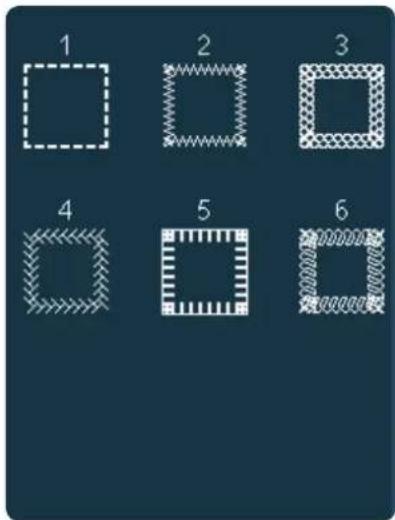
6.3 Sewing techniques - Four direction stitches
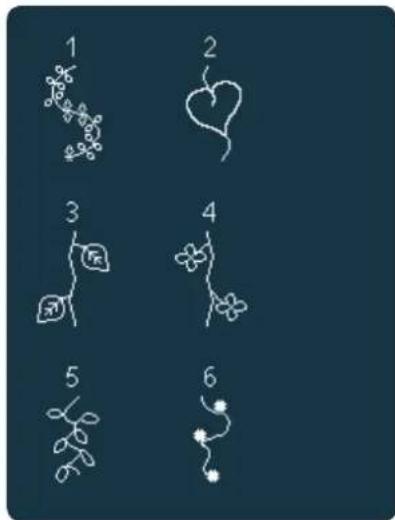
6.4 Sewing techniques - Stacking stitches
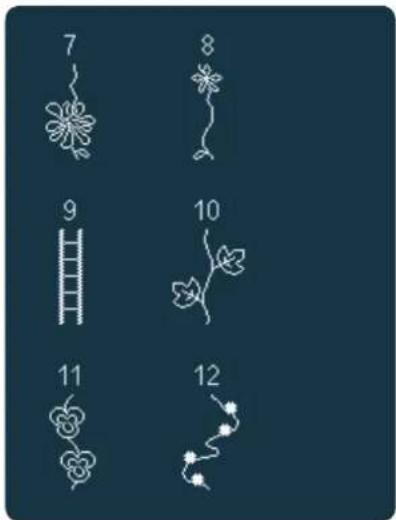
6.4 Sewing techniques - Stacking stitches
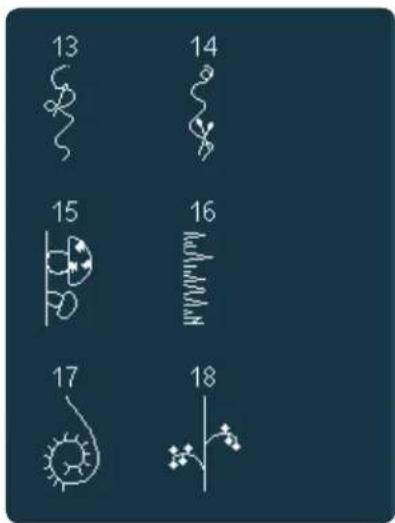
6.4 Sewing techniques - Stacking stitches
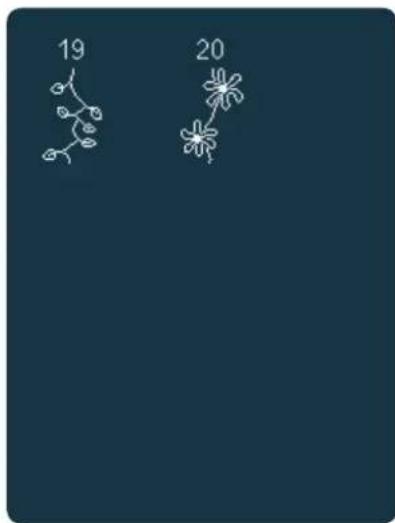
6.4 Sewing techniques - Stacking stitches
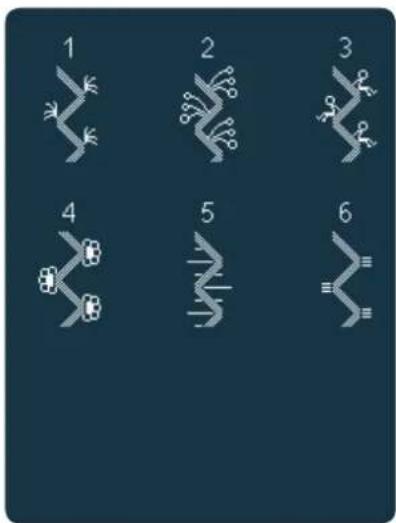
6.5 Sewing techniques - Ribbon stitches
Alphabets
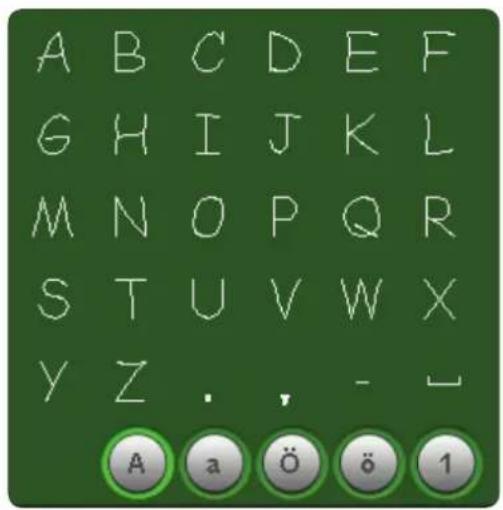
Comic
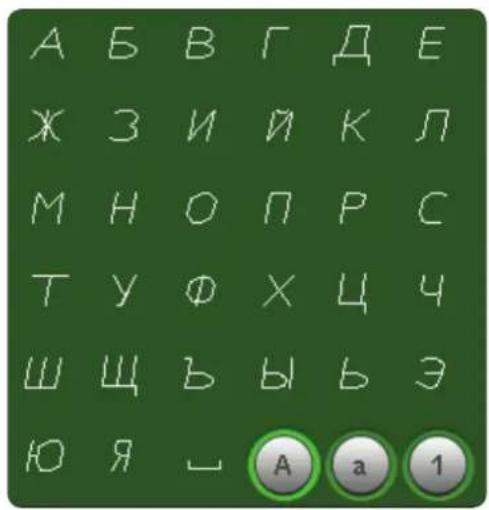
Grand
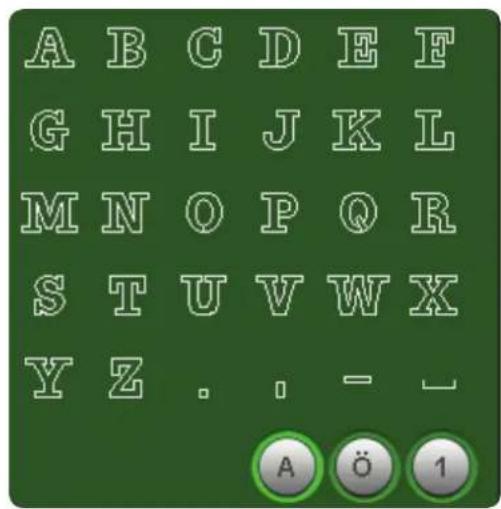
Outline
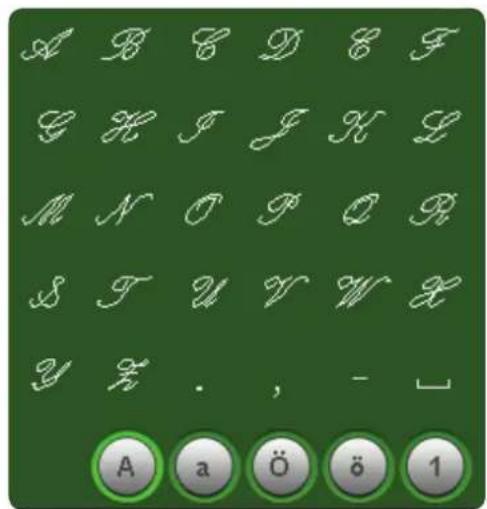
Script
Preparations
Unpacking
- Place the box on a steady, flat surface. Lift the machine out of the box and remove the outer packaging and lift off the machine carrying case.
- Remove all other packing material and the plastic bag.
- Slide off the accessory tray and remove the styrofoam inside.
Note: Styrofoam left in the accessory tray while sewing may affect stitch quality. The styrofoam is for packing purposes only and should be removed.
Note: Your creative™ 4.5 sewing and embroidery machine is adjusted to provide the best stitch result at normal room temperature. Extreme hot and cold temperatures can affect the sewn result.
Some fabrics have a lot of excess dye which can cause discoloration on other fabric but also on your sewing machine. This discoloring may be very difficult or impossible to remove. Fleece and denim fabric, especially red and blue, often contain a lot of excess dye. If you suspect that your fabric/ready-to-wear garment contains a lot of excess dye, always pre-wash it before sewing to avoid the discoloring.
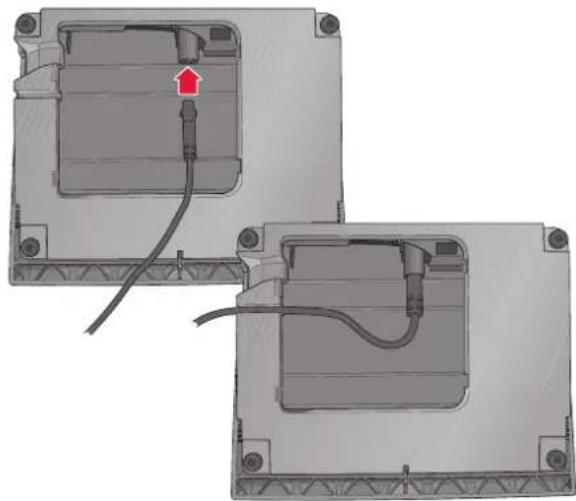
Among the accessories you will find the foot control cord. Connecting the foot control cord to the foot control is only necessary the very first time you are going to use the machine.
- Take out the foot control cord. Turn the foot control over. Connect the cord to the socket inside the open space on the underside of the foot control as shown.
- Push firmly to make sure it is properly connected.
- Pull the cord into the slot to the left of the socket to ensure that the foot control will rest evenly on the floor.
Note: Before plugging in the foot control, check to ensure that it is type "FR5" (see underside of foot control).
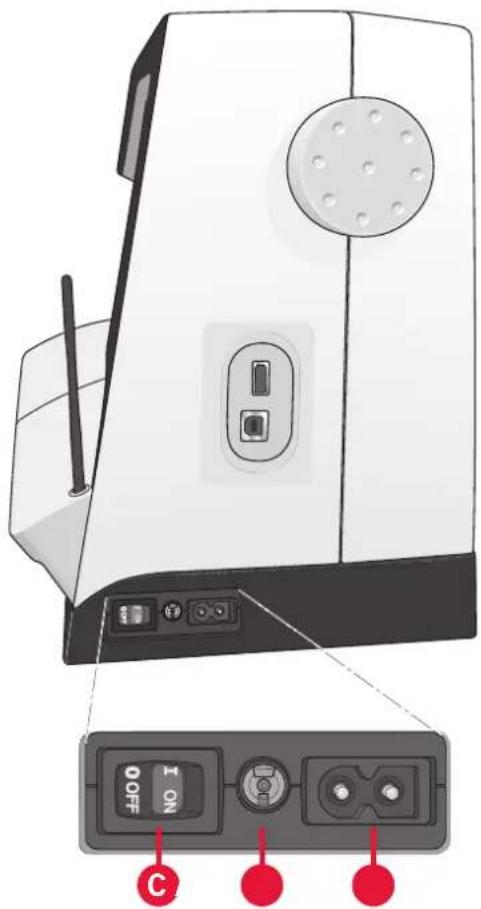
- Connect the foot control cord to the front socket on the bottom right side of the machine (A).
- Connect the power cord to the rear socket on the bottom right side of the machine (B). Plug the cord into a wall socket.
- Press the ON/OFF switch to ON to turn on power and light (C).
For the USA and Canada
This sewing machine has a polarized plug (one blade wider than the other). To reduce the risk of electric shock, this plug is intended to fit in a polarized outlet only one way. If the plug does not fit fully in the outlet, reverse the plug. If it still does not fit, contact a qualified electrician to install the proper outlet. Do not modify the plug in any way.
Pack away after sewing
- Turn the main switch (C) off.
- Unplug the cord from the wall socket and then from the machine (B).
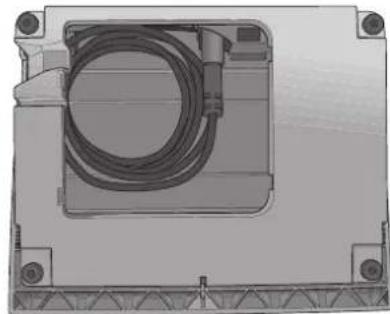
- Unplug the foot control cord from the machine (A). Wind the foot control cord and place inside the open area on the underside of the foot control.
- Place all accessories in the accessory tray. Slide the tray on to the machine around the free arm.
- Place the foot control in the space above the free arm.
- Put on the hard cover.
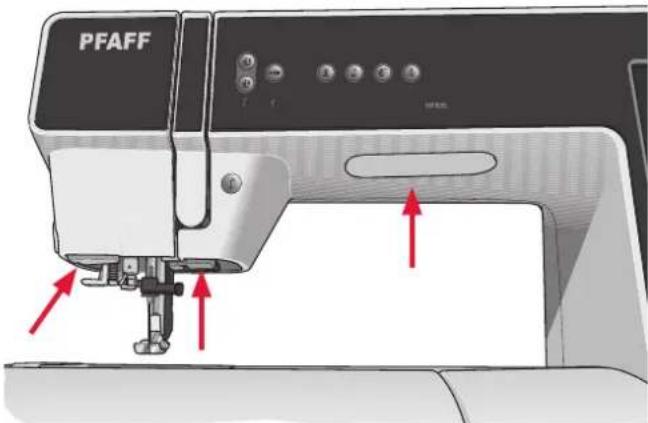
LED lights
Your machine has LED lights which distribute the light evenly over the sewing area and eliminates shadows.
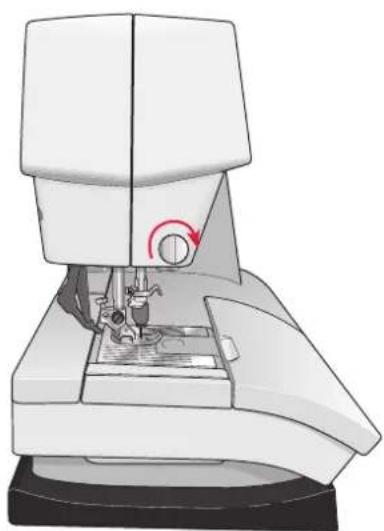
Free arm
To use the free arm, slide off the accessory tray. When attached, a hook keeps the accessory tray locked to the machine. Remove the tray by sliding it to the left.
Thread cutter
To use the thread cutter, pull the thread from back to front as shown.
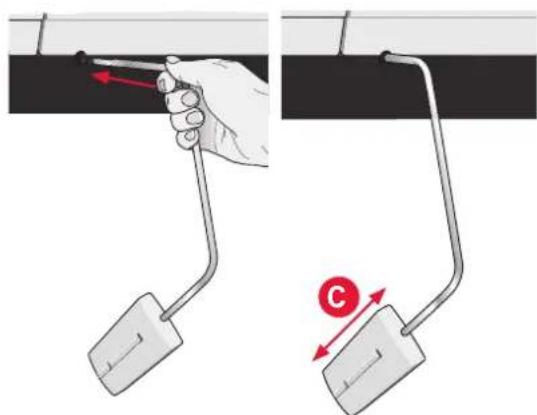
Electronic knee-lift
Your machine comes with an electronic knee-lift for regulating the presser foot height.
Insert the knee-lift in the provided hole on the machine. Adjust the rectangular bar on the knee-lift until it is positioned at a comfortable height for you (C).
If you press the knee-lift to the right, the presser foot will raise. You can now guide the fabric with both hands.
To remove the knee-lift, just pull it straight out of the hole.
Spool pins
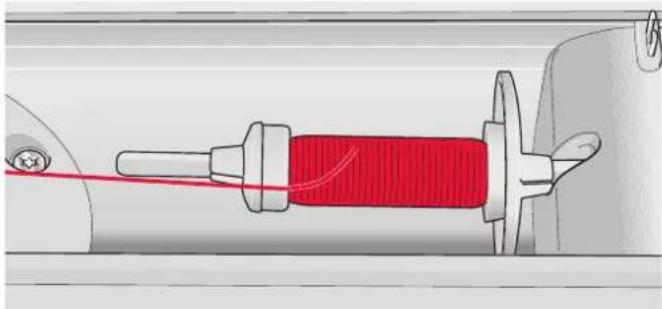
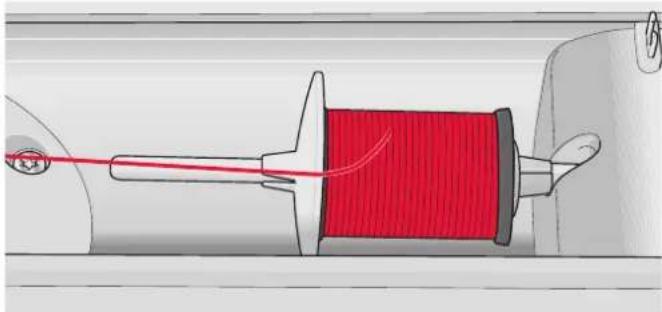
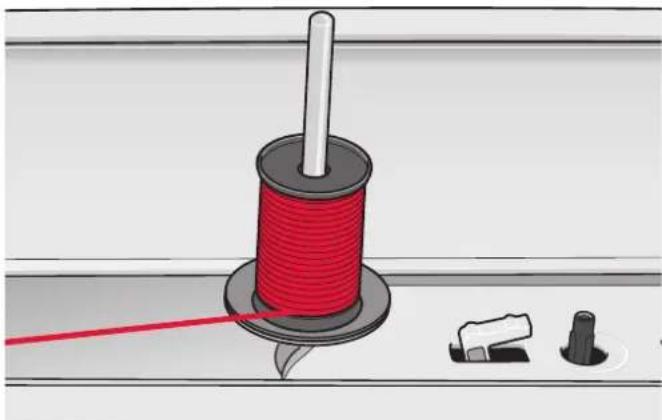
Your machine has two spool pins, a main spool pin and an auxiliary spool pin. The spool pins are designed for all types of thread. The main spool pin is adjustable and can be used both in a horizontal position (the thread reels off the spool) and a vertical position (the thread spool rotates). Use the horizontal position for normal threads and the vertical position for large spools or specialty threads.
Horizontal position
Place a spool cap and the thread spool on the spool pin. Make sure that the thread reels off the spool counter clock-wise and slide on a second spool cap.
Note: Not all thread spools are manufactured in the same way. If you experience problems with the thread, turn it in the opposite way or use the vertical position.
Use a spool cap slightly larger than the thread spool. For narrow thread spools, use a smaller spool cap in front of the spool. For large thread spools, use a larger spool cap in front of the spool.
The flat side of the spool cap should be pressed firmly against the spool. There should be no space between the spool cap and the thread spool.
Vertical position
Raise the spool pin to the vertical position. Slide on the large spool cap and place a felt pad under the thread spool. This is to prevent the thread from reeling off too fast.
Do not place a spool cap on top of the spool pin as that would prevent the spool from rotating.
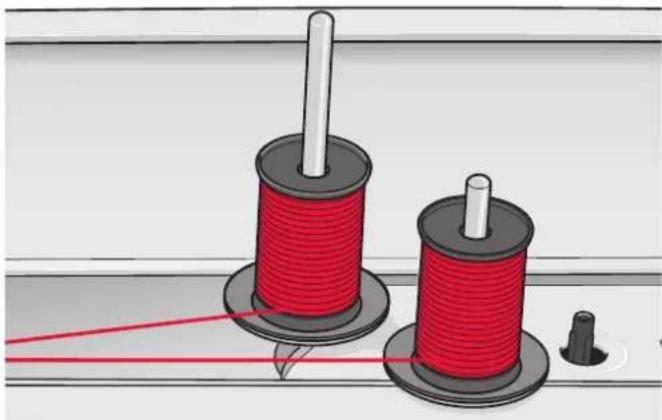
Auxiliary spool pin
The auxiliary spool pin is used when winding a bobbin thread from a second spool of thread or for a second spool when sewing with a twin needle.
Raise the auxiliary spool pin. Slide on a large spool cap and place a felt pad under the thread spool.
Small spool cap
Large spool cap
Main spool pin in vertical position
Auxiliary spool pin and main spool pin in vertical position.
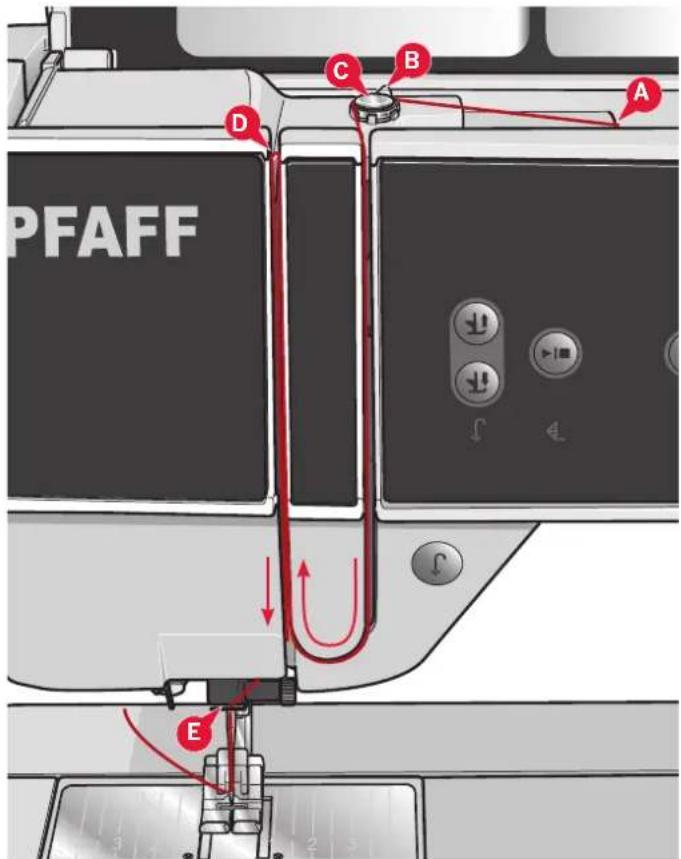
Threading the machine
Make sure that the presser foot is raised and the needle is in the up position.
- Place the thread on the spool pin and fit a spool cap of the right size.
Note: Hold thread with both hands to prevent it from slacking while threading. This ensures that the thread will be positioned properly in the threading path.
-
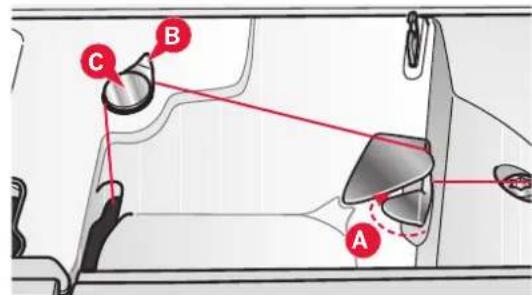
Pull the thread into the thread guide by pulling it from the front to the back (A). Make sure the thread clicks into place. Then pull the thread underneath the bobbin winder thread guide (B) on the pre-tension disc (C).
-
Thread down through the right-hand threading slot and then upwards through the left-hand threading slot.
-
Bring the thread from the right into the take-up lever (D) and down in the left-hand threading slot to the needle thread guide (E).
-
Thread the needle.
Needle threader
The needle threader allows you to thread the needle automatically. The needle must be in the up position to use the built-in needle threader. We also recommend lowering the presser foot.
-
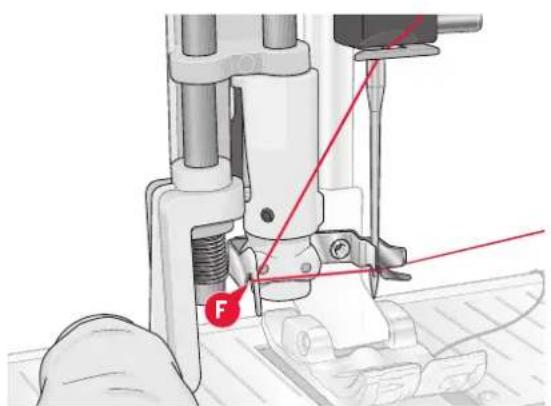
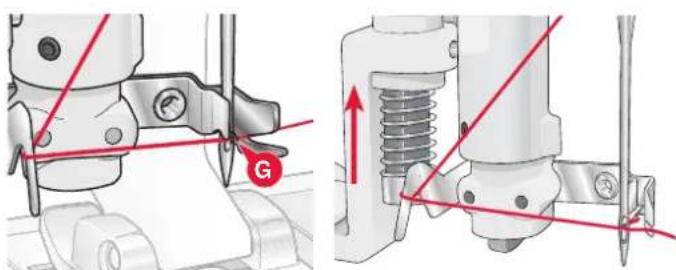
Use the handle to pull the needle threader all the way down. The threader hook (G) swivels through the needle eye.
-
Place the thread from the back over the hook (F) and under the thread hook (G).
-
Let the needle threader gently swing back. The hook pulls the thread through the needle eye and forms a loop behind the needle. Pull the thread loop out behind the needle.
Note: The needle threader is designed to be used for size 70-120 needles. You cannot use the needle threader for size 60 needles or smaller, the wing needle, twin needle or triple needle. There are also some optional accessories that require manual threading of the needle.
When threading the needle manually make sure that the needle is threaded from front to back. The bobbin cover can be used as a magnifying glass.
Threading for twin needle
Replace the sewing needle with a twin needle. Make sure that the presser foot is raised and the needle is in the up position.
- Place the thread on the spool pin and fit a spool cap of the right size. Raise the auxiliary spool pin. Slide on a large spool cap and a felt pad. Place the second thread on the spool pin.
Note: Hold threads with both hands to prevent them from slacking while threading. This ensures that the threads will be positioned properly in the threading path.
-
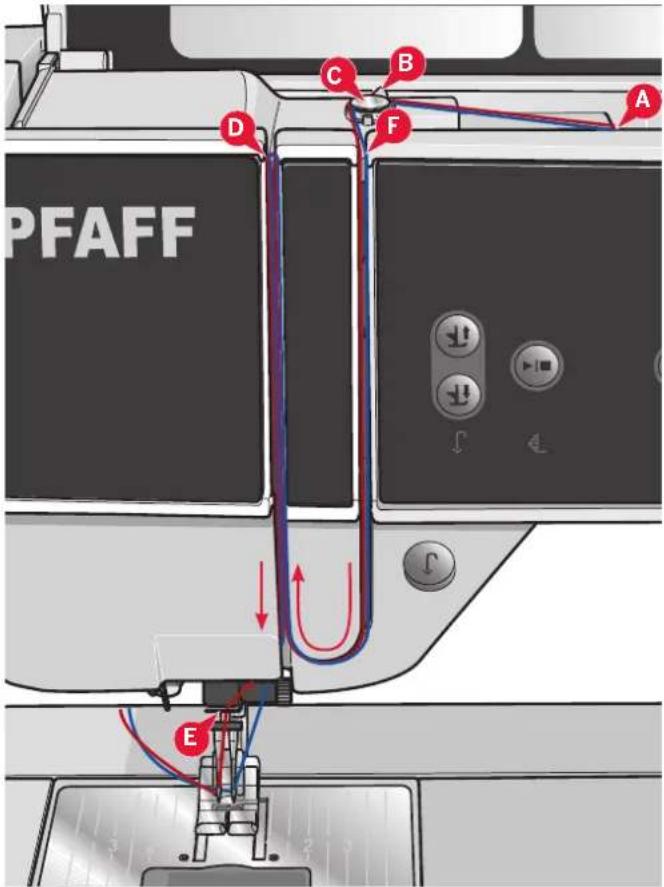
Pull the threads into the thread guide by pulling them from the front to the back (A). Make sure the threads click into place. Then pull the threads underneath the bobbin winder thread guide (B) on the pre-tension disc (C).
-
Thread down through the right-hand threading slot and then upwards through the left-hand threading slot. Make sure that you pass one thread to the left and one thread to the right sides of the tension disk (F).
-
Bring the threads from the right into the take-up lever (D) and down in the left-hand threading slot. Make sure that one thread is inside the needle thread guide (E) and the other one outside. Make sure that the threads do not become twisted together.
-
Thread the needles.
Note: Activate twin needle and select the correct twin needle width in Settings menu. This will limit the width of all stitches for that needle size to prevent damage to presser foot and needle.
Note: The weight and irregular surface of specialty threads such as metallic increases the amount of friction on the thread. By reducing the tension, the risk of needle breakage is prevented.
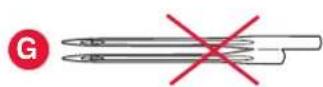
Note: Do not use asymmetrical twin needles (G), since it may damage your sewing machine.
Thread sensor
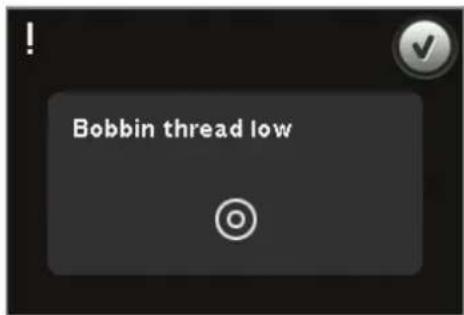
If the needle thread breaks or bobbin thread is running low, the machine stops and a pop-up appears on the screen. If needle thread breaks: Re-thread the machine and touch OK in the pop-up. If bobbin thread is running low: You can continue sewing without closing the pop-up before the bobbin thread runs out completely. This gives you an opportunity to plan where to stop sewing and change the bobbin. When the bobbin is replaced with a full one, touch OK in the pop-up.
Bobbin winding
Winding from horizontal position
- Place an empty bobbin on the bobbin spindle, with the logo facing up. Use only the original PFAFF® bobbins approved for this model.
- Place the thread spool on the spool pin in horizontal position. Slide a spool cap tightly against the spool.
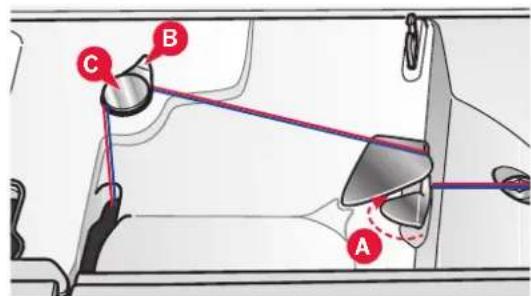
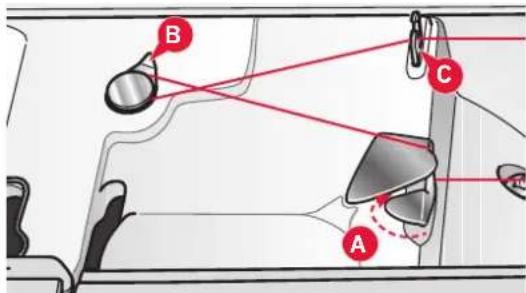
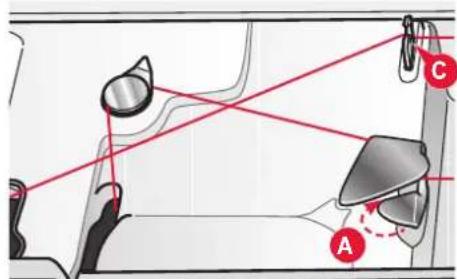
- Place the thread into the thread guide (A) from front to back. Pull the thread counter-clockwise above the bobbin winder thread guide (B) and then through the bobbin thread guides (C) at the rear.
Note: Make sure the thread is pulled securely inside the pre-tension device for correct thread tension.
-
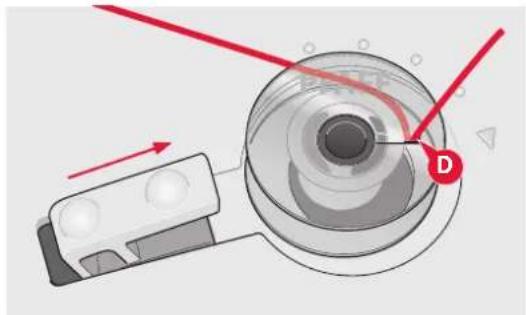
Thread through the slot in the bobbin (D) from the inside to the outside.
-
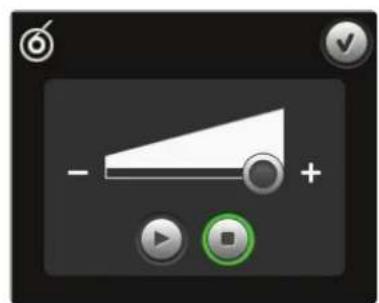
Push the bobbin winder lever towards the bobbin to wind. A pop-up appears on the screen. To adjust winding speed, use the slider in the pop-up. Stop and start bobbin winding with the icons in the pop-up. Hold the end of the thread firmly when starting to wind.
When the bobbin is full, the bobbin winder lever will switch back and the winding will stop automatically. The pop-up closes. Remove the bobbin and cut the thread using the bobbin thread cutter. Cut the free thread end close to the bobbin.
Winding while threaded
Make sure that the presser foot and the needle are in the up position. To prevent the needle from bending, pull the thread out of the needle.
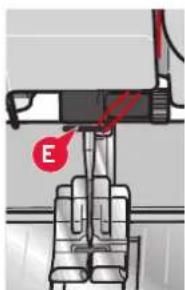
Bring the thread up from the needle thread guide (E), upward through the left-hand threading slot and through the bobbin thread guides (C). Then follow step 4 and 5 above.
Winding while embroidering or sewing
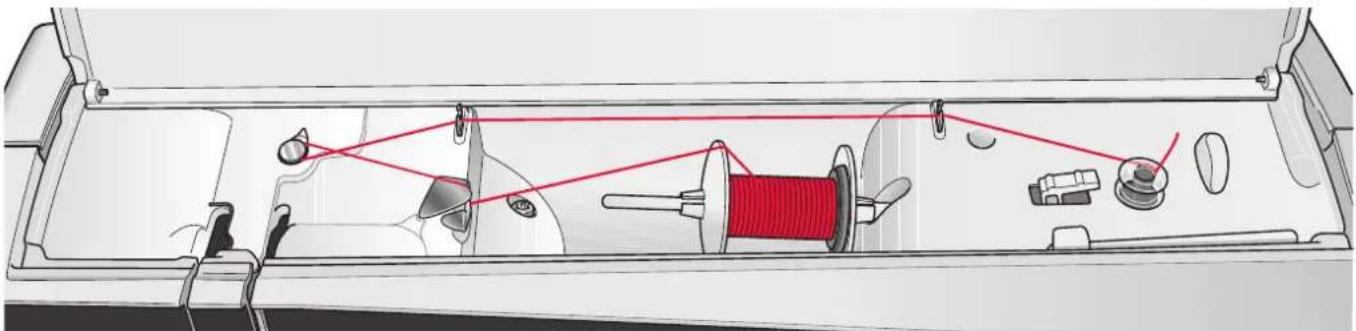
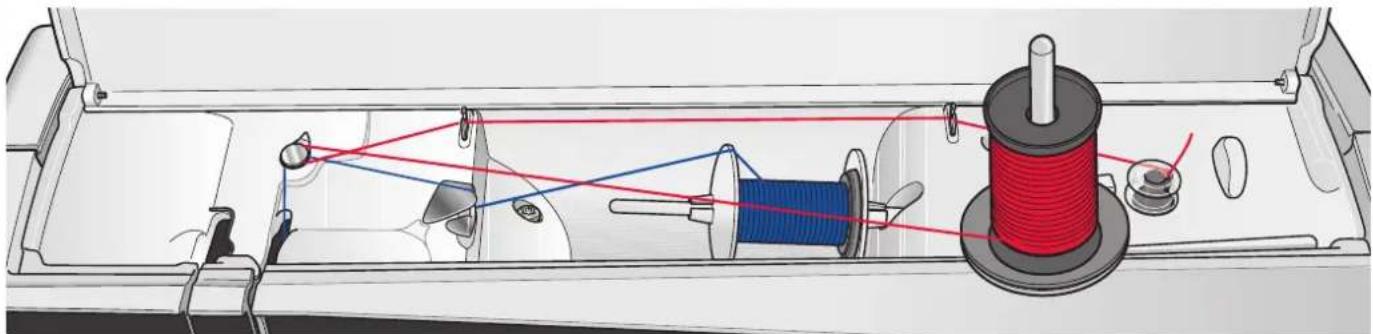
Swing the auxiliary spool pin up. Place an appropriate spool cap, felt pad and thread spool on the spool pin.
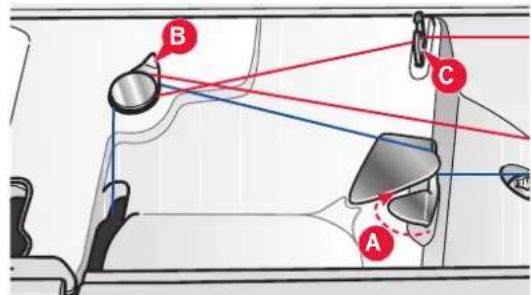
The needle thread (blue) is placed into the thread guide (A) and underneath the bobbin winder thread guide (B). Pull the bobbin thread (red) counterclockwise above the bobbin winder thread guide (B) and through the bobbin thread guides (C). Then follow step 4 and 5 on the previous page.
Inserting the bobbin
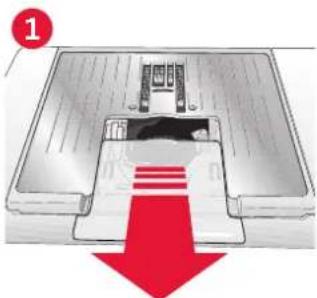
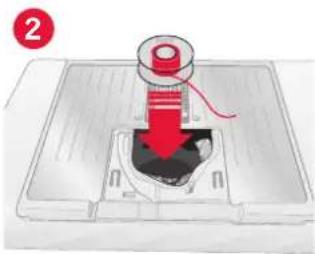
- Remove the bobbin cover by sliding it towards you.
- Place the bobbin in the bobbin case with the logotype facing up and the thread unreeling from the left of the bobbin. The bobbin will then rotate counter-clockwise when you pull out the thread.
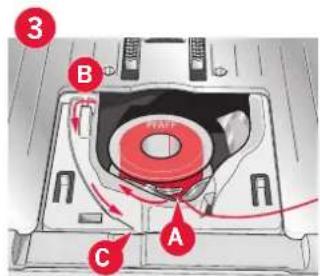
- Place your finger on the bobbin to keep it from turning as you pull the thread firmly to the right and then to the left into the tension spring (A) until it "clicks" into place.
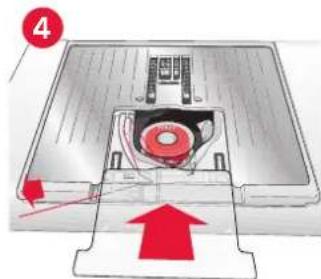
- Continue threading around (B) and to the right of the thread cutter (C). Replace the cover. Pull the thread to the left to cut.
IDTTM system (Integrated Dual Feed)
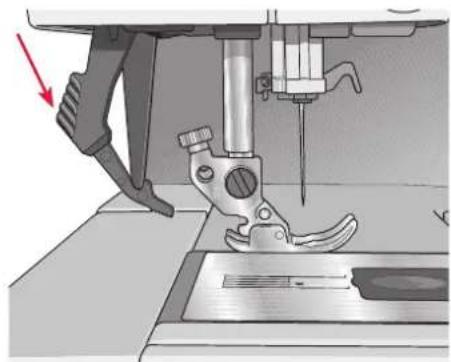
For sewing any fabric precisely PFAFF ® creative TM 4.5 sewing and embroidery machine provides the ideal solution: the integrated dual feed, IDT TM system. As on industrial machines, the IDT TM system feeds the fabric from the top and bottom at the same time. The material is fed precisely, eliminating puckering on seams in light weight fabrics such as silk and rayon. The dual feed action of the IDT TM system prevents layers from shifting while sewing, keeping quilt layers aligned and ensuring a more perfect match when sewing plaid or striped fabrics.
Engaging the IDT™ system
Important: For all work with the IDT ™ system use presser feet with the center back cut-out.
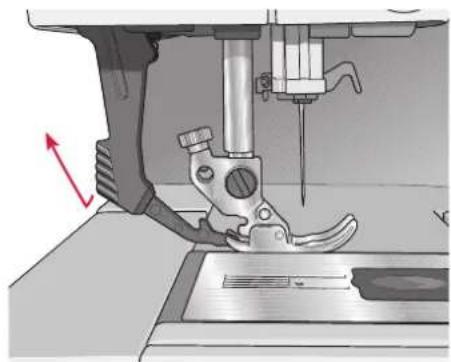
Raise the presser foot. Press the IDT ™ system down until it engages.
Disengaging the IDT™ system
Raise the presser foot. Hold the IDT TM system with two fingers at the ribbed ankle. Pull the IDT TM system down, then pull it away from you to release the IDT TM system slowly upward.
-
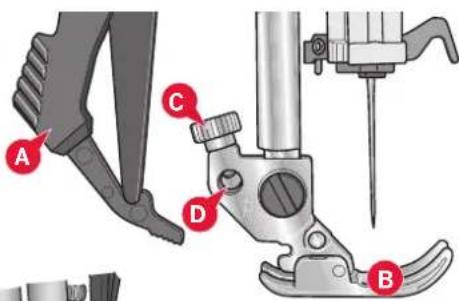
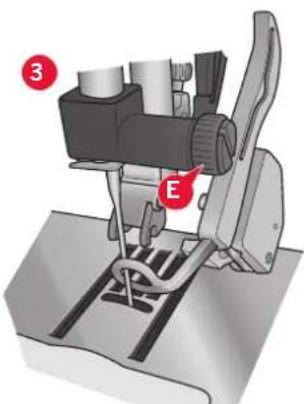
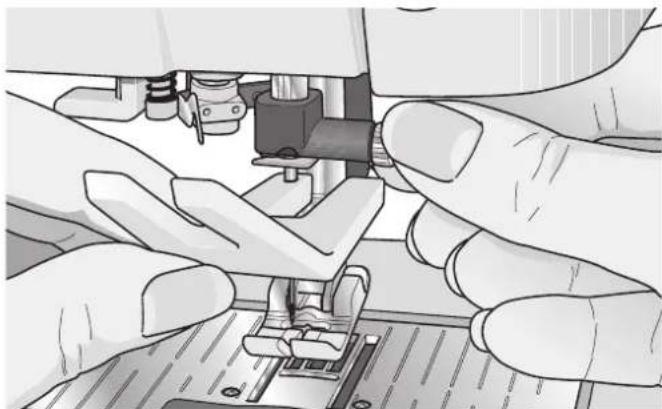
Disengage the IDT ™ system (A). Remove the standard presser foot (B). Carefully loosen the screw (C) until the cross-hole (D) is accessible.
-
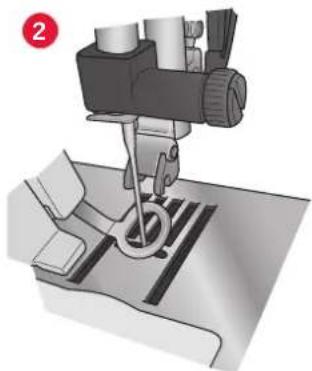
Hold the foot in front of the needle. Turn the hand wheel to lower the needle into the hole of the foot and through the needle plate.
-
Turn the foot behind the needle screw (E) and squeeze the foot to insert the pin of the foot into the cross-hole (D) of the presser foot holder.
-
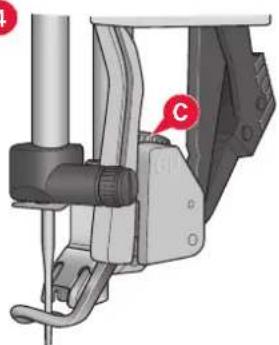
Push the foot into the hole as far as it will go while tightening the screw (C).
To remove the embroidery foot loosen the screw (C), squeeze the embroidery foot together and pull it out to the right. Tighten the screw.
1
4
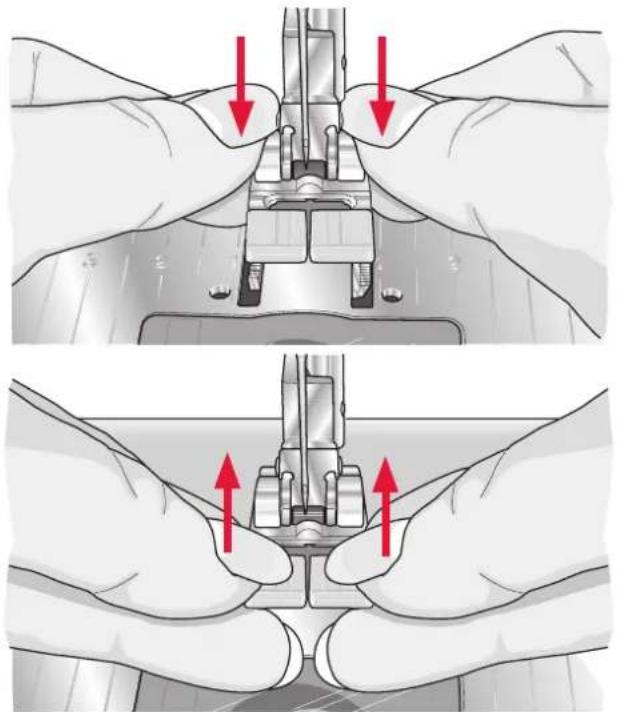
Press the presser foot downwards until it disengages from the presser foot holder.
Line up the pins on the foot with the gap underneath the presser foot holder. Press upwards until the foot snaps into place.
You can also use the presser foot up/down buttons to raise or lower the presser foot holder. Place the presser foot under the presser foot holder, so that the pins of the foot snap onto the presser foot holder when lowered.
Needles
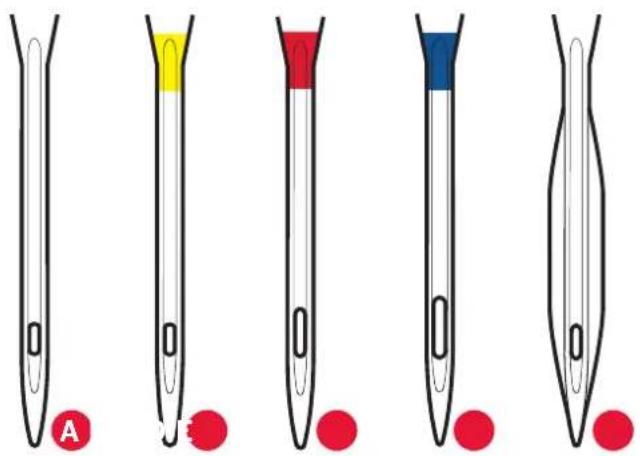
The sewing machine needle plays an important role in successful sewing. Use only quality needles. We recommend needles of system 130/705H. The needle package included with your machine contains needles of the most frequently used sizes.
Universal needle (A)
Universal needles have a slightly rounded point and come in a variety of sizes. For general sewing in a variety of fabric types and weights.
Stretch needle (B)
Stretch needles have a special scarf to eliminate skipped stitches when there is a flex in the fabric. For knits, swimwear, fleece, synthetic suedes and leathers.
Embroidery needle (C)
Embroidery needles have a special scarf, a slightly rounded point and a slightly larger eye to avoid damage to thread and materials. Use with metallic and other specialty threads for embroidery and decorative sewing
Denim needle (D)
Denim needles have a sharp point to penetrate tightly woven fabrics without deflecting the needle. For canvas, denim, microfibers.
Wing needles (E)
The Wing needle has wide wings on the side of the needle to poke holes in the fabric when sewing entredeux and other hemstitches on natural fiber fabrics.
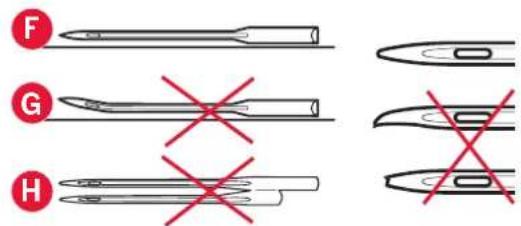
Note: Change the needle often. Always use a straight needle with a sharp point (F).
A damaged needle (G) can cause skipped stitches, breakage or snapping of thread. A damaged needle can also damage the needle plate.
Do not use asymmetrical twin needles (H), since it may damage your sewing machine.
Changing the needle
- Use the hole in the multi-purpose tool to hold the needle.
- Loosen the needle screw.
- Remove the needle.
- Insert the new needle, using the multi-purpose tool. Push the new needle upwards with the flat side away from you until it will go no further.
- Tighten the needle screw as tight as it will go.
USB ports
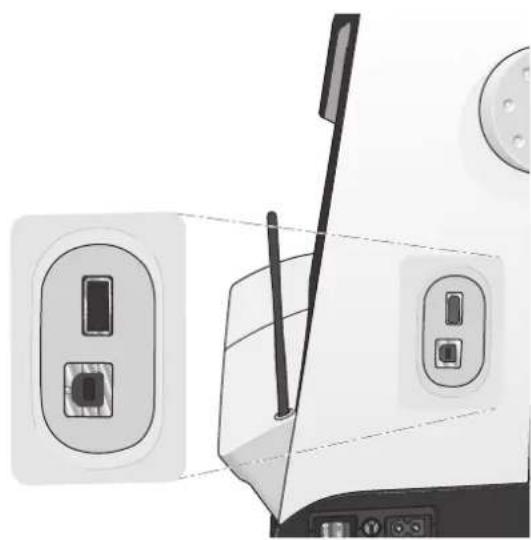
Your machine has two USB ports - one to connect the sewing machine to your computer, and one to connect either your USB embroidery stick, optional USB hub or optional mouse.
Note: Make sure that the USB stick you use has the format FAT32.
Delivered with your machine is a USB embroidery stick. Use the stick to store designs and other files, or to move files between the computer and sewing machine.
Connect to and remove from USB port
Insert the USB embroidery stick or other devices in the upper port. The USB plugs can only be inserted one way – do not force them into the ports!
The USB PC cable packed with your machine (P/N:412 62 59-04) plugs in to the lower port. No other cable should be used in this port. Connect the other end of the cable to your PC.
Note: Install the complimentary software before connecting the machine to your PC (see next page).
To remove, carefully pull the USB embroidery stick or the plug of the USB cable out straight.
Using the USB embroidery stick
When loading from or saving to the USB embroidery stick an hourglass appears on the screen.
Note: Do not remove the USB embroidery stick when the hourglass is shown on the screen or while Files & Folders is open. Removing the stick at that time can damage the files on your USB embroidery stick.
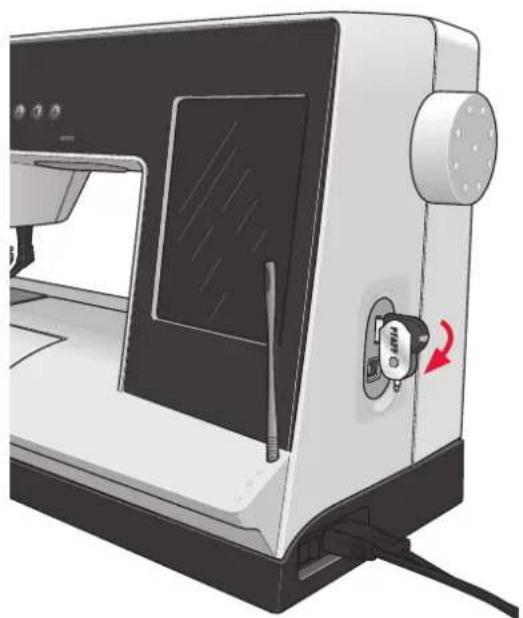
Note: The USB embroidery stick provided with the machine can be left in the machine when putting on the hard cover. Make sure that the cover of the USB stick is turned downwards.
Complimentary software (PC)
A PC software package is available for your PFAFF ® creative ™ 4.5 sewing and embroidery machine. It adds the following features:
- Communication module allows you to connect the machine to your computer. Required to use the Send To features in any Embroidery software system module.
- QuickFont program to create unlimited number of embroidery fonts from most TrueType® and OpenType® fonts on your computer.
- Plug-in for your Windows Explorer to handle embroidery designs: viewing designs as thumbnail images, reading different embroidery file formats, add trim commands and more.
This software should be installed before the machine is connected to your computer for the first time. Go to PFAFF® website at www.pfaff.com and look for support and download the software. During installation you will be asked for an Installation Code. Enter number:
8200
More information and detailed installation instructions are available on the download page.
How to update your machine
Be sure to consult the web site at www.pfaff.com and/or your local authorized PFAFF® dealer for updates and upgrades for your machine and Owner's manual.
You can update your machine using the USB embroidery stick or the USB cable packed with your machine (P/N:412 62 59-04).
Updating instructions
- Go to the PFAFF ® web site at www.pfaff.com to find information about available updates.
- Follow the update wizard to prepare your USB embroidery stick for the update.
- To start your machine in update mode, press and hold the reverse button (A) while turning on your machine. Keep the reverse button pressed until update mode is visible on the PFAFF® creative™ Color Touch Screen. Follow the instructions to update.
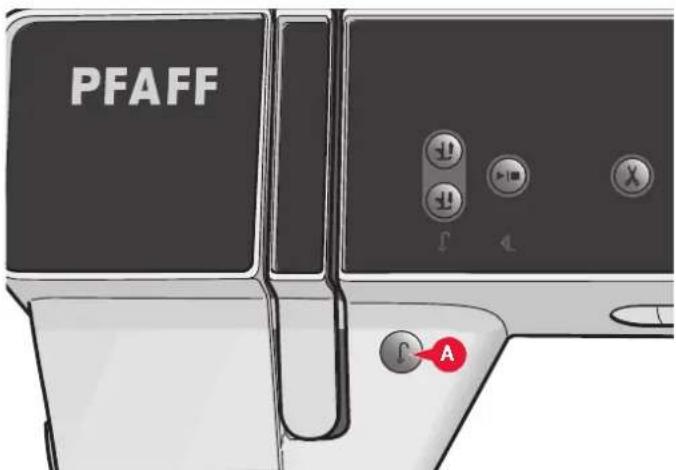
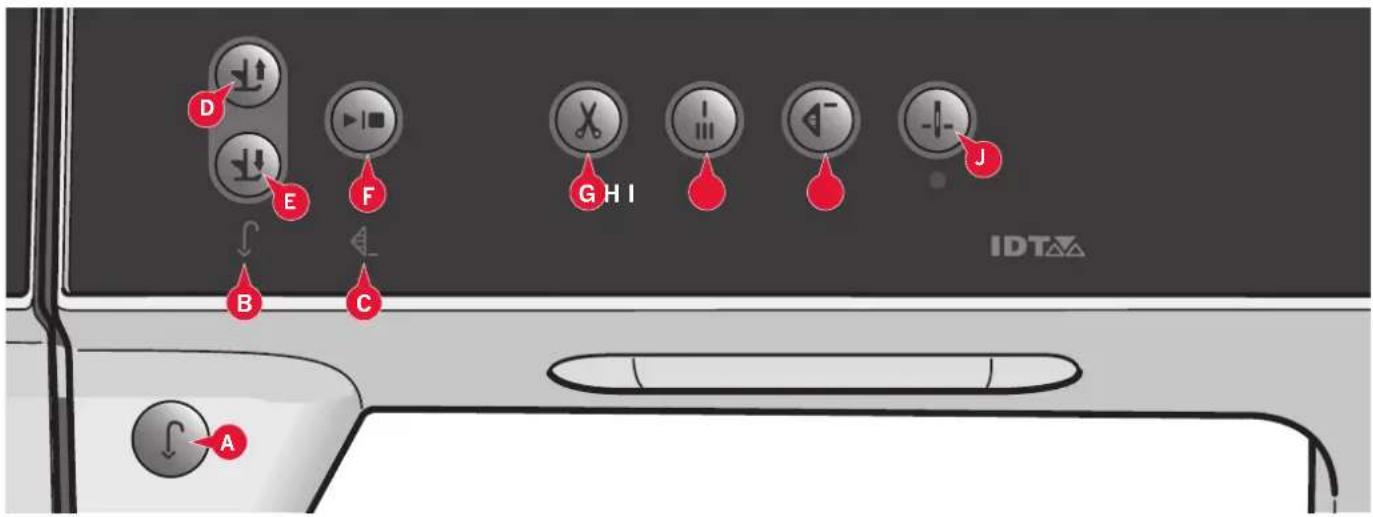
For permanent reverse, press the button once before starting to sew. The reverse indicator (B) will be lit and the machine sews in reverse until you press the button again to cancel. If you press the reverse button while sewing, the machine sews in reverse for as long as you keep the button pressed. The reverse indicator is lit when the reverse button is pressed.
Reverse is also used when sewing buttonholes, programmed tie-off end, darning stitches and tapering stitches to step between the parts of the stitch.
Reverse indicator (B)
The reverse indicator will be lit when pressing the reverse button to sew in reverse. It is also lit while sewing permanent reverse.
Action indicator (C)
The action indicator is lit to indicate that an action is to be done, for example performing tapering. The icon stays lit until the action is done.
Raises the presser foot and needle to the up position.
Press the button once more and the presser foot will raise to extra lift. The feed dogs will be lowered to make it easier to get thick fabric under the presser foot.
Lower the presser foot completely. Press the button once more to raise the presser foot to pivot height.
The presser foot is lowered automatically when you start sewing.
Start/stop (F)
Press this button to start or stop the machine without using the foot control. Press the button once to start and press it again to stop.
Thread snips (G)
Press to cut both needle and bobbin thread immediately.
If pressing this button while sewing, the threads will be cut before the needle moves to the start position of the next stitch. Your machine ties off the thread, cuts the needle and bobbin threads and raises the presser foot and the needle.
The thread snips function can be programmed, see chapter 4.
Note: Threads are cut automatically when buttonholes are sewn with the Sensormatic buttonhole foot.
The presser foot will not raise after thread snips if Automatic presser foot lift has been deactivated in the Settings menu.
Thread snips performed by the machine can be cancelled in the Settings menu.
In embroidery mode the threads are cut and the presser foot raised. The upper thread is only cut automatically at the color change. When the design is finished both needle and bobbin threads are cut automatically.
Press immediate tie-off while sewing and your machine sews a few tie-off stitches and stops automatically.
By touching the tie-off button once more while the action indicator is lit, the function can be turned off.
The tie-off function can be programmed, see chapter 4.
Stitch restart (I)
When having stopped sewing in the middle of a stitch, press restart to start sewing at the beginning of the stitch again without having to reset any special settings you have made.
If pressing the stitch restart button while sewing, the stitch will be finished and the machine will then stop.
You can also use stitch restart to go back to the beginning of an embroidery.
Needle up/down (J)
Press this button to move the needle up or down. The setting of the needle stop position is changed at the same time. When needle down is activated, the icon is lit, the needle will stop in the down position and the presser foot will raise to pivot height.
You can also tap the foot control to raise or lower the needle.
PFAFF® creative™
Color Touch Screen
PFAFF® creative™ Color Touch Screen
Your machine features the PFAFF ® creative ™ Color Touch Screen. This technology provides great resolution and color.
The screen is very easy to work with - just touch it with your stylus or your finger tip to make your choices. The task bar at the bottom of the screen includes the main functions and help.
Every mode has its own color scheme, to make it easier to navigate and use the machine.
Start view
When your machine is turned on, a welcome screen is shown and then the machine opens sewing mode. If the embroidery unit is attached the machine automatically opens embroidery mode.
Main parts
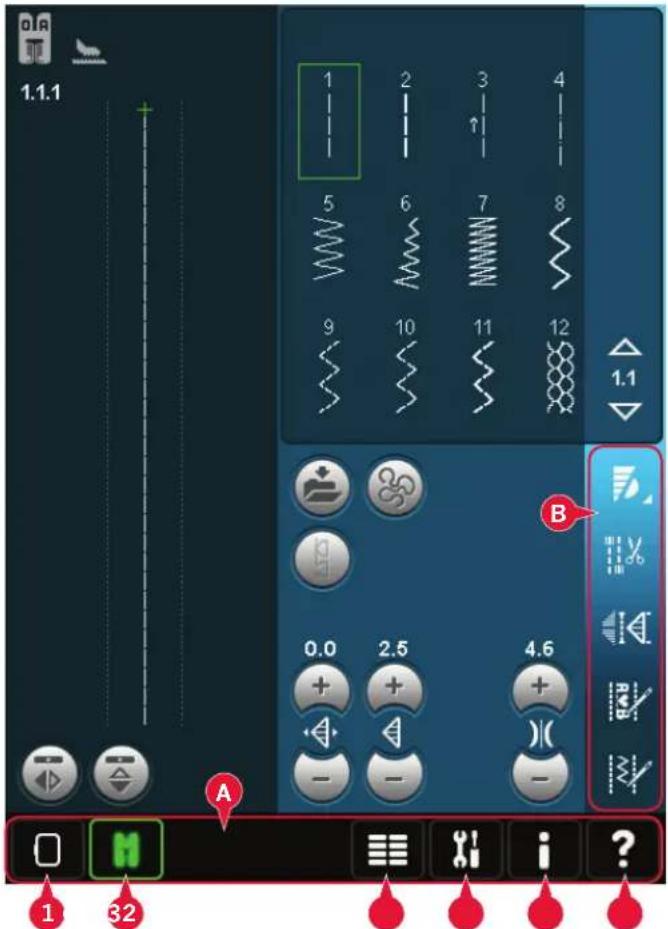
The task bar (A) is used for selecting and activating the main functions.
The colored vertical bar on the right side of the screen is called the option bar (B). It has different options depending on which mode is active.
Task bar (A)
The look of the task bar will change depending on whether sewing mode or embroidery mode is active. Change mode by touching the corresponding icon (1 or 2). The icon for the active mode is highlighted. The task bar is always located at the bottom of the screen.
- Embroidery mode icon
- Sewing mode icon
- Selection menu
- Settings menu
- Info menu
- Quick help
In embroidery mode
- Embroidery stitch-out icon
The task bar in embroidery mode has an additional icon (7) above the embroidery icon. This is the Embroidery stitch-out icon. Touch it to toggle to Embroidery stitch-out mode.
Return to Embroidery edit by touching the embroidery mode icon (1).
Main functions in task bar
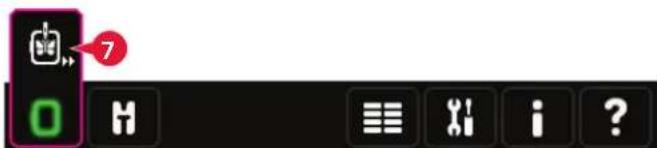
Task bar in Embroidery edit mode

Task bar in Embroidery stitch-out mode
Option bar (B)
The option bar contains different options in sewing mode, Embroidery edit and Embroidery stitch-out. Read more about the options for each mode in chapters 4, 7 and 8.
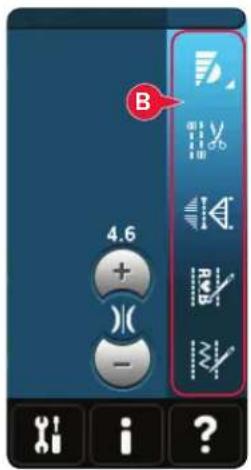
Option bar in
sewing mode
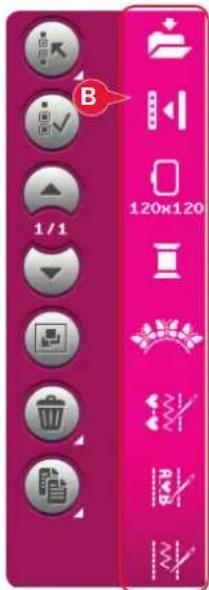
Option bar in embroidery edit
Common icons
There are some icons and functions that are frequently used on the screen. The most common are described below.
Touch the arrows to scroll between available stitches.
OK (D) and cancel (E)
The OK (D) and cancel (E) icons are used to confirm your settings and selections. They are also used to close full screen windows.
To abort an actual process, touch cancel. To continue, touch OK.
Long touch (F)
Some icons have increased functions, marked with an arrow at the lower right corner. To access these functions, touch and hold the icon for a few seconds.
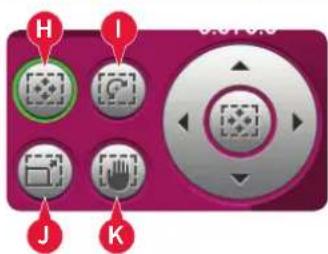
Touch functions (G)
The touch functions will be used to make adjustments. There are up to four functions to use; move (H), rotate (I), scale (J) and pan (K).
When a function is selected, you can make adjustments by touching the arrows in the wheel, or by touching and dragging your stylus on the screen. The appearance of the wheel will change depending on which function is selected.
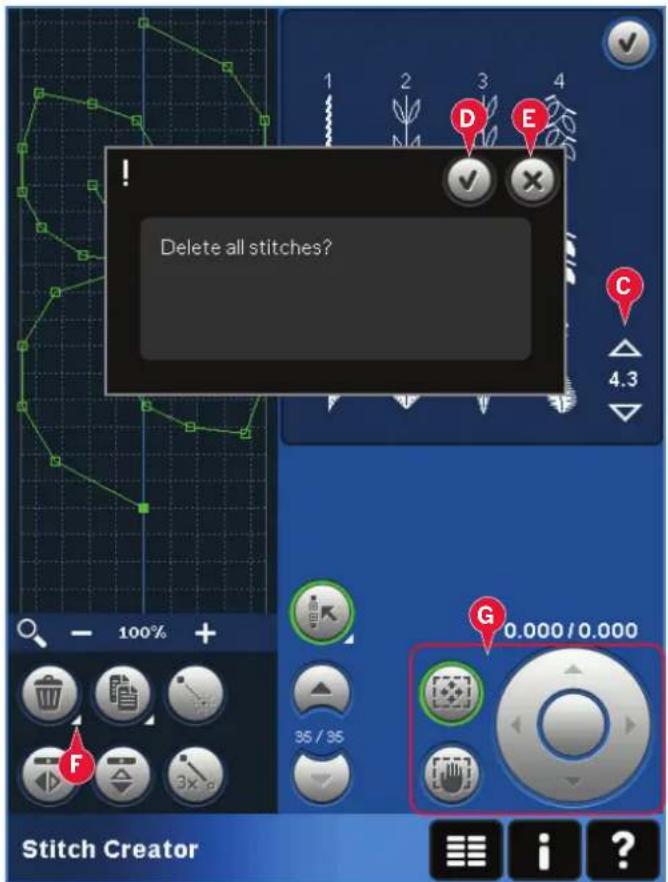
Touch functions in embroidery edit
The selection menu contains a selection bar at the bottom with icons for stitches, fonts, designs and Files & Folders. Read more about Files & Folders in chapter 10.
Select one of the icons in the selection bar to access the menus. When a stitch, font or design is selected, the selection menu will close automatically. To return to previous view, close by touching cancel.
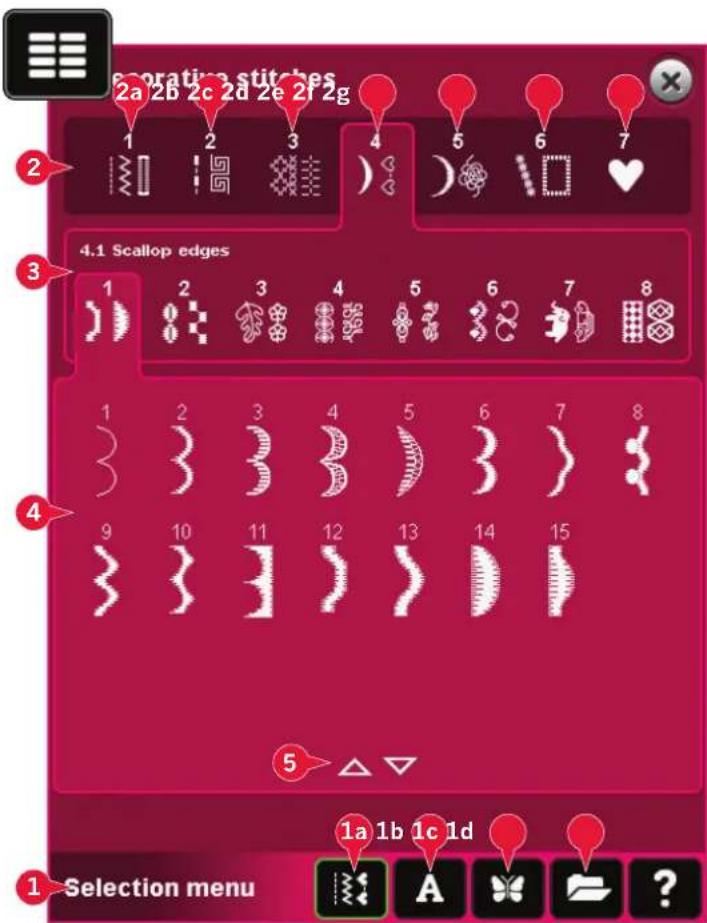
- Selection bar
a) Stitches
b) Fonts
c) Designs
d) Files & Folders
- Stitch categories
a) Utility stitches
b) Quilt stitches
c) Needle art stitches
d) Decorative stitches
e) Maxi stitches
f) Sewing techniques
g) Personal menu
- Stitch subcategories
- Stitches
- Scroll arrows
- Clear personal menu (only visible if personal menu is selected)
Selecting a stitch
To select a stitch, first select a category at the top (2). For each category, there are one or more subcategories (3). For each subcategory a list of stitches is shown (4). Use the scroll arrows (5) to go to the next page in the subcategory. Select a stitch by touching it.
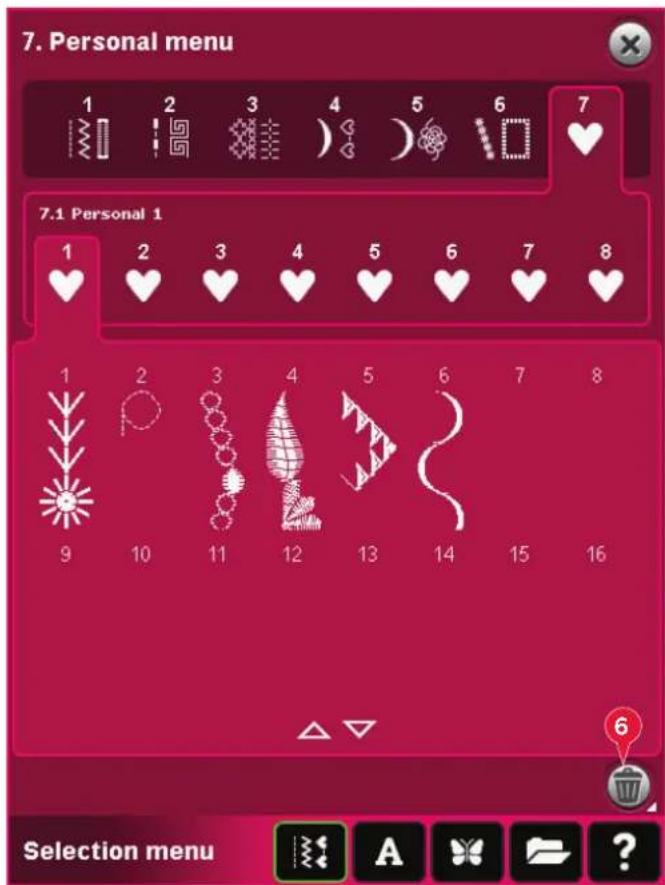
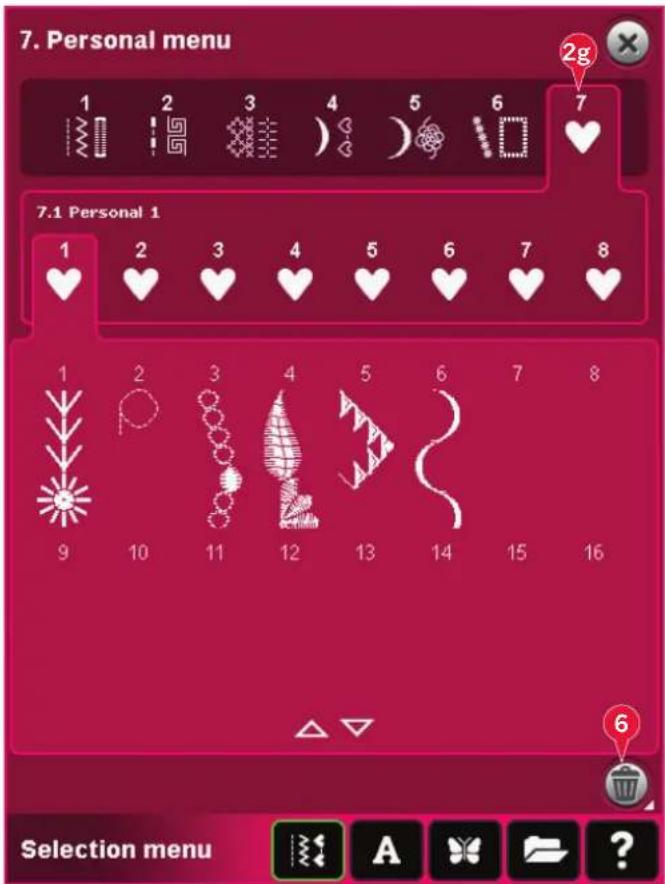
To find your personal saved stitches, open personal menu (2g). Each subcategory in the personal menu has 16 positions to save your own stitches or sequences. Scroll through the stitches in the selected subcategory using the scroll arrows. Select a stitch by touching it.
If you want to delete one stitch, first touch the delete icon (6), and then touch the stitch. The positon will be emptied. To abort the deletion before selecting a stitch, deselect the delete icon.
A long touch of the delete icon (6) will empty the whole subcategory selected.
Note: All stitches in the subcategory will be deleted, even though they are not visible on the screen.
Selecting a font
Stitch fonts are indicated with a lighter background and embroidery fonts have a darker background. Select a font by touching it. Use the scroll bar to see additional fonts.
A selected stitch font opens in sequencing. A selected embroidery font opens in the embroidery text editor.
Note: Embroidery fonts are only visible if the embroidery mode is active and neither sequencing nor Stitch Creator ™ is active.
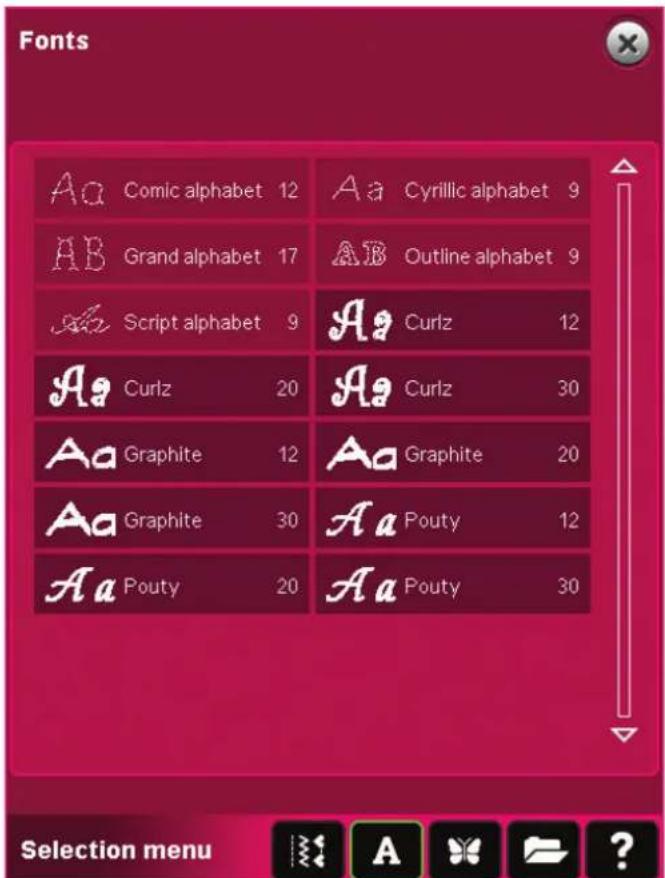
Selecting a design
Your machine has four tabs with designs: Personal designs, machine designs, mini designs and quilt designs. Read more about the different design tabs in chapter 8.
Touch a tab to display the contents. Select an embroidery design by touching it. Use the scroll bar to browse through additional designs.
When a design is selected, the machine will automatically switch to embroidery mode and the design will be loaded into Embroidery edit.
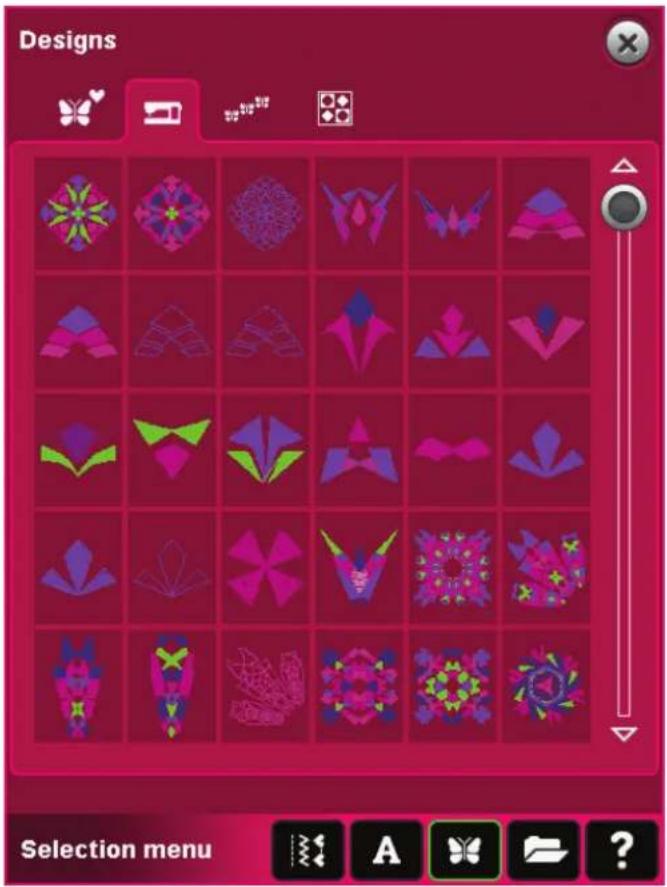
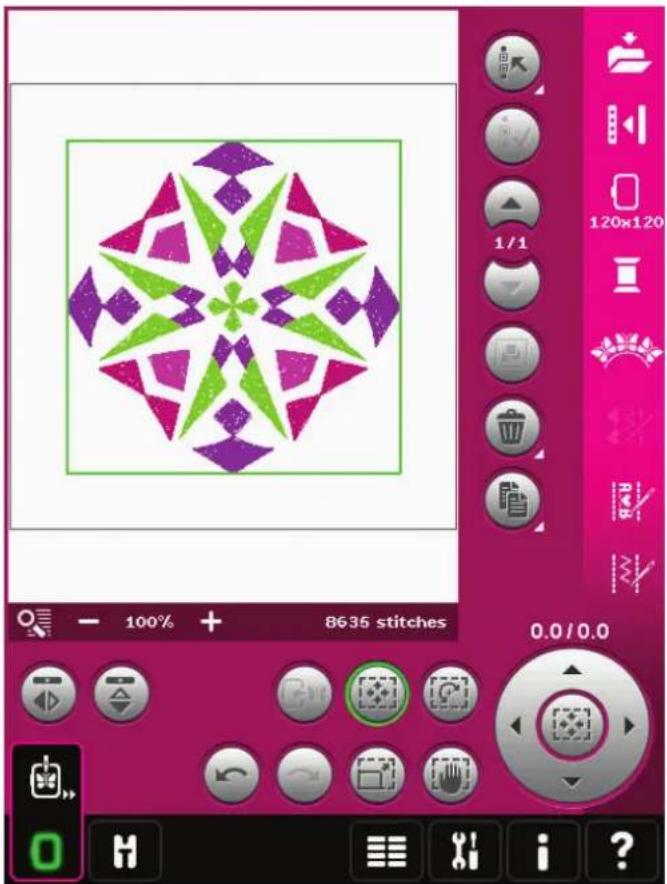
Embroidery edit
In Embroidery edit you can scale, change colors, position and rotation of your designs. You can also combine designs, save, restore and delete designs.
You can edit your designs with or without the embroidery unit attached.
Read more about Embroidery edit in chapter 8.
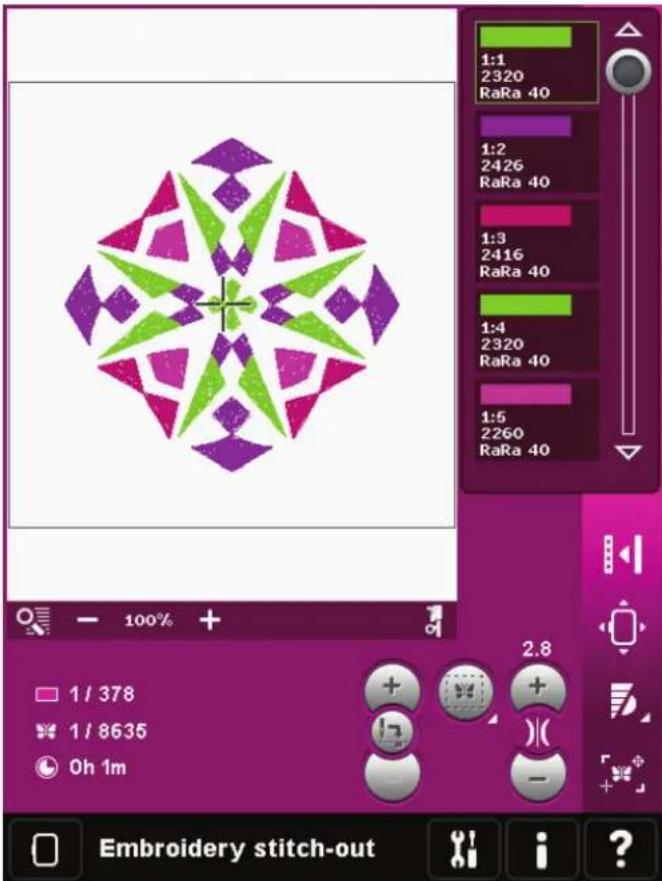
Embroidery stitch-out
To embroider your design, change from Embroidery edit to Embroidery stitch-out by touching the Embroidery stitch-out icon on the task bar.
In Embroidery stitch-out you find functions that are useful when embroidering.
Read more about Embroidery stitch-out in chapter 9.
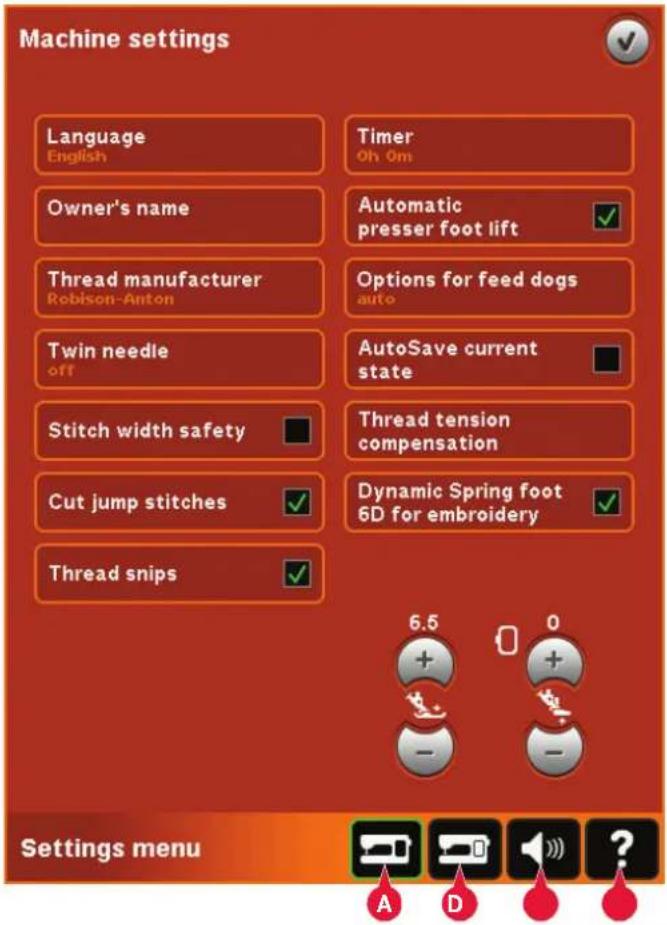
In the Settings menu, you can change default settings and make manual adjustments to the machine settings (A), screen settings (B) and sound settings (C).
Touch the icons to activate a function or open a list of choices. The settings are saved even after turning off the machine with one exception: changes made to Options for feed dogs will not be saved when the machine is switched off. The setting will revert back to the default which is auto. See page 3:10 for more information.
Use Quick help to receive instant information about the settings. Touch the Quick help icon (D) and then the setting you want information about. Read more about Quick Help on page 3:13.
Machine settings (A)
Language
Touch the icon to view the available languages. Select your desired language from the list by touching it.
Owner's name
Touch the icon to get a pop-up where you can enter your name.
Thread manufacturer
Touch to select preferred thread manufacturer. You can select between Gütermann Sulky and Robison-Anton. Color codes from the selected manufacturer will be used when changing colors in a design, or creating a new design from stitches or fonts in your machine.
Note: Changing thread manufacturer setting will not automatically convert the colors in existing designs to the selected thread manufacturer.
Twin needle
Touch the icon to open a list for twin needle width selections. When a twin needle size is selected, the width of all stitches is limited for that needle size to prevent needle breakage. The setting is kept until you deselect the twin needle width.
When a twin needle size is selected, a pop-up is shown when turning on your machine. Another warning pop-up is shown when selecting a stitch that is too wide for the set twin needle size. The stitch width of those stitches is automatically adjusted to fit the twin needle. Deselect twin needle to go back to normal sewing.
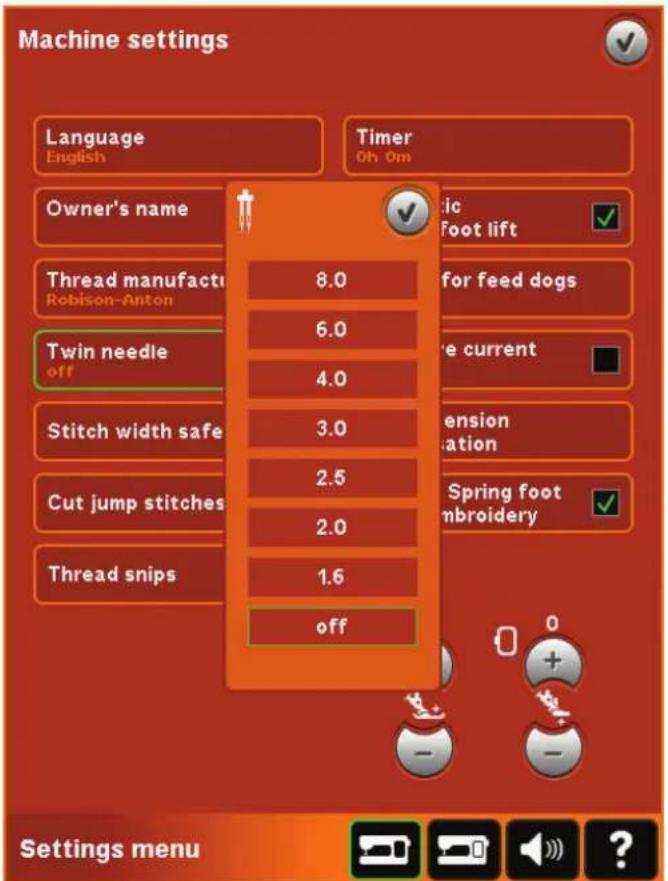
Pop-up for twin needle selection.
Stitch width safety
Select this function when using a straight stitch presser foot to lock the needle in center position for all stitches, preventing damage to the needle and/or presser foot.
When turning on the machine with this setting activated and for every stitch selection that is not a straight stitch, a pop-up informs you that it is set to straight stitch. Deselect stitch width safety to go back to normal sewing.
Note: Twin needle and stitch width safety cannot be used at the same time.
Cut jump stitches
Your machine features the automatic function Cut jump stitches. This function saves you time trimming after the embroidery is completed. When Cut jump stitches is selected your machine will trim the top jump stitch thread and pull the thread end to the underside of the fabric as you embroider.
Note: Your machine will also cut the thread after you have changed to a new color. Hold the thread end when you start embroidering again, so that you can easily remove the thread end when cut.

Designs marked with this symbol are programmed for Cut jump stitches. Trim commands to cut jump stitches can be added to any design using the software package downloaded via the PFAFF ® website (see page 2:12).
Automatic thread snips
When selected, the automatic thread snips is activated. The threads are cut automatically and the presser foot raises at color changes or when an embroidery is finished. When deselected, no automatic thread snips will be performed.
Timer
Displays the total sewing and embroidery time of your machine. Touch the icon to reset the timer.
When selected, the automatic presser foot lift is activated. The presser foot will raise to pivot height for example when stopping with the needle in the down position. When deselected, the presser foot will stay lowered even if the machine stops with the needle in down position.
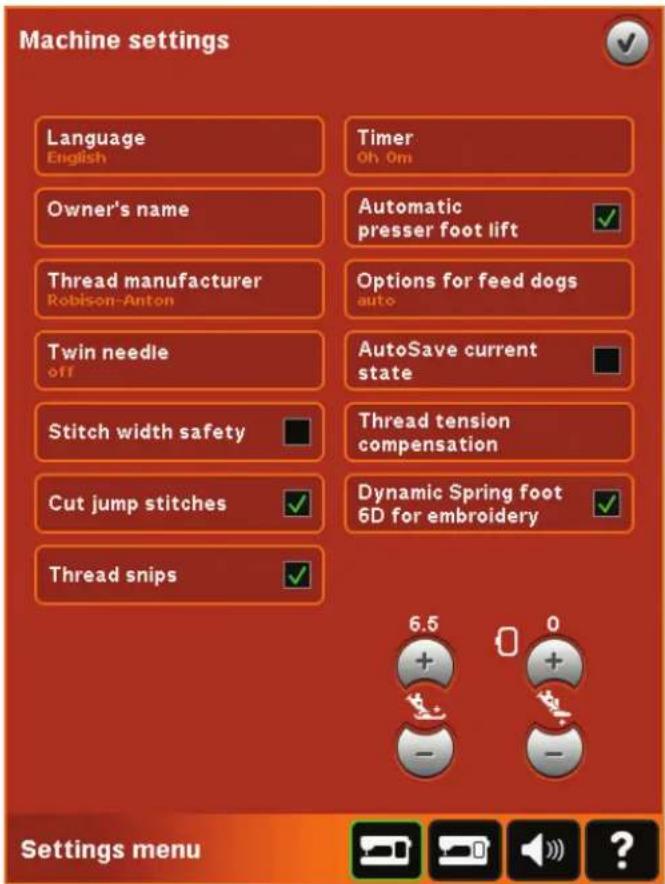
Options for feed dogs
Touch to open a pop-up with three options.
The default setting is auto (recommended).
Changes to the default setting are not retained once the machine has been turned off. Your machine automatically raises or lowers the feed dogs, depending on the stitch/technique selected.
For example, the feed dogs lower automatically in free-motion or embroidery modes, when the button sewing stitch is selected or when using the Presser foot extra lift. When a new stitch/technique is selected, the feed dogs come up automatically when you start sewing.
Select up to set the feed dogs to remain raised for all sewing.
Select down to set the feed dogs to remain lowered for all sewing.
AutoSave current state
When AutoSave current state is selected, the machine will save current state periodically while embroidering and also when you stop embroidering.
The information about the embroidery will be saved even after switching the machine off.
Note: If AutoSave current state is selected it can take longer to go from Embroidery edit to Embroidery stitch-out.
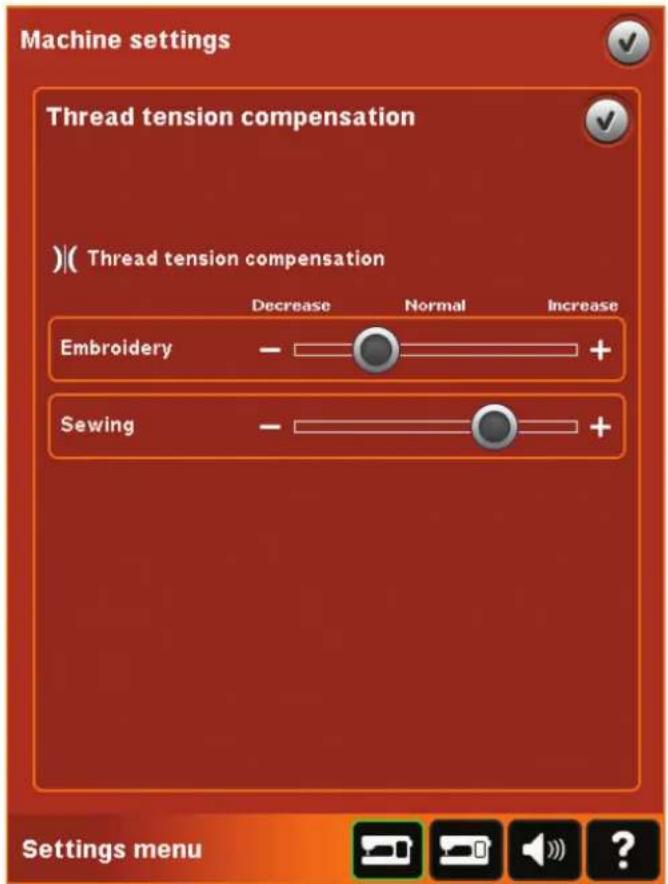
Thread tension compensation
If you find that the thread tension needs to be increased or decreased for most stitches or embroideries, you can change the general setting for embroidering and/or sewing. You may need to adjust the thread tension controls if you regularly sew or embroider on special fabric or use specialty threads.
Touch Thread tension compensation. Adjust the slider bars to generally increase or decrease the thread tension for all stitches and/or embroidery. Default setting is normal.
Once you have increased or decreased the value in the Settings menu, the thread tension control icon will change to green.
Note: Contact you authorized PFAFF® dealer if you experience thread tension problems that cannot be helped with the Thread tension compensation.
"Dynamic spring foot 6D for embroidery" function is selected by default. When embroidering, using the Dynamic spring foot 6D, make sure that the "Dynamic spring foot 6D for embroidery" is selected.
When another type of foot is used, e.g. presser foot 6A, deactivate Dynamic Spring foot 6D for embroidery in the Settings menu.
In most cases, you do not need to adjust the presser foot pressure. Specialty techniques may require an adjustment. The higher the number the more pressure on the fabric.
Adjust the height of the presser foot in Embroidery stitch-out mode. Use the + and - icons to either raise or lower the height of the presser foot.
Some embroideries may build up under the presser foot. If there is not enough space between the presser foot and the embroidery, the top thread will form loops on the underside of the embroidery. Increase the presser foot height in small steps until the embroidery moves freely under the presser foot.
Note: Because the Dynamic spring foot 6D measures the fabric thickness, the option to adjust presser foot height in embroidery is only available if Dynamic spring foot 6D for embroidery is deselected.
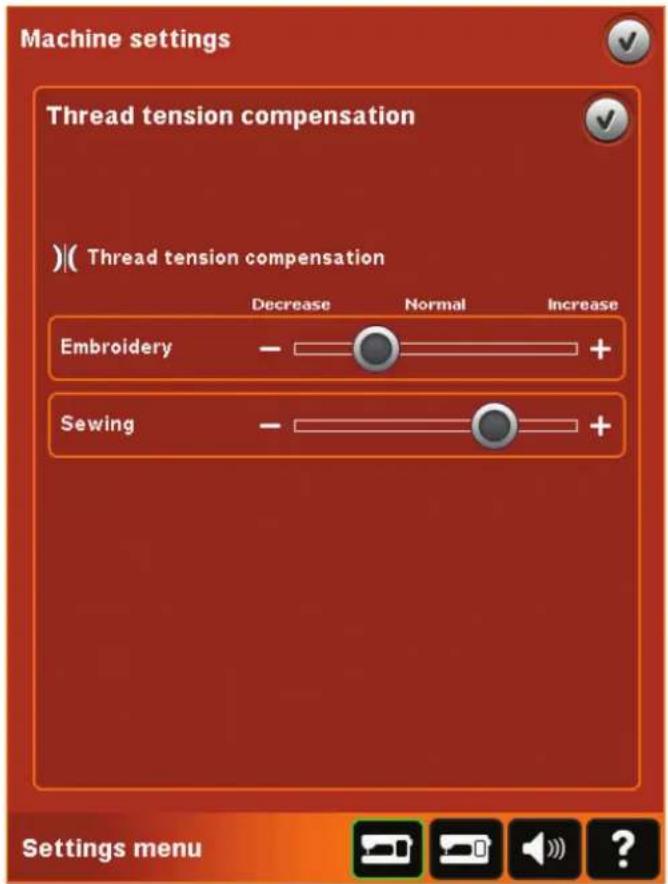
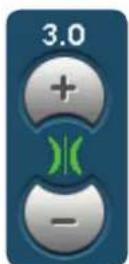
Once you have increased or decreased the value in the Settings menu, the thread tension control icon will change to green.
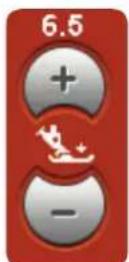
Presser foot pressure
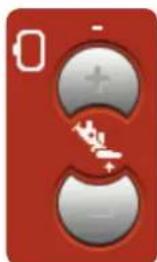
Presser foot height
embroidery
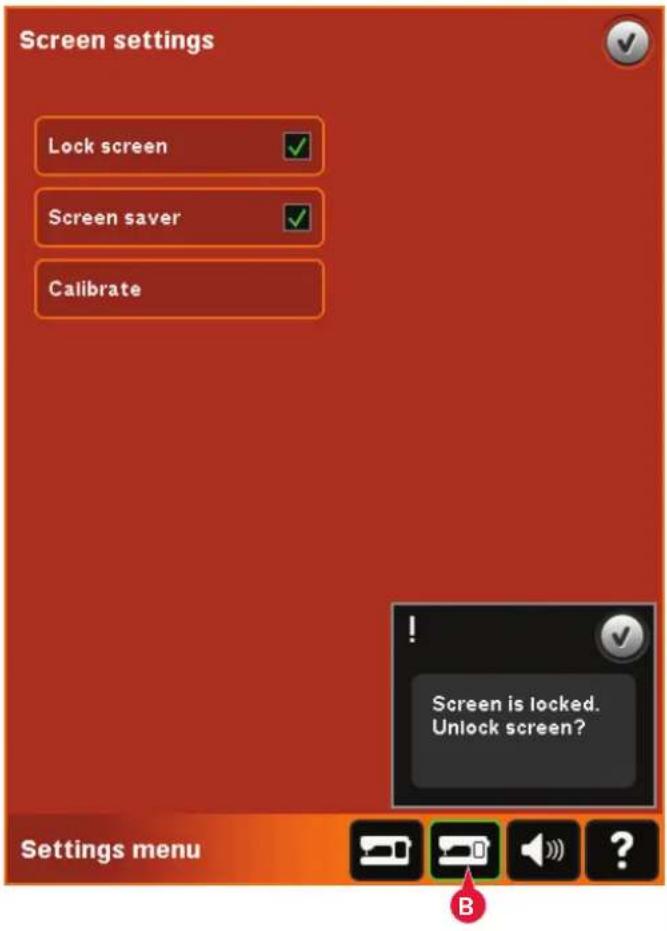
Screen settings (B)
Lock screen
If needed, you can easily lock the screen while sewing or embroidering.
When activated, the screen is locked every time it is inactive for ten seconds. The screen will be locked until you unlock it by touching OK.
Screen saver
When activated, the creative™ 4.5 start up screen will be displayed as a screen saver ten minutes after the last touch. Touch the screen or press any button to exit the screen saver.
Calibrate
When touching the icons on the screen, the screen might need a calibration to adjust to your touch.
Touch the calibrate icon to open a special view for PFAFF® creative™ Color Touch Screen calibration. Follow the instructions on the screen to calibrate.
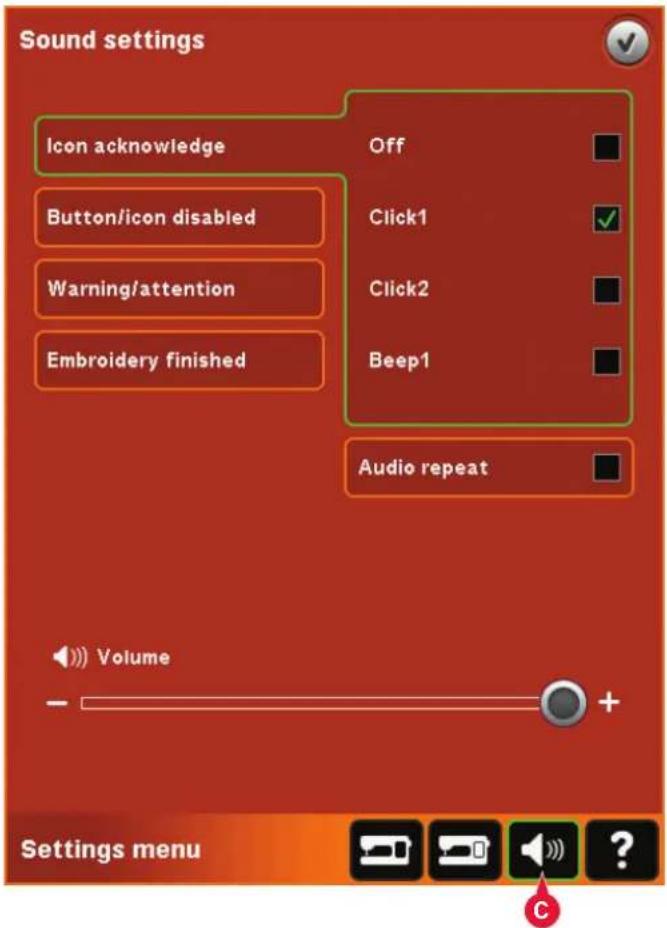
Sound settings (C)
You can change the sound settings on your machine for different situations. First select from the list which sound event you want to change. Then, select the sound you want to play by checking one of the boxes. You will be able to hear the sound when you check the box. Each event can have a different sound.
Audio repeat
When active, the signal for some warning or attention pop-ups is repeated in intervals until it is cancelled.
Volume
You can change the volume using the slider.
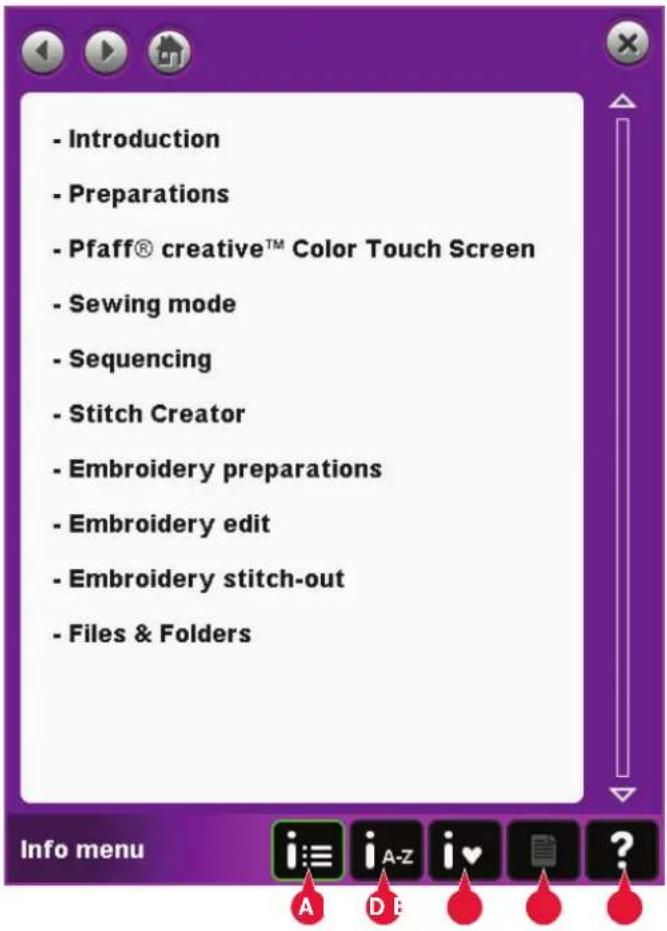
Use the info system to easily get help topics and information. The Info menu is a built-in shortened version of the Owner's manual.
When you touch the info menu icon on the task bar, you have four options to select from - category (A), index (B), personal info (C) and text (D).
Browse through the topics using your stylus. The left arrow at the top of the screen opens the previous page. The right arrow takes you back to the current page.
Category (A)
Category shows the help topics divided into categories following the structure of the Owner's manual.
Index (B)
Index shows the help topics in alphabetical order.
Personal info (C)
Personal info contains the owner's name, machine's software information and serial number.
Text (D)
You can open and read text and HTML-files on your machine. The text view shows these text files which are opened from Files & Folders (see chapter 10).
Note: The text icon is not active if no text or HTML file has previously been opened from Files & Folders.
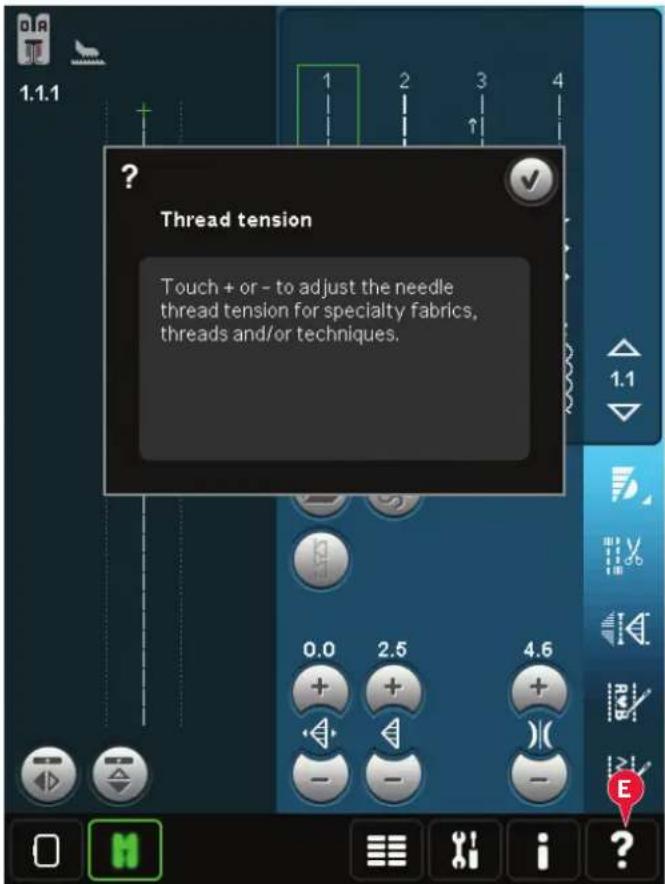
Quick help (E)
Your machine has a built-in Quick help, which gives you instant information about everything you see on the screen. Touch the Quick help icon on the lower right corner of the screen (E). It starts flashing indicating that Quick help is active. Touch the icon or the part of the screen you want information about. A pop-up gives a short explanation. Touch OK to close the pop-up and exit Quick help.
When a USB mouse is connected, it is even easier to use the built-in Quick help. Place the cursor over the icon and right click on the mouse and Quick help will pop-up instantly.
Sewing mode
Sewing mode
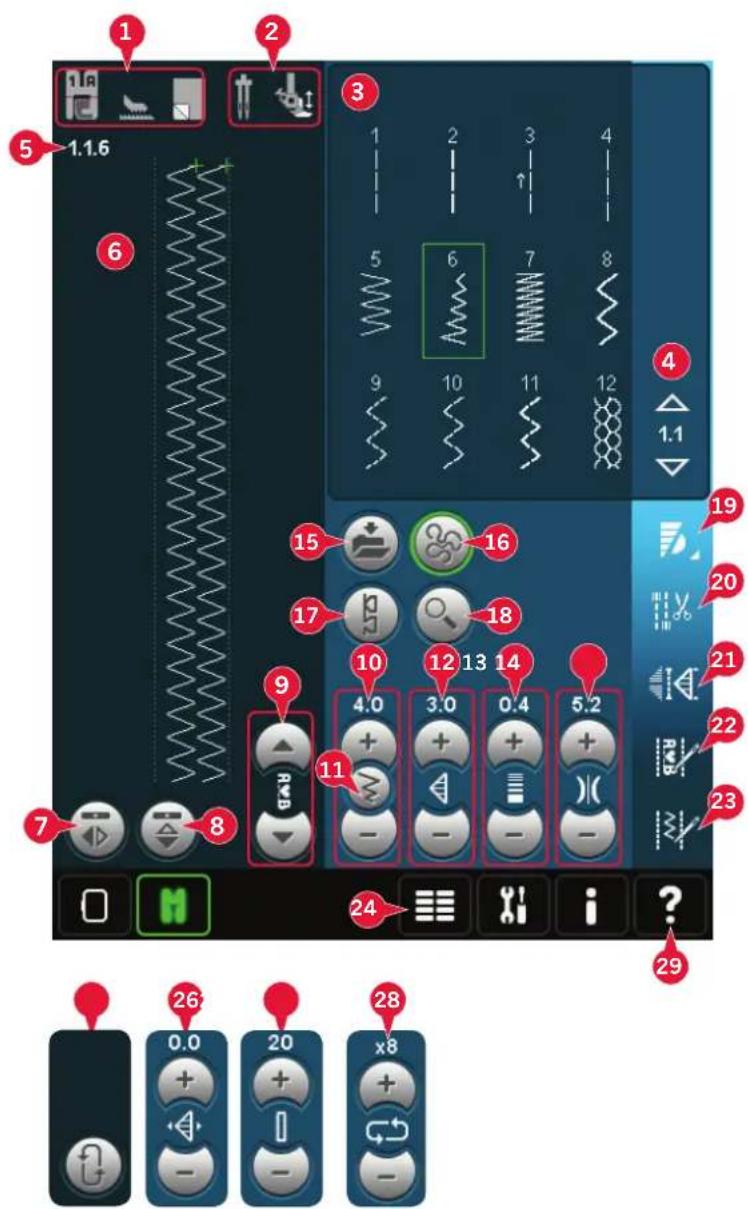
In sewing mode you can select stitches, adjust and sew them. Use Stitch Creator™ feature and sequencing to create your own stitches and sequences. The selected stitch is shown in actual size in the stitch field. Recommendations and machine settings are shown at the top of the screen.
Sewing mode - overview
- Sewing recommendations
- Machine settings
- Stitch selection area
- Arrows for scrolling through stitch categories
- Selected stitch number
- Stitch field
- Mirroring side to side
- Mirroring end to end
- Sequence start position
- Stitch width
- Width/position toggle
- Stitch length
- Stitch density
- Thread tension
- Save options
- Free-motion options
- Balance
- Zoom to all
- Speed control
- Tie-off options
- Sewing programs
- Sequencing
- Stitch Creator™ feature
- Selection menu
- Repeat buttonhole
- Stitch positioning
- Buttonhole slit length
- Button stitch repetition
- Quick help
Note: All symbols and options will not be shown at the same time.
Quick help (29)
Use Quick help to receive instant information about any icon or part of the screen. Touch the Quick help icon (29) and then the icon or the part of the screen you want information about.
Select a stitch
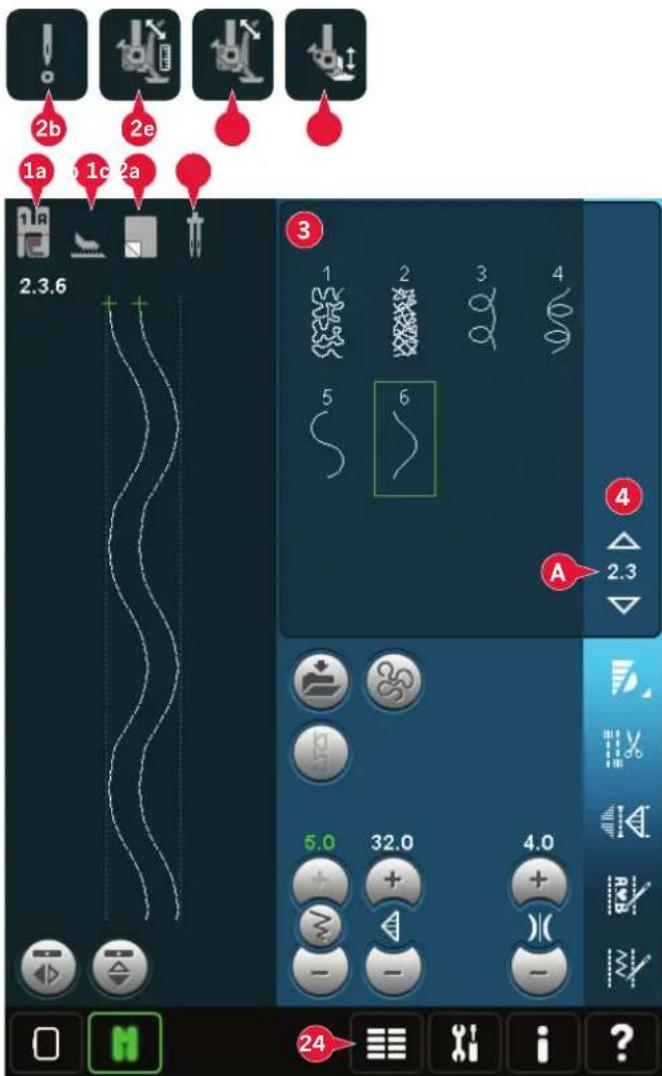
To select a stitch, touch the actual stitch in the stitch selection area (3). You can scroll through the list of stitches by touching the arrows at the right of the stitch selection area (4). The number of the actual subcategory is shown between the arrows (A).
You can also select a stitch from the selection menu (24), see page 3:4.
Sewing recommendations (1)
Your machine automatically gives you recommendations for the selected stitch.
1a) Presser foot recommendation
1b) IDT™ system recommended
1c) Stabilizer recommended
Machine settings (2)
Some machine settings are indicated with a symbol when activated in the settings menu.
2a) Set for twin needle
2b) Set for stitch width safety
2c) Set for dynamic spring foot free-motion
2d) Set for spring foot free-motion
2e) Set for sensormatic free-motion
Your machine features the automatic presser foot up and extra lift button and the presser foot down and pivot button.
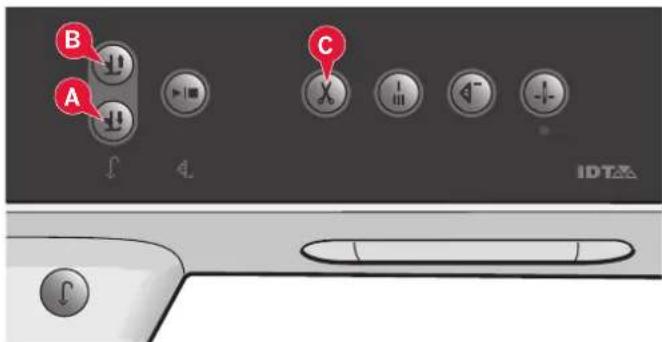
To lower the presser foot, place the fabric under the presser foot and press the presser foot down button (A) or step on the foot control. To raise the presser foot, press the presser foot up button (B) or press the thread snips button (C) to cut needle and bobbin thread and raise the foot. When the needle stops in the down position, the presser foot raises to pivot height.
You can also lower the presser foot and the needle with your foot control. If you tap your foot control once you will lower the presser foot. If you tap the foot control a second time the needle will be lowered into the fabric.
Note: With Needle down selected, when you stop sewing and touch the presser foot up button the foot will raise but the needle stays in the fabric. Touch presser foot up again to raise the needle.
Stitch settings
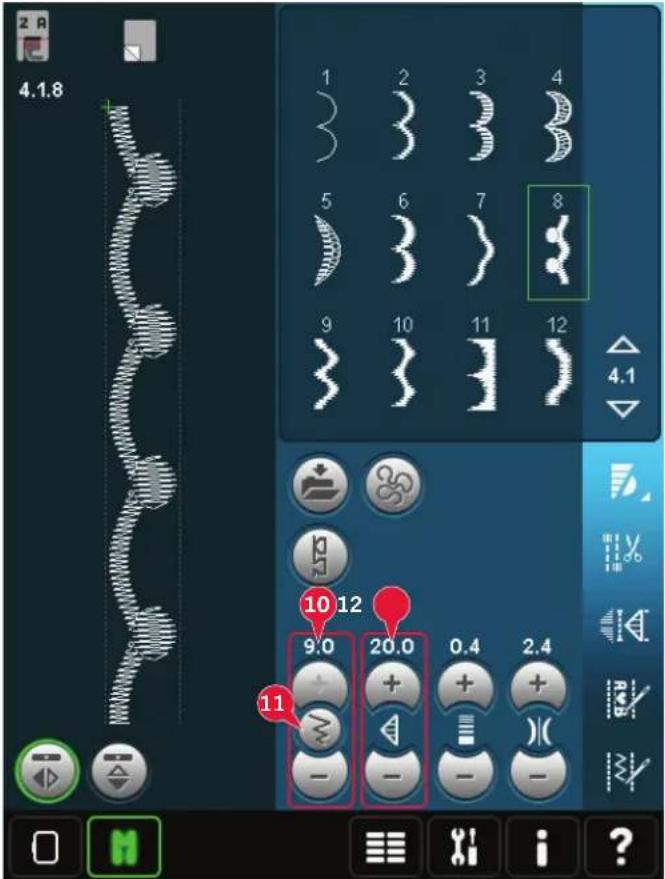
Your machine will set the best settings for each selected stitch. You can make your own adjustments on the selected stitch.
The setting changes only affect the selected stitch. Your changed settings will be reset to default when selecting another stitch. The changed settings are not automatically saved when turning your machine off. You can save the adjusted stitch in Personal menu.
Note: The set stitch width and the stitch length are shown above the icons. When trying to exceed minimum or maximum settings for width and length, a warning sound will be heard.
The default value is shown in white. Value changes are shown in green.
Stitch width (10)
Increase or decrease the stitch width using + and -.
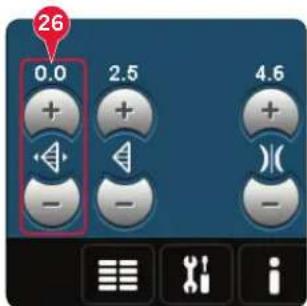
Stitch positioning (26)
For straight stitches the stitch positioning icon (26) is shown instead of the stitch width icon. Use + to move the needle to the right and - to move the needle to the left. For straight stitches the machine has 37 needle positions.
It is possible to change the needle position of all stitches that are less than 9 mm wide. Touch the width/position toggle (11) icon to toggle between stitch width and stitch positioning. The stitch position can only be changed to the limit of the maximum stitch width. Changing the stitch position will also limit the stitch width adjustment.
Stitch length (12)
Increase or decrease the stitch length using + and -. If lengthening a zigzag stitch or a decorative stitch, the entire stitch will be longer. If lengthening a satin stitch where the density can be adjusted, the entire stitch will be longer but the density will remain the same.
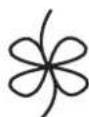
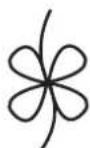
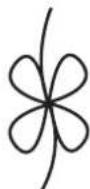
Stitch length + Stitch length -
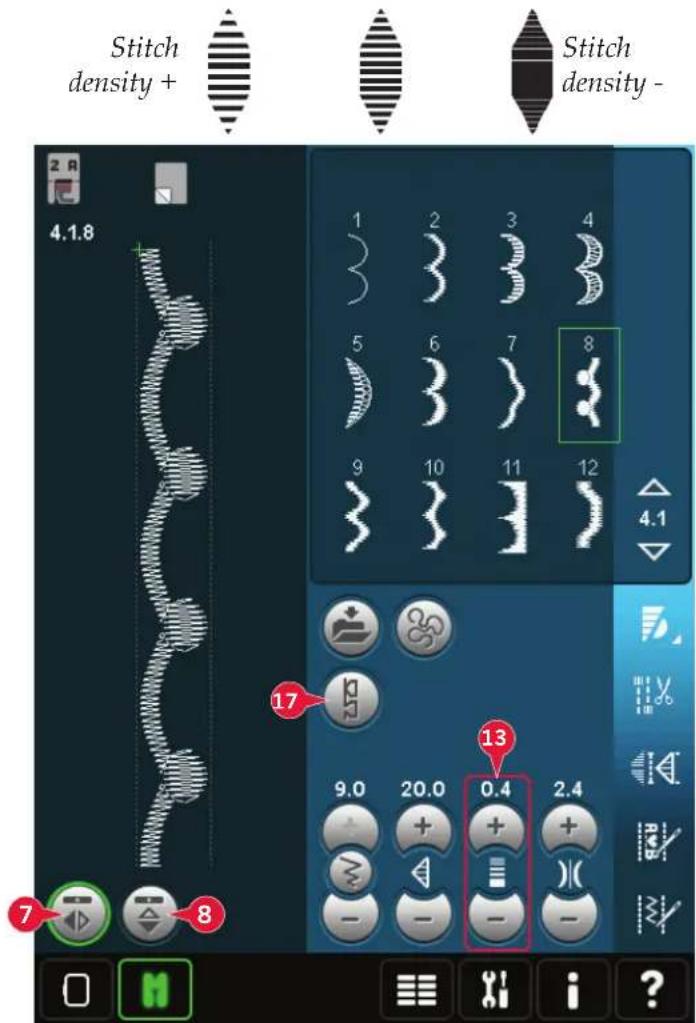
Stitch density (13)
The stitch density control adjusts the density (the closeness of the satin stitches that make up the entire stitch). The density does not affect the actual length of the entire stitch.
Touch + to decrease the density. Touch - to increase the density.
Note: This is often used with specialty threads and when a less dense satin stitch is desired.
Mirroring (7 and 8)
To mirror stitches or sequences side to side touch icon (7). For mirroring end to end touch icon (8).
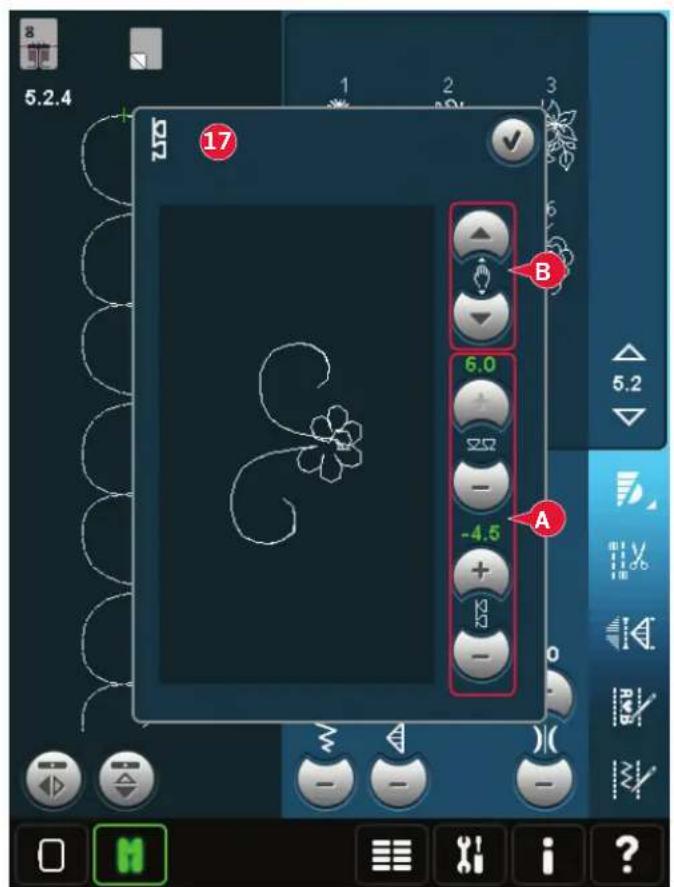
Balance (17)
When sewing on special fabrics or doing a special technique, the balance may need to be adjusted.
Start by sewing a stitch on a piece of scrap fabric. Touch the balance icon (17) to open the balance window. Use the + and - icons (A) to adjust the side to side and/or forward/backward balance of the stitch. Use the pan icons (B) to see the whole stitch. Change the picture on the screen to match your sewn sample. When you sew again, the balance will be corrected.
Buttonholes can also be balanced.
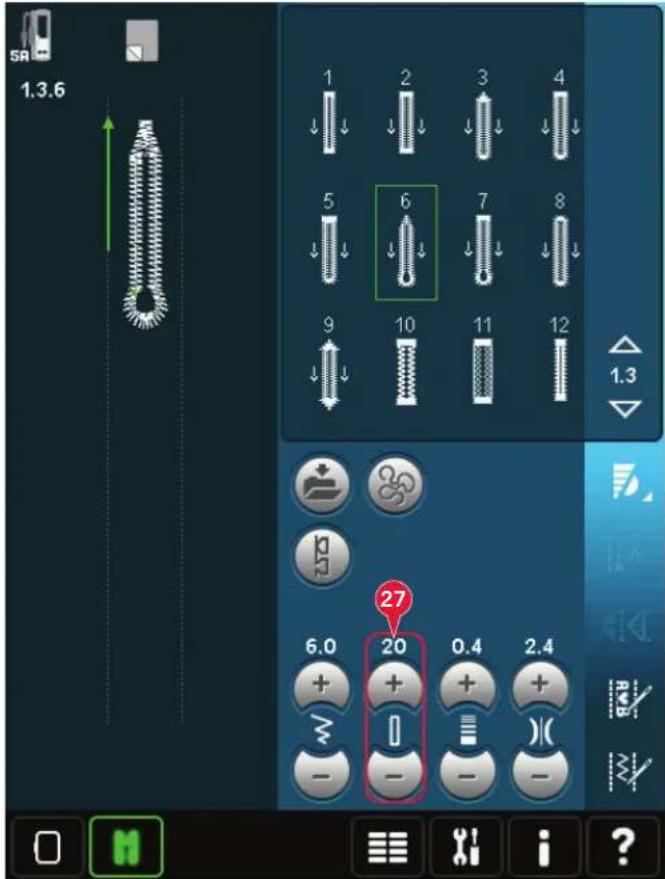
Set the buttonhole slit length by using + to increase and - to decrease when sewing a buttonhole with the Sensormatic buttonhole foot.
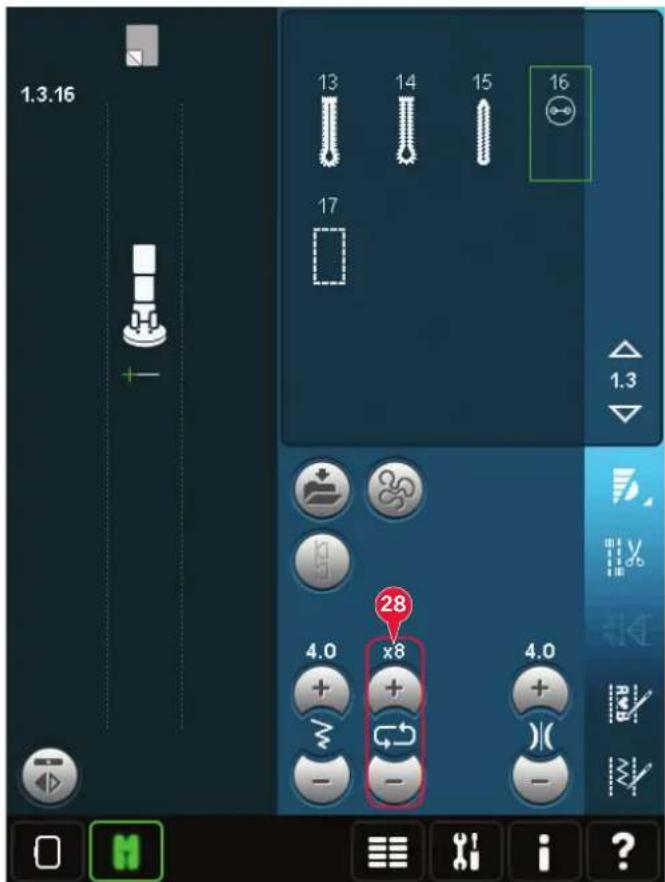
Touch + to increase and - to decrease the number of stitch repetitions to be sewn, when sewing on a button.
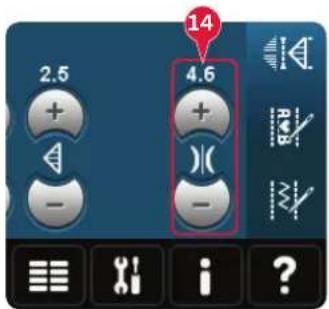
Adjust thread tension (14)
Touch + to increase and - to decrease the needle thread tension.
For the best stitch appearance and durability make sure the needle thread tension is correctly adjusted, i.e. for general sewing, the threads evenly meet between the two fabric layers (A).
If the bobbin thread is visible on the top side of the fabric, the needle thread tension is too tight. Reduce the needle thread tension (B).
If the top thread is visible on the underside of the fabric, the needle thread tension is too loose (C). Increase the needle thread tension.
For decorative stitches and buttonholes the top thread should be visible on the underside of the fabric.
Thread tension compensation
If you find that the thread tension in general is too low or too high, touch Thread tension compensation in the Machine settings menu and adjust the settings in the window that appears, see page 3:11.
Note: Any changes to the Thread tension compensation will remain even when turning your machine off.



Free-motion options (16)
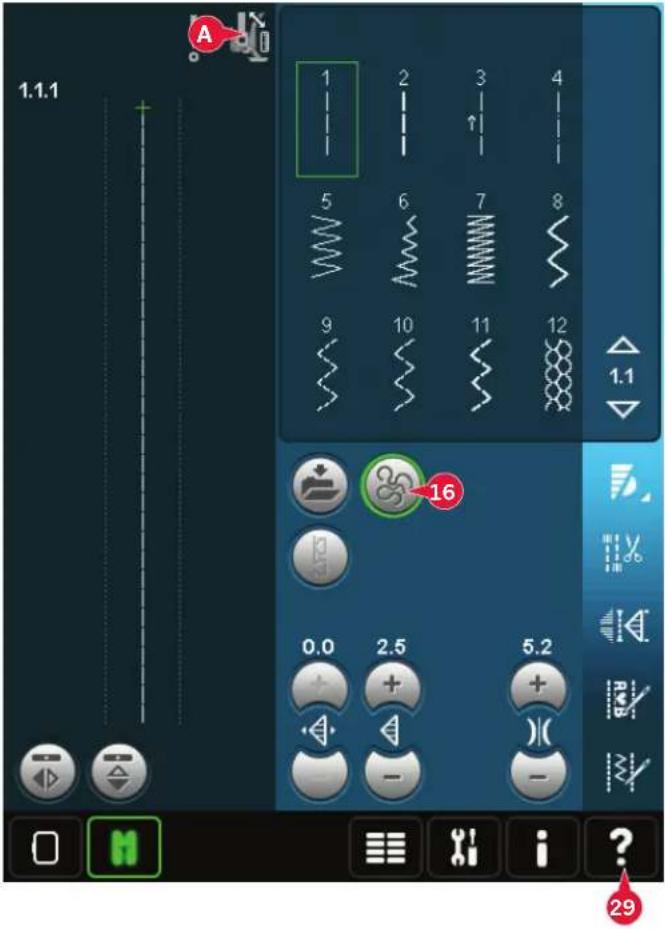
All stitches on your machine can be sewn in free-motion to create fantastic effects.
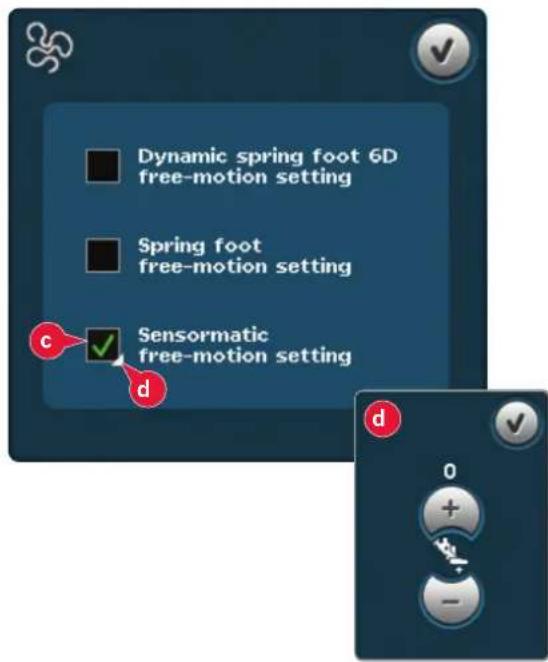
Touch the free-motion options icon (16) to open a window where you can select between three different free-motion options. A free-motion foot symbol at the top of the screen (A) indicates which setting is selected. Use Quick help (29) on the symbol for information about the current setting.
For all free-motion sewing the feed dogs will lower automatically and the fabric must be moved manually.
Note: Make sure that the IDT™ system is disengaged.
Read more about free-motion sewing on page 4:20.
Activate to set the machine in Dynamic spring foot free-motion mode for the Dynamic spring foot 6D. The Dynamic spring foot measures the fabric thickness and will raise and lower with each stitch to hold the fabric on the needle plate while the stitch is being formed.
Note: The Dynamic spring foot 6D is recommended for use with straight stitch. Activate Stitch width safety in Machine settings.
Activate to set the machine in Spring foot free-motion mode for optional spring feet. A spring foot will raise and lower with each stitch to hold the fabric on the needle plate while the stitch is being formed.
Note: Optional spring feet can be purchased at your local authorized PFAFF® dealer.
Do not use a spring foot if Sensormatic free-motion is activated, since the needle might damage the presser foot.
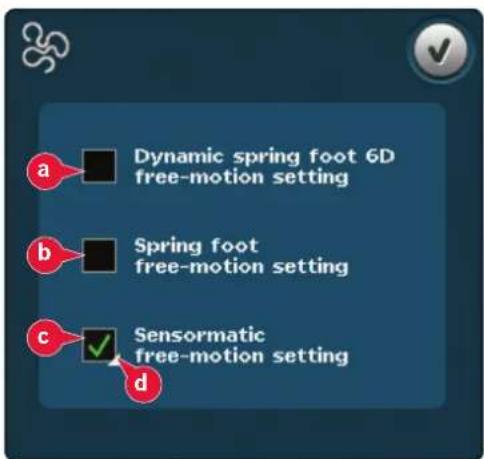
Sensormatic free-motion (16c)
Activate to set the machine in Sensormatic free-motion mode for presser foot 6A.
When sewing free-motion at low speed the presser foot will raise and lower with each stitch to hold the fabric on the needle plate while the stitch is being formed. At higher speed, the presser foot floats over the fabric while sewing.
Skipped stitches can occur if your fabric moves up and down with the needle as you are stitching. Lowering the presser foot height will reduce the space between the presser foot and the fabric and eliminate the skipped stitches.
To adjust the presser foot height in Sensormatic free-motion mode, long touch the check box (d) and make adjustments in the pop-up.
Note: Be careful not to reduce the presser foot height too much. The fabric must still move freely under the presser foot.
Sequence start position (9)
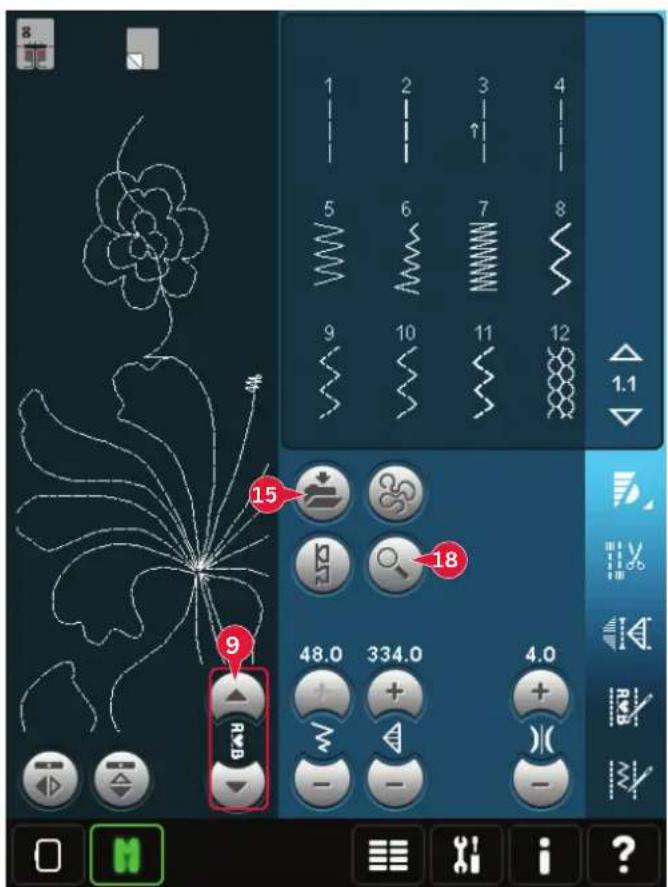
When sewing a sequence it is possible to start sewing anywhere in the sequence. Use the arrows (9) to step through the sequence. Read about sequencing in chapter 5.
Zoom to all (18)
If the stitch or sequence is wider than what can be shown on the screen, you may use the zoom to all icon to see the whole width of the sequence.
Note: Zoom to all is only visible if the stitch or sequence is wider than the stitch field.
Save options (15)
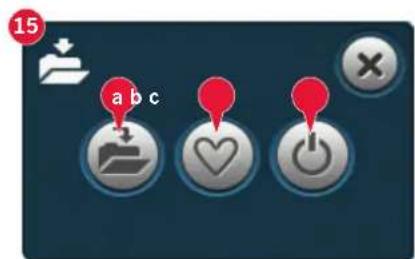
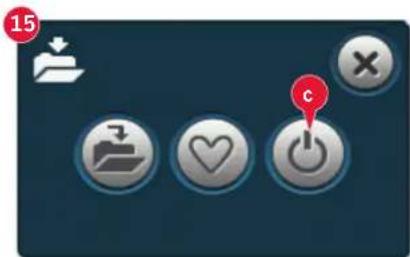
Select where to save your stitch, open the different save options under save (15).
a) Save to Personal files
b) Save to Personal menu
c) Save personal default stitch
Save to Personal files (15a)
To save a stitch into your Personal files, touch the save icon (15) and select save to Personal files (15a).
The icon will open a new window where you can select where to save your stitch. You can save either to a folder in your Personal files or to an approved external device.
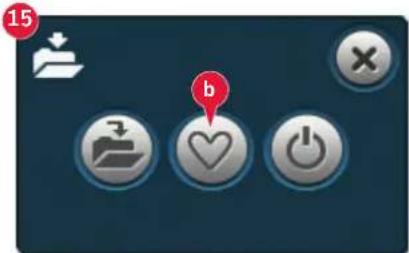
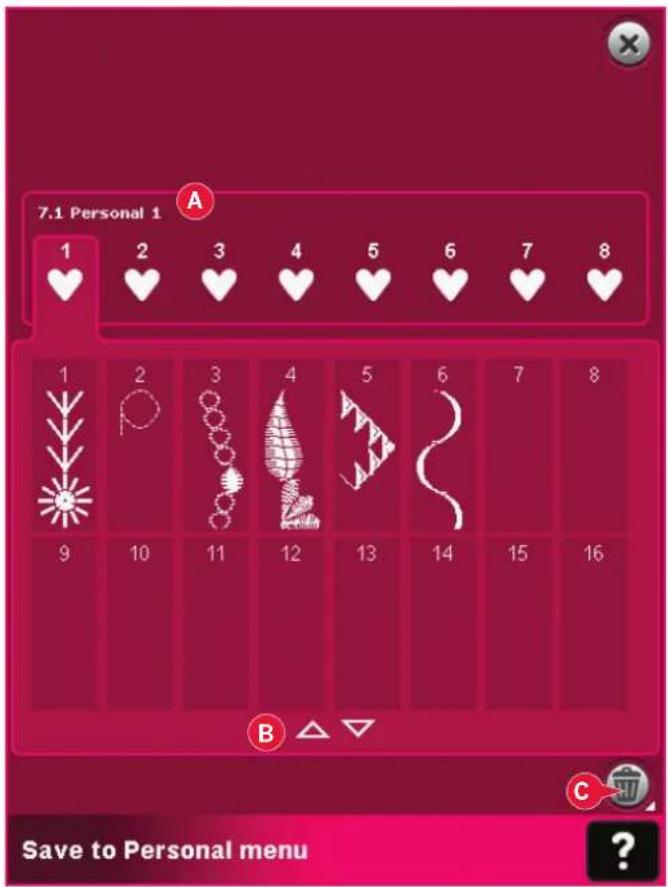
To save a stitch into your Personal menu, touch the save options icon (15) and select save to Personal menu (15b). A new window will open. Choose which subcategory you want to save your stitch in (A). All your previously saved stitches will be shown in the Personal menu.
You can scroll through the personal menus to find a free position, using the arrows (B). Any box without a stitch is a free position and can be used to save your new stitch. Simply touch the position and your stitch is saved.
Any box with a stitch is an occupied position. You can overwrite a previously stored stitch. Simply touch the stitch to overwrite. A pop-up will ask you to confirm that you want to overwrite the previously stored stitch. Cancel the saving process by touching the cancel icon. The saving window will close and you return to the previous screen.
To delete a saved stitch or sequence, touch the delete icon (C). The delete icon will be active until a stitch is selected and deleted or until the delete icon is touched again. A pop-up will ask you to confirm the deletion.
Long touch the delete icon to delete all stitches saved in the current subcategory at one time.
Note: If using the long touch function, even the stitches in the actual subcategory not visible on screen, will be deleted.
Save personal default stitch (15c)
Select your stitch and then touch this icon (15c) to confirm your default stitch. This stitch will now be selected when you turn on your machine.
Note: A sequence cannot be saved as a default stitch. The icon (c) will be grayed out.
Option bar
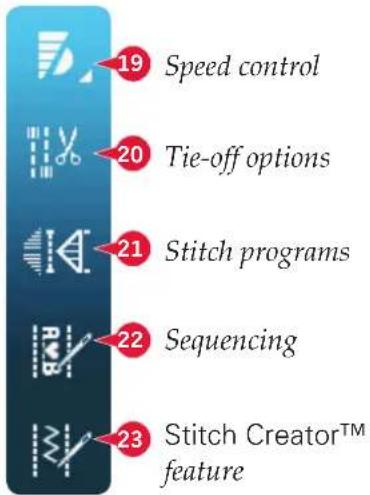
Speed control (19)
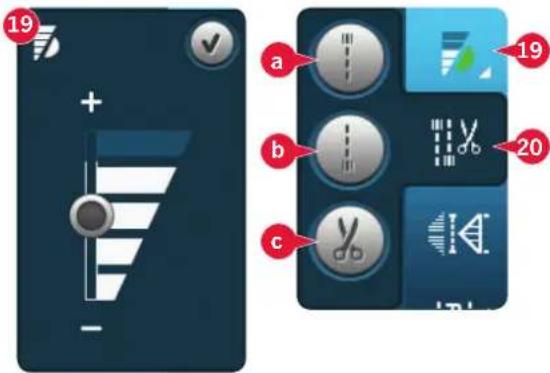
This function enables you to easily reduce the maximum sewing speed. Just touch the speed control icon to reduce the speed. To return to normal speed, deselect the icon.
You can change the set speed limit. Long touch the speed control icon to get a pop-up. Set desired speed limit using the slider then close the pop-up. The next time you touch the speed control icon, the speed will be reduced to the limit you have chosen.
You can sew without closing the pop-up.
Note: You cannot set maximum speed in the popup. To set maximum speed, close the popup and deselect the speed control icon.
Tie-off options (20)
These options let you program tie-offs both at the beginning and the end, and thread snips at the end of the stitch.
When touching the tie-off icon, three options open to let you select different functions; tie-off beginning (20a), tie-off end (20b) and thread snips (20c).
When you have activated your settings, you can hide the three icons by touching the tie-off icon on the option bar again. The tie-off icon will show your settings by changing the color of the chosen function. The settings will remain active until you switch them off.
Note: For immediate tie-off, use the tie-off button, found on the front of the machine.
Sewing with tie-off options selected
-
The tie-off beginning (20a) will be performed as soon as you start to sew.
-
Press the reverse button to perform tie-off end (20b). The action indicator will be lit. The machine will finish the stitch and do a tie-off.
When a thread snip (20c) is programmed, the machine will automatically cut the threads after performing the tie-off end. The needle and presser foot will raise.
Note: Stop sewing and press the reverse button twice to activate reverse sewing. The reverse indicator will be lit. No tie-off will be performed.
Press the reverse button when sewing in reverse to activate tie-off end. Both the reverse indicator and the action indicator will be lit.
To go back to sewing forward, stop sewing in reverse and press the reverse button. No indicators will be lit and no tie-off will be performed.
Sewing programs (21)
Sewing programs - overview
A Tapering program
B Single stitch program
C Patchwork program
D Preview field
E Set number of stitch repetitions in single stitch program
Note: Not all programs can be used at the same time. You can sew without closing this pop-up.
Tapering program (A)
Tapering increases or decreases the width of the stitch during sewing to create symmetrical or asymmetrical tapers.
Activate tapering by selecting either of the tapering icons (A). The default angle is 45 degrees. Long touch a tapering icon (A) to view the angle choices for that taper. Select one angle for the beginning taper and the same angle or a different one for the end taper.
If tapering is deactivated and then activated again, the angle will be set to the previously selected angle.
When tapering is activated at both the beginning and at the end and you start to sew, the stitch width will start at 0mm. It becomes wider until the selected stitch width is reached. Sew your desired length and press the reverse button. The width is reduced until the width is 0mm and the action indicator on the machine will be lit until the taper is finished.
Single stitch program (B)
Activate the single stitch program by touching the icon (B). The single stitch program lets you decide how many repetitions of the stitch you want to sew.
Set the number of repetitions using the icons on the right (E). The number of repetitions chosen is shown between the + and - icons. The estimated length of the repetitions is shown in the preview field (D). The machine will stop automatically when the repetitions are sewn.
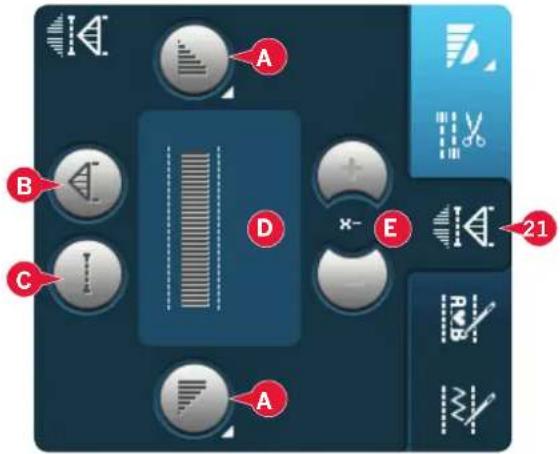
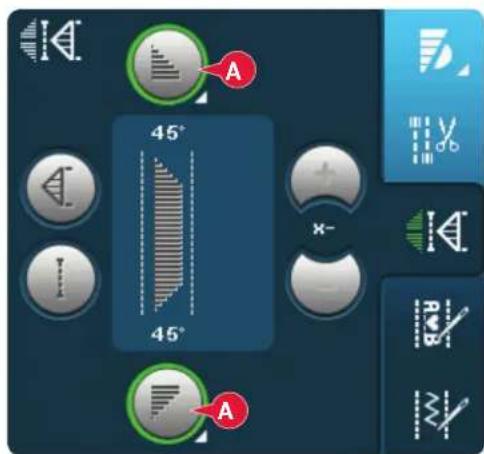
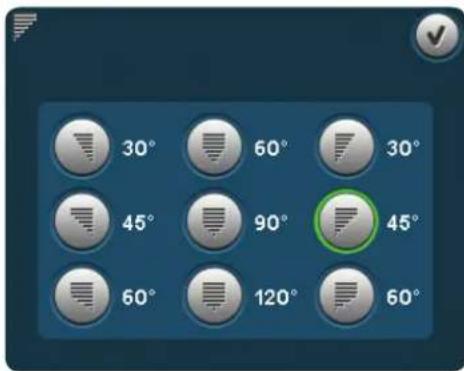
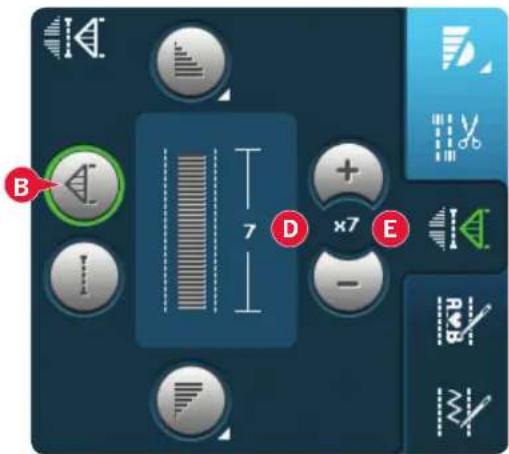
Patchwork program (C)
The patchwork program makes it possible for you to program an exact seam length that can be sewn repeatedly. This is very useful when quilting.
To program a seam length, activate the patchwork program (C). Sew your desired seam length and press the reverse button. The action indicator on the machine will be lit until the last repetition of the stitch is finished. This will set the length of the seam. The length of the patchwork sequence is shown in millimeters in the preview field (D).
After you have programmed the patchwork sequence, the patchwork program icon is inactive. The single stitch program is now activated instead.
The programmed length of your patchwork can be adjusted using the single stitch adjustment icons (E).
Combining Tapering and Patchwork or Single stitch programs
Combining Tapering and Patchwork or Single stitch programs makes it possible to repeat a tapered seam with the same length.
Activate tapering by selecting any of the tapering icons (A) then activate Patchwork by touching the icon (C). Follow the instructions for tapering on the previous page. When the reverse button is pressed the action indicator will be lit until the taper and last repetition of the stitch is finished.
The seam is now programmed and the single stitch program is activated. When you start sewing again the seam will automatically be repeated with the same length.
The length of the seam is shown in millimeters in the preview field (D). Between the + and - icons (E) the number of repetitions in the program is shown. Use the + and - icons to adjust the length of the seam.
Note: The tapering is included in the repetitions shown on the screen.
Sequencing (22)
Touch this icon to open sequencing. Read about sequencing in chapter 5.
Stitch Creator™ feature (23)
Touch this icon to open the Stitch Creator™ feature. Read about the Stitch Creator™ feature in chapter 6.
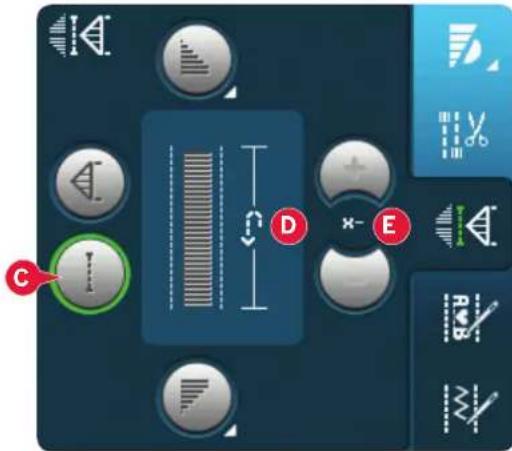
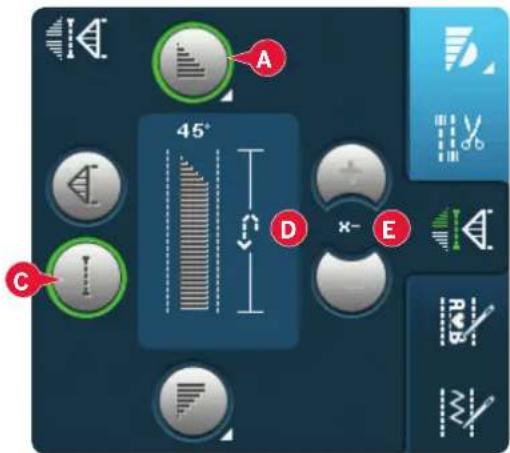
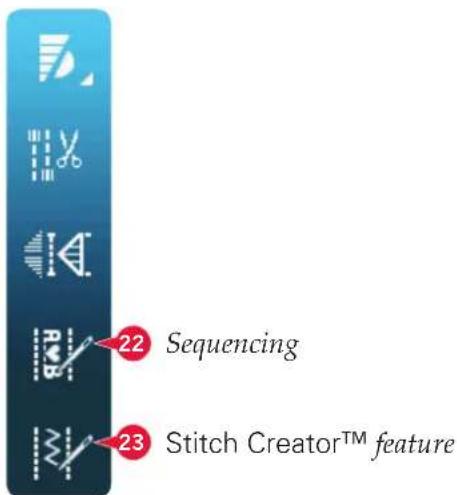
Sewing techniques
These techniques may require some special presser feet and accessories.
Sewing in zippers
There are different ways to sew in zippers. Follow the directions included with your pattern for best results.
For some zipper applications it is important to sew close to the teeth of the zipper. The zipper foot 4 can be snapped onto the presser foot holder on the left or right, for stitching on either side of the zipper. Set the stitch position so that the needle enters close to the edge of the zipper teeth by using one of the 37 needle positions available for the straight stitch.
Note: If the presser foot is attached on the right side of the presser foot holder, the needle should only be moved to the left. If the foot is attached on the left side of the presser foot holder, the needle should only be moved to the right.
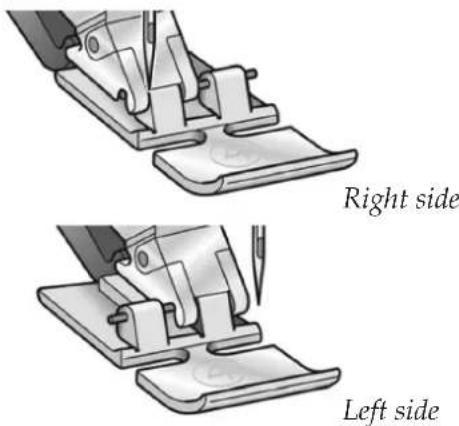
Sewing hems in heavy fabric
When sewing over seams in extra heavy fabric or a denim hem, the presser foot can tip as the machine climbs over the seam.
Use the multipurpose tool to balance the height of the presser foot as you sew. One side of the tool is thicker than the other. Use the side that suits the thickness of the seam best.
Engage the IDT ™ system, see page 2:9. At the thickest point on the fabric, slow down the sewing speed.
Tip! Increasing the stitch length may improve the sewing result when sewing hems in heavy fabric.
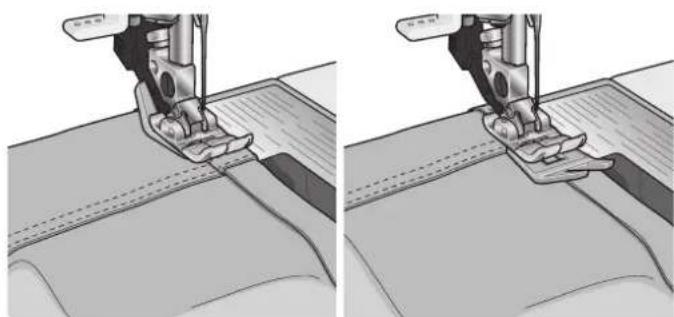
Three-step zigzag stitch
Stich number 1.1.9 can be used to overcast raw edges. Make sure the needle pierces the fabric on the left side and overcasts the edge on the right side.
Stitch number 1.1.9 can also be used as an elastic stitch to add elastic to pajamas, skirts and sportswear.
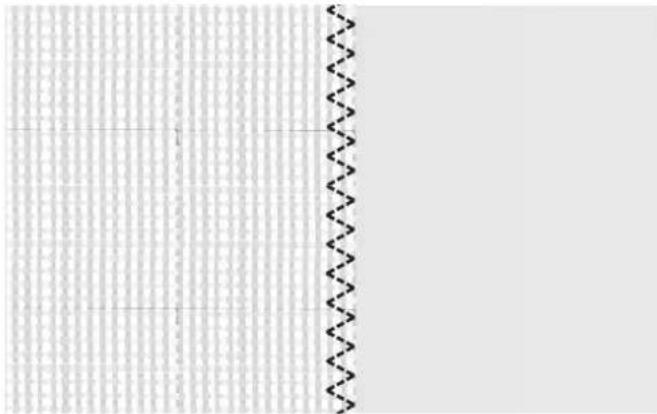
Blindhem stitch
The blindhem stitch number 1.1.16 is used to make invisible hems on skirts, trousers and home decorating. Use foot number 3 with IDT ™ system.
• Finish the edge of the hem.
- Fold and press the hem allowance to the wrong side.
- Fold the hem back on itself so approximately 3/8" (1 cm) of the finished edge extends beyond the fold. The wrong side of your project should now be facing up.
- Place the fabric under the presser foot so that the fold runs along edge guide A.
- When the needle swings into the fold it should catch a small amount of fabric. If the stitches are visible on the right side, adjust edge guide A by turning adjusting screw B until the stitch that catches the hem just barely shows.
Elastic blindhem stitch
The elastic blind stitch number 1.1.17 is especially suitable for stretchy fabrics, because the zigzag in the stitch lets the stitch stretch. The hem is finished and sewn at the same time. There is no need to finish the raw edge first on most knits.
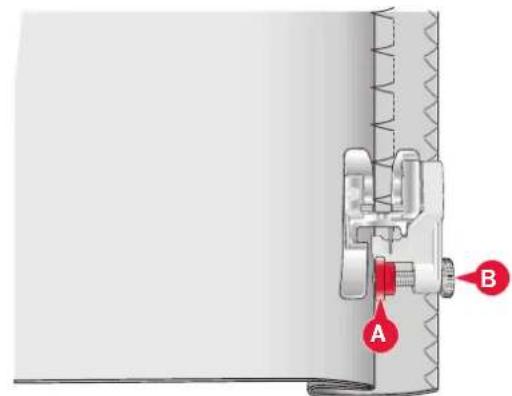
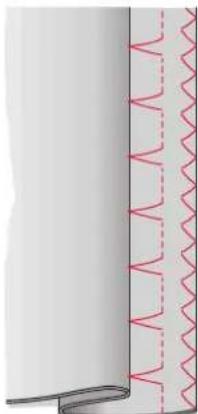
Blindhem stitch number 1.1.16
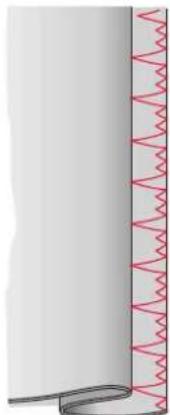
Elastic blindhem
stitch number 1.1.17
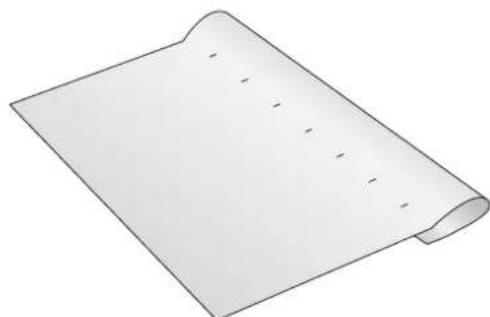
Buttonholes are found in category 1, subcategory 1.3 in the selection menu. You can also scroll through the categories in sewing mode to find the buttonhole subcategory.
Note: Buttonholes up to 50 mm can be sewn using the Sensormatic buttonhole foot. Both sides of the Sensormatic buttonhole are sewn in the same direction for a more even result.
Buttonholes over 50 mm are sewn manually in four steps with presser foot 5M.
The direction of the stitches being sewn will be indicated on the screen by an arrow next to the buttonhole.
To sew a buttonhole, first attach the correct foot, then select your buttonhole. To ensure a good result, start with sewing a test sample on the fabric and stabilizer you will use.
Note: Make sure that the IDT™ system is disengaged.
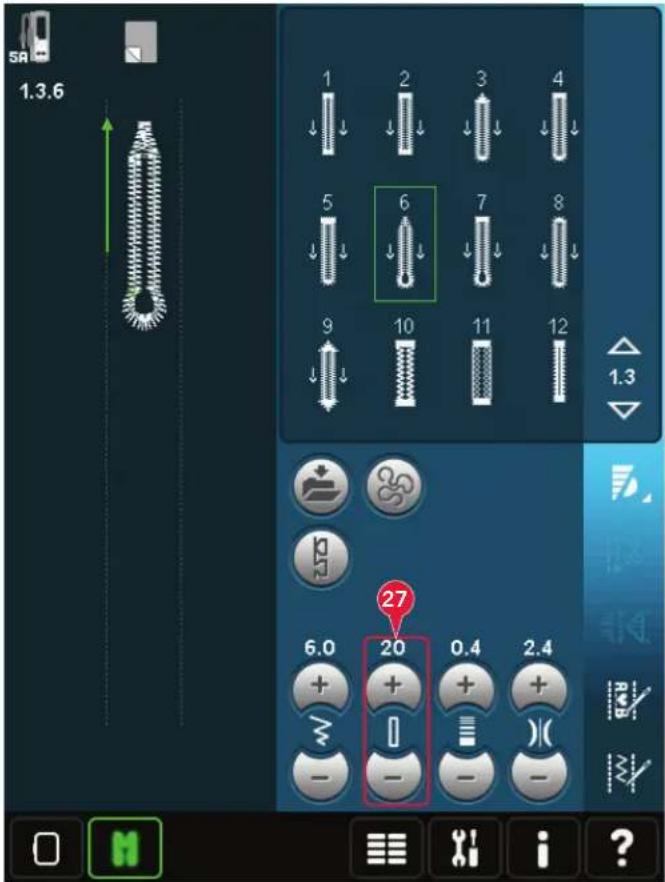
- Snap on the Sensormatic buttonhole foot.
- Plug the cord into the socket found to the left above the needle area, behind the needle threader (A).
When you sew a buttonhole with the Sensormatic buttonhole foot, adjust the slit length (27) so that it is slightly larger than the size of the button. You can measure your button using the button ruler on the lid.
Set the slit length and make sure that the red arrow lines up with the marking on the foot (B). Start sewing by pressing the foot control or start/stop button. The buttonhole will be completed automatically and the threads are cut. You can repeat the buttonhole as many times as you wish.
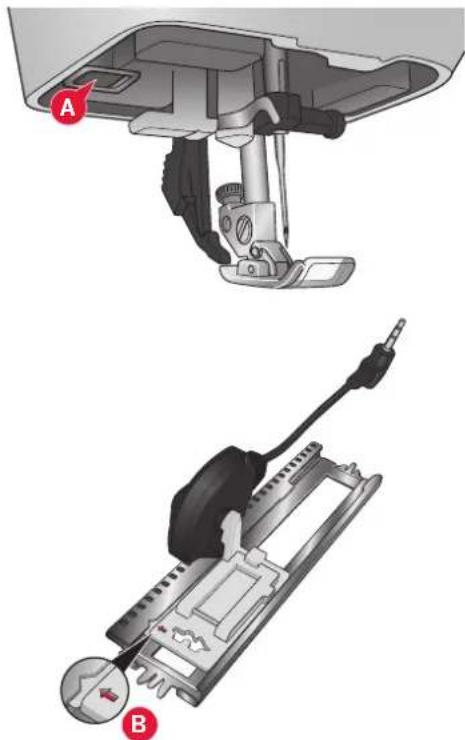
To sew a manual buttonhole, use presser foot 5M. Sew the first column as long as you want the buttonhole. Touch the reverse button. The machine sews the bartack and the second column. When the columns are aligned, press the reverse button to sew the second bartack.
When you have adjusted your buttonhole, use the repeat buttonhole function (25), to sew identical copies. As long as that icon is selected, the machine will repeat the buttonhole over and over again. Repeat buttonhole is only visible when sewing a buttonhole manually.
To cancel the function, just deselect the icon.
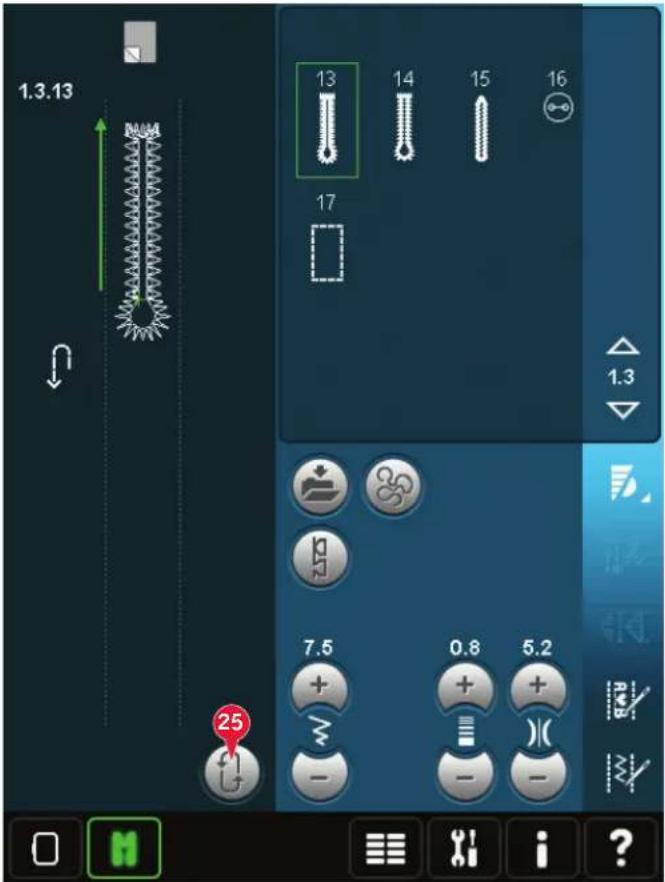
Corded buttonholes that are sewn with gimp threads are more stable, durable and have a professional appearance. Use pearl cotton or a regular gimp thread.
- Place the center of a length of gimp thread over the metal bar extending from the center back of the Manual buttonhole foot 5M. Pass the thread ends under the foot to the front of the foot.
- Snap on the Manual buttonhole foot 5M.
- After completing the buttonhole, pull the ends of the gimp thread until the loop of thread is hidden below the buttonhole bartack.
- Thread the gimp threads into a needle and pull them to the wrong side of the garment. Tie the gimp threads and cut off the excess thread.
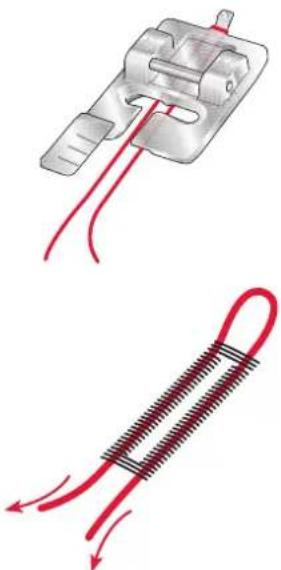
To sew on a button, remove the presser foot and select the sew on button program. The feed dogs will automatically be lowered.
Place the button under the presser foot holder. Use the mirroring icon to make sure the holes in the button are aligned with the swing of the needle and the width is appropriate for the actual button. If needed change the width between holes with the width icons.
If needed, increase or decrease the number of stitches that will fasten the button on the fabric, using the button stitch repetition icons (28). Start to sew. The machine will sew the program for you.
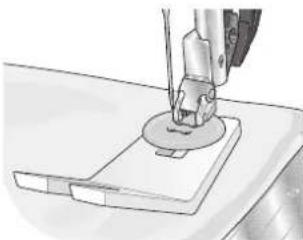
Note: Use the multi-purpose tool to create a thread shank for your button. You can also use a sew on button foot, available as an optional accessory at your local authorized PFAFF® dealer.
Darning
Darning a small hole or a tear before it becomes larger can save a garment. Choose a lightweight thread in a color as close to your garment as possible.
- Place fabric or stabilizer in position under the hole or tear in your garment.
- Select a darning stitch.
- Start sewing above the hole and over it.
- Once you have sewn across the hole, press the reverse button to set the length of the stitch. Your sewing machine will automatically complete the stitch.
- By default, the machine will be set to repeat the same size darning square; just continue sewing.
The repeat icon (A) will be highlighted, indicating that repeat is activated. Touch the repeat icon to deactivate repeat.
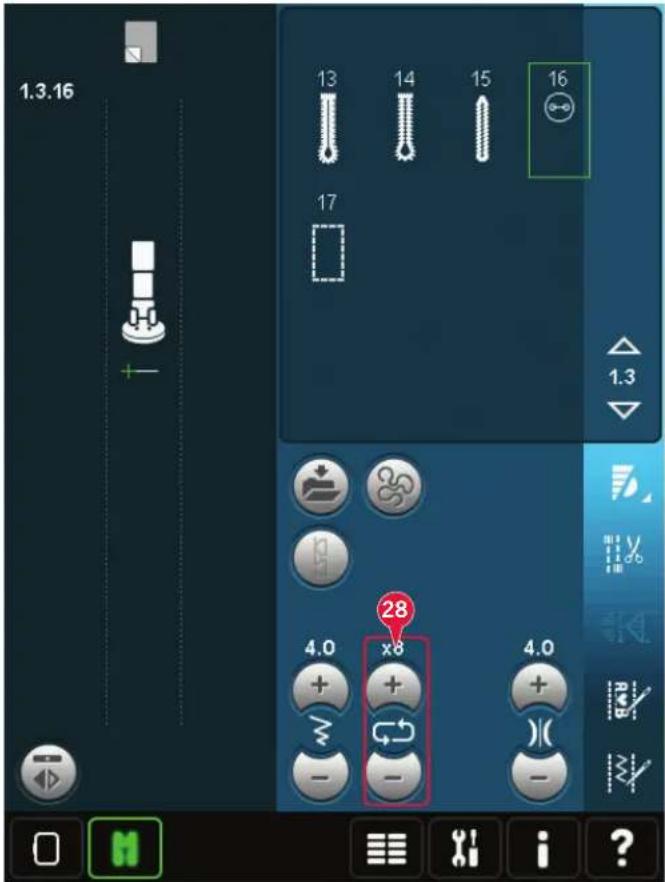
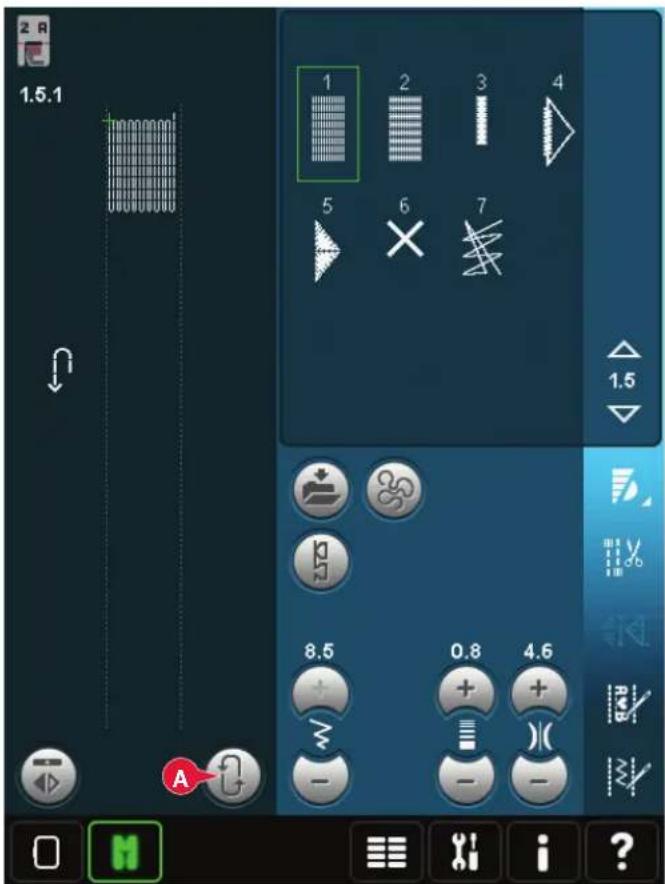
Quilting
A quilt usually consists of three layers, two layers of fabric with a layer of batting sandwiched between.
To sew three layers together, you have a wide variety of stitches and techniques to choose from.
When the quilting is finished simply bind the edges or make it into cushions, wearable art or other smaller projects.
Straight stitch needle plate (optional)
Attach the straight stitch neede plate (optional accessory, part number 412964304) when piecing your quilt. The smaller hole in the straight stitch needle plate supports the fabric closer to the needle and helps prevent the fabric from being pulled down into the bobbin area, especially at the beginning and/or end of a seam. In addition, when chain piecing, it is sometimes helpful to begin sewing on a leader cloth and then continue with the piecing.
Patchwork program
The patchwork program makes it possible for you to program an exact seam length that can be sewn repeatedly. This is very useful when quilting, especially when piecing many quilt blocks of the same size.
See page 4:13 on how to use the patchwork program.
Piecing the quilt top
Cut out the pieces of fabric for your quilt top with a seam allowance of 1/4 " (6 mm). Snap on the 1/4 " quilting foot with IDT ™ system; position the fabric under the foot so that the cut edge is aligned with the outer edge of the toe of the foot. Press the seam flat to lock the stitches, then open the pieces and press the seam allowance to one side. When possible, press seam allowances towards the darker fabric. Assemble the pieces according to the pattern instructions. Layer the pieced quilt top with batting and backing. Pin baste the layers together in preparation for quilting.
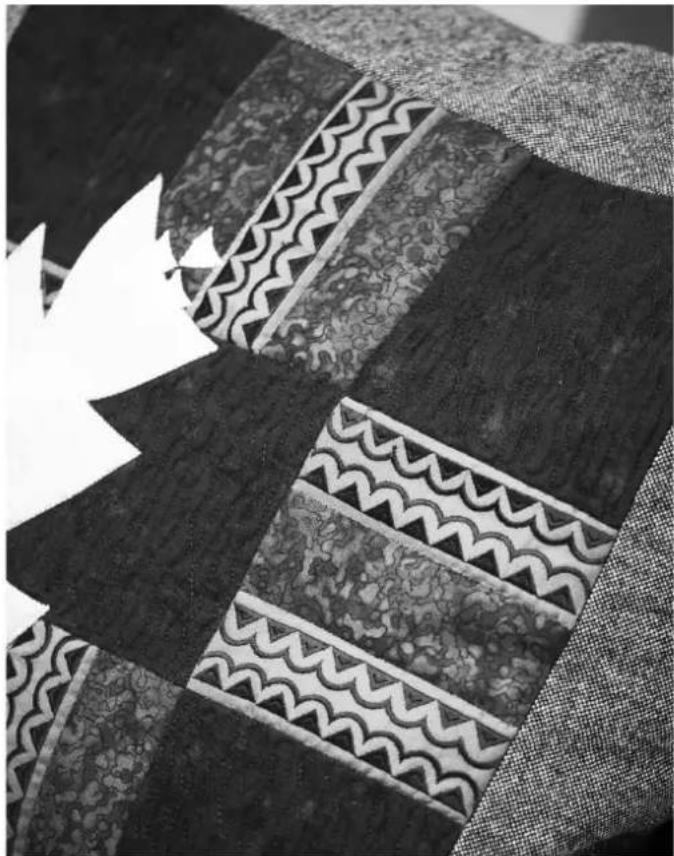
Handlook quilting
-
Baste the completed quilt top to the batting and backing.
-
Thread the needle with an invisible (monofilament) thread. Use contrasting or matching rayon or cotton thread in the bobbin.
-
Snap on the recommended foot shown in the sewing recommendations view.
-
Engage the IDT TM system.
-
Select one of the handlook quilt stitches 6.2.1-6.2.11. These stitches are pre-set with a higher thread tension value to intentionally pull up bobbin thread and produce the desired "hand look" effect.
Free-motion stippling
Free-motion stippling adds texture and interest to your quilt, while keeping the layers together.
Free-motion stippling is done with the feed dogs lowered. You move the fabric manually to determine the stitch length.
- Set your sewing machine for free-motion sewing with a straight stitch. Attach the straight stitch needle plate. Touch the free-motion options icon (A) and select one of the three options.
Note: Read about the different options on page 4:8.
- Disengage the IDT ™ system and attach the correct free-motion foot depending on which technique you have selected. A symbol of the foot for the selected setting is displayed at the top of the screen (B).
- Begin by pin basting your quilt through all layers with safety pins, starting from the center of your quilt and working out. Place a pin every 6-8 inches (15-20 cm).
Tip! Practice stippling on scraps of the fabric and batting from your quilt. It is important to move your hands at the same speed as the needle to prevent stitches that are too long or too short. Maintaining a consistent speed while free-motion sewing will also help keep stitches even.
- Begin near the center of your quilt. Take one stitch and pull the bobbin thread to the top of the quilt. Take a few stitches right next to one another to lock the threads. Activate Needle down.
- Plan a path for your stitching, then begin stitching your desired stipple pattern, moving the quilt as you go. Continue stippling until all areas of the quilt top are filled.
Stitch-in-the-Ditch
Stitch-in-the-ditch is another option for joining the layers of your quilt. Pin baste the layers as described above. Snap on the Fancy stitch foot 1A with IDT™ system and engage IDT™ system. Stitch in the seams of the quilt, using the red line on the presser foot as a guide.
Note: You can also use the optional presser foot, Stitch-in-Ditch w/IDT™ system P/N 820 925 096.
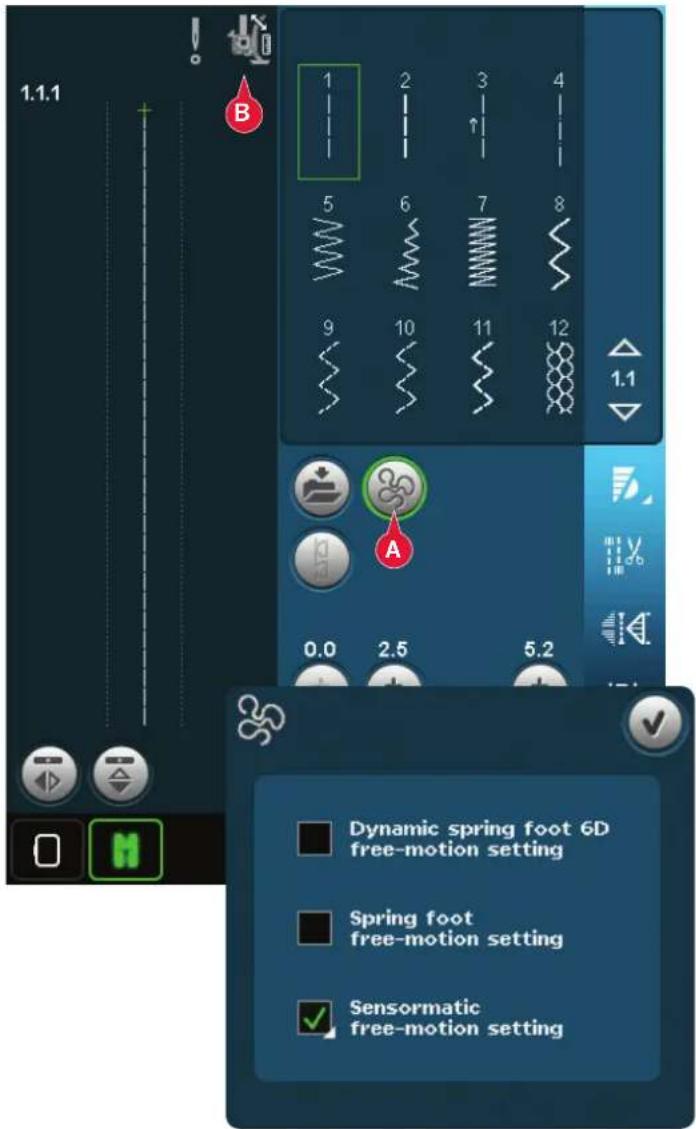
Crazy quilt stitching
Embellish your quilt with decorative stitches from stitch category 2.4. The stitches can be sewn in a coordinating or contrasting color, depending on the desired effect. Decorative threads like rayon embroidery or heavy cotton threads are sometimes used.
Special sewing techniques
The 6th stitch category includes special sewing technique stitches such as candlewicking, beading stitches, edge stitches, four direction sewing, stacking stitches and ribbon stitches. These techniques may require some special presser feet and accessories. This is indicated by the optional presser foot icon (A).
Note: Touch Quick help and then touch the selected stitch in the stitch selection area to find out which special presser foot is required for that stitch.
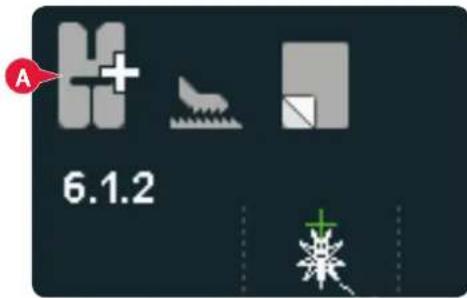
Four direction sewing
Use the four direction stitches for sewing on patches without having to turn your fabric and for decorative stitch designs. When selecting a stitch in this subcategory, the four direction icons will be shown (C).
The starting point is marked in the stitch field (B). To change the direction of the starting point, select one of the four direction icons (C).
When the desired length is sewn in one direction, select the new direction by touching one of the four direction icons.
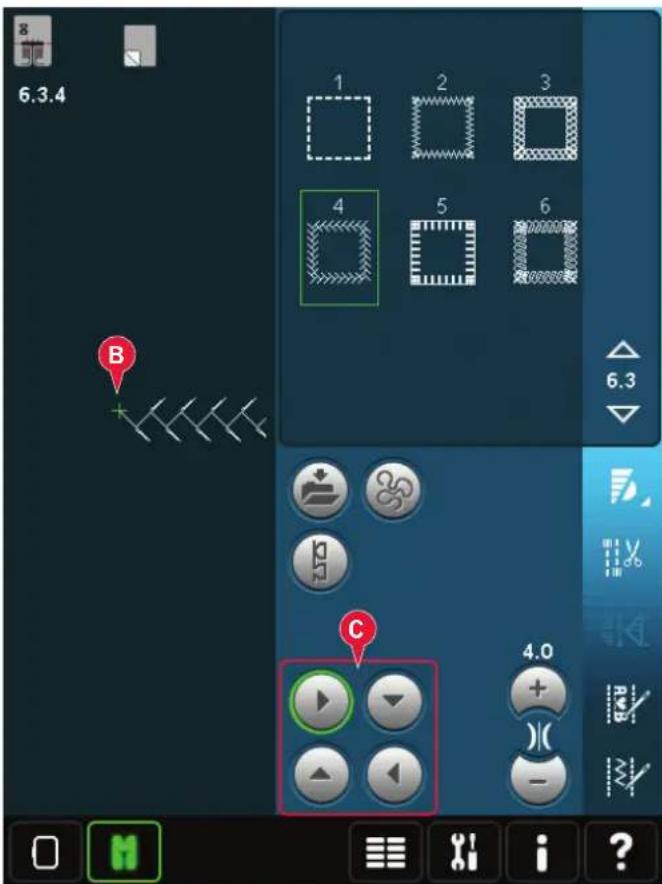
Stacking stitches
Sew beautiful decorations in two colors using the stacking stitches. The stacking stitches consist of pairs of matching stitches that are designed to be sewn on top of each other.
Sew the first stitch and then sew the second, overlapping the first. Be sure to use the same starting point for each.
Touch Quick Help (29) and one of the stacking stitches to preview what the stitches look like when combined/stacked.
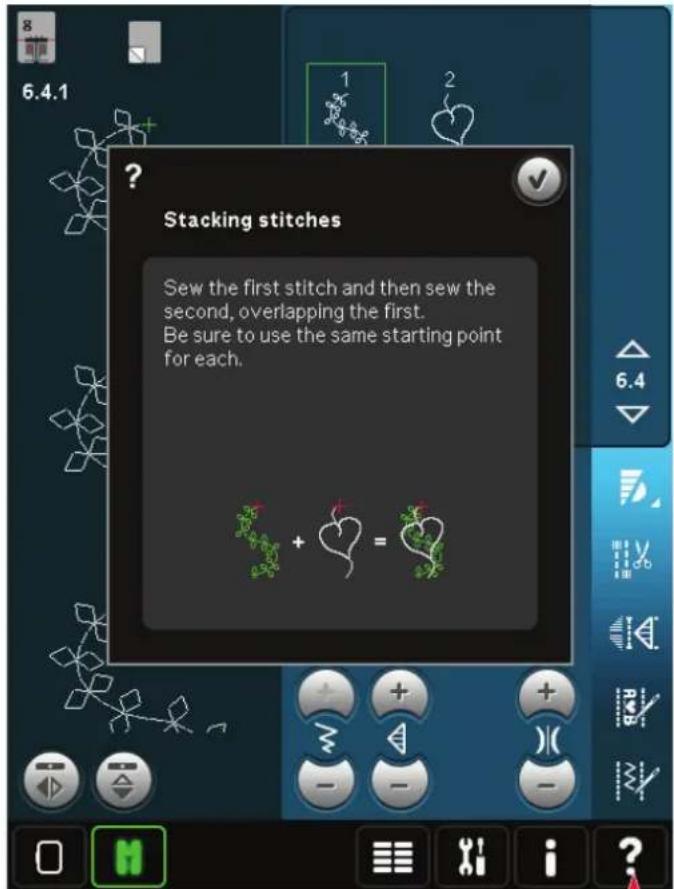
29
Ribbon stitches
Add dimensional elements to your decorative stitching with the beautiful ribbon stitches in your machine. Narrow ribbons are woven into theses special stitches as you sew. 2-5mm (approx. 1/8'' - 1/4'' ) ribbons are recommended for this technique. For best results, use stabilizer, appropriate for your fabric type and weight, under your fabric to support your stitching.
- Choose a ribbon stitch in category 6.5. Activate needle down. Sew the first part of pattern, sew until the machine stops automatically with needle down.
- When you start to sew the stitch, it is important that you place the ribbon in the front of the needle in the same angle as the first part of the stitch is sewn. See illustration 2. Continue sewing until the machine stops again.
- Fold the ribbon over the stitching and pull it across the fabric so that it is directly in front of the needle again. Continue sewing until the machine stops. Fold the ribbon over again and position in front of the needle as before; continue stitching until the machine stops. Repeat this process until the desired length of stitching is achieved.

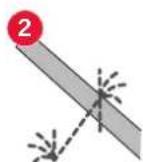
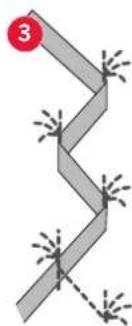
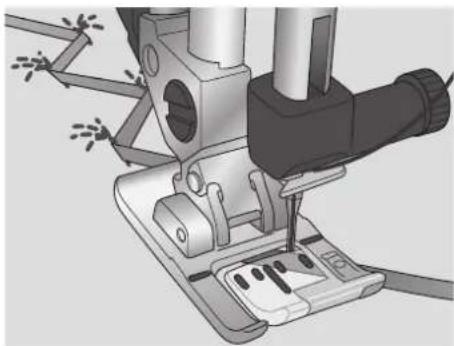
Common sewing pop-ups
System busy
When the machine is loading, saving, moving files or anything that takes time, an hour glass is shown.
Bobbin thread low
When the bobbin thread is running low, a pop-up message appears giving you an indication that the bobbin needs to be changed soon. This gives you an opportunity to plan where to stop sewing and change the bobbin. If you want to continue sewing, touch the foot control without closing the pop-up. When the bobbin is replaced with a full one, touch OK in the pop-up.
Check needle thread
The machine stops automatically if the needle thread runs out or breaks. Re-thread the needle thread, close the pop-up and start sewing again.
The Sensormatic buttonhole foot needs to be removed before doing any of the following:
- Sewing a stitch that is not a buttonhole.
- Sewing a buttonhole that can not be sewn with the Sensormatic buttonhole foot.
- Sewing an adjusted buttonhole saved without the Sensormatic buttonhole foot in your Personal menu.
Machine needs to rest
If the machine stops and this pop-up appears on the screen, the machine needs to rest. When the OK icon is enabled you can resume sewing. The sewing results will not be affected.
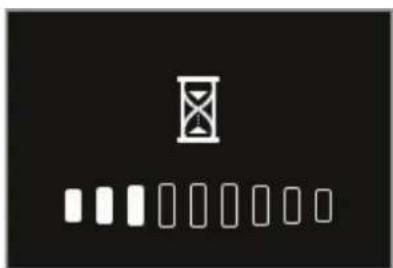
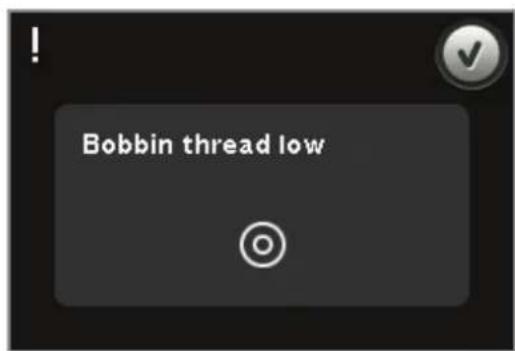
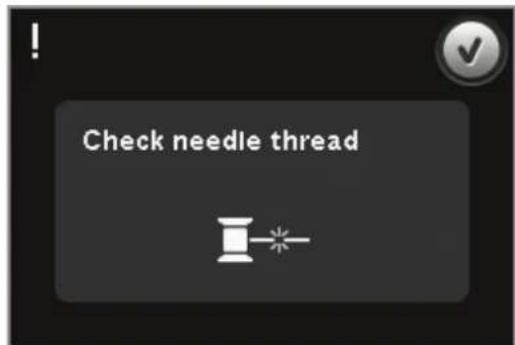
Sequencing
Sequencing
In sequencing, you can create and adjust a sequence of stitches. Combine various 9mm stitches, Maxi Stitches and stitch fonts from the machine or from an external device. Stitches made in Stitch Creator™ feature can also be inserted in a sequence.
You can create sequences up to approximately 500mm (20") long. You can see how long your actual sequence is in the upper left corner (1).
Sequencing - overview
- Approximate length of sequence
- Stitch selection area
- Arrows for scrolling through stitch categories
- Stitch field
- Delete
- Duplicate
- Mirroring side to side
- Mirroring end to end
- Horizontal preview
- Arrows (move cursor back and forth in the sequence)
- Stitch width
- Width/position toggle
- Stitch length
- Stitch density
- Sequence commands
a) tie-off
b) stop
c) cut
16. Zoom to all
17. Directional stitches
18. Selection menu
19. Stitch positioning
20. OK, close Sequencing
21. Quick help
Note: All symbols and options will not be shown at the same time.
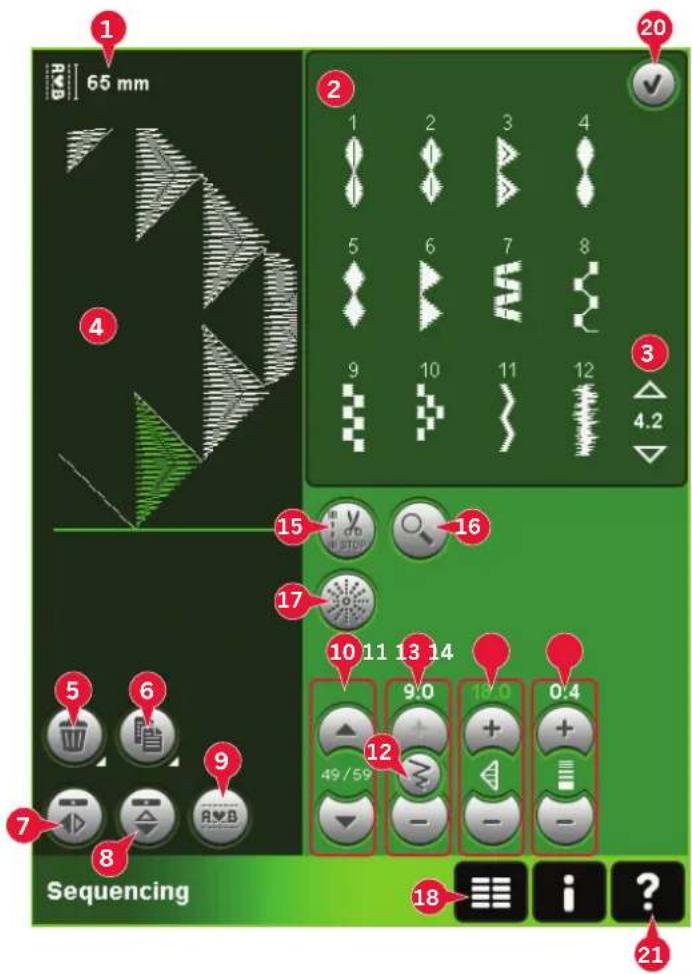
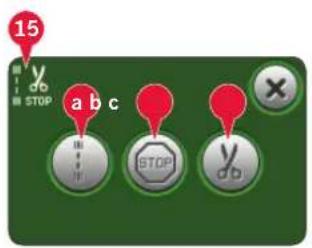
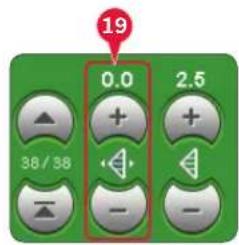
Quick help (21)
Use Quick help to receive instant information about any icon or part of the screen. Touch the Quick help icon (21) and then the icon or the part of the screen you want information about.
Open and exit sequencing
Sequencing can be used in both sewing mode and in embroidery mode. To open, just touch the sequencing symbol (A) on the option bar. To close sequencing and sew or embroider your created sequence, touch OK (20) in the top right corner.
Note: If sewing mode is active and your programmed stitch is ready to be sewn, you can also close the active function by pressing the foot control, or by pressing the start/stop button.
Not all stitches are available to use in a sequence. If you try to select an unavailable stitch, a pop-up will notify you.
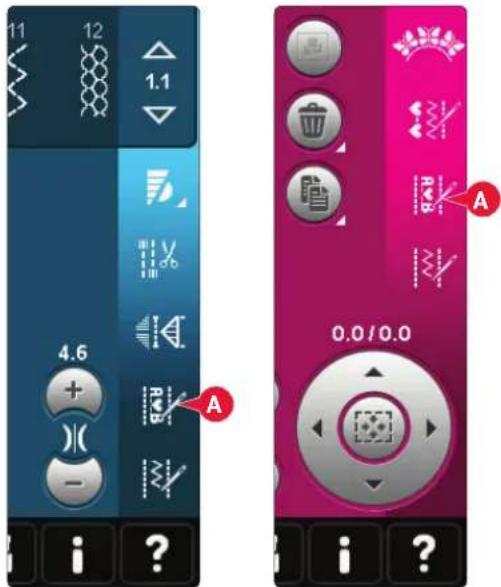
Sewing mode Embroidery mode
Create a sequence
To start creating a sequence, find the desired stitch category by scrolling with the arrows at the bottom of the stitch selection area or by opening the selection menu (18). Touch a stitch in the selection area to add it to the sequence.
To create a sequence from letters, open the selection menu (18) and load the desired stitch font. In the stitch selection area, touch the circles (B) to select upper or lower case letters, normal or numbers and special symbols.
The active position is marked by a cursor and the selected stitch or letter will be marked in green. Inserted stitches will be placed at the cursor position. Only the selected stitch can be adjusted.
Move the cursor through the sequence using the arrows (10). The number of the selected stitch and total number of stitches in the sequence are shown between the arrows.
Insert a stitch or letter
Move the cursor where you want to add a stitch or letter. Select the desired stitch you want to insert. It will be placed at the cursor position.
Adjust text and stitches
You can mirror, adjust length and width or change the density or position of the selected stitch. The adjustments work just like in sewing mode.
Delete a stitch or letter (5)
If you want to delete a stitch, move the cursor to the stitch you want to delete and touch the delete icon. Use the long touch function to delete the whole sequence.
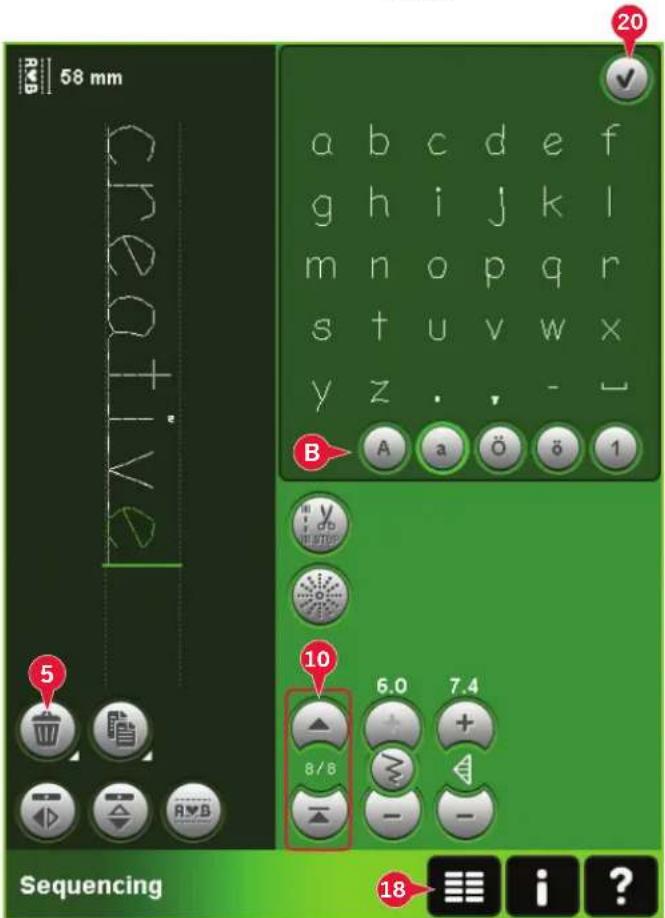
Duplicate a stitch or letter (6)
To duplicate a stitch, move the cursor to the stitch you want to duplicate. Touch the duplicate icon to copy the selected stitch.
Note: Make your adjustments on the stitch before duplicating and the copied stitch includes the adjustments.
Use the long touch function to get a pop-up where you can enter the exact number of copies you want to insert.
Replace a stitch or letter
To replace a stitch, simply select it and then touch delete and insert the new stitch. It will be placed at the cursor position.
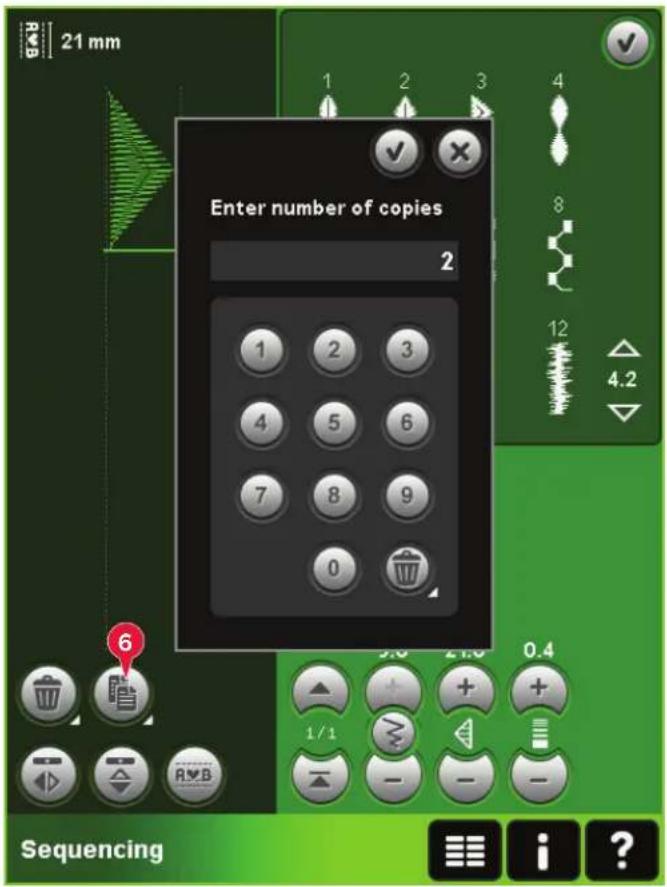
Sequence commands (15)
You can insert tie-offs, stop and thread snips commands into the sequence. These commands will be included in the sequence and will always be performed when sewing it.
Use the tie-off command (a) if you want a secure tie-off. You can insert the tie-off commands anywhere in the sequence.
Note: If creating a sequence in embroidery mode, tie-offs at the beginning and end will be added automatically, allowing you to create a sequence in between. The commands can be removed.
Insert a stop command (b) if you want the machine to stop. This is useful for example at the end of the sequence if you want to sew it only once or to create a sequence in several rows.
Insert the thread snips command (c) if you want the machine to tie-off and cut the threads and raise the presser foot.
Move the cursor to the position where you want to add a command. Select it and an icon will be added into the sequence. This confirms that the command is inserted and it also shows where the command will be performed in the sequence.
Note: The commands will appear on the screen in the order you program them.
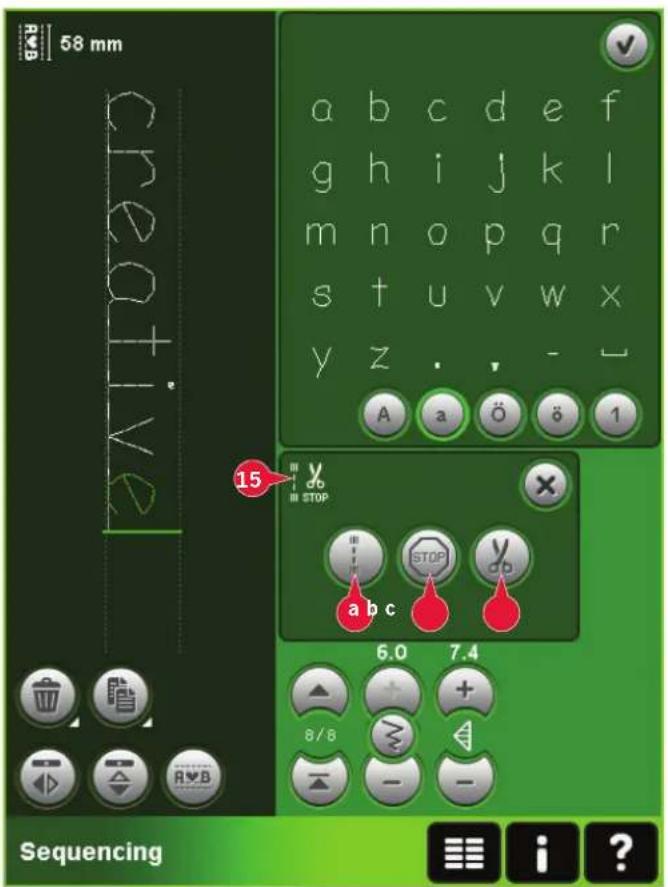
Horizontal preview (9)
To see your sequence horizontally, touch the preview icon.
Your sequence will be shown on a pop-up. If it is too long for the window, it is possible to zoom to all (A) to see the entire sequence. You can also scroll through the sequence with the arrows (B).
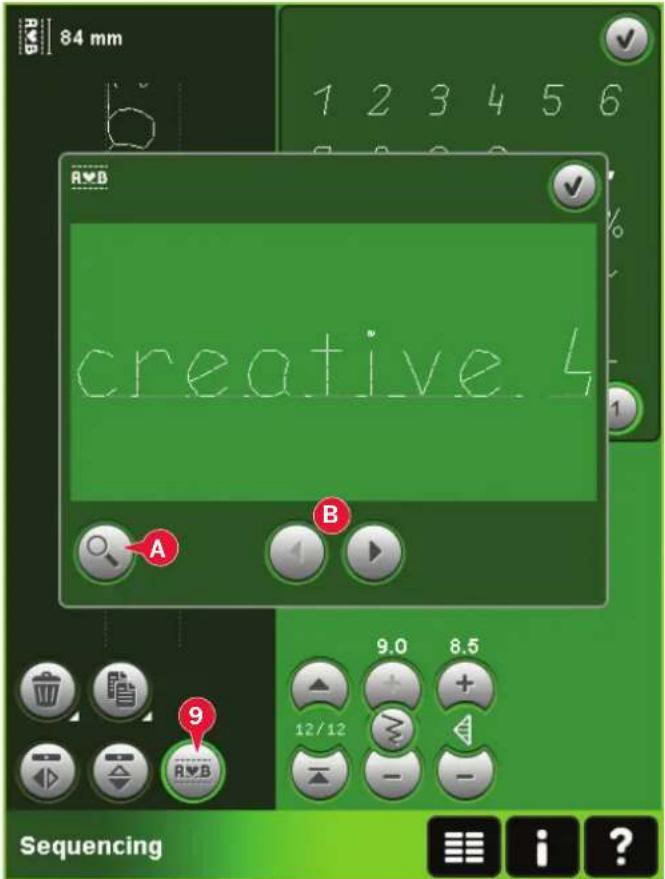
Directional stitches (17)
Add directional stitches between stitches in a sequence. These stitches make it possible to move stitches in various directions and you can create new shapes and wider large-area borders.
Directional stitches are straight stitches with a length of approximately 1mm and can be used in 16 different directions.
Open the directional stitches pop-up. The selected angle will be indicated in green (C) in the directional field. The angle will also be shown on the pop-up (D). Touch the directional field to select which angle you want to insert a stitch. You can either touch the desired line or touch and drag the green line and then release it at the desired angle.
When the intended angle is selected, touch the insert icon (E) and one stitch will be inserted in the sequence at the cursor position.
The directional stitch can be deleted, duplicated or mirrored without closing the directional stitches pop-up.
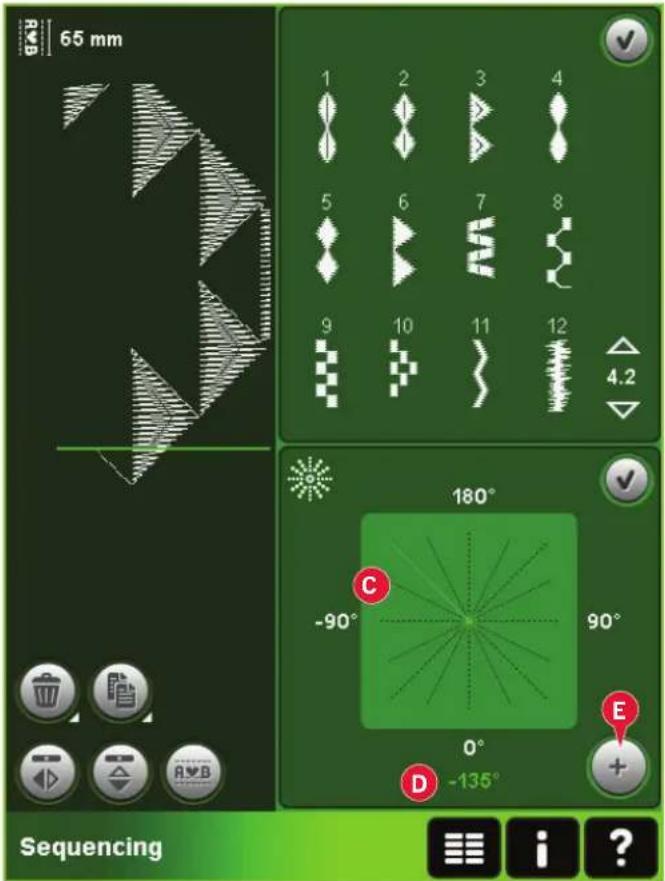
Zoom to all (16)
If the stitch or sequence is wider than what can be shown on the screen, you may use the zoom to all icon to see the whole width of the sequence.
Note: Zoom to all is only visible if the stitch or sequence is wider than the stitch field.
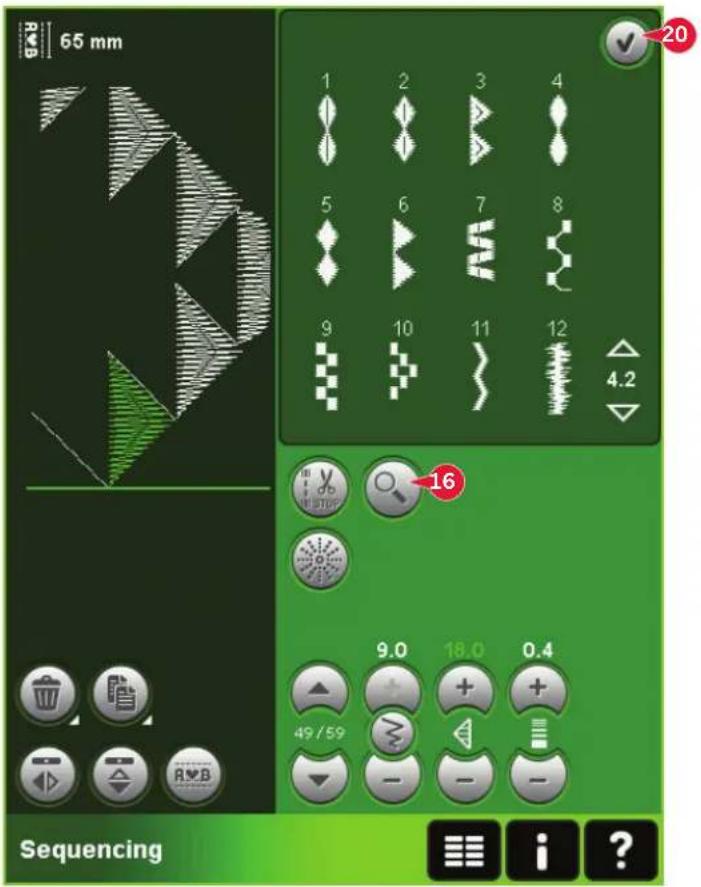
Loading and sewing a sequence
To sew the sequence touch OK (20) in the top right corner of the screen. The sequence will be loaded to the mode that was active before entering sequencing; sewing mode or Embroidery edit.
Sewing mode
In sewing mode it is possible to start sewing anywhere in the sequence. Use the arrows (A) to step through the sequence.
If selecting another stitch in sewing mode and then re-opening sequencing, your sequence will remain unchanged. Every time sequencing is closed, the sequence will be loaded to sewing mode.
Note: If you have used directional stitches to create your sequence and the total width of the sequence is more than 9mm, the maxi-stitch foot 8 for side motion stitches must be used even if the machine recommends another foot.
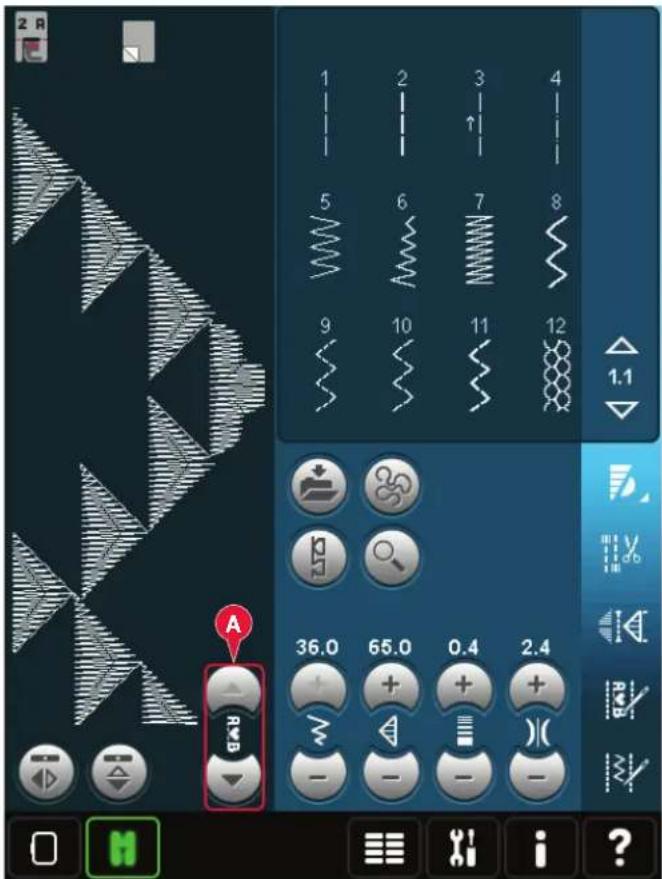
Embroidery edit
When loaded to Embroidery edit your sequence will become an embroidery design. Go to Embroidery stitch-out and stitch it out as a regular design.
If a sequence is selected and you re-open sequencing from embroidery mode, the sequence will remain unchanged. If no sequence is selected, sequencing will be empty when re-opened, ready to create something new. Every time sequencing is closed, the sequence will be loaded to Embroidery edit.
Saving a sequence
Saving a sequence is done in sewing mode or Embroidery edit. Close sequencing by touching OK (20) in the top right corner of the screen.
Embroidery mode
In embroidery mode the sequence is saved as a design. Touch the Save to Personal designs icon (A) and select Personal designs, Personal files or an external device. See page 8:8 for more information.
Sewing mode
In sewing mode sequences are saved the same way as stitches. Save the sequence by touching the Save options icon (A). You can save your sequence both in personal files (a) and personal menu (b). See page 4:9-4:10 for more information.
Note: A sequence cannot be saved as a default stitch. The icon (c) will be grayed out.
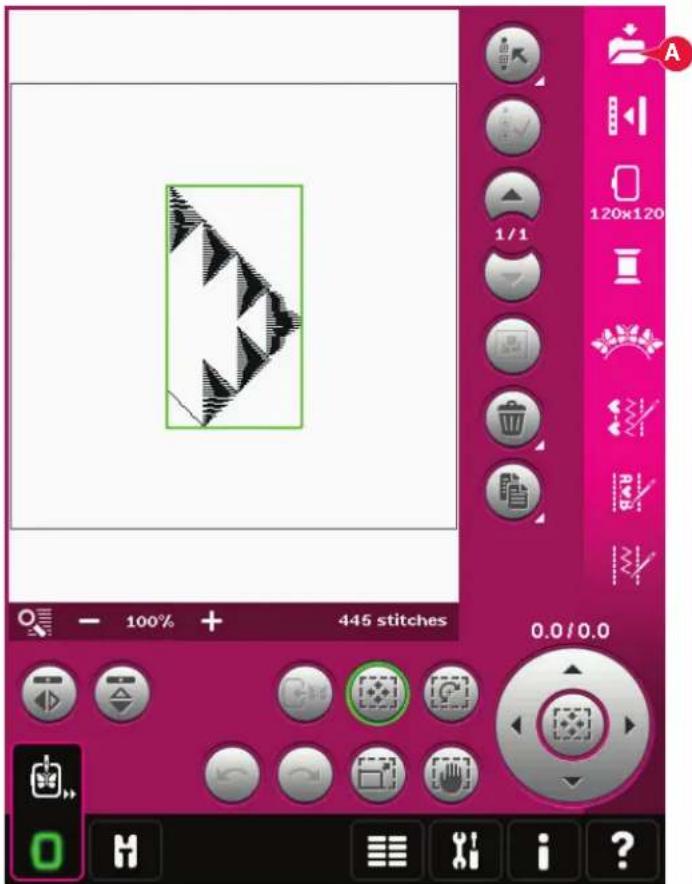
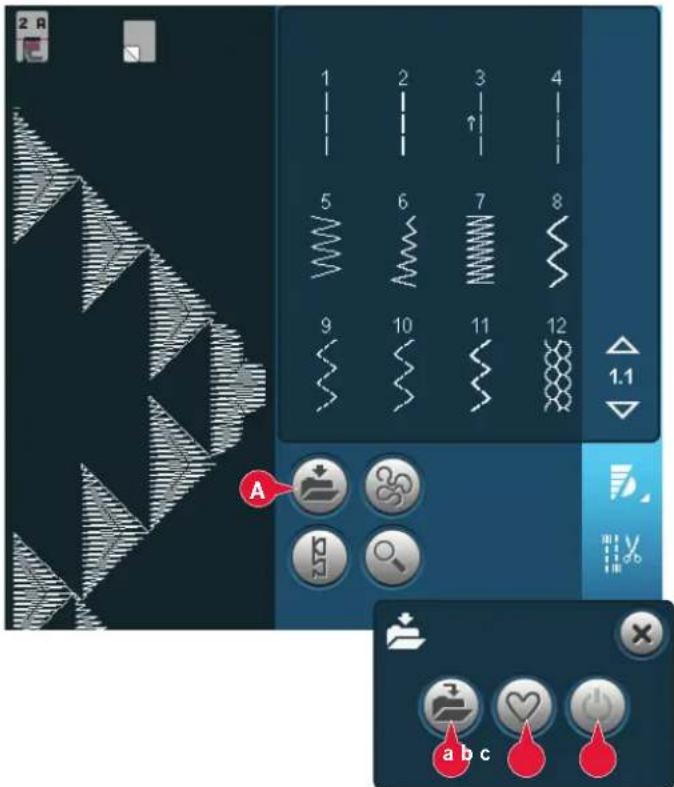
Sequence adjustments
Adjustments made in sewing mode or embroidery mode will affect the whole sequence. However, these changes will not be saved if you return to sequencing. In Embroidery edit, the position of the sequence will be kept.
To adjust individual stitches in the sequence, return to sequencing.
To use sequencing in either sewing mode or embroidery mode
Sequencing can be used in either sewing mode or embroidery mode. A sequence created when sewing mode is active will not be available when opening sequencing after activating embroidery mode and vice versa. The created sequence will not be transferred to the other mode.
A sequence created when embroidery mode is active will become an embroidery design when loaded to Embroidery edit and cannot be sewn as a stitch in sewing mode.
A sequence created in sewing mode can be loaded manually into Embroidery edit, but will then become an embroidery design.
Sequences in Stitch Creator™ feature
A sequence can be opened in Stitch Creator™ feature and modified. Note that when doing this, your sequence will become one stitch. When re-opening sequencing, it will not be possible to adjust any part of the former stitches in the sequence any more. The entire sequence will be handled as one stitch.
Common sequencing pop-ups
Not an editable stitch
Some stitches are not possible to insert in a sequence, for example buttonholes and four direction stitches.
Sequence out of range
Your programmed stitch can be up to approximately 500mm (20") long and contain up to 99 stitches. If the sequence exceeds the maximum length this pop-up will let you know.
The stitch you are trying to add will make the sequence too long.
Stitch Creator™ feature
Stitch Creator™ feature
In Stitch Creator™ feature, you can create completely new stitches and adjust every single stitch point.
Or, customize any of the built-in 9mm stitches to create your own version of that stitch. Add, erase, mirror and move stitch points directly on screen.
The width of the stitch field is 9mm and maximum feeding length is 6mm. The grid and the vertical center line will help you to create your stitch. Your stitch can be up to approximately 500mm (20") long and can be stored in your personal menu or in personal files.
Stitch Creator™ feature - overview
- Stitch selection area
- Arrows for scrolling through stitch categories
- Stitch field
- Delete
- Duplicate
6 New stitch point
- Mirroring side to side
- Mirroring end to end
- Triple stitch
- Zoom in/out
- Multi-select
- Arrows (mark previous or next stitch point)
- Touch function - move
- Touch function - pan
- Wheel
- Stitch point needle position
- Feeding length
- OK, close Stitch Creator™ feature
- Selection menu
- Quick help
Quick help (20)
Use Quick help to receive instant information about any icon or part of the screen. Touch the Quick help icon (20) and then the icon or the part of the screen you want information about.
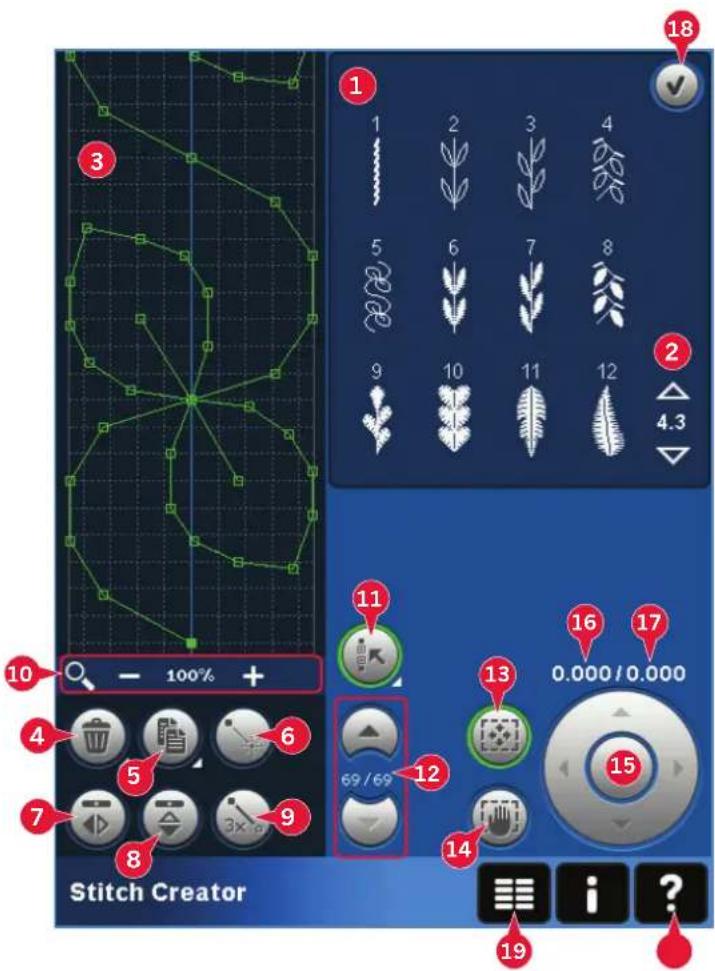
Open and exit Stitch Creator™ feature
Stitch Creator™ feature can be used in both sewing mode and in embroidery mode. To open, just touch the Stitch Creator™ feature icon (A) on the option bar. To close Stitch Creator™ feature and sew or embroider your created stitch or combination, touch OK (18) in the top right corner of the screen.
Note: If sewing mode is active and your programmed stitch is ready to be sewn, you can also close the active function by pressing the foot control, or by pressing the start/stop button.
Some stitches cannot be used with Stitch Creator™ feature. If you try to select one of these stitches, a pop-up will notify you.
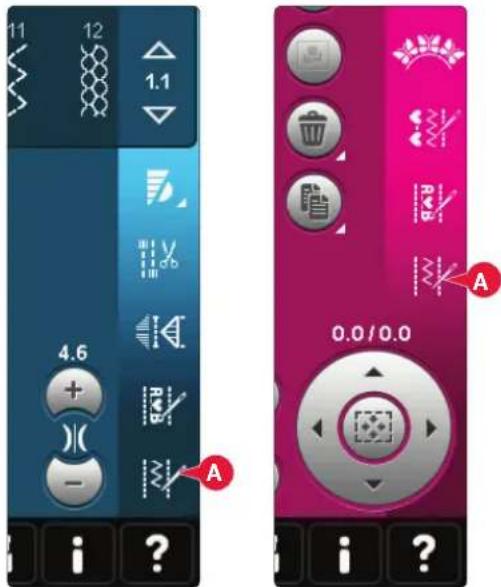
Sewing mode Embroidery mode
Definition of a stitch point
A stitch point is the point where the needle goes through the fabric. Stitches are connected by stitch points.
Each stitch point is indicated by a dot. A marked stitch point is indicated by a filled square. A selected stitch point is indicated by an outlined square.
Start creating - add a stitch or stitch point
To add a new stitch point touch the new stitch point icon (6). You can also add an existing stitch from the stitch selection area (1) or selection menu (19).
Select stitches/stitch points
To select a stitch point, just touch it on screen with your stylus. If selecting more than one stitch point, the stitches in between will automatically be selected as well.
To mark the previous or next stitch point in your stitch, use the arrows (12).
Information about the created stitch is shown between the arrows. The first number is the marked stitch point. The second number is the total number of stitch points.
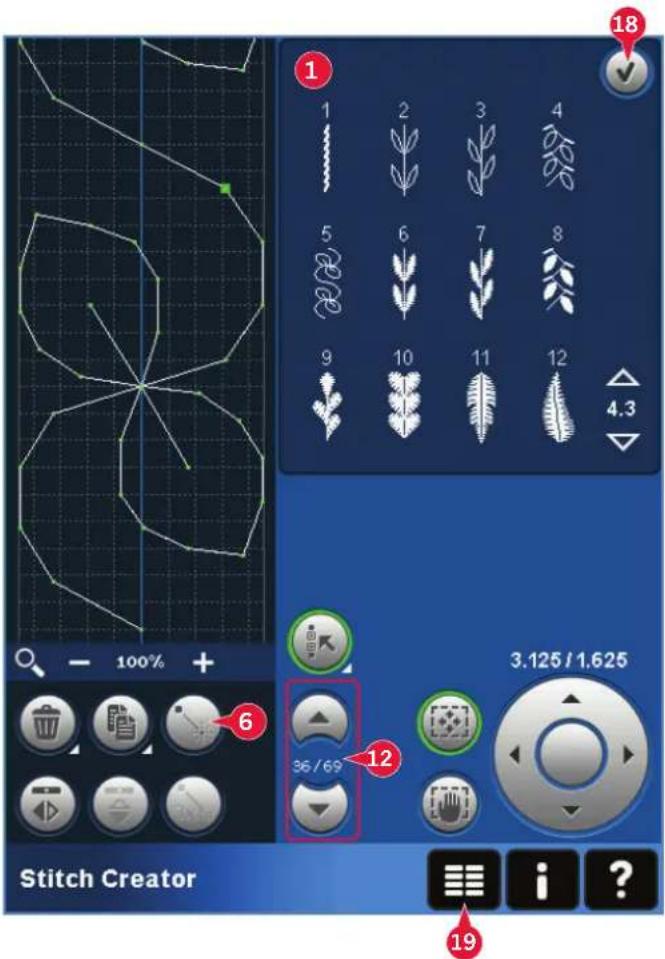
Multi-select (11)
Long touch the multi-select icon to select all stitch points at the same time.
To select the stitch points next to the marked stitch point, touch the multi-select icon and then touch the arrows (12) to select the next stitch point.
Use the up arrow to select stitch points before the marked stitch point and the down arrow to select the stitch points after the marked stitch point.
Note: If selecting stitch points using the up arrow, you can deselect them by touching the down arrow.
Delete selected stitch point (4)
If you want to delete a single stitch point, select the stitch point and touch the delete icon. If more than one stitch point is selected, they will all be deleted when touching the delete icon.
Use the long touch function to delete all stitch points in the stitch field.
Duplicate selected stitch point (5)
If you want to duplicate a stitch point, select the stitch point and use the duplicate icon to create a copy.
If several stitch points are selected, all stitch points will be duplicated and inserted after the marked stitch point.
Use the long touch function to get a pop-up where you can enter the exact number of duplicates you want to insert.
Insert a new stitch point (6)
Touch this icon to insert one single stitch point. The two stitch points will create a new stitch.
Zoom (10)
When using the zoom icons, the focus will be on the marked stitch point.
The distance between the grid lines equals 1mm on the fabric. If you zoom in on the stitch field, thinner grid lines will appear. The distance between these lines equals 0.5mm. If zooming out, only the edge lines of the stitch field will be visible.
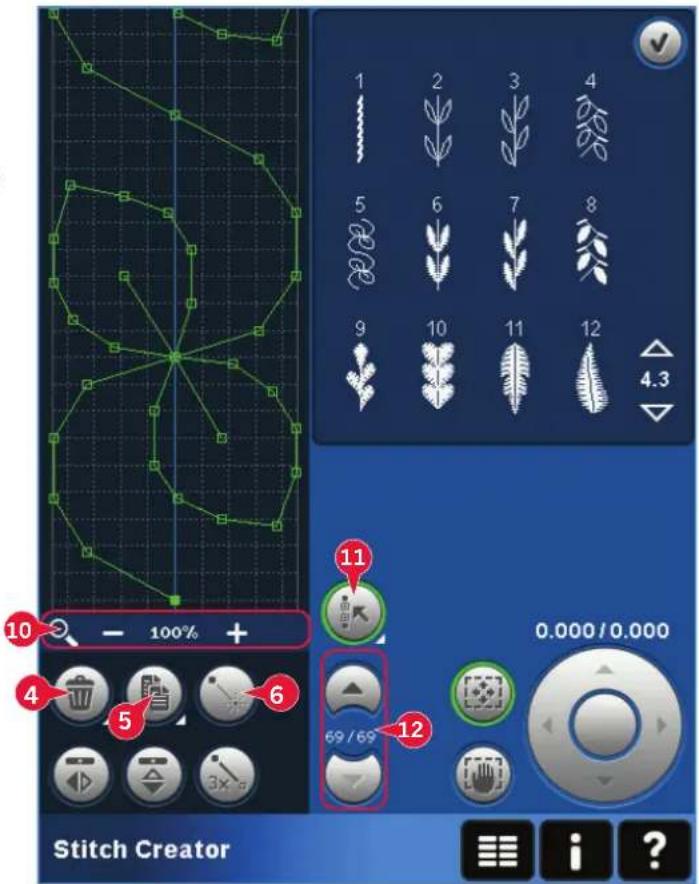
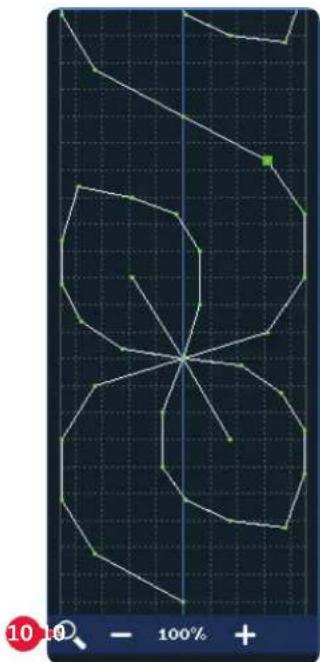
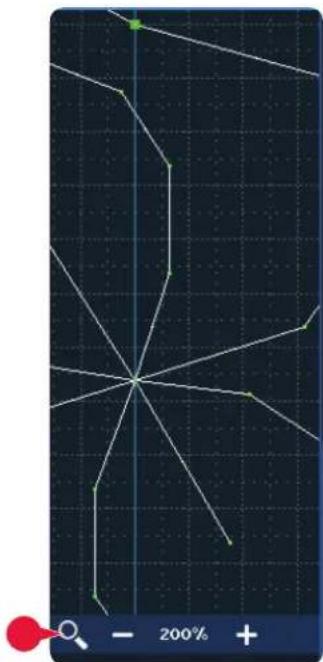
Mirroring side to side (7)
The selected stitch point(s) will be mirrored side to side.
Mirroring end to end (8)
The selected stitch points will be mirrored end to end.
Note: Only enabled if more than one stitch point is selected.
Triple stitch (9)
Touch the triple stitch icon and the selected stitch(es) will be tripled.
Note: Only enabled if more than one stitch point is selected.
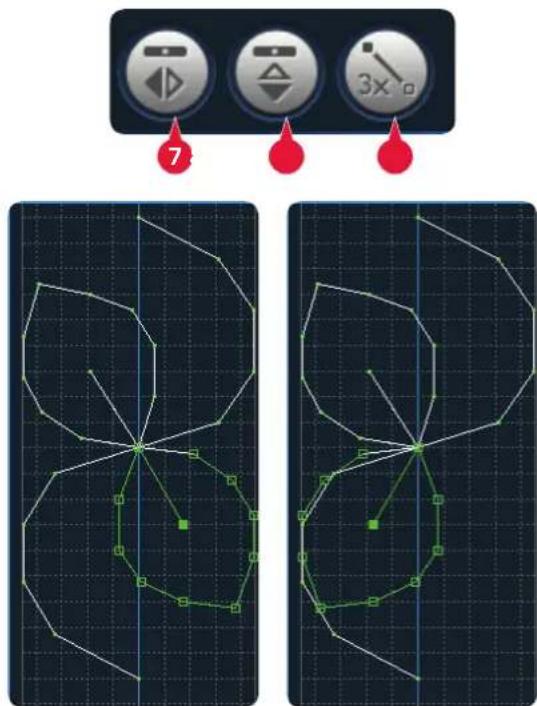
- Mirroring side to side
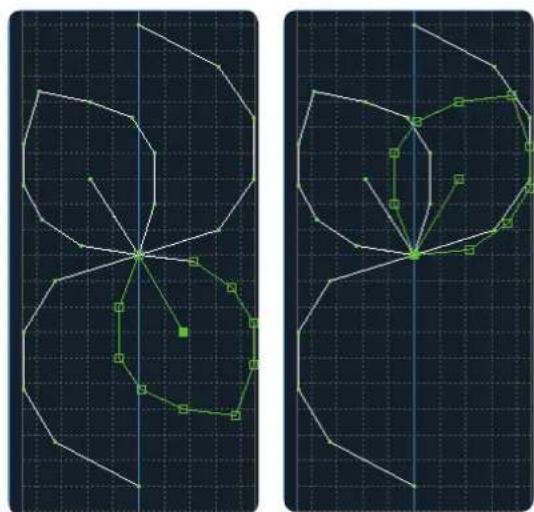
- Mirroring end to end
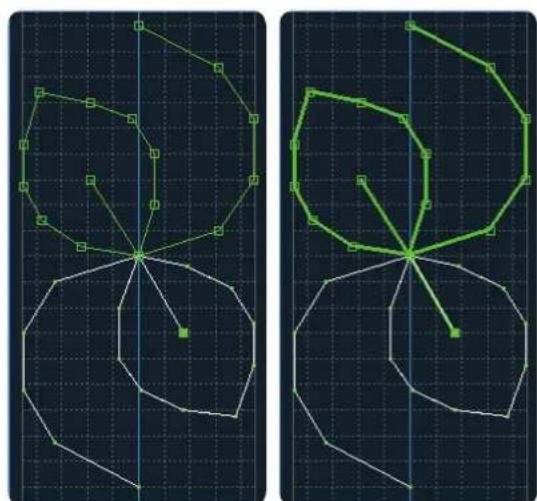
- Triple stitch
Touch functions
Use your stylus to make changes directly on screen by touching and dragging in the stitch field. You can pan and move depending on which touch function is activated. You can also use the arrows in the wheel to make minor adjustments.
Move (13)
You can move the selected stitch or stitch points using your stylus on the screen or touch the arrows in the wheel (15).
Pan (14)
You can either pan using your stylus on the screen or touch the arrows in the wheel (15).
Note: You can not pan outside the sewing area, i.e. when scale is 100% or less, you can not pan sideways.
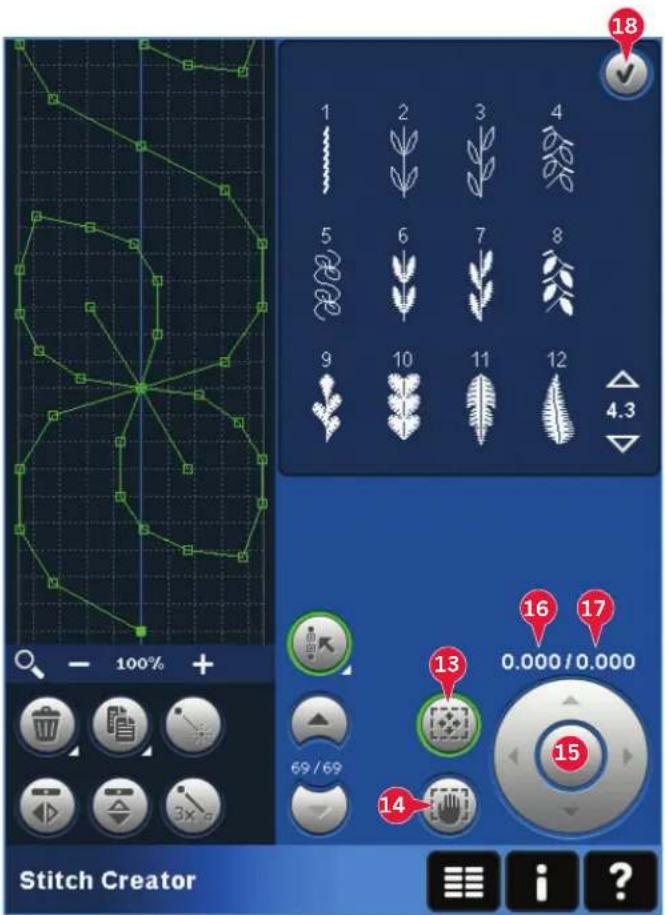
Position of the marked stitch point
The number to the left above the wheel (16) shows the actual needle position from the center line for the marked stitch point.
The number to the right above the wheel (17) shows the actual feeding length from the previous stitch point.
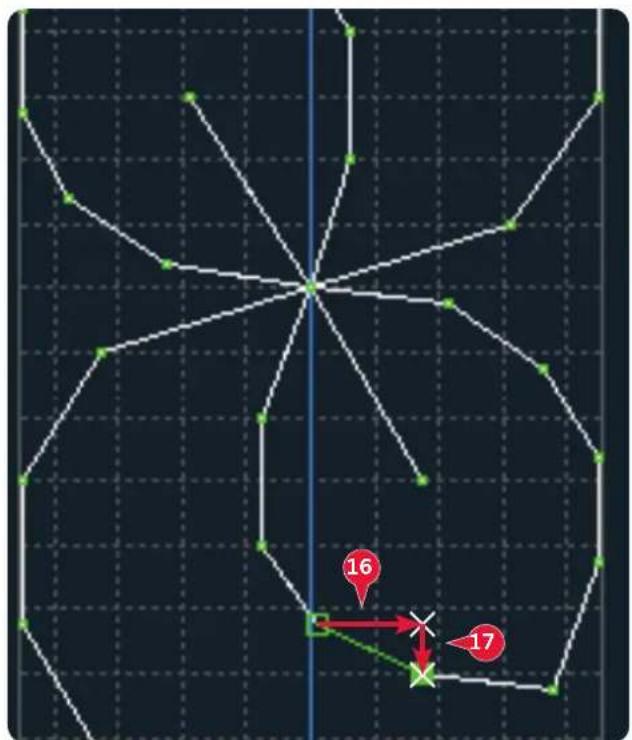
Loading and sewing a stitch
To sew the created stitch touch OK (18) in the top right corner of the screen. The stitch will be loaded to the mode that was active when entering Stitch Creator™ feature; sewing mode or Embroidery edit.
Sewing mode
If sewing mode is active when closing Stitch Creator ™ feature, your stitch will be loaded to sewing mode and is ready to be sewn.
If selecting another stitch in sewing mode and then re-opening Stitch Creator™ feature, your created stitch will remain unchanged. Every time Stitch Creator™ feature is closed, the stitch will be loaded to sewing mode.
Embroidery edit
When loaded to Embroidery edit your stitch will become an embroidery design. Go to Embroidery stitch-out and stitch it out as a regular design.
If a stitch is selected and you re-open Stitch Creator™ feature from embroidery mode, the stitch will remain unchanged. If no stitch is selected, Stitch Creator™ feature will be empty when re-opened, ready to create something new. Every time Stitch Creator™ feature is closed, the stitch will be loaded to Embroidery edit.
Saving a stitch
Saving a stitch is done in sewing mode or Embroidery edit. Close Stitch Creator™ feature by touching OK (18) in the top right corner of the screen.
Sewing mode
In sewing mode stitches created in Stitch Creator™ feature are saved the same way as regular stitches. Save the stitch by touching the Save options icon (A). You can save your stitch both in personal files (a) and personal menu (b). See page 4:9-4:10 for more information.
Note: A stitch created in Stitch Creator™ feature cannot be saved as a default stitch. The icon (c) will be grayed out.
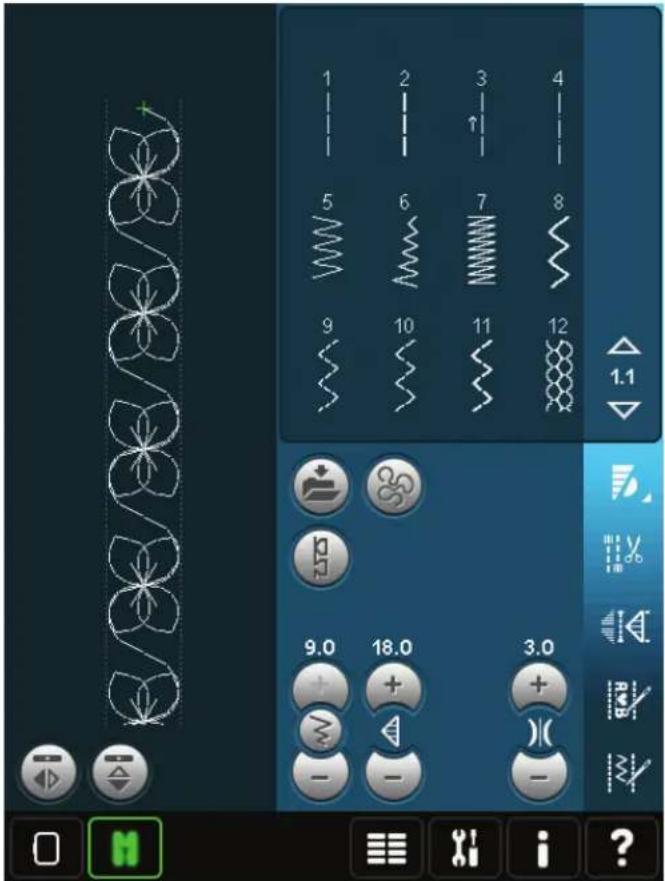
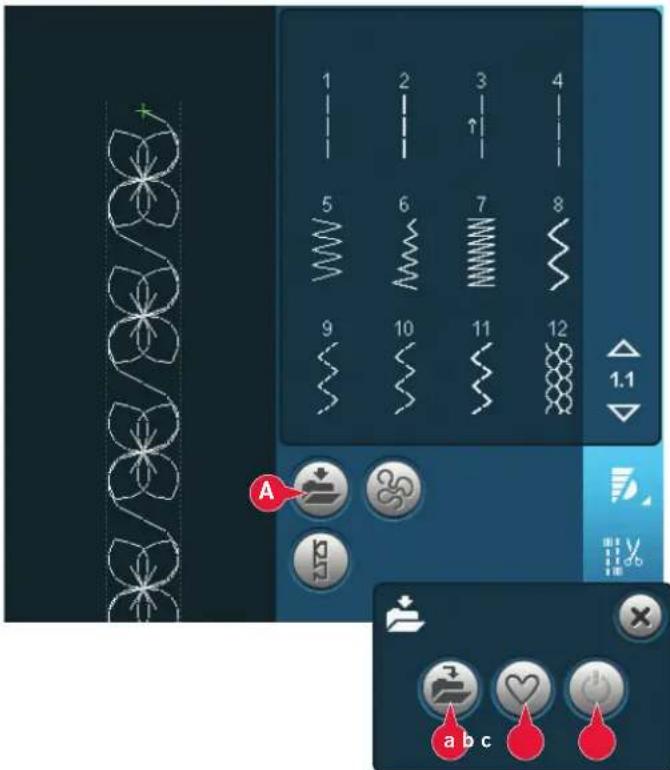
Embroidery mode
In embroidery mode the stitch is saved as a design. Touch the Save to Personal designs icon (A) and select Personal designs, Personal files or Devices. See page 8:8 for more information.
To use Stitch Creator™ feature in either sewing mode or embroidery mode
Stitch Creator™ feature can be used in either sewing mode or embroidery mode. A stitch created when sewing mode is active will not be available when opening Stitch Creator™ feature after activating embroidery mode and vice versa. The created stitch will not be transferred to the other mode.
A stitch created when embroidery mode is active will become an embroidery design when loaded to Embroidery edit and cannot be sewn as a stitch in sewing mode.
A stitch created in sewing mode can be loaded manually into Embroidery edit, but will then become an embroidery design.
Using created stitches in sequencing
A stitch created in Stitch Creator™ feature can be used as part of a sequence. In sequencing, open selection menu and locate your saved stitch. The stitch will be inserted at the cursor position in the sequence.
Common Stitch Creator™ feature pop-ups
Not an editable stitch
Some stitches are not available to edit in Stitch Creator™ feature. Buttonholes, Maxi Stitches, stacking stitches, ribbon stitches and four direction stitches cannot be opened in Stitch Creator™ feature.
Sequence out of range
Your programmed stitch can be up to approximately 500mm (20") long. If the sequence exceeds the maximum length this pop-up will let you know.
The stitch or stitch point you are trying to add will make the sequence too long.
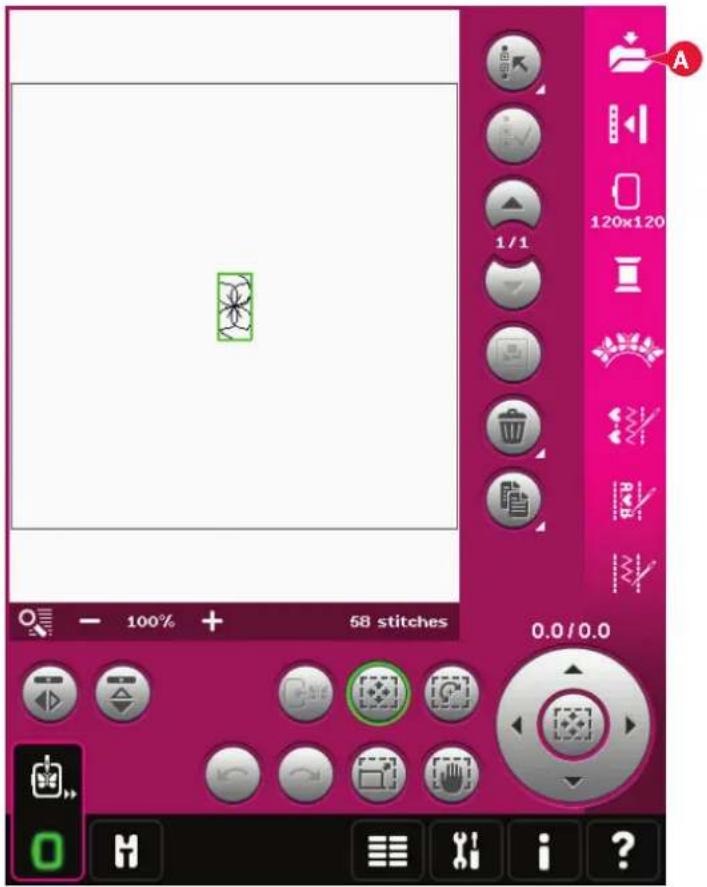
Embroidery mode – preparations
Embroidery mode - preparations
The PFAFF ® creative ™ 4.5 sewing machine has all of the top features for every sewing need. For those who want more, it also has embroidery capabilities. There are two optional embroidery units that can be used: one large (part number 850135-096, type BE20) and one small unit (part number 850151-096, type BE16).
The embroidery units are available at your local authorized PFAFF ® dealer.
The selection of hoops differs depending on which embroidery unit you choose for your PFAFF® creative "4.5 sewing and embroidery machine.
The following hoops are standard accessories for the large embroidery unit:
• creative™ 120 Square Hoop (120x120 mm)
• creative™ Master Hoop (240x150 mm)
• creative™ Deluxe Hoop (360x200 mm)
The following hoops are standard accessories for the small embroidery unit:
• creative™ 120 Square Hoop (120x120 mm)
• creative™ Elite Hoop (260x200 mm)
Several optional hoops are avialable at your authorized PFAFF ® dealer.
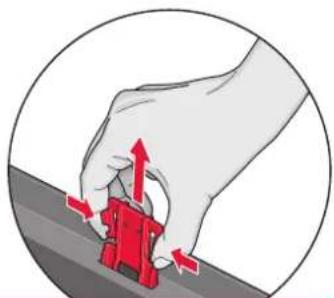
When removing the embroidery unit from the box for the first time, be sure the shipping brace on the underside of the embroidery unit has been removed.
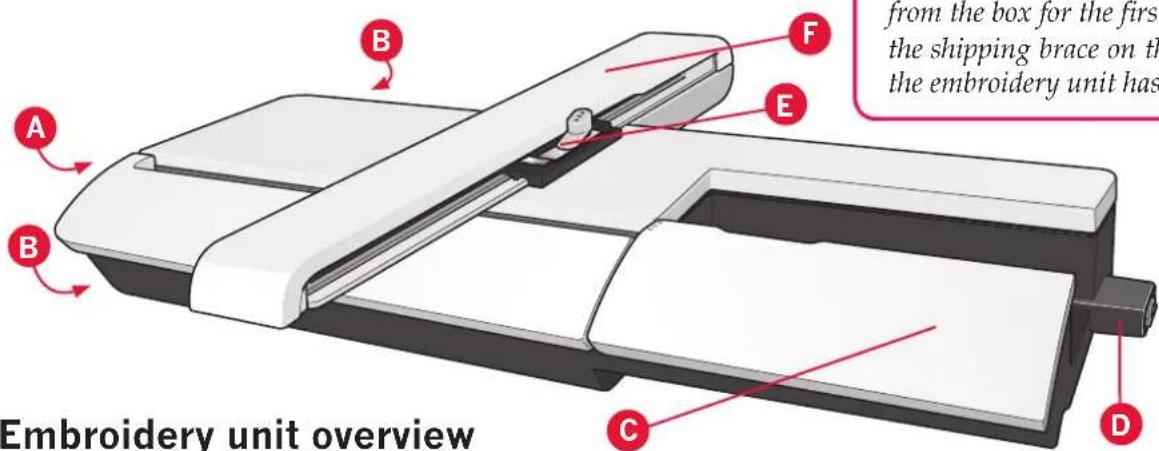
Embroidery unit overview
(type BE20)
A Embroidery unit release button
B Level adjusting feet
C Embroidery unit accessory tray (only on the large embroidery unit, part number 850 135-096)
D Embroidery unit socket
E Embroidery hoop connection assembly
F Embroidery arm
Embroidery unit accessory tray
Use the tray in the embroidery unit to store accessories used for embroidering.
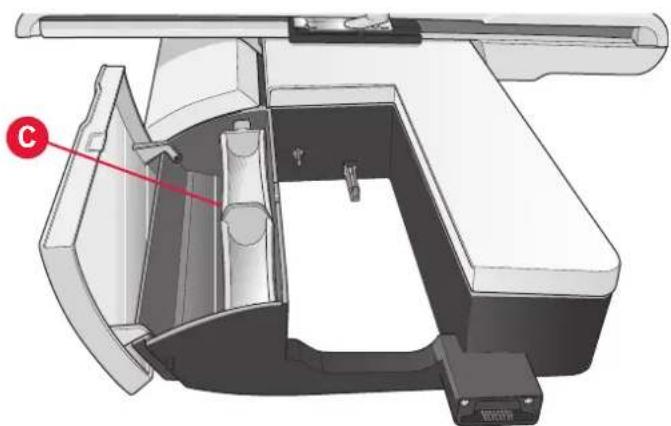
Embroidery hoop overview
G Embroidery hoop connector
H Outer hoop
I Inner hoop
J Quick release
K Retaining screw
L Ribs for fitting the clips
M Center marks
Built-in designs
About 270 designs are included in the memory in your machine.
Embroidery collection
Page through the creative™ 4.5 Embroidery collection for designs and fonts.
The design number, stitch count (number of stitches in the design) and the design size are displayed next to each design. The suggested thread colors for each color number are shown.
Connect the embroidery unit
There is a covered socket behind the free-arm, see picture. The cover will open automatically when connecting the embroidery unit.
- Slide the accessory tray off.
-
Slide the embroidery unit onto the free arm of the machine until it plugs firmly into the socket. If needed, use the level adjusting feet so that the machine and embroidery unit are even. If the machine is turned off, turn it on.
-
A pop-up tells you to clear the embroidery area and remove the hoop for positioning. Touch OK. The machine will calibrate and the embroidery arm will move to the ready position. This calibration will set your embroidery functions each time you slide on the embroidery unit.
Make sure not to calibrate the machine with the embroidery hoop attached as this can damage the needle, presser foot, hoop and/or the embroidery unit. Be sure to clear all materials from around the machine before calibrating so that the embroidery arm does not bump into anything while calibrating.
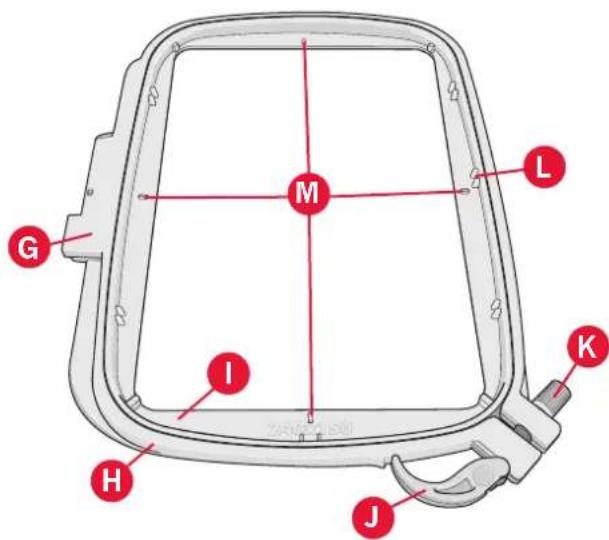
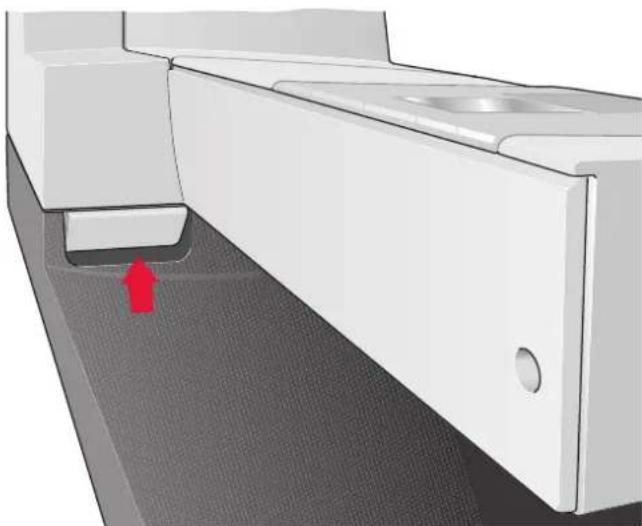
Remove the embroidery unit
- To store the embroidery unit in the embroidery case, move the embroidery arm to park position by selecting park position on the screen in either Embroidery edit or Embroidery stitch-out.
- Press the button at the left, underneath the embroidery unit (A) and slide the unit to the left to remove it.
- The cover of the socket closes automatically.
- Store the embroidery unit in the original packing material, place in the soft carrying bag.
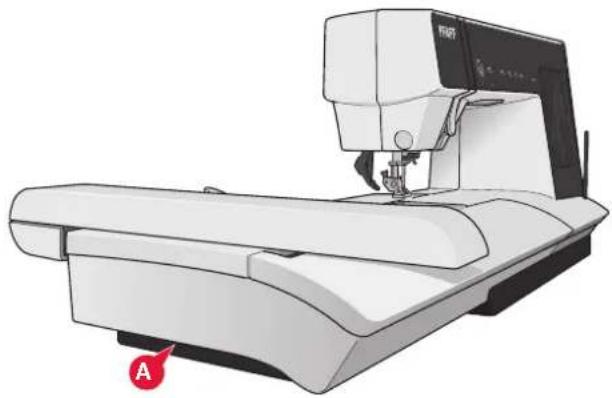
- Disengage the IDT ™ system (A). Remove the standard presser foot (B). Carefully loosen the screw (C) until the cross-hole (D) is accessible.
- Hold the foot in front of the needle. Turn the hand wheel to lower the needle into the hole of the foot and through the needle plate.
- Turn the foot behind the needle screw (E) and squeeze the foot to insert the pin of the foot into the cross-hole (D) of the presser foot holder.
- Push the foot into the hole as far as it will go while tightening the screw (C).
To remove the embroidery foot loosen the screw (C), squeeze the embroidery foot together and pull it out to the right. Tighten the screw.
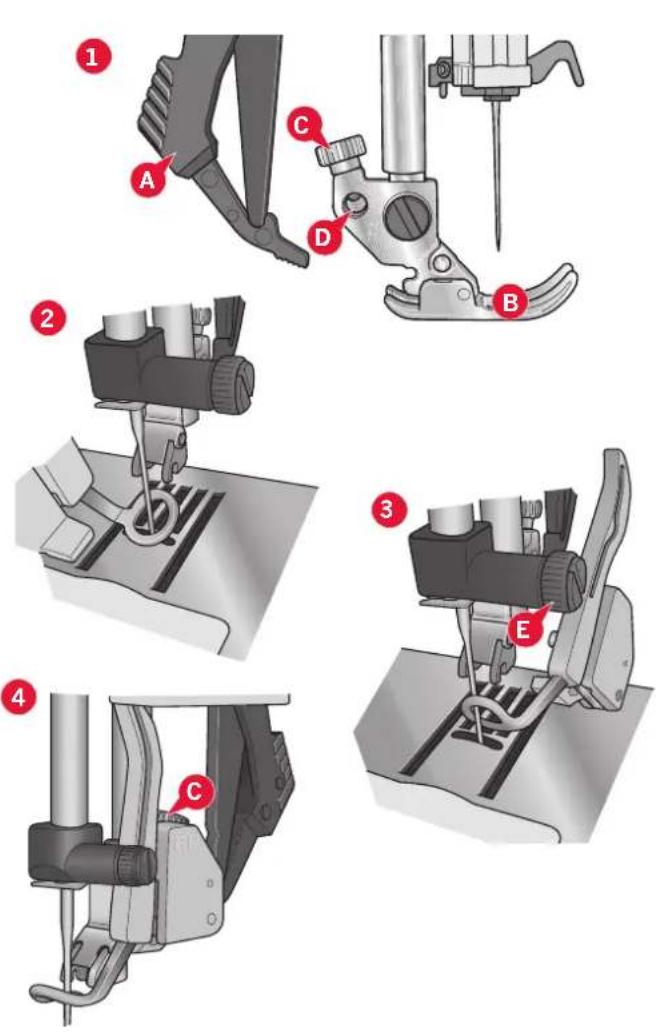
Slide on the hoop
Make sure that the accessory tray (only on the large embroidery unit, type BE20) on the embroidery unit is closed. Slide the hoop onto the embroidery unit from front to back until it clicks into place.
The marked center point on the design should match the starting point of the needle. If minor adjustments are needed use the icons on the screen (See chapter 8).
To remove the hoop from the embroidery arm, press the grey button on the hoop connection assembly and slide the hoop towards you.
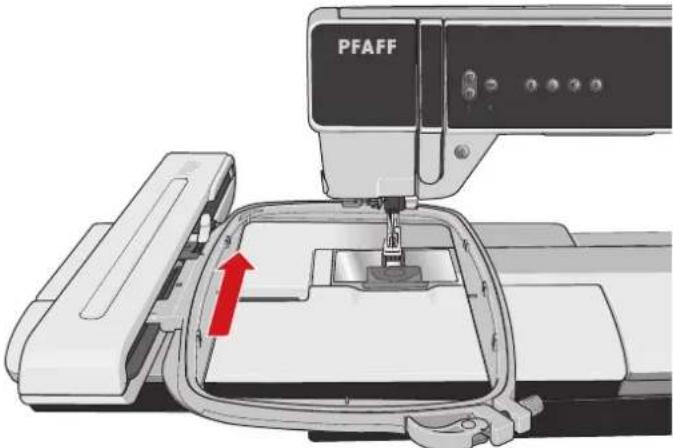
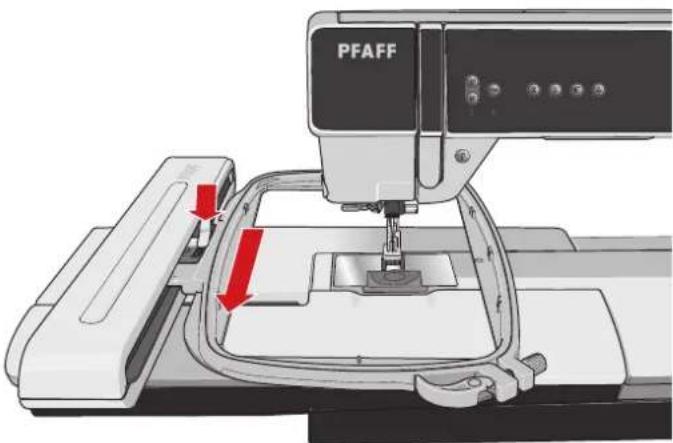
To hoop the fabric
For the best embroidery results, place a layer of stabilizer beneath the fabric. When hooping stabilizer and fabric make sure that they are smooth and securely hooped.
- Open the quick release (A) on the outer hoop. Remove the inner hoop. Place the outer hoop on a firm flat surface with the screw on the lower right. There is a small arrow in the center of the lower edge of the hoop which will line up with a small arrow on the inner hoop.
- Place stabilizer and the fabric, with the right sides facing up, on top of the outer hoop. Place the inner hoop on top of the fabric with the small arrow at the bottom edge.
- Push the inner hoop firmly into the outer hoop.
- Close the quick release. Adjust the pressure of the outer hoop by turning the retaining screw (B). The fabric should be taut in the hoop for the best results.
Note: When embroidering additional designs on the same fabric, open the quick release, move the hoop to the new position on the fabric and close the quick release.
When changing type of fabric, you might need to adjust the pressure using the retaining screw. Do not force the quick release.
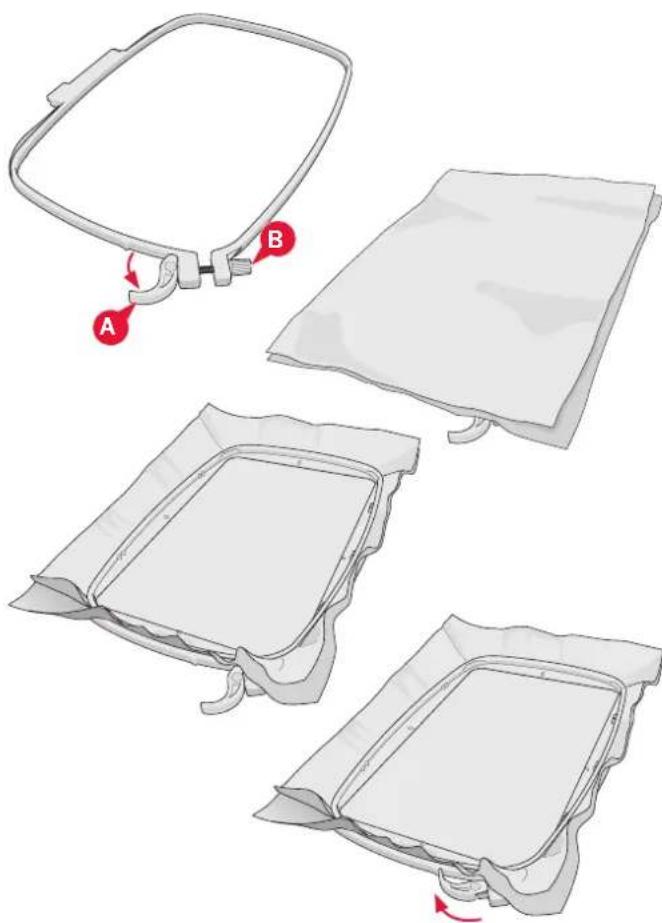
Getting started embroidering
- After attaching the embroidery unit and embroidery foot, insert a bobbin with lightweight bobbin thread.
Note: Make sure that the IDT TM system is disengaged.
-
To select a design, open selection menu and touch the design menu icon (A). Locate desired design and touch it once to load to Embroidery edit.
-
The machine automatically switches to Embroidery edit. The design is placed in the center of the hoop.
- Hoop a piece of fabric and slide on the hoop.
- Switch from Embroidery edit to Embroidery stitch-out by touching the embroidery toggle icon (B) on the task bar.
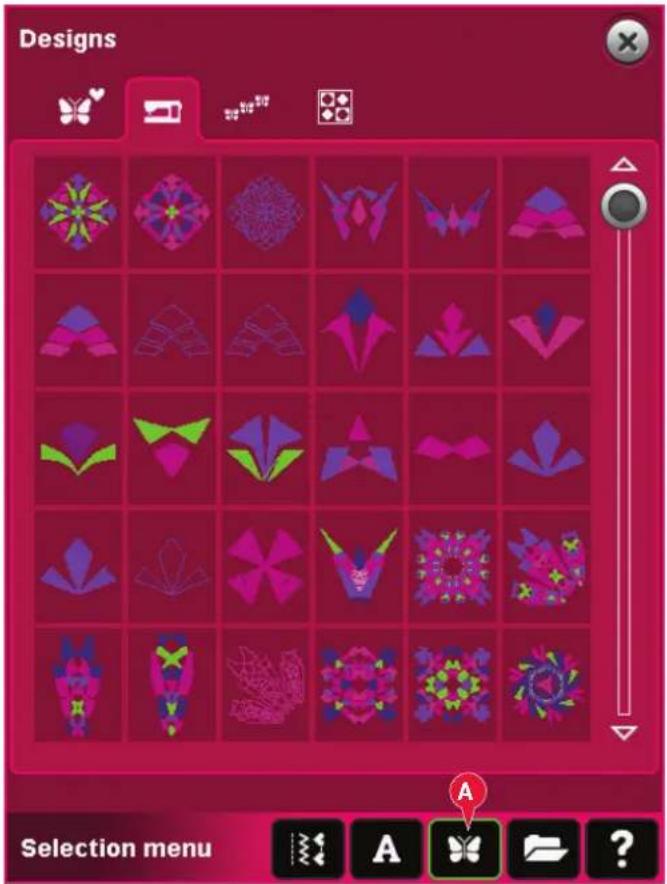
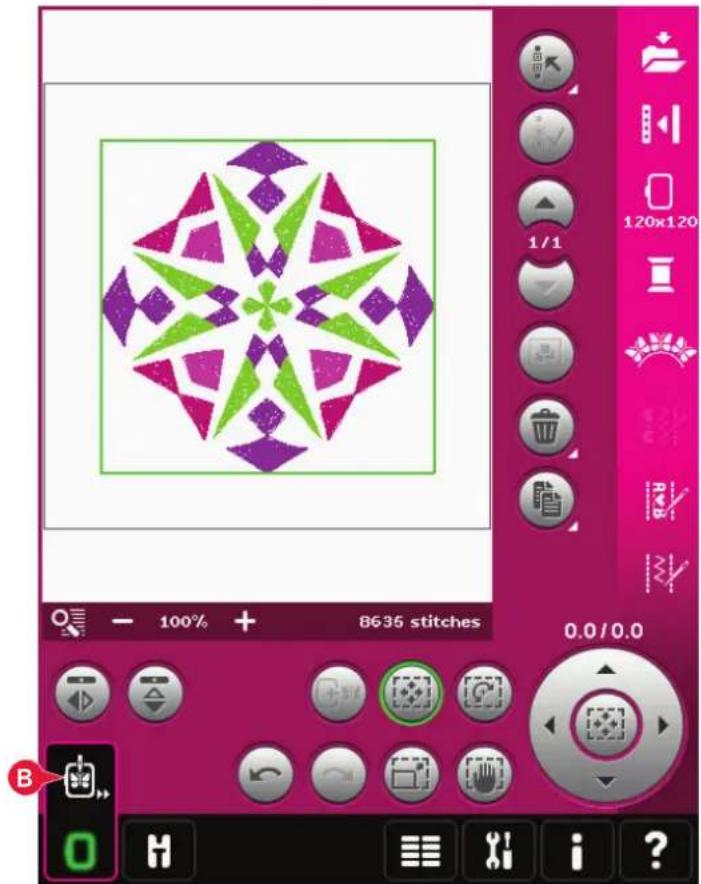
- Thread the machine with the first color in the color list (C).
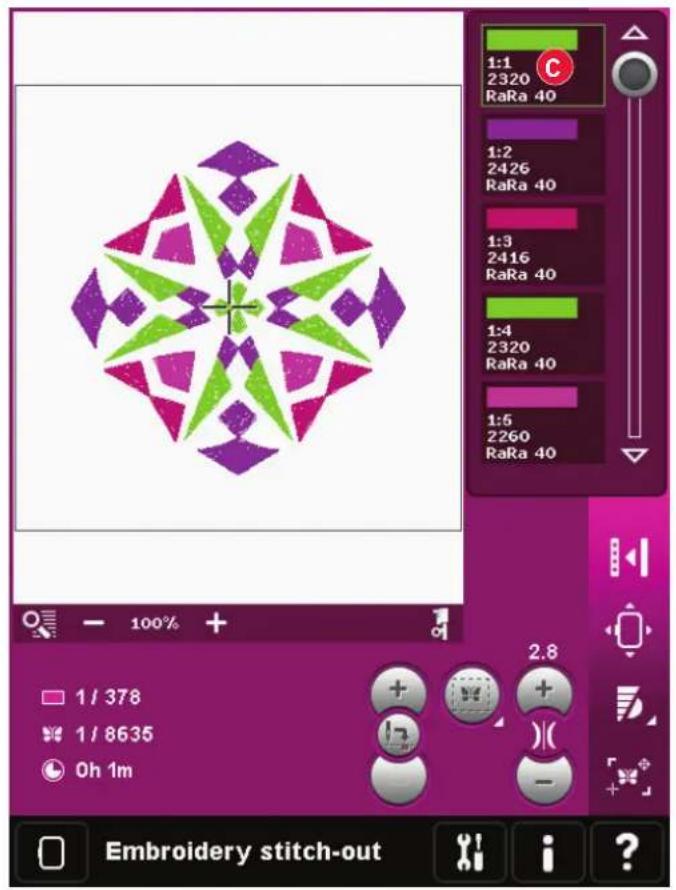
- Clear sufficient space to accommodate movement of the embroidery arm and the hoop. Hold the needle thread and touch the start/stop button (D) or the foot control. The machine starts embroidering.
Note: This machine features the automatic function Cut jump stitches. When activated the machine trims the top jump stitch threads and pulls the thread ends to the underside of the fabric. The default setting is on. To turn it off, go to the Settings menu, Machine settings and deselect Cut jump stitches. Read more about Cut jump stitches in chapter 3.
- If Cut jump stitches is not activated the machine will stop after stitching a few stitches. A pop-up appears on the screen asking you to cut the thread end. Cut the thread and press start/stop to continue embroidering.
- When the first color is completed, your machine stops. A pop-up appears asking you to change color. Re-thread with the next color and continue embroidering by pressing start/stop.
Each color segment is tied off at the end and the needle thread is cut.
- When the embroidery is completed, your machine cuts the needle and bobbin thread and stops. The needle and presser foot raise automatically for easy removal of the hoop.
A pop-up informs you that your embroidery is finished. Touch OK to keep the design loaded and stay in Embroidery stitch-out.
Embroidery mode
– edit
Embroidery mode - edit
In Embroidery edit you can adjust, combine, save, delete and restore designs. You do not need to have the embroidery unit connected to your machine to edit your designs. The loaded design(s) are shown in the embroidery field (1).
Embroidery edit - overview
- Embroidery field
- Zoom Options
- Multi-select
- Select/deselect design
- Arrows
- Group
- Delete
- Duplicate
- Total number of stitches
- Mirroring side to side
- Mirroring end to end
- Move design into hoop
- Undo
- Redo
- Touch function - move
- Touch function - rotate
- Touch function - scale
- Touch function - pan
- Wheel
- Wheel center icon
- Save to Personal designs
- More options
- Select hoop
- Thread color edit
- Basic Shape Creator TM feature
- Embroidery stitch editor
- Sequencing
- Stitch Creator™ feature
- Selection menu
- Quick help
Note: All symbols and options will not be shown at the same time.
Quick help (30)
Use Quick help to receive instant information about any icon or part of the screen. Touch the Quick help icon (30) and then the icon or the part of the screen you want information about.
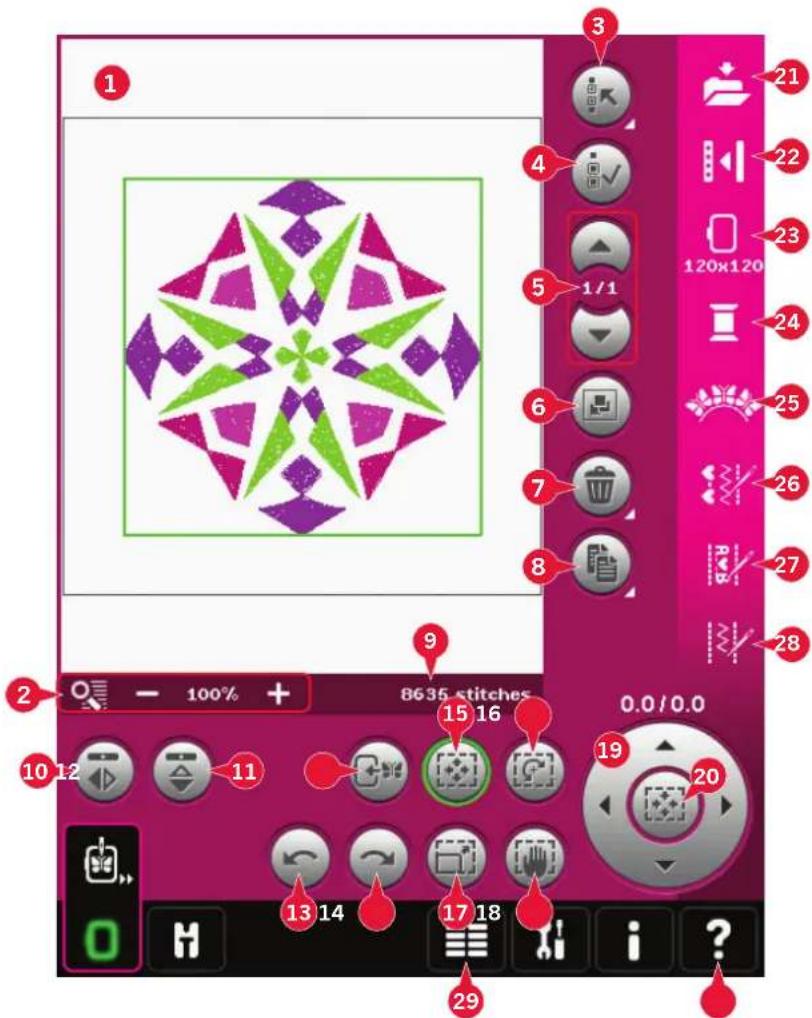
Load a design
To load a design, open the selection menu (29). Select designs (A) from the selection bar, then choose one of the following four tabs:
Personal designs (B)
Designs that you have created, adjusted and/or combined and saved.
Built-in machine designs (C)
Designs that are stored in the permanent sewing machine memory.
Mini designs that are stored in the permanent sewing machine memory.
Built-in quilt designs (E)
Designs created especially for quilting. Stored in the permanent memory.
Available designs from the selected tab will be shown on screen. Touch the desired design to load it into Embroidery edit.
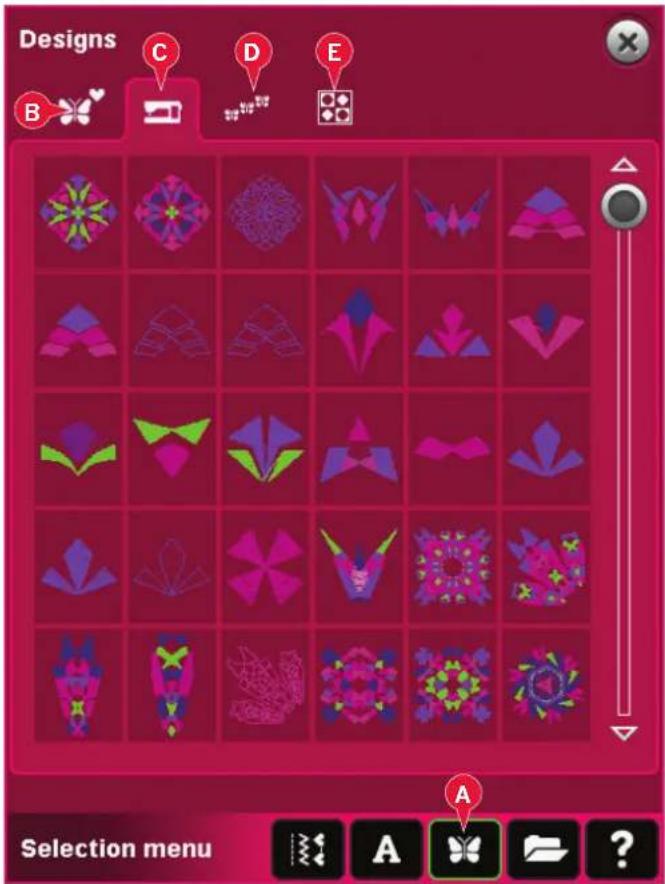
Load a font
Text can be created both with embroidery fonts and stitch fonts. Load a font by selecting fonts (F) from the selection bar and touch your desired font on the screen.
Embroidery fonts are indicated by a dark back-ground. The font will be loaded into embroidery text editor.
Stitch fonts are indicated by a lighter background. The font will be loaded to sequencing. The text created will then be loaded into Embroidery edit.
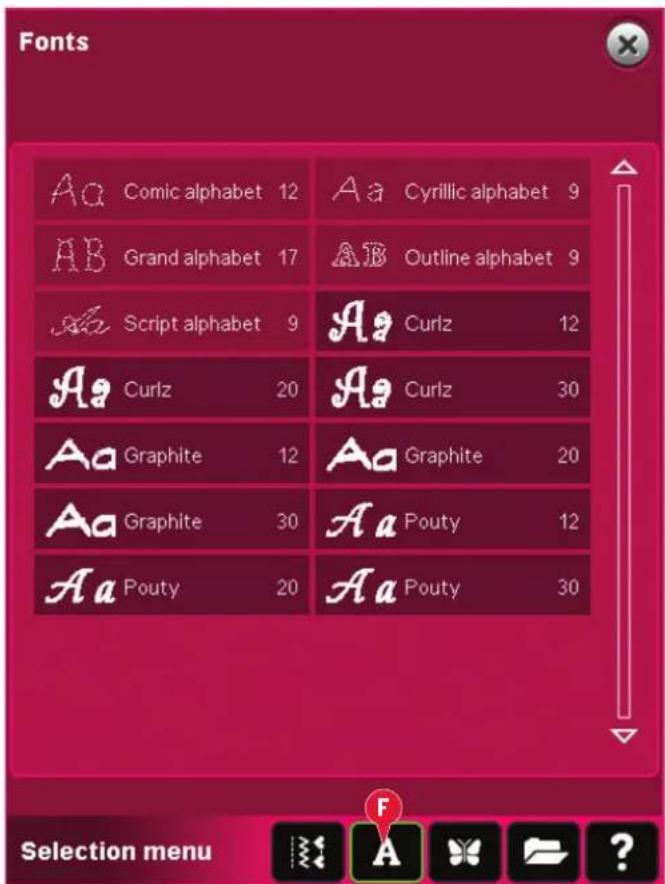
Load a stitch
To load a stitch, select stitches (A) from the selection bar. Select a category and then a subcategory. Touch your desired stitch on the screen to load to Embroidery edit.
It is possible to load previously stored patchwork, single stitch and tapering programs into Embroidery edit to stitch-out in the hoop.
If the stitch contains tapering, the stitch combination will be converted to an embroidery design.
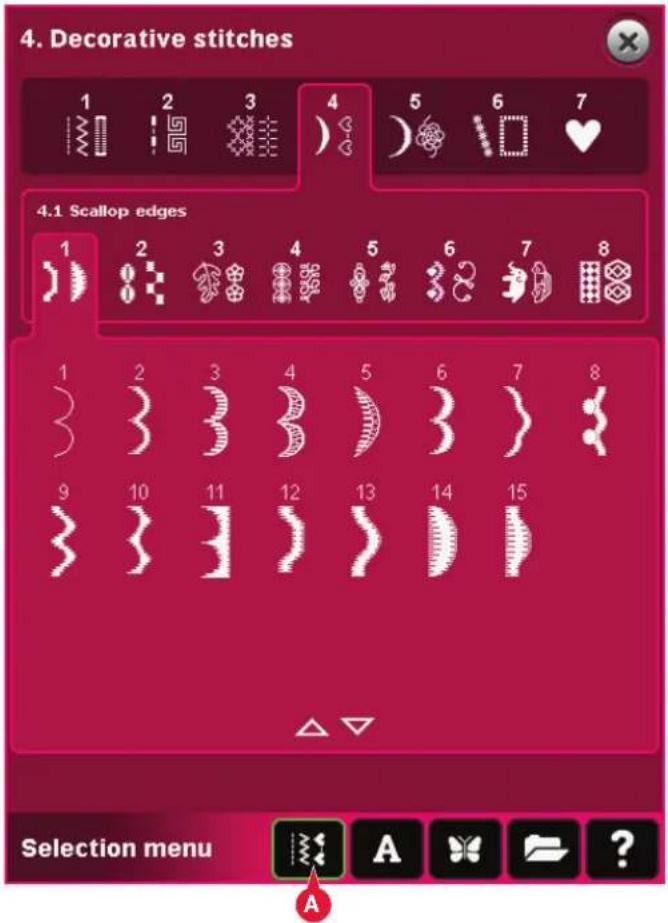
Zoom Options (2)
Use the + and - icons to zoom in or out in the embroidery field. Touch the Zoom Options icon (2) to open a list of zoom options.
Zoom to Box (A) lets you decide how much and where to zoom in the embroidery area. First, select Zoom to Box in the pop-up. The Zoom Options icon starts flashing, indicating that zoom to box is active. In the embroidery field on the PFAFF® creative™ Color Touch Screen, touch and drag with your stylus to define the area to be zoomed. Zoom to Box will then be deactivated.
Note: While Zoom to Box is active the touch functions are disabled. To deactive Zoom to Box without making any selection, touch any of the touch function icons. How much you can zoom in depends on the selected hoop.
Zoom to All (B) will show all the designs in the embroidery combination in the largest view possible.
Zoom to Hoop (C) will adjust the view to show the selected hoop.
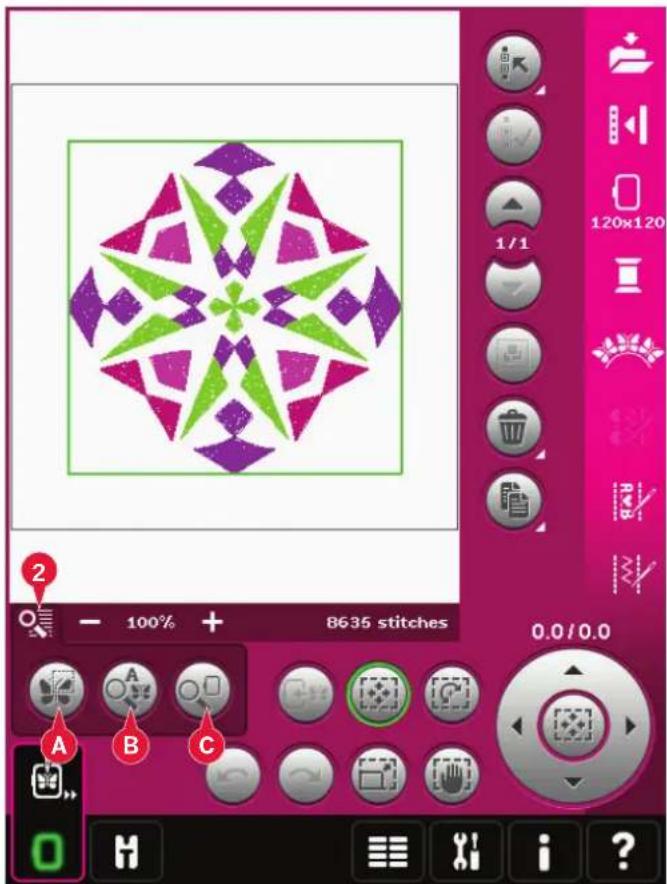
Select design(s)
When loading designs into Embroidery edit, the last loaded design is selected by default.
There are two ways to select another design. Either touch it on the screen or step through the designs using the arrows (5). The selected design is surrounded by a green frame.
Note: A selected embroidery font text is surrounded by a blue frame.
Multi-select (3)
If you have loaded several designs and want to make adjustments to some of them, you can use multi-select. The multi-select function allows you to easily select some or all of your loaded designs.
Start by touching the multi-select icon (3). A black marking frame appears that is used as a cursor to highlight, i.e. mark, current design (A). Touch a design with the stylus once to mark it or step through the designs using the arrows (5) to change currently marked design. Touch the design once again or touch the select/deselect icon (4) to select it.
To add a design to the group of selected designs to work with, mark another design and then touch it with the stylus or touch the select/deselect design icon (4) to select.
A long touch on the multi-select icon will select all designs in the embroidery field. To remove a design from the group of selected designs, mark the design according to above and touch it with the stylus or press the select/deselect design icon (4) to deselect currently marked design.
Note: Currently marked design is shown by a black frame (A). A selected design is shown by a green frame (B). If currently marked design is selected, it is shown by a combination of a green and black frame around the design (C). Only selected designs will be affected by adjustments. The currently marked design will remain unchanged unless it is selected.
When several designs are loaded at the same time, the multi-select function is automatically activated and all of the loaded designs will be selected.
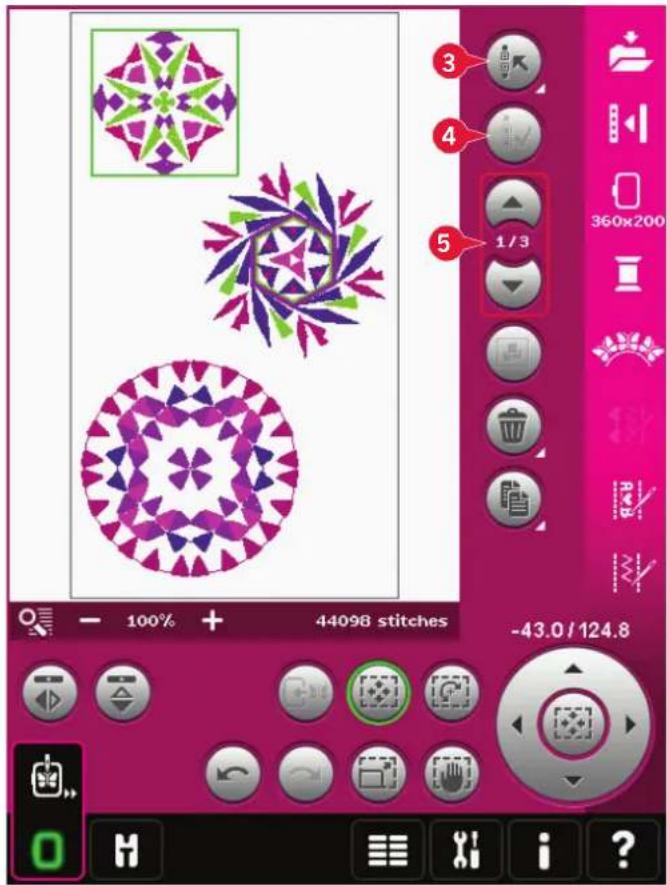
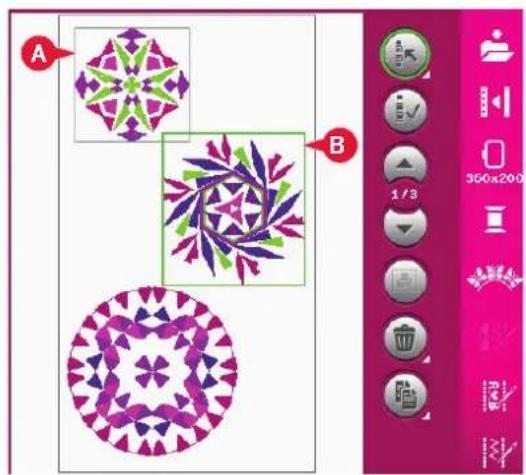
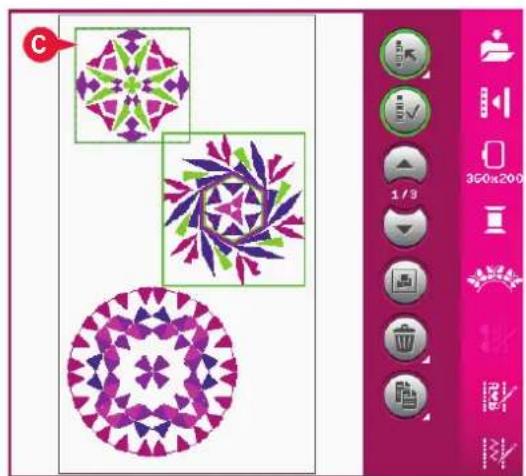
Stitch-out order
Designs are by default stitched out in the order they are loaded to Embroidery edit. The numbers (A) between the arrows show the position in the stitch-out order for the selected design as compared to the total number of designs in the embroidery area.
Adjustments
Group (6)
When the group icon is touched, any designs that are selected on the screen will be grouped together. Adjustments made will affect all designs in the group. The stitch-out order of the designs might change after they have been grouped. To ungroup, just deselect the icon.
Delete (7)
When touching the delete icon, the selected design(s) will be deleted from the embroidery field. If more than one design is selected, a pop-up window will ask you to confirm the deletion.
Long touch the delete icon to delete all. A pop-up window for confirmation will appear.
Duplicate (8)
Touch the duplicate icon to make a copy of the selected design(s).
If you want more than one copy, long touch the icon and a pop-up will open where you can enter the desired number of copies.
Mirroring (10 and 11)
To mirror a design side to side, touch icon (10) and for mirroring end to end, touch icon (11).
Move design into hoop (12)
This is used to move any design that is outside the hoop area into the hoop area. The design will be placed as close to the previous position as possible.
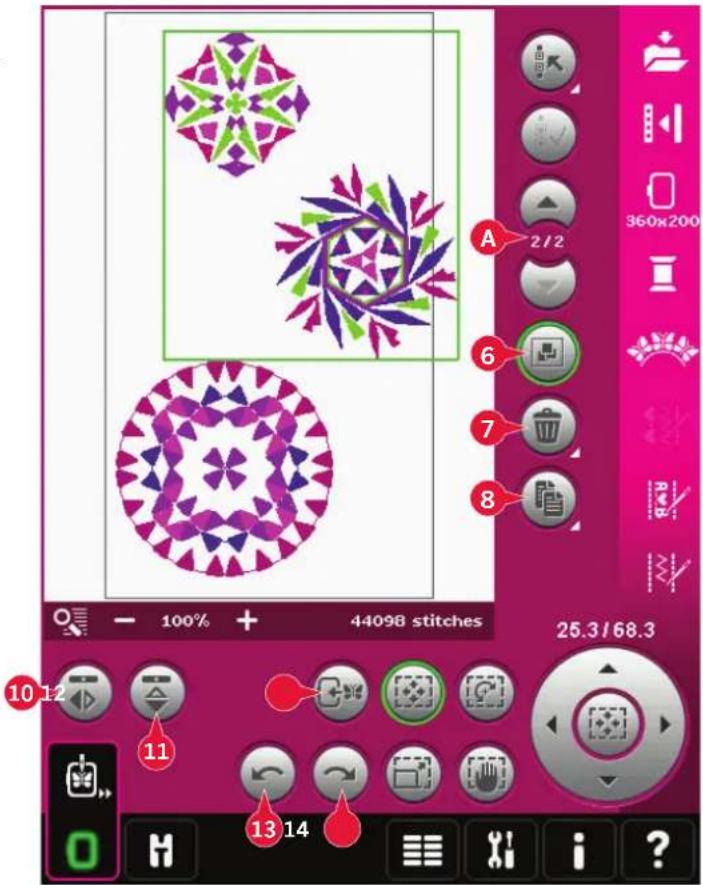
Undo (13)
Touch the arrow pointing left to undo your latest design adjustment. Touch repeatedly to step back through your adjustments.
Note: Not all adjustments can be undone. The arrows will be greyed out if undo is not possible.
Redo (14)
Redo is activated when Undo is touched, so you can step forward again through your adjustments.
Touch functions
You can use your stylus to make adjustments directly on screen, by touching and dragging in the embroidery field. You can pan, move, rotate and scale, depending on which touch function is active. You can also use the arrows in the wheel (19) to fine tune.
Move (15)
When move is active, you can move the design(s) anywhere in the embroidery field. The numbers above the wheel show in millimeters how far the design has been moved from the center of the hoop, both horizontally and vertically.
Touch the wheel center icon (20) and the design(s) will be moved to the center of the hoop.
Rotate (16)
When rotate is active, the selected design(s) will be rotated around the center point of the selected design(s).
Use the arrows in the wheel to rotate the design(s) in one degree steps. Each touch of the wheel center icon (20) will rotate the design(s) 90 degrees clockwise.
Above the wheel you can see how many degrees the design(s) has rotated from its original position.
Scale (17)
When scale is active, you can increase or decrease the design or a group of designs up to 20%.
By default, the proportions are locked. This is shown with the closed padlock in the wheel center icon (20). To unlock, just touch the padlock. Height and width can now be changed individually.
If you move the stylus on the screen towards the center of the selected design(s), the size will decrease. If you move the stylus from the center of the selected design(s), the size will increase. Use the wheel to fine tune.
Pan (18)
When pan is active, you can pan the embroidery field in the zoomed view.
Touch the wheel center icon (20) to center the view over the hoop.
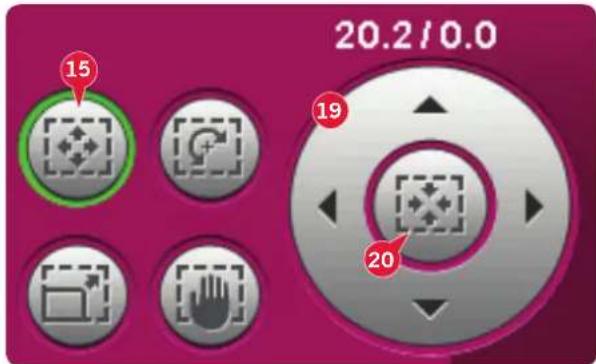
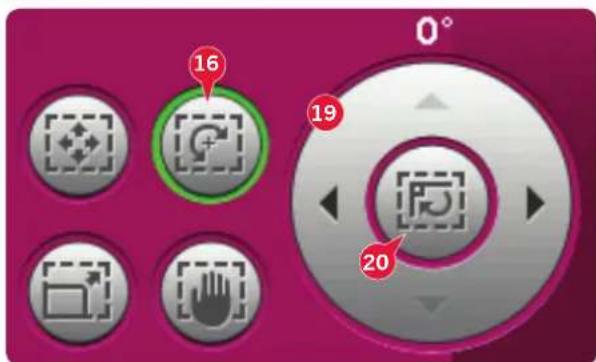
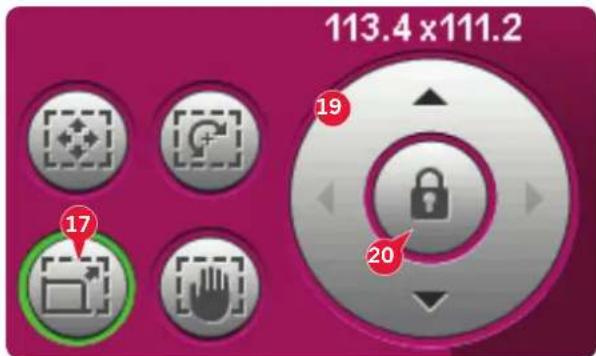
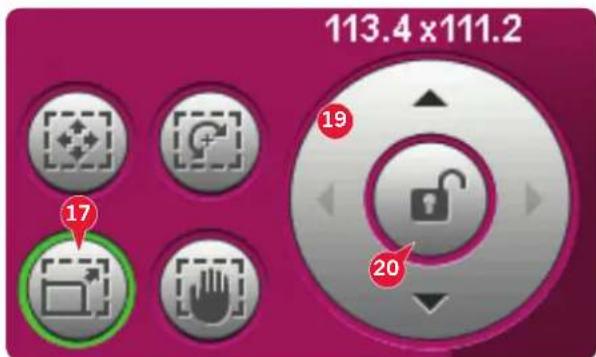
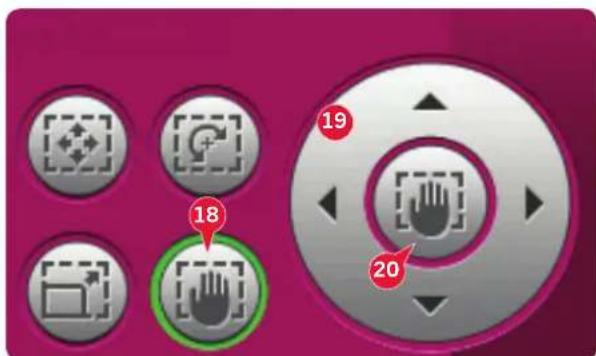
Option bar
- Save to Personal designs
- More options
- Select hoop
- Thread color edit
- Basic Shape Creator TM feature
- Embroidery stitch editor
- Sequencing
- Stitch Creator™ feature
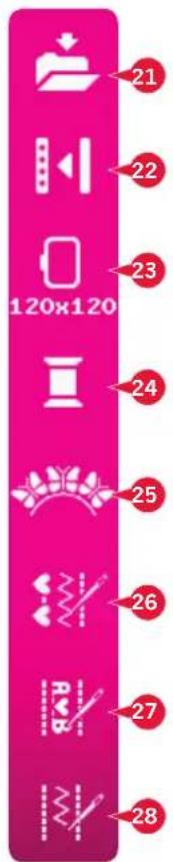
Save to Personal designs (21)
Touch the Save to Personal designs icon (21) to save the design you are working with. A new window will appear where you can choose to save your design in either your personal designs (A) or personal files (B) for quick and easy access. You can also save to a connected external device (C). Touch the icons (A, B, or C) to select where to save. Touch the list view icon (D) to show the files in the current folder listed in alphabetical order.
Design combinations can also be saved exactly the same way. When the combination is reloaded again, each combined part can still be edited separately.
File name
The default name will be the same as first design that was loaded. If an embroidery text or a stitch is saved, the default name will be NewDesign1.vp3, the next NewDesign2.vp3, etc. To change the name of the file, touch the rename icon (E) and enter the name in the pop-up that will be opened.
Touch OK to confirm the save. If you want to abort the save, touch cancel and you will return to Embroidery edit.
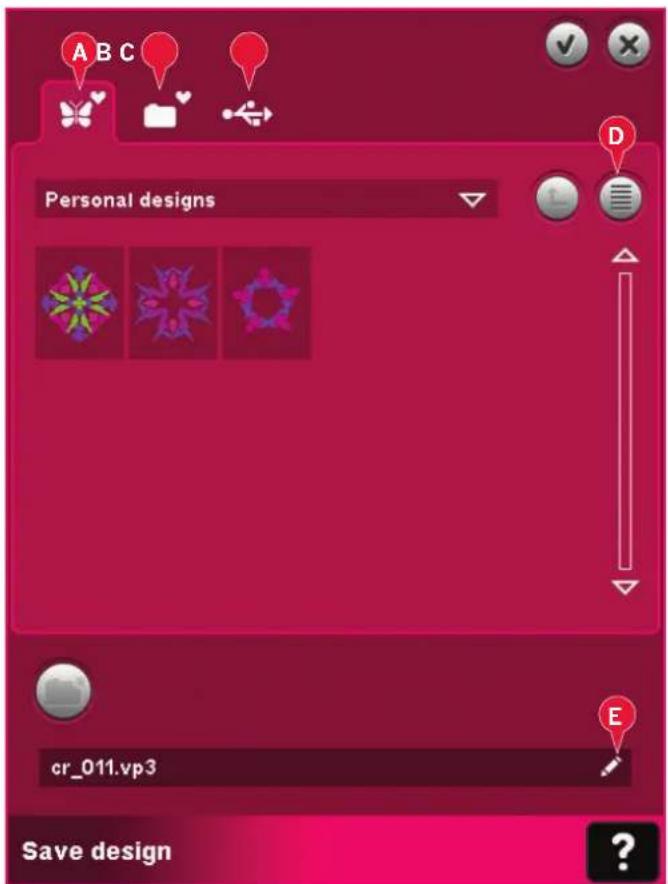
More options (22)
Grid (A)
Touch the grid icon (A) to activate/deactivate a grid on the embroidery field. The grid is used as a guide when combining or placing designs. The distance between the grid lines equals 20mm. As you zoom in on the embroidery field, the distance between these lines reduces to 10mm and 5mm, indicated with lighter lines.
Move to park position (B)
Touch the park position icon (B) to move the embroidery arm to park position for storing the embroidery unit.
The hoop must be removed first, to avoid damage.
3-dimensional view (C)
Touch the 3-dimensional view icon (C) to turn on or off a 3-dimensional view of the designs in the embroidery field.
By default, the designs are displayed in 2-dimensional view in the embroidery field. In 2-dimensional view, the designs load faster on the screen and it is easier to see the color blocks in the design. The view setting remains as selected even when you turn your machine off.
Restore current state (D)
If you have stopped embroidery and saved your current position before turning your machine off, you can reload your design by touching restore current state (D). You will start to embroider the design where you stopped. When touching restore current state you will automatically move from Embroidery edit to Embroidery stitch-out.
If any design is loaded to Embroidery edit when you restore current state, it will be deleted.
Select hoop (23)
To select the correct hoop size, touch the hoop selection icon (23). A pop-up will appear with the hoop choices, including hoops that are available to purchase from your authorized PFAFF ® dealer.
After selecting your hoop size, the pop-up will close automatically.
Note: Hoops that can only be used with the 350x360 size embroidery unit are indicated with a lighter background.
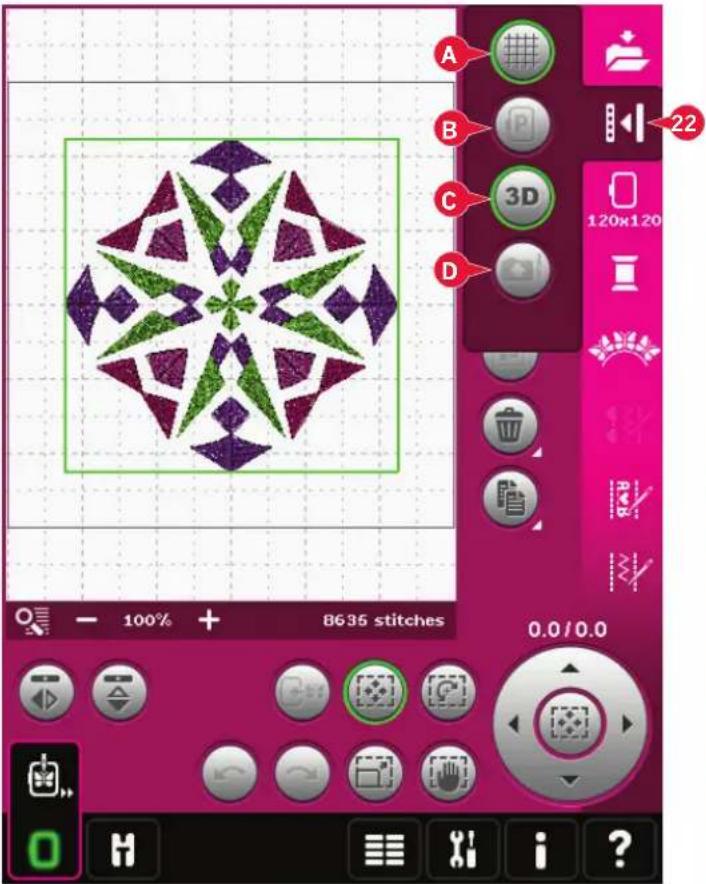
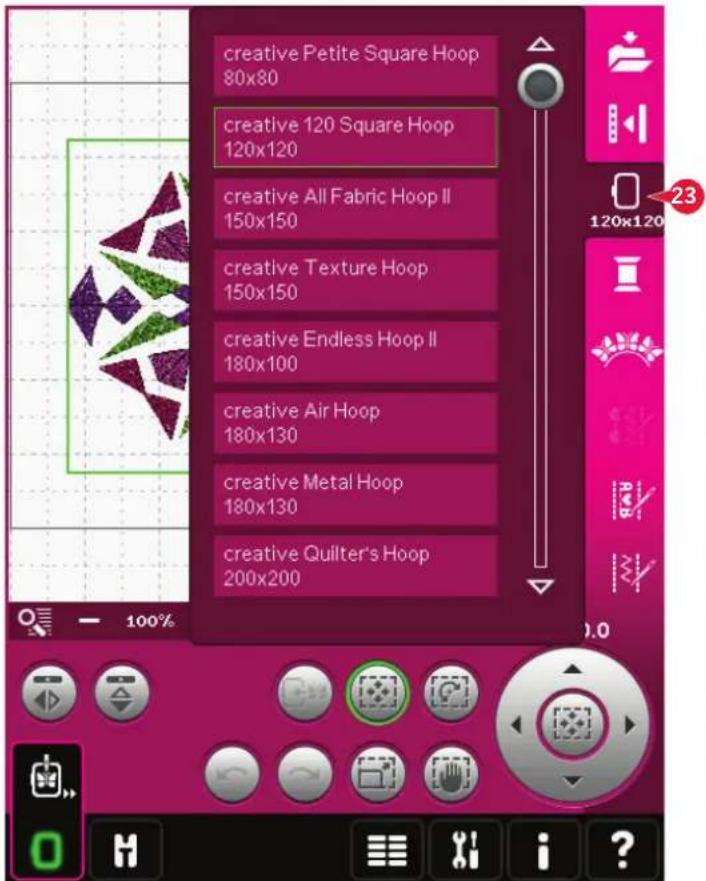
Thread color edit (24)
In thread color edit you can edit the colors in your design. Touch the thread color edit icon (24) to open.
Example (A): 1:3, RaRa 40, 2416 means the eighth thread color in the first loaded design is RobisonAnton 40 weight rayon, color number 2416.
Touch the color you want to replace in the color list. Then touch the quick color change icon (B) to open a window with 64 different color choices. Select your new color by touching it and touch OK. The window will close and your new color will be shown in the color list.
Multi-select (C) and select equal (D)
If you want to change more than one color block at a time, use the multi-select icon (C). Touch the multi-select icon to activate the function, then touch the color blocks you want to select. Long touch the multi-select icon (C) to select all color blocks in the color list. To deselect a color block, touch it in the list. Touch the multi-select icon again to deactivate the multi-select function.
Use the select equal icon (D) to automatically select all color blocks with the identical thread color(s) to the currently selected color block(s). When the select equal icon is used and more than one color block is selected, multi-select is automatically activated.
The selected color block(s) will be highlighted in the embroidery field.
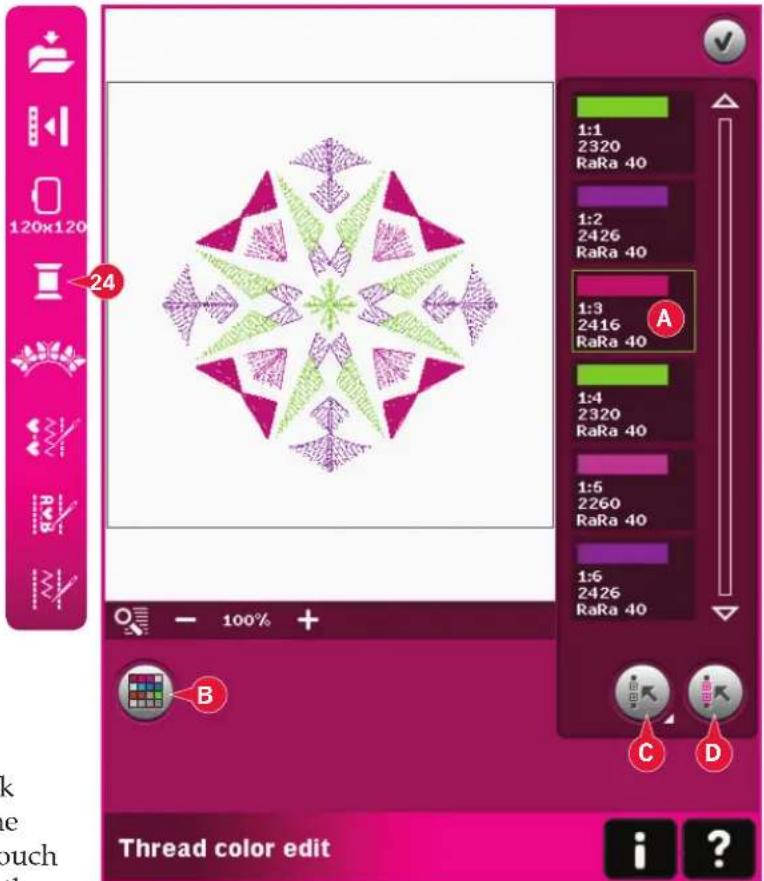
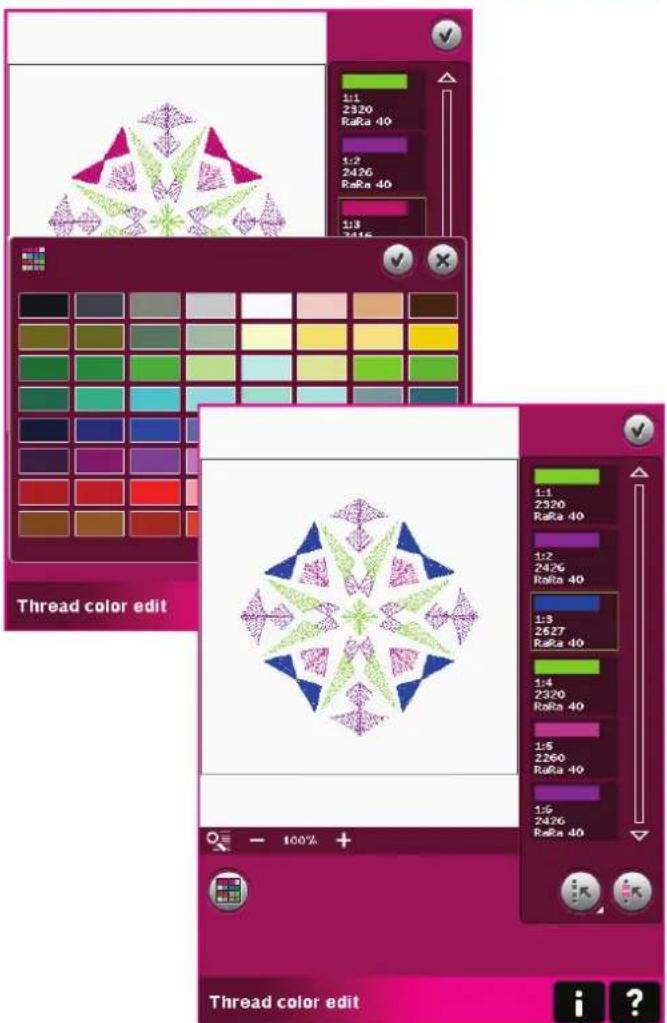
Basic Shape Creator™ feature (25)
Shaping is a unique way to use your beautiful built-in decorative stitches, sequences or even small design elements to form new embroidery designs.
Basic Shape Creator™ feature - overview
A Select shape
B Zoom
C Delete/Duplicate last object
D Enter number of designs
E Select control points
F Select spacing
G Select line positioning
H Select side positioning
I Select design angle
J Control points
K Baseline
Note: Duplicate/delete and enter number of designs are not available when shaping an embroidery text. If shaping text, you can use embroidery text editor to adjust your text while shaping. Read more on page 8:21.
Select shape (A)
Select a shape by touching it in the list (A). The stitches or designs will be placed along the baseline (K) in the order that they were loaded into Embroidery edit. The stitches or designs will follow the line in the direction indicated by a small arrow in the icons in the select shape list.
Note: When selecting a new shape, all your custom adjustments to the shape will be set to default.
Delete/Duplicate last object (C)
If you want to delete the last object in the shape, touch the - icon. Only the last object in the shape will be deleted.
If you want to add a copy of the last object, use the + icon. The last object in the shape will be duplicated and the copy will be added after the last object on the baseline.
Note: If several designs are grouped before opening Basic Shape Creator™ feature, the whole group will be duplicated or deleted.
Enter number of designs (D)
Touch the enter number of designs icon (D) to get a pop-up where you can enter the desired total number of designs to be used in the shape.
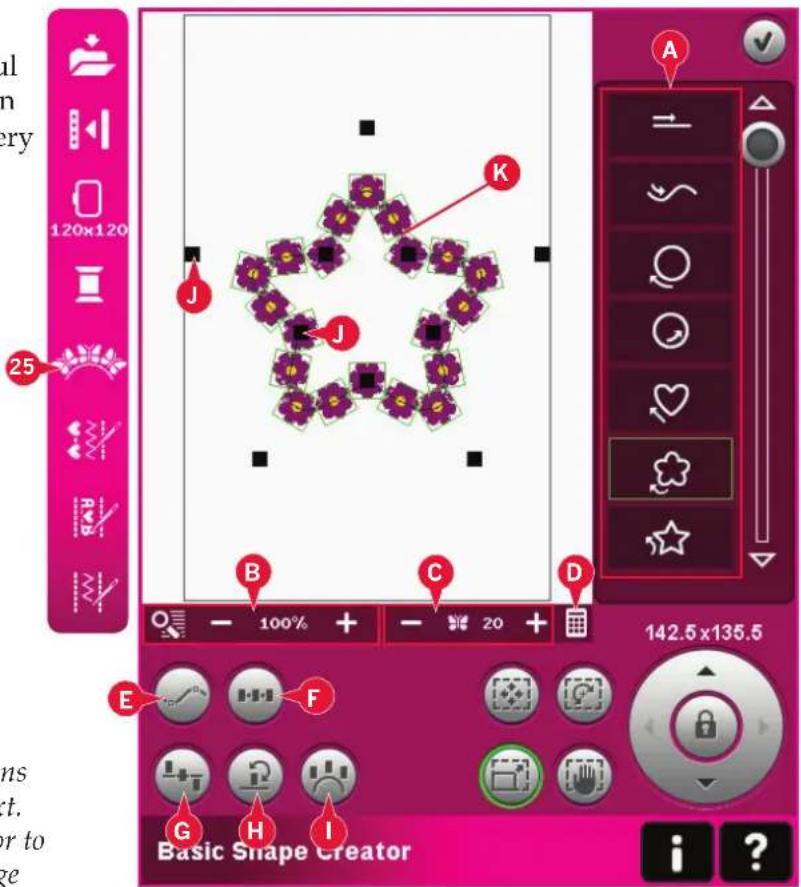
Definition of a control point
A control point is a point affecting the selected shape. Each shape is built by several control points. Together they define what the shape will look like.
A selected control point is marked with a filled square (L). An unselected control point is marked with an outlined square (M). All control points are visible when you are editing the points.
By adjusting the control points, the selected shape can be changed with unlimited possibilities.
Select control points (E)
Touch the select control points icon (E) to open a pop-up. For each shape, there are pre-defined sets of control points. Select all or some of the control points.
When you have selected a set of control points, you can make adjustments to the shape. Use the touch functions or your stylus to move, rotate and scale your selected control points. The adjustments made will only affect the selected control points.
Use the slider to increase or decrease the attraction percentage of the selected control points. The higher the attraction percentage, the closer the baseline will be to the selected control points.
Select spacing (F)
Touch the select spacing icon (F) to open a pop-up. The default setting spaces the objects evenly along the baseline (placing the same distance between each).
You can choose left or right justification on the baseline. The gap between the objects can be increased or decreased by using the slider. The actual gap is shown above the slider in the pop-up.
If there are too many objects in the shape, the baseline will be red. Enlarge the shape or delete some objects until the objects fit in the shape. The baseline will change to black again.
![graph TD A["Star"] --> B["M"] B --> C["L"]](/content/2026/08/1613050/images/0657112f825762c1758f04a60c6c9a45b9a854e76a4be03839203b65ec93493a.jpg)
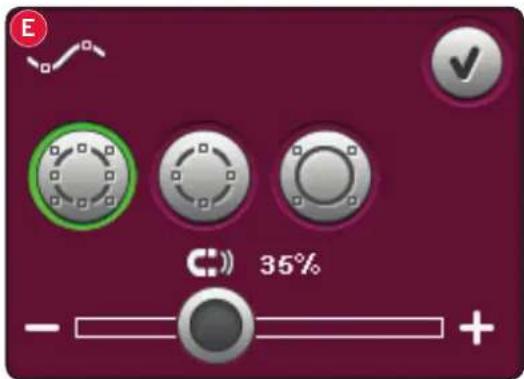
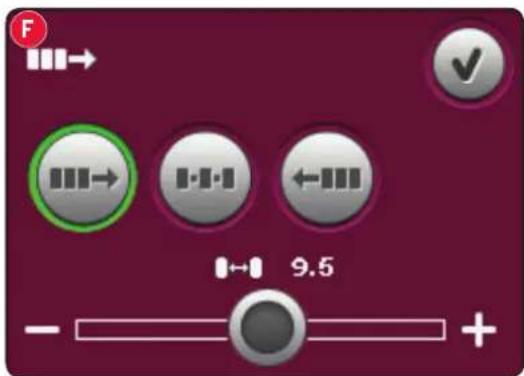
Select line positioning (G)
Touch the select shape line positioning icon (G) to open a pop-up. You can choose to place the objects on the top of the baseline, or on the baseline or under the baseline. The selected positioning will affect all objects on the shape.
Select side positioning (H)
Select which side of the object is positioned on the baseline. Touch the select side positioning icon (H) to open a pop-up. Choose to place objects on the line in the default direction, (0° rotation), rotated 90°, rotated 180° or rotated 270°. The selected setting will affect all objects on the baseline.
Select design angle (I)
Decide how to align the objects on the baseline. Touch the select design angle icon (I) to toggle between objects placed parallel to the baseline or to keep the current angle. The setting affects all objects on the shape.
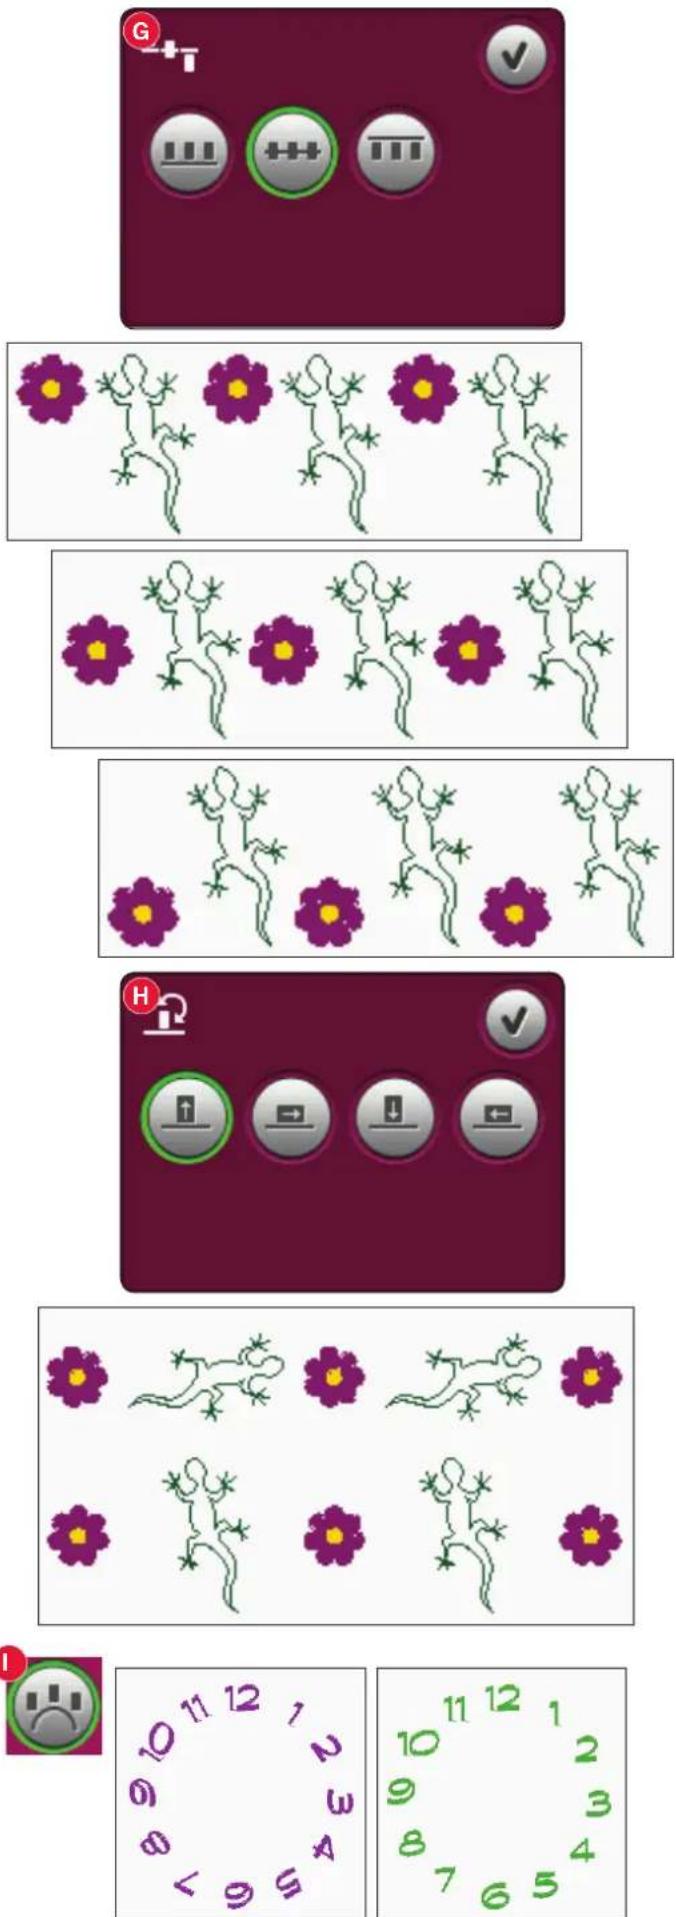
Basic Shape Creator™ feature example 1 - create a design from built-in mini designs
- In embroidery mode, open the selection menu, touch the tab for mini designs and select design cm_52.vp3 to load to Embroidery edit.
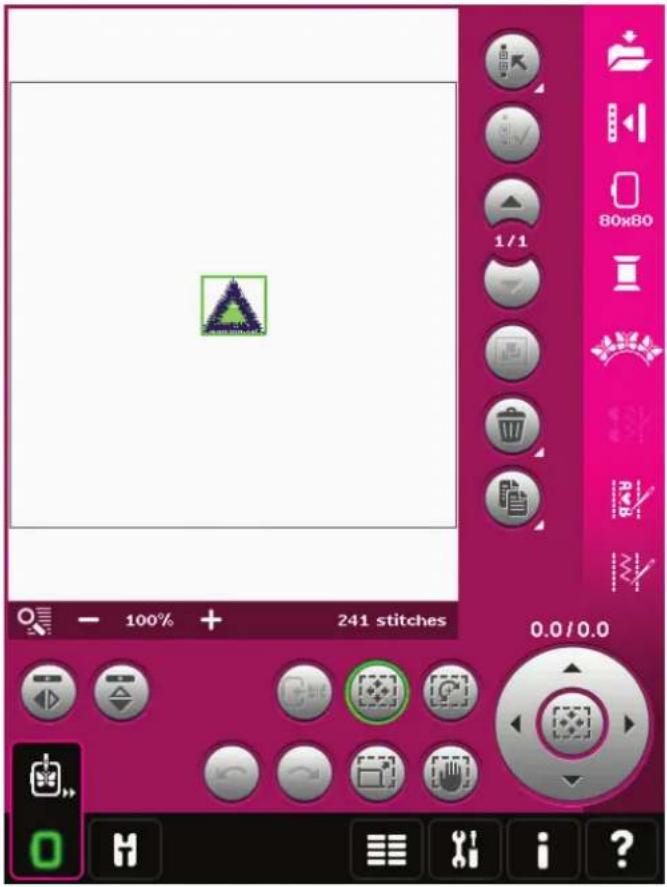
- Open Basic Shape Creator™ feature. Select the clockwise circle in the list (A). Touch Enter number of designs (B) to open the keypad, enter 18 and touch OK.
- Close Shape Creator™ feature by touching OK in the top right corner (C).
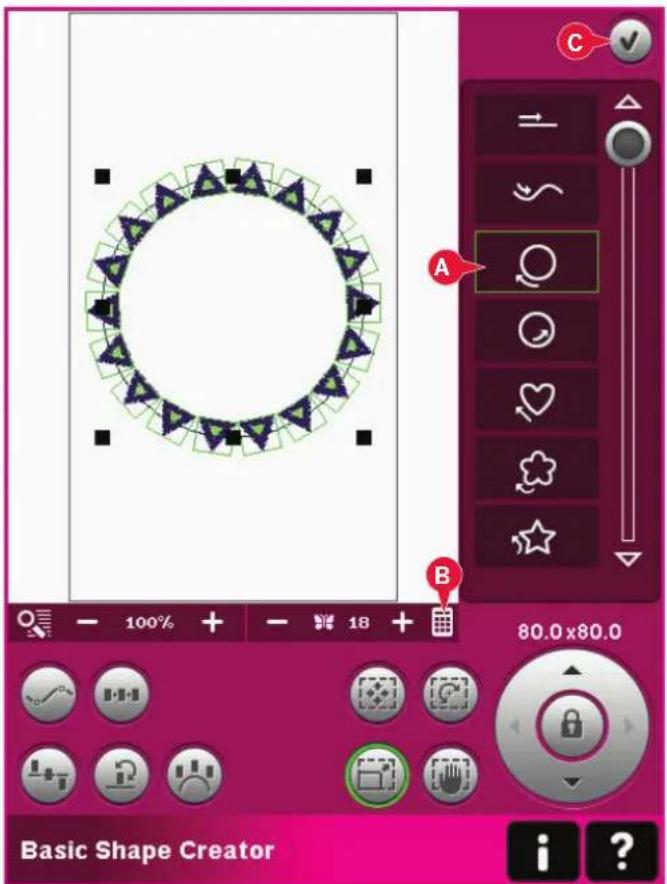
- Open the selection menu and select design cm_52.vp3 again. Center it by touching the wheel center icon when the touch function - move is active.
-
Open Basic Shape Creator™ feature. Select the clockwise circle in the list (A). Touch Enter number of designs (B) to open the keypad, enter 16 and touch OK. Select the touch function - scale. Either touch and drag on the screen, or use the arrows in the wheel to decrease the size to 55x55mm. The size is indicated just above the wheel.
-
Touch Select side positioning (D), select the third option in the popup and touch OK.
-
Close Basic Shape Creator™ feature by touching OK (C). Toggle to Embroidery stitch-out to embroider the design.
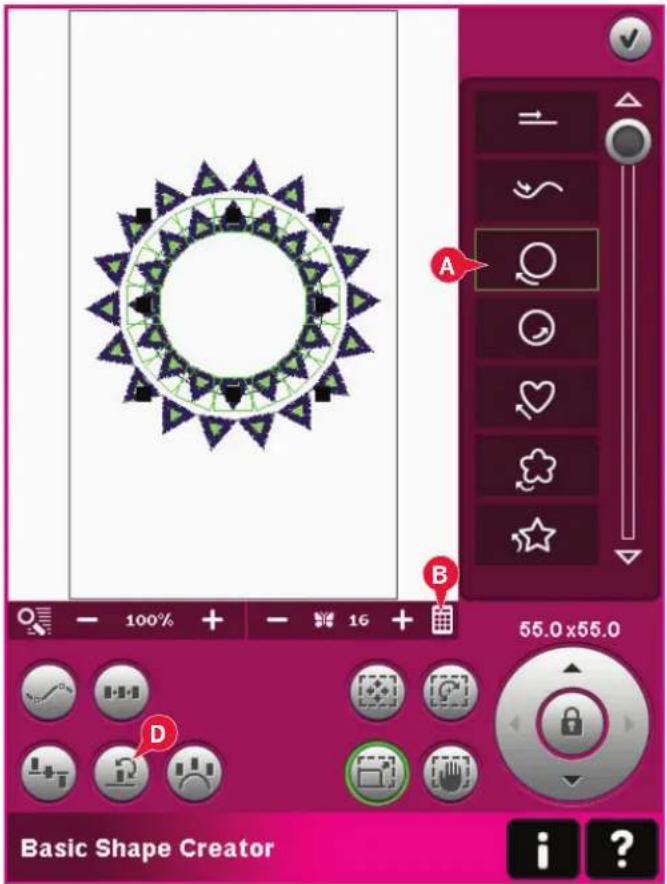
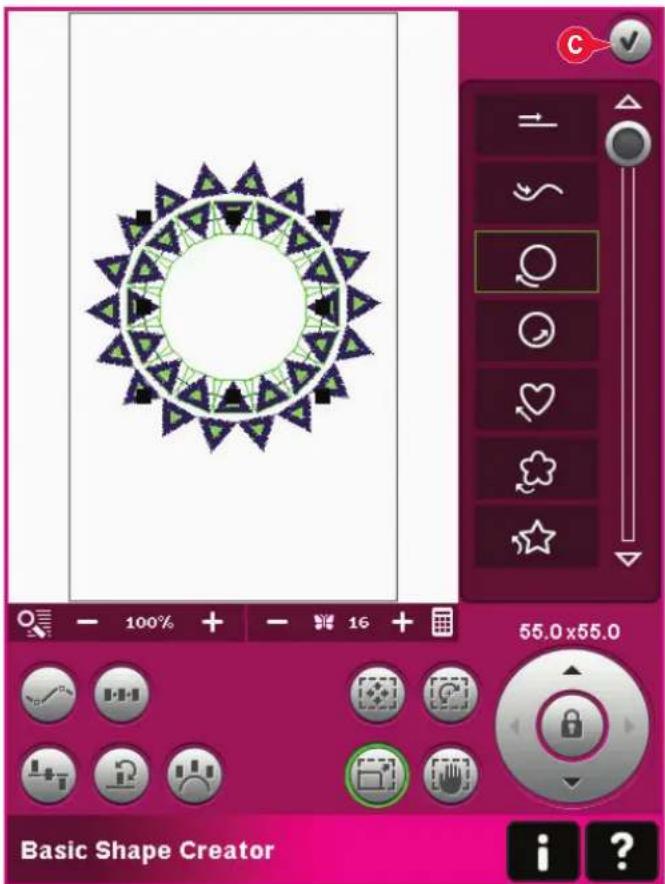
- In embroidery mode, select hoop size 360x200 and open the selection menu. Open stitches and select the linen buttonhole 1.3.1.
Note: If you want to change the length, width or density of the buttonhole, use the embroidery stitch editor. Read more on page 8:18.
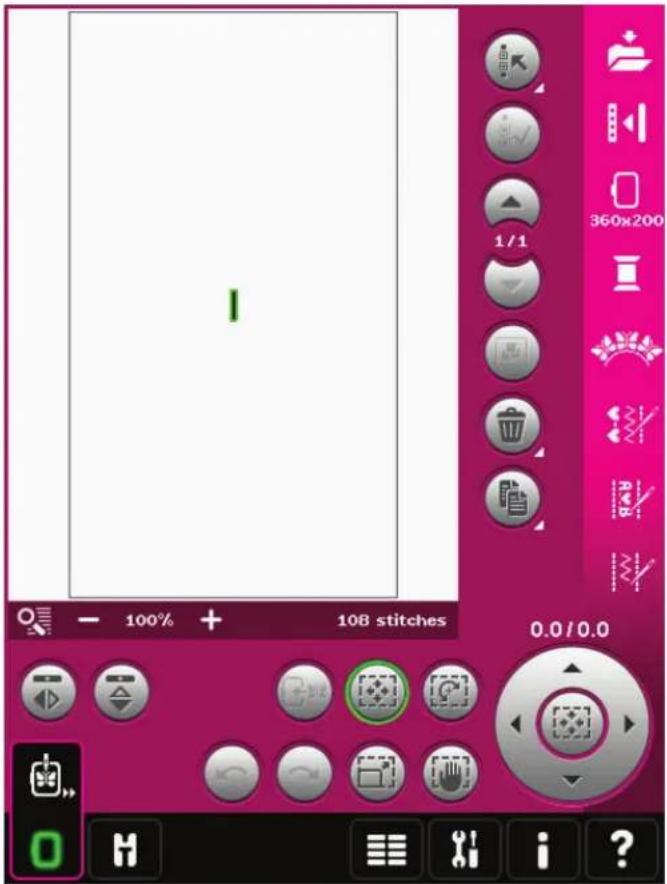
- Open Basic Shape Creator™ feature. Select the straight line from the list (A). Select touch function - rotate, and then touch the wheel center one time to rotate the baseline 90 degrees.
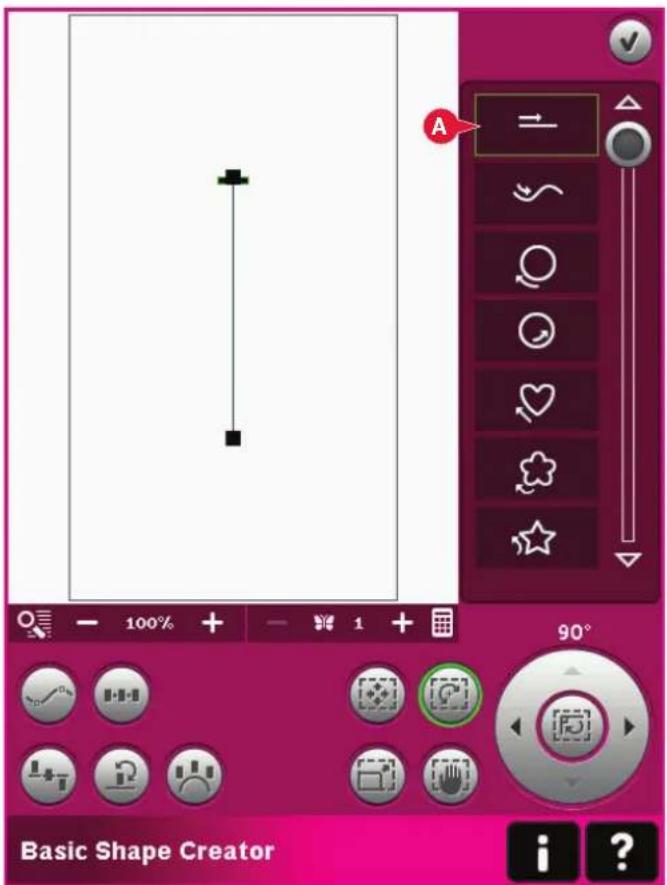
- Select touch function - scale, and adjust the line to desired length by touching and dragging on screen or using the arrows in the wheel.
Touch Enter number of designs to open the keypad and enter the desired number of buttonholes. Touch Select side positioning and select the fourth option in the pop-up to stitch out the buttonholes vertically.
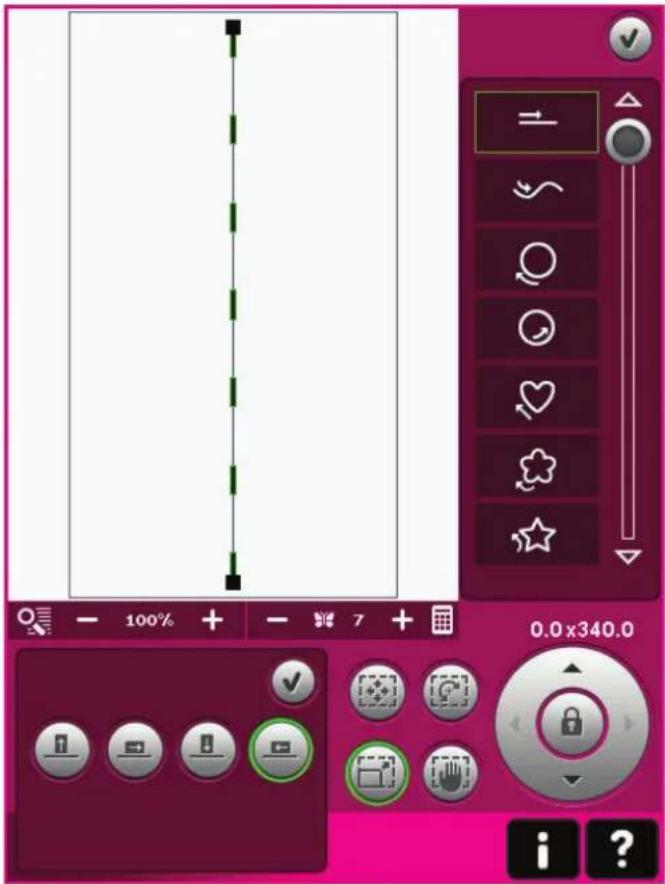
- Close Basic Shape Creator™ feature and toggle to Embroidery stitch-out to embroider the buttonholes.
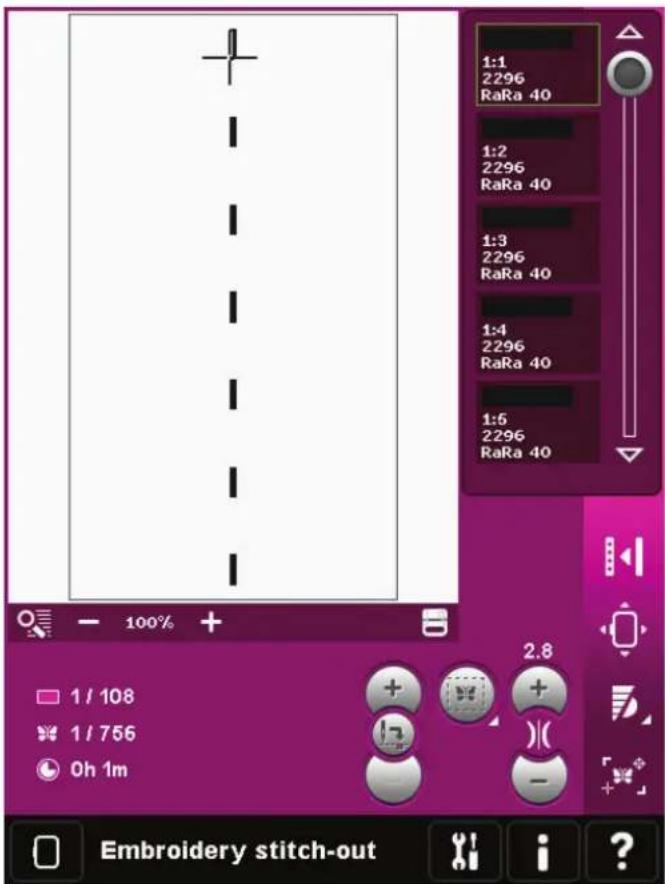
Embroidery stitch editor (26)
Sequences and stitches can be adjusted in Embroidery stitch editor. You can also adjust your own created sequence or stitch, loaded to Embroidery edit (see chapter 5 and 6).
Note: When a stitch or a sequence is loaded into Embroidery edit, tie-offs are automatically inserted at the beginning and at the end. The tie-offs are only visible when you open the stitch or sequence in sequencing.
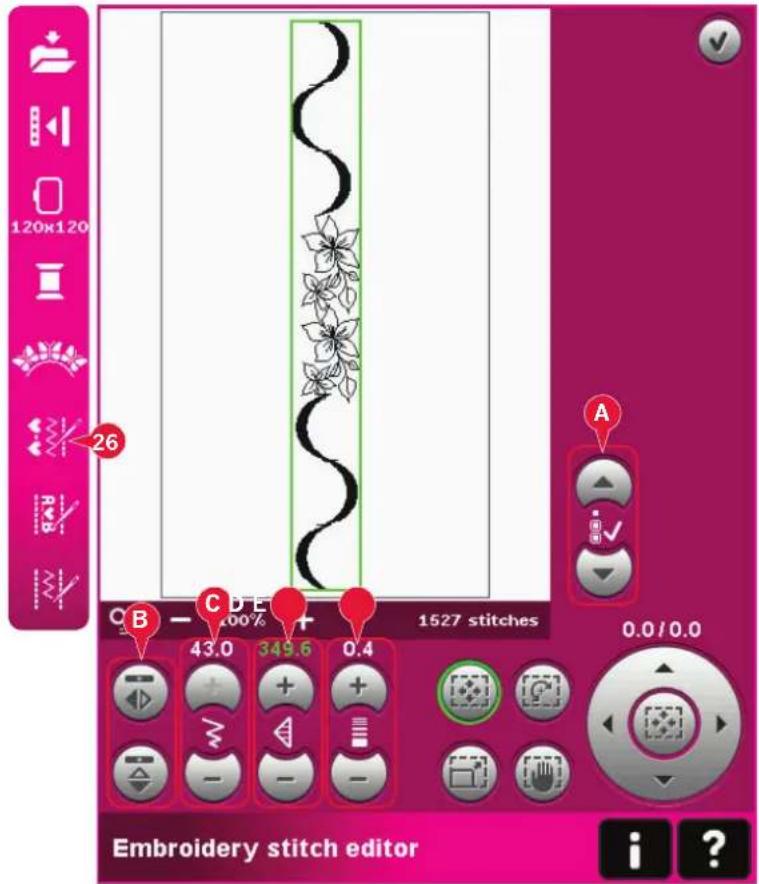
Adjust stitches
Open Embroidery stitch editor to adjust the stitches. The adjustments will affect the stitch just like they do in sewing mode. If more than one sequence is inserted, you can toggle between them using the arrows (A).
Use the + and - icons to increase or decrease the stitch width (C) and stitch length (D).
Density (E) can be changed if satin stitches are inserted.
When mirroring (B), the stitch will be mirrored within its own area. It will not affect the position of the stitch like when mirroring is used in Embroidery edit.
You can also use the touch functions to make adjustments. The selected stitch will be affected as if it was a design.
Note: If you make adjustments to a sequence or stitch in Embroidery stitch editor, you can still use sequencing or Stitch Creator™ feature to modify it.
When returning to Embroidery edit, the sequence or stitch will be replaced by the adjusted one.
Decrease width of the selected stitch
Decrease length of the selected stitch
Mirroring the selected stitch side to side
Mirroring the selected stitch end to end
Embroidery stitch editor - example
- Enter Embroidery edit.
- To create a sequence, open sequencing by touching the icon on the option bar (27). Select stitch number 4.3.20, then 4.3.15, 4.2.1, 4.3.15. Mirror the last inserted stitch end to end. Insert stitch 4.3.19, 4.3.15, 4.2.1, 4.3.15. Mirror the last inserted stitch and finally add stitch 4.3.20.
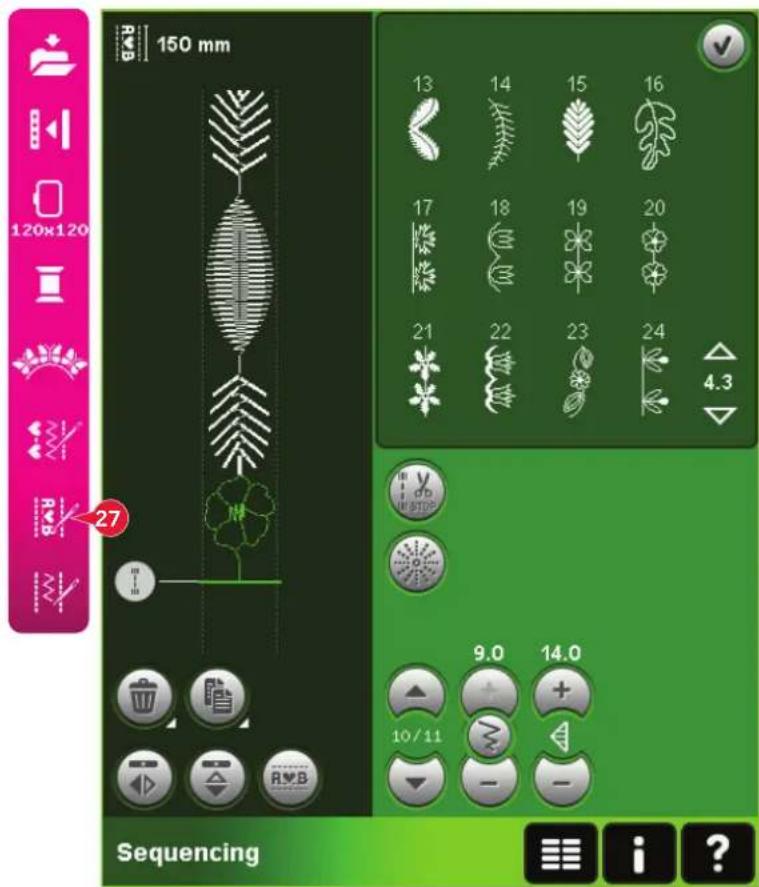
- Close sequencing by touching OK in the top right corner. The sequence is loaded to Embroidery edit.
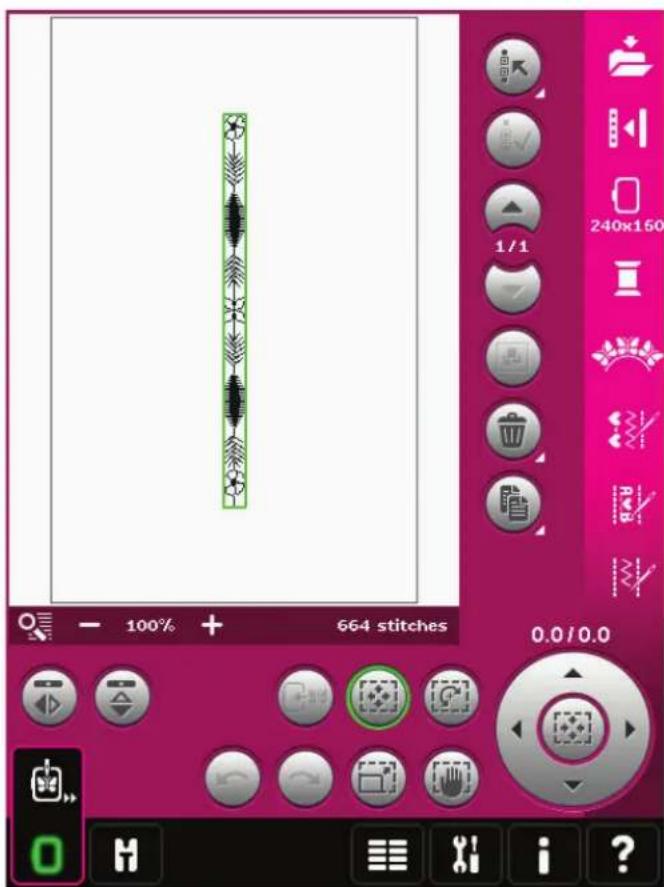
- Deselect the sequence by touching outside the design on the screen, or step by using the arrows.
- Open sequencing once again. Select stitch number 4.1.7.
- Long touch the duplicate icon. In the pop-up that appears, enter 7 and touch OK for a total of eight copies.
- Close sequencing to load the second sequence to Embroidery edit.
- Touch the wheel center icon when move is selected, to move the new sequence to the center of the hoop. Move 9 mm to the right.
- Open Embroidery stitch editor (26).
-
Toggle to the first sequence, using the arrows (A). Increase the length of the sequence to fit the second sequence, 160.4 mm. Increase the density to 0.6.
-
Close Embroidery stitch editor. Select the second sequence and duplicate. Mirror side to side. Center the copy and move 9 mm to the left of the first sequence.
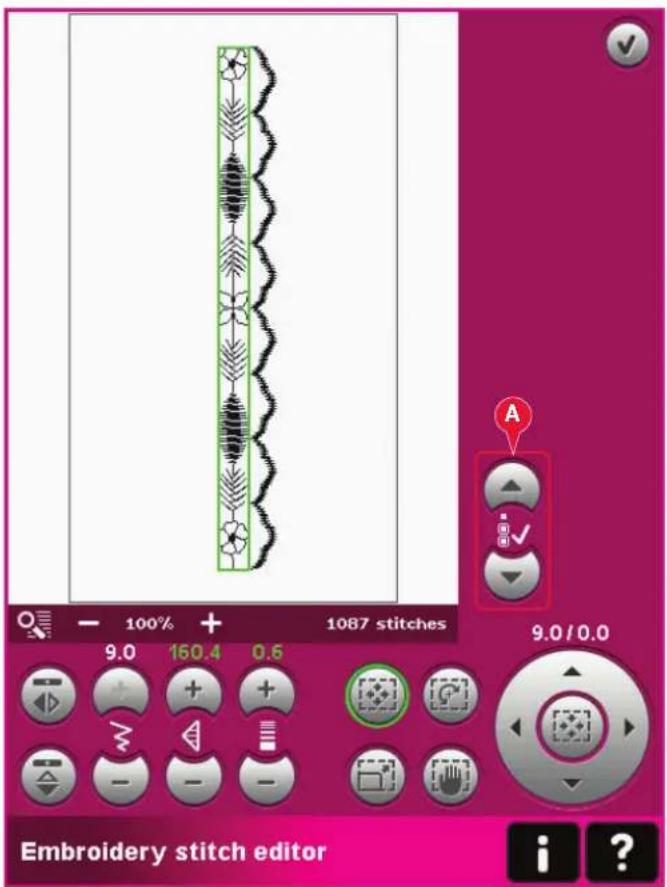
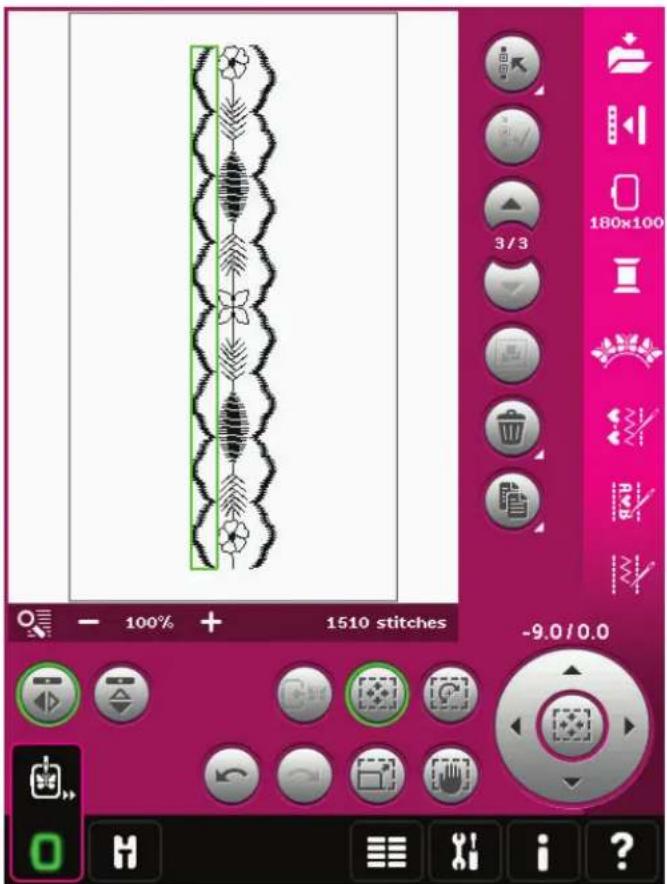
Embroidery text editor (27)
To open embroidery text editor
Embroidery text editor opens automatically when you select an embroidery font in the selection menu.
You can also open embroidery text editor by adjusting an existing text already in Embroidery edit. Just select the text and touch the sequencing icon (27) on the option bar.
Note: If the text is created of stitch fonts, sequencing will be opened instead of embroidery text editor.
To use embroidery text editor
Use the stylus and touch the letters you want to add to the text. The text is shown in the text area (A) with the cursor at the active letter. Use the arrows (B) to step forward and backward.
You can change the font and the size of the text by touching the change font icon (D). A preview of the selected font is shown in the preview area (E).
Add a letter into a text
Use the arrows (B) to move the cursor to where you want to add a letter. Touch the letter and it will be inserted at the cursor position.
Delete a letter
To delete one letter, place the cursor after the letter to be deleted. Touch the delete icon (C). If you want to delete all the text you have written, long touch the delete icon. A pop-up will ask you to confirm the deletion.
Change font
You can change the font and size of the text by touching the change font icon (D). The change font pop-up will show all available embroidery fonts. You can select different sizes for each font.
When changing the font, all inserted letters in the embroidery font editor window will change to the new font.
Load a font from another location
To load a font from personal fonts or an external device, touch the load font icon (F) at the bottom in the change font pop-up. A load dialog window will be opened for you to find the new font.
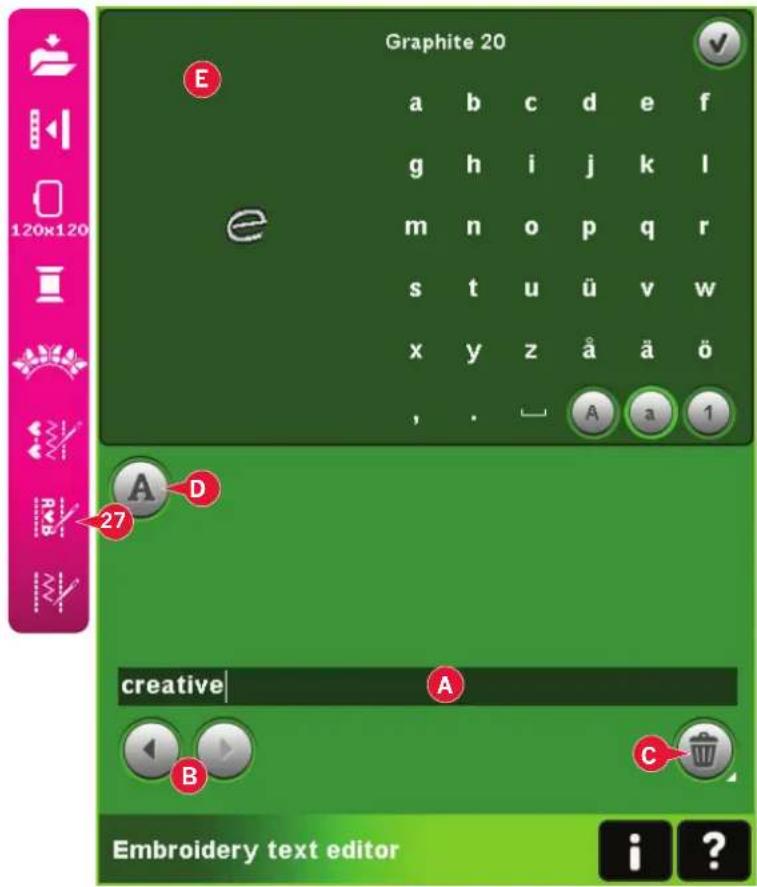
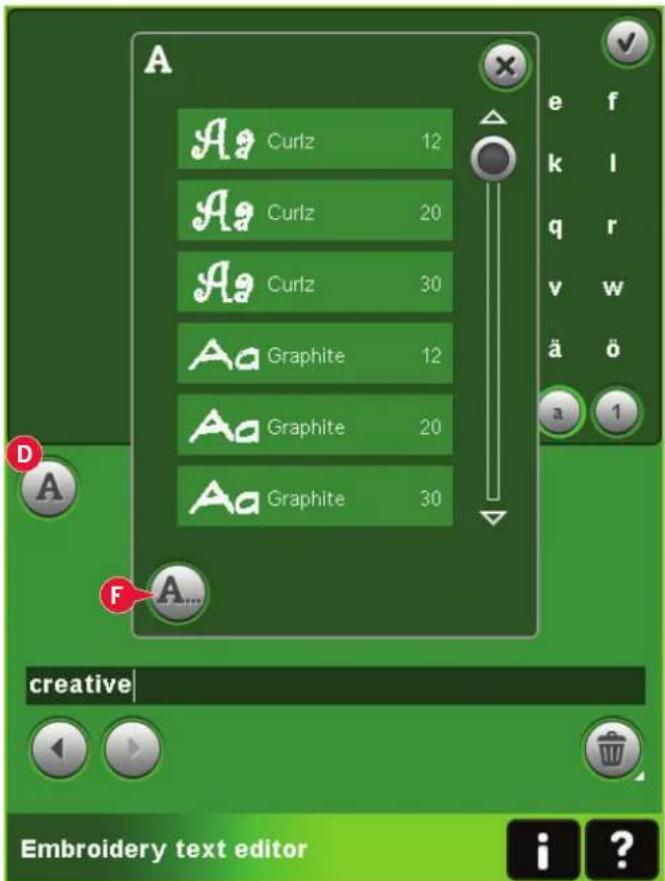
Load text to Embroidery edit
Return to Embroidery edit by touching OK in the top right corner of the screen. Embroidery text editor will close and the text will be loaded into Embroidery edit. If the text was an existing text, it will be placed and rotated in the same way as it was before the adjustment.
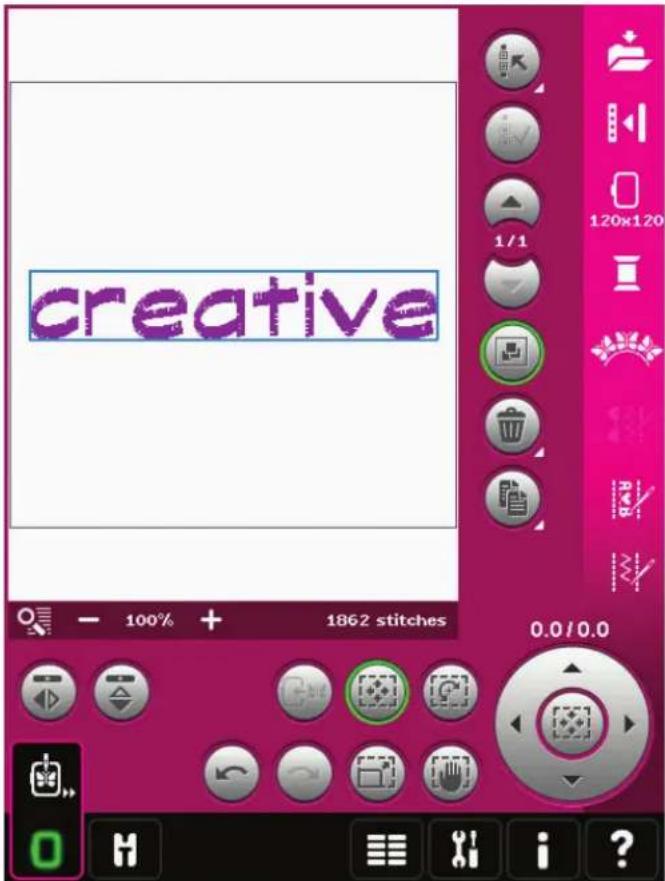
Embroidery edit pop-ups
Delete selected designs?
Your machine will ask you to confirm when you have selected to delete more than one design.
Delete all designs?
Your machine will ask you to confirm when you have selected to delete all designs or when using delete long touch.
Replace file?
The first time you try to save a design with the same name as a design file that already exists, your machine will ask you to confirm this.
If you keep working on the same design and save again, your machine will not ask again.
Remove hoop
This pop-up will appear when a function has been chosen that forces the embroidery unit to move outside the limits for the attached hoop. In order for the embroidery arm to move freely, remove the hoop and then touch OK. To abort the function touch Cancel.
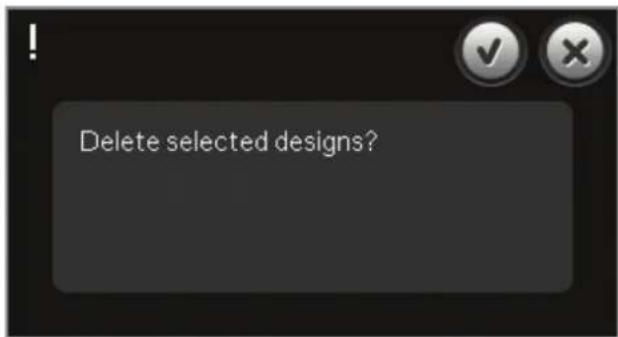
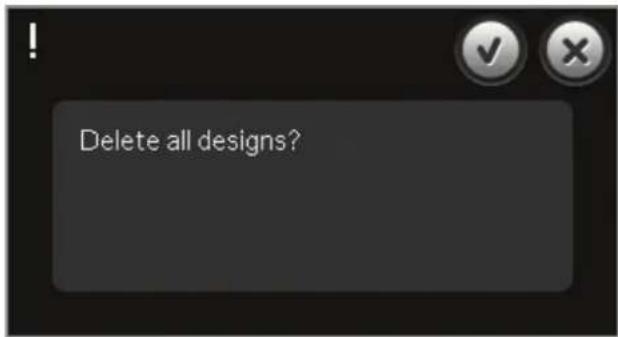
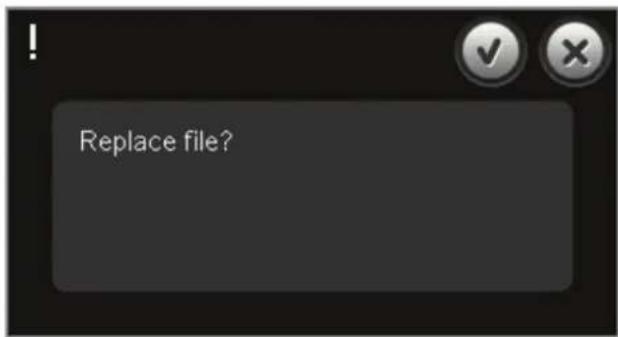
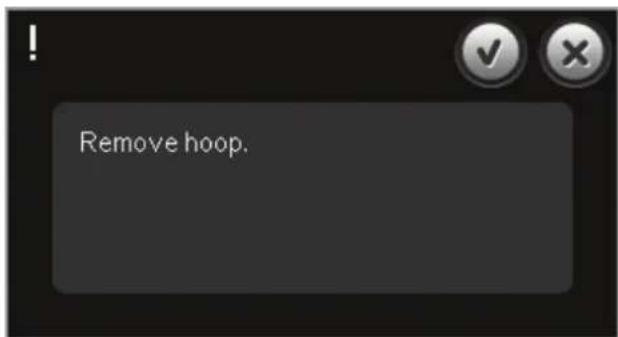
There might not be enough disk space to save current state
This pop-up appears when going to Embroidery stitch-out and the available memory in the machine is low. Because of low memory you might not be able to save current state while embroidering. To clear some memory before starting to embroider, first touch OK to close the pop-up and then go back to Embroidery Edit and use Files & Folders to delete files.
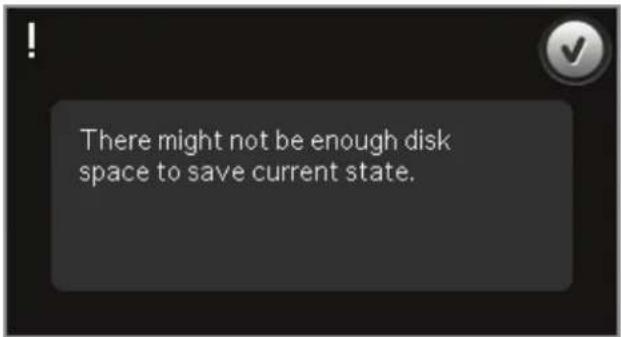
Exceeded maximum number of stitches
The design combination you are trying to make contains too many stitches. Your design combination can have up to approximately 500.000 stitches.
Embroidery combination is too complex
This pop-up appears for one of the following reasons:
- The design combination contains too many color blocks.
• There are too many designs in the combination.
Embroidery mode
- stitch-out
To enter Embroidery stitch-out
To embroider your design(s), enter Embroidery stitch-out. Make sure the embroidery unit is connected and the selected hoop is securely attached to the embroidery arm. Toggle to Embroidery stitch-out by touching the Embroidery stitch-out icon (A) above the embroidery mode icon on the task bar. Functions used when embroidering a design are now shown.
In Embroidery stitch-out, the pan function is always active. Use the stylus to pan on screen.
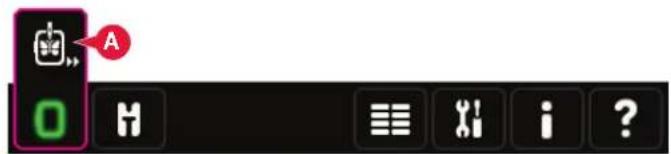
Embroidery mode - edit
Embroidery stitch-out - overview
- Crosshair
- Color list and scroll bar
- Zoom
- Presser foot recommendation
- Current stitch
- Go to stitch
- Basting
- Thread tension
- More options
- Hoop position
- Speed control
- Precise Positioning
- Return to Embroidery Edit
- Quick help
Quick help (14)
Use Quick help to receive instant information about any icon or part of the screen. Touch the Quick help icon (14) and then the icon or the part of the screen you want information about.
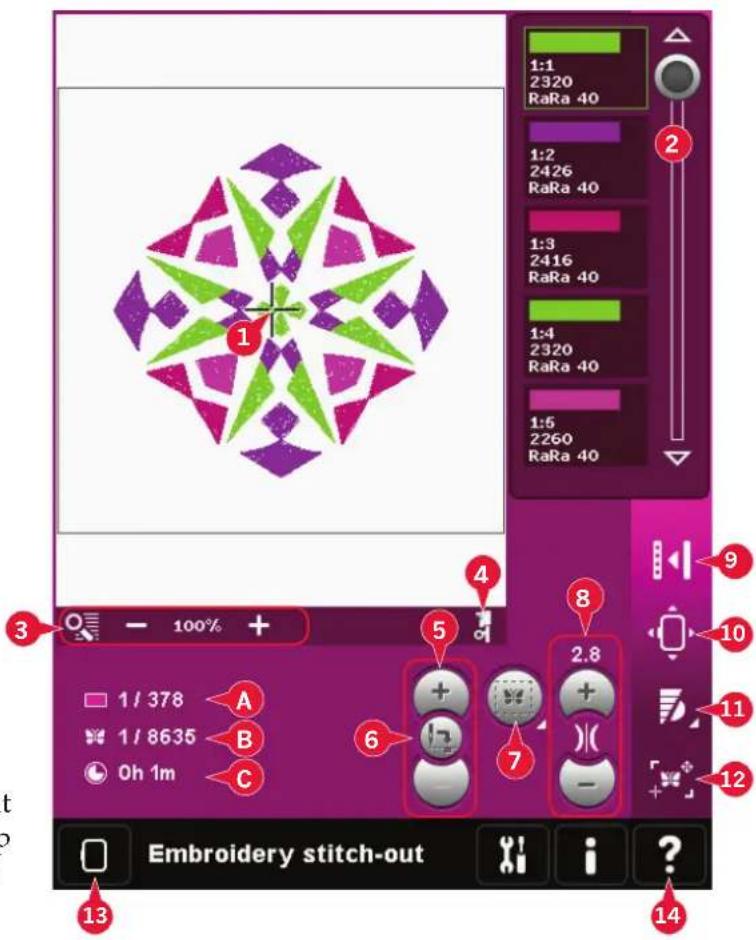
The current stitch in the current color block is shown next to the picture (A). The number after the slash shows the total number of stitches in the current color block.
The current stitch in the design or combination is shown next to the picture (B). The number after the slash shows the total number of stitches in the design or combination.
An estimation of the embroidery time for the current color block is shown next to the picture (C). If Monochrome is activated, the estimated remaining embroidery time for the whole embroidery is displayed.
Crosshair (1)
When embroidering, a crosshair indicates current needle position on the screen.
Color list (2)
All colors in the loaded design(s) are shown in the order they will be embroidered. Each listed color shows color order and number. Also shown are the thread manufacturer, thread weight and color number. Use the scroll bar to see all of the colors in the list. To go to the next color block, just touch it in the color list.
Thread manufacturer and thread number are displayed for designs in .VP3 and .VIP-format. If changing color, some information might be lost.
Example (A): 1:2, RaRa 40, 2426 means the second thread color in the first loaded design is RobisonAnton 40 weight rayon, color number 2426.
To make changes to the color list, return to Embroidery edit.
Zoom options (3)
Use the + and - icons to zoom in or out in the embroidery field. Touch the Zoom options icon to open a list of choices.
Zoom to box (B) lets you decide how much and where to zoom in the embroidery area. First, select zoom to box in the pop-up. The zoom icon starts flashing, indicating that zoom to box is active. In the embroidery field on the screen, touch and drag with your stylus to define the area to be zoomed. Zoom to box will then be deactivated.
Note: How much you can zoom in depends on the selected hoop.
Zoom to all (C) will show all the designs in the embroidery combination in the largest view possible.
Zoom to hoop (D) will adjust the view to show the selected hoop.
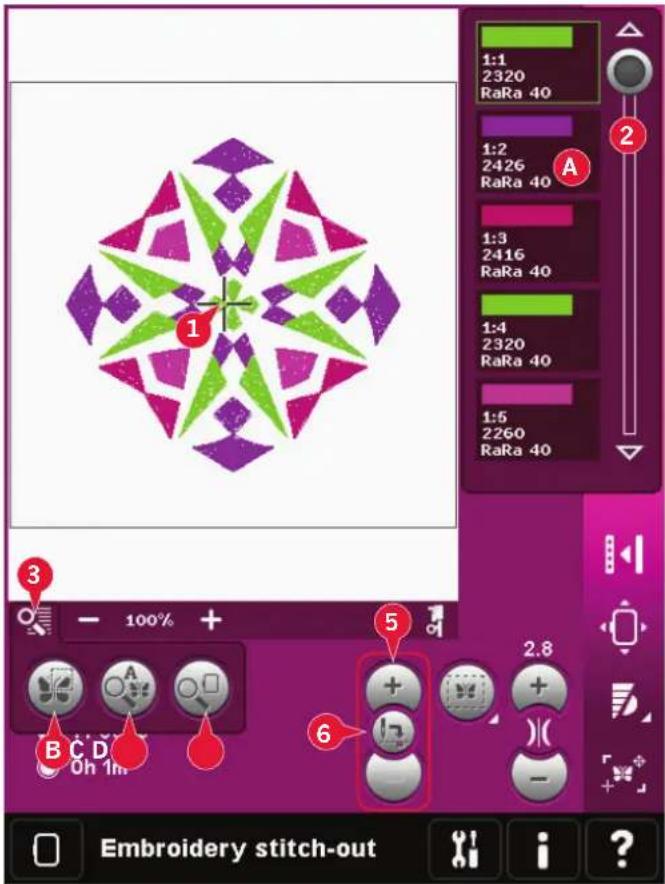
Current stitch (5)
Touch + to step forward and - to step backwards stitch by stitch. Use the - icon to move backwards a few steps if the needle thread breaks or runs out. Touch and hold to move through the stitches quickly. The crosshair will follow the stitches in the embroidery field.
Go to stitch (6)
To move to a particular stitch in the design touch the go to stitch icon. A pop-up will appear, where you can enter the desired stitch number. Current stitch will then move to that stitch number. If the number entered is too large, current stitch will move to the last stitch in the design(s).
Basting (7)
Basting enables you to secure your fabric to a stabilizer placed under it. It is especially useful when the fabric to be embroidered cannot be hooped. Basting provides support for stretchy fabrics.
Touch the basting icon (7) to activate basting.
Long touch the icon to open a window to select to add the basting stitch around the design area and/or around the hoop area.
Select baste around design and the machine will add a basting stitch around the design area, outlining the area where the design will be placed on the fabric. Select baste around hoop area to add a basting stitch close to the inner edge of the hoop.
The baste stitches will be added as the first separate color block(s) (A) at the beginning of the color list. You can step stitch by stitch and step in and out of the baste color block(s).
Note: Basting can only be enabled while on the first stitch in the embroidery.
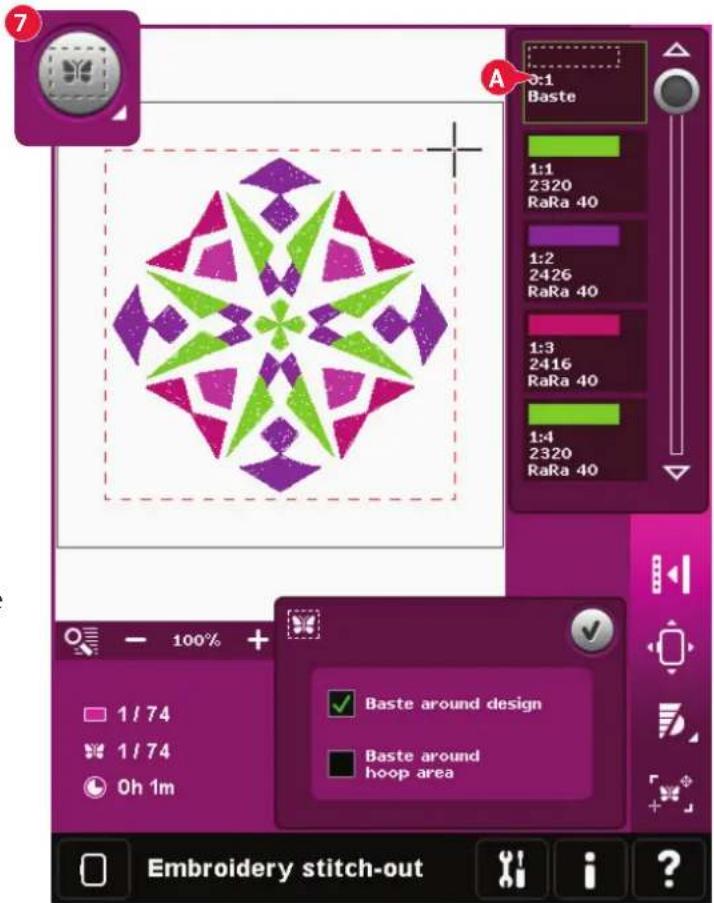
Thread tension (8)
When embroidering with specialty thread or fabric you may need to adjust the thread tension to achieve the best result. Thread tension can be adjusted up or down using the + and the -.
If you find that the thread tension in general is too low or too high, touch the Thread tension compensation icon in the Machine settings menu and adjust the settings in the window that appears, see page 3:11.
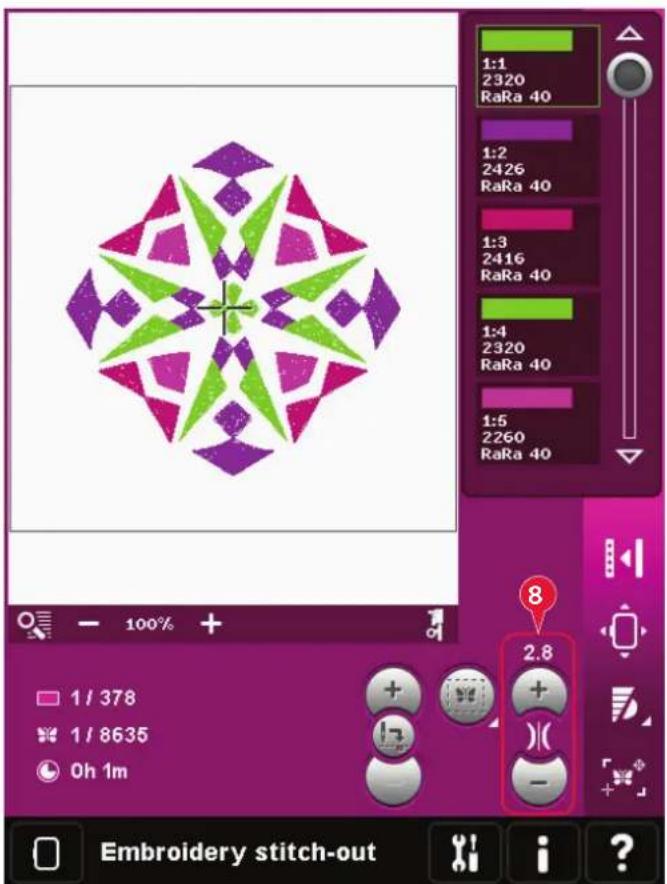
Option bar
More options (9)
Monochrome (A)
Touch the icon to activate monochrome embroidery. All designs are shown in a grey color and the machine does not stop for color block changes. To deactivate monochrome embroidery, touch the icon again.
Full screen (B)
To see your design as large as possible, use the full screen function. The embroidery will fill the whole screen. To close, touch the screen once.
3-dimensional view (C)
Touch the 3-dimensional view icon (C) to turn on or off a 3-dimensional view of the designs in the embroidery field.
By default, the designs are displayed in 2-dimensional view in the embroidery field. In 2-dimensional view, the designs load faster on the screen and it is easier to see the color blocks in the design. The view setting remains as selected even when you turn your machine off.
Save current state (D)
If you want to stop embroidering and save your current position, touch Start/Stop to stop the embroidery. Then touch the save current state icon to save the current position. You can now turn the machine off.
When saving current state, all your adjustments are stored and you can continue the embroidery later. A current state is saved until you replace it.
Note: If you have chosen AutoSave current state in the Settings menu, this icon will be disabled, and current state is stored periodically.
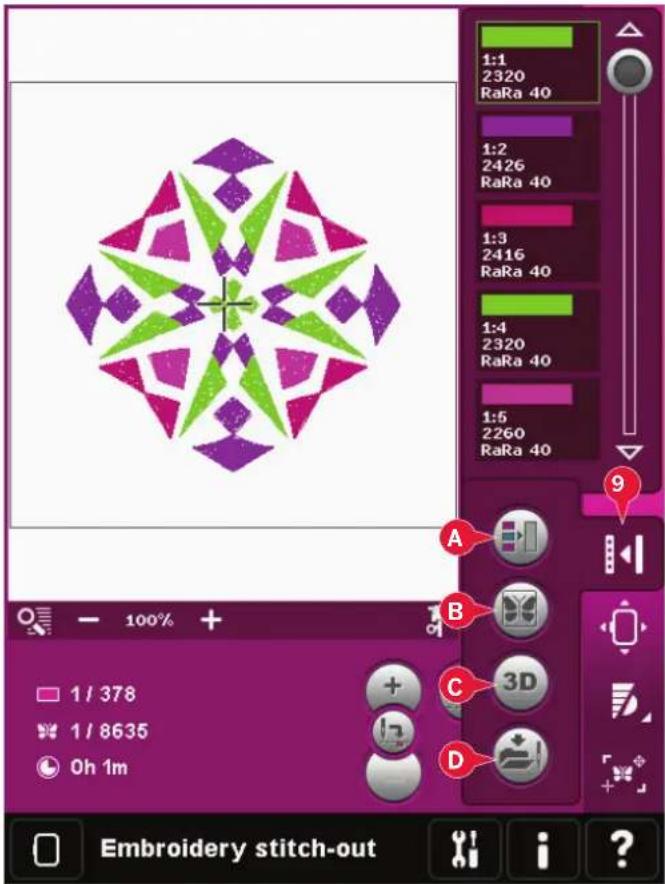
Hoop position (10)
Use the hoop position functions to move the hoop to different positions.
Current position
When you want to return to the current stitch and start embroidering again where the embroidery was interrupted, touch the current position icon. You can also press the start/stop button once to return to the current stitch and start to embroider.
Park position
When you have finished your embroidery, remove the hoop and select park position. The embroidery arm will be placed in a position that will allow easy storage.
Use the park position when you need to have a free sewing space with the embroidery arm out of the way.
Note: It is very important that the hoop is removed, otherwise it may be damaged.
Bobbin position
To make it easier to change the bobbin, touch bobbin position. The hoop will move backwards, allowing you to open the bobbin cover and replace the bobbin.
Cut position
Cut position will move the hoop towards you making it easier to cut jump stitches and trim fabric when embroidering an appliqué.
Center position
Use the center position if you want to check where the center position of the hoop will be placed on the fabric.
Speed control (11)
This function enables you to easily reduce the maximum embroidery speed. Just touch the speed control icon to reduce the speed. To return to normal speed, deselect the icon.
You can change the set speed limit. Long touch the speed control icon to get a pop-up. Set desired speed limit using the slider then close the pop-up. The next time you touch the speed control icon, the speed will be reduced to the limit you have chosen. You can embroider without closing the pop-up.
Note: You cannot set maximum speed in the popup. To set maximum speed, close the popup and deselect the speed icon.
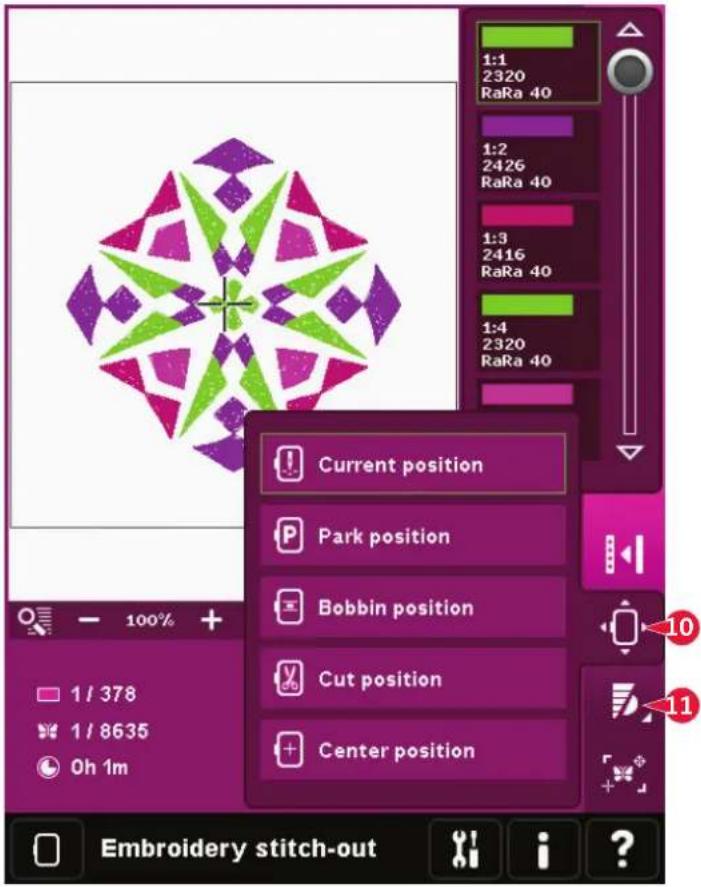
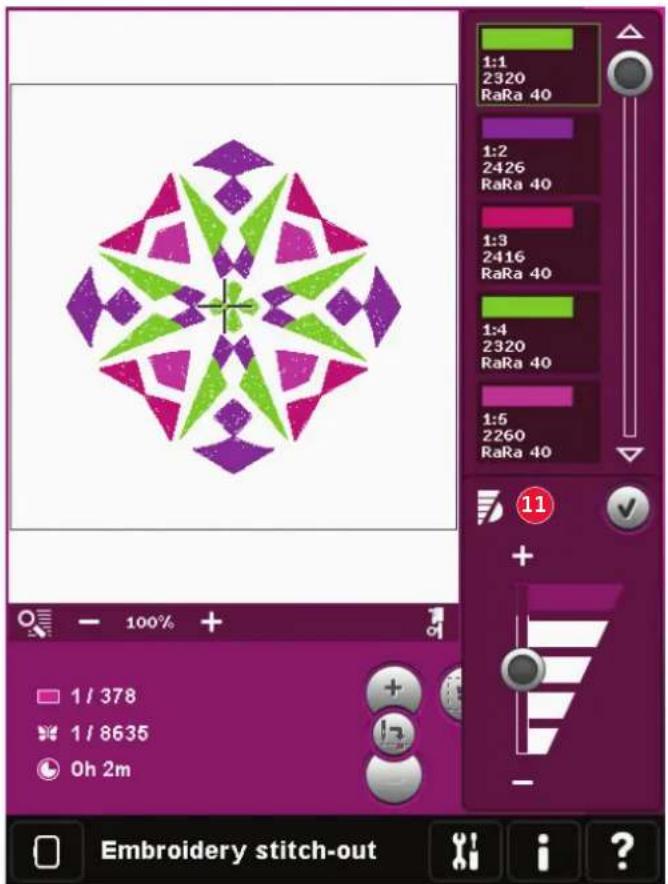
Precise positioning (12)
Precise positioning allows you to place a design on an exact spot on your fabric. It is also used when you want to embroider a design next to a previously embroidered design.
Use zoom and pan to be sure that you are placing the design exactly where you want it. Fine tune with the wheel.
Precise positioning - overview
A Select locking point on screen
B Place locking point on fabric
C Select matching point on screen
D Place matching point on fabric
E Touch function - move
F Touch function - rotate
G Touch function - pan
H Wheel
I Corner icons
J Zoom to crosshair
To select locking point on screen
Select locking point on screen (A). Place the green crosshair where you would like the locking point to be in your embroidery. Use zoom to crosshair (see below) to be able to place the crosshair exactly where you want it.
To place locking point on fabric
Next activate (B), place locking point on fabric. The green crosshair will be locked on the screen, changing color from green to black with a ring around the center of the locking point. Now you can place the design exactly where you want it on the fabric by using the stylus or the wheel.
The position of the needle indicates where the locking point is placed on the fabric.
Zoom to crosshair (J)
Precise positioning is easy to use with the zoom to crosshair option. Touch the zoom to crosshair icon (J) to pan to the current crosshair position and zoom in as much as possible on the screen. You can position the locking and matching point on screen exactly where you want them.
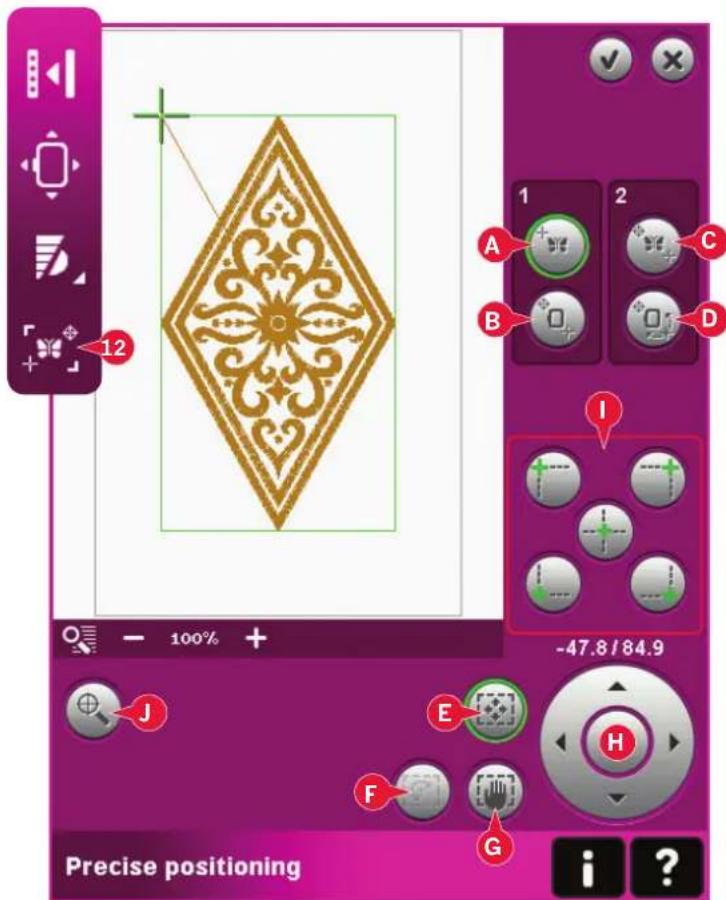
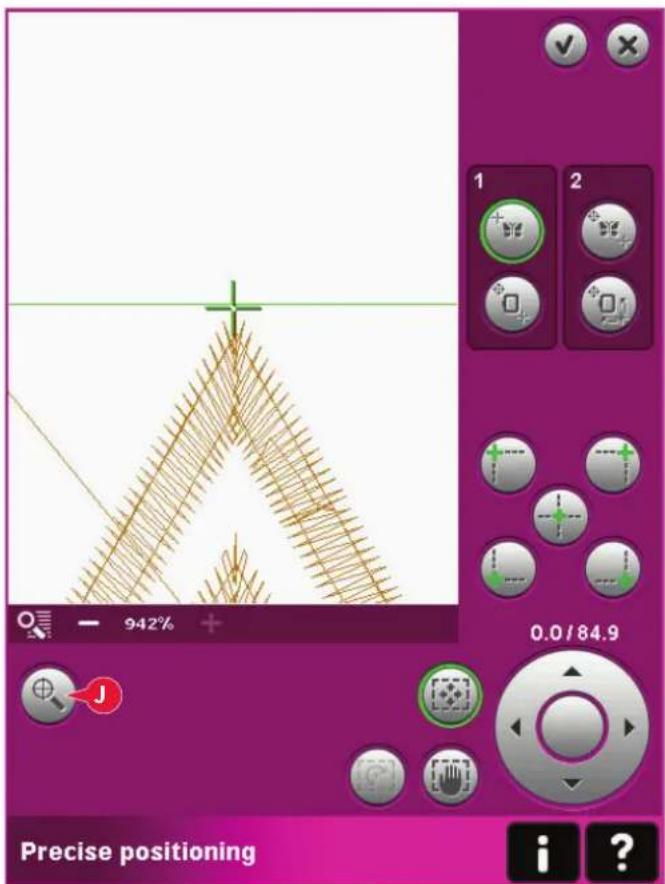
To select matching point on screen
You have the ability to check a second position within the design to make sure your design is lined up properly and make further adjustments if necessary. Activate (C), select matching point on screen.
A second crosshair will appear, the matching point. Place it at the point where you would like another part of the design to connect.
To place matching point on fabric
To line up the design where you want it, activate (D), place matching point on fabric. To move the matching point to the right place on the fabric, the rotate function will automatically be selected.
Use the stylus or wheel to rotate the design on the screen around the locking point, kept in position. Rotate the design to connect with the previously embroidered design, or to get the correct placement on the fabric.
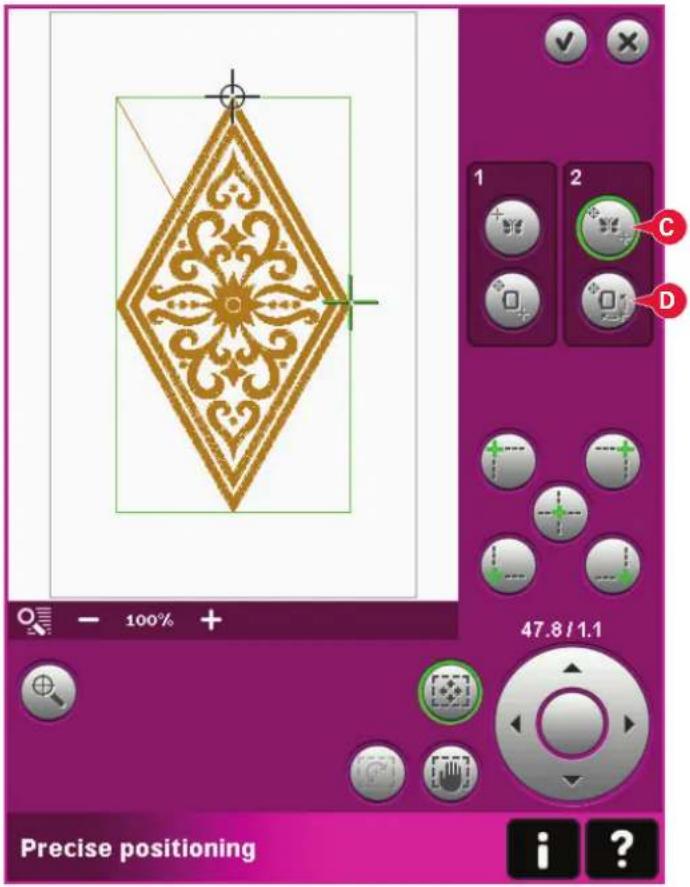
Corner icons (I)
Use the corner icons to set the connecting point (locking point or matching point) for precise positioning in a corner of the design. This is the easiest and most precise way since the connecting point will be automatically placed exactly in the corner. This is useful when positioning a design on a patterned fabric.
The corner icons can also be used to trace the design field (activate B or D) by touching each of the four corner icons in turn. You can find the center of the design again by touching the centering icon.
When touching one of the icons, the selected point will automatically be set to the corresponding position, i.e. at a corner or at the center of the embroidery.
E.g. when choosing the upper left corner icon, the connecting point will be set at the upper left corner in the outer line of the design(s). After this, you can continue and make your own adjustments on the connecting point.
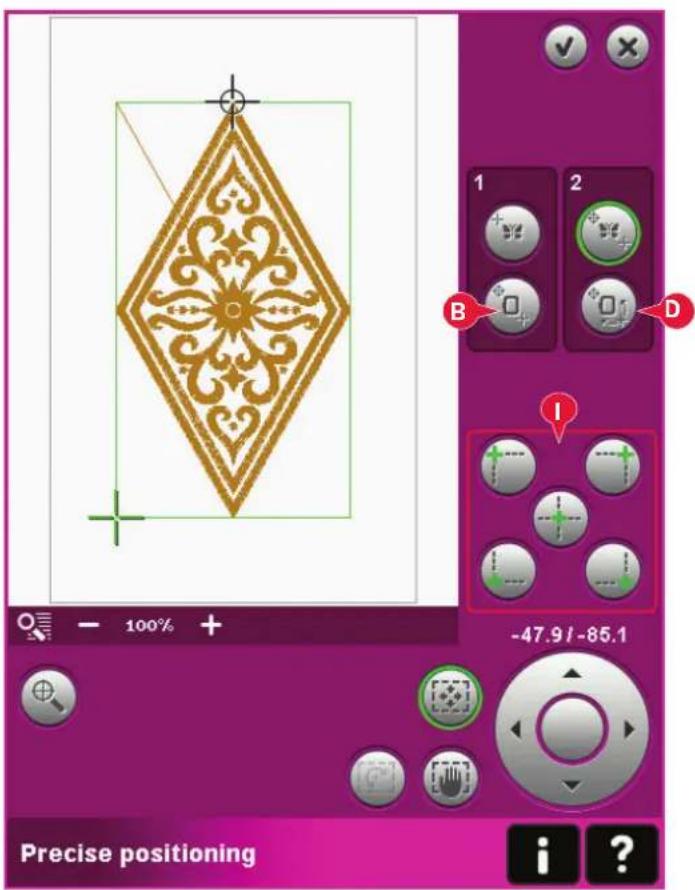
Disable needle warning (K)
Check allow lower needle position (K) to temporarily allow the needle to be in a lower position while moving the hoop. The needle can then remain close to the fabric when using precise positioning. Just make sure the needle is above the fabric to prevent damage to the needle and fabric.
Note: The warning cannot be disabled when the needle is below the needle plate.
Precise positioning - example
When adding one design to one previously embroidered, precise positioning is very useful.
1a. Choose one of the corners to select locking point on screen (a) by touching one of the corner icons (I). You can also set the locking point on screen using touch function - move or the wheel.
1b. Select the next function, place locking point on fabric (b), to move the locking point on the screen to the right position in the hoop.
Move the locking point to the upper left corner of the embroidered design. Use the touch function - move. Check that the needle is at the exact position.
If satisfied, close precise positioning and start embroidering. Follow step 2 on the next page if more adjustments are necessary to get the correct placement of the design.
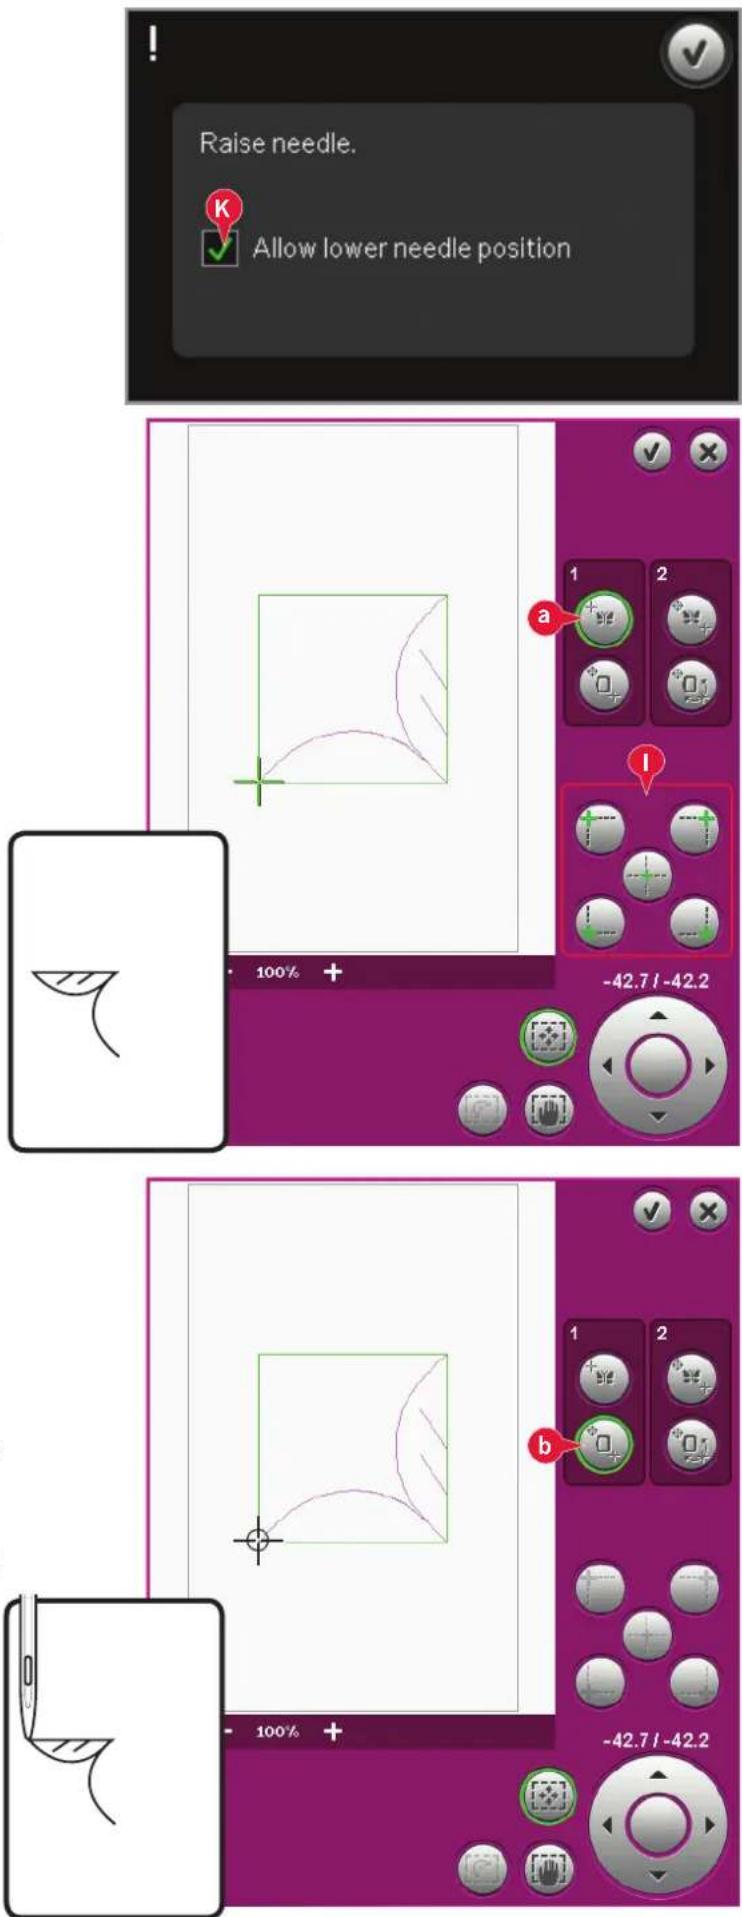
2a. To line up the design on the screen with the previously embroidered, select matching point on screen (a) to be the corner. Use the touch function - move or the corner icons.
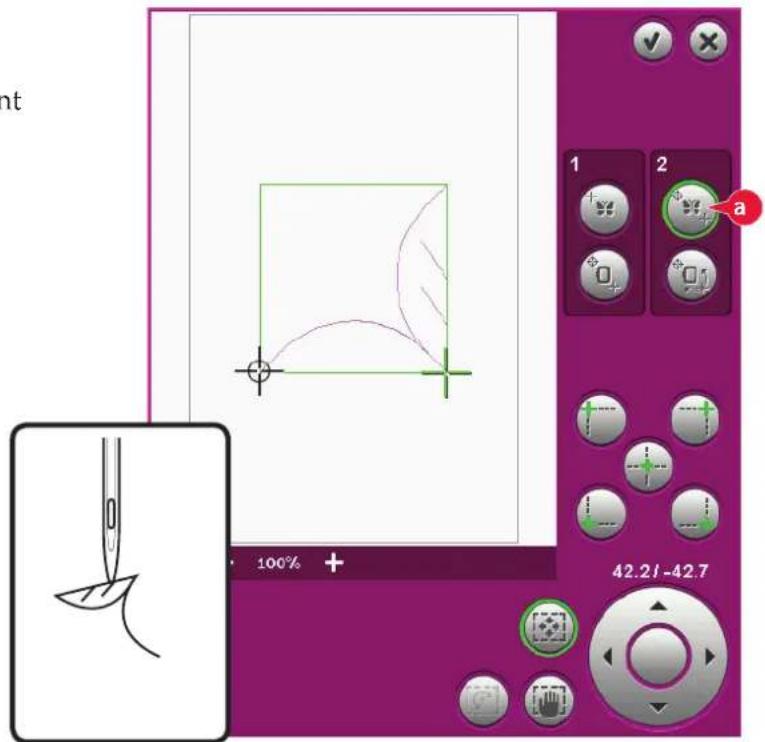
2b. Select the next function, select matching point on fabric (b) to move the matching point to the right position in the hoop. Use the touch function - rotate to line up the designs. Check that the needle is at the exact position.
Close precise positioning and start embroidering.
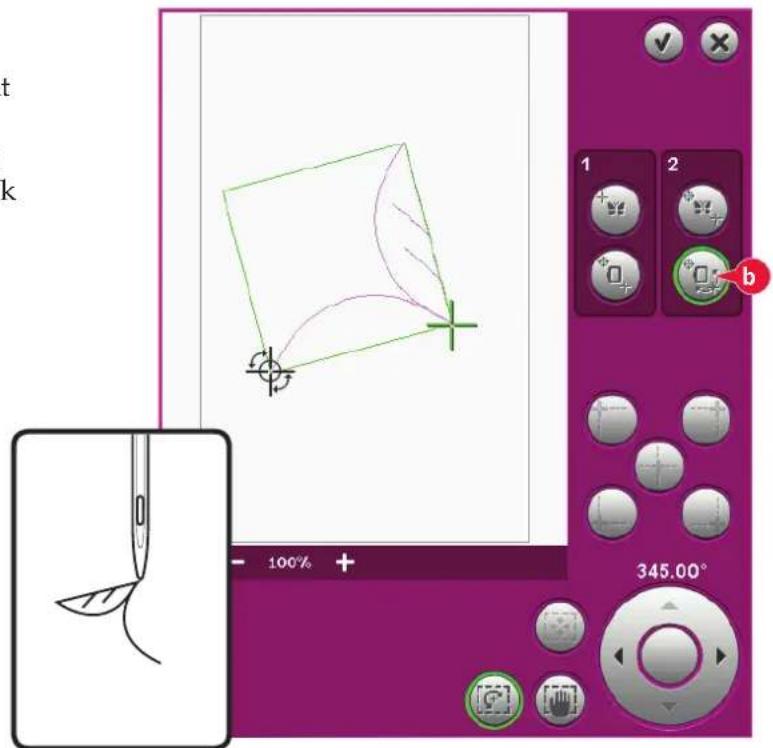
Common Embroidery stitch-out pop-ups
Embroidery unit calibration
When the embroidery unit is attached, a pop-up asks you to slide off the hoop and clear the machine area for calibrating the embroidery arm. You will also be reminded to disengage the IDT™ system and attach the embroidery presser foot.
Note: It is very important to remove the hoop, otherwise the hoop or the embroidery unit may be damaged while calibrating.
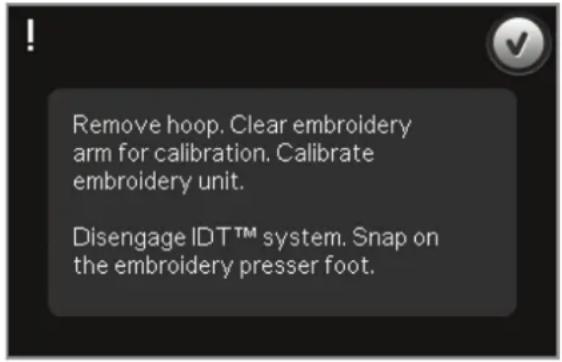
Attach correct hoop
If the size of the hoop attached to the machine does not match the size displayed on screen, the machine will not embroider. You must change the hoop to the displayed size or change the hoop setting to the hoop size attached.
To change hoop settings, re-enter Embroidery edit and go to select hoop.
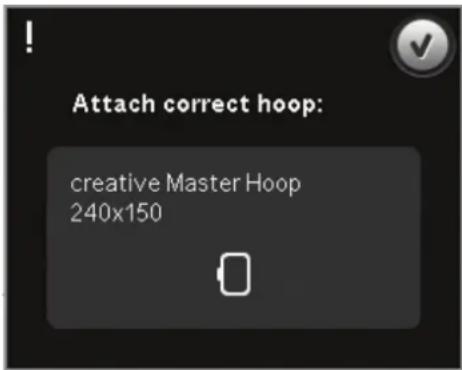
Bobbin thread low - move to bobbin position?
When the bobbin thread is running low, a pop-up message appears giving you an indication that the bobbin needs to be changed soon. This gives you an opportunity to plan where to stop embroidering and change the bobbin.
It is possible to embroider until the thread completely runs out. Press Start/Stop button to continue embroidering, without closing the bobbin thread low pop-up.
Touch cancel to remain at the current stitch position. Touch OK to move the hoop to bobbin position. The hoop position tab opens. Replace the empty bobbin with a full one. Touch Current position and pull back excess needle thread. Move a few stitches backwards using the current stitch icons (5). Press start/stop or press your foot control to continue embroidering.
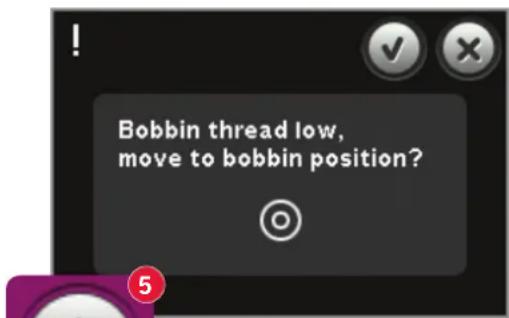
Check Needle Thread
The machine stops automatically if the needle thread runs out or breaks. Re-thread the needle thread, close the pop-up, step back a few stitches and start embroidering again.
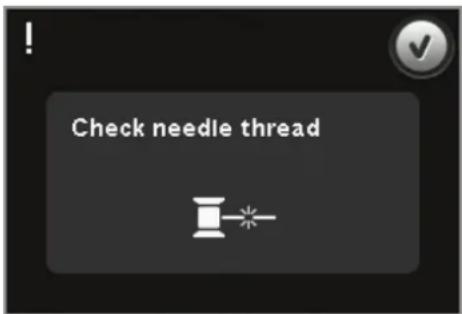
Change thread color
When it is time to change the needle thread, the machine stops and the upper thread is cut. Change the spool and re-thread the machine. The next recommended color is shown in the pop-up.
Cut thread end
If Cut jump stitches is not activated in Machine settings in the Settings menu, the machine will stop after stitching a few stitches. Cut the thread and press start/stop to continue embroidering.
Embroidery is finished
When the embroidery is finished, a pop-up will appear on the screen. Touch OK to keep the design(s) loaded and stay in Embroidery stitch-out.
Change to Cutwork Needle (optional accessory)
Some cutwork designs can be stitched out using the optional accessory PFAFF® Embroidery Cutwork Needle Kit, (P/N 820 945-096). These designs are marked with a cutwork needle symbol in the creative™ 4.5 Embroidery Collection. When the machine stops and this pop-up message is shown, insert the corresponding cutwork needle. Touch OK and press the Start/Stop button to resume.
Note: These cutwork designs can also be stitched out without the cutwork needles, but will then have to be cut manually.
Machine needs to rest
If the machine stops and this pop-up appears on the screen, the machine needs to rest. When the OK icon is enabled you can resume embroidery. The embroidery results will not be affected.
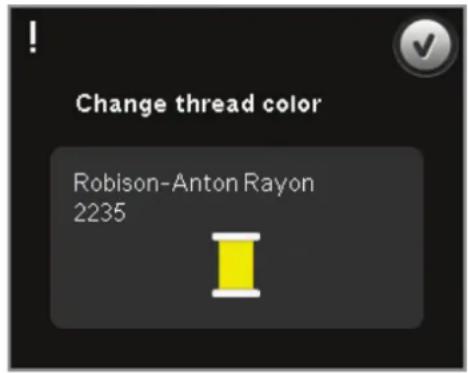
Files & Folders
Files & Folders
Files & Folders is used to organize, add, move, remove and copy all your designs, fonts and stitch files. Use either built-in memory or an external device connected to your machine for storing. While loading the files to the selection area a default icon is shown in the meantime.
Files & Folders - overview
Parts of the selection bar
- Stitches
- Fonts
- Designs
- Files & Folders
- Quick help
Parts of Files & Folders
- Load file
- Close and return to previous view
- Search path
- Move up one folder level
- List view
- Selection area
- Scroll bar
- Personal designs folder
- Personal fonts folder
- Personal files folder
- Built-in designs folder
- External device (only visible when a device is connected)
- Create new folder
- Cut
- Copy
- Paste
- Delete
- Rename file or folder
- File name of selected file
Quick help (5)
Use Quick help to receive instant information about any icon or part of the screen. Touch the Quick help icon (5) and then the icon or the part of the screen you want information about.
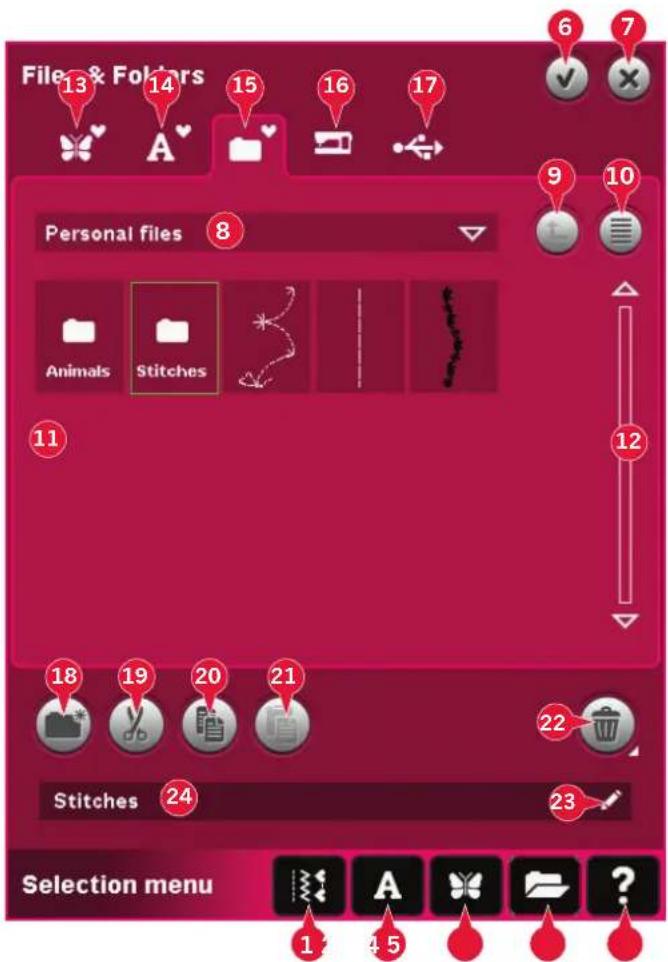
Your machine can load the following file formats:
- .SHV, .DHV, .VP3, .VIP, .HUS, .PEC, .PES, .PCS, .XXX, .SEW, .JEF, .EXP, .10* and .DST (embroidery files)
- .SPX (stitch files)
• .SFX (stitch font files)
• .VF3 (embroidery font files)
• .TXT and .HTM/HTML-files
Note: If the file type or file version is not supported by your machine, or the file is damaged, it is shown in the selection area as an unrecognized file.
Available memory
The built-in memory can store designs, fonts, stitches and other files. To check how much memory is still available in the built-in memory, touch Quick help (5) and then touch either Personal designs (13), Personal fonts (14) or Personal files (15). A pop-up shows how much memory is available.

Design file

Embroidery font file

Stitch file

Text file

Unrecognized file
Browse Files & Folders
To open Files & Folders, open selection menu from the task bar. Select Files & Folders (4) in the selection bar at the bottom.
Within the built-in memory there are four folders: Personal designs (13), Personal fonts (14), Personal files (15) and Built-in designs (16). You can also explore external devices (17) connected to the USB-ports. The external device icon (17) is only available when a device is connected.
Touch any of these to display their contents in the selection area. The path of the shown folder is written in the search path field (8). Files are displayed as thumbnail images or with an icon.
List view (10)
Touch the list view icon (10) to show the files in the current folder listed in alphabetical order. For each file, file name and type will be displayed. Touch the list view icon again to switch back to thumbnail view.
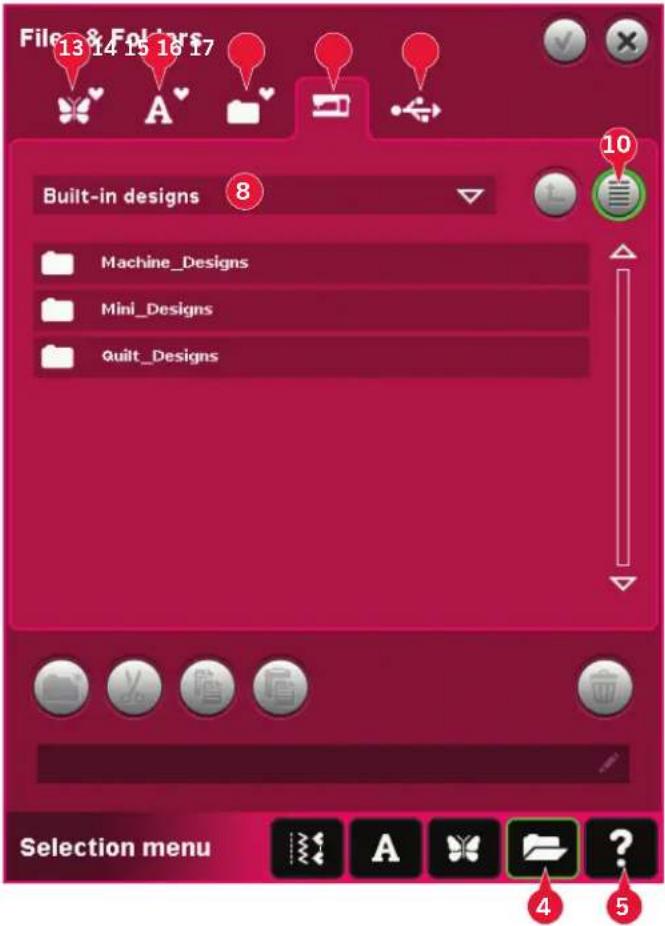
Personal designs (13)
Store design files in Personal designs (13). You cannot create folders in the Personal designs folder.
Personal fonts (14)
Store embroidery font files in Personal fonts (14). Stored fonts are shown both in fonts (2) and in shortcut to Personal fonts (14). You cannot create folders in the Personal fonts folder.
Personal files (15)
Fill Personal files (15) with designs, fonts, your customized designs, stitch programs, text files or any file that you want to store.
Create folders and arrange your Personal files so that you can find your favorites easily.
Built-in designs (16)
Built-in designs are the designs that are stored in the machine's permanent memory. Built-in designs are divided into three folders: machine designs, mini designs and quilt designs. Long touch the desired folder to open it.
Files cannot be added to or removed from the Built-in design folders. Built-in designs can be copied and added to another folder using the paste function.
External device (17)
The external device icon is only active when a device is connected to the USB port. Touch external device (17) to display all connected devices. You can have your computer and another device such as a PFAFF® USB embroidery stick connected at the same time. Touch either of the devices to explore.

USB
embroidery
stick

Computer
Use to store files and/or move files to and from your computer.
Load designs or other files directly from your computer. Store all file types here.
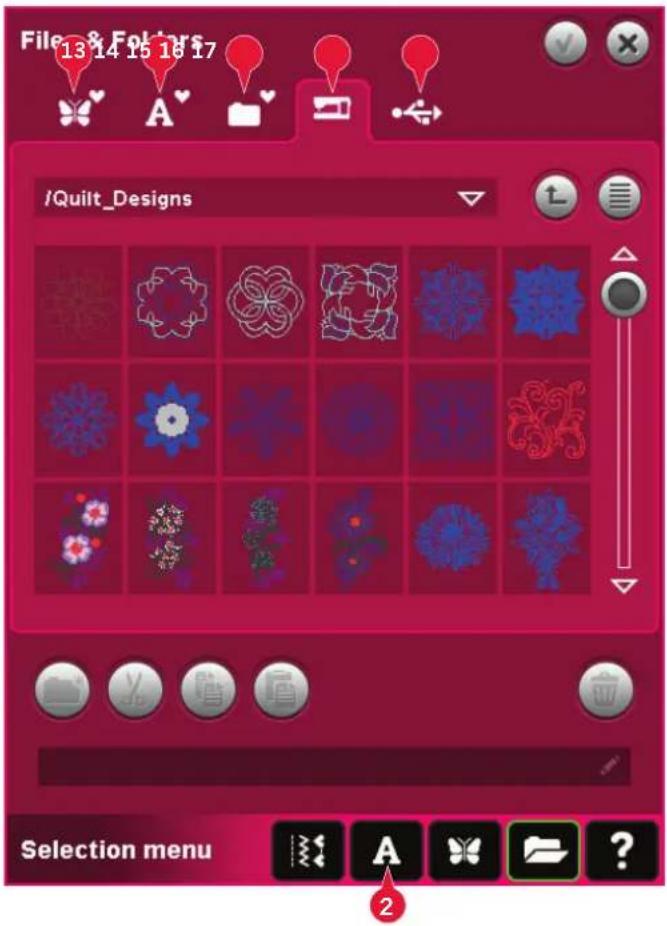
Load a file
To load a file, touch load (6) or long touch the file. It will be loaded to the appropriate window.
If you want to open several designs at one time, click on the ones you want to open. Long touch on the last one. All the designs will open in Embroidery edit.
Open a folder
To open a folder in Files & Folders, long touch the folder. The contents of the folder will be displayed in the center window.
Move up one folder level (9)
Use the move up one folder level icon to step up through the levels of folders. You can step up all the way to the root level. In the center window you will see included files and folders for each level as you step.
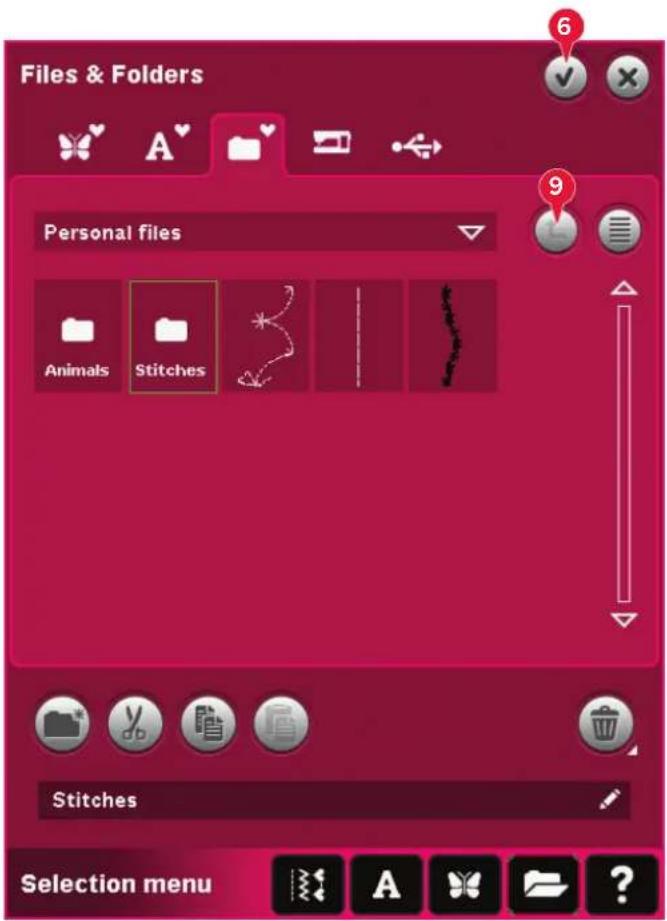
Folder structure
Touch the area of the search path field (8) to open a drop down window that shows the folder levels down to the current folder. Work your way back through the levels by touching a folder at another level.
Also use this icon to switch between external devices such as your computer or USB embroidery stick.
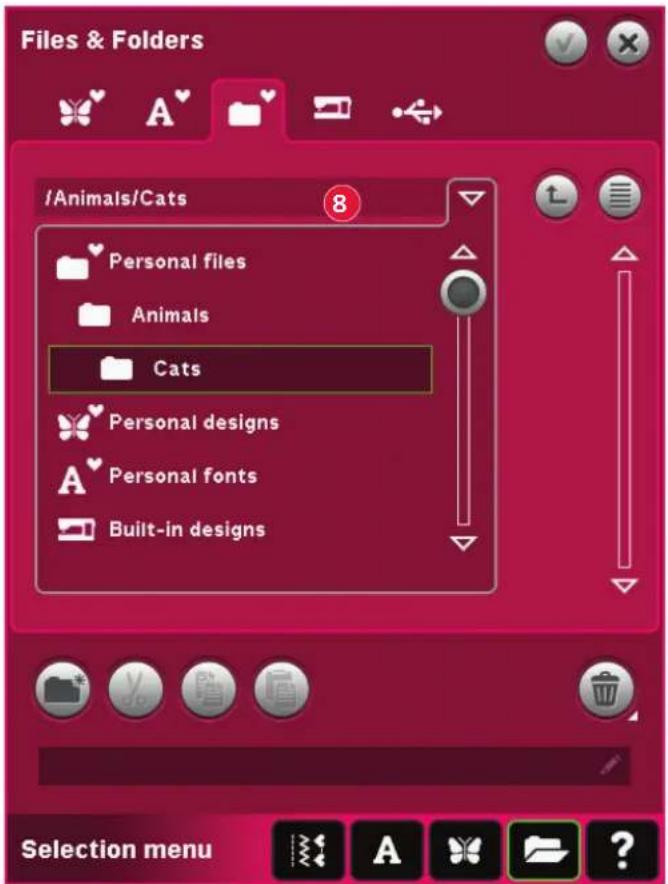
Organize
Create a new folder (18)
Touch the create new folder icon (18) to create a new folder. A pop-up opens where you can enter a name for your folder.
Move a file or folder
Use cut (19) and paste (21) to move a file or folder to another place.
Select the file or folder, then touch cut. Open the folder where you want to place the file or folder. Touch paste. The file or folder is now stored here and is removed from the folder where it was cut from.
Copy a file or folder
Use copy (20) and paste (21) to copy a file or folder to another place.
Select the file or folder, then touch copy. Open the folder where you want to place the file or folder. Touch paste. The file or folder is now stored here and the original file or folder is also stored in the folder where you copied it from.
Delete a file or folder (22)
To delete a file or folder, mark it and touch delete (22). A pop-up asks you to confirm the deletion. If a folder is deleted, all files within the folder are deleted as well.
To delete all files and folders in the current folder, long touch the delete button.
Rename a file or folder (23)
Select the folder you want to rename, then touch this icon to a open a pop-up where you can enter a new name. Use this icon for renaming files as well.
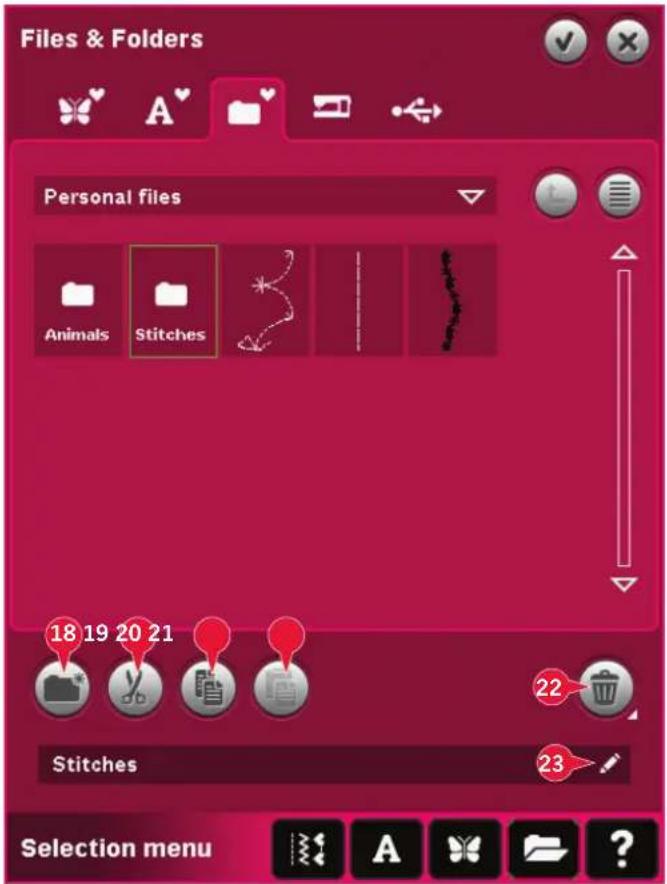
Common Files & Folders pop-ups
Delete file or folder
Your machine will always ask you to confirm when you have selected to delete a file or folder. This prevents you from deleting anything by mistake.
Could not delete file or folder
You cannot delete files or folders from CDs or from other write protected media.
The folder already exists
You cannot create a new folder with the same name as another folder on the same level. Create your folder elsewhere or enter a different name for the folder.
Available memory is low
Your machine can store files in the built-in memory. When the memory is full, you can move them to an external device by using the cut and paste functions.
When only a small amount of memory is left, your machine will alert you once. If you continue to fill the memory, it will not remind you again, until the memory is completely full.
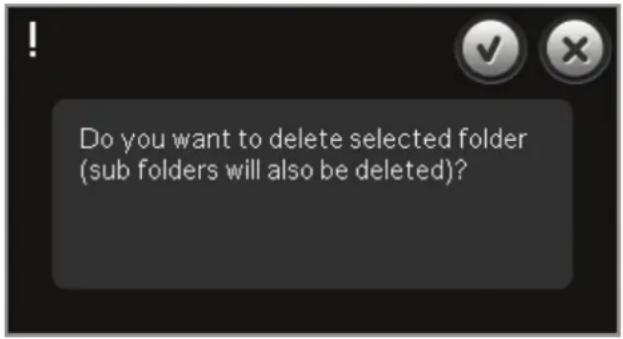
System busy
When the machine is loading, saving, moving files or anything that takes time, an hour glass is shown.
Invalid file type for this folder
Only designs can be stored in Personal designs, and only font files can be stored in Personal fonts. Select the proper folder to store in.
Maintenance
Cleaning the machine
To keep your sewing machine operating well, clean it often. No lubrication (oiling) is needed.
Wipe the exterior surface of your machine with a soft cloth to remove any dust or lint built up.
Note: Use of cleaners or solvents on the machine can cause damage to the plexifront. Clean only with a soft dry cloth.
Wipe the PFAFF ® creative ™ Color Touch Screen with a clean, soft and damp cloth.
Cleaning the bobbin area

Note: Lower the feed dogs by pressing presser foot up and extra lift. Turn off the machine.
Remove the presser foot and slide off the bobbin cover. Place the screwdriver under the needle plate as shown in the picture and gently turn the screwdriver to pop off the needle plate. Clean the feed dogs with the brush found with the accessories.
Cleaning under the bobbin area
Clean the area under the bobbin case after sewing several projects or any time you notice an accumulation of lint in the bobbin case area.
Remove the bobbin case holder (A) covering the front part of the bobbin case by lifting it up. Remove the bobbin case (B) by lifting it up. Clean with the brush.

Note: Use caution when cleaning around the thread snips knife (C).
Put the bobbin case and the bobbin case holder back in place.
Note: Do not blow air into the bobbin case area. The dust and lint will be blown into your machine.
Note: When using the optional accessory PFAFF ® Embroidery Cutwork Needles, it is necessary to clean the bobbin area after each embroidered design/project.
Replacing the needle plate
With feed dogs lowered, place the needle plate with the knob fitting into the notch at the back (D). Press the needle plate down until it clicks into place. Slide on bobbin cover.
Non-original parts and accessories
The warranty does not cover any defect or damage caused by use of non-original accessories or parts.
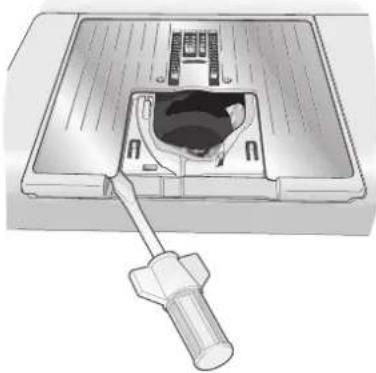
B
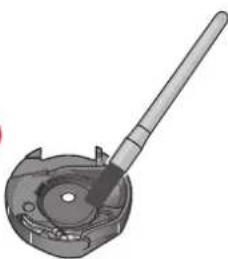

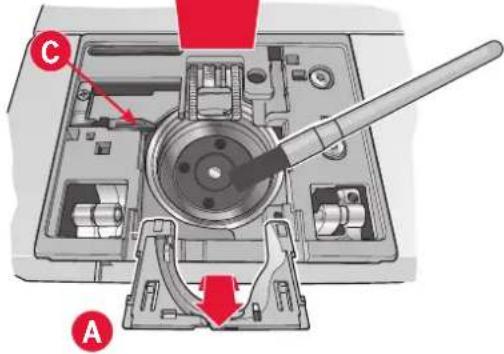
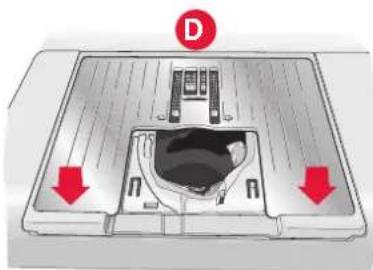
Troubleshooting
In this troubleshooting guide you will find solutions to the problems you may have with your machine. For further information please contact your local authorized PFAFF ® dealer who will be happy to help you.
Problem/cause Remedy
| General problems |
| Bobbin alarm does not work? Clean lint from bobbin | area and use only the originalPFAFF®bobbins approved for this model. |
| Thread snips does not cut the thread? Remove needle | plate and clean lint from bobbin area.Enable automatic thread snips in the Settings menu. |
| Fabric does not move? Make sure that machine is not set in free-motion mode.See chapter 4. | |
| Wrong stitch, irregular or narrow stitch? Deactivate | twin needle or stitch width safety in theSettings menu. |
| The needle breaks? Insert needle correctly as described in chapter 2. | |
| The machine will not sew? Check that all plugs are securely plugged into themachine and into the wall socket.Push bobbin winder lever to sewing position. | |
| The PFAFF®creativeTM Color Touch Screen displays the startup screen? | Touch the screen to activate.Turn off screen saver in the Settings menu. |
| Icons on the screen are not activated when touched? | Close any pop-ups that may be blocking the screen.Calibrate the screen. Calibrate is found in the Settings menu. |
| The sewing and embroidery machine screen and/or Function Buttons do not respond to touch? | The sockets and function buttons on the machine can be sensitive to static electricity. If the screen does not respond to touch, turn the machine OFF and then ON again. If the problem persists, contact your authorized PFAFF®dealer. |
| The machine skips stitches |
| Did you insert the needle properly? Insert needle correctly as described in chapter 2. |
| Did you insert a wrong needle? Use needle system 130/705 H. |
| Is the needle bent or blunt? Insert a new needle. | |
| Did you thread the machine properly? Check how the machine is threaded. |
| Is the correct presser foot used? Attach correct presser foot. |
| Is the needle too small for the thread? Change the needle. |
| Is the fabric moving up and down with the needle when free-motion sewing or embroidering? | Attach Dynamic spring foot 6D.If using foot 6A, reduce the presser foot height. |
| Needle thread breaks |
| Did you insert the needle properly? Insert needle correctly as described in chapter 2. |
| Did you insert a wrong needle? Use needle system 130/705 H. |
| Is the needle bent or blunt? Insert a new needle. | |
| Did you thread the machine properly? Check how the machine is threaded. |
| Is the needle too small for the thread? Change the needle to the proper size for the thread. |
| Are you using poor thread with slubs or thread which has become dry? | Change to a new higher quality thread purchased from an authorized PFAFF® dealer. |
| Is a correct spool cap used? Attach a spool cap of the right size for the actual thread spool. |
| Is the best spool pin position used? Try a different spool pin position (vertical or horizontal). |
| Is the needle plate hole damaged? Change the needle plate. |
| Bobbin thread breaks |
| Did you insert the bobbin properly? Check the bobbin thread. |
| Is the needle plate hole damaged? Change the needle plate. |
| Is the bobbin area full of lint? Clean lint from bobbin area and use only the original PFAFF®bobbins approved for this model. |
| Is the bobbin wound correctly? Wind a new bobbin. | |
| The seam has uneven stitches |
| Is the thread tension correct? Check needle thread tension and the threading. |
| Are you using too thick or slubbed thread? Change the thread. |
| Is the bobbin thread evenly wound? Check bobbin winding. |
| Is a correct needle used? Insert a proper needle correctly as described in chapter 2. |
| The machine does not feed or feeds irregularly |
| Did you thread the machine properly? Check how the machine is threaded. |
| Has sewing lint collected between the feed dogs? Remove the needle plate and clean the feed dogs with a brush. |
| Thread loops are forming on the underside of the embroidery design |
| Has the embroidery built up too much to move freely under the presser foot? | Increase the presser foot height in the Settings menu in small steps until problem is solved. |
| The embroidery design is distorted |
| Is the fabric hooped properly? The fabric must be tightly hooped. |
| Is the inner embroidery hoop completely inserted in the outer embroidery hoop? | Hoop the fabric in such a way that the inner hoop always exactly matches the outer hoop. |
| The embroidery design has puckered |
| Did you stabilize your fabric sufficiently? | Ensure you use the proper stabilizer for your technique or fabric type. |
| The machine will not embroider |
| Is the embroidery unit attached? Make sure that the embroidery unit is properly attached into the socket. |
| Is the wrong hoop attached? | Slide on the correct hoop. |
Have your sewing machine serviced regularly by your local authorized PFAFF® dealer!
If you have followed this troubleshooting information and still have problems, take your sewing machine to your dealer. If there is a specific problem, it is a great help to test sew with your thread on a scrap of your sewing fabric and bring it to your dealer. A sewing sample will often give much better information than words.
Index
1/4" quilting foot with IDT™ system 1:11
3-dimensional view....8:9, 9:5
A
Accessories....1:10
Accessory tray 1:9, 2:3
Action indicator....2:13
Add a letter into a text....8:21
Add a stitch or stitch point 6:3
Adjustments....8:6
Adjust stitches 8:18
Adjust text and stitches 5:3
Adjust thread tension 4:7
Allow lower needle position 9:9
Alphabets 1:21
Attaching the Dynamic spring foot 6D....2:9
Attaching the Dynamic spring foot for embroidery ....7:5
Attaching the Sensormatic buttonhole foot.... 4:16
Attach presser foot....2:10
Audio preview application....10:7
Audio repeat....3:11
Automatic presser foot lift....3:9
Automatic thread snips....3:9
AutoSave current state 3:9
Auxiliary spool pin....1:9
Available memory....10:3, 10:7
B
Balance....4:5
Basic Shape Creator™ feature....8:11
Basting 9:4
Blindhem foot with IDT™ system 3....1:11
Blindhem stitch....4:15
Elastic blindhem stitch....4:15
Bobbin area, cleaning....11:2
Bobbin cover 1:8
Bobbin, insert....2:8
Bobbin position....9:6
Bobbins 1:10
Bobbin spindle....1:9
Bobbin thread cutter 1:9
Bobbin thread guide 2:5
Bobbin thread guides....1:9
Bobbin thread low....4:23
Bobbin winder lever 1:9
Bobbin winder thread guide 1:9
Bobbin winding 2:7
Bobbin winder thread guide 2:7
Winding while embroidering or sewing....2:8
Winding while threaded....2:7
Browse Files & Folders....10:3
Brush....1:10
Built-in designs....7:3, 10:4
Built-in machine designs....8:3
Built-in mini designs....8:3
Built-in quilt designs 8:3
Buttonhole, corded....4:17
Buttonhole, manual.... 4:17
Buttonholes 4:16
Buttonhole slit length 4:6
Button ruler....1:8
Buttons 2:13
Immediate tie-off.... 2:14
Needle up/down....2:14
Presser foot down and pivot toggle....2:13
Presser foot up and extra lift toggle....2:13
Reverse button.... 2:13
Start/stop....2:13
Stitch restart....2:14
Thread snips....2:13
Button sewing....4:18
Button stitch repetition....4:6
C
Calibrate screen 3:11
Cancel....3:3
Carrying case 2:2
Center position 9:6
Change font 8:22
Changing the presser foot....2:10
Cleaning the machine....11:2
Color block sort 9:4
Color list 9:3
Color Touch Screen....1:8
Complimentary software (PC) 2:12
Computer 10:4
Connect the embroidery unit 7:3
Connect the foot control....2:2
Connect to and remove from USB port 2:11
Connect to the power supply 2:2
Control point, definition 8:12
Control points, select 8:12
Copy a file or folder 10:6
Corded buttonhole 4:17
Corner icons 9:8, 9:9
Cover....2:3
Crazy quilt stitching 4:20
Create a new folder....10:6
Create a sequence....5:3
Crosshair 9:3, 9:7, 9:8
Current color block 9:2
Current position 9:6
Current stitch....9:3
Cursor 5:3, 5:4, 5:5, 6:8, 8:21
Cut jump stitches.... 3:9
Cut position....9:6
D
Darning....4:18
Decorative stitches....1:15
Delete 8:6
Delete a file or folder 10:6
Delete a letter 8:21
Delete a stitch or letter....5:3
Delete/Duplicate last object 8:11
Delete selected stitch point....6:4
Denim needle....2:10
Design adjustments
Delete....8:6
Duplicate 8:6
Group....8:6
Mirroring....8:6
Move design into hoop 8:6
Redo 8:6
Undo 8:6
Design angle, select....8:13
Design, load 8:3
Designs, built-in 7:3
Design, select 3:6
Directional stitches....5:5
Duplicate 8:6
Duplicate a stitch or letter....5:4
Duplicate selected stitch point....6:4
Dynamic spring foot 6D....1:11, 4:8
Attach 2:9,7:4
Dynamic spring foot 6D for embroidery ....3:10
Dynamic spring foot free-motion 4:8
E
Edge guide 1:10
Electronic knee-lift 2:3
Embroidery collection 1:10, 7:3
Embroidery edit 8:2-8:24
Embroidery edit pop-ups....8:23
Embroidery fonts 8:3
Embroidery foot 6A....1:11
Embroidery hoop overview....7:3
Embroidery information....9:2
Embroidery needle....2:10
Embroidery stitch editor....8:18
Embroidery stitch-out 9:2-9:12
Embroidery stitch-out pop-ups....9:11
Embroidery text editor....8:21
Embroidery time 9:2
Embroidery unit, connect 7:3
Embroidery unit connection socket....1:9
Embroidery unit overview 7:2
Embroidery unit, remove....7:4
Enter number of designs....8:11
External device....10:4
F
Fancy stitch foot 2A 1:11
Fancy stitch foot with |DT™ system 1A....1:10
Feed dogs, options 3:9
Felt pad....1:10, 2:4
File formats 10:3
File name 8:8
Files & Folders 10:2-10:8
Files & Folders, browse 10:3
Files & Folders pop-ups 10:7
Folder level....10:5
Folder structure 10:5
Font, load....8:3
Foot control....1:10, 4:3
Four direction sewing....4:21
Free arm....1:8, 2:3
Free-motion options....4:8
Free-motion stippling 4:20
Full screen 9:5
G
Go to stitch....9:3
Grid 8:9
Group....8:6
Gütermann Sulky 3:8
H
Handle 1:9
Handlook quilting....4:19
Handwheel 1:8
Hard cover 2:3
Hems in heavy fabric....4:14
Hoop clips....1:10
Hoop position....9:6
Hoop selection 8:9
Hoop, slide on....7:5
Hoop the fabric 7:5
Horizontal preview....5:5
How to update your machine 2:12
HTML-files 3:12
I
Icons, common....3:3
Cancel 3:3
Long touch....3:3
OK....3:3
Scroll arrows....3:3
Touch functions....3:3
IDT™ system....1:9, 2:9, 4:8, 4:15, 4:16, 4:19, 7:6
Disengaging....2:9
Engaging....2:9
Immediate tie-off....2:14
Included accessories....1:10
Included hoops....1:10
Info menu 3:12
Insert a new stitch point....6:4
Insert a stitch or letter....5:3
Inserting the bobbin....2:8
K
Knee-lift 1:10, 2:3
L
Language....3:8
LED lights....1:8
Lid 1:8
Line positioning, select....8:13
List view 10:3
Load a design....8:3
Load a file....10:5
Load a font 8:3
Load a font from another location....8:21
Load a stitch....8:4
Loading and sewing a sequence 5:6
Loading and sewing a stitch....6:7
Load text to Embroidery edit 8:21
Locking point, select....9:7
Lock screen....3:11
Long touch 3:3
Lower case letters....5:3
Lower the presser foot....4:3
M
Machine designs....8:3
Machine needs to rest 4:23, 9:12
Machine overview....1:8
Machine settings....3:8, 4:3
Main switch....1:8
Manual buttonhole.... 4:17
Manual buttonhole foot 5M....1:11
Matching point, select 9:8
Maxi-stitch foot....1:11
Memory available.... 10:3
Mini designs....8:3
Mirroring....4:5, 8:6, 8:18
Mirroring end to end 6:5
Mirroring side to side 6:5
Monochrome....9:5
More options....8:9, 9:5
Mouse....2:11
Move 6:6, 8:7
Move a file or folder.... 10:6
Move design into hoop....8:6
Move to park position 8:9
Move up one folder level....10:5
Multi-purpose tool....1:10, 2:11, 4:18
Multi-select....6:4, 8:5, 8:10
N
Needle bar....1:8
Needle, change 2:11
Needle plate 1:8
Needles 1:10, 2:10
Needle screw....1:8
Needle threader....1:8, 2:5
Needle thread guide....1:8, 2:5
Needle up/down 2:14
New folder 10:6
Non-original parts and accessories 11:2
O
OK 3:3
Open a folder 10:5
Optional accessories ..... 2:5, 4:8, 4:18, 4:20, 4:21, 9:12, 11:2
Option bar 3:2, 3:3, 4:11, 8:8, 9:5
Options for feed dogs 3:9
Organize 10:6
Overview
Basic Shape Creator™ feature 8:11
Embroidery edit....8:2
Embroidery hoop....7:3
Embroidery stitch-out 9:2
Embroidery unit....7:2
Files & Folders....10:2
Machine....1:8
Precise positioning....9:7
Sequencing....5:2
Sewing mode....4:2
Stitch CreatorTM feature....6:2
Stitches....1:12
Owner's name....3:8
P
Pan....6:6,8:7
Park position....7:4, 8:9, 9:6
Patchwork program 4:13, 4:19
Personal designs....8:3, 10:4
Personal files 10:4
Personal fonts 10:4
Personal menu 3:5
PFAFF® creative™ Color Touch Screen....1:8
Piecing the quilt top 4:19
Place locking point on fabric 9:7
Place matching point on fabric....9:7
Pop-ups
Embroidery edit....8:23
Embroidery stitch-out 9:11
Files & Folders....10:7
Sequencing....5:8
Sewing 4:23
Stitch Creator™ feature....6:8
Position of the marked stitch point 6:6
Power cord 1:10
Precise positioning....9:7-9:9
Presser feet 1:10
Presser foot....1:8
Presser foot bar....1:8
Presser foot, change 2:10
Presser foot down and pivot toggle 2:13, 4:3
Presser foot height 2:3
Presser foot height embroidery....3:10
Presser foot holder....1:8
Presser foot pressure.... 3:10
Presser foot, raise and lower 4:3
Presser foot up and extra lift toggle 2:13, 4:3
Pre-tension device for threading and bobbin winding 1:9
Pre-tension disc 2:5
Preview sequence....5:5
Q
Quick help ....3:8, 3:12, 4:2, 4:8, 4:21, 4:22, 5:2, 6:2, 8:2, 9:2, 10:2, 10:3
Quilt designs 8:3
Quilting....4:19
Crazy quilt stitching....4:20
Free-motion stippling....4:20
Handlook quilting 4:19
Patchwork program....4:19
Piecing the quilt top.... 4:19
Stitch-in-the-Ditch 4:20
Straight stitch needle plate 4:19
R
Raise and lower the presser foot....4:3
Redo 8:6
Removable bobbin holder....1:9
Removable tray for presser feet 1:9
Remove presser foot 2:10
Remove the embroidery unit....7:4
Rename a file or folder 10:6
Replace a stitch or letter 5:4
Replacing the needle plate....11:2
Restore current state 8:9
Reverse button....2:13, 4:11, 4:12, 4:13
Reverse indicator....2:13
Ribbon stitches....4:22
Robison-Anton.... 3:8
Rotate 8:7
S
Save current state 9:5
Save design 8:8
Save options 4:9
Save personal default stitch....4:10
Save to Personal files....4:9
Save to Personal menu....4:10
Saving a sequence 5:7
Saving a stitch....6:7
Scale....8:7
Screen....1:8
Screen and light settings 3:11
Screen, lock....3:11
Screen saver 3:11
Screwdriver....1:10
Scroll arrows 3:3
Seam ripper....1:10
Select control points....8:12
Select design angle....8:13
Select design(s) 8:5
Select equal....8:10
Select hoop 8:10
Selecting a design 3:6
Selecting a font 3:5
Selecting a stitch 3:4, 4:3
Selection bar 3:4
Selection menu.... 3:4
Select line positioning....8:13
Select locking point on screen 9:7
Select matching point on screen....9:7
Select shape 8:11
Select side positioning....8:13
Select spacing....8:12
Select stitches/stitch points 6:3
Sensormatic buttonhole....4:16
Sensormatic buttonhole foot 5A....1:11
Sensormatic buttonhole foot, attach....4:16
Sensormatic buttonhole foot socket.... 1:8
Sensormatic free-motion 4:9
Sensormatic free-motion foot 6A 1:11, 4:9
Sequence adjustments 5:8
Sequence commands 5:4
Sequences in Stitch Creator™ feature 5:8
Sequence start position....4:9
Sequencing 5:2-5:8
Sequencing pop-ups 5:8
Settings menu 3:8
Sewing a sequence 5:6
Sewing a stitch....6:7
Sewing mode 4:2-4:24
Sewing pop-ups....4:23
Sewing programs 4:12
Patchwork program....4:12
Single stitch program 4:12
Tapering program....4:12
Sewing recommendations....4:3
Sewing techniques 4:14
Sew on a button....4:18
Shipping brace....7:2
Side positioning, select....8:13
Single stitch program....4:12
Slide on the hoop....7:5
Soft Touch Buttons....2:13
Sound settings 3:11
Spacing, select....8:12
Special sewing techniques 4:21
Speed control 4:11, 9:6
Spool cap 2:4
Spool caps....1:9, 1:10
Spool pin....1:9
Spool pin, auxiliary....1:9
Spool pins....2:4
Auxiliary spool pin....2:4
Horizontal position....2:4
Main spool pin 2:4
Vertical position....2:4
Spring foot free-motion....4:8
Stacking stitches 4:22
Standard presser foot with IDTTM system 0A....1:10
Start/stop 2:13
Stitch categories....3:4
Stitch Creator™ feature....6:2-6:8
Stitch CreatorTM feature pop-ups 6:8
Stitch density 4:5, 8:18
Stitch fonts....3:5, 8:3
Stitch-in-the-Ditch....4:20
Stitch length 4:4, 8:18
Stitch-out order....8:6
Stitch overview 1:12
Stitch point, definition....6:3
Stitch positioning.... 4:4
Stitch restart 2:14
Stitch, select....3:4, 4:3
Stitch settings....4:4
Stitch subcategories 3:4
Stitch width....4:4, 8:18
Stitch width safety.... 3:9, 4:8
Stop command....5:4
Straight stitch needle plate 4:19
Stretch needle....2:10
Stylus....1:10
Stylus holder 1:8
T
Take-up lever....1:9, 2:5
Tapering program 4:12
Task bar 3:2
Text editor 8:21
Thread color edit 8:10
Thread cutter.... 1:8, 2:3
Thread guide....1:9, 2:5
Threading the machine.... 2:5
Needle threader 2:5
Threading for twin needle....2:6
Thread manufacturer....3:8, 9:3
Thread net 1:10
Thread sensor 2:6
Thread snips.... 2:13
Thread snips command....5:4
Thread tension compensation....3:10
Three-step zigzag stitch.... 4:15
Tie-off command....5:4
Tie-off options....4:11
Tie-offs 8:18
Timer 3:9
Touch functions....3:3, 6:6, 8:7
Move....6:6,8:7
Pan....6:6,8:7
Rotate....8:7
Scale 8:7
Triple stitch 6:5
Troubleshooting 11:3
Twin needle....2:6, 3:8
Twin needle width....3:8
U
Undo 8:6
Universal needle....2:10
Unpacking....2:2
Unrecognized file 10:3
Updating instructions....2:12
Upper case letters....5:3
USB cord....1:10
USB embroidery stick 1:10, 2:11, 10:4
USB ports....1:8, 2:11
Utility stitches 1:12
V
Volume 3:11
W
Wing needles 2:10
Z
Zipper foot with IDT™ system 4....1:11
Zippers, sewing....4:14
Zoom....6:4, 8:4, 9:3
Zoom to all....4:9,5:6,8:4,9:3
Zoom to box....8:4, 9:3
Zoom to hoop 8:4, 9:3
Zoom to crosshair....9:7
You have purchased a modern, updatable sewing and embroidery machine. As we regularly release software updates, it is possible that there may be some differences between the machine software and the software described in the owner's manual. Consult your local authorized PFAFF ® dealer, and be sure to visit our website at www.pfaff.com for the latest updates of both the software and the Owner's Manual.
We reserve the right to change the machine equipment and the assortment of accessories without prior notice, or make modifications to the performance or design.
Such modifications, however, will always be to the benefit of the user and the product.
Intellectual Property
Patents protecting this product are listed on a label positioned underneath the Sewing Machine.
PFAFF, PERFECTION STARTS HERE, CREATIVE, STITCH CREATOR, SHAPE CREATOR and IDT (image) are trademarks of KSIN Luxembourg II, S.ar.l.
Please note that on disposal, this product must be safely recycled in accordance with relevant National legislation relating to electrical/electronic products. Do not dispose of electrical appliances as unsorted municipal waste, use separate collection facilities. Contact your local government for information regarding the collection systems available. When replacing old appliances with new ones, the retailer may be legally obligated to take back your old appliance for disposal free of charge.
If electrical appliances are disposed of in landfills or dumps, hazardous substances can leak into the groundwater and get into the food chain, damaging your health and well-being.
www.pfaff.com