
SLORLAWBSWA - Bed Kogan - Free user manual and instructions
Find the device manual for free SLORLAWBSWA Kogan in PDF.


| Product Type | Bed Frame |
| Brand | Kogan |
| Model | SLORLAWBSWA |
| Size | Single |
| Overall Dimensions | 190 cm (L) x 90 cm (W) x 30 cm (H) |
| Weight | 25 kg |
| Maximum Load Capacity | 250 kg |
| Material | Metal frame with wood slats |
| Finish | Black powder coating |
| Assembly Required | Yes |
| Tools Included | Allen key |
| Mattress Included | No |
| Slats Included | Yes, wood slats |
| Headboard Included | No |
| Under Bed Storage | No (low profile) |
| Recommended Mattress Thickness | 15 - 20 cm |
| Cleaning Instructions | Wipe with damp cloth, avoid abrasive cleaners |
| Safety Features | Sturdy construction, anti-slip foot caps |
| Warranty | 1 year |
Frequently Asked Questions - SLORLAWBSWA Kogan
User questions about SLORLAWBSWA Kogan
0 question about this device. Answer the ones you know or ask your own.
Ask a new question about this device
Download the instructions for your Bed in PDF format for free! Find your manual SLORLAWBSWA - Kogan and take your electronic device back in hand. On this page are published all the documents necessary for the use of your device. SLORLAWBSWA by Kogan.
USER MANUAL SLORLAWBSWA Kogan
natural_image
Line drawing of a wooden table with slatted panels and four legs (no text or symbols)ORLANDO WOOD BED
SINGLE
SLORLAWBSNA, SLORLAWBSWA
COMPONENTS

Hardware

A Ú4Û

B (x8)
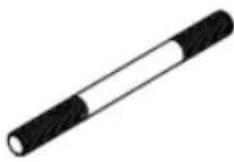
C (x8)

D (x8)

E (x8)

F (x8)

G (x1)

J (x52)
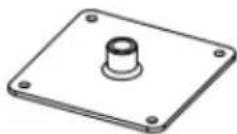
N (x6)
ASSEMBLY
Step 1: Secure A into the middle hole either side of part 1.
Repeat this process with the remaining part labelled 1. This will create two end assemblies.
Note:
Do not use power tools to assemble this bed as it may damage the components.
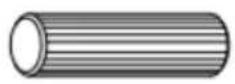
A (x4)

x2
Step 2: Ensuring the hole on B is facing outward, secure B into one part labelled 2. Insert C into B as shown below.
Repeat this process with the remaining part labelled 2. This will create two side assemblies.

B (x8)

C (x8)

x2
Step 3: Align the holes on end assemblies and connect them to the side assemblies. This will result in C to protrude through the holes on the top of the side assemblies.
Inside one top hole, insert D, E and F over C. Using the G wrench, tighten F to secure into place. Repeat this process with the remaining seven top holes.

D (x8)
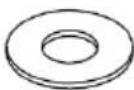
E (x8)
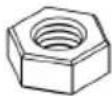
F (x8)

G (x1)

x8
Step 4: Ensuring N is facing down, align and insert N into the holes shown in the example below. Using a Phillips screwdriver (not supplied), secure N with J screws.

natural_image
Two technical illustrations: a screw and a plate with a knob, both labeled with magnified views (no text or symbols on the objects themselves)
Step 5: Twist and secure parts labelled 4 onto the side and end assemblies as shown below.

Step 6: Using a Phillips screwdriver (not supplied), secure parts labelled 6 onto the bed with J screws.


natural_image
Line drawing of a wooden table frame with slatted sides and supports (no text or symbols)Assembly complete.
NOTES
Need more information?
We hope that this user guide has given you the assistance needed for a simple set-up.
For the most up-to-date guide for your product, as well as any additional assistance you may require, head online to help.kogan.com
kogan.com


Brand : Kogan
Model : SLORLAWBSWA
Category : Bed