
LK500FT - Fitness Equipment BH FITNESS - Free user manual and instructions
Find the device manual for free LK500FT BH FITNESS in PDF.


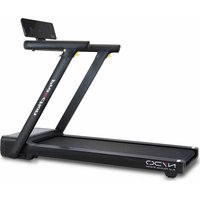
| Product Type | Treadmill |
| Model | LK500FT |
| Brand | BH Fitness |
| Dimensions (L x W x H) | 185 x 85 x 135 cm |
| Weight | 85 kg |
| Max User Weight | 130 kg |
| Power Supply | 220-240V, 50/60 Hz |
| Motor Power | 2.5 HP continuous |
| Speed Range | 1 - 18 km/h |
| Incline Range | 0 - 15% |
| Display | LCD with time, distance, calories, pulse |
| Programs | 12 preset programs, 3 user programs |
| Heart Rate Monitoring | Hand grip sensors and chest belt compatible (optional) |
| Safety Features | Safety key, emergency stop |
| Folding | Soft drop folding system |
| Transport Wheels | Yes |
| Warranty | 2 years on parts and labor |
| Maintenance | Regular lubrication of belt, clean after use |
| Spare Parts Availability | Through BH Fitness authorized dealers |
Frequently Asked Questions - LK500FT BH FITNESS
User questions about LK500FT BH FITNESS
0 question about this device. Answer the ones you know or ask your own.
Ask a new question about this device
Download the instructions for your Fitness Equipment in PDF format for free! Find your manual LK500FT - BH FITNESS and take your electronic device back in hand. On this page are published all the documents necessary for the use of your device. LK500FT by BH FITNESS.
USER MANUAL LK500FT BH FITNESS
BH
TABLE OF CONTENTS
| Title | Page | ||
| Introduction | 03 | ||
| Warnings | and | Labels | 04 |
| Anchoring | the | Unit | 08 |
| Important Safety Instructions | 09 | ||
| Training | Guidelines | 10 | |
| Suggested | Stretches | 14 | |
| Assembly | Instructions | 16 | |
CONGRATULATIONS

L51"XW51"XH83"
CDP-300 WEIGHT: 600 lbs
WARNINGS AND LABELS


BNH4069
BE ALERT!
THE FITNESS EQUIPMENT IN THIS FACILITY PRESENTS HAZARDS
| INSCHEPTS | ||||
| Recommended InspectionReplace of parts at first sign of wear or damage. | DAILY | WEEKLY | MONTHLY | 6-MONTH YEARLY |
| INSPECT:Links, pull pins, snap locks, salves, connectors, selector pin, and welded joints. | × | |||
| CLEAN:Up所述ery with tensin-base cleaner. Do not use Windows. | × | |||
| INSPECT:Cabies, Belts and tension (adjust if needed) | × | |||
| INSPECT:All binds. | × | |||
| INSPECT:All nuts and bolts tighten if needed. | × | |||
| INSPECT:Accessory bars, handles, rubber grips. | × | |||
| INSPECT:All anti-skid surfaces. | × | |||
| CLEAN & LUBRICATE:Clean guide rods with Super Lube® spray lubricant and laborate with Super Lube® (PTE) grease. | × | |||
| LUBRICATE:Seat soars, pull-pin sliding mechanism, bushings and linear bearings. | × | |||
| CLEAN & WAX:All powder-coil finishes. | × | |||
| REPLACE:Cabies & connecting parts. | × | |||
| Use only genuine B&I replacement parts. Failure to do so will void warranty and could result in serious injury or death. B&ITNESS FOOTHILL RANCY, CA 92410, USA. | ||||
BHF4304
It is extremely important that the BE ALERT! (87) Sign shown to the left be
ANCHORING THE UNIT
Holes on footplates are provided for anchoring the unit to the floor. (See anchoring hole locations below)

IMPORTANT SAFETY INSTRUCTIONS
It is the responsibility of the facility owner and/or owner of the equipment to review the Owner's Manual with their facility personnel and understand all Danger, Warning and Caution labels affixed on the machine. It is the responsibility of the floor personnel to instruct users on proper operation of the equipment and review all danger, warning and caution labels.
WARNING WARNING INJURY OR DEATH CAN
OCCUR IF THESE SAFETY PRECAUTIONS ARE NOT OBSERVED:
- Obtain a medical exam before beginning any exercise program.
- Read and understand Owner's Manual and all Danger, Warning and Caution labels before using this equipment. If you still need help, seek assistance from floor personnel.
- Inspect the equipment before each use for wear and tear, loose fittings, worn or frayed cables and frame welds. DO NOT USE if it appears to be inoperable or damaged.
- Stop exercising if you feel faint or dizzy. Consult a physician if you are experiencing pain.
- Use this equipment only for the intended use.
- Keep body, clothing and hair clear from all moving parts. Do not attempt to free any jammed parts by yourself.
- Always warm-up before and cool-down after weight training. Warm-up for 10-15 minutes with stretching and cardiovascular exercises. Cool-down should include light stretching exercises for 5-15 minutes.
- Never hold your breath - will limit the flow of oxygen to your brain and may cause dizziness. The most often used breathing pattern is inhaling during least resistance and exhaling during maximum resistance. Do not use accessories or accessory attachments that are not recommended by BH.
- Make sure selector pin is completely inserted. Use only the selector pin provided by the manufacturer.
- Never pin the weights in an elevated position. Do not use
installation and inspected prior to use. Failure to anchor the machine to the floor could cause the machine to tip or fall over due to incorrect usage and misuse, and could result in serious injury or death.
-
Perform regular maintenance (see Inspection Label). Pay special attention to areas most susceptible to wear and tear, including but not limited to cables, pulleys and rubber grips.
-
Do not lean against or pull on the framework, weight stack or any component at all times.
-
Children must not be allowed near the equipment. Teenager must be supervised.
-
Replace immediately all parts at first sign of wear or damage. If unable to replace worn or damaged components/parts, remove machine from service until the repair is made.
-
Use only genuine replacement parts. Failure to do so will void warranty and could result in serious injury or death to the users.
-
Do not remove any decals affixed to the machine. Replace if damaged.
-
Do not alter or modify the original manufacturer's weight stack with any add-on incremental weights, weight plates or dumbbells except those with standard factory installed option.
-
Maintain a service contract with a BH Authorized Dealer or a Professional Service Company approved by BH. Keep a service log of all maintenance and repair activities. NOTICE: It is the sole responsibility of the owner or facility operator to ensure that regular maintenance is
TRAINING GUIDELINES
Exercise is one of the most important factors in the overall health of an individual. Listed among its benefits are:
- Increased capacity for physical work (strength endurance)
- Increased cardiovascular (heart and arteries/veins) and respiratory efficiency
• Decreased risk of coronary heart disease
• Changes in body metabolism, e.g. losing weight - Delaying the physiological effects of age
- Reduction in stress, increase in self-confidence, etc.
There are several components of physical fitness and each is defined below.
STRENGTH
The capacity of a muscle to exert a force against resistance. Strength contributes to power and speed.
MUSCULAR ENDURANCE
The capacity to exert a force repeatedly over a period of time, e.g. it is the muscular endurance of your legs to carry you 10 km without stopping.
FLEXIBILITY
The range of motion of your joints. Improving flexibility involves the stretching of muscles and tendons to maintain or increase suppleness, and it provides increased resistance to muscle injury or soreness.
CARDIO-RESPIRATORY ENDURANCE
The most essential component of physical fitness. It is the efficient functioning of the heart and
OXYGEN UPTAKE
The effort that you can exert over a prolonged period of time is limited by your ability to deliver oxygen to the working muscles. Regular vigorous exercise produces a training effect that can increase your aerobic capacity by as much as 20 to 30%. An increased VO2 Max indicates an increased ability of the heart to pump blood, of the lungs to ventilate oxygen, and of the muscles to take up oxygen.
THE TRAINING THRESHOLD
This is the minimum level of exercise which is required to produce significant improvements in any physical fitness parameter.
OVERLOAD
This is where you exercise above your comfort level. The intensity, duration and frequency of exercise should be above the training threshold and should be gradually increased as the body adapts to the increasing demands. As your fitness level improves, the training threshold should rise. Working through your program and gradually increasing the overload factor is important.
PROGRESSION
As you become more fit, a higher intensity of exercise is required to create an overload and therefore provide continued improvement.
SPECIFICS
Different forms of exercise produce different results. The type of exercise that is carried out is specific to the muscle groups being used and to the energy source involved. There is little transfer of the effects of exercise, i.e. from strength training to cardiovascular fitness. That is why it is important to have an exercise program tailored to your specific needs.
REVERSIBILITY
If you stop exercising or do not do your program often enough, you will lose the benefits you have gained. Regular workouts are the key to success.
HEART RATE
As you exercise, your heart beat increases. This is often used as a measure of the required intensity of an exercise. You need to exercise hard enough to condition your circulatory system, and increase your pulse rate, but not enough to strain your heart.
Your initial level of fitness is important when developing an exercise program for you. When starting, you can get a good training effect with a heart rate of 110-120 beats per minute (BPM). If you are more fit, you will need a higher threshold of stimulation.
To begin with, you should exercise at a level that elevates your heart rate to about 65 to 70% of your maximum. If you find this is too easy, you may want to increase it, but it is better to lean on the conservative side.
As a rule of thumb, the maximum heart rate is 220 minus your age. As you increase in age, your heart, like other muscles, loses some of its efficiency. Some of its natural loss is won back as fitness improves. The following table is a guide to those who are “starting fitness.”
| Age | Target | Heart | Rate | 25 | 30 | 35 | 40 | 45 | 50 | 55 | 60 | |||
| 10 | Second | Count | 23 | 22 | 22 | 21 | 20 | 19 | 19 | 18 | 18 | |||
| Beats per Minute | 138 | 132 | 132 | 126 | 120 | 114 | 114 | 108 | 108 | |||||
65
PULSE COUNT
The pulse count (on your wrist or carotid artery in the neck, taken with two index fingers) is done for ten seconds, taken a few seconds after you stop exercising. This is for two reasons: (a) 10 seconds is long enough for accuracy, (b) the pulse count is to approximate your BPM rate at the time you are exercising. Since heart rate slows as you recover, a longer count isn't as accurate.
The target is not a magic number, but a general guide. If you're above average with your fitness, you may work comfortably a little above that suggested for your age group. The following table is a guide.
MUSCLE SORENESS
For the first week or so, muscle soreness may be the only indication you have that you are on an exercise program. This, of course, does depend on your overall fitness level. A confirmation that you are on the correct program is a very slight soreness in most major muscle groups. This is quite normal and will disappear in a matter of days.
If you experience major discomfort, you may be on a program that is too advanced, or you have increased your program too rapidly.
If you experience PAIN during or after exercise, your body is telling you something. Stop exercising and consult your doctor.
WHAT TO WEAR
Wear clothing that will not restrict your movement in any way while exercising. Clothes should be light enough to allow the body to cool. Excessive clothing that causes you to perspire more than you normally would give you no advantage. The extra weight you lose is body fluid and will be replaced with the next glass of water you drink. Always wear a pair athletic shoes.
BREATHING DURING EXERCISE
Do not hold your breath while exercising. Breathe normally as much as possible. Remember, breathing involves the intake and distribution of oxygen, which feeds the working muscles.
REST PERIODS
Once you start your exercise program, you should continue through to the end. Do not break off halfway through and then restart at the same place later on without going through the warm-up stage again. The rest period required between exercises may vary from person to person.
SUGGESTED STRETCHES
Head Rolls
Rotate your head to the right for one count while feeling the stretch up the left side of your neck. Next, rotate your head back for one count, stretching your chin to the ceiling. Rotate your head to the left for one count, and finally, drop your head to your chest for one count.
Shoulder Lifts
Lift your left shoulder up toward your ear for one count. Then lift your right shoulder up for one count as you lower your left shoulder.
Side Stretches
Open your arms to the side and continue lifting them until they are over your head. Reach your left arm as far upward as you can for one count. Feel the stretch up your left side. Repeat this action with your right arm.


SUGGESTED STRETCHES
Inner Thigh Stretch
Sit with the soles of your feet together with your knees pointing outward. Pull your feet as close into your groin as possible. Gently push your knees towards the floor. Hold for 15 counts.

Toe Touches
Slowly bend forward from your waist, letting your back and shoulders relax as you stretch toward your toes. Reach down as far as you can and hold for 15 counts.

Hamstring Stretches
Sit with your right leg extended. Rest the soles of your left foot against your right inner thigh. Stretch toward your toes as far as possible. Hold for 15 counts. Relax and then repeat with left leg extended.

ASSEMBLY INSTRUCTIONS

Step 1 Assembly List
| Item Qty. Description |
| 20 2 BLACK NYLON PULLEY WIDE GROOVE 3/8 X 1 X 3 1/2 |
| 25 4 FLANGED SPACER Z/P 3/8 X 16.5MM |
| 31 2 HEX HEAD CAP SCREW GR-5 Z/P 3/8-16 X 2 9/16 |
| 44 2 NYLON INSERT THIN PATTERN LOCK NUT Z/P 3/8-16 |
| *2 1 BASE FRAME, LEFT SIDE ASSEMBLY |
| *3 1 BASE FRAME, RIGHT SIDE ASSEMBLY |


Fully Tighten
100%

Wrench tighten all hardware in this step.
Step 2 Assembly List
Item Qty. Description
29 2 HEX HEAD CAP SCREW GR-5 Z/P 3/8-16 X 1
34 1 HEX HEAD CAP SCREW GR-5 Z/P 3/8-16 X 3
39 2 SPLIT LOCK WASHER Z/P 3/8"
43 4 FLAT WASHER SAE ZIP 3/8"
44 1 NYLON INSERT THIN PATTERN LOCK NUT Z/P 3/8-16
*1 1 REAR UPRIGHT ASSEMBLY
*2 1 BASE FRAME, LEFT SIDE ASSEMBLY
*3 1 BASE FRAME, RIGHT SIDE ASSEMBLY
Note:
It is strongly recommended that two people participate in this assembly step.
Loosely Tighten
70%

Loosely tighten all hardware in this step. DO NOT Fully Tighten. Some component(s) may need pre-assembly and or alignment during the assembly process.


Step 3 Assembly List
| Item Qty. Description | |
| 4 2 $ELECTOR POST | |
| *13 1 CARRIAGE RT | |
| *14 1 CARRIAGE LT |
Note:
It is strongly recommended that two people participate in this assembly step.

Step 4 Assembly List
4 2 SELECTOR POST
26 2 NYLON SPACER 3/8 X 7/8 X 3/8
31 2 HEX HEAD CAP SCREW GR-5 Z/P 3/8-16 X 2 9/16
34 2 HEX HEAD CAP SCREW GR-5 Z/P 3/8-16 X 3
43 8 FLAT WASHER SAE Z/P 3/8"
44 4 NYLON INSERT THIN PATTERN LOCK NUT Z/P 3/8-16
Note:
It is strongly recommended that two
people participate in this assembly step.
Loosely Tighten
70%
Loosely tighten all
hardware in this step.
DO NOT Fully Tighten.
Some component(s)
may need pre-assem-
bly and of alignment during the assembly
during the assembly
process.
Note:
Position reference numbers
facing toward the inside of
the unit.

70%
Loosely tighten all hardware in this step. DO NOT Fully Tighten. Some component(s) may need pre-assembly and or alignment


Standard 150 lbs Weight Stacks

with Upgraded 200 lbs Weight Stacks

NOTE:
- TOP PLATE LABEL GOES ON HOLE OFF CENTER AS SHOWN BELOW. LABEL WILL COVER HOLE ON CENTER.

86
| TOP PLATE10 lbs. | TOP PLATE4.5 kgs. |
| 20lbs. | 9.0kg.s |
| 30lbs. | 13.6kg.s |
| 40lbs. | 18.1kg.s |
| 50lbs. | 22.7kg.s |
| 60lbs. | 29.5kg.s |
| 70lbs. | 31.8kg.s |
| 80lbs. | 36.3kg.s |
| 90lbs. | 40.8kg.s |
| 100lbs. | 45.4kg.s |
| 110lbs. | 49.9kg.s |
| 120lbs. | 54.4kg.s |
| 130lbs. | 59.0kg.s |
| 140lbs. | 63.5kg.s |
| 150lbs. | 68.0kg.s |
| 160lbs. | 72.6kg.s |
| 170lbs. | 77.1kg.s |
| 180lbs. | 81.6kg.s |
| 190lbs. | 86.2kg.s |
| 200lbs. | 90.7kg.s |
Weight stack labels and lubrication instructions
- Wine front surface of weight stack with rubbing alcohol and wine dry

Note:
• Make sure the cable runs in the grooves of the pulleys.
• It is strongly recommended that two people

43 32
43
Note:
Install Plastic Insert Cap #75 after Making sure the Cable is running over the two Reinforcement Tubes.
43
43
44
75
44
20
Reinforcement Tubes
27
64
Note:
• Make sure the cable runs in the grooves of the pulleys.
Note:

Step 14
Fully Tighten
100%

Proceed to inspect; align and wrench tighten ALL hardware assemblies specially those left loosely fasten, making sure the unit is assembled square and perpendicular.
Note:
It is strongly recommended that two people participate in this assembly step.

| Step 15 Assembly List | |
| Item Qty. Description | |
| 28 8 HEX HEAD CAP SCREW GR-5 Z/P 1/4-20 X 3/4 | |
| 41 8 FLAT WASHER USS Z/P 1/4" | |
| *11 1 REAR SHROUD, LEFT SIDE ASSEMBLY | |
| *46 1 REAR SHROUD, RIGHT SIDE ASSEMBLY |
Note:
- It is strongly recommended that two people participate in this assembly step.
• Some parts have been removed for Clarity.


PRE-ASSEMBLED COMPONENTS


PARTS LIST
To order replacement parts: provide your customer service representative with the product model number and the part number located on the Parts List below, along with the quantity you require.
| ITEM | DESCRIPTION PART NO. QTY | DESCRIPTION PART NO. QTY | |||||
| 1 | Rear upright UP8071 1 57 | Button head socket cap screw 10-32 x 1/2 | BNH3406 8 | ||||
| 2 | Base frame, left side UP8066 1 58 | Button head socket cap screw b-zip 1/4-20 x 1/2 | BNH4091 8 | ||||
| 3 | Base frame, right side UP8067 1 59 | Button head socket cap screw b-zip 3/8-16 x 1 3/4 | BNH2590 6 | ||||
| 4 | Selector post UP8072 2 60 | Button head socket cap screw b-zip 5/16 18 x 1 | BNH014 6 | ||||
| 5 | Top frame, left side UP8068 1 61 | Button head socket cap screw z/p 3/8-16 x 3 5/8 | BNH3408 2 | ||||
| 6 | Top frame, right side UP8069 1 62 | Flat soc washer b-zip #12 | BNH4008 8 | ||||
| 7 | Adjustable pulley bracket UP8071 2 63 | Flat washer sac zip 5/16" | BNH2534 12 | ||||
| 8 | Chin up cross brace UP8070 1 64 | Cable stepper shell 1 1/2 x 1 3/4 | BNH4230 4 | ||||
| 9 | Accessory holder tube UP8071 1 65 | 7/8 kd x 1/28 link 1/8 cable | BNH4231 4 | ||||
| 10 | Guide rod UP8073 1 66 | Oval head screw z/p #10-32 x 1 1/8 | BNH2793 4 | ||||
| 11 | Rear shroud UP8075 2 67 | Snap link zip 8mm x 80mm | BNH0065 6 | ||||
| 12 | Front shroud UP8078 1 68 | Nylon bushing 25/32 rd x 1 1/16 rd x 29/32 | BNH0532 64 | ||||
| 13 | Carriage, left side UP7080 1 69 | Nylon assect lock nut z/p #16-18 | BNH2026 6 | ||||
| 14 | Carriage, right side UP7085 1 70 | Plastic insert cap 2" sq 10-14 ga | BNH0012 4 | ||||
| 15 | 10 L top plate w/adj sle bar 19 hks was assy BNH11982 2 71 | Plastic insert cap 1 1/4" rd v30006 | BNH3407 4 | ||||
| 16 | Selector pin wheel 5/8 x 4 gold knob UP8085 2 72 | Plastic insert cap 1" x 3", 11 ga | BNH0007 2 | ||||
| 17 | Flat washer zip 3/8 x 2 BNH2128 8 73 | Plastic insert cap 2 x 3 11 14 ga | BNH0052 1 | ||||
| 18 | Weight snack spacer 1 1/4 rd x 5 UP6745 4 74 | Plastic insert cap 3" sq 10-14 ga | BNH2392 1 | ||||
| 19 | Rubber donet 3/4 x 2 1/2 BNH0008 4 75 | Plastic insert cap elliptical 2 x 4-150mm x 100mm) | BNH1794 2 | ||||
| 20 | Black nylon pulley wide groove 3/8 x 1 x 3 1/2 BNH12832 14 76 | Pull pin 1/2 x 2 3/4 short nose (yellow kamb) | BNH0610 2 | ||||
| 21 | Nylon ankle strap BNH12303 1 77 | Roll pin bin 3/8 x 2 | BNH0661 2 | ||||
| 22 | Low cow bag 1 1/4 aluminium BNH1771 1 78 | Roller wheel | BNH2869 6 | ||||
| 23 | Squat bar 46" double link (tubular) BNH3228 1 79 | Rubber foot for 0 x 4 1/4 plate | BNH1617 3 | ||||
| 24 | Conlor ergo handle long strap BNH12738 2 80 | Shoulder bolt alloy 1/2 x 1 1/2 | BNH0098 2 | ||||
| 25 | Flanged spacer zip 3/8 x 16.5mm BNH4333 4 81 | Socket set screw zip 10-32 x 1/8x | BNH2088 2 | ||||
| 26 | Nylon spacer 3/8 x 7/8 x 3/8 BNH09292 2 82 | Split lock washer b-zip 1/4 | BNH2680 8 | ||||
| 27 | Cable cup 300 UP8078 2 83 | U style tapped hole mut 1/4 20 | BNH0708 4 | ||||
| 28 | Hex head cap screw gr-5 z/p 1/4-20 x 3/4 BNH12306 12 84 Yellow grip 1/2 x 4 BNH3059 2 | Yellow grip 1/2 x 4 | BNH3059 2 | ||||
| 29 | Hex head cap screw gr-5 z/p 3/8-16 x 1 BNH2037 2 85 BH logo BHF4304 1 | BH logo | |||||
| 30 | Hex head cap screw gr-5 z/p 3/8 x 1 3/4 BNH2040 6 86 Decimal numbers 10-200 lbs/pts 2/8 x 3 yellow & blk BNH10069 2 | Decal numbers 10-200 lbs/pts 2/8 x 3 yellow & blk BHF3138 1 | |||||
| 31 | Hex head cap screw gr-5 z/p 3/8-16 x 2 9/16 BNH4314 4 87 Facility sign be alert " The fitness equipment... | Facility sign be alert " The fitness equipment... | |||||
| 32 | Hex head cap screw gr-5 z/p 3/8-16 x 2 1/2 BNH2041 8 88 Exercise cardi LK300FT decal BHF3139 1 | Exercise cardi LK300FT decal BHF3139 1 | |||||
| 33 | Hex head cap screw gr-5 z/p 3/8-16 x 2 3/4 BNH2045 4 89 Label caution check pull pin is fully... 1 1/2 X 1 3/8 BNH2912 2 | Label caution check pull pin is fully... 1 1/2 X 1 3/8 BNH3146 2 | |||||
| 34 | Hex head cap screw gr-5 z/p 3/8-16 x 3 BNH2046 3 90 Label danger check retaining mut... 1.5 X 1 BNH3146 2 | Label danger check retaining mut... 1.5 X 1 BNH3146 2 | |||||
| 35 | Hex head cap screw gr-5 z/p 3/8-16 x 3 1/2 BNH2107 2 91 Label important for smooth performance... BNH2916 2 | Label important for smooth performance... BNH3146 2 | |||||
| 36 | Hex head cap screw gr-5 z/p 3/8-16 x 4 BNH2267 2 92 Label resistance ratio at the handle 3/6BHF3150 1 | Label resistance ratio at the handle 3/6BHF3150 1 |
PARTS LIST
To order replacement parts: provide your customer service representative with the product model number and the part number located on the Parts List below, along with the quantity you require.
| PRE ASSEMBLED PARTS LIST (*=REFERENCED IN PREVIOUS PARTSLIST) | |||||||
| ITEM | DESCRIPTION PART NO. QTY. DESCRIPTION PART NO. QTY. | ||||||
| *1 | Rear upright assembly | UP807X1 | *11 | Rear shroud, left side assembly | UP8075X1 1 | ||
| *2 | Base frame, left side assembly | UP806X1 | *12 | Front shroud assembly | UP8076X1 1 | ||
| *3 | Base frame, right side assembly | UP8067X1 | *13 | Carriage, left side assembly | UP7680X1 1 | ||
| *5 | Top frame, left side assembly | UP808X1 | *14 | Carriage, right side assembly | UP7685X1 1 | ||
| *6 | Top frame, right side assembly | UP809X1 | *15 | 10 L3 top plate w/adj site but 19 bits wet assy | BNH198X2 5 | ||
| *7 | Adjustable policy bracket assembly | UP8071X1 | *27 | Cubic assembly LK300FT | UP8078X1 2 | ||
| *8 | Chin up cross brace assembly | UP8070X1 | *46 | Rear shroud, right side assembly | UP8075X2 1 | ||
| *9 | Accessory holder tube assembly | UP8077X1 | *51 | 10 L3 steel weight plate blk 4 9/16 x 9 7/16 asm | BNH1690 28 | ||
MAINTENANCE AND CLEANING
Care has been taken to assure that your equipment has been properly adjusted and lubricated at the factory. It is not recommended that the user attempt service on the internal components. Instead, seek service from an authorized service center. However, you may clean the outer surface. Use a soft cloth, dampened with warm water. Do not use aerosol sprays or pump bottles as they may deposit sediments upon the console surface. The use of harsh chemicals will destroy the protective coating and cause a static build-up that may damage the some of the components.
BH
LIGHT COMMERCIAL WARRANTY
This warranty applies only in the United States to the products manufactured or distributed by BH Fitness under the BH Fitness brand name. BH warrants to the original purchaser that BH equipment will be free from defects in material and workmanship. All warranty periods begin to run from the date of purchase to the original purchaser. The warranty and remedies set forth herein are conditioned upon proper storage, installation, use and maintenance and conformance with any recommendations of BH. This warranty does not cover products not manufactured by BH or products which are altered without the express written consent of BH.
LIGHT COMMERCIAL WARRANTY:
TEN (10)Years: Structural main frames, welds, cams and weight plates.
FIVE (5) Years: Pivot bearings, pulleys, bushings, guide rods and gas shocks.
ONE (1)Year: Belts, linear bearings and pull-pin components. All other parts not mentioned elsewhere in the warranty will expire one. (1) year from the date of purchase to the original purchaser.
SIX (6) Months: Upholstery, cables, finish, and rubber grip
Light Commercial Use:
Light Commercial Warranty applies to facilities like hotels, apartment complexes, personal training studios, fire & police stations, etc. where the equipment would be used by no more than 30 people per day.
HOME LIFETIME WARRANTY:
LIFETIME of the equipment while owned by the original purchaser (applies only to defects from manufacturer only).
This warranty does NOT cover:
- BH products sold for and used in a commercial or institutional environment.
-
Any damage, failure or loss caused by accident, misuse, neglect, abuse, improper assembly, improper maintenance, or failure to follow instructions or warnings in the owner's manual and warning labels posted on the machines.
-
Use of the product in a manner for which it was not designed.
- Original product that is altered, or the use of replacement parts and components of another manufacturer other than BH.
The obligation of BH under this warranty is limited to repairing or replacing warranted defective parts as BH may elect, at BH facility in Foothill Ranch, California, without charge to the purchaser. Purchaser is responsible for installation of repaired or replaced parts, and all transportation and insurance costs on returned or replaced equipment to and from BH's facility in Foothill Ranch.
THE FOREGOING SHALL CONSTITUTE THE SOLE REMEDY OF THE PURCHASER AND THE SOLE LIABILITY OF BH WITH REGARD TO WARRANTY. NO IMPLIED STATUTORY WARRANTY OR IMPLIED STATUTORY WARRANTY OF MERCHANTABILITY OR FITNESS FOR A PARTICULAR PURPOSE SHALL APPLY. IN NO

- BH
- BE ALERT
- ANCHORING THE UNIT
- IMPORTANT SAFETY INSTRUCTIONS
- WARNING WARNING INJURY OR DEATH CAN
- TRAINING GUIDELINES
- STRENGTH
- MUSCULAR ENDURANCE
- FLEXIBILITY
- CARDIO-RESPIRATORY ENDURANCE
- OXYGEN UPTAKE
- THE TRAINING THRESHOLD
- OVERLOAD
- PROGRESSION
- SPECIFICS
- REVERSIBILITY
- HEART RATE
- PULSE COUNT
- MUSCLE SORENESS
- WHAT TO WEAR
- BREATHING DURING EXERCISE
- REST PERIODS
- SUGGESTED STRETCHES
- HEAD ROLLS
- SHOULDER LIFTS
- SIDE STRETCHES
- INNER THIGH STRETCH
- TOE TOUCHES
- HAMSTRING STRETCHES
- STEP 2 ASSEMBLY LIST
- ITEM QTY. DESCRIPTION
- NOTE
- LOOSELY TIGHTEN
- STEP 4 ASSEMBLY LIST
- WEIGHT STACK LABELS AND LUBRICATION INSTRUCTIONS
- STEP 14
- PARTS LIST
- MAINTENANCE AND CLEANING
- LIGHT COMMERCIAL WARRANTY
- LIGHT COMMERCIAL USE
- HOME LIFETIME WARRANTY
- THIS WARRANTY DOES NOT COVER
Brand : BH FITNESS
Model : LK500FT
Category : Fitness Equipment