Professional - Sewing machine Carina - Free user manual and instructions
Find the device manual for free Professional Carina in PDF.

User questions about Professional Carina
0 question about this device. Answer the ones you know or ask your own.
Ask a new question about this device
Download the instructions for your Sewing machine in PDF format for free! Find your manual Professional - Carina and take your electronic device back in hand. On this page are published all the documents necessary for the use of your device. Professional by Carina.
USER MANUAL Professional Carina
natural_image
Line drawing of a sewing machine with control panel and buttons, rendered in red ink on a dotted background (no text or symbols)When using an electrical appliance, basicsafety should always be followed, including the following:
Readallinstructionsbeforeusingthissewingmachine.
DANGER -Toreducetheriskofelectricshock:
- Anappliances should never be left unattended when plugged in.
- Always unplug this appliance from the electric outlet immediately after using and before cleaning.
WARNING-Toreducetheriskofburns,fire,electricshock,orinjurytopersons:
- Donotallowtobeusedasatoy. Closeattentionisnecessarywhenthisapplianceisusedbyornear children.
- Use this appliance only for its intended use as described in this manual. Use only the attachments recommended by the manufacturer as contained in this manual.
- Never operate this appliance ifithasadamaged cordor plug, ifitisnotworking properly, ifithasbeen dropped or damaged, or dropped into water. Return the appliance to the nearest authorized dealer or service center for examination, repair, electrical or mechanical adjustment.
- Neveroperatetheappliancewithanyaiopeningsblock. Keepventilationopeningsofthesewing machineandfootcontrollerfreefromaccumulationoflint,dust,andloosecloth.
- Keepfingersawayfromallmovingparts.Specialcareisrequiredaroundthesewingmachinencedle.
- Alwaysusetheproperneedleplate,awrongneedleplatecancausetheneedletobreak.
- Donotusebentneedles.
- Donotpullorpushfabricwhilestitching. It may deflect the needle causing it to break.
- Switch these wing machine off ("O") when making any adjustments in the needle area, such as threading needle, changing needle, threading bobbin, or changing presser foot, and the light.
- Always unplug sewing machine from the electrical outlet when removing covers, lubricating, or when making any other users servicing adjustments mentioned in the instruction manual.
- Neverdroporinsertanyobjectintoanyopening.
- Donotuseoutdoors.
- Donotoperatewhereaerosolsprayproductsarebeingusedorwhereoxygenisbeingadministered.
- Todisconnect, turnallcontrolstotheoff("O") position, thenremoveplugfromoutlet.
- Donotunplugbypullingoncord. Tounplug, grasptheplug, notthecord.
- Thesoundpressurelevelundernormaloperatingconditionsis75dB(A).
- Pleaseturnoffthemachineorunplugwhenthemachineisnotoperatingproperly.
- Neverplaceanythingonthefootcontroller.
- This appliance is not intended for use by persons (including children) with reduced physical, sensory or mental capabilities, or lack of experience and knowledge, unless they have been given supervision or instruction concerning use of the appliance by person responsible for their safety.
- Children should be supervised to ensure that they don't play with the appliance.
SAVETHESEINSTRUCTIONS
Thissewingmachineisintendedforhouseholduseonly.
PRINCIPALPARTSOFTHEMACHINE....1
ACCESSORIES....2
CONNECTINGTHEMACHINETOTHEPOWERSOURCE....3
Connectingthemachine....3
STARTINGSEWING....4
Footcontrol. 4
CHANGINGTHEPRESSERFOOT....5
TYPEOPRESSERFOOTCHART....6
REPLACINGTHENEEDLE....7
MATCHINGNEEDLE/FABRIC/THREAD....7
WINDING THE BOBBIN....8-9
Bobbin winding....8-9
INSERTING THE BOBBIN....10
THREADING THE UPPER THREAD 11-12
USING THE NEEDLE THREADER .... 13
THREAD TENSION....14
RAISING UP THE LOWER THREAD .... 15
CUTTING THE THREAD....15
TWO-STEP PRESSER FOOT LIFTER....16
TO RAISE OR DROP THE FEED DOGS 16
BUTTONSOFTHEMACHINE....17-18
LCD SCREEN 19
PATTERN CHART 20
OPERATIONBUTTONS....21-22
Start/stop button 21
Reverse button 21
Auto-lock button....22
Needle up/ down position button 22
MEMORY BUTTONS 23
Memory button 23
Clear button 23
Arrow button 23
FUNCTIONBUTTONS....24-25
Stitch width adjustment button....24
Stitch length adjustment button 25
MODE selection button 25
Mirror button. 26
SELECTION BUTTONS 27
Direct pattern selection and number buttons 27
USEFULSKILLS....28-29
Sewing corners 28
Reverse 28
Free arm 28
Installing the extension table 29
Sewing on the heavy fabric....29
STRAIGHT STITCHES AND NEEDLE POSITION 30
ZIGZAG STITCHES 30
STRETCH STITCH ....31
OVERCASTING STITCHES....32
Using the overcasting foot 32
Using the all purpose foot....32
BLIND HEM/ LINGERIE STITCH .... 33
BUTTON SEWING....34
BUTTONHOLESTITCHING....35-38
Making a buttonhole on stretch fabrics. 38
EYELET STITCH....39
DARNINGSTITCH....40-41
ZIPPERINSERTION....42-43
Inserting a centered zipper 42
Inserting a side zipper....43
NARROW HEMMING....44
CORDING 45
Single cording....45
Triple cording 45
SATIN STITCH SEWING 46
QUILTING....47
SCALLOP STITCH....47
GATHERING....48
SMOCKING....49
FREEMOTIONDARNING, EMBROIDERY AND MONOGRAMMING. 50-51
Darning 50
Embroidery 51
Monogramming 51
FAGOTING 52
MIRROR 53
TWIN NEEDLE....54
WALKING FOOT....55
MEMORY....56-58
Combining patterns or letters 56
Adding patterns or letters 57
Clearing patterns or letters 57
Recalling and sewing the memorized pattern 57-58
WARNING FUNCTIONS....59
Instruction message display 59
Warning beeping sound....59
MAINTENANCE....60-61
Cleaning the screen....60
Cleaning the sewing machine surface....60
Cleaningthehook....60-61
TROUBLESHOOTINGGUIDE....62-63
QUICKADJUSTMENTREFERENCECHART....64-66

text_image
Speedlimiting adjustmentlever Needleup/down positionbutton Auto-lockbutton Reversebutton Start/stopbutton Threadcutter Buttonholelever Autoneedlethreader Bobbincoverplate Sewingtableand accessorybox Tensiondial Bobbinwinderspindle LCDscreen Stitchlength adjustmentbutton Stitchwidth adjustmentbutton Memorybuttons Selectionbuttons Functionbuttons Quickreferenceplate
text_image
Bobbinwinderstopper Holeforsecondspoolpin Handwheel Mainpowerswitch Powercord Footcontrollerconnector Horizontalspoolpin Bobbinthreadguide Upperthreadguide Handle Presserfootlifter Dropfeedlever
text_image
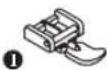
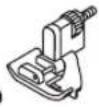
1 T 006186008006905008 2 I 3 D 006H1A0004 4 E 006907008 5 F 006904008 6 A 006172008 7 006914008 8 006084009 9 R12373209 10 TA10943209 11 006015009 12 006914008 13 006012008 14 006008001 1516 006099008Standard
- Allpurposefoot(T)
2.Zipperfoot(I) - Buttonholefoot(D)
- Overcastingfoot(E)
- Blindhemfoot(F)
6.Satinstitchfoot(A)
7.Buttonsewingfoot
8.Bobbin(3x)
9.Spoolholder(Large)
10.Spoolholder(Small)
11.Spoolpinfelt
12.Secondspoolpin
13.Screwdriver(L&S) - Edge/quiltingguide
15.Brush/Seamripper
16.Needle(3x)

text_image
17 K 006900008 18 M 006813008 19 P 006916008 20 006016008 21 006917008 22 006185008 232425 006020008Optional
17.Hemmerfoot(K)
18.Cordingfoot(M)
19.Quiltingfoot(P)
20.Darning/Embroideryfoot
21.Gatheringfoot
22.Walkingfoot
23.Twinneedle
24.Rigidcover
25. Extensiontable

Caution: Always make sure that the machine is unplugged from power source and the main switch is on("O").whenthemachineisnotinuseandbeforeinsertingorremovingparts.

text_image
Diagram of a sewing machine with labeled components and directional arrows indicating connection to the switch, including 'ON' and 'OFF' labels.Connectingthemachine
Beforeconnectingthepowersupply, makesurethatthevoltageandfrequencyshownonthemachineis conformingwithyourelectricalpower.
Placethemachineonastabletable.
- Connectthepowerlinecordtothemachinebyinsertingthe2-holeplugintotheterminalbox.
- Connect the power line plug to the electric outlet.
- Turnonthepowerswitch.
- Thesewinglampwilllightupwhentheswitchisturnedon.
Todisconnect,turnthepowerswitchtotheoffposition,thenremoveplugfromoutlet.

natural_image
Hand holding a switch with a red arrow indicating left motion (no text or symbols)Polarizedpluginformation
Thisappliancehasapolarizedplug(onebladewiderthantheother),toreduce theriskofelectricalshock;thisplugwillfitinapolarizedoutletonlyoneway. Iftheplugdoesnotfitfullyintheoutlet,reversetheplug.Ifitstilldoesnotfit, contactaqualifiedelectrician.Donotmodifythepluginanyway.
Startingsewing

natural_image
Technical line drawing of a mechanical component with a highlighted circular feature and arrow (no text or symbols)
natural_image
Pure technical line drawing of a mechanical assembly without any text, numbers, or symbolsStart/stopbutton
ThemachinewillstartrunningwhenStart/stop buttonispressedandwillstopwhenpressedthe secondtime.
Themachinewillrotateslowlyatthebeginning ofthesewing.
Thespeedlimitingadjustmentlevercancontrol thesewingspeed. To increasesthespeed, slide thelevertotheright, to decreasesthesewing speed, slidethelevertotheleft.

natural_image
Diagram showing connection between a device and a cable with red arrows indicating signal or connection points (no text or symbols present)
natural_image
Line drawing of a hairdryer with a red arrow indicating force or movement (no text or symbols)Footcontrol
With these sewing machine turned off, insert the foot control plug into its connector on these sewing machine.
Turnonthesewingmachine, and then slowly depress the foot control to start sewing. Releasethe foot control to stop these sewing machine.

Attention: Consult a qualified electrician if in doubt as how to connect the machine to the power source. Unplugthepowercordwhenthemachineisnotinuse.
The appliance must be used with the foot controller C-9000 manufactured by CHIENHUNG TAIWAN., LTD.
Changingthepresserfoot

Attention: Turnpowerswitchtooff("O")whencarryingoutany ofthebelowoperations!

text_image
a + - bAttaching the presser footholder
Raisethepressorfootbar(a). Attachthepresserfootholder(b)asillustrated.

text_image
Technical diagram of a sewing machine with labeled parts and directional arrows indicating motion or movement.Attaching the presser foot
Lowerthepresserfootholder(b)untilthecut-out(c)isdirectlyabove thepin(d).
Presstheblacklever(e). Lowerthepresserfootholder(b)andthepresserfoot(f)willengage automatically.

text_image
eRemoving the presser foot
Raisethepressorfoot. Presstheblacklever(e)andthefootwilldisengages.

text_image
Technical diagram of a sewing machine with labeled parts and directional arrows indicating movement or forceAttaching the guide/quilting
Attachtheguidg(g)iprthislqtasillustrated.Adjust accordingtoneedforhems,pleats,etc.
| PRESSERFOOT | APPLICATION | NEEDLEN | PRDSSERFOOT | APPLICATION | |
 Allpurposefoot(T) Allpurposefoot(T) | Generalsewing, Patchworkstitches, Decorativestitching, Smocking, Fagoting,etc. |  Cordingfoot(M)(Optional) Cordingfoot(M)(Optional) | Cording | ||
 Zipperfoot(I) Zipperfoot(I) | Insertingzippers |  Hemmerfoot(K)(Optional) Hemmerfoot(K)(Optional) | Narrowhemming | ||
 Buttonholefoot(D) Buttonholefoot(D) | tonholesewing |  DarningEmbroideryfoot(Optional) DarningEmbroideryfoot(Optional) | DarningFreecembroideryMonogramming | ||
 Buttonsewingfoot Buttonsewingfoot | Buttonsewing |  Quiltingfoot(P)(Optional) Quiltingfoot(P)(Optional) | Quilting | ||
 Blindhemfoot(F) Blindhemfoot(F) | Blindhemstitching |  Gatheringfoot(Optional) Gatheringfoot(Optional) | Gathering | ||
 Overcastingfoot(E) Overcastingfoot(E) | Overcasting | 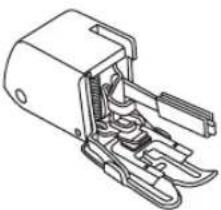 Walkingfoot(Optional) Walkingfoot(Optional) | Thisfoothelpsto preventuneven feedingofvery difficultfabrics | ||
 Satinstitchfoot(A) Satinstitchfoot(A) | Satinstitchsewing |

Note: Thetwinneedleisoptional. It is not included with the accessories.
Whensewingwithtwinneedle,thestitchwidthshouldbesetatlessthan"5.0".
Replacingtheneedle

text_image
Diagram illustrating a mechanical or electrical procedure with labeled components A and B, showing hand-cranked tool manipulation and polarity indicators.Attention: Turnpowerswitchtooff("O") whencarryingoutanyoftheabove operations!
Changetheneedleregularly,especiallyifitis showingsignsofwearandcausingproblems. Inserttheneedlefollowingtheillustrated instructions.
A. Loosentheneedleclampscrewandtighten againafterinsertingthenewneedle. Theflat sideoftheshaftshouldbetowardstheback.
B. Inserttheneedleasfarupasitwillgo.
Needlesmustbeinperfectcondition.
Problemscanoccurwith:
-Bentneedles
-Bluntneedles
-Damagedpoints
Matchingneedle/fabric/thread
NEEDLE, FABRIC, THREADSELECTIONGUIDE
| NEEDLESIZE | FABRICS | THREAD |
| 9-11 (70-80) | Lightweight fabrics-thin cottons, voile, serge, silk,muslin, Qiana,interlocks, cottonknits, tricot,jerseys,crepes,woven polyester,shirt & blousefabrics. | Light-duty thread in cotton, nylon, polyesterorcottonwrappedpolyester. |
| 11-14(80-90) | Mediumweightfabrics-cotton,satin, sailcloth,doubleknits,lightweightwoollens. | Mostthreadssoldaremediumsize and suitable for these fabrics and needlesizes.Use polyester threads on synthetic materialsandcottononnaturalwoven fabricsforbestresults.Alwaysusethesamethreadontop andbottom. |
| 14(90) | Mediumweightfabrics-cottonduck,woolen, heavierknits,terrycloth,denims. | |
| 16(100) | Heavyweightfabrics-canvas,woolens,outdoor tentandquiltedfabrics,denims,upholstery material(lighttomedium). | |
| 18(110) | Heavywoollens,overcoatfabrics,upholstery fabrics,someleathersandvinyls. | Heavydutythread,carpetthread. |

PleaseNote:
- In general, fine threads and needles are used for sewing fine fabrics, and thicker threads are used for sewing heavy fabrics.
-Alwaysstestthreadandneedlesizeonasmallpieceoffabricwhichwillbeusedforactualsewing.
-Usethesamethreadforneedleandbobbin.

text_image
Technical diagram of a sewing machine with labeled components and directional arrows indicating motion or flow.Bobbinwinding

natural_image
Illustration of a mechanical component with a circular base and a coiled spring-like structure, showing a red thread pattern (no text or symbols)- Placethethreadandspoolholderontothespoolpin. Forsmallerspoolsoftthread, placespoolholderwiththe smallsidenexttothespoolorusethesmallspoolholder.

natural_image
Illustration of two hands manipulating a small object with red arrows indicating direction (no text or symbols)- Snapthethreadintothethreadguide.

natural_image
Illustration of a hand holding a small device with a red arrow indicating direction (no text or symbols present)- Windthethreadclock when the bobbin windertension discs.

natural_image
Diagram of a mechanical assembly with a knob, pulley, and handle (no text or labels)- Placethethreadendthroughoneoftheinnerholesinthe bobbinasillustratedandplaceemptybobbinonthespindle.

natural_image
Diagram of a mechanical device with a red wire and arrow indicating motion (no text or symbols)- Pushthebobbintoright.
Windingthebobbin

natural_image
Hand holding a small mechanical component with a red wire, no text or symbols visible- Holdthethreadtailsecurelyinonehand.

natural_image
Diagram showing a foot pressing down on a curved pipe with arrows indicating motion (no text or symbols)- Presson the foot control or the Start/stop button to start winding the bobbin.

text_image
Diagram illustrating sewing process with scissors cutting thread and spool, showing correct and incorrect states- Afterthebobbinhaswoundafewturnsstopthemachine and cutthethreadnearthecholeofthebobbin. Continuefilling thebobbinuntilitisfull. Themotorstopsautomatically whenthebobbinisfull. Stopthemachine. Pushthebobbin winderspindletoleft.

natural_image
Illustration of a sewing process with scissors, thread, and spool (no text or symbols)- Cutthethreadandthenremovethebobbin.
Please Note: When the bobbin winder switch is placed on the right, "bobbin winding position", the machinewillnotsewandthehandwheelwillnotturn.Tostartsewing.pushthebobbinwinderswitch totheleft"sewingposition".

natural_image
Line drawing of a hand operating a sewing machine with a red arrow indicating the process (no text or symbols present)
text_image
A
text_image
B A
text_image
B CAttention: Turnpowerswitchtooff("O") beforeinsertingorremovingthebobbin.
Wheninsertingorremovingthebobbin,the needlemustbefullyraised.
Insertthebobbininthebobbincasewiththe threadrunninginacounterclockwisedirection (arrow).
Pullthethreadthroughtheslit(A).
Withafingerheldgentlyontopofthebobbin. Draw thethreadatthearrowmarkingsintothe stitchplatethreadguidefrom(A)to(B).
Pullthethreadatthearrowmarkingsintothe stitchplatethreadguidefrom(B)to(C). Tocutoffexcessthreadpullthreadbackoverthe cuttingoffbladeatpoint(C).Closethebobbin coverplate.

text_image
Technical diagram of a sewing machine with numbered parts and labeled parts for assembly or maintenance.
PleaseNote: It is important to carry out the threading correctly as by not doing so several sewing problems could result.
Startbyraisingtheneedletoitshighestpoint, andalsoraise thepressorfoottoreleasethetensiondiscs.

natural_image
Illustration of a mechanical component with a circular base and a coiled spring-like structure, showing a red thread pattern (no text or symbols)- Liftupthespoolpin. Placethespoolofthreadonthespoolpin so thatthethreadcomesfromthefrontofthespool, thenplace thespoolcapatthecendofthespoolpin.

natural_image
Illustration of two hands tying a knot with red arrows indicating direction (no text or symbols)- Drawthethreadfromthespoolthroughtheupperthread guide.
Threadingtheupperthread

natural_image
Diagram of a remote control switch with red arrows indicating direction (no text or symbols)- Guidethethreadaroundthethreadguidepullingthethread throughthepre-tensionspringasillustrated.

text_image
Diagram illustrating vehicle trajectory with red arrows indicating movement and a dotted line highlighting a specific path or route.- Threadthetensionmodule bypassingthethreadbetweenthe silverdiscs.

natural_image
Illustration of a hand using a tool to adjust or install a mechanical component, with no visible text or symbols.- Then, downandaroundthecheckspringholder.

natural_image
Diagram of a car's side profile showing hand positioning and movement arrows (no text or labels)- Atthetopofthismovement, passthethreadfromrighttothe leftthroughtheslottedeyeofthetake-upleverandthen downwardsagain.

natural_image
Diagram of a mechanical assembly with red arrows indicating force or direction (no text or symbols)- Passthethreadbehindtheflat, horizontalthreadguide.
Guidethethreadthroughthewireloop.
Pulltheendofthethreadthroughtheneedlefromfronttorear, andpulloutabout10cmofthread.
Usetheneedlethreadertothreadtheneedle.(Onthenext page.)
! Attention: Turnpowerswitchtotheoffposition("O").

text_image
Technical diagram showing hands operating a sewing machine with labeled parts and a magnified inset showing the foot symbol.Raisetheneedletoitshighestpositionandlowerthe presserfoot.
Lowertheneedlethreaderleverslowlyanddrawthethread throughthethreadguideasillustratedandthentotheright.

text_image
Technical diagram showing a hand operating a mechanical device with red arrows indicating direction and measurement points.Theneedlethreaderautomaticallyturnstothethreading positionandthehookpinpassesthroughtheneedleeye.

natural_image
Technical diagram of a mechanical clamp or bracket assembly with a magnified inset showing a pin detail (no text or symbols present)Takethethreadinfrontoftheneedle.

natural_image
Illustration of a sewing machine needle being sewn, with a magnified inset showing the needle insertion (no text or symbols)Holdthethreadlooselyandreleasetheleverslowly. The hookwillturnandpassthethreadthroughtheneedleeye formingaloop.
Pullthethreadthroughtheneedleeye.
Threadtension

text_image
5 4 1 3-Basicthreadtensionsetting:"4"
-To increase the tension, turn the dial to then next number up. To reduce the tension, turn the dial to then next number down.
-Propersettingoftensionisimportanttogoodsewing.
-Foralldecorativesewingyouwillalwaysobtainanicerstitch andlessfabricpuckeringwhentheupperthreadappearsonthe bottomsideofyourfabric.

text_image
Surface ReversesideNormalthread tension for straight stitch sewing.

text_image
Upperthread Bobbinthread
natural_image
Illustration of a layered structure with red and pink surfaces, no text or symbols presentThreadtensionistoolooseforstraightstitchsewing. Turndial tohighernumber.


natural_image
Illustration of a notebook with a dashed line indicating a section (no text or symbols)Threadtensionistootightforstraightstitchsewing.Turndialto lowernumber.


natural_image
Illustration of a red notebook with zigzag edges and a wavy top (no text or symbols)Normalthread tension for zigzag and decorative sewing.

Raisingupthelowerthread

natural_image
Line drawing of hands operating a sewing machine with a digital display (no text or symbols)- Hold the upper thread with the lefthand. Turn the hand wheel towards you (counterclockwise) lowering, then raising the needle.

natural_image
Line drawing of a hand using a sewing machine to lift fabric (no text or symbols)- Gentlypullontheupperthreadobringthe bobbinthreadupthroughtheneedleplatehole. Thebobbinthreadwillcomeupinaloop.

natural_image
Line drawing of hands using a sewing machine to connect fabric to a sewing machine (no text or symbols present)- Pullboththreadstothebackunderthepresser foot.
Cuttingthethread

natural_image
Illustration of a sewing machine needle stitching fabric, with red fabric bands and a hand adjusting the seam (no text or symbols)Raisethepressorfoot. Removethefabric, drawthethreadstotheleft sideofthefacecoverandcutusingthethread cutter.
Thethreadsarecutattheproperlengthtostart thenextseam.
Two-steppresserfootlifter

natural_image
Line drawing of a sewing machine needle and fabric (no text or symbols)The presserfootlifteraisesandlowersyour presserfoot.

natural_image
Line drawing of a sewing machine needle being adjusted, showing the handle and base (no text or symbols)Whensewingseverallayersorthickfabrics, the presserfootcanberaisedasecondstageforeasy positioningofthework.
Toraiseordropthefeeddogs

natural_image
Line drawing of a sewing machine needle and base mechanism (no text or symbols)With theseewing table of them machine, the feed dog adjustment lever can be seen on the base in back of these sewing machine.

text_image
Technical diagram of a sewing machine with labeled parts a and b, showing mechanical components and directional arrows.
text_image
a ↓ bSlidingthelevertothe" "(b)willowerthe feeddog,forexampleduringbuttonsewing.Ifyou wishtocontinuesewingnormally,slidetheleverto the" "(▲)nordertoraisethefeeddogs.
The feeddogify would trist the handwheel, even if the lever is slid to the right. Make a complete turn tor a is the feeddogs.

text_image
Diagram of a sewing machine with numbered parts for identification and functionOperationbuttons(seepage21/22)
1.Start/stopbutton
Pressthisbuttontostartorstopthemachine.
2.Reversebutton
Holddownthisbuttontoseweitherbackwardsorareinforcementstitchatalowspeed.
3. Auto-lockbutton
Holddownthisbuttontosewlockingstitchesimmediatelyorattheendofthecurrentpatternsand automaticallystop.
4. Needleup/downpositionbutton
Pressthisbuttontomovetheneedleeitherupordown.
5. Speedlimitingadjustmentlever
Slidethislevertochangethesewingspeed.
Memorybuttons(seepage23)
6.Memorybutton
Pressthisbuttonontoenterorstorethecreatedpatterncombinationinthememory.
7. Arrowbutton
Pressthe""buttonor""buttonuntiltheactualstitchnumberisdisplayed.
8.Clearbutton
Ifanincorrectpatternisselectedormemorized,pressingthisbuttonwillclearit.
Functionbuttons(seepage24/25/26)
9.Stitchlengthadjustmentbutton
Pressthisbuttontoadjustthelengthofthestitch.
10.Stitchwidthadjustmentbutton
Pressthisbuttontoadjustthewidthofthezigzagstitch.
11. Modeselectionbutton
Pressthisbuttontoselectdirectmode,utilityanddecorativepatternmodeandblocklettermode.
12.Mirrorbutton
Pressthisbuttontosewareflectionpattern.
Selectionbuttons(seepage27)
13.Directpatternselectionandnumberbuttons
Instantaccesstodirectpatternorpressnumberbuttonsofthepatternnumbertoselectthedesired pattern.
DirectPattern

text_image
Needleup Auto-lock Mirror Buttonholelever Bobbinwinding NeedlepositionReverse Stitchwidth Patternnumber Directmode 1 2.5 3.5 Direct
text_image
Pattern Needledown Mirror Auto-stop Reverse 32 Patternnumber 0.5 7.0 Patterns Stitchwidth Numberofcurrentunit Totalnumberofunit MEM Normalized Mode Suggested presserfoot Memory StitchlengthAlphabet

text_image
Needleup Auto-stop Patternnumber AUTO STOP 11 7.0 Stitchwidth Numberofcurrentunit Totalnumberofunit Alphabet MEM Suggestedpresserfoot Alphabetmode MemoryThe portion marked in colored on the chart below shows the one unit of each pattern.
A. Direction Patterns

text_image
1 2 3 4 5 6 7 8 9 0B. Patterns

text_image
1718192021222324250203040506070809101112131 3031322926283343536373839404142434445 464748495051 525354 55 56 57 585960 6162636465666768697071727374 75 76 77 78798081828384858687888990919293949596979899C. Alphabets

text_image
0102 03 04050607080910 1 2 3 4 5 6 7 8 9 0 1112 13 14 1516 17 181920 2122 23 24 2526 27 2829 30313233343536 A B C D E F G H I J K L M N O P Q R S T U V W X Y Z 3738 39 40 4142 43 444546 4748 49 50 5152 53 5455 56575859606162 a b c d e f g h i j k l m n o p q r s t u v w x y z 6364 65 66 67 68 69 70 71 72 73 7475 76 77 78 79 80 81 82 838485868788 Ä Å Æ Ñ Ð Ø Ç Ü ä ä å æ ë è é ê ñ ö õ ø i ç ü û β & 89 9091 92 9394 95 96 97 ? ! _ ’ , . - ( )
text_image
Needleup/down positionbutton Auto-lockbutton Reversebutton Start/stopbutton
natural_image
Diagram of a car interior showing a valve, handle, and seat with a red arrow pointing to a circular component (no text or symbols)Start/stopbutton
ThemachinewillstartrunningwhenStart/stopbutton ispressedandwillstopwhenpressedthesecondtime. Themachinewillrotateslowlyatthebeginningofthe sewing.
Thesewingspeedcanbecontrolledbythespeed limitingadjustmentlever.
This way you may operate the machine without foot control.

text_image
AUTO LOCK 00 2.5 3.5 PatternsReversebutton
WhentheattDims0P-05anes1-5andP selected.
Reverseispressedtosewinreverse.Anarrow"" willbeshownintheLCDwhenthefunctionisactive. IfyoupressandholdtheReversebuttonthemachine willsewbackwardsuntilyoureleasethebutton.Ifyou pressandreleasethebuttonbeforestartingtosew,the machinewillpermanentlysewinreverse.Pressthe buttonagaintosewforwardagain.
Thelongestreversestitchlength3mm.
Pressthereversebuttonwhenthe DirectPatterns6-7 andP atterns06-14,26-99areselected,themachine willsewareinforcementstitchatalowspeedifthe Reversebuttonispressed.
Operationbuttons

text_image
AUTO LOCK 00 T 2.5 3.5 Patterns
text_image
AUTO STOP 0.9 A T 2.0 5.0 PatternsAuto-lockbutton
WhentheareDirectPatterns1-4andPatterns00-04 selected,themachinewillimmediatelysew3locking stitcheswhentheAuto-lockbuttonispressed,then automaticallystop.
TheLCDwilldisplaythefigure""until machine isstopped.

PleaseNote:
TheLCDwilldisplaythefigure""whent13A Direct Patterns1-4andPatterns00-04 areselected.Press"" buttonwillcancelthisfunctionandpressitagainto restore.
Whenthe DirectPatterns5-7andPatterns05-14,26-99 areselected,presstheAuto-lockbutton,the machinewillsew3lockingstitchesattheendofthe currentpatternandautomaticallystop.
TheLCDwilldisplaythefigure" "ur the machineisstopped. Thefunctionwillbecancelledif youpressthebuttononceagainorselectanother pattern.

text_image
AUTO LOCK 0.0 2.5 3.5 Patterns AUTO LOCK 0.0 2.5 3.5 Patterns
text_image
Technical diagram showing sewing machine needle positioning with two views of the mechanism, marked with red circular indicators.Needleup/downpositionbutton
With the Needleup/downposition button, you decide whether thencedle shall stop in the supposition or in thematerial when you stop sewing.

PleaseNote: Duringsewing, press the button will be no function.
Pressthebuttonsothatthearrow,ontheLCDscreen, willpointupward" ▲andtheneedlewillstopinthe highestposition.Whenyoupressthebuttonsothatthe arrowpointsdownward" ▼themachinewillstop with the needle in the lowest position.

text_image
Clearbutton Arrowbutton Memorybutton
text_image
30 Patterns 0.5 7.0 MEM M ← MEM → MEM CMemorybutton
Pressthe""bumontoenterthememorymode,and storethecombinationsofcharactersordecorative stitches.Pressthe""buttoagaintoleavethe memorymodeandreturnDirectmode.

PleaseNote:TheDirectmodepatternsand buttonholescannotbememorized.

flowchart
graph LR
    M --> ← MEM
    ← MEM --> → MEM
    → MEM --> C
Clearbutton
Pressthisbuttonwhentheincorrectcharacteris selected. Each pressofthisbuttonerasesonecharacter, orpressthisbuttontoremoveanaddedpatternwhen sewingcombinationsofcharactersordecorative stitches.

flowchart
graph LR
    M --> MEM
    MEM --> MEM
    MEM --> C
Arrowbutton
Usethearrow""or"buttonontoconfirmthe patternmemorizedbypressingthisbuttoninmemory mode.

text_image
Stitchwidth adjustmentbutton Stitchlength adjustmentbutton Mirrorbutton Modeselectionbutton
text_image
05 2.0 5.0 PatternsStitchwidthadjustmentbutton
Whenyouselectastitch, themachinewillautomaticallysettherecommendedstitchwidth, which will be indicated by numbersontheLCDscreen. Thestitch width can be regulated by pressing the stitch width adjustment buttons.
Certainstitcheshavealimitedstitchwidth.

text_image
Diagram showing waveforms and electrical symbols including a resistor, capacitor, and zigzag lineForanarrowerstitch, pressthe" "button(left). Fora widerstitch, pressthe" + "button(right).
Thestitchwidthcanbeadjustedbetween"0.0-7.0". Certainstitcheshavealimitedstitchwidth.

text_image
AUTO LOCK 00 R T 2.5 3.5 PatternsWhenpatterns00-04areselected,theneedleposition isregulatedbythestitchwidthadjustmentbuttons. Pressingthe""button(left),willmovetheneedleto theleftandpressingthe"+"button(right),willmove theneedletotheright.
Thenumberswillbechangedfromleftposition"0.0" toextremerightposition"7.0".Thepre-setcenter needlepositionwillbeindicatedas"3.5".

text_image
AUTO LOCK 00 A T 2.5 3.5 PatternsStitchlengthadjustmentbutton
When you select a stitch the machine will automatically set therecommended stitch length which will be indicated by number on the LCD screen. The stitch length can be adjusted by pressing the stitch length adjustment buttons.

text_image
Diagram showing bidirectional arrow and minus sign with a pill symbol, alongside vertical dashed lines and dotted reference lines.Toshortenthestitchlength,pressthe""button(left). Foralongerstitchlength,pressthe"+"button(right). Thestitchlengthcanbeadjustedbetween"0.0-4.5". Certainstitcheshavealimitedlength.

text_image
AUTO LOCK 1 2.5 3.5 Direct Patterns Alphabet M MEM MEM C 1 2 3 4 5 6 7 8 9 A 0MODEselectionbutton
Whenyouturnthemachine"ON"theLCDscreen displaywillbesetatdirectmode"". Direct
Pressthe""buttonto""mode,if pattern thefunctionbuttonagain,""will be displayed. Afterathirdpress,""is "dual yedagain.
Direct Directmodestitchselection.
Patterns Utilityanddecorativepatternmode:Stitch selectionusingnumberbuttons.
Alphabet Blocklettermode:Characterselectionusing numberbuttons.

text_image
32 0.5 7.0 Patterns - + - + M ← MEM → MEM C 1 2 3 4 5 6 7 8 9 A 0Mirrorbutton(seepage53)
Thepatterns00-14,26-99canbemirror,pressing the""buttonwillsewareflectionpatternfrom yourselectedstitch.
The LCD will display them mirror function and the machine will continue to set were reflected pattern until the mirror function is pressed against a cancel the mirror function.
WhenthemirrorfunctiondisappearsfromtheLCD screen,themachinewillcontinuetosewthenormal stitch.
If you changethe pattern setting, thenthemirror function will be cancelled accordingly. If you need the reflection pattern, then press them mirror button again.

text_image
Directpatternselection andnumberbuttons
text_image
AUTO LOCK 1 R T 2.5 3.5 Direct ↓ 32 R A 0.5 7.0 Patterns -- + M MEM MEM C 1 2 3 4 5 6 7 8 9 A 0Directpatternselectionandnumberbuttons
Directpatternselection
Pressthebuttonstoselecttheutilitypatternsshown besidethenumberbuttonwhenthemodebuttonisset attheDirectmode.
Numberbuttons
Pressthenumberbuttonsforselectingthepattern needed.
Except the Directpatternmode, the other mode can be selected by pressing the desired numbers.
Forexample:pattern32
Usefulskills

text_image
Technical diagram of a sewing machine with numbered parts and directional arrows indicating assembly steps
natural_image
Technical illustration of a sewing machine needle stitching on fabric, with close-up details showing hand positioning (no text or symbols)
natural_image
Technical line drawing showing two stages of sewing machine operation: top-down and side-view (no text or symbols)Sewingcorners
- Stop these sewing machine when you reach a corner.
- Lowertheneedleintothefabricmanuallyor bypassingtheneedleup/downbuttononce.
- Raisethepressorfoot.
- Usetheneedleasapivotandturnthefabric.
- Lowerthepresserfootandresumesewing.
Reverse
Reversestitchingisusedtosecurethethreadsat thebeginningandattheendofascam.
Pressthereversebuttonandsew4-5stitches.
Themachinewillsewforwardwhenthebuttonis released.
Freearm
Free-armsewingisconvenientforsewing tubularareassuchaspanthemsandcuffs.

text_image
Technical diagram showing sewing machine operation with labeled components and directional arrows indicating movement
text_image
3 A B
natural_image
Illustration of a sewing machine needle stitching fabric, showing step-by-step disassembly (no text or symbols)
natural_image
Illustration of hands operating a sewing machine on a red fabric (no text or symbols visible)
text_image
Cardboardor thickfabricInstallingtheextensiontable
*TheadExtsorsjocblonal.Itis notincludedwiththismachine.
Pullthesewingtableandaccessoryboxoffby slidingittotheleft.(1)
Followthearrow, and stretch the foot of the extensionable.(2)
Snap(A)oftheextensiontableinto(B)ofthe machine.(3)
Extensiontablecanhelpmovingduringsewing.
Sewingontheheavyfabric
Theblackbuttonontheleftsideofthepresser footwilllockthepresserfootinahorizontal positionifyoupushitinbeforeloweringthe presserfoot. Thisensuresevenfeedingatthe beginningofaseamandhelpswhensewing multiplelayersofffabricsuchassewingover seamswhenhemmingjeans.
Whenyoureachthepointofanincreased thickness,lowertheneedleandraisethepressor foot.Pressthetoeofthefootandpushinthe blackbutton,thenlowerthefootandcontinue sewing.
The black button releases automatically after sewing few stitches.
Youalsocanplaceanotherpieceoffabricwith thesamethicknessatthebackoftheseam.Or supportthepresserfootwhilefeedingbyhand andsewingtowardthefoldedside.

text_image
00 0102 03 04 TChangingtheneedleposition
Thesesettingapplyonlytopatterns00-04.Thepre-setpositionis "3.5",centerposition.Whenyoupressthe""stitchwidth adjustmentbutton,theneedlepositionwillmovetotheleft. Whenyoupressthe"+"stitchwidthadjustmentbutton,the needlepositionwillmovetotheright.

Changingthestitchlength
Toshortenthestitchlength,pressthe""stitchlength-adjustmentbutton.Foralongerstitchlength,pressthe"+"stitchlengthadjustmentbutton.
Generally speaking, the thicker the fabric, thread and needle, the longer the stitch should be.

bar
| Value | |---| | 0.51.02.0 | | 3.0 | | 4.5 |Zigzagstitches

text_image
05 06 0707 AAdjustingthestitchwidth
Themaximumzigzagstitchwidthforzigzagstitchingis"7.0"; however, the width can be reduced on any patterns. Thewidth increases as you press the " + " stitch width adjustment button from "0.0-7.0".

Adjustingthestitchlength
Thedensityofzigzagstitchesincreaseasthesettingofstitch lengthapproaches"0.3".
Neatzigzagstitchesareusuallyachievedat"1.0-2.5".
Closedupzigzagstitches(closetogether)arereferredtoasa satinstitch.

line
| Series | Value | |--------|-------| | 1 | 0.51 | | 2 | 2.0 | | 3 | 3.04 |
text_image
02 03 0707 1 AStraightstretchstitch

text_image
Straightstitch
text_image
02 03
natural_image
Diagram showing two spring-like structures with wavy lines and a red shaded section, no text or symbols present.Itassuresyouofastitchthatisstrongand flexibleandwillgivewiththefabricwithout breaking.Goodforeasytoravelandknitfabrics. Itisgoodforjoiningdurablefabricsuchas denims.
Thesestitchescanalsobeusedasadecorative topstitch.
Straightstretchstitchisusedtoaddtriple reinforcementtostretchandhardwearingseams.
Triplezigzagstretchstitchissuitableforfirm fabricslikedenim,poplin,duck,etc.
Overcastingstitches

text_image
05 08 5.0~7.0 2.0~3.0
natural_image
Technical illustration of a sewing machine stitching red fabric, showing needle insertion and component alignment (no text or symbols)
text_image
06 09 2.5~4.5 2.0~3.0
natural_image
Technical illustration of a sewing machine needle stitching fabric, showing thread pattern and seam details (no text or symbols)Usingtheovercastingfoot
Changethepressorfoottotheovercastingfoot(E).
Sewthefabricwiththefabricedgeagainstthe guideoftheovercastingfoot.
Attention: The overcasting foot should be used to sew with patterns 05 and 08 only and donot set the stich width narrower than "5.0". It is possible that needle could hit the presser foot and break when sewing other patterns and width.
Usingtheallpurposefoot
Changethepressorfoottotheallpurposefoot(T).
Sewingtheovercastingalongtheedgeofthe fabricsothattheneeddropsovertheedgeof thefabricontherightside.
Blindhem/Lingeriestitch

text_image
10 11 2.5~4.0 1.0~2.0
text_image
5mm5mm Reverse side Overcasting stitches Reverse side
text_image
Technical diagram showing sewing machine stitching technique with labeled parts a and b
natural_image
Illustration of a sewing machine needle stitching fabric (no text or symbols)
natural_image
Diagram showing a red arrow pointing to a pink rectangular object, with no visible text or symbols.10: Blindhem/lingerieforfirmfabrics
11: Blindhemforstretchfabrics
PleaseNote: It takes practicetosewblind hems. Always make asewing test first.
Foldthefabricasillustratedwiththewrongside uppermost.
Placethefabricunderthefoot.Turnthe handwheelforwardsbyhanduntiltheneedle swingsfullytotheleft.Itshouldjustpiercethe foldofthefabric.Ifitdoesnot,adjustthestitch widthaccordingly.
Adjusttheguide(b)byturningtheknob(a)so thattheguidejustrestsagainstthefold.
Sewslowly, guiding the fabric carefully along the edge of the guide.
Turnoverthefabric.
Buttonsewing

text_image
05 2.5~4.5
text_image
a b a bChangethepressorfoottothebuttonsewingfoot.
Movethedropfeedcontrolto""tolowir thefeeddogs.
Positiontheworkunderthefoot.Placethebutton inthedesiredposition,lowerthefoot.

text_image
05 2.5~4.5Selectzigzagpattern.Adjustthestitchwidthto "2.5-4.5"accordingtothedistancebetweenthe twoholesofthebutton.
Turnthehandwheeltocheckthattheneedlegoes cleanlyintotheleftandrightholesofthebutton.

natural_image
Technical illustration of a sewing machine needle stitching on a red fabric background (no text or symbols)Beforesewing, press the Auto-lockbutton to sew reinforcement stitches automatically at the beginning and at the end of the stitch.
Ifashankisrequired,placeadarningneedleon topofthebuttonandsew.

natural_image
Three circular diagrams with red symbols: a horizontal line, two horizontal lines, and a cross (no text or labels)Forbuttonswith4holes,sewthroughthefront twoholesfirst,pushworkforwardandthensew throughthebacktwoholes.
Buttonholestitching

text_image
15 2.5~7.0 0.3~1.0 16 1819 2.5~5.5 0.3~1.0 17 5.5~7.0 0.3~1.0 20 3.0~7.0 1.0~2.0 21 3.0~7.0 1.0~3.015: Forthinormediumfabric
16: For horizontal holes on blouses or shirts made from thin or medium fabric
17: Forsuitsorovercoats
18: For horizontal button holes on thick fabrics
19: Forthinormediumfabric
20: Forjeansorstretchfabricwithacoarse weave
21:Forstretchfabric
Please Note: Before sewing a buttonhole on your project, practice on a scrap piece of the same type offabric.

natural_image
Two abstract geometric shapes with vertical and horizontal lines on a solid pink background, separated by dashed lines (no text or symbols)Markthepositionsofthebuttonholeonthe fabric.
Themaximumbuttonholelengthis3cm(13/16 inch).(Totalofdiameter+thicknessofbutton.)

natural_image
Mechanical assembly diagram showing a tool interacting with a component, no text or symbols presentAttachthebuttonholefoot,thenpulloutthebutton holderplateandinsertthebutton.
Thesizeofthebuttonholeisdeterminedbythe buttoninsertedinthebuttonplate.
Thethreadshouldbepassedthroughtheholein thepressorfoot,thenbeplacedunderthefoot.
Buttonholestitching

text_image
Technical diagram showing a sewing machine with a close-up of its starting point, labeled in English.Selectthebuttonholestitch.
Adjustthestitchwidthandthestitchlengthtothe desiredwidthanddensity.
Positionthefabricunderthepresserfootwiththe frontendofthebuttonholemarkalignedwiththe centerlineonthebuttonholefoot.

text_image
Diagram illustrating a medical procedure with labeled components and a magnified view showing a device with 'PUSH' button.Pullthebuttonholeleverallthewaydownand positionitbehindthebracketonthebuttonhole foot.

text_image
15 Patterns 0.5 5.0Please Note: When you select any buttonhole pattern, LCD screen will be demonstrated the figure "", it is remind you to lower the button hole lever.

natural_image
Illustration of a sewing machine needle stitching fabric, with a hand pulling the needle (no text or symbols)While lightly holding the end of upper thread and start sewing.
PleaseNote: Gentlyfeedthefabricbyhand. Beforestopping, themachinewillautomatically sewareinforcementstitchafterthebuttonhole issewn.
*Buttonholesaresewnfromthefrontofthepresserfoottotheback,asshown.

text_image
15 16 18 19 17 20 21
natural_image
Illustration of a hand using a sewing machine to adjust cable, showing needle insertion and wiring (no text or symbols)Buttonholesaresewnfromthefrontofthe presserfoottotheback,asshown.
Raisethepressorfootandcutthread. Tosew oversamebuttonhole, raisethepressorfoot(will returntooriginalposition).
Aftersewingthebuttonholestitch, raisethe buttonholeleveruntilstops.

natural_image
Illustration of a hand using a tool to tighten a red screw on a fabric (no text or symbols)Cutthecenterofthebuttonholebeingcarefulnot tocutanystitchesoneitherside.Useapinasa stopperatthebartacksoyoudonotcuttoo much.

text_image
Technical diagram illustrating a mechanical device operation with labeled parts and tool tips, including wire connections and cutting steps.Makingabuttonholeonstretchfabrics
Whensewingbuttonholesonstretchfabric, hookheavythreadorcordunderthebutton-holefoot.
Attachthebuttonholefootandhookthegimp threadontothebackofthepresserfoot.
Bringthetwogimpthreadendstothefrontofthe footandinsertthemintothegrooves,then temporarilytiethemthere. Lowerthepresser footandstartsewing.
Setthestitchwidthtomatchthediameterofthe gimpthread.
Oncesewingiscompleted,pullthegimpthread gentlytoremoveanyslack,thentrimoffany excess.
PleaseNote: It suggested that you use interfacing on the backside of the fabric.

text_image
22 5.06.07.022:Selectforsewingeyeletsonbelts,etc

text_image
22 Patterns 7.0Selectpattern22togettheeyeletstitch.Attach satinstitchfoot(A).

flowchart
graph LR
    A["A"] --> B["B"]
    B --> C["C"]
Pressthe""or"+" stitchwidthadjustmentto buttonselecttheeyeletsize.
Sizeofeyelet.
A. Large: 7.0mm (1/4inch).
B. Medium: 6.0mm (15/64inch).
C.Small:5.0mm(3/16inch).

flowchart
graph LR
    A["Start"] --> B{Rotation}
    B --> C["Loop Back"]
    C --> D["End"]
Lowertheneedleintothefabricatthebeginning ofthestitching,andthenlowerthepresserfoot lever.
Once sewing is completed, the machine automatically sews reinforcement stitches, then stops.

natural_image
Illustration of a hand holding a tool above a red surface with a small red spike (no text or symbols)Makeaholeatthecenterusinganeyeletpunch.
*Eyeletpunchisnotincludedwiththemachine.
PleaseNote: If thin thread is used, the stitching may be coarse. If this occurs, sew the eyelet twice one on top of the other.
Darningstitch


text_image
3.5~7.0 1.0~2.0
text_image
23 2.0 7.0 PatternsSelectpattern23togetthedarningstitch. Changthepresserfoottothebuttonholefoot.

natural_image
Technical illustration of a sewing machine tool with red and white components, shown from two different angles (no text or symbols present)Bastetheupperfabricandtheunderfabric together.Selecttheneedleposition.Lowerthe presserfootoverthecenterofthetear.

natural_image
Illustration of a hand using a tool to adjust or install a mechanical component, with no visible text or symbols.Pullthebuttonholdertorear. Setthebuttonguideplateonbuttonholefootto thedesiredlength.

text_image
Stop a Start bThesizeofonedarncycleisvariable. However, themaximumstitchlength this 2.6cm (1 inch) and themaximumstitchwidth this 7mm (9/32inch).
a. Thelengthofsewing. b. Thewidthofsewing.
Darningstitch

text_image
2mmPositionthefabricsothattheneedleis2mm (1/16inch)infrontoftheareatobedarned, and thenlowerthepresserfootlever.
PleaseNote: Whenloweringthepresser foot, donotpushinthefrontofthepresser foot, otherwisethedarningwillnotbesewn withthecorrectsize.

text_image
Diagram illustrating a manual tool application with a hand holding a push button, showing the process and insertion step.Passtheupperthreaddownthroughthe holcinthepresserfoot. Pulldownthebuttonholelever. Thebuttonhole leverispositionedbehindthebracketonthe buttonholefoot.
Gentlyholdtheendoftheupperthreadinyour lefthand,andthenstartsewing.

flowchart
graph LR
    A["Grid with 23 top row"] --> B["↑"]
    B --> C["Down arrow"]
    C --> D["Right arrow"]
    D --> E["Down arrow"]
    E --> F["Heat sink with upward arrow"]
Darningstitchesaresewnfromthefrontofthe presserfoottotheback,asshown.

natural_image
Two abstract diagrams showing a grid pattern with red rectangular blocks on pink background, no text or symbols present.If thesewingrangeistoobigtosew, then we suggest you can sew severaltimes (or crosssew) to get better sewing result.
Zipperinsertion


text_image
~~ 3.5 1.5~3.0
text_image
5mm
natural_image
Technical illustration of a sewing machine with red measurement lines and base mount (no text or symbols)
natural_image
Technical illustration of a sewing machine needle stitching on fabric, showing the same mechanical setup with no text or symbols.Attention: Zipperfootshouldbeused for sewingwidthcenterneedlepositionstraight stitchonly. It is possible that needle could hit the presser foot and break when sewing other patterns.
Insertingacenteredzipper
-Bastethezipperopeningonthegarment.
-Pressopentheseamallowance. Placethe zipperfacedownontheseamallowance with theteethagainsttheseamline. Bastethezipper tape.
-Attachthezipperfoot.Attachtherightsideof thepressorfootpintotheholderwhensewing theleftsideofthezipper.
-Attachtheleftsideofthepresserfootpintothe presserfootholderwhensewingtherightside ofthezipper.
-Stitchleftsideofthezipperfromtoptobottom.
-Stitchacrossthelowerendandrightsideof zipper.Removethebastingandpress.
Zipperinsertion

text_image
5mm
natural_image
Technical illustration of sewing machine stitching process, showing needle insertion and fabric application (no text or symbols)
natural_image
Two-panel diagram showing a mechanical assembly with dashed lines indicating alignment or connection points (no text or symbols)Insertingasidezipper
-Bastethezipperopeningonthegarment.
-Foldbacktotheleftseamallowance. Turnundertherightseamallowancetoform 3mm(1/8inch)fold.
-Attachtheczipperfoot.Attachtherightsideof thepresserfootpintotheholderwhensewing theleftsideofthezipper.Attachtheleftside ofthepresserfootpintothepresserfoot holderwhensewingtherightsideofthe zipper.
-Stitchtheleftsideofzipperfrombottomto top.
-Turnthefabricrightsideout, stitchacross the lowerendandrightsideofzipper.
-Stopabout5cm(2inches)fromthetopof zipper.Removethebastingandopenthe zipper.Stitchtheremainderoftheseam.
Narrowhemming


text_image
3.5 1.5~3.0
natural_image
Illustration of a hand holding a pen, poised to write on a surface (no text or symbols present)*TheHemmerfootaccessoryisoptional.Itis notincludedwiththismachine.
Foldedgeoffabricoverabout3mm(1/8inch), thenfolditoveragain3mm(1/8inch)forabout 5cm(2inches)alongtheedgeofthefabric.

natural_image
Illustration of hands using a sewing machine to cut fabric (no text or symbols)Inserttheneedleintothefoldbyrotatingthe handwheeltowardyou,andlowerthepresser foot.Sewseveralstitchesandraisethepresser foot.
Insertthefabricfoldintothespiralopeningof hemmerfoot.Movefabricbackandforthuntil thefoldformsascrollshape.

natural_image
Illustration of hands using a sewing machine to handle fabric (no text or symbols)Lowerthepresserfootandstartsewingslowly guidingtherawedgeofthefabricinfrontofthe hemmerfootevenlyintothescrollofthefoot.
Sewoveronestrandofcordingtocreateaprettyswirleddesignonajacketorvestorsewoverthree strandsofcordingforbordertrims.Pearlcotton,knittingyarn,embroideryfloss,lacethread,finewoolor lilyyarncanbeusedforcording.
*The footaccessoryisoptional.Itisnotincludedwiththismachine.Cording


natural_image
Technical illustration of a sewing machine needle stitching fabric, showing rope routing and mechanical components (no text or symbols)Singlecording
Markthedesignonthefabric.Insertthecordin thecentergrooveofthecordingfootfromthe rightsideopening.Pullthecordabout5cm(2 inches)behindthefoot.
Thegroovesunderthefootwillholdthelength ofthecordinplacewhilethestitchesarebeing formoverthecord.
Selectthestitchandadjustthestitchwidthso thatthestitchesarejustcoveringthecord. Lower thefootandsewslowly, guidingthecordover thedesign.

text_image
06 14 M
natural_image
Technical illustration of a sewing machine needle stitching a red fabric (no text or symbols)Triplecording
Pushthesewingthreadtotheleftandinsertthree cordsintothegroovesofthefootandpullabout 5cm(2inches)ofthecordsbehindthefoot.
Selectthedesiredpatternandadjustthestitch widthsothatthestitchesarejustcoveringthe cords. Lowerthefootandsewslowlyguidingthe cords.
Satinstitchsewing
05 26333@728293031323435


natural_image
Illustration of a sewing machine needle stitching fabric, with red fabric and white background (no text or symbols)
3.5\~7.0

0.5\~1.0
Usethesatinstitchfootforsatinstitchingand sewingdecorativestitches. Thisfoothasafull indentationontheundersidetoallowedeasy sewingoverthethicknessofthestitchesformbycloselyspacedzigzagstitches,andevenfeeding ofthefabric.
Totailorthesatinordecorativestitchpattern, youmayadjustthelengthandwidthofthe patternbypassingthestitchlengthandwidth adjustmentbuttons. Experimentwithfabric scrapsuntilyougetthedesiredlengthandwidth.

PleaseNote: Whensewingverythinfabrics, itissuggested that you use interfacing on the backside of the fabric.
Quilting

natural_image
Technical line drawings of mechanical components including screw, pin, and bracket (no text or symbols)
text_image
~~ 3.5 1.0~3.0 --------
natural_image
Technical line drawing of a mechanical clamp or tool with a red directional arrow indicating motion (no text or symbols)*TheQuiltingfootaccessoryisoptional.It is not included with this machine.
Inserttheeindepqasirfoguide holderasillustratedandsetthespaceasyou desire.

natural_image
Diagram of a sewing machine needle stitching on a red fabric background (no text or symbols)Sewthefirstrowandmoveoverthefabricto sewsuccessiverowswiththeguideridingalong thepreviousrowofstitching.
Scallopstitch


natural_image
Illustration of a sewing machine needle stitching fabric (no text or symbols)
natural_image
Close-up of a pink decorative corner with scalloped edges and red stitching (no text or symbols)-Stitchalongtheedgeofthefabric,makingsure
nottosewdirectlyontheedgeofthefabric.
*Forbetterresults,applysprystarchontothe fabricandpresswithahotironbeforeitis sewn.
-Trimalongthestitches.
*Becarefulnottocutthestitches.
Gathering


text_image
3.5 4.5
natural_image
Illustration of a sewing machine needle stitching fabric, showing needle positioning and stitching details (no text or symbols)*TheGatheringfootaccessoryisoptional.Itis notincludedwiththismachine.
Gatheredfabric
Removethepressorfootholderandattachthe gatheringfoot,loweringthetensionsettingto below2.
Placefabrictobegatheredunderpresserfootto therightofthepresserfoot.
Sewarowofstitching,keepingtherawedgeof fabricalignedwiththerightedgeoffoot.
Thestitchesautomaticallycausethefabricto gather. Suitableforlighttomediumweight fabrics.

natural_image
Technical illustration of a sewing machine needle stitching fabric, showing rope routing and cutting edge (no text or symbols)
natural_image
Abstract diagram with diagonal lines and a pink triangular shape, no text or symbols presentTogether and attached gathered fabricinonestep
Lookcloselyatthegatheringfoottoseeasloton thebottom.
Whenusingtheslot,youcangatherthebottom layerofthefabricwhileattachingittoaflattop layer,suchasthewaistbandonadressbodice.
-Removethepressorfootholderandattach gatheringfoot.
-Placethefabrictobegatheredwithrightside upunderthefoot.
- Place top layer of the fabric right side down in the slot.
-Guidethetwolayersasillustrated.
Note: Whentestingmachineforadjustments to achieved desired fullness, work with 10" increment of the fabric, trimsorelastic. This makes site asiertodeterminetheadjustments and how much change is needed for your project. Always test your project fabric and on the same grain line as will be used in your finished project.
Note: Sewslowtomediumspeedforbetter fabriccontrol.
Smocking

text_image
13 T 14 A
natural_image
Illustration of a sewing machine needle stitching fabric, with red dashed lines indicating seam or cutting path (no text or symbols)Usetheallpurposefoottosewstraightlines1cm (3/8inch) apart, across the areatobes mocked.

natural_image
Illustration of hands manipulating a red fabric with parallel lines and dots (no text or symbols)Knotthethreadsalongoneedge. Pullthebobbinthreadsanddistributethegathers evenly.Securethethreadsattheotherend.

natural_image
Illustration of a surgical sutured tissue section with visible stitching and hair follicles (no text or symbols)Reducethetension, if necessary and sew decorative pattern stitches between the straight seams.

natural_image
Illustration of hands tying a red knitted fabric with a string (no text or symbols)Pulloutthegatheringstitches.
Freemotiondarning, embroidery and monogramming

text_image
00 05 3.5~5.0
text_image
a b a b*TheDarning/Embroideryfootaccessoryis optional.Itisnotincludedwiththismachine.
Movethedropfeedcontrolto""toloworthe feeddogs.

text_image
Technical diagram of a mechanical device with labeled parts a, b, and cRemovethepressorfootholder, and attach the darningfoottothepresserfootholderbar.
Thelever(a)shouldbebehindtheneedleclamp screw(b).Pressthedarningfootonfirmlyfrom behindwithyourindexfingerandtightenthe screw(c).

natural_image
Illustration of a sewing machine needle stitching red fabric on a pink fabric background (no text or symbols)Darning
Firstsewaroundtheedgesofthehole(tosecure thethreads). Workingfromlefttoright,sewover theholeinaconstantandcontinuousmovement.
Turntheworkby1/4andsewoverthefirst stitchingmovingtheworksloweroverthehole toseparatethethreadsandnotformbiggaps betweenethreads.
PleaseNote:Freemotiondarningis accomplishedwithoutthesewingmachine internalfeedsystem.Movementofthefabric iscontrolledbytheoperator.Itisnecessary tocoordinatesewingspeedandmovementof fabric.
Freemotiondarning, embroidery and monogramming

natural_image
Illustration of a sewing machine needle stitching a floral pattern in a circular basin (no text or symbols)
natural_image
Illustration of a sewing machine needle stitching a red flower in a circular basin (no text or symbols)Embroidery
Selectzigzagstitchpatternandadjustthestitch widthasdesired.
Stitchalongtheoutlineofthedesignbymoving theembroideryhoop.Makesuretomaintaina constantspeed.
Fillinthedesignworkingfromtheoutline towardstheinside.Keepthestitchesclose together.
Youwillgetlongerstitchesbymovingthehoop fasterandshorterstitchesbymovingthehoop moreslowly.
Securewithareinforcementstitchesattheend bypassAuto-lockbutton.

text_image
AnjeMonogramming
Selectthezigzagstitchpatternandadjustthe stitchwidthhasdesired.Sewataconstantspeed, movingthechoopslowlyalongthelettering.
Whentheletterisfinished.Securewitha reinforcementstitchesattheendbypressAuto-lockbutton.
*Embroiderhoopisnotincludedwiththe machine.
Fagoting


text_image
Thinpaper Basting
natural_image
Technical illustration of a mechanical assembly with red structural elements and a close-up view of a vertical structure (no text or symbols)-Separatethefoldededgesofthefabricpieces withagapof4mm(1/8inch)andbastethem ontoapieceofthinpaperorwater-soluble stabilizersheet.
-Alignthecenterofthepresserfootwiththe centerofthetwopiecesoffabricandbegin sewing.
-Aftersewing,removethepaper.
Patchworkstich


natural_image
Simple line drawings of four abstract shapes: a zigzag pattern, two crossed lines forming triangles, and a stylized shoe with a handle (no text or symbols)
natural_image
Simple geometric diagram with a vertical dashed line dividing a pink rectangle (no text or symbols)
natural_image
Diagram showing a curved surface with a dashed line indicating direction, no text or symbols present
natural_image
Illustration of a sewing machine needle stitching fabric (no text or symbols)-Placethetwopiecesoffabricwiththeright sidetogetherandsewwiththestraightstitch.
-Opentheseamallowancesandpressesitflat.
-Placethecenterofthepresserfootontheseam lineofthejoinedpiecesoffabricandsewover theseam.

text_image
28 0.5 7.0 Normal
text_image
28 10.5 7.0 Patterns - + - + M MEM MEM C 1 2 3 4 5 6 7 8 9 A 0
text_image
A BSelectthepattern.
Pressingthemirrorbutton.LCDwilldisplaythe mirrorfunctionandthemachinewillsewthe reflectedpatternuntilyoupressthemirrorbutton again.
A.Normalpatternsewing.
B.Mirrorpatternsewing.

PleaseNote:
-Pattern15-25 cannot bemirrorimaged.
-Mirrorimagedpatternscanalsobecombined withotherpatterns.
Twinneedle

text_image
2.0~5.0
text_image
Diagram illustrating a soldering process with tool tip, magnified view showing dislocation or indentation on a test tube.
text_image
Technical diagram of a mechanical device with labeled components and directional arrows indicating flow or movement.
text_image
Diagram showing sewing machine operation with red-handled cable and rotary knob, alongside a hand adjusting the device's handle.
natural_image
Five distinct patterned textile or textile designs with vertical and horizontal lines, no text or symbols present.* The twin needle is optional. It is not include with the accessories.
Insertthetwinneedle.
Attention: When using twin needles, use theallpurposefoot(T)regardlessofwhat kindofsewingfootwillbecarriedout. Useonlytwinneedleassemblieswithmax. 2mmneedledistance.
Followtheinstructionsforsingle-needlethreading usingthehorizontalspoolpin.Threadthroughthe leftneedle.
Setthesecondspoolpin(includedwiththe accessories)intotheholeonthetopofthe machine.Threadthroughremainingpoints, makingcertaintoomitthethreadguideabovethe needleandpassthreadthroughtherightneedle.
Threadeachneedleseparately.
PleaseNote: Makesurethatthetwothreads usedtothreadthetwinneedleareofthesame weight. Youcanuseoneortwocolors
Beforesewingadjustthestitchwidth, Turnthe handwheeltochecktheneedleclearance, so that needledoesnothittheneedleplate.
Whensewingwithtwinneedle,alwaysproceed slowly,andmakesuretomaintainalowspeedto insurequalitystitching.
Selectastitchpatternandstarttosewing.
Utilityanddecorativepatterns00-14,26-99can beused.
Sewingresultwillbeapatternwithtwoparallel stitchlines.
PleaseNote: Whensewingwithtwinneedle, alwaysproceedslowly,andmakesureto maintain a low speed to insure quality stitching.
Walkingfoot

natural_image
Technical illustration of a connector with pinout and internal structure (no text or symbols)*Thewalkingfootaccessoryisoptional.Itisnotincludedwith thismachine.
Alwaystrytosewfirstwithoutthewalkingfootaccessorywhichshouldbeusedonlywhennecessary.
Itiseasiertoguidethefabricandyouhaveabetterviewoftheseamwhenusingthestandard,regularfoot onyourmachine.
Yoursewingmachineofferexcellentstitchqualityorawiderangeoffabricsfromdelicatechiffonsto multiplelayersofdenim.
The WalkingFootaccessoryequalizesthefeedingoftheupperandlowerlayersofffabricandimprovesthe matchingofplaids,stripesandpatterns.Italsohelpstopreventunevenfeedingofverydifficultfabrics. The WalkingFootaccessoryequalizesthefeedingoftheupperandlowerlayersofffabricandimprovesthe matchingofplaids,stripesandpatterns.Italsohelpstopreventunevenfeedingofverydifficultfabrics.

text_image
Diagram of a sewing machine needle with Chinese label 'U' and directional arrows indicating movement or forceLiftthepresserfootliftertoraisethepressorfootbar.

natural_image
Diagram of a mechanical tool with red arrows indicating motion or force direction (no text or symbols)Removethepressorfootholderbyunscrewing(counterclockwise) thepressorbarattachingscrew.

text_image
Technical diagram of a sewing machine with labeled parts a, b, and c, showing a needle insertion mechanism.AttachtheWalkingFoottothemachineasfollows:
- Thearm(a) should fit into a bovetheneedles
-Slidetheplasticattachinghead(c)fromyourlefttorightso thatitisfittedintothepresserfootbar.
-Lowerthepresserfootbar.
-Replaceandtighten(clockwise)thepresserbarattachingscrew.
-Makesureboththeneedlescrewandthepresserbarattaching screwaretightlysecured.

natural_image
Illustration of a sewing machine needle stitching fabric (no text or symbols)Drawthebobbinthreadupandplaceboththebobbinthreadand theneedlethreadbehindthewalkingfootattachment.
Combinedpatternscanbestoredforlateruse.Sincestoredpatternsarenotlostafterthesewing machine is turned off, they can be recalled at any time. This is convenient for patterns, such as names, thatwillbeusedoften.

PleaseNote:
- The machine has a program memory that can retain 30 units of stitches.
- Multiple patterns selecting from pattern modes "Patterns, Alphabet" can be combined and sewn together.
- All the units in the memory can be edited to set its function such as Stitch length, Stitch width, Mirror and Auto-lock.
- TheDirectmodepatternsand thepatterns15-25cannotbememorized.

text_image
AUTO LOCK 1 2.5 3.5 Direct
text_image
Patterns MEM M ← MEM → MEM C
text_image
13 2.5 7.0 Patterns MEM - + M MEM + MEM C 1 2 3 4 5 6 7 8 9 A 0
text_image
30 R 0.5 7.0 Patterns MEM M MEM MEM CCombiningpattern sorletters
Whenyouturnthemachine"ON",theLCDscreen displays"" Direct
Pressthe""b Montoenterthememorymode, and storethecombinationsofcharacterordecorativestitches.
Pressthe""buttontoselectanydesiredpatterngroup among""(Patterns)theLCAlphabeten.Then pressthedesiredpatternnumber(E.g.13).( Youcan changethestitchlength,width,orchoosetheAuto-stop, mirrorfunctionifdesired.)
Repeatstep3formorepatternstobestoredinthe memory.

Please Note: When the memory the full with 30 unitsofpatterns,themachinewillbeeptosignalit.
Use the arrow "MEM" or "MEM" button to check what you haveprogrammed.
Memory

text_image
AUTO LOCK 1 R T 2.5 3.5 Direct M MEM MEM CPressthe""butontoleavethememorymodeand returntotheDirectmode.

Attention: Theselectedpatternwillbecleared fromthememorymoduleafterclosingthe machineifyoudonotpressthe""button M againwhenyouhavecompletedyourselection.

text_image
AUTO LOCK 30 A 0.5 7.0 Patterns MEM M MEM MEM CAddingpattern sorletters
Whileinthememorymode,pressthe""buttonthe
" " but to n u n t i displayed, thenaddthenewstitchorchangethestitch length, width, Auto-stopormirror, if desire.

text_image
AUTO LOOK 30 A 0.5 7.0 Patterns MEM M MEM MEM CClearingpattern sorletters
If you wishtodelete acertainstitch within in thememory mode, usethe "" but tenor "" button until the actual stitch number is displayed.
Pressthe""buctontodeletetheselectedpatternand thenextpatterninthebackwillmoveforward.

text_image
13 2.5 7.0 Patterns MEM M MEM MEM CRecallingandsewingthememorizedpattern
Pressthe" M"buttontoenterthememorymode . The machine will be positioned at the first programmed stitch.
Memory

text_image
57 T 2.5 3.5 Patterns MEMPressfootcontroller. Themachinewillstarttosewfrom firstenteredpattern.OntheLCDscreen,sewingstitch dataisindicated.

text_image
AUTO STOP 30 A 0.5 7.0 Patterns MEM M + MEM + MEM CIf you wisht o check what is programmed or if you wish to start sewing a few stitches in, use thememory mode the "buttonor" button.
YoucanusetheAuto-lock""functionwhenthesewing machineisstopped.

PleaseNote: If you wish to repeat your stitch combination without having them machine stop press the Auto-lock "bontocancel the Auto-Stop in thememorymode.
The""willdisappearfromtheLCDscreen.

text_image
AUTO LOCK 1 2.5 3.5 Direct M ← MEM → MEM CPress the "M" button to leave the memory mode and returntotheDirectmode.

text_image
17 Patterns 0.5 7.0Instructionmessagedisplay
Loweringthebuttonholelever
Whenyouselectanybuttonholepatternordarning pattern,LCDscreenwillshowthefigure""Itisto remindyoutolowerthebuttonholelever.

text_image
09 Patterns 2.5 5.0Bobbinwinding
Whenthebobbinwinderspindleisactivatedfor bobbinwinding(intherightmostposition)this figure appearsontheLCDscreenasareminder.
Warningbeepingsound
-Whenoperatingcorrectly:1beep
-Whenthememoryisfull30unitsofpattern:2-shortbeeps
-Whenoperatingincorrectly:3-shortbeeps
-Whenthesewingmachineisintroubleandcan'tsew:3-shortbeeps
Itmeansthatthethreadistwistedorjammedandthehandwheelaxlecan'tmove.Pleaselookthrough the"Troubleshootingguide"onpage62/63tofindthesolution.Aftertheproblemhasbeensolved,the machinewillcontinuetosew.

natural_image
Illustration showing a sewing machine and a hand holding a spool, with no visible text or symbols.Returnbobbinwinderspindletoleft
If you press any button on them machine when the bobbin is full or the bobbin winders spindle in theright position, then them machine will beep 3 times as awarning.
Returnthebobbinwinderspindletotheleft position.
PleaseNote: If the problem is still not solved, please contact your local dealer.
Attention: During the sewing, if the thread get jammed inside the hook stopping the needle from moving and you continue pressing the foot control, the security switch will stop the machine completely. In order to restart these sewing machine, you will have to turn the off switch to the OFF position and then ON again.
Maintenance

Attention: Disconnect the power cord from the wall socket before cleaning the screen and sewing machines surface, otherwise injury or electrical shock may result.
Cleaningthescreen

natural_image
Illustration of a hand inserting a card into a mobile phone (no text or symbols visible)Ifthefrontpanelisdirty, wipeitgentlywithasoft,drycloth. Donotuseanyorganicsolventsordetergents.
Cleaning these sewing machines surface
If the surface of these sewing machine is dirty, lightly soak a cloth thin mild detergent, squeeze it out firmly and then wipethesurface. After cleaning it once in this way, wipethesurface again with adrycloth.

Attention: This machine is equipped with a 100mW LED lamp. If lamp replacement is needed, please contactnearestauthorizedretailer.
Cleaningthehook
Iflintandbitsofthreadaccumulateinthehook,thiswillinterferewiththesmoothoperationofthe machine.Checkregularlyandcleanthestitchingmechanismwhennecessary.

Attention: Disconnect the machine from the wall outlet before carrying out any maintenance.

natural_image
Illustration of a sewing machine needle stitching fabric, with arrows indicating fabric movement (no text or symbols)Removetheneedleplatecoverandbobbin.
Maintenance

natural_image
Line drawing of a hand using a screwdriver to adjust or install electronic components on a circuit board (no text or symbols visible)Cleanthebobbinholderwithabrush.

natural_image
Technical diagram showing a sewing machine needle stitching a component with red arrows indicating assembly or operation (no text or symbols present)Removetheneedle, presserfootandpresserfootholder.
Removethebobbincoverplateandbobbin.
Removethescrewholdingtheneedleplateandremovethe needleplate.

natural_image
Hand inserting a component into an electronic device (no text or symbols visible)Liftupthebobbincaseandremoveit.

natural_image
Line drawing of a hand inserting a cable into an electronic component (no text or symbols visible)Cleanthehookrace, feeddogandbobbincasewithabrush. Also cleanthem, using asoft, drycloth.

text_image
a bReplacethebobbincaseintothehookracesothatthetip(a)fitsto thestopper(b)asshown.
Beforecallingforservice, check the following items. If the problem still persists, contact the place of purchase or your nearest authorized dealer.
| Problem | Cause | Correction | Reference |
| Upperthread breaks | 1. Themachineisnotthreadedcorrectly. | 1. Rethreadthemachine. | Page11 |
| 2. Thethreadtensionistootight. | 2. Reducethethreadtension(lowernumber). | Page14 | |
| 3. Thethreadistoothickfortheneedle. | 3. Selectalargerneedle. | Page7 | |
| 4. Theneedleisnotinsertedcorrectly. | 4. Removeandreinserttheneedle(flatside towardstheback). | Page7 | |
| 5. Thethreadiswoundaroundthespoolholder pin. | 5. Removethereelandwindthreadontoreel. | Page11 | |
| 6. Theneedleisdamaged. | 6. Replacetheneedle. | Page7 | |
| Lowerthread breaks | 1. Thebobbincaseisnotinsertedcorrectly. | 1. Removeandreinsertthebobbincaseand pullonthethread. Thethreadshouldpull easily. | Page10 |
| 2. Thebobbincascisthreadedwrong. | 2. Checkbothbobbinandbobbincase. | Page10 | |
| 3. Thelowerthreadtensionistootight | 3. Loosenlowerthreadtensionasdescribed. | Page14 | |
| Skipped stitches | 1. Theneedlcisnotinsertedcorrectly. | 1. Removeandreinsertneedle(flatside towardstheback). | Page7 |
| 2. Theneedleisdamaged. | 2. Insertanewneedle. | Page7 | |
| 3. Thewrongsizeneedlehasbeenused. | 3. Chooseaneedletosuitthethread. | Page7 | |
| 4. Thefootisnotattachedcorrectly. | 4. Checkandattachcorrectly. | Page5 | |
| 5. Themachineisnotthreadedcorrectly. | 5. Rethreadthemachine. | Page11 | |
| Needle breaks | 1. Theneedleisdamaged. | 1. Insertanewneedle. | Page7 |
| 2. Theneedleisnotcorrectlyinserted. | 2. Inserttheneedlecorrectly(flatsidetowards theback). | Page7 | |
| 3. Wrongneedlesizeforthefabric. | 3. Chooseaneedletosuitthethreadand fabric. | Page7 | |
| 4. Thewrongfootisattached. | 4. Selectthecorrectfoot. | Page64 | |
| 5. Theneedleclampscrewisloose. | 5. Usethescrewdrivertofirmlytightenthe screw. | Page7 | |
| 6. Thepresserfootthatisisusedisnot appropriateforthetypeofstitchthatyou wishtosew. | 6. Attachthcpresserfootthatisappro-private forthetypeofstitchthatyouwishtosew. | Page64 | |
| 7. Theupperthreadtensionistootight. | 7. Loosentheupperthreadtension. | Page14 | |
| Loose stitches | 1. Themachincisnotcorrectlythreaded. | 1. Checkthcthreading. | Page11 |
| 2. Thebobbincascisnotcorrectlythreaded. | 2. Threadcbobbincascasillustrated. | Page10 | |
| 3. Needle/fabric/threadcombinationis wrong. | 3. Theneedlesizemustsuitthefabricand thread. | Page7 | |
| 4. Threadtensioniswrong. | 4. Correctthethreadtension. | Page14 | |
| Scam gatheror pucker | 1. Theneedlcistoothickforthefabric. | 1. Selectafinerneedle. | Page7 |
| 2. Thestitchlengthisadjustedwrong. | 2. Readjustthestitchlength. | Page25 | |
| 3. Thethreadtensionistootight. | 3. Loosenthethreadtension. | Page14 | |
| Seam puckering | 1.Thencedlethreadtensionistootight. | 1.Lossenthethreadtension. | Page14 |
| 2.Thencedlethreadisnotthreadedcorrectly. | 2.Rethreadthemachine. | Page11 | |
| 3.Thencedlcistooheavyforthefabric beingsewn. | 3.Chooscancedletosuitthethreadandfabric. | Page7 | |
| 4.Thestitchlengthistoolongforthefabric. | 4.Makestitchdense. | Page25 | |
| Patternsare distorted | 1.Thecorrectpresserfootisnotused. | 1.Selectthecorrectfoot. | Page64 |
| 2.Theneedlethreadtensionistootight. | 2.Loosenthethreadtension. | Page14 | |
| Themachine jams | 1.Threadiscaughtinthchook. | Removetheupperthreadandbobbincase,turn thehandwheelbackwardsandforwardsbyhand andremovethethreadremands. | Page60 |
| 2.Thefeeddogsarepackedwithlint. | |||
| The machineis noisy | 1.Flufforoilhavecollectedonthehookor needlebar. | 1.Cleanthehookandfeeddogasdescribed. | Page60 |
| 3.Theneedleisdamaged. | 3.Replacethencedle. | Page7 | |
| 4.Slighthummingsoundcomingfrom internalmotor. | 4.Normal. | -- | |
| 5.Threadiscaughtinthehook. | Removetheupperthreadandbobbincase,turn thehandwheelbackwardsandforwardsbyhand andremovethethreadremands. | Page60 | |
| 6.Thefecdogsarcpackedwithlint. | |||
| Uneven stitches, unevenfeed | 1.Poorqualitythread. | 1.Selectabetterqualitythread. | Page7 |
| 2.Thebobbincaseisthreadedwrong. | 2.Removethebobbincase,thethreadand reinsertcorrectly. | Page10 | |
| 3.Fabrichasbeenpulled. | 3.Donotpullonthefabricwhilesewing,letit betakenupbythemachine. | -- | |
| Thesewing machine doesn'toperate | 1.Themachineisnotturnedon. | 1.Turnonthemachine. | Page3 |
| 2.Thepressorfootlifterisraised. | 2.Lowerthepresserfootlifter. | Page16 | |
| 3.Themachineisnotpluggedin. | 3.Connectthepowerlineplugtotheelectric outlet. | Page3 |
Contact your local government for information regarding the collections systems available.
Ifelectricalappliancesaredisposedofinlandfillsordumps,hazardoussubstancescanleakintothe groundwaterandgetintothefoodchain,damagingyourhealthandwell-being.
When replacing old appliances with new once, her retailer is legally obligated to take back your old appliance for disposal at least for free of charge.
Bedienungsanleitung

natural_image
Line drawing of a sewing machine with control panel and digital display (no text or symbols)text_image
Diagram of a sewing machine with labeled components and wiring, including a fan switch, power plug, and control panel.NähcomputeransStromnetzanschliessen
natural_image
Technical line drawing of a mechanical component with a highlighted circular feature and arrow (no text or symbols)
natural_image
Pure technical line drawing of a mechanical assembly without any text, numbers, or symbols
natural_image
Diagram showing connection between a device and a cable with red arrows indicating signal or connection points (no text or symbols present)
natural_image
Line drawing of a shoe being placed on a cord with a red arrow indicating motion (no text or symbols)Ein/AusKnopf
text_image
Technical diagram of a sewing machine with labeled parts and directional arrows indicating motion or assembly.Nähfusseinsetzen
text_image
Technical diagram of a sewing machine with labeled parts and directional arrows indicating movement or forceKantenlinealanbringen
text_image
Diagram illustrating a mechanical or electrical procedure with labeled components A, B, and directional arrows indicating motion or force.text_image
Technical diagram of a sewing machine with labeled components and directional arrows indicating motion or movement.DasWickelnderGarnrolle

natural_image
Illustration of a mechanical component with a circular base and a coiled spring-like structure, showing a red thread pattern (no text or symbols)natural_image
Illustration of two hands holding a small object with red arrows indicating direction (no text or symbols)natural_image
Illustration of a hand holding a small device with a red arrow indicating direction (no text or symbols)natural_image
Diagram of a mechanical assembly with a pulley, shaft, and base (no text or symbols)natural_image
Diagram of a mechanical device with a red wire and arrow indicating motion (no text or symbols)natural_image
Hand using a red line to connect two small mechanical parts (no text or symbols visible)- Halten Siedas Fadenendemitder Handfest.

text_image
Medical diagram showing foot positioning and measurement setup with labeled points and arrowstext_image
Diagram illustrating the sewing process of a thread, showing a hand holding a thread with scissors and a spool being sewn.natural_image
Illustration of a sewing process with scissors, thread, spool, and mechanical component (no text or symbols)natural_image
Line drawing of a hand operating a sewing machine with a red arrow indicating the process (no text or symbols present)
text_image
A
text_image
B A
text_image
B Ctext_image
Technical diagram of a sewing machine with numbered parts and labeled parts for assembly or maintenance.
natural_image
Illustration of a mechanical component with a spool and a red thread being inserted (no text or symbols)natural_image
Illustration of two hands manipulating a small object with red arrows indicating direction (no text or symbols)natural_image
Pure mechanical component diagram with arrows indicating direction (no text or symbols)text_image
Diagram illustrating vehicle trajectory with red arrows and dotted lines indicating movement paths, including a circular object labeled 'S15' and a car.natural_image
Illustration of a hand using a tool to adjust or install a mechanical component, with no visible text or symbols.- Dannachuntenundumden Kontrollfedernhalter.

natural_image
Diagram of a car's side profile showing hand positioning and movement arrows (no text or labels)natural_image
Diagram of a mechanical or electrical component with red arrows indicating direction, no text or symbols presenttext_image
Technical diagram showing hands operating a sewing machine with red annotation lines and a magnified inset highlighting the handle mechanism.
text_image
Technical diagram showing a hand operating a mechanical device with red arrows indicating direction and measurement points.
natural_image
Technical diagram of a mechanical clamp or bracket assembly with a magnified inset showing a pin detail (no text or symbols present)
natural_image
Illustration of a sewing machine needle being inserted, with a magnified inset showing the needle being inserted (no text or symbols present)natural_image
Cross-sectional diagram of a layered structure with red and pink components, no text or symbols presentnatural_image
Illustration of a notebook with a dashed line indicating a section (no text or symbols)natural_image
Illustration of a layered notebook or notebook with zigzag edges and a wavy top (no text or symbols)natural_image
Line drawing of hands operating a sewing machine with a digital screen and tool (no text or symbols)natural_image
Line drawing of a hand using a sewing machine to lift fabric (no text or symbols)natural_image
Line drawing of a sewing machine needle stitching fabric, with red lines indicating thread connection (no text or symbols)natural_image
Illustration of a sewing machine needle stitching fabric, with red fabric being inserted (no text or symbols)natural_image
Line drawing of a sewing machine needle and fabric (no text or symbols)natural_image
Line drawing of a sewing machine needle being adjusted, showing the handle and base (no text or symbols)natural_image
Line drawing of a sewing machine needle and base mechanism (no text or symbols)text_image
Technical diagram of a sewing machine with labeled parts a and b, showing mechanical components and directional arrows.
text_image
a ↓ btext_image
Diagram of a sewing machine with numbered parts for identification and functionnatural_image
Collection of decorative line drawings with various colors and shapes, no text or symbols presentC.Dasalphabet

text_image
0102 03 04050607080910 1 2 3 4 5 6 7 8 9 0 1112 13 14 1516 17 181920 2122 23 24 2526 27 2829 30313233343536 A B C D E F G H I J K L M N O P Q R S T U V W X Y Z 3738 39 40 4142 43 444546 4748 49 50 5152 53 5455 56575859606162 a b c d e f g h i j k l m n o p q r s t u v w x y z 6364 65 66 67 68 69 70 71 72 73 7475 76 77 78 79 80 81 82 838485868788 Ä Å Æ N Ö Ø Ç Ü ä ä ä æ ë è é ê ñ ö õ ø i ç ü û β & 89 9091 92 9394 95 96 97 ? ! _ , . - ( )
natural_image
Diagram of a car interior showing a valve, handle, and directional arrow (no text or symbols)Ein/AusTaste
text_image
AUTO LOCK 00 2.5 3.5 PatternsRücktransportknopf
text_image
AUTO LOCK 00 T 2.5 3.5 Patterns
text_image
AUTO STOP 09 R T 2.0 5.0 Patternstext_image
Technical diagram showing sewing machine needle positioning with red circular indicators and directional arrows indicating movement.text_image
30 Patterns 0.5 7.0 MEM M MEM MEM C
flowchart
graph LR
    M --> ← MEM
    ← MEM --> → MEM
    → MEM --> C

flowchart
graph LR
    M --> ← MEM
    ← MEM --> → MEM
    → MEM --> C
Speichertaste
text_image
Diagram showing waveforms and electrical symbols including a resistor, capacitor, and zigzag line
text_image
AUTO LOCK 00 R T 2.5 3.5 Patternstext_image
Diagram showing bidirectional arrow and minus sign with a battery symbol, enclosed by vertical dashed lines.
text_image
AUTO LOCK 1 2.5 3.5 Direct Patterns Alphabet M MEM MEM C 1 2 3 4 5 6 7 8 9 A 0text_image
Technical diagram of a sewing machine with numbered parts and directional arrows indicating assembly steps
natural_image
Technical illustration of a sewing machine needle stitching on fabric, with close-up detail showing hand positioning (no text or symbols)
natural_image
Line drawing of a sewing machine procedure showing step-by-step assembly (no text or symbols)Eckennähen
text_image
Technical diagram showing sewing machine operation with labeled components and directional arrows indicating movement
text_image
3 A B
text_image
Diagram illustrating sewing process steps with labeled parts and directional arrows indicating movement
natural_image
Illustration of hands operating a sewing machine on a fabric cutting board (no text or symbols visible)
text_image
Kartonoder dickerStoffnatural_image
Simple line drawing of a zigzag line and a stylized object with a letter 'A' (no text or symbols)natural_image
Diagram showing two spring-like structures with wavy lines and a red fabric section, no text or symbols presentnatural_image
Technical illustration of a sewing machine needle stitching on fabric, showing stitching details (no text or symbols)
text_image
06 09 2.5~4.5 2.0~3.0
natural_image
Technical illustration of a sewing machine needle stitching fabric, showing thread pattern and stitching details (no text or symbols)Kantenumnähfuss
text_image
10 11 2.5~4.0 1.0~2.0
text_image
Technical diagram showing sewing machine stitching technique with labeled parts a and b
natural_image
Illustration of a sewing machine needle stitching fabric (no text or symbols)
natural_image
Diagram showing a red arrow pointing to a section of a layered material or structure (no text or symbols present)natural_image
Mechanical sewing machine needle stitching a red fabric surface with circular components (no text or symbols visible)natural_image
Three circular diagrams with red symbols: a horizontal line, two horizontal lines, and a cross (no text or labels)natural_image
Two abstract geometric shapes with vertical and horizontal lines on a pink background, separated by dashed lines (no text or symbols)natural_image
Mechanical assembly diagram showing a tool interacting with a component, no text or symbols presentnatural_image
Mechanical sewing machine diagram showing needle insertion and cutting path (no text or symbols)
text_image
Diagram illustrating a sewing machine operation with labeled parts and a magnified view of the base component.natural_image
Illustration of a sewing machine needle stitching fabric, with a hand pulling the needle (no text or symbols)natural_image
Illustration of a hand using a sewing machine to adjust cable, with no visible text or symbolsnatural_image
Illustration of a hand using a tool to adjust a red screw on a fabric (no text or symbols)natural_image
Technical diagram of a mechanical device with red wiring and a separate view showing internal components (no text or symbols)
natural_image
Illustration of a hand holding a pen with scissors, showing a downward trend (no text or symbols)flowchart
graph LR
    A["Stage A"] --> B["Stage B"]
    B --> C["Stage C"]
A.Groß:7,0mm(1/4inch).
B.Mittel:6,0mm(15/64inch).
C.Klein:5,0mm(3/16inch).

flowchart
graph LR
    A["Start"] --> B["Arrow to Right"]
    B --> C["Arrow to Left"]
    C --> D["Arrow to Center"]
    D --> E["Arrow to Right"]
    E --> F["Arrow to Center"]
natural_image
Illustration of a hand holding a tool above a red surface with a small red spike (no text or symbols)text_image
3.5~7.0 1.0~2.0
text_image
23 Patterns 2.0 7.0natural_image
Technical illustration of a sewing machine tool with red and white components, shown from two different angles (no text or symbols present)natural_image
Illustration of a hand using a tool to adjust or install a mechanical component, with no visible text or symbols.text_image
Stop a Start btext_image
Diagram illustrating a hand operating a mechanical device with a 'PUSH' button, showing a red arrow indicating the process.flowchart
graph LR
    A["Grid with 23 top"] --> B["Vertical structure"]
    B --> C["Vertical structure with arrow indicating direction"]
    C --> D["Vertical structure with arrow indicating direction"]
natural_image
Two abstract diagrams showing a grid pattern on the left and a vertical bar pattern on the right, both set against a pink background (no text or symbols)natural_image
Technical illustration of a sewing machine with red measurement lines and base mount (no text or symbols)natural_image
Technical illustration of a sewing machine needle stitching on fabric, showing front and side views (no text or symbols)natural_image
Technical illustration of sewing machine stitching process, showing needle insertion and assembly steps (no text or symbols)
natural_image
Two-panel diagram showing a mechanical component inserted into a housing, with dashed lines indicating alignment or connection (no text or symbols)natural_image
Illustration of a hand holding a red pen, poised to write on a pink surface (no text or symbols)natural_image
Illustration of hands using a sewing machine to cut fabric (no text or symbols visible)natural_image
Illustration of hands using a sewing machine to trim a piece of fabric (no text or symbols)natural_image
Technical illustration of a sewing machine needle stitching fabric, showing rope routing and mechanical components (no text or symbols)natural_image
Technical illustration of a sewing machine needle stitching a red fabric (no text or symbols)natural_image
Illustration of a sewing machine needle stitching red fabric (no text or symbols)
3.5\~7.0

0.5\~1.0
natural_image
Technical line drawings of mechanical components including a pin, bracket, and angled tool (no text or symbols)
text_image
~~ 3.5 1.0~3.0
natural_image
Technical line drawing of a mechanical clamp or tool with a red directional arrow indicating motion (no text or symbols)natural_image
Technical illustration of a sewing machine needle and handle mechanism on a red fabric background (no text or symbols)natural_image
Illustration of a sewing machine needle stitching red fabric, with a close-up of the patterned fabric detail (no text or symbols)natural_image
Technical illustration of a car seat and its side bracket (no text or symbols)
text_image
3.5 4.5
natural_image
Illustration of a sewing machine needle stitching fabric, showing needle positioning and stitching details (no text or symbols)natural_image
Technical illustration of a sewing machine needle stitching fabric, showing rope routing and mechanical components (no text or symbols)
natural_image
Geological cross-section diagram showing layered rock strata with no text or symbolsnatural_image
Line drawing of a sewing machine needle stitching fabric, with red dashed lines indicating seam allowance (no text or symbols)natural_image
Illustration of hands manipulating a red fabric with parallel lines and dots (no text or symbols)natural_image
Surgical tissue section showing stitching pattern with no text or symbolsnatural_image
Illustration of hands tying a red knitted fabric with a string (no text or symbols)text_image
Technical diagram of a mechanical device with labeled parts a, b, and c
natural_image
Mechanical sewing machine needle stitching a red circular seam on a pink fabric background (no text or symbols)natural_image
Illustration of a sewing machine needle stitching a circular object with a dotted pattern (no text or symbols)
natural_image
Illustration of a sewing machine stitching a floral pattern in a circular basin (no text or symbols)
text_image
AnieSticken
natural_image
Technical illustration of a mechanical assembly with red structural elements and a close-up view of a vertical panel (no text or symbols)natural_image
Simple geometric diagram with a vertical dashed line dividing a pink rectangle (no text or symbols)
natural_image
Diagram showing a curved surface with a dashed line and red arrow indicating rotation (no text or symbols)
natural_image
Illustration of a sewing machine needle stitching red fabric (no text or symbols)natural_image
Five distinct patterned textile or textile designs with vertical and zigzag lines, no text or symbols present.natural_image
Technical illustration of an electrical connector with a pinout and internal wiring (no text or symbols)natural_image
Line drawing of a sewing machine needle and base (no text or symbols)natural_image
Diagram showing mechanical assembly with arrows indicating motion (no text or symbols)text_image
Technical diagram of a sewing machine with labeled parts a, b, and c, showing needle insertion and rotation mechanism.natural_image
Illustration of a sewing machine needle stitching fabric (no text or symbols)text_image
Patterns MEM M MEM MEM Ctext_image
30 0.5 7.0 Patterns MEM M MEM MEM C