
CD-1594 - Hi-Fi System AudioSonic - Free user manual and instructions
Find the device manual for free CD-1594 AudioSonic in PDF.


| Product type | Hi-Fi System |
| Brand | AudioSonic |
| Model | CD-1594 |
| Mains power | AC 230 V ~ 50 Hz (detachable power cord) |
| Backup power | 6 C-size batteries (LR14) |
| Radio | AM/FM with manual tuning |
| CD/MP3 player | Compatible with audio CDs and MP3, programmable playback |
| USB port | Play MP3 files from USB flash drive |
| Auxiliary input | 3.5 mm jack socket (Aux-in) |
| Built-in clock | 12/24 h display, adjustable |
| Dual alarm | 2 independent alarms with source selection (buzzer, radio, CD, USB) |
| Programmed sleep function | Auto shut-off from 10 to 90 minutes |
| Repeat/random function | Repeat 1, album, all, random playback |
| FM antenna | Deployable wire antenna at the back |
| Maintenance | Clean with a damp cloth; do not use abrasive products |
| Safety | Do not expose to water; do not open the casing; unplug before cleaning |
| Warranty | 24 months, subject to presentation of proof of purchase |
| Service and spare parts | Available at service.tristar.eu |
Frequently Asked Questions - CD-1594 AudioSonic
User questions about CD-1594 AudioSonic
0 question about this device. Answer the ones you know or ask your own.
Ask a new question about this device
Download the instructions for your Hi-Fi System in PDF format for free! Find your manual CD-1594 - AudioSonic and take your electronic device back in hand. On this page are published all the documents necessary for the use of your device. CD-1594 by AudioSonic.
USER MANUAL CD-1594 AudioSonic
natural_image
Two electronic devices, one white and one black, displayed against a plain background with no visible text or symbols.Stereo radio
CD / MP3 / USB - 2 x 3 Watt
CD-1593
CD-1594

AudioSonic
SAFETY INSTRUCTIONS
By ignoring the safety instructions the manufacturer can not be hold responsible for the damage.

EXCLAMATION POINT - within an equilateral triangle, is used to indicate that a specific component shall be replaced only by the component specified in that documentation for safety reason.

LIGHTNING FLASH WITH ARROWHEAD SYMBOL - within an equilateral triangle, is intended to alert the user to the presence of uninsulated dangerous voltage within the products enclosure that may be of sufficient magnitude to constitute a risk of electric shock to persons.
- The AC/DC adaptor and main unit shall not be exposed to dripping or splashing; no objects filled with liquids, such as vases, shall be placed on the apparatus.
- The AC/DC adaptor of the apparatus should not be obstructed or should be easily accessed during the intended use.
• To completely disconnect the power input, the AC/DC adaptor of the apparatus should be disconnected from the mains, as the disconnected device is the AC/DC adaptor of apparatus. - If the supply cord is damaged, it must be replaced by the manufacturer, its service agent or similarly qualified persons in order to avoid a hazard.
Warning: To reduce the risk of electric shock, do not remove cover (or back). No user-serviceable parts inside. Refer servicing to qualified service personnel.
PARTS DESCRIPTION
Front view
- LCD Display
- Standby / Function
- Band / Album
- Sleep / Time set
- Vol + / Alarm 1
- Vol-/Alarm 2
- USB slot
- Play / Pause
- Stop
- Mode
- Skip +
- Skip
Top view
-
CD door
-
Snooze
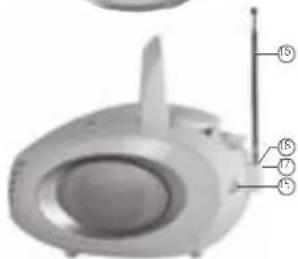
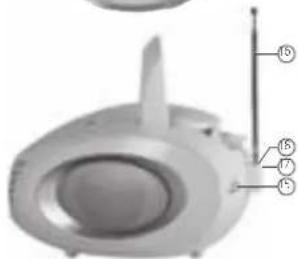
Back view
- Tuning control
- FM Antenna
- AC power cord
- Aux-in Jack

BEFORE THE FIRST USE
• Take the appliance and accessories out the box. Remove the stickers, protective foil or plastic from the device.
- Place the device on a flat stable surface and ensure a minimum of 10 cm. free space around the device. This device is not suitable for installation in a cabinet or for outside use.
POWER SOURCES
AC power
You can power your portable system by plugging the detachable AC power cord into the AC inlet at the back of the unit and into a wall AC power outlet. Check that the rated voltage of your appliance matches your local voltage. Make sure that the AC power cord is fully inserted into the appliance.
Battery power
Insert 6 x "C" size batteries into the battery compartment. Be sure that the batteries are inserted correctly to avoid damage to the appliance. Always remove the batteries when appliance will not be used for a long period of time, as this will cause leakage to the batteries and subsequently damage to your appliance.
Notes:
- Use batteries of the same type. Never use different types of batteries together.
- When using the appliance with batteries, disconnect the AC powercord.
USE
Basic function
- Press the "ST/FUNC" button in the standby mode, to switch on the system. (FM radio mode as default mode when switch on the system.)
- Press the "ST/FUNC" button to switch the system to CD/MP3/USB/AUX-IN mode.
- Press and hold the "ST/FUNC" button for 3 seconds to switch off the system. (No matter in which mode.)
Radio
- Press the "ST/FUNC" button to select the "RADIO" mode.
- Press the "BAND / ALBUM" button to select AM or FM.
- Adjust radio frequency to your desired station by using the "TUNING" control.
For better reception
- FM: This appliance has a FM antenna located at the rear cabinet. Make sure this antenna is fully extended.
- AM: This appliance is equipped with a built - AM antenna. Rotate the appliance to get better reception.
CD / MP3 operation
- Press the "ST/FUNC" button to select "CD" mode.
- Open the CD door and place a CD / MP3 disc with the label up in the CD compartment.
- Close the CD door.
• Focus search is performed when: - For CD disc - Total number of tracks is read and appears on the display.
- For MP3 disc - "MP3" appears on the display."
- It will start automatically from the first track.
- Press the "VOL + / AL1" or "VOL - / AL2" button to adjust the volume to the desired level.
- Press the "PLAY / PAUSE" button again when you want to stop playback temporarily.
- Press the "STOP" button when finished.
Folder select
Press the "BAND / ALBUM" button to select a folder. (Folder select function can only operate if the discis stored with at least 2 directories / files.)
Program
- Up to 20 tracks of CD disc, 99 tracks of MP3 disc can be programmed for disc play in any order. Be sure to press the "STOP" button before use.
- Press the "MODE" button, the display will show "P01".
- Select desired track by using the "SKIP +" or "SKIP -" button. (You may select a desired album by pressing the "ALBUM" button).
- Press the "MODE" button again to confirm the desired track into the program memory.
-
Repeat step 2 and 3 to enter additional tracks into the program memory.
-
When all the desired tracks have been programmed, press the "PLAY / PAUSE" button to play the disc in the order you have programmed.
- Press the "STOP" button twice to terminate programmed playback.
Mode
Press the "MODE" button during playing CD / MP3 disc, each press switches the mode function as follows:
- Repeat 1
- Repeat album (*mp3 only)
- Repeat all
- Random
- Normal playback
USB operation
- Plug your USB device into the port.
- Press the "FUNCTION" button to select "CD" mode.
- If there is no disc on the disc tray. It will read and play automatic your USB device.
- If There is a disc on the disc tray. It will read and play automatic your DISC,
- Press and hold the "PLAY / PAUSE" button for a few seconds to entry USB mode when playing CD.
- Playback will start automatically from the first track and the display will show "USB".
- Press the "STOP" button when you're finished.
Programme mode
The programme mode works the same as the CD / MP3 programme mode.
Aux in
- Connect an external audio source to the device by plugging it in the aux in jack.
- Press the power button to turn on the device.
- Use the native controls on the external audio source to start playing music.
Clock setting
- Press and hold the "ST/FUNC" button to switch unit in the standby mode.
-
Press and hold the "SLEEP / TIME SET" button to entry the clock set mode. The display will show "24H" and is flashing.
-
Adjust the time format (12H / 24H) by pressing the "SKIP+" or "SKIP-" button.
- Press the "SLEEP / TIME SET" button to confirm the time format, the display will show "AM 12:00" if 12H format is set or "0:00" if 24H is set.
- Adjust the hour by pressing the "SKIP+" or "SKIP-" button, press the "SLEEP / TIME SET" button to confirm.
- Adjust the minutes by pressing the "SKIP +" or "SKIP -" button, press the "SLEEP / TIME SET" button to confirm.
- Notes: Because the clock setting is at standby mode, the display is dim.
Alarm setting
• Alarm setting must be after completed clock setting.
- Press and hold the "ST/FUNC" button to switch unit at standby mode.
- Press the "VOL + / AL 1" or "VOL - / AL 2" button to entry alarm set mode.
- Adjust hour by pressing the "SKIP +" or "SKIP -" button, press the "VOL + / AL 1" or "VOL - / AL 2" button to confirm.
- Adjust minute by pressing the "SKIP +" or "SKIP -" button, press the "VOL + / AL 1" or "VOL - / AL 2" button to confirm.
- Pressing the "SKIP +" or "SKIP -" button to select BUZZ
RADIO
CD
USB
- Press the "VOL + / AL 1" or "VOL - / AL 2" button to confirm.
- Adjust alarm volume by pressing the "SKIP +" or "SKIP -" button, press the "VOL + / AL 1" or "VOL - / AL 2" button to confirm.
• After confirm the alarm volume, the display will automatically scan your setting one time. - The display will show "1" or "2". Alarm setting is now complete.
- Press the "VOL + / AL 1" or "VOL - / AL 2" button to activate the alarm on / off function.
- Note: If you need to reset the alarm, press and hold the "VOL + / AL 1" or "VOL - / AL 2" button for 3 seconds to re-entry the alarm set mode.
Snooze
When the alarm is triggered. You may press the "SNOOZE" button to delay the alarm for another 9 minutes.
Sleep
- In CD mode, press and hold the "SLEEP / TIME SET" button for 3 seconds, the display will show "SLEEP 90". That means, after 90 minutes the appliance will automatically turn to the standby mode.
- Press the "SLEEP" button again to select the automatically turn off time, from 90, 80, 70, 60, 50, 40, 30, 20, 10 minutes.
- Press the "SLEEP" button to "SLEEP 00" to cancel the sleep function.
CLEANING AND MAINTENANCE
- Clean the appliance with a damp cloth. Never use harsh and abrasive cleaners, scouring pad or steel wool, which damages the device.
- Never immerse the electrical device in water or any other liquid. The device is not dishwasher proof.
GUARANTEE
- This product is guaranteed for 24 months granted. Your warranty is valid if the product is used in accordance to the instructions and for the purpose for which it was created. In addition, the original purchase (invoice, sales slip or receipt) is to be submitted with the date of purchase, the name of the retailer and the item number of the product.
- For the detailed warranty conditions, please refer to our service website: www.service.tristar.eu
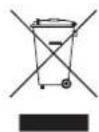
GUIDELINES FOR PROTECTION OF THE ENVIRONMENT
This appliance should not be put into the domestic garbage at the end of its durability, but must be offered at a central point for the recycling of electric and electronic domestic appliances. This symbol
on the appliance, instruction manual and packaging puts your attention to this important issue. The materials used in this appliance can be recycled. By recycling of used domestic appliances you contribute an important push to the protection of our environment. Ask your local authorities for information regarding the point of recollection.
SUPPORT
You can find all available information and spare parts at service.tristar.eu!
VEILIGHEIDSVOORSCHRIFTEN
AVANT LA PREMIÈRE UTILISATION

natural_image
Top-down view of a white toilet with labeled parts (no text or symbols on the object itself)


natural_image
Top-down view of a white toilet with labeled parts (no text or symbols on the object itself)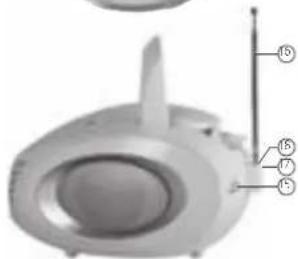
PRIMA DEL PRIMO UTILIZZO
FÖRE FÖRSTA ANVÄNDNING
PŘED PRVNÍM POUŽITÍM

PRED PRVÝM POUŽITÍM


- Stereo radio
- AudioSonic
- SAFETY INSTRUCTIONS
- PARTS DESCRIPTION
- Front view
- Top view
- Back view
- BEFORE THE FIRST USE
- POWER SOURCES
- AC power
- Battery power
- Notes:
- USE
- Basic function
- Radio
- For better reception
- CD / MP3 operation
- Folder select
- Program
- Mode
- USB operation
- Programme mode
- Aux in
- Clock setting
- Alarm setting
- Snooze
- Sleep
- CLEANING AND MAINTENANCE
- GUARANTEE
- GUIDELINES FOR PROTECTION OF THE ENVIRONMENT
- SUPPORT
- VEILIGHEIDSVOORSCHRIFTEN
- AVANT LA PREMIÈRE UTILISATION
- PRIMA DEL PRIMO UTILIZZO
- FÖRE FÖRSTA ANVÄNDNING
- PŘED PRVNÍM POUŽITÍM
- PRED PRVÝM POUŽITÍM
Brand : AudioSonic
Model : CD-1594
Category : Hi-Fi System