HTFS 2 - Speaker HARMAN KARDON - Free user manual and instructions
Find the device manual for free HTFS 2 HARMAN KARDON in PDF.

User questions about HTFS 2 HARMAN KARDON
0 question about this device. Answer the ones you know or ask your own.
Ask a new question about this device
Download the instructions for your Speaker in PDF format for free! Find your manual HTFS 2 - HARMAN KARDON and take your electronic device back in hand. On this page are published all the documents necessary for the use of your device. HTFS 2 by HARMAN KARDON.
USER MANUAL HTFS 2 HARMAN KARDON
Power for the Digital Revolution.®
HTFS 2
FLOOR STANDS OWNER'S MANUAL
natural_image
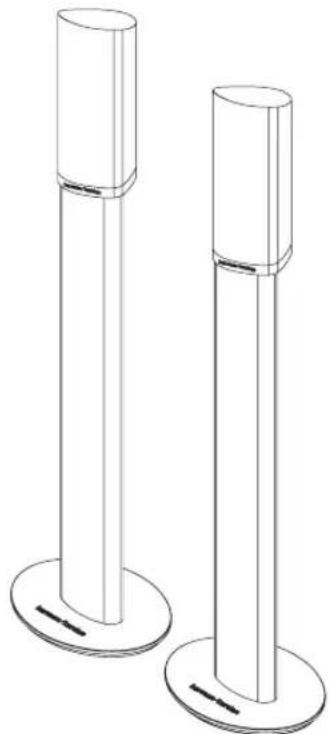
Line drawing of two cylindrical objects with base plates, no text or symbols presentIntroduction
Thank you for purchasing Harman Kardon HTFS 2 floor stands. These stands are designed to enhance your enjoyment of a Harman Kardon HKTS 7 or HKTS 14 home cinema loudspeaker system by expanding your speaker-placement options to create the optimum audio presentation. The HTFS 2 stands are also compatible with Harman Kardon HKS 3 and HKS 4 loudspeakers.
To obtain maximum enjoyment of your home theater system, we ask you to spend a few minutes reading the speaker placement and setup instructions in the owner's manual supplied with your loudspeakers, and a few moments reviewing the assembly instructions for your HTFS 2 floor stands. If you have any questions about this product or its installation, or about your loudspeakers, please contact your Harman Kardon dealer, who is your best local source of information.
Included

natural_image
Two identical cylindrical metal profiles with internal cutouts, shown in isometric view (no text or symbols)Two floor stand columns
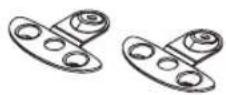
Two mounting plates
Eight rubber pads
Eight floor spikes
Eight round Phillips-head screws for assembling the stands (M5-0.8P, 19mm or #10-32, 3/4" long)
natural_image
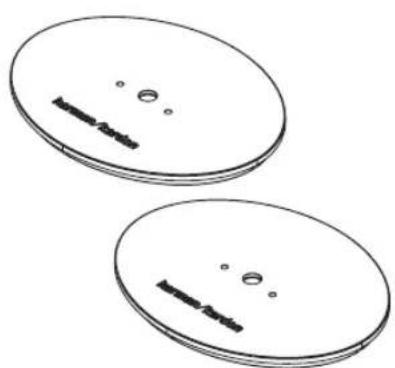
Two identical oval-shaped objects with internal dark rectangular cutouts and small circular holes, no text or symbols present.Two weighted bases
Assembly
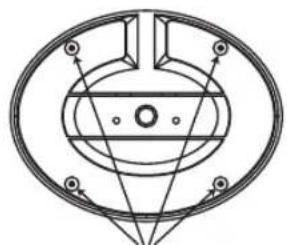
- If you will be placing the HTFS 2 stands on a hard surface, such as a wood or tile floor, attach four of the supplied self-adhesive rubber pads to the underside of the base in the recesses as indicated in the drawing.
natural_image
Pure mechanical diagram showing concentric circles and radial lines without any text, numbers, or symbolsPlace rubber pads or floor spikes here
- If you will be using the HTFS 2 stands on a carpeted surface, screw four of the supplied floor spikes into the base using the threaded inserts in the recesses as shown in the drawing.
- Following the instructions on pages 9 through 12 of the owner's manual provided with your HKTS system, thread the appropriate speaker cable through the hole in the center of the base, being careful to avoid the two screw holes. Then feed the cable through the length of the column from the bottom until it comes out the top.
- Attach the column to the base using two of the supplied screws.
-
Thread the speaker cable through the hole in the center of the mounting plate, being careful to avoid the three screw holes.
-
Attach the mounting plate to the top of the column using two of the supplied screws. The mounting plate tab with the third screw hole should sit on the higher rim of the column.

natural_image
Technical line drawing of a cylindrical mechanical component with mounting holes and base mount (no text or symbols)Attaching the Speaker to the Stand
- Unscrew the bolt that attaches the black shelf stand to the bottom of the speaker. Store the stand in a safe place in case it is needed for a future installation. The bolt will be used to attach the speaker to the floor stand mounting plate.
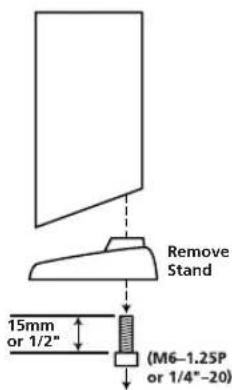
text_image
Remove Stand 15mm or 1/2" (M6-1.25P or 1/4"-20)- Insert the speaker wires into the terminals on the bottom of the speaker, being careful to observe the correct polarity.
- Place the speaker on top of the mounting plate with the remaining screw hole lined up with the threaded insert on the bottom of the speaker.
- Insert the bolt that was used for the shelf stand up through the remaining screw hole and into the speaker.
Repeat the assembly and speaker attachment processes for each floor stand in your system, and adjust the final speaker placement as indicated in the owner's manual supplied with the speakers. You are now ready to enjoy your home theater system!
Dimensions (Product)
Height: 34-1/2" (875mm) assembled, not including floor spikes and without speaker
Base: 9" x 7" oval (227mm x 178mm)
Shipping Dimensions (H x W x D)
3-1/2" × 35" × 9-1/2"
(88mm x 888mm x 240mm)
Weight (Product)
16.7 lb/7.5kg
Shipping Weight
19.1 lb/8.6kg
All features and specifications are subject to change without notice.
Harman Kardon and Power for the Digital Revolution are registered trademarks of Harman International Industries, Incorporated.
harman/kardon®
250 Crossways Park Drive, Woodbury, New York 11797
516.255.HKHK (4545) Fax: 516.682.3523
©2003 Harman International Industries, Incorporated
Part No. 406-000-05010