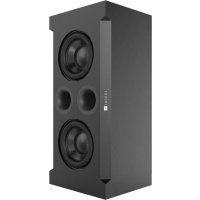
Grand Touring GT650P - Subwoofer JBL - Free user manual and instructions
Find the device manual for free Grand Touring GT650P JBL in PDF.

User questions about Grand Touring GT650P JBL
0 question about this device. Answer the ones you know or ask your own.
Ask a new question about this device
Download the instructions for your Subwoofer in PDF format for free! Find your manual Grand Touring GT650P - JBL and take your electronic device back in hand. On this page are published all the documents necessary for the use of your device. Grand Touring GT650P by JBL.
USER MANUAL Grand Touring GT650P JBL
natural_image
Black cylindrical audio speaker with visible sound waves and a label (no text or symbols on body)AUTOMOTIVE POWERED SUBWOOFER SYSTEMS
GT650P & GT800P OWNER'S MANUAL
GENUINE JBL
JBL
Thank You for selecting a JBL GT Series Powered Subwoofer System. JBL's history of high performance and innovation goes back 50 years, yet the only things old-fashioned about the GT Series products are the craftsmanship and attention to detail that go into each one. The model you have chosen delivers exceptional performance in a compact package. With proper installation and use, it will provide many years of listening pleasure.
GT Powered Subwoofer Features
Your Powered Subwoofer features a built-in amplifier and electronic crossover capable of supplying 80 watts of power to the specially designed Dual Voice Coil 2-ohm woofer. The built-in crossover features an adjustable low-pass filter and level, facilitating simple matching to virtually all main speaker systems. In addition, this unit will accept signals from either preamp level, or speaker level inputs, allowing connection to virtually all source units whether supplied by the car manufac-
turer or purchased separately. A built-in music sensing circuit will turn the unit on in the presence of a music signal without the need to run a separate remote turn-on wire. The unit will turn off automatically a few minutes after the music stops to conserve battery power.
Installation
We recommend that you have your JBL system professionally installed by an authorized JBL automotive dealer. However, if you prefer to perform the installation yourself, please read the following information in order to get the most from your GT Series Subwoofer.
General Installation Guidelines
Placement and Warnings
Your JBL speakers are designed for the rigors of the automotive environment and can withstand high and low temperatures as well as extreme humidity. However, you can effectively increase the life of your speakers by avoiding installations that expose them directly to moisture or water. For safety and reliability, they should be securely fastened to prevent them from moving around when driving, or from becoming dangerous missiles in the event of an accident or sudden stop.
Select your mounting locations very carefully so as to avoid cutting or drilling into critical components such as brake or fuel lines, and electrical wiring, which may be damaged when drilling holes for the mounting screws. Be especially cautious because these components may be hidden between double-walled panels.
The mounting locations for optimum performance will vary from vehicle to vehicle, but in general your Powered Subwoofer will work well just about anywhere: In the trunk, hatch area, or any surface large enough to accommodate it. Just make sure to keep at least 3" clearance around the port end of the unit so that you do not restrict port airflow. Unlike some other brands, your JBL subwoofer does not require corner loading for optimum performance, which means that it may be pointed whichever way is most convenient for your particular installation. Pointing the unit into a corner will increase its low
frequency output, which will please some listeners. Others might find this increase too much, and will prefer pointing the unit away from the corner. Since each vehicle model has different acoustic characteristics, we recommend experimentation with placement before permanently mounting your subwoofer. Also, leave space around the amplifier end of the unit so that airflow is not restricted, otherwise the unit may overheat and activate its protection circuitry.
Installing JBL tie-down straps with your JBL subwoofer GT650P or GT800P.

natural_image
Technical illustration of a mechanical clamp or bracket with four screws (no text or symbols)
natural_image
Abstract black-and-white graphic of a stylized object with an upward arrow, no text or symbols present.Figure 1
Securing Your Speakers
The GT Subwoofers must be securely fastened to the vehicle with screws, brackets, and/or the included tie-down straps to prevent movement of the speaker system while the car is in motion. A secure mounting will also improve the bass performance. Again, because each vehicle is different, your ingenuity will play a major role in how and where you mount your unit. If you do not feel that you have the skills or the tools necessary to properly and safely mount your unit, please refer the installation to an authorized JBL dealer. Refer to Figure 1 for a diagram of how to use the tie-down straps to secure the subwoofer to its mounting surface. When using the strap, make sure that it is pulled tight.
Wiring
Power Connections
Connect the Black ground wire coming from the amplifier module to the vehicle chassis. Keep this wire as short as possible. If you need to extend it, use a minimum #12AWG stranded copper wire.
Connect the Red wire to a source of constant +12V power. If you are installing your unit in a system which uses a high-quality power distribution system, your GT Powered Subwoofer can be connected to an unused output of a distribution block. Otherwise, the power wire should be extended with a minimum #12AWG power cable and con-
nected directly to the vehicle battery. Install a fuseholder with a 15-amp fuse at the battery end of this cable. Keep the fuseholder as close as possible to the battery (within 18" if possible) and be sure that it is installed between the battery and the point where the wire passes through the firewall or the closest metal panel. A high-value power supply capacitor mounted close to the GT Subwoofer will enhance its performance.

text_image
Connection Diagram GT Series Powered Subwoofers USE EITHER PREAMP OR SPEAKER LEVEL CONNECTION SOURCE UNIT PREAMP OUTPUTS SPEAKER OUTPUTS MIN. AWG#12 POWER WIRE IN-LINE FUSEHOLDER WITH 15A FUSE INSTALLED AT VEHICLE CHASSIS GROUND 12V Figure 2Input Connections
Your GT Subwoofer may be driven either with the preamp output or speaker level output of your source unit. The input impedance of the GT amplifier module is such that a "y-connector" may be used to connect your source unit simultaneously to the GT Subwoofer and an external power amplifier used to drive the main speakers when the preamp level connection is used.
Equivalently, if you are using the speaker-level connection, you can connect the Powered Subwoofer in parallel with the speakers. The Powered Subwoofer will sample the signal, but will not load the source unit the way a second pair of conventional speakers would, so you do not need to worry that this connection will lower the speaker impedance too far for your amplifier or source unit. If you are using two GT Powered Subwoofers, only one input channel needs to be used on each subwoofer. Please refer to Figure 2 on page 5 for a wiring diagram.
Adjustments
Volume Level and Crossover Frequency (labeled "X-Over") adjustments are done by ear. The Crossover Frequency may be adjusted over the range of 80Hz to 150Hz. Midpoint on the X-Over scale is at 125Hz. The knob at "9:00" equals 100Hz, and at "3:00" equals 175Hz.
-
We recommend starting your setup procedure with the volume control set at the minimum, and the X-Over set at the most counterclockwise (80Hz) position.
-
Increase the volume level of the source unit to the maximum listening position. This is the point where the main speakers in the system begin to sound slightly distorted.
-
Back off on the source unit's volume control until just below the point where you hear distortion. Slowly increase the Powered Subwoofer volume control until you begin to hear slight distortion from the subwoofer. Mark or remember the position of the Powered Subwoofer volume knob and do not exceed this point in subsequent adjustments.
- Adjust the volume control so that the bass level is balanced to your taste from the listening position.
Specifications
- Slowly raise the crossover frequency while listening for the smoothest response. When the frequency is properly adjusted, bass will be solid and powerful, but vocals will not be overly bass heavy. If the subwoofer seems to be affecting the vocal range, adjust the frequency downward.
Model GT650P GT800P
Description 6-1/2" Powered Tube Subwoofer 8" Powered Tube Subwoofer
Maximum Output Power 80 Watts 80 Watts
Continuous Output Power 50 Watts @ <1% THD 50 Watts @ <1% THD
Crossover Frequency Range 80 - 250Hz 80 - 250Hz
Frequency Response 50 - 250Hz 40 - 250Hz
Dimensions (HxWxD) 12-1/8 x 8-1/8 x 12-1/8 inches 14 x 10-1/8 x 12-1/8 inches
308 × 206 × 308mm 356 × 257 × 308mm
Service
Should your loudspeaker ever need service, return it to the JBL dealer from whom it was purchased. If for some reason this is impractical, call 800-336-4JBL for your nearest
warranty station. Do not return products to the JBL factory without prior authorization.
General Care
The loudspeaker grilles may be cleaned with a slightly damp cloth.
To remove dust from the carpet use a vacuum with a brush attachment. Spots on the carpet may be removed with a commercial spot remover.
Do not use any cleaners or solvents on the grilles or the speaker drivers.
Safety Note
To avoid the dangers of accidental suffocation, please properly dispose of the plastic bag used in the speaker packaging.
Warranty Terms: 1 Year Transferable Limited Warranty / 2-Year Extended Transferable Limited Warranty
This is an important document. Attach your bill of sale to this page and keep it in a safe place. Your bill of sale is your warranty.
The JBL warranty remains in effect for one year from the date of the first consumer purchase unless installed by an authorized JBL dealer. Installation by an authorized JBL dealer will extend the warranty to a period of two years.
Who is Protected by this Warranty
The JBL warranty protects the original owner and all subsequent owners providing that the JBL product was purchased from an authorized dealer in the United States or purchased by military personnel from an authorized military outlet. A copy of the original dated bill of sale must be presented whenever warranty service is required.
What is Covered by this Warranty
Except as specified below, the JBL warranty covers all defects in material and
workmanship. The following are not covered: Damage caused by accident, misuse, abuse, product modification or neglect; damage occurring during shipment; damage from failure to follow instructions contained in the instruction manual; damage resulting from the performance of repairs by someone not authorized by JBL; damage caused by installation of parts that do not conform to JBL specifications; units used for commercial or business use; any claims based on misrepresentations by the seller; products sold on an "as-is" or final sale basis; or the cost of installing, removing, or reinstalling the unit. JBL's liability is limited to the repair or replacement, at our option, of any defective product and shall not include incidental or consequential damages. JBL reserves the right to replace a discontinued model with a comparable model. Any replacement units or parts may be new or rebuilt.


JBL Consumer Products
80 Crossways Park West
Woodbury, NY 11797
8500 Balboa Blvd.
Northridge, CA 91329
800-336-4JBL (4525)
harman consumer group www. consumer group
Part No. GT650800OM
Made in USA
To Obtain Warranty Service
If you require warranty service, please return the product to your dealer. If this is not possible and you live in the United States, please call 1-800-336-4JBL, for information on how to obtain service or replacement.
If purchased outside the United States, contact your local dealer for repair or replacement.
Do Not Return Products to the JBL
Factory without Authorization. They will be Returned Unopened.
You are responsible for transporting your product for repair or replacement. JBL will pay reasonable return charges for delivery to any location in the United States if the repair or replacement is covered under the warranty.
Correspondence with JBL should be addressed to: JBL Customer Service, 80 Crossways Park West, Woodbury, NY 11797 or fax us at 516-496-0812.
Outside the United States, please contact your local distributor.
This warranty gives you specific legal rights. You may also have other rights which vary from state to state. Some states do not allow the exclusion or limitation of incidental or consequential damages or limitations on how long an implied warranty lasts, so the above may not apply to you.
Declaration of Conformity

We, JBL Europe A/S
Kongboden 1845 UK 7480 University
DK-3400 DIRK5960 DENMARK
declare in own responsibility, that the products described
In this owner's manual are in compliance with technical
e standards:
EN 50 081-1/1992
EN 50 082-173.1995

Sloan Mischelsen
JBL Europe AS
Diversid. DENMARK, 4597