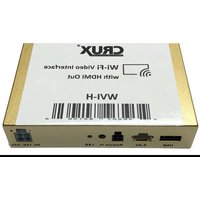
WVICH-03M - Unknown CRUX - Free user manual and instructions
Find the device manual for free WVICH-03M CRUX in PDF.


| Type de produit | Wi-Fi Interface Module |
| Marque | CRUX |
| Modèle | WVICH-03M |
| Fonction principale | Wireless screen mirroring and AV input addition |
| Compatibilité smartphones | iOS 7+, Android 4.2+ |
| Compatibilité véhicules | Chrysler, Dodge, Jeep, Volkswagen (2007-2017 models) |
| Wi-Fi | Dual-band (2.4 GHz & 5 GHz) |
| Entrées vidéo | 1x composite (RCA) |
| Sorties vidéo | 1x HDMI, 1x composite to radio |
| Entrée USB | Yes (for media playback) |
| Antenne | Dual external with SMA connectors |
| Alimentation | 12V DC (ACC and ground) |
| Consommation | < 5 W |
| Dimensions (approx) | 100 x 60 x 20 mm (module) |
| Poids (approx) | 100 g |
| Matériau | ABS plastic |
| Température de fonctionnement | -20°C to 60°C |
| Commande à distance | Virtual remote via WiFi web interface |
| Réglages | DIP switch for vehicle programming |
| Câbles inclus | Power harness, AV harness, extension cables |
| Installation | T-harness plug-and-play |
| Contenu du colis | Module, harness, antennas, cables |
Frequently Asked Questions - WVICH-03M CRUX
User questions about WVICH-03M CRUX
0 question about this device. Answer the ones you know or ask your own.
Ask a new question about this device
Download the instructions for your Unknown in PDF format for free! Find your manual WVICH-03M - CRUX and take your electronic device back in hand. On this page are published all the documents necessary for the use of your device. WVICH-03M by CRUX.
USER MANUAL WVICH-03M CRUX
- Enables wireless (Wi-Fi) Audio/Video mirroring from mobile devices to the OEM screen.
- Provides an audio/video input which can also be used to add a camera.
- Includes a USB input to play audio and video files.
- Provides a virtual remote control via a smartphone wifi connection.
- Dual band (5GHz and 2.4GHz) Wifi capability for clear connection.
- Includes HMDI output for high quality video.
- Works with Facetime, Maps, Skype, YouTube, and other apps.
WORKS WITH:

iOS 7 and newer

OS 4.2 and newer
PARTS INCLUDED:
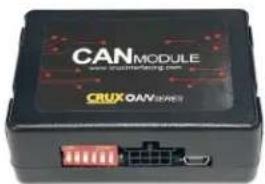
WVICH-03M MODULE WVICH-03M HARNESS

natural_image
Two types of connected electrical cables with various colored wires and connectors (no visible text or symbols)
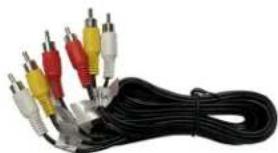
natural_image
Coiled black cable with multiple colored audio/video connectors (no text or symbols visible)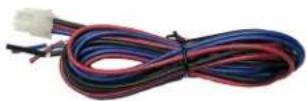
WVI-H WiFi Module Extension AV Cable Power Harness

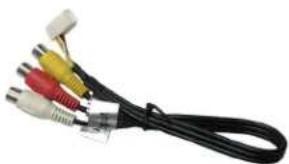
natural_image
Black cable with multiple colored connectors (red, yellow, white) attached to a white cable, no text or symbols visible.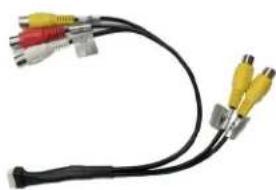
natural_image
Close-up of a black cable with two yellow connectors and red connectors (no text or symbols visible)Dual Antennas WiFi AV Out Harness AV In / Video Out Harness
INSTALLATION DIAGRAM:

flowchart
graph TD
    A["WHITE"] --> B["22-PIN (male plug)"]
    B --> C["AUDIO/VIDEO OUTPUTS"]
    B --> D["AUDIO/VIDEO INPUTS"]
    E["GRAY"] --> F["22-PIN (male plug)"]
    F --> G["GREEN / VIDEO UNLOCK"]
    G --> H["8-PIN (male plug)"]
    H --> I["STATUS LEDs"]
    I --> J["USB Input"]
    J --> K["A/V INPUT"]
    L["OPEN/LED Light"] --> M["OPTIONAL / TOOCLE SWITCH"]
    M --> N["7.5x100"]
    O["HDMI OUTPUT"] --> P["Wi-Fi INTERFACE"]
    P --> Q["USB Input"]
    R["*Connect BLUE A/V Trigger to +12V to toggle A/V INPUT"] --> S["Blue = A/V TRIGGER*"]
    R --> T["RED = +12V ACC"]
    R --> U["BLACK = GROUND"]
INSTALLATION INSTRUCTIONS:
THE AV INTERFACE:
- Remove the factory radio from the dashboard.
- Unplug the factory connectors from behind the factory radio.
- Mate the WVICH-03M T-Harness connections to the factory connectors. (Make sure all connectors are properly seated into the interface and into the radio.)
- On the CAN Module, set DIP switch number 1 to ON to enable AV Input.
- Switch to the new AV input by pressing the MEDIA button on the radio then select VES. If the radio does not have a MEDIA button use the GREEN wire option to toggle the AV source by connecting it to +12V. We recommend using a toggle switch to use this feature.
THE WIFI INTERFACE:
- Connect the 18-Pin power/video cable to the Wi-Fi Interface module.
- Connect the antenna leads to the module.
- Connect the RED power lead to +12V ACC and the BLACK wire to Ground.
- Connect the BLUE A/V Input wire to +12V to trigger the optional A/V input feature. The video input can also be connected to a camera source instead. A toggle switch (not included), wired between the BLUE wire and +12V can be used to switch ON or OFF the A/V input feature.
- If the USB input feature will be used, you can use the virtual remote control on your smartphone to control the USB functions. See VIRTUAL REMOTE section for details. Extended a USB cable to an easily accessible location.
- Plug in the Composite RCA output of the WVI-H harness to the WVICH-03 AV input.
- Switch to the new AV input by pressing the BACK button on the radio or the middle button on the SWC. (See below)
- Test the interface and re-install the radio into the dash.
DIP SWITCH SETTINGS ON THE MODULES:
Make sure the DIP#1 is set to the ON position. This sets the programming to the vehicle.

| DIP 1 | SET TO ON | ||||
| DIP 2 | OFF | Not Used | |||
| DIP 3 | OFF | Not Used | |||
| DIP 4 | OFF | Not Used | |||
| DIP 5 | OFF | Not Used | |||
| DIP 6 | OFF | Not Used | |||
SWITCHING TO THE VIDEO INPUT:
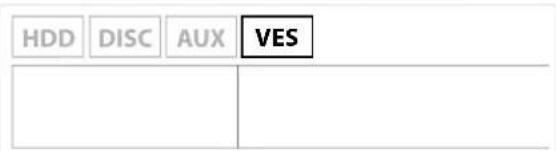
Press the MEDIA button once to switch to the AV source.
Select VES to enter the AV mode.
NOTE: If there is no video signal flowing through the AV input, there will be a BLUE screen present. To exit, simply press the MEDIA button again.

SETTING YOUR DEVICE:
With the WVI-H module ON and READY:
For iOS Devices:
NOTES:
- Does not support Netflix and any DRM protected files on iOS devices due to Restrictions by Apple.
Open settings > Select Wi-Fi > Under 'Choose Network' Select "Crux WiFi ***"
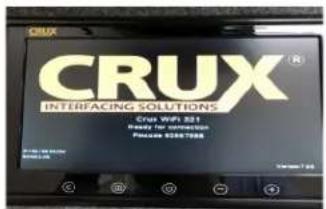
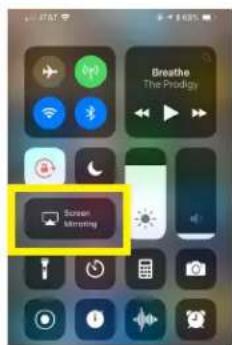
After connecting to Crux Wifi, select "SCREEN MIRRORING" from the Control Center and tap Crux Wifi *** . To access Control Center, on iPhone X, pull down from the upper right corner of the screen, on other iPhone models, pull up from the bottom of the screen.
For Android Devices:
From the drop down drawer, press "Quick Connect" > Select "Crux Wifi ***"
Notes:
1) Make sure the "Power Saving Mode" is turned off.
2) Make sure Quick Connect is updated to the latest version.
MIRRORING:
The mirroring connection uses a direct Wi-Fi connection to transfer the Audio and Video from your device to the WVI-H module. This does not require an active network. If your smartphone has the Screen Time Out enabled and your display goes to sleep mode, you will no longer see the image on the screen. Deactivate this feature for continuous viewing
VIRTUAL REMOTE CONTROL:
The WVI-H comes with a Virtual Remote Control via a Wifi connection. To access the virtual remote control, make sure that the phone is connected to Crux Wifi *** . Open your web browser and type in the following on the address bar: 192.168.59.254
The Virtual Remote control will open. Use the virutal remote control to PLAY, PAUSE, STOP, TRACK UP/DOWN, VOLUME UP/DOWN, etc.

Plug in a USB thumb drive to the USB cable port of the WVI-H. Tap OPTIONS on the Virtual Remote Control to select MOVIES, PHOTOS, MUSIC, etc. Use the remote to play/pause or skip tracks.

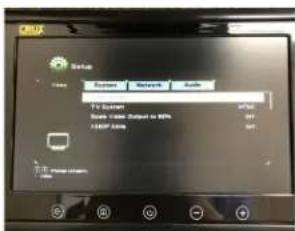
Tap SETUP to change settings on VIDEO, SYSTEM, NETWORK, and AUDIO. We recommend NOT to change any SYSTEM settings as this would interfere with the WVI-H functionality.
VEHICLE APPLICATIONS:
| CHRYSLER | JEEP | ||
| 2011-2013 | 200 | 2008-2010 | Commander |
| 2008-2010 | 300/300C | 2008-2016 | Compass |
| 2008-2010 | Aspen | 2008-2013 | Grand Cherokee |
| 2007-2011 | Sebring | 2008-2015 | Liberty |
| 2008-2017 | Town & Country | 2009-2017 | Patriot |
| 2007-2017 | Wrangler | ||
| DODGE | |||
| 2007-2015 | Avenger | VOLKSWAGEN | |
| 2010-2012 | Caliber | 2009-2013 | Routan |
| 2008-2017 | Caravan | ||
| 2009-2014 | Challenger | ||
| 2008-2010 | Charger | ||
| 2008-2012 | Dakota | ||
| 2008-2013 | Durango | ||
| 2009-2010 | Journey | ||
| 2007-2012 | Nitro | ||
| 2009-2012 | Ram | ||


Brand : CRUX
Model : WVICH-03M
Category : Unknown